Manually Enroll Kubernetes Clusters
Overview
In QueryPie, you can manually register Kubernetes clusters located on on-premises environments where access control needs to be applied.
Enrolling Cluster Manually
To manually register individual servers, you need to input basic information about the cluster.
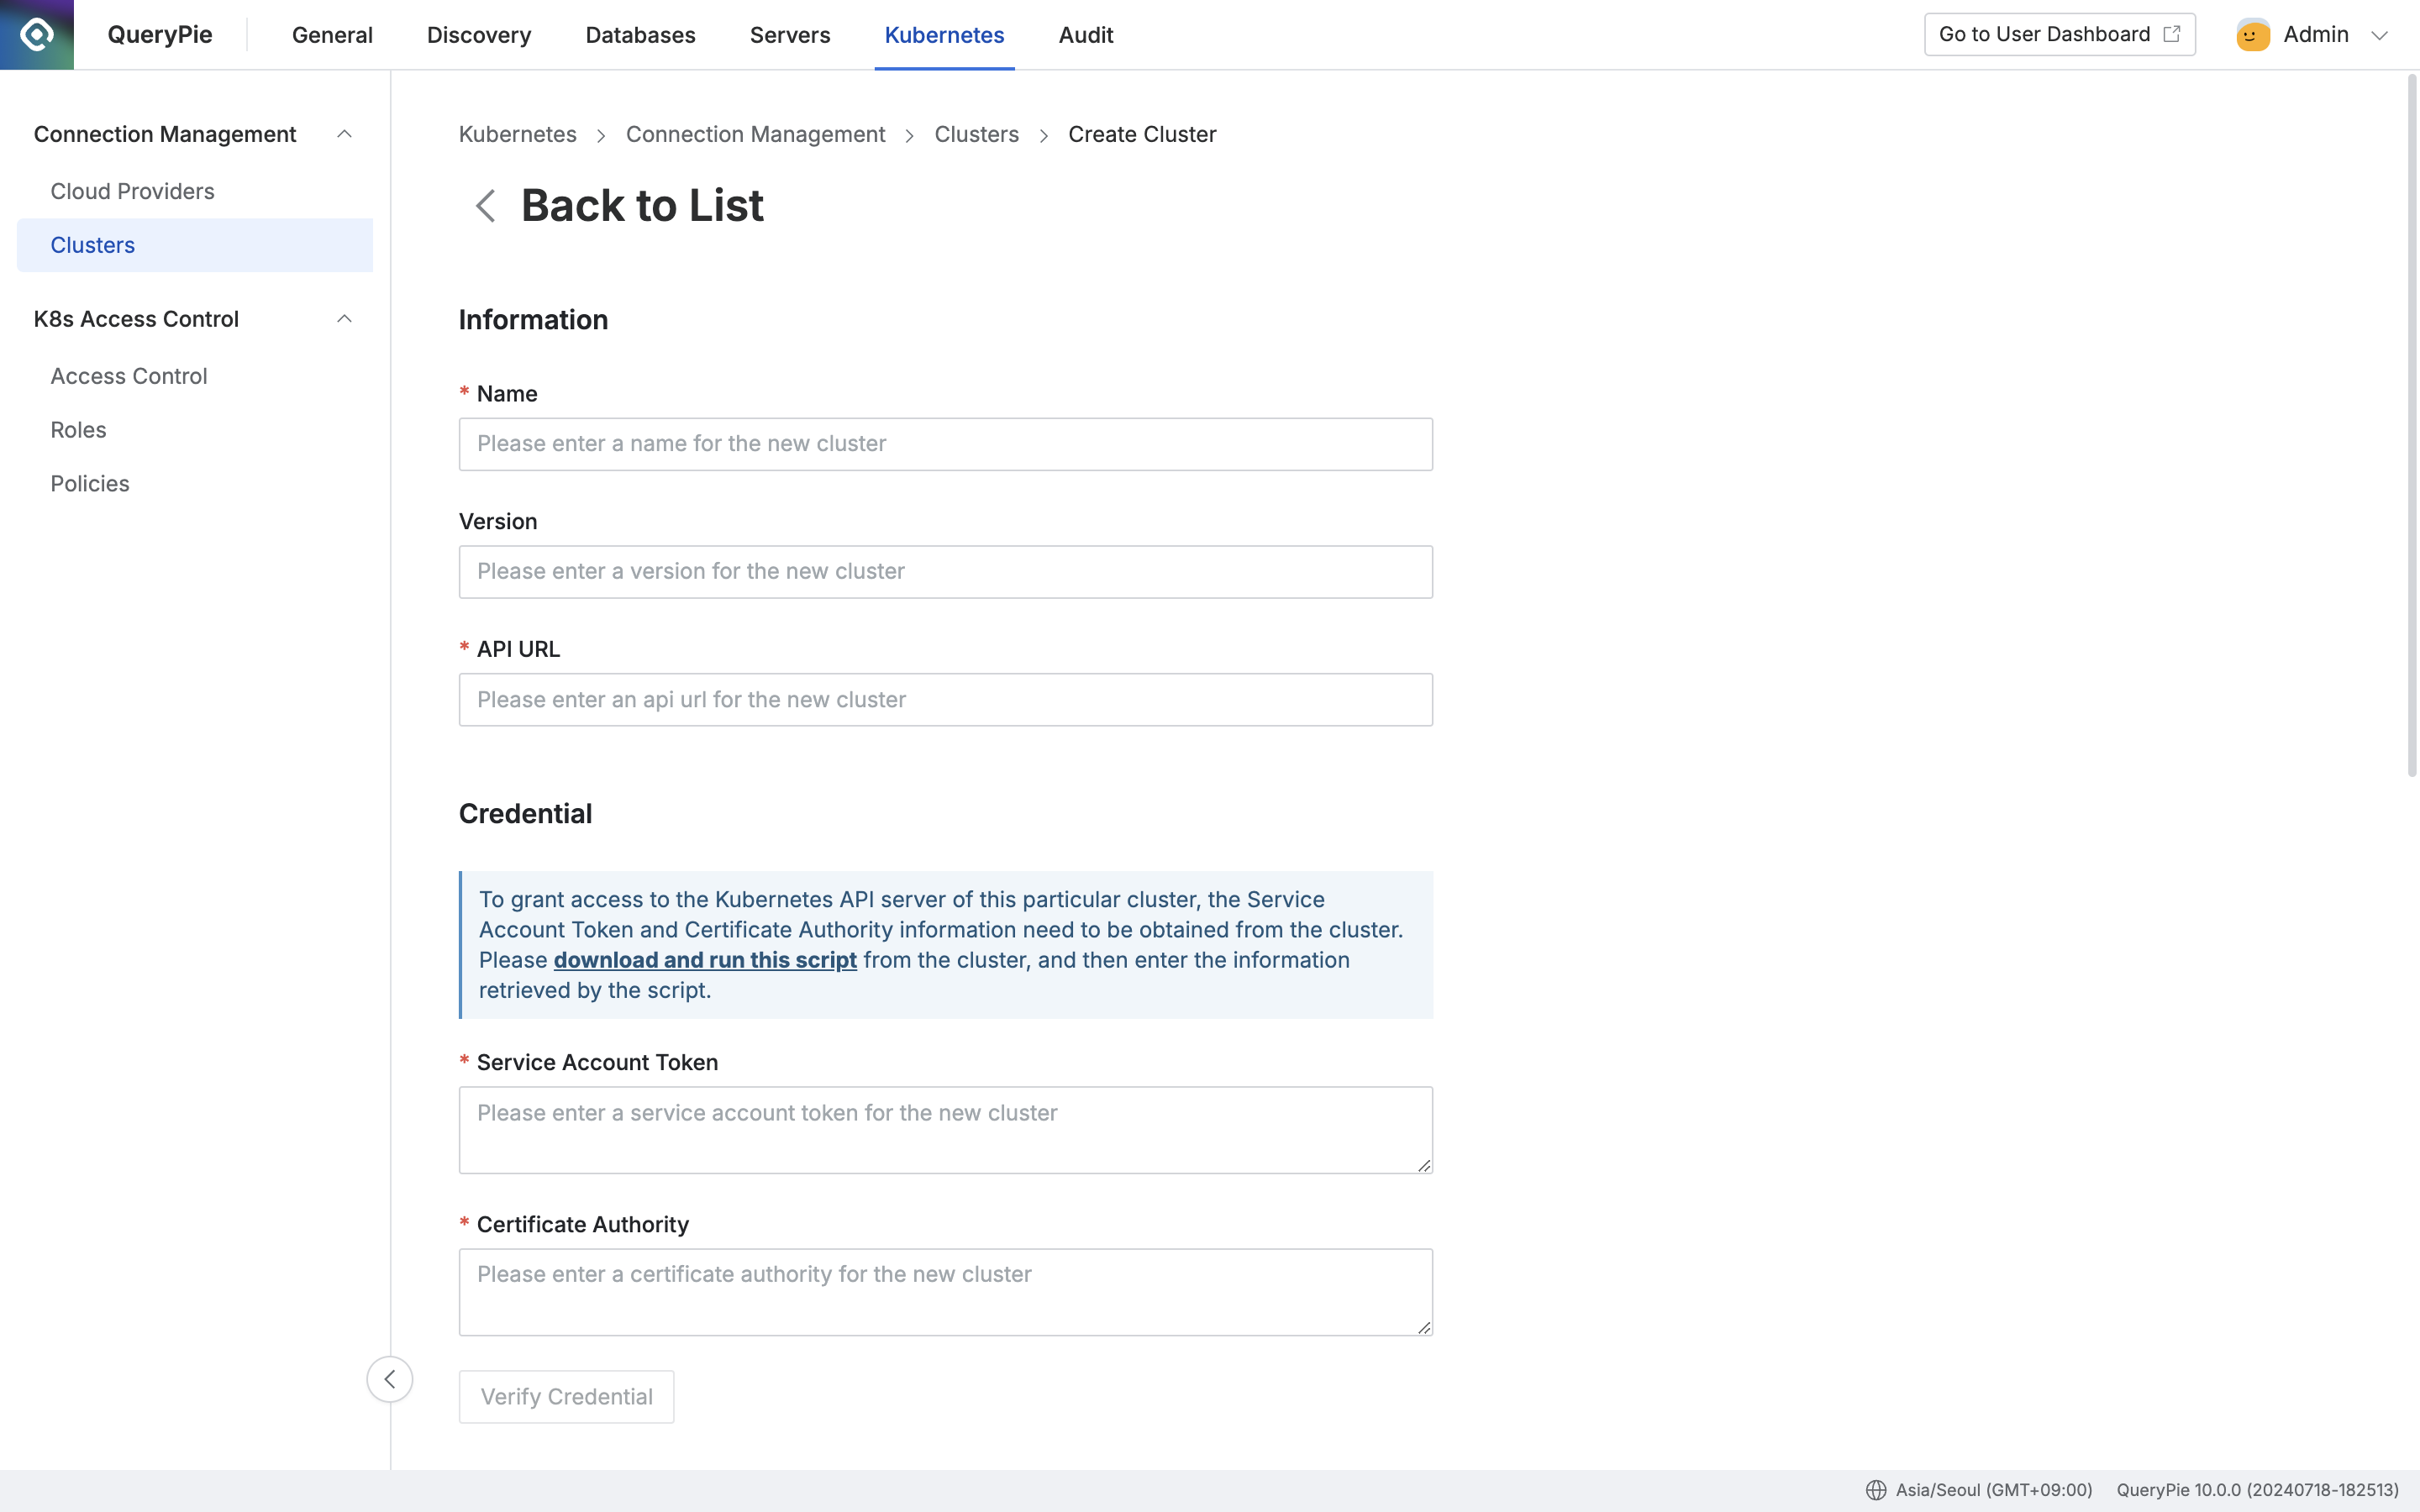
Administrator > Kubernetes > Connection Management > Clusters
Navigate to the Administrator > Kubernetes > Connection Management > Clusters menu.
Click the
+ Create Clusterbutton located at the top right.Here are the details to be entered for manual cluster registration:
Information
Enter the basic information for the cluster you want to register manually.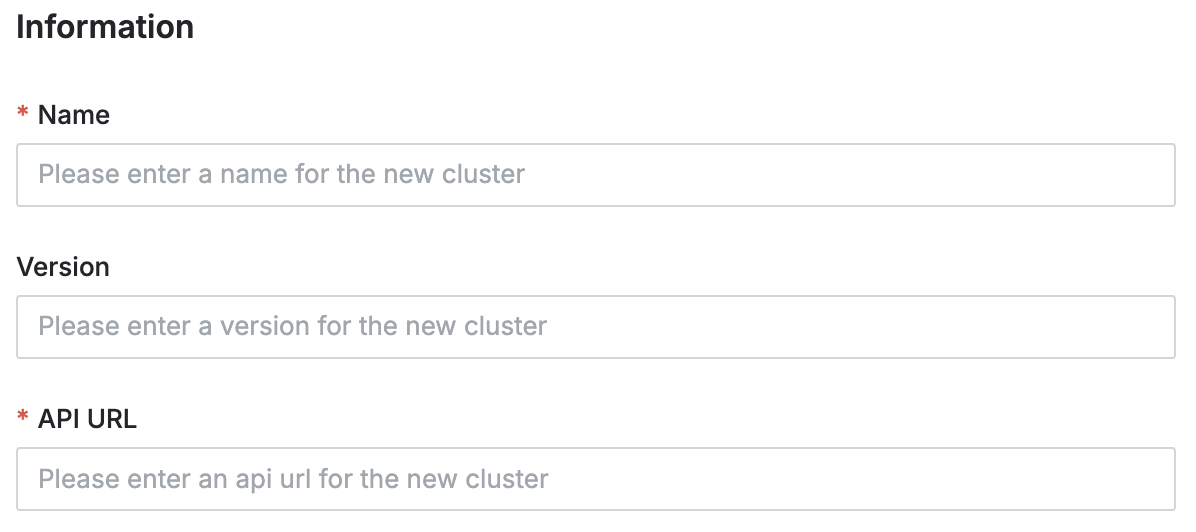
Name : Enter a name to identify the cluster. (Required)
This information cannot be modified in the future.
Version : Enter the version of the cluster. (Optional)
This will be automatically filled in later during credential authentication testing.
API URL : Enter the API URL of the cluster to receive Kubernetes API requests. (Required)
Credential
To grant access to the Kubernetes API server of your cluster, you need to retrieve the service account token and CA certificate from the cluster itself. Please refer to the Kubernetes Cluster Integration Script Guide below.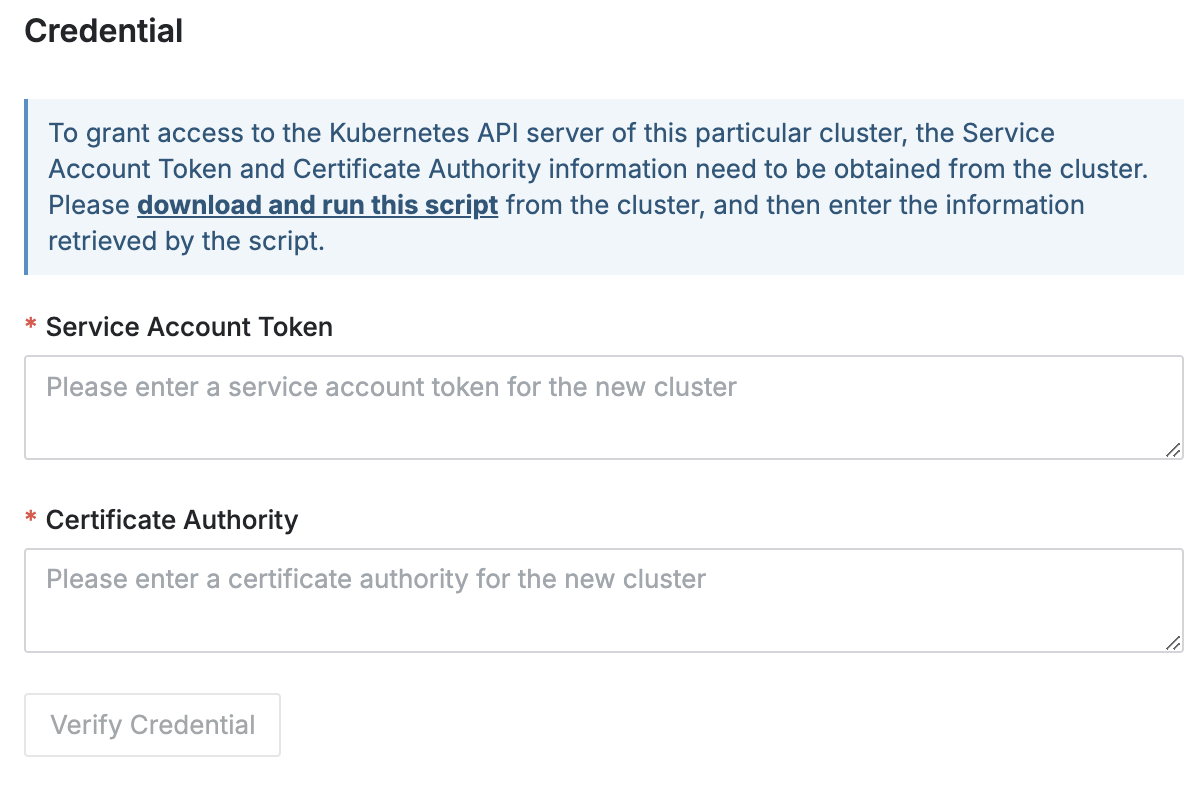
Service Account Token : Enter the service account token of the Kubernetes cluster that QueryPie Proxy will use for user Kubernetes API calls.
Certificate Authority : Enter the CA certificate used by QueryPie to validate the Kubernetes API server's certificate.
Verify Credential : Once both the service account token and CA certificate are entered, this button will become active. Clicking it will check if a successful connection can be established.
Execution Results:
 Verified : Indicates a successful cluster connection, confirming that both the service account token and CA certificate are correctly entered.
 Verification Failed : Indicates a failed cluster connection. This could be due to errors in the service account token or CA certificate values, or it could indicate a network connection issue.
Logging Options
Choose logging options for this cluster.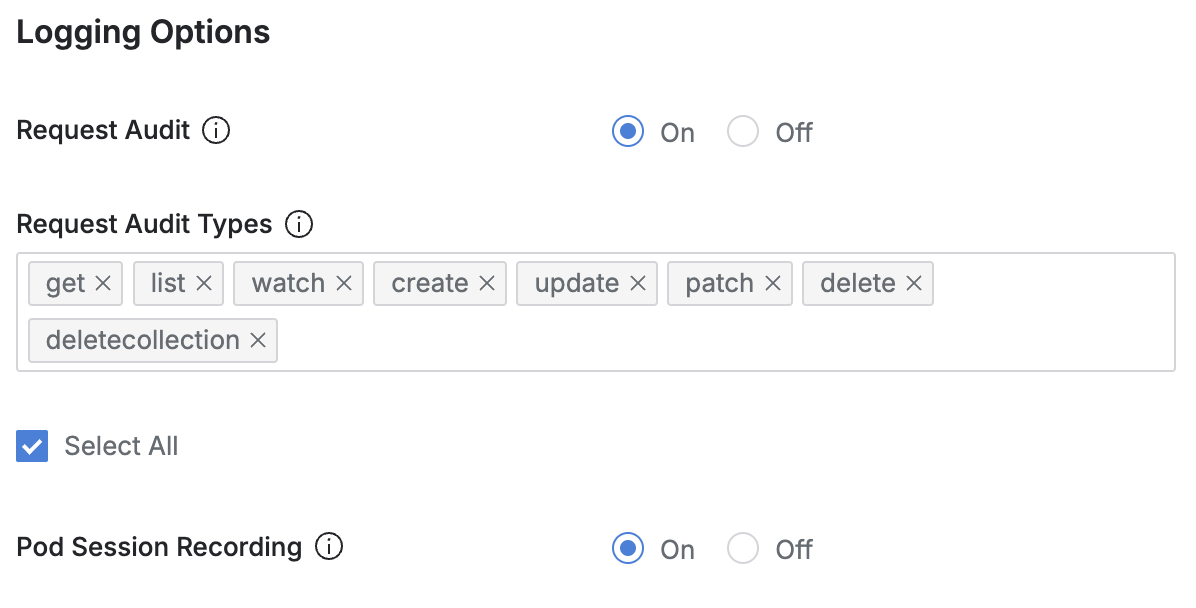
Request Audit : Request Audit: Enables logging for Kubernetes API call history on this cluster. The default setting is
On. If this feature is turnedOff,No Kubernetes API call history will be logged for this cluster.
All sub-options under Request Audit Types and Pod Session Recording will be disabled in bulk.
Request Audit Types : Administrators can select the verbs to audit for this cluster. The default setting selects all basic verbs listed below.
Verb Types:
getlistwatchcreateupdatepatchdeletedeletecollection
✅ Select All : Conducts auditing for all API calls.
Pod Session Recording : Enables recording for sessions opened by Pod exec commands within this cluster. The default setting is
On. This feature will be turnedOffunless the following conditions are met:Request Audit is enabled (
On).The following verbs are selected in Request Audit Types:
createget
Tags
You can manually input tags for individual clusters if needed. For clusters synchronized via a Cloud Provider, tags imported from the platform will also be displayed. (Note that tags imported through synchronization cannot be deleted or modified.)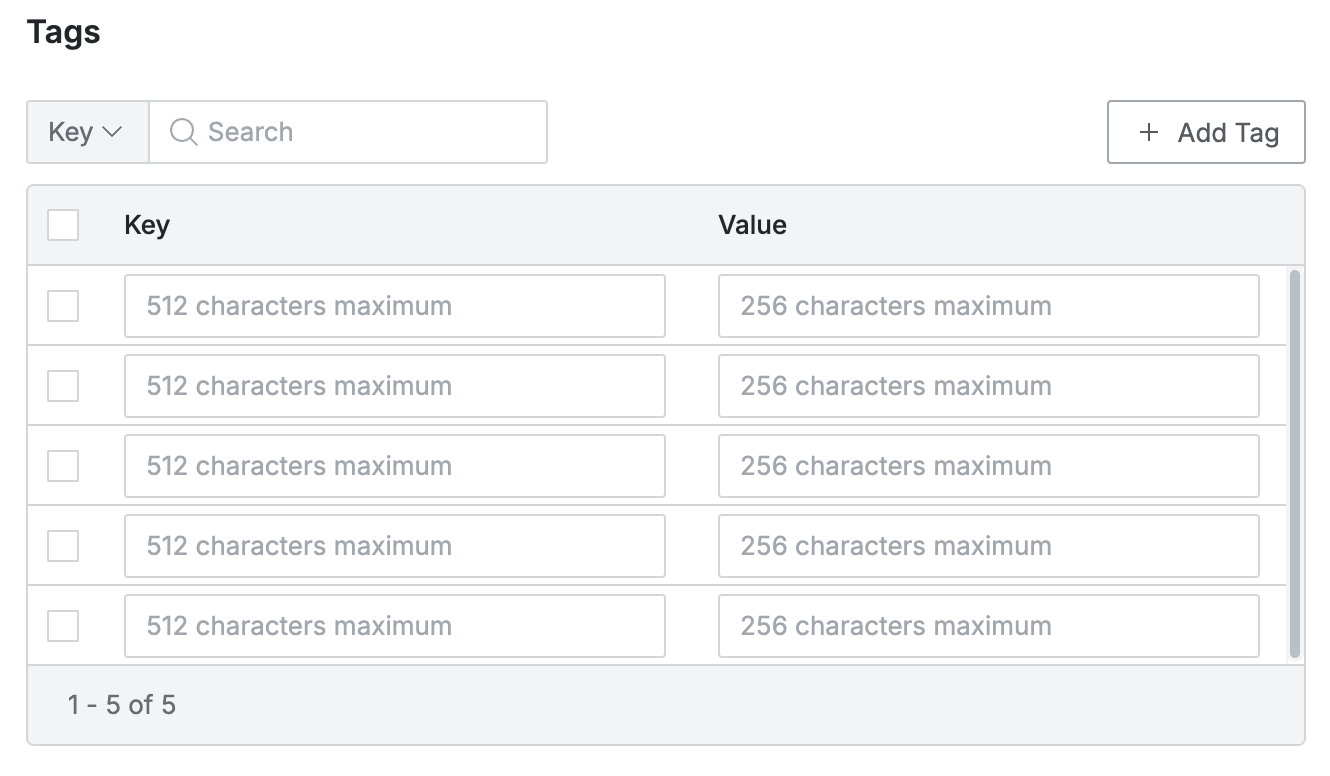
Click the
+ Add Tagbutton to add a new row and enter the desired tag values.Tags should be entered in a key-value format.
Key : Enter a key value that distinguishes the tag, up to 512 characters.
The key is mandatory, and duplicate keys cannot be entered.
Duplicates are checked case-sensitively.
Value : Enter a value, up to 256 characters, to be used for filtering.
After completing these steps, click the
Savebutton to successfully register the cluster.
Kubernetes Cluster Integration Script Guide
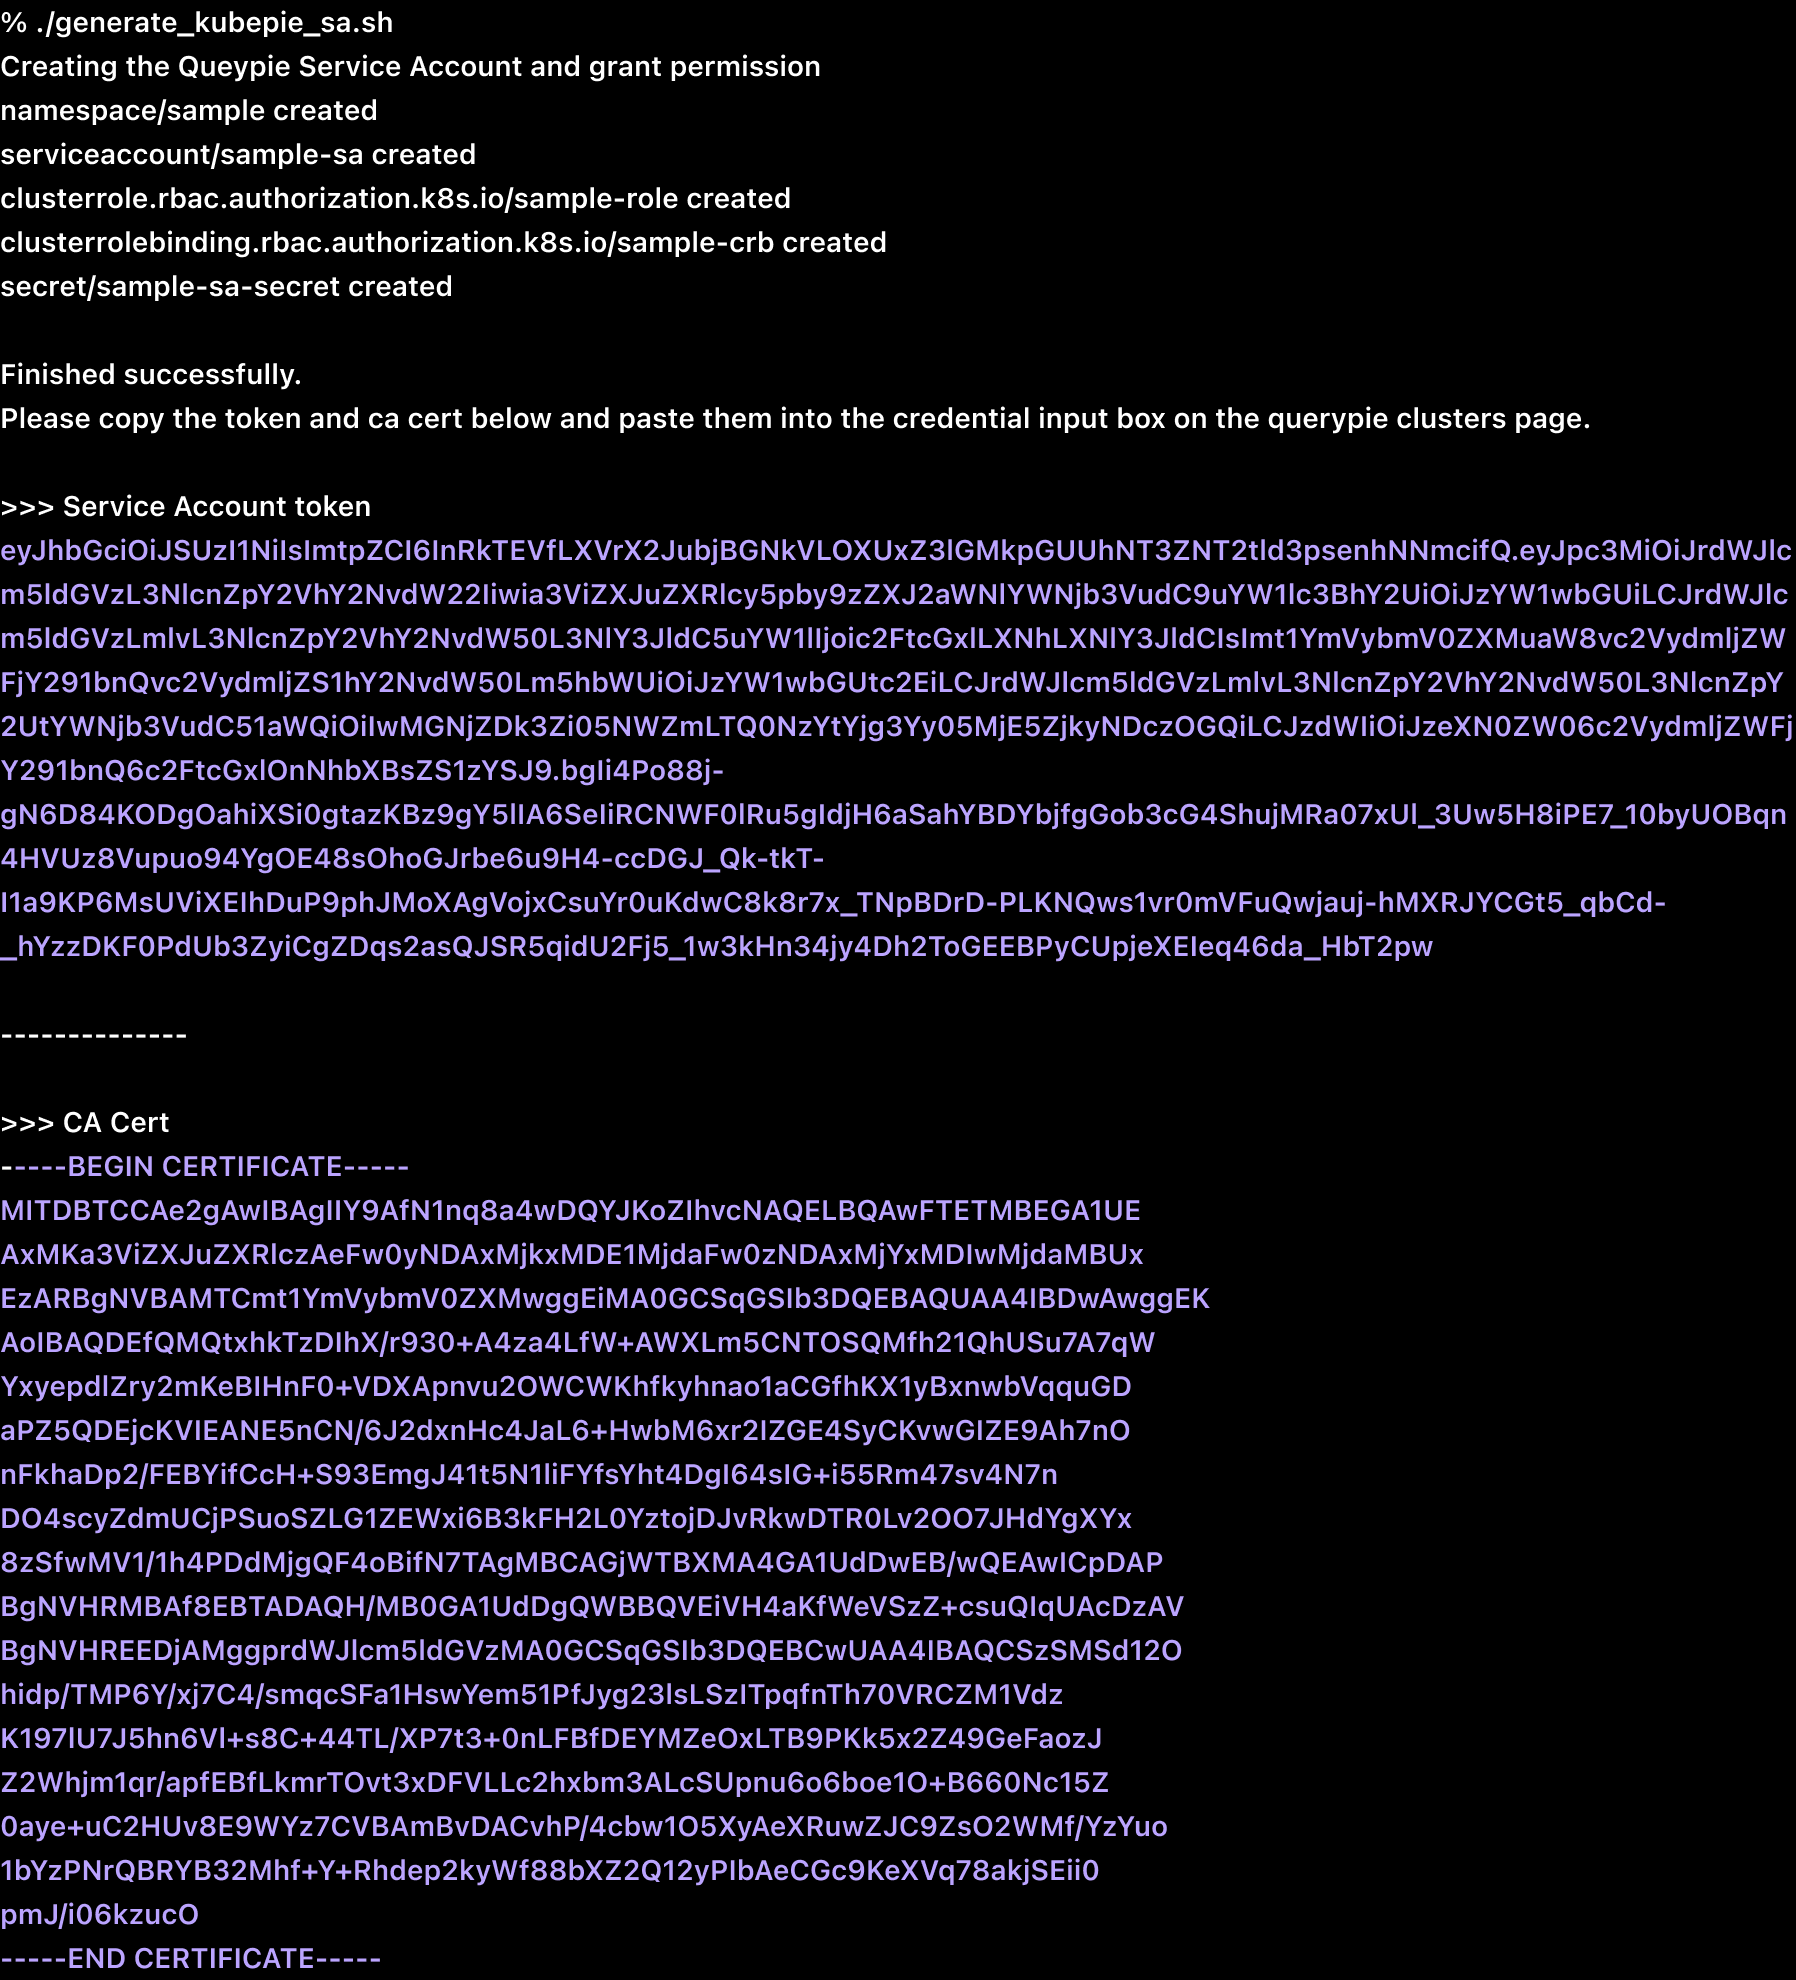
Sample of Script Execution (Note: The token values shown above are not valid examples.)
The administrator must have prior access to the target Kubernetes cluster.
The administrator can navigate to Administrator > Kubernetes > Connection Management > Clusters > Create Cluster > Credential, and click on the "download and run this script" link within the guidance box to download the script.
After downloading the script, navigate to the downloaded directory and execute the following commands to grant execution permissions and run it:
CODEchmod +x generate_kubepie_sa.sh ./generate_kubepie_sa.sh
%201.png)