Agent
Overview
Installing the QueryPie Agent allows you to use SQL clients like DataGrip and DBeaver, SSH clients like iTerm and SecureCRT, and Kubernetes applications like Lens and k9s.
Downloading and Running the Agent App
1. After logging into QueryPie, click on your profile in the top right corner and select the Agent Download button.
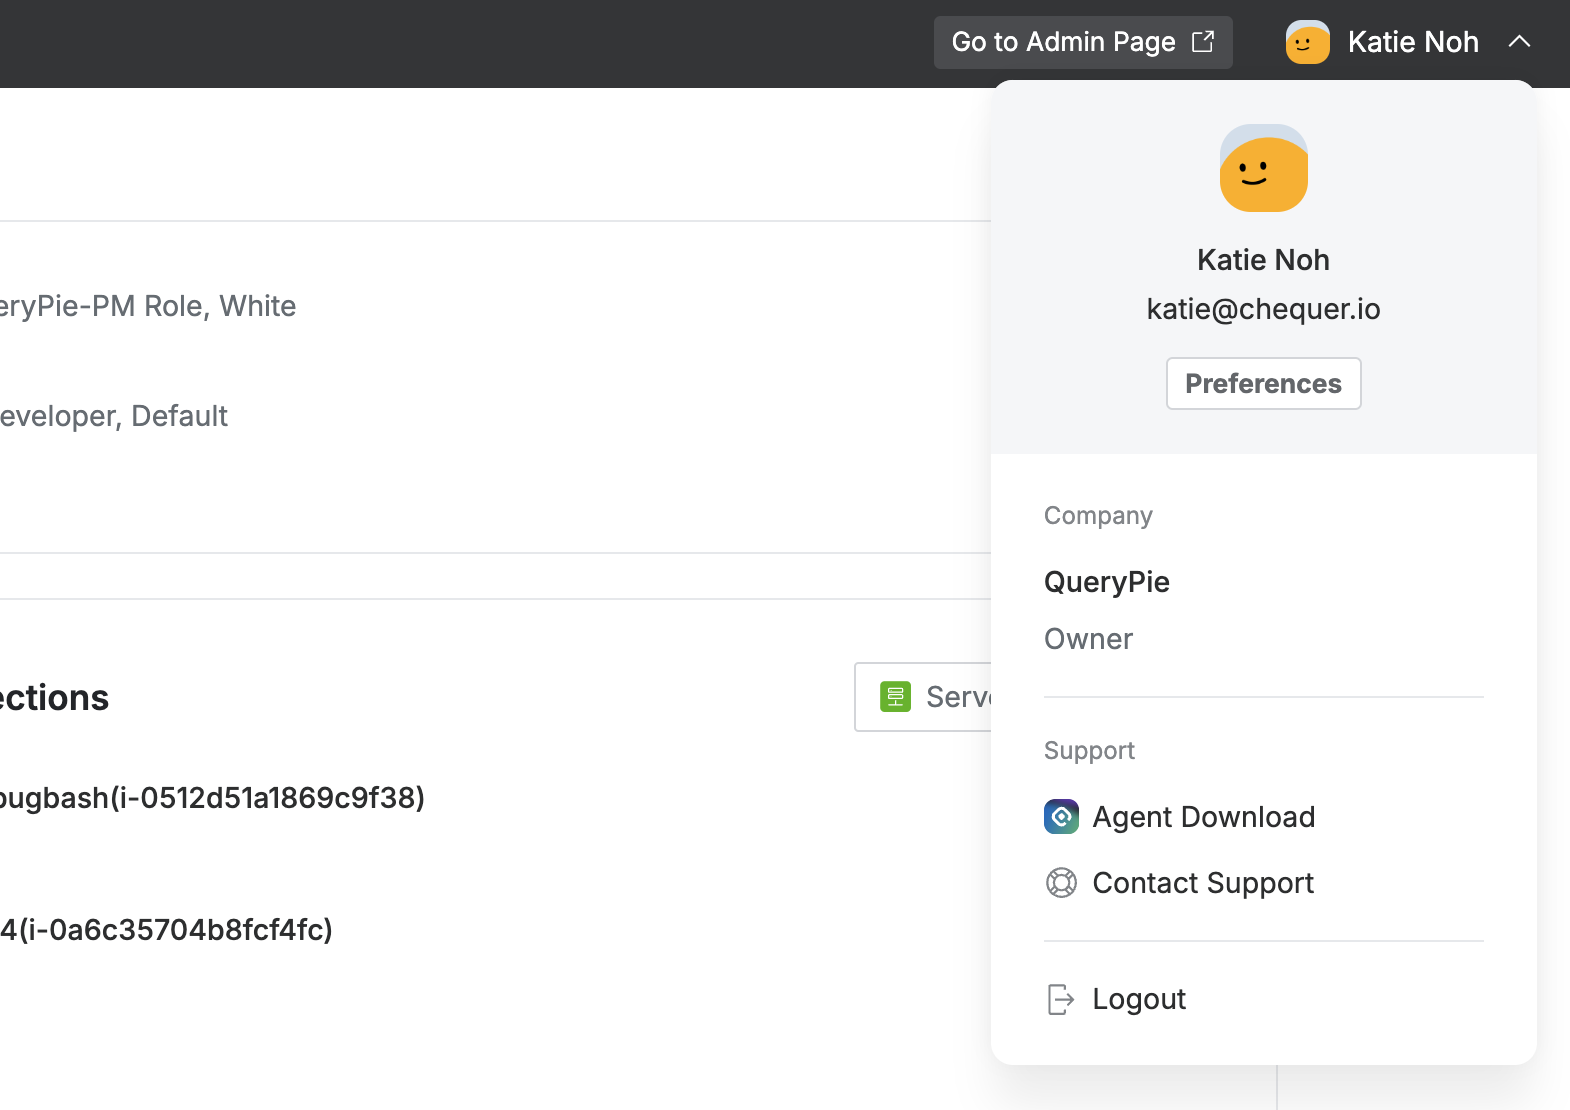
QueryPie Web > Profile Menu
2. In the QueryPie Agent Downloads popup, download the installation file suitable for your PC's operating system from Step 1. and copy the QueryPie URL from Step 3.
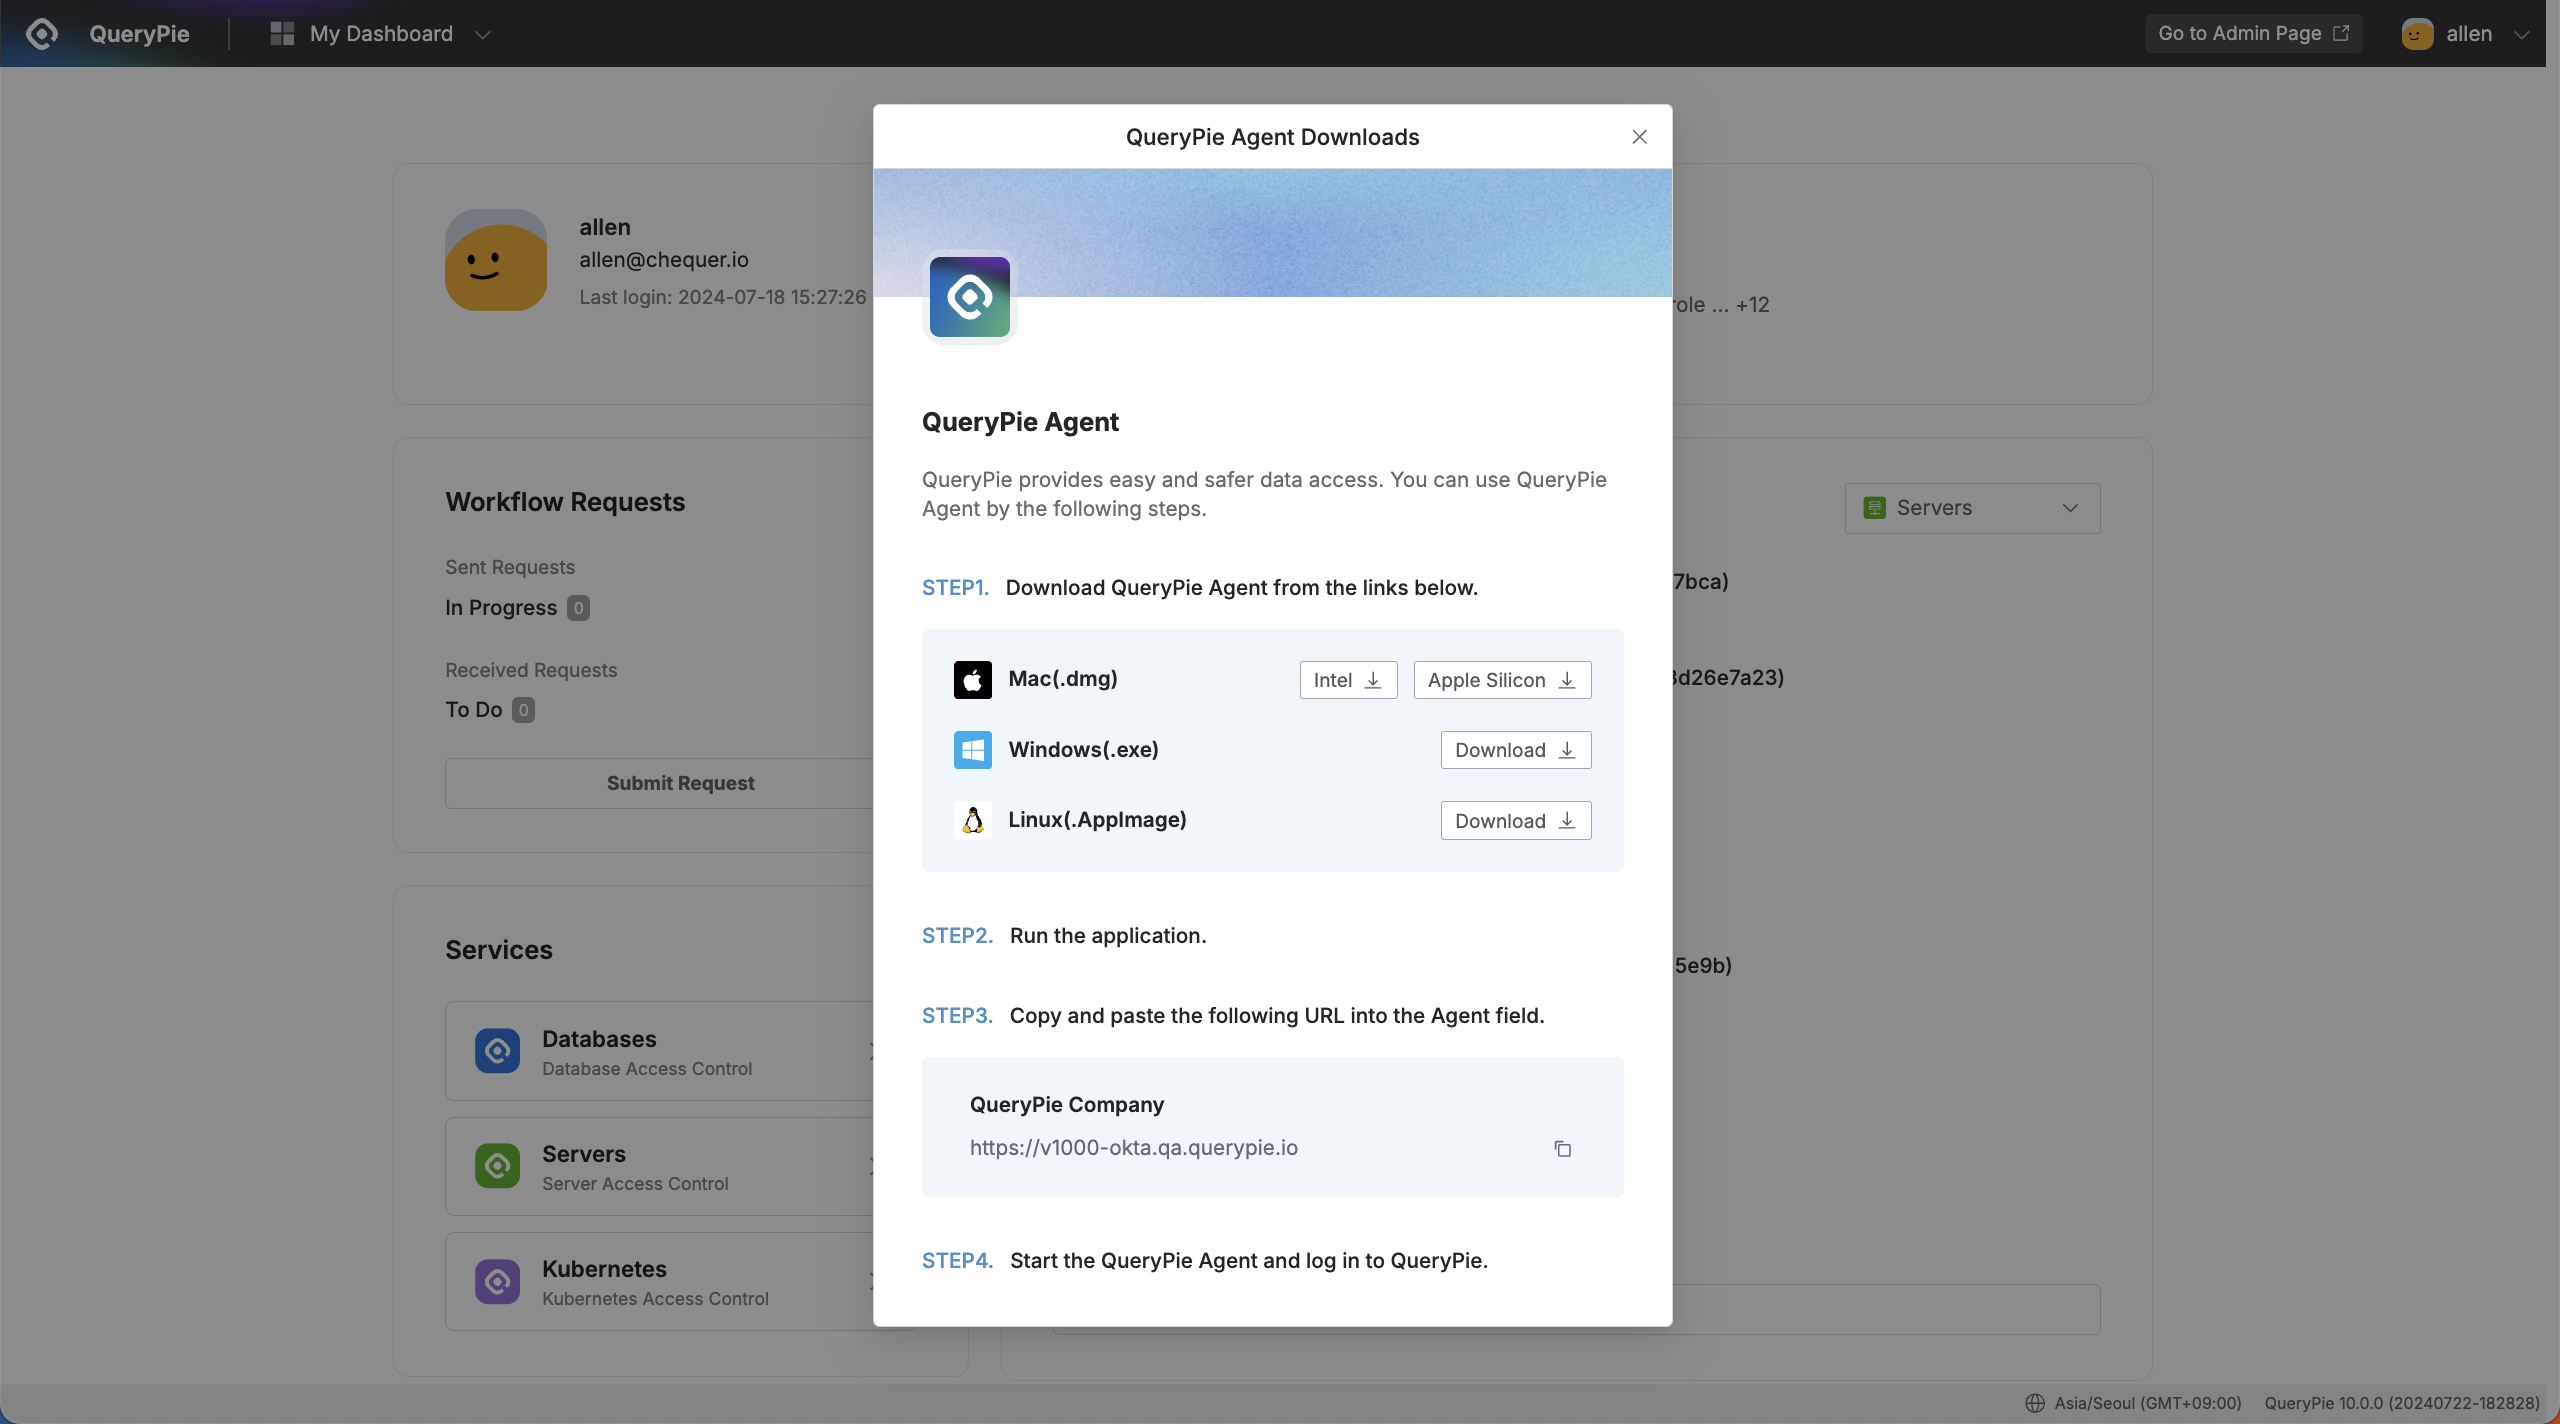
QueryPie Web > Agent Download Popup
QueryPie Agent supports Mac, Windows, and Linux OS.
3. Run the downloaded QueryPie Agent installation program and complete the installation.
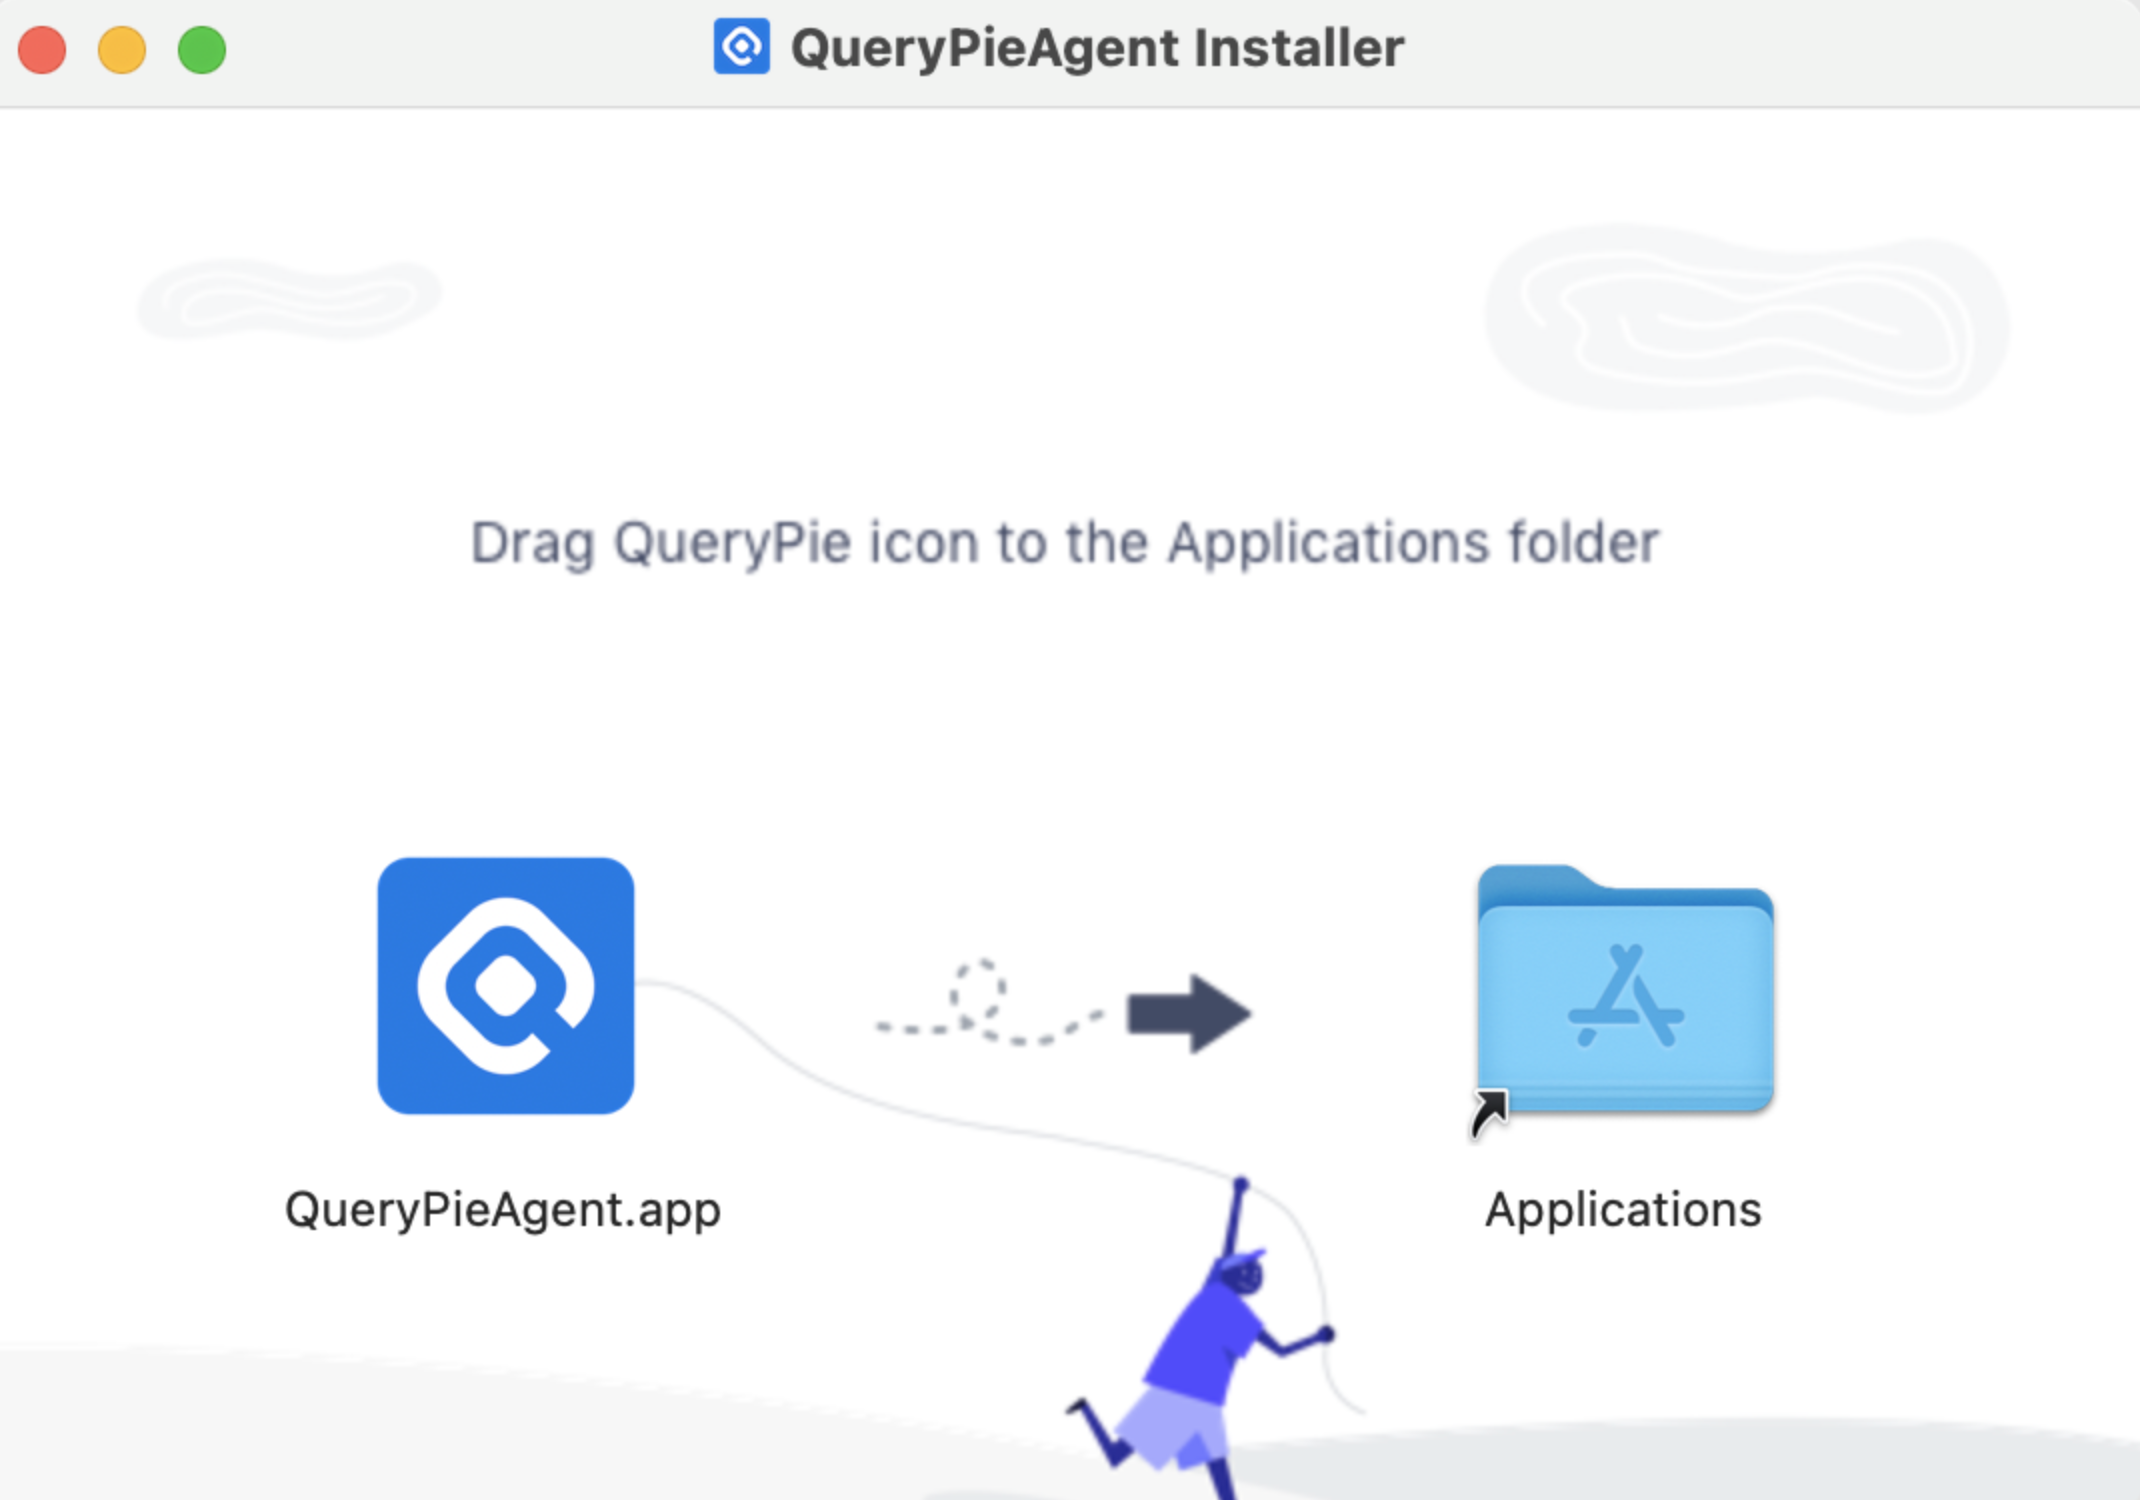
Mac OS Installer
4. Launch the installed QueryPie Agent. Enter the QueryPie URL copied earlier in the QueryPie Host input field and click the Next button to proceed to the login screen.
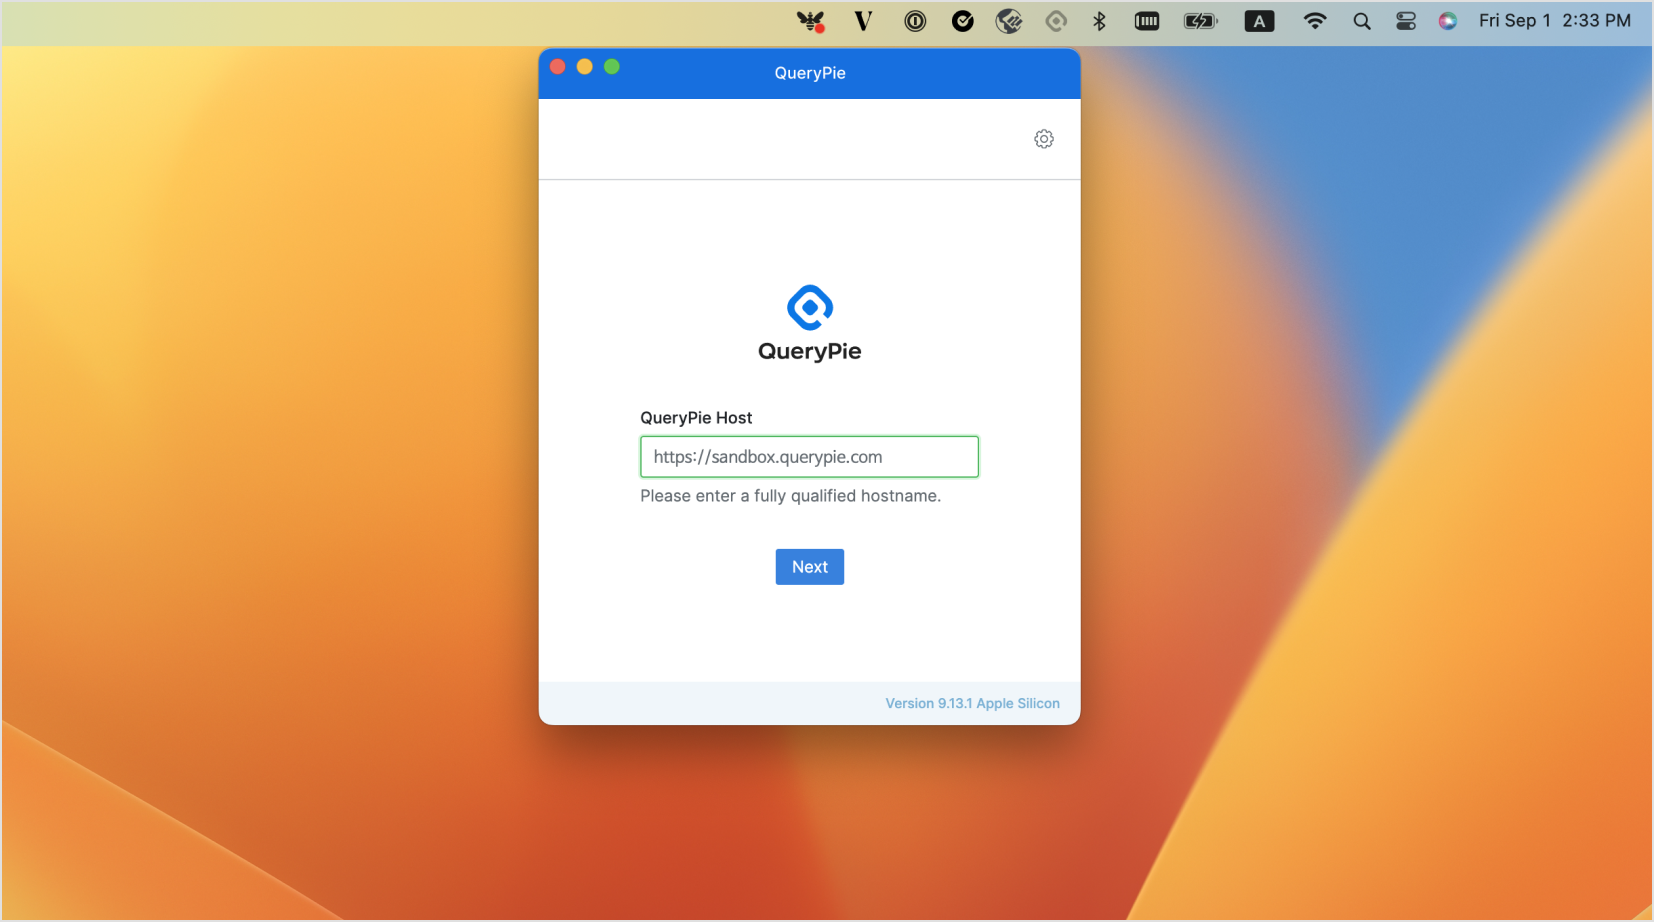
Agent > QueryPie Host Input
Logging into the QueryPie Agent
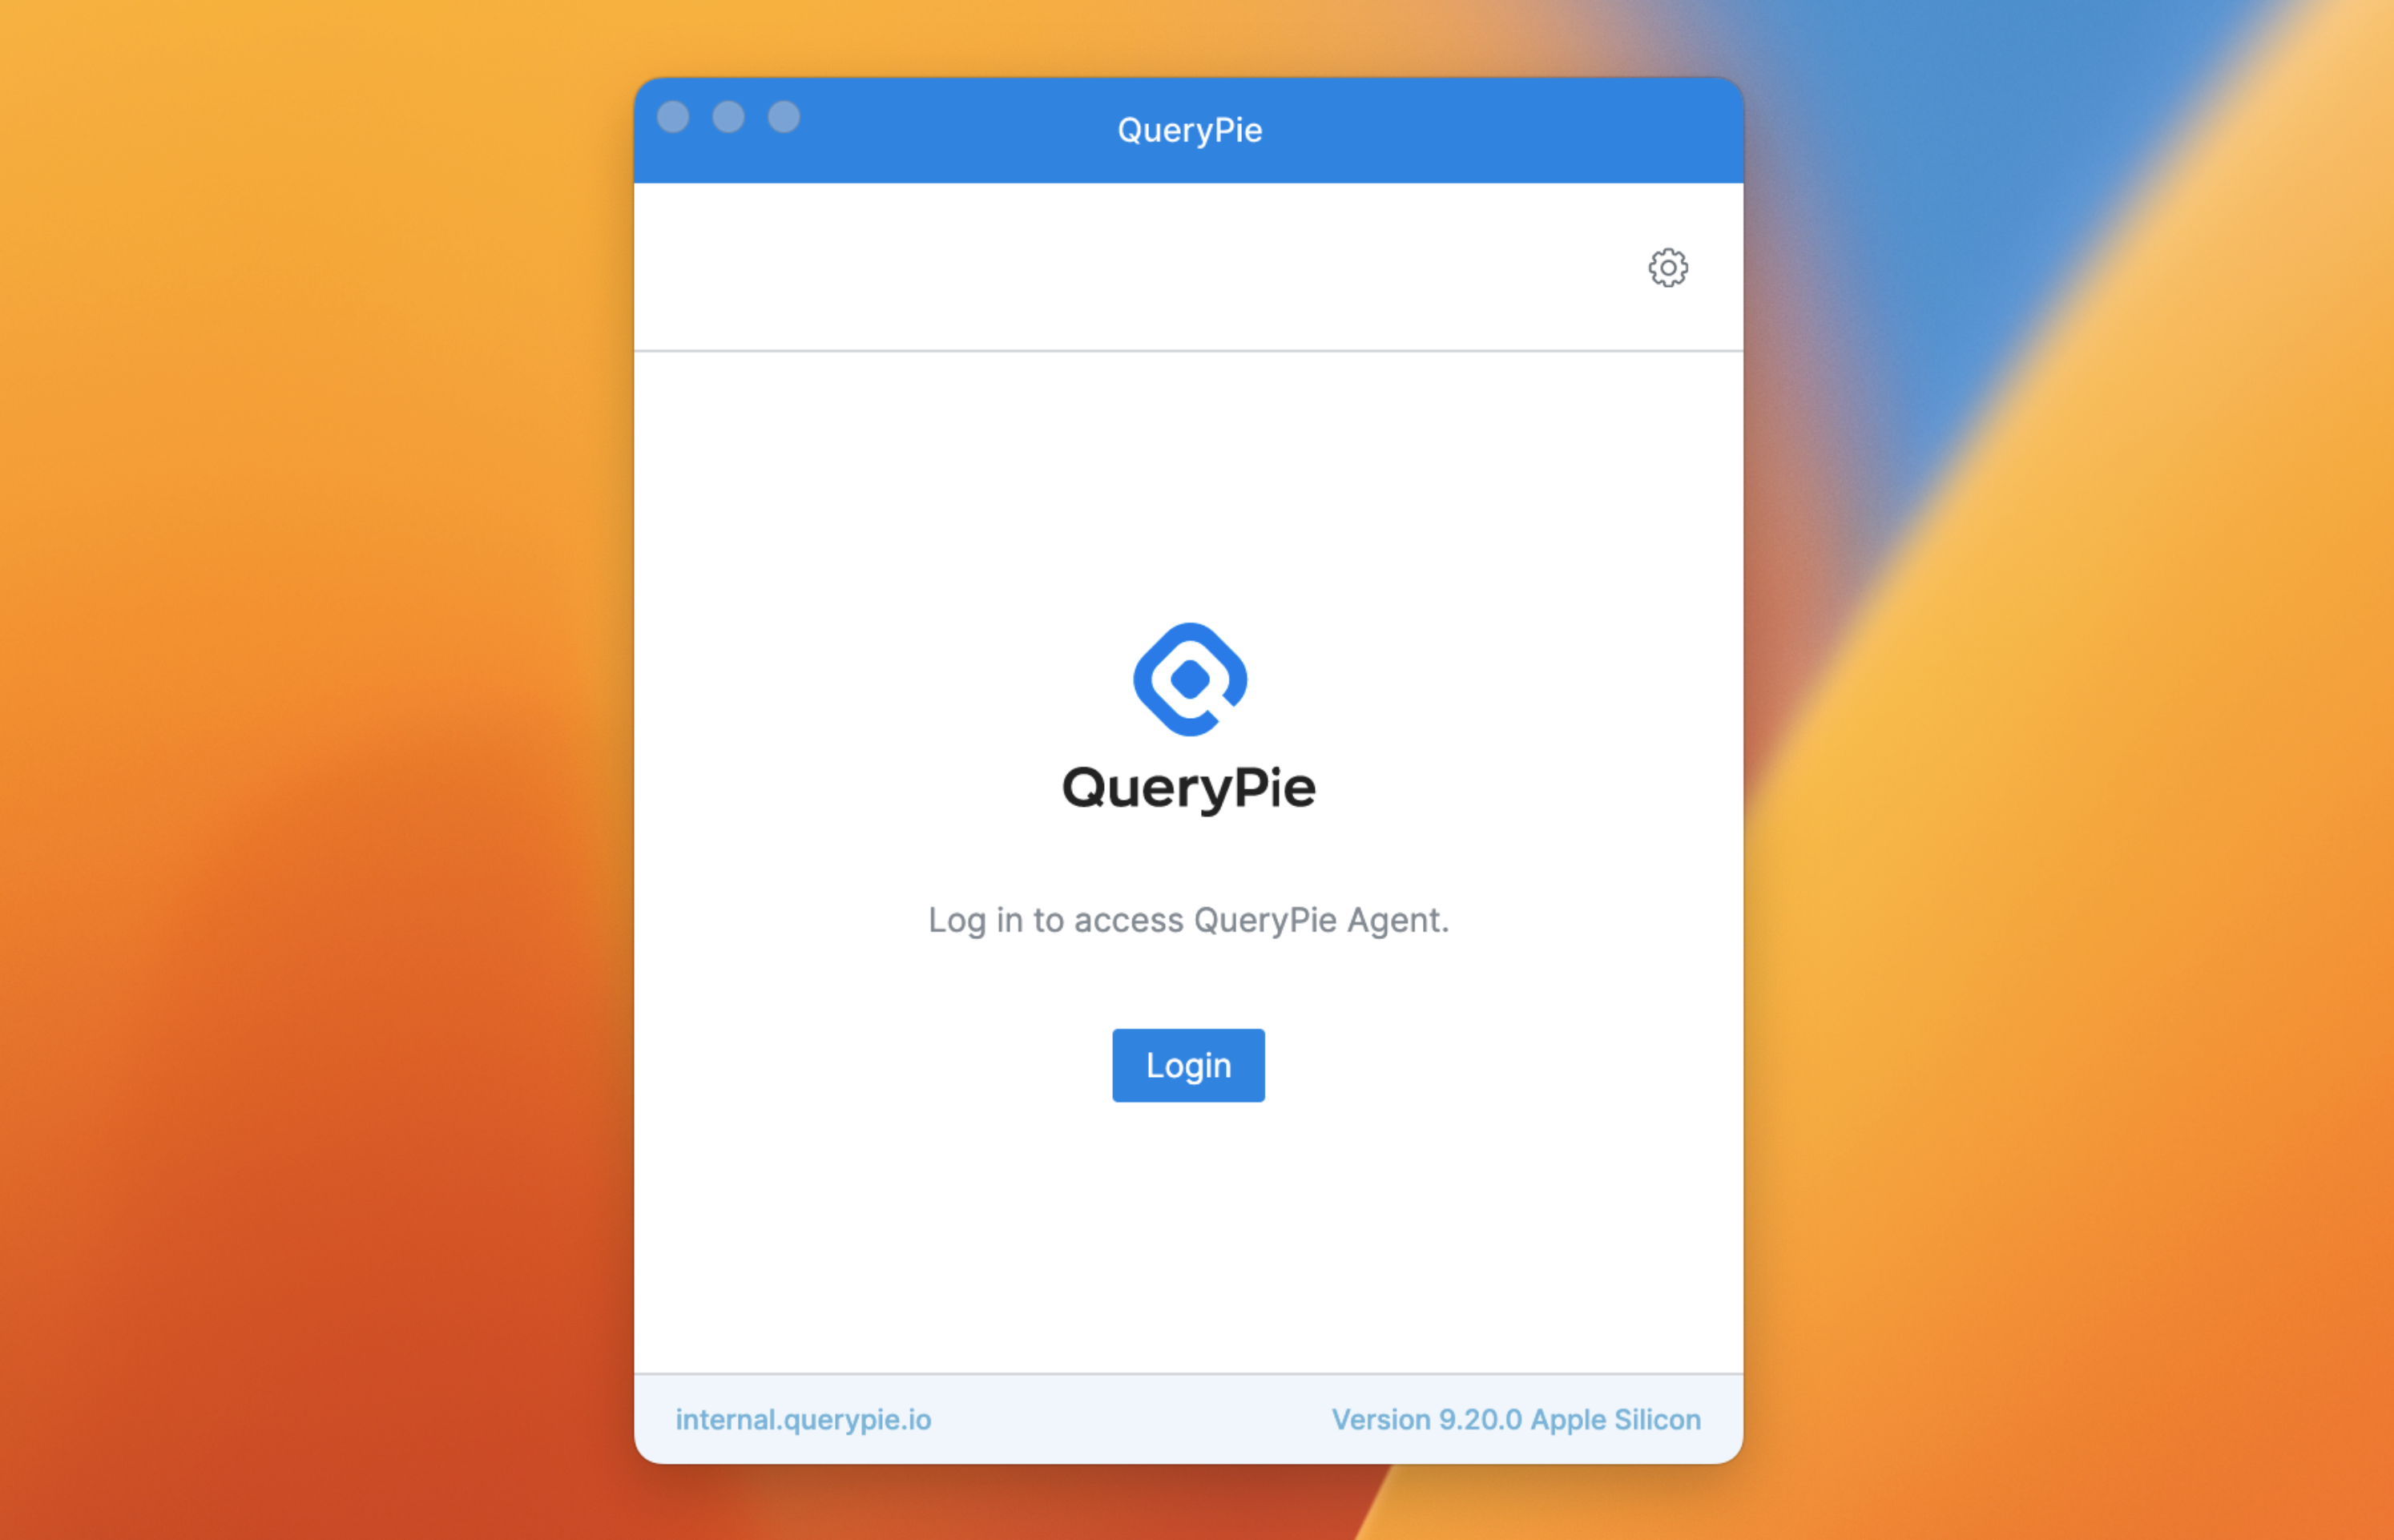
1. On the login screen of the Agent app, click the Login button.
2. A web browser will open. Enter your credentials on the login page and click the Continue button.
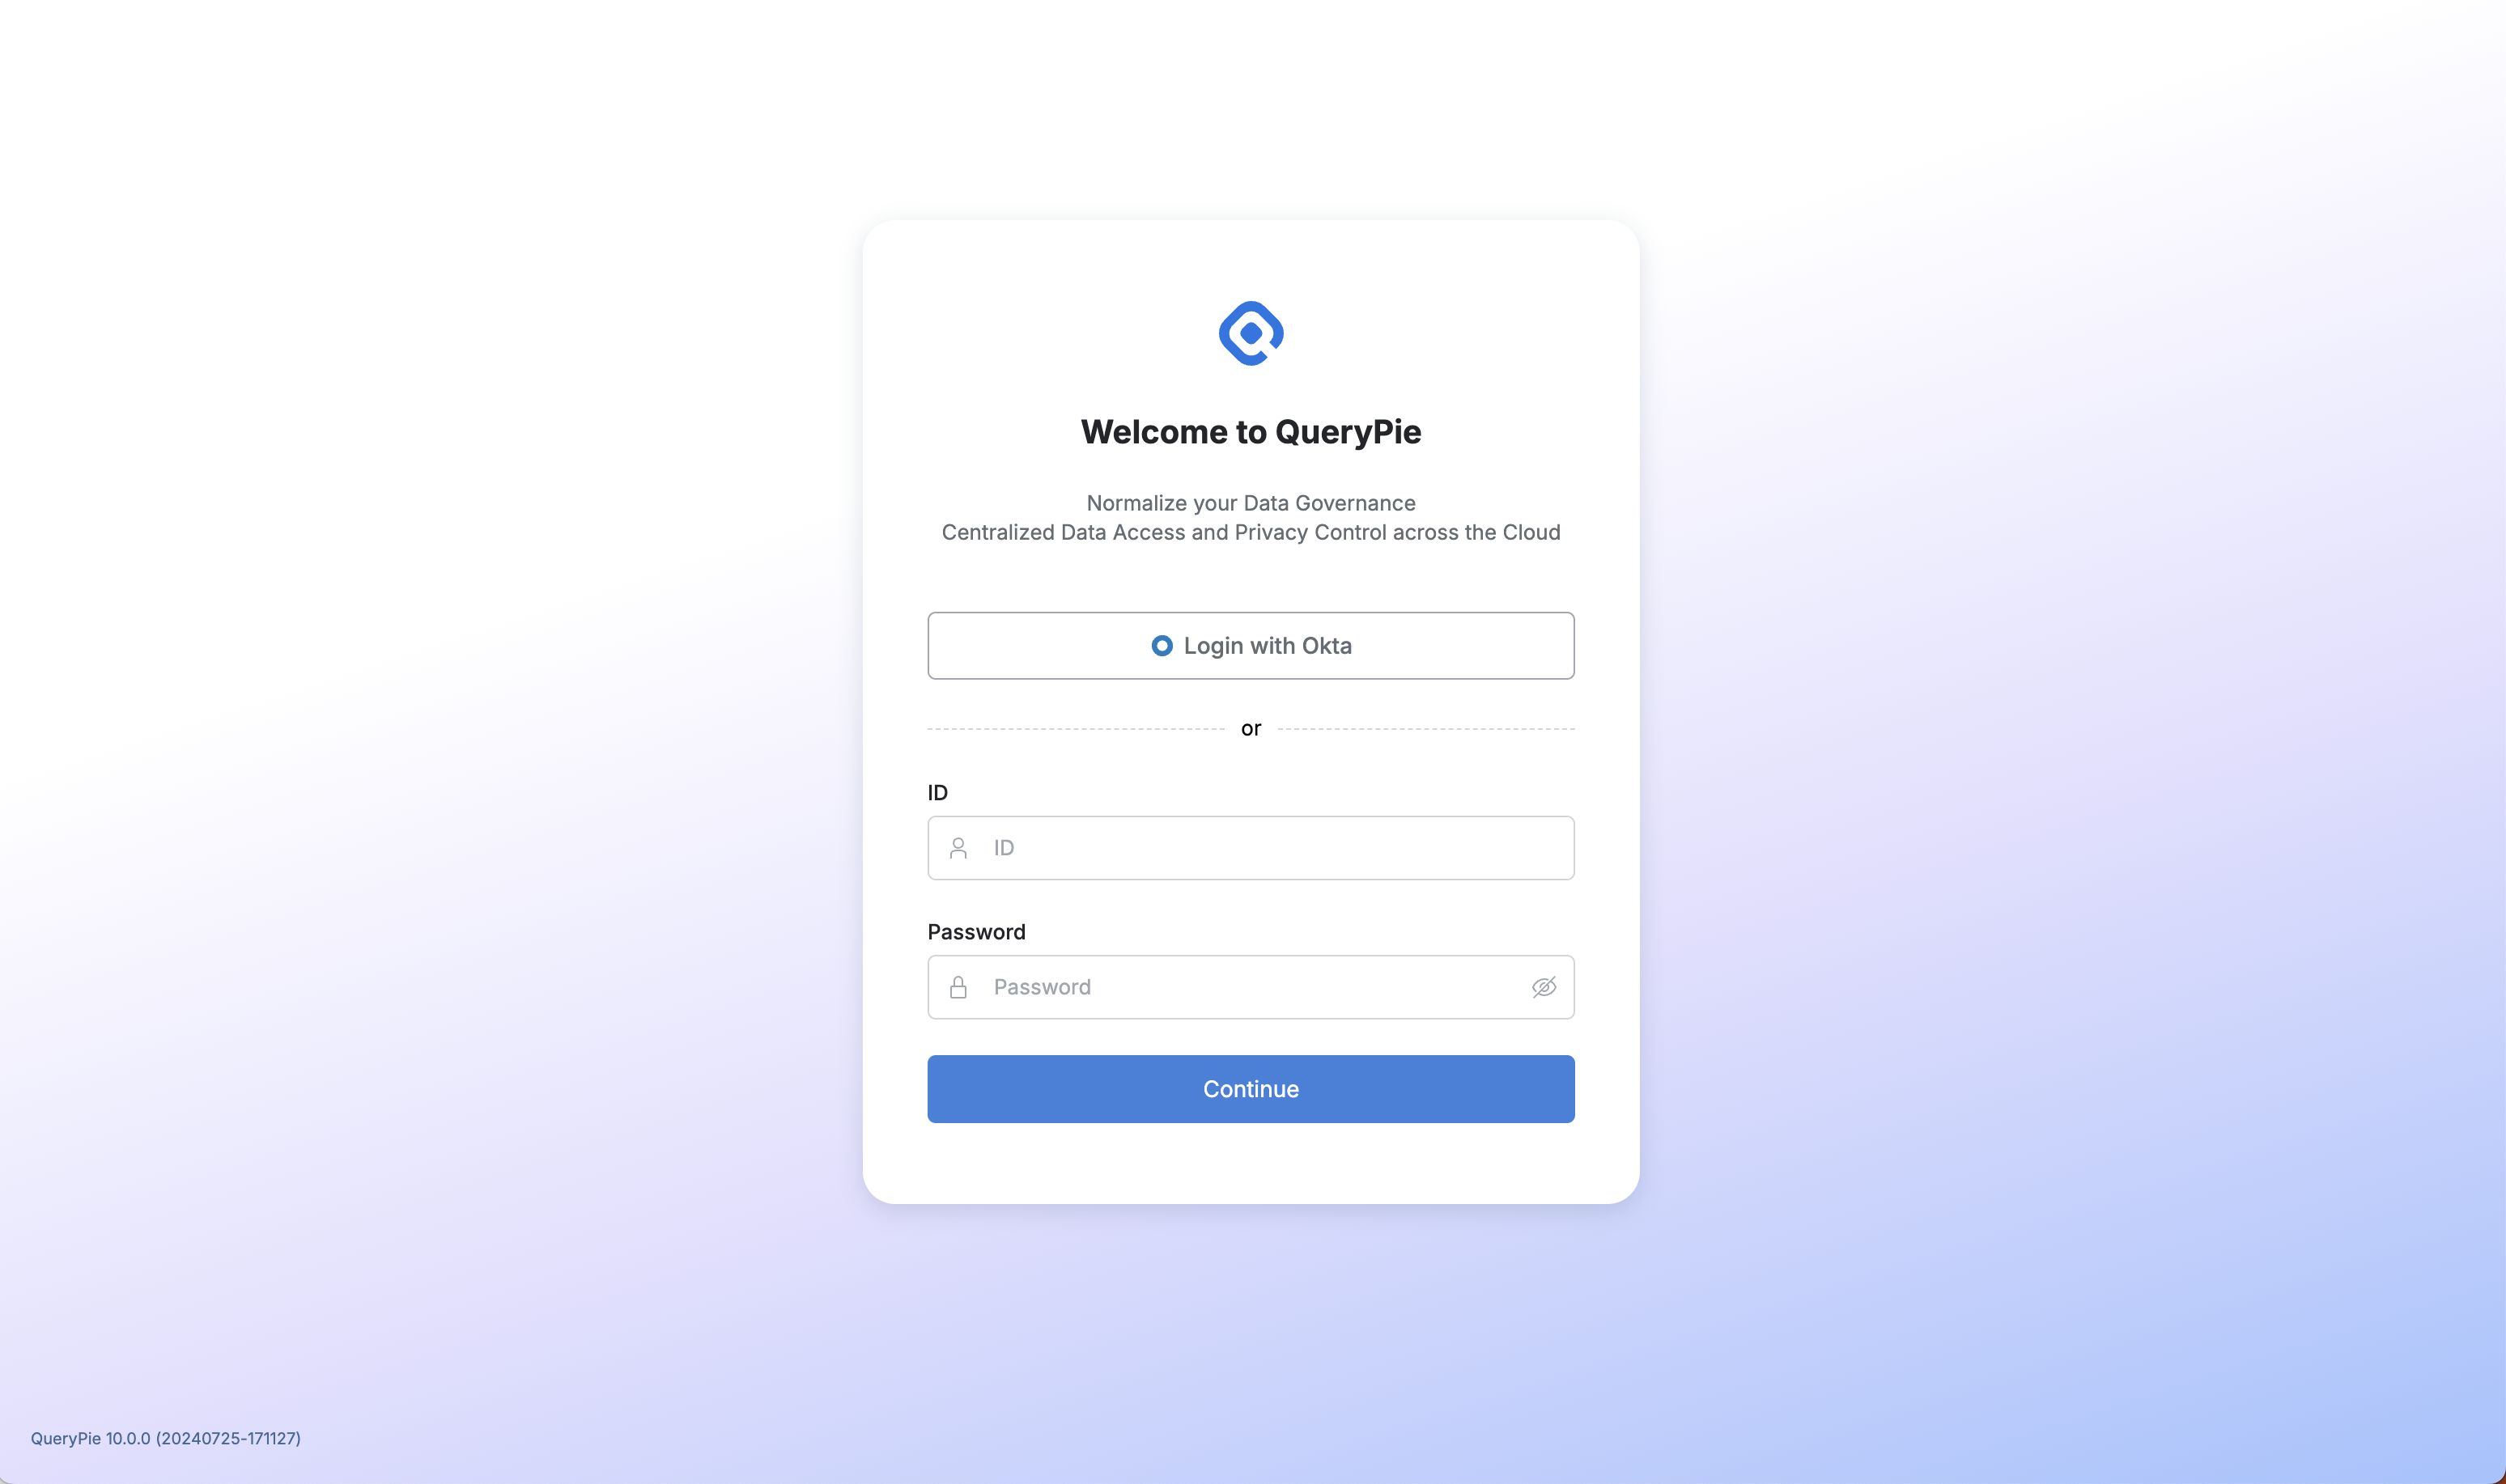
QueryPie Web > Agent Login Page
3. Upon successful login, a login success screen will be displayed, and you will return to the Agent.
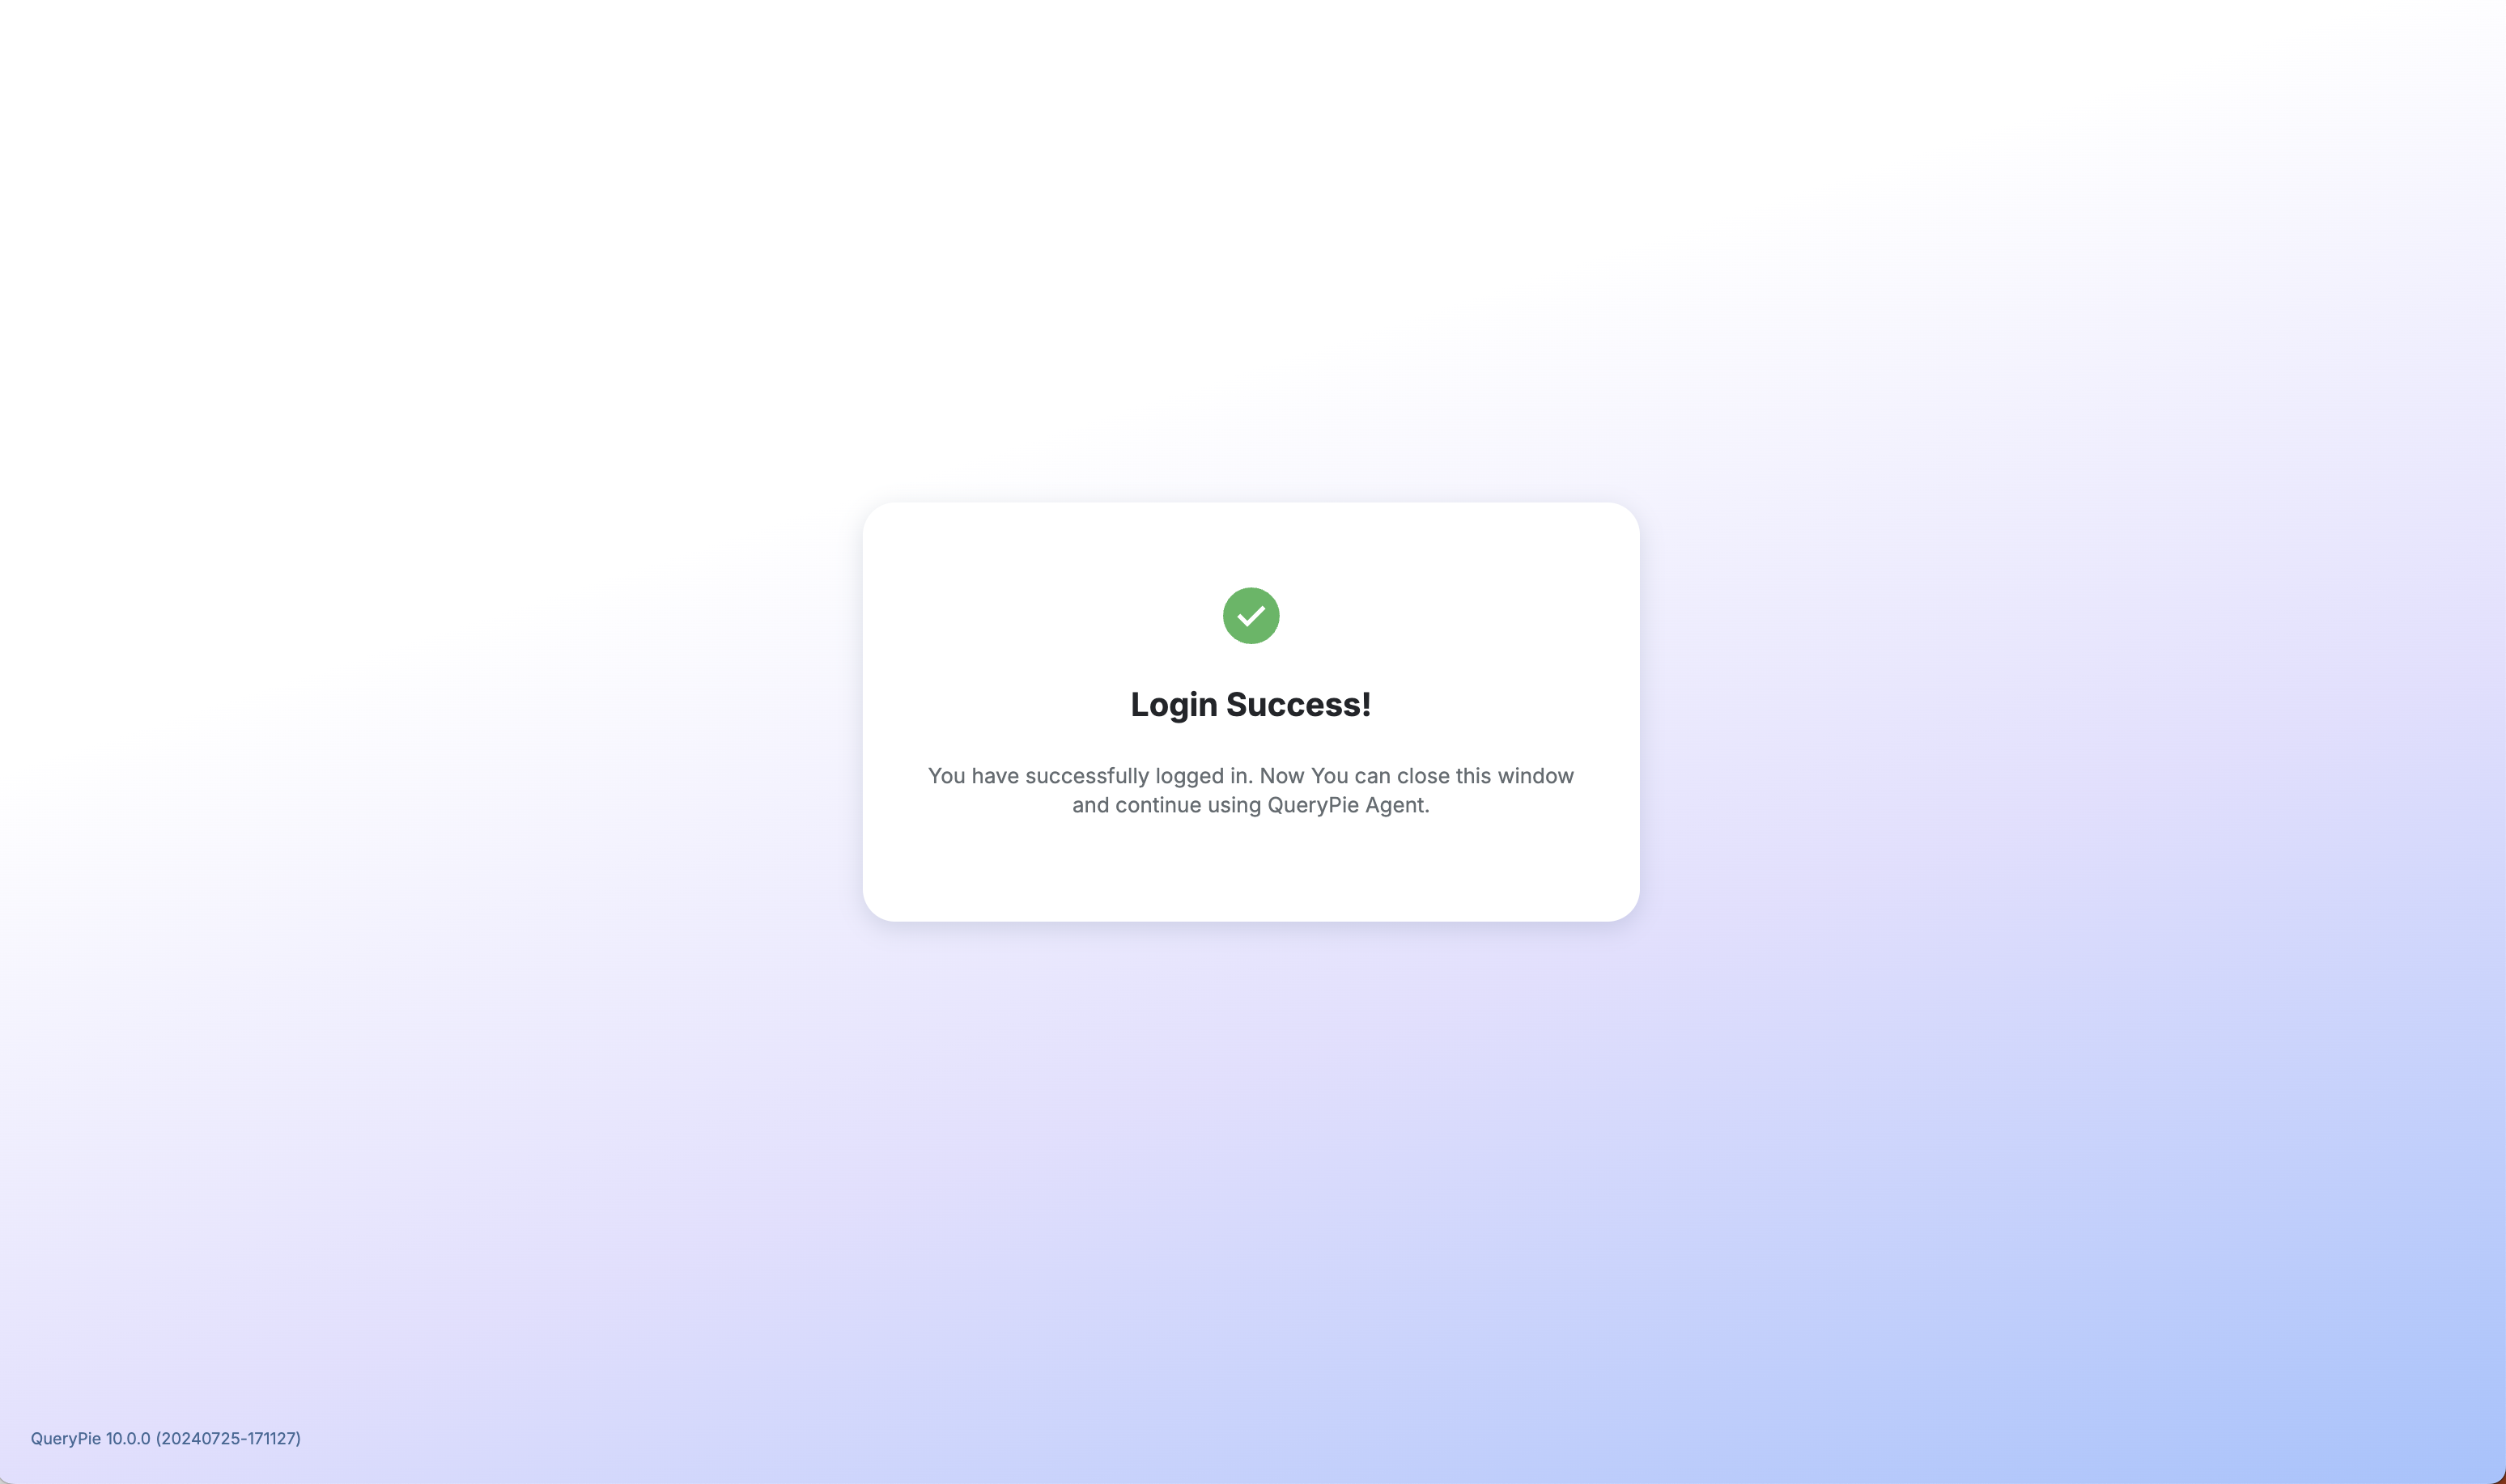
QueryPie Web > Agent Login Success Page
4. Explicitly open the Agent to pass authentication information to the Agent.
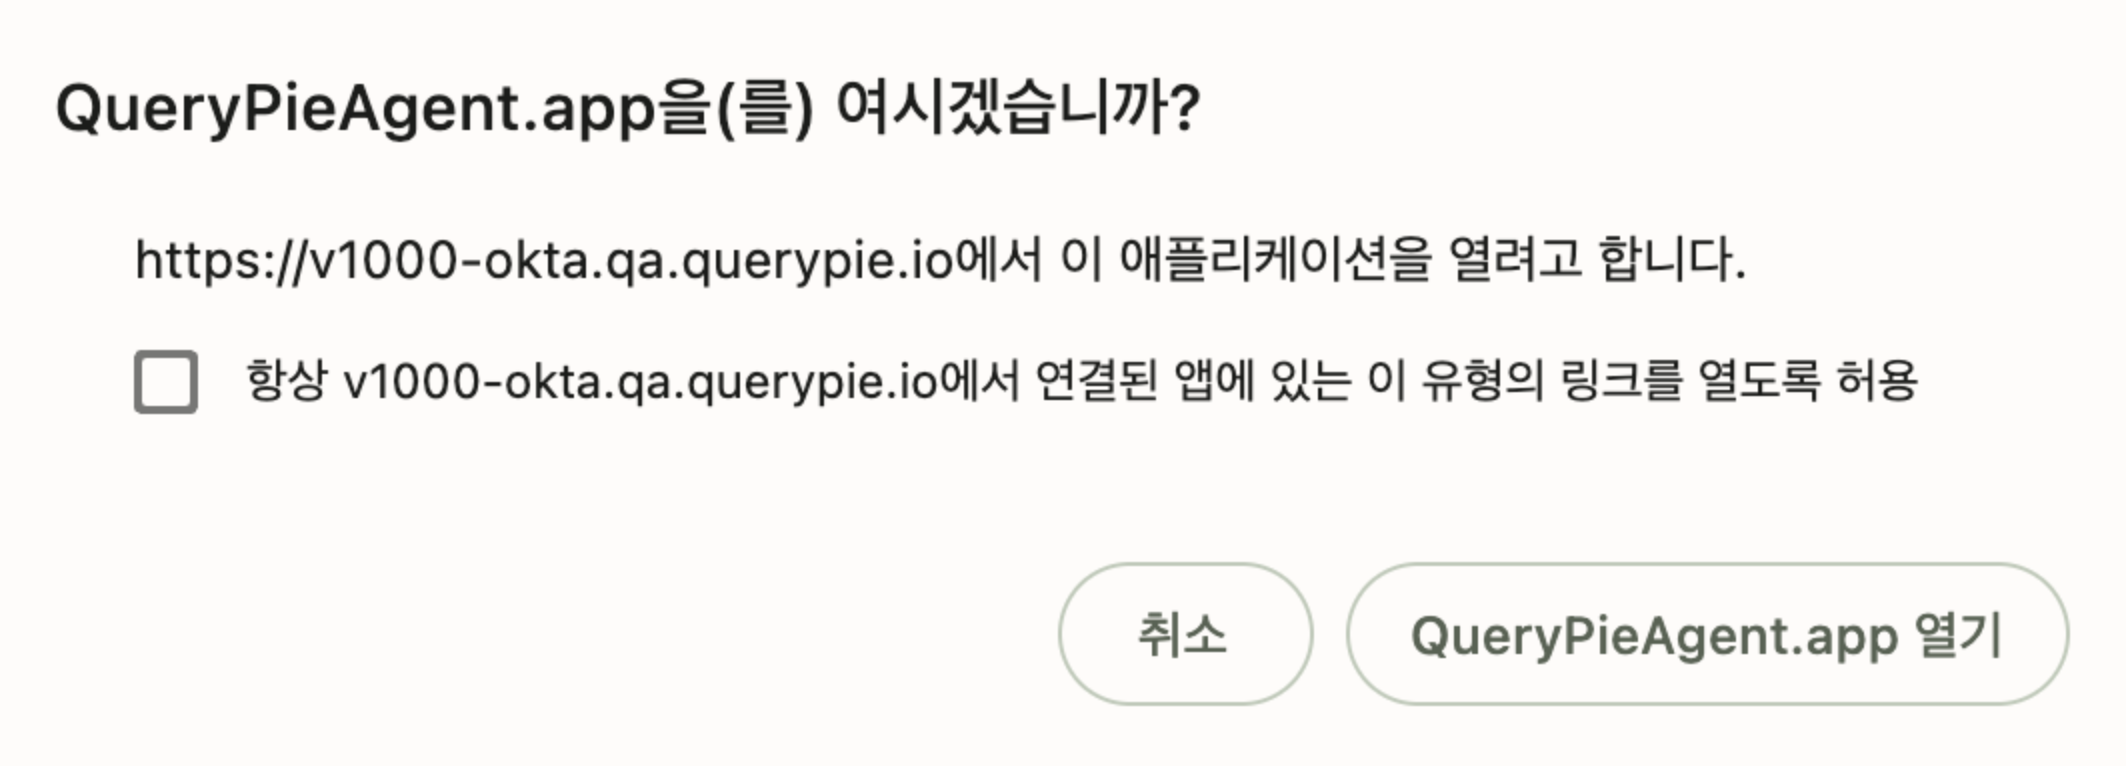
Chrome - Agent App Open Modal
Connecting to a Database through the Agent
1. After a successful login, you can view connection information for authorized connections in the Databases tab of the Agent app. Click on the port assigned to the connection to view the Proxy Credentials.
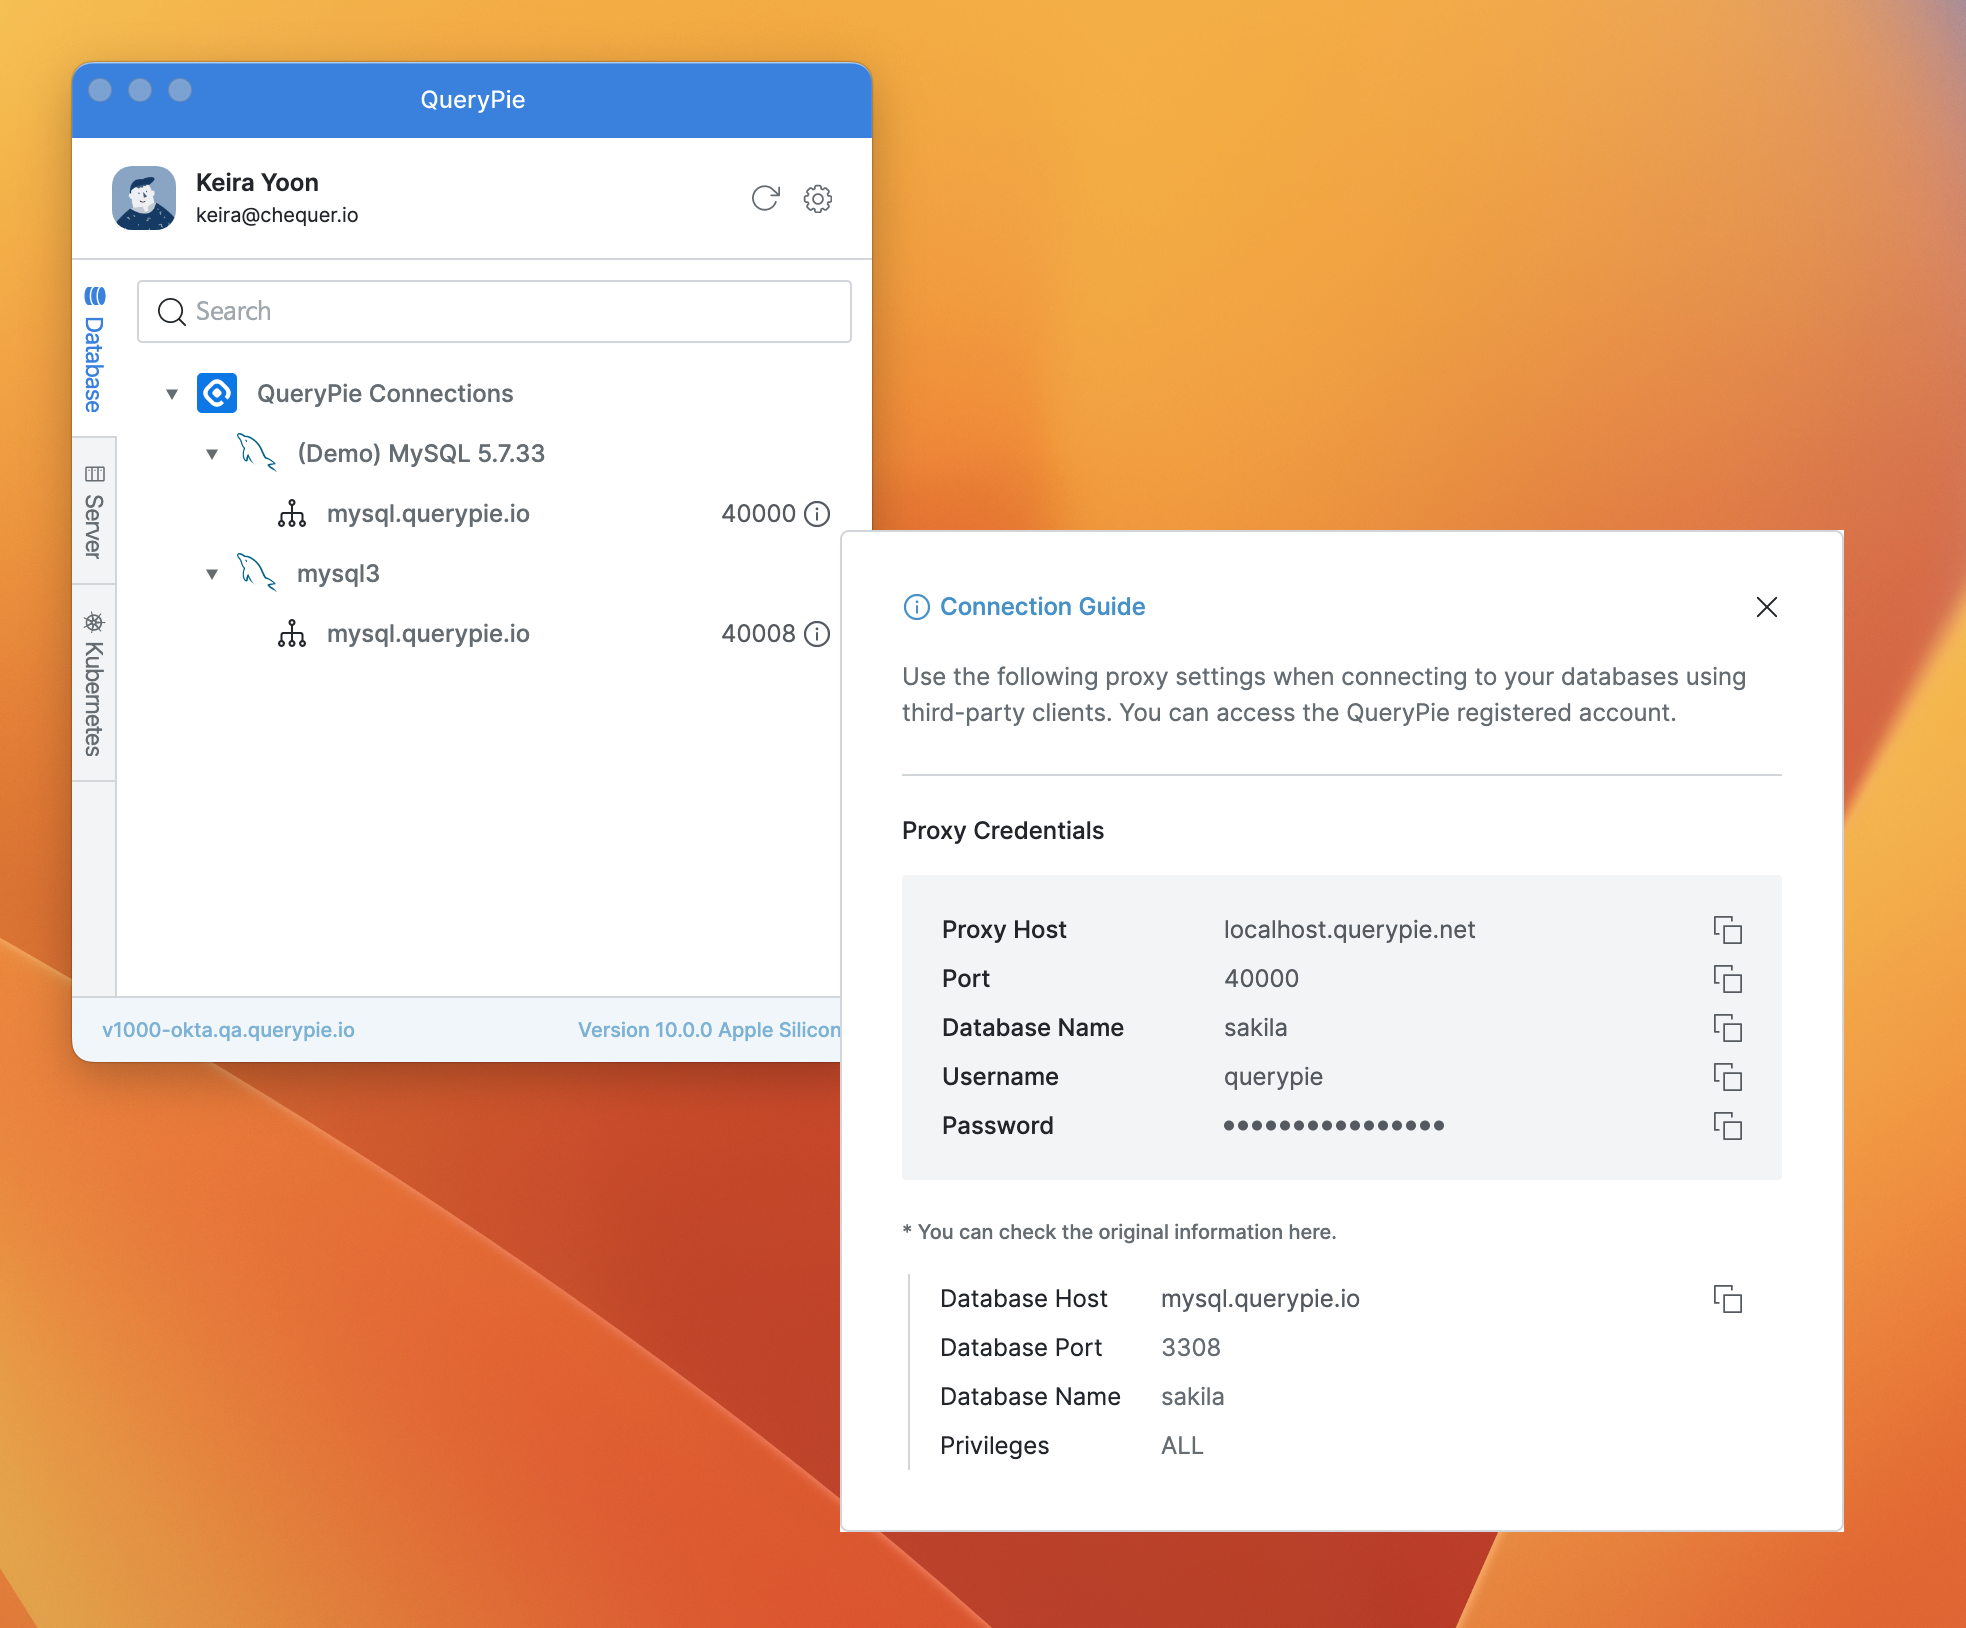
Agent > DB Connection Information
2. Enter the connection information in a 3rd party client to establish a DB connection.
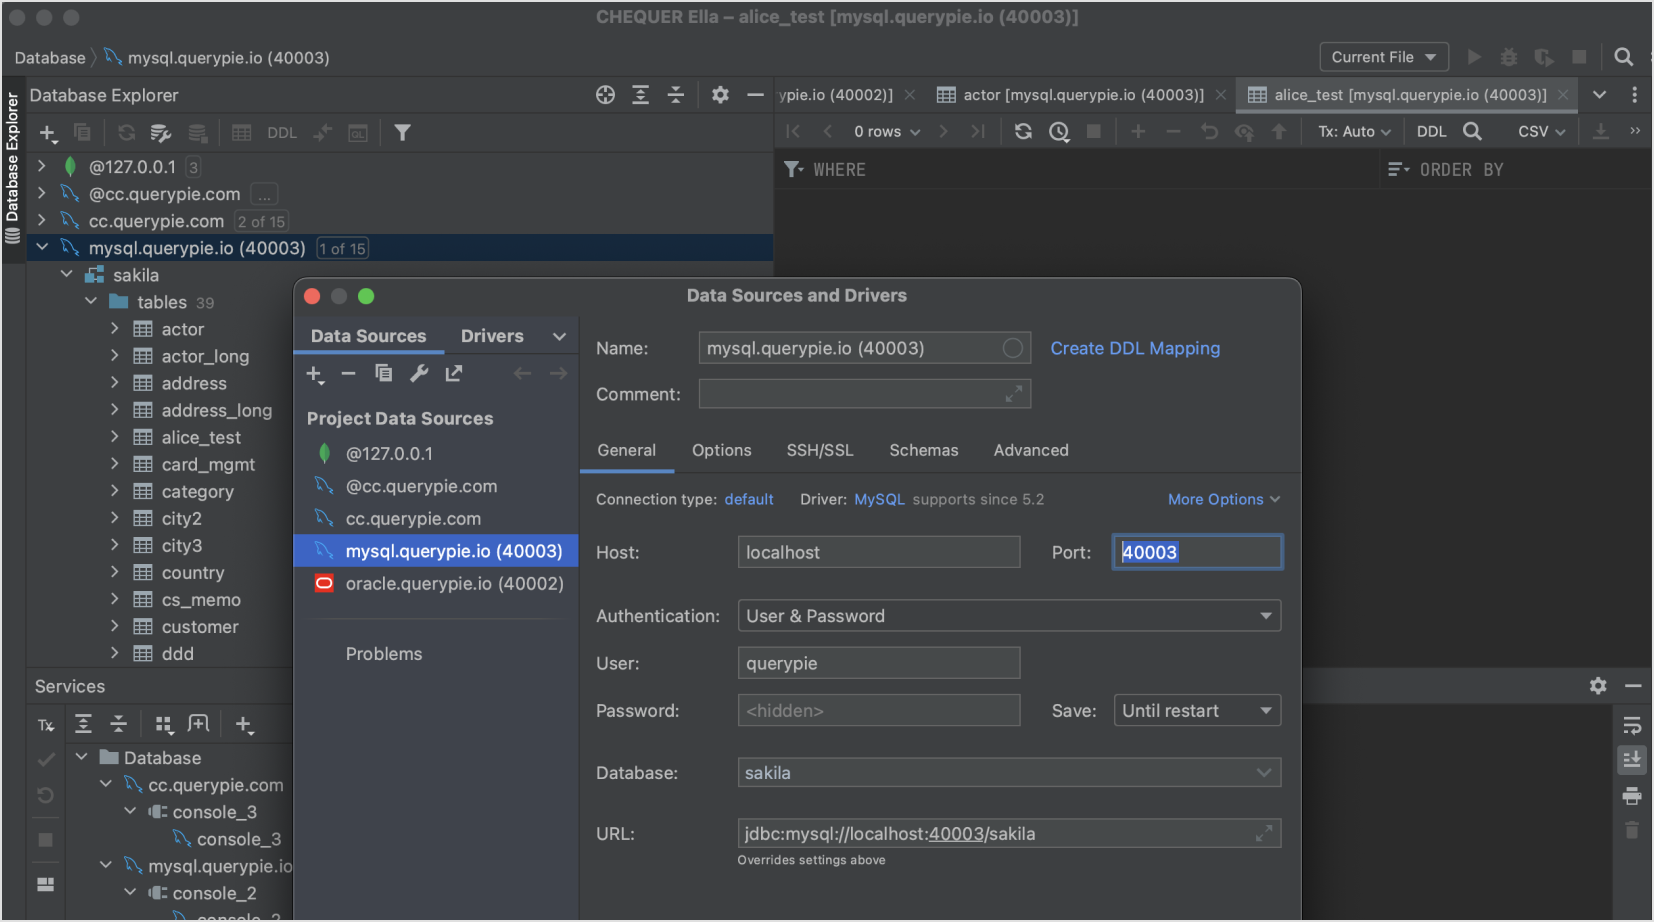
DB Connection via 3rd Party Client
Connecting to a Server through the Agent
After a successful login, users can view the authorized servers in the Server tab of the Agent app.
1. Select a Role
Click the role button at the bottom of the profile area, select the desired role, and click the
Selectbutton.Default Role: Uses server permissions assigned via Workflow > Server Access Request.
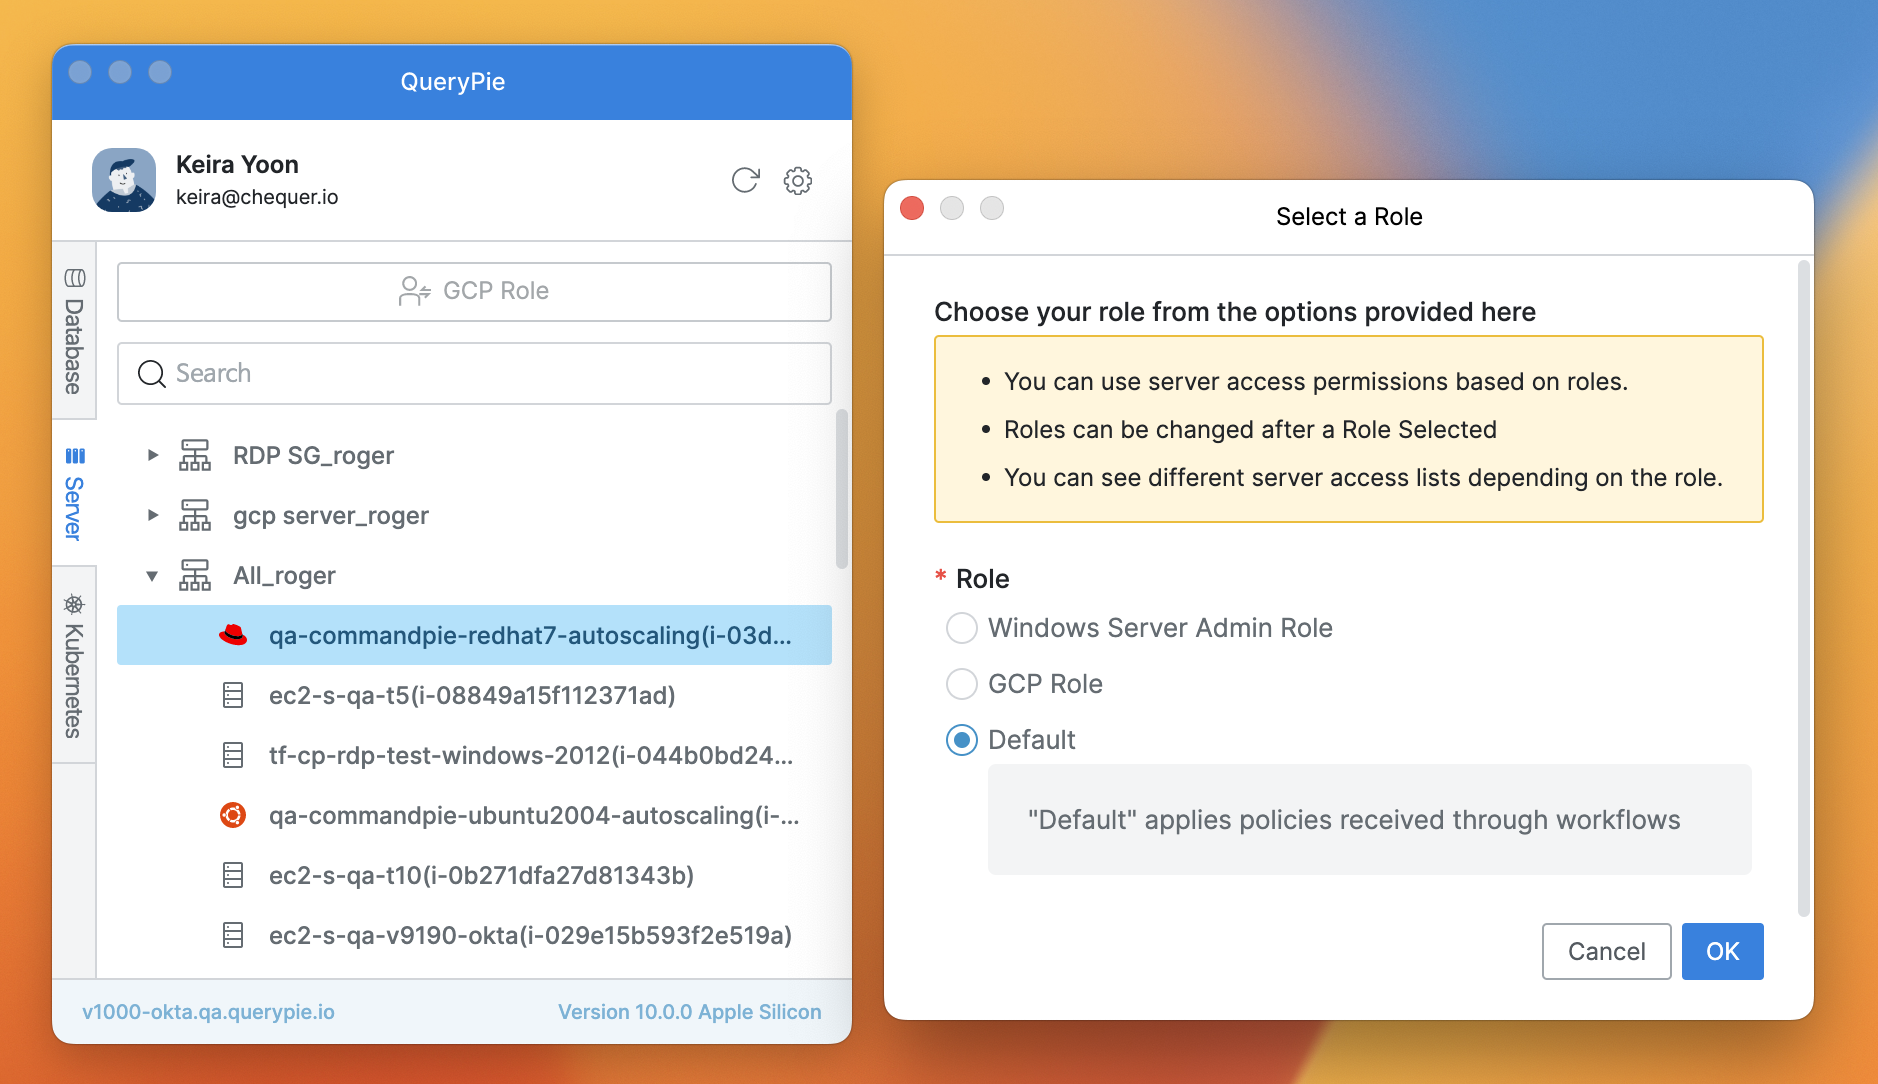
Agent > Server > Select a Role
If you have multiple roles, select a role before using the Server function after logging into the Agent.
2. Connect to a Server
Right-click the server you want to connect to, select
Open Connection with, and choose the terminal tool you want to use.
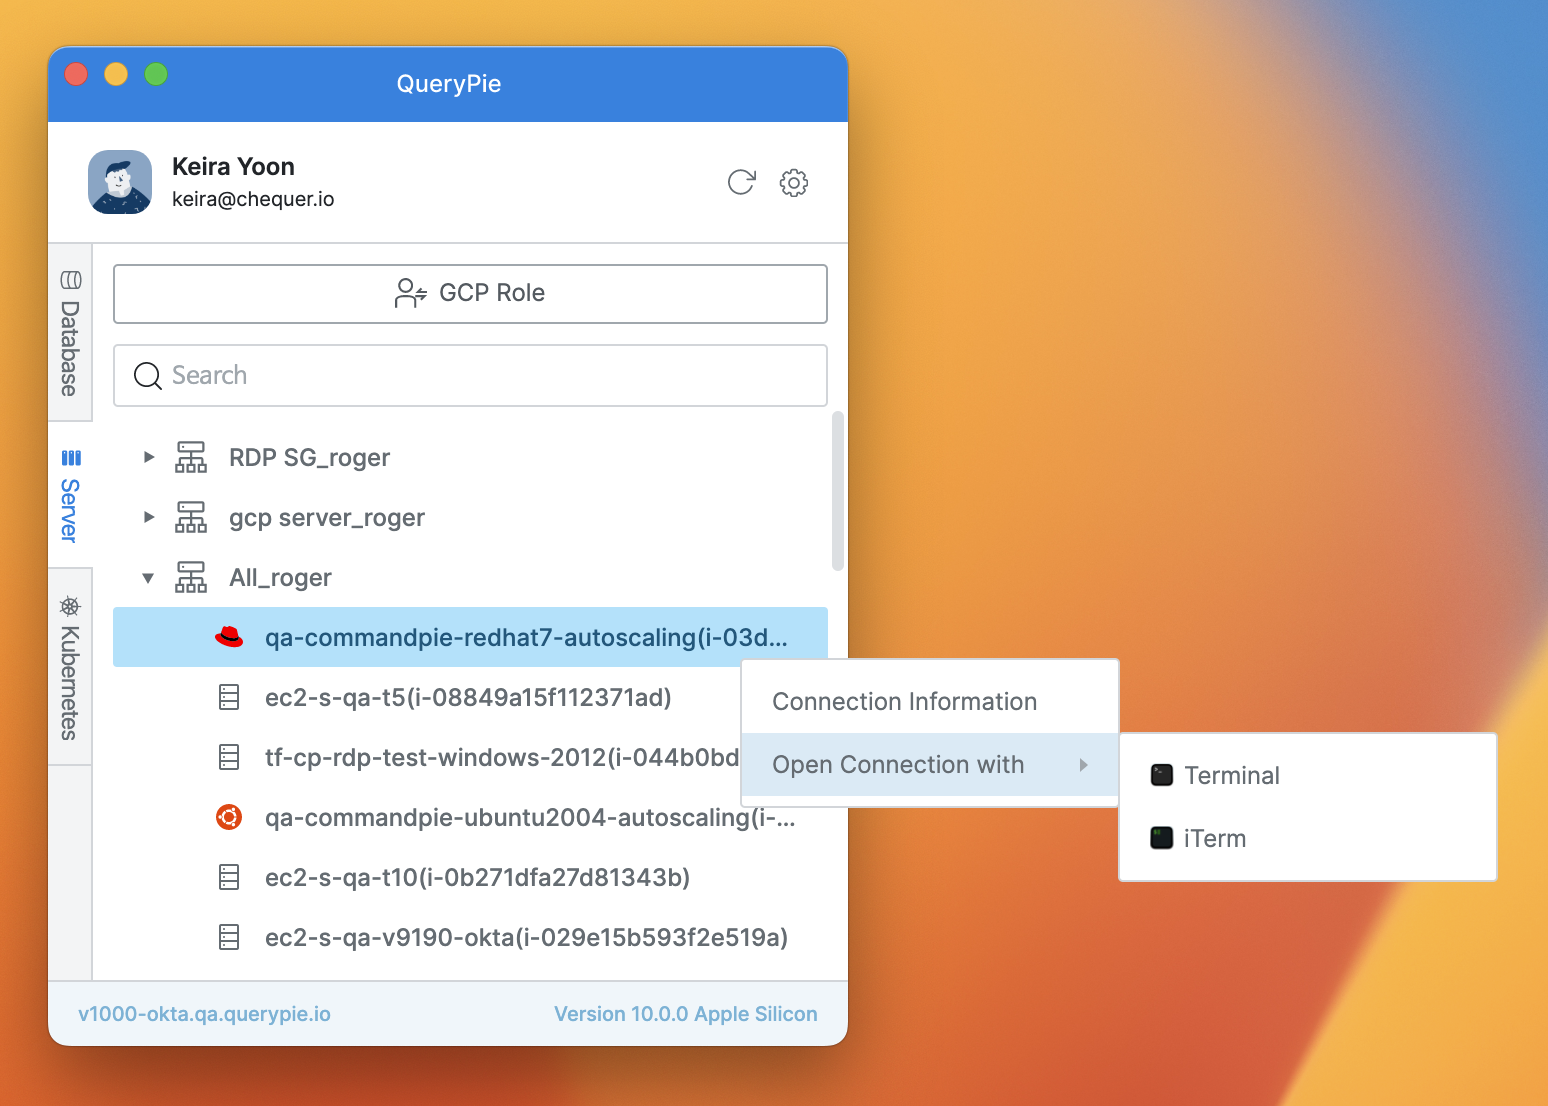
Agent > Server > Open Connection with
If multiple accounts are available for the server, an account selection window will open.
Choose the desired account, enter the password if needed, and click the
OKbutton to open a session.
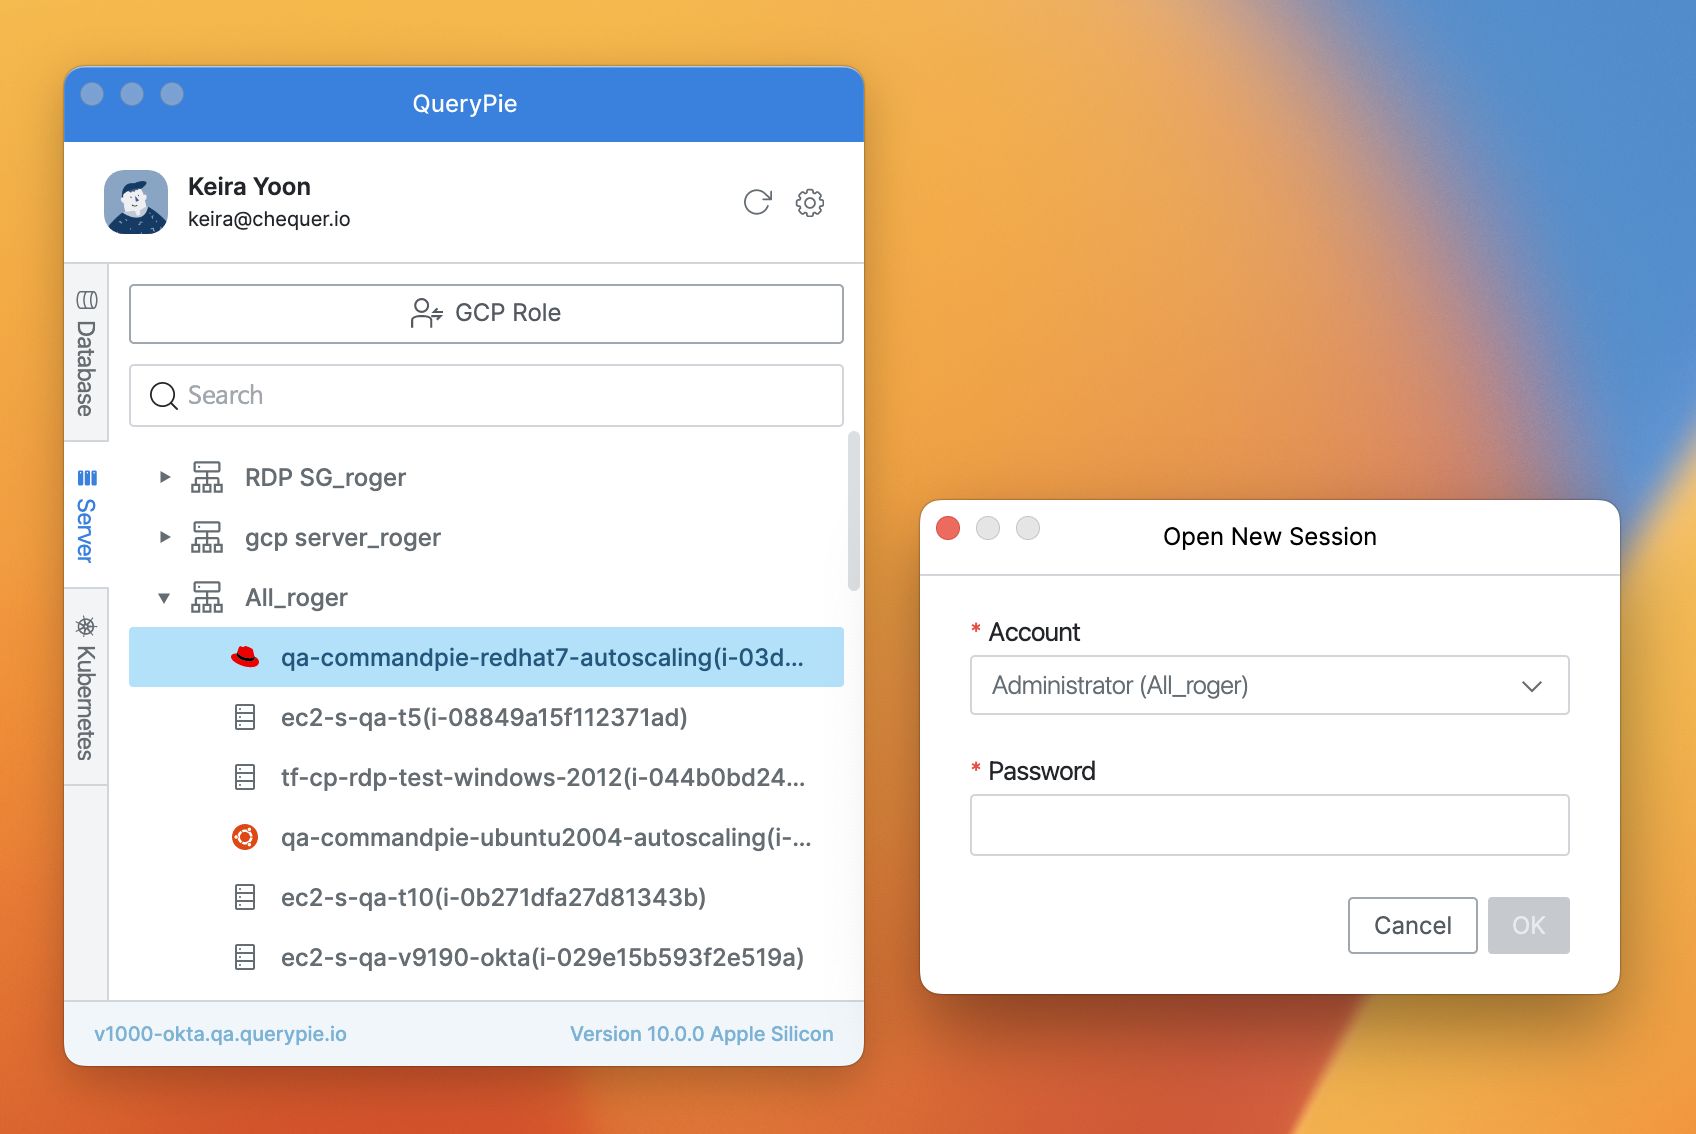
Agent > Server > Open New Session
3. Seamless SSH Setup
Seamless SSH allows you to connect to servers through QueryPie while maintaining the existing terminal usability. Follow these steps to create a config file in the .ssh folder for seamless SSH setup:
1) Open a terminal and navigate to the .ssh folder:
$ cd .ssh2) Open the vi editor to create a config file:
$ vi config3) Enter the following content, then press wq to exit the vi editor:
Host {{Server Name}}
  Hostname {{Server URL}}
  Port {{Server SSH Port}}
  ProxyCommand qpa ssh %r %h %p
Specify the server name, URL, and port for each server you want to configure for seamless SSH. If URLs and ports are unique across servers, you can use the following configuration:
Host *
  ProxyCommand qpa ssh %r %h %p
4) The setup is complete. After selecting a role in the Agent > Server tab, you can use the existing ssh command to connect to the server:
$ ssh deploy@{{Server Name}}Connecting to Kubernetes through the Agent
When running the agent, users with granted permissions will automatically receive a kubeconfig file according to the current policy.
This file allows access to Kubernetes API resources using tools like kubectl, Lens, or k9s.
The agent displays a list of accessible clusters and their applied policies.
You can specify the save path for the kubeconfig file and upload a local file path if necessary.
1. Select a Kubernetes Role
In the profile area at the bottom, click and choose the role you want to use from the list of available roles. Then, click the Select button to confirm your choice.
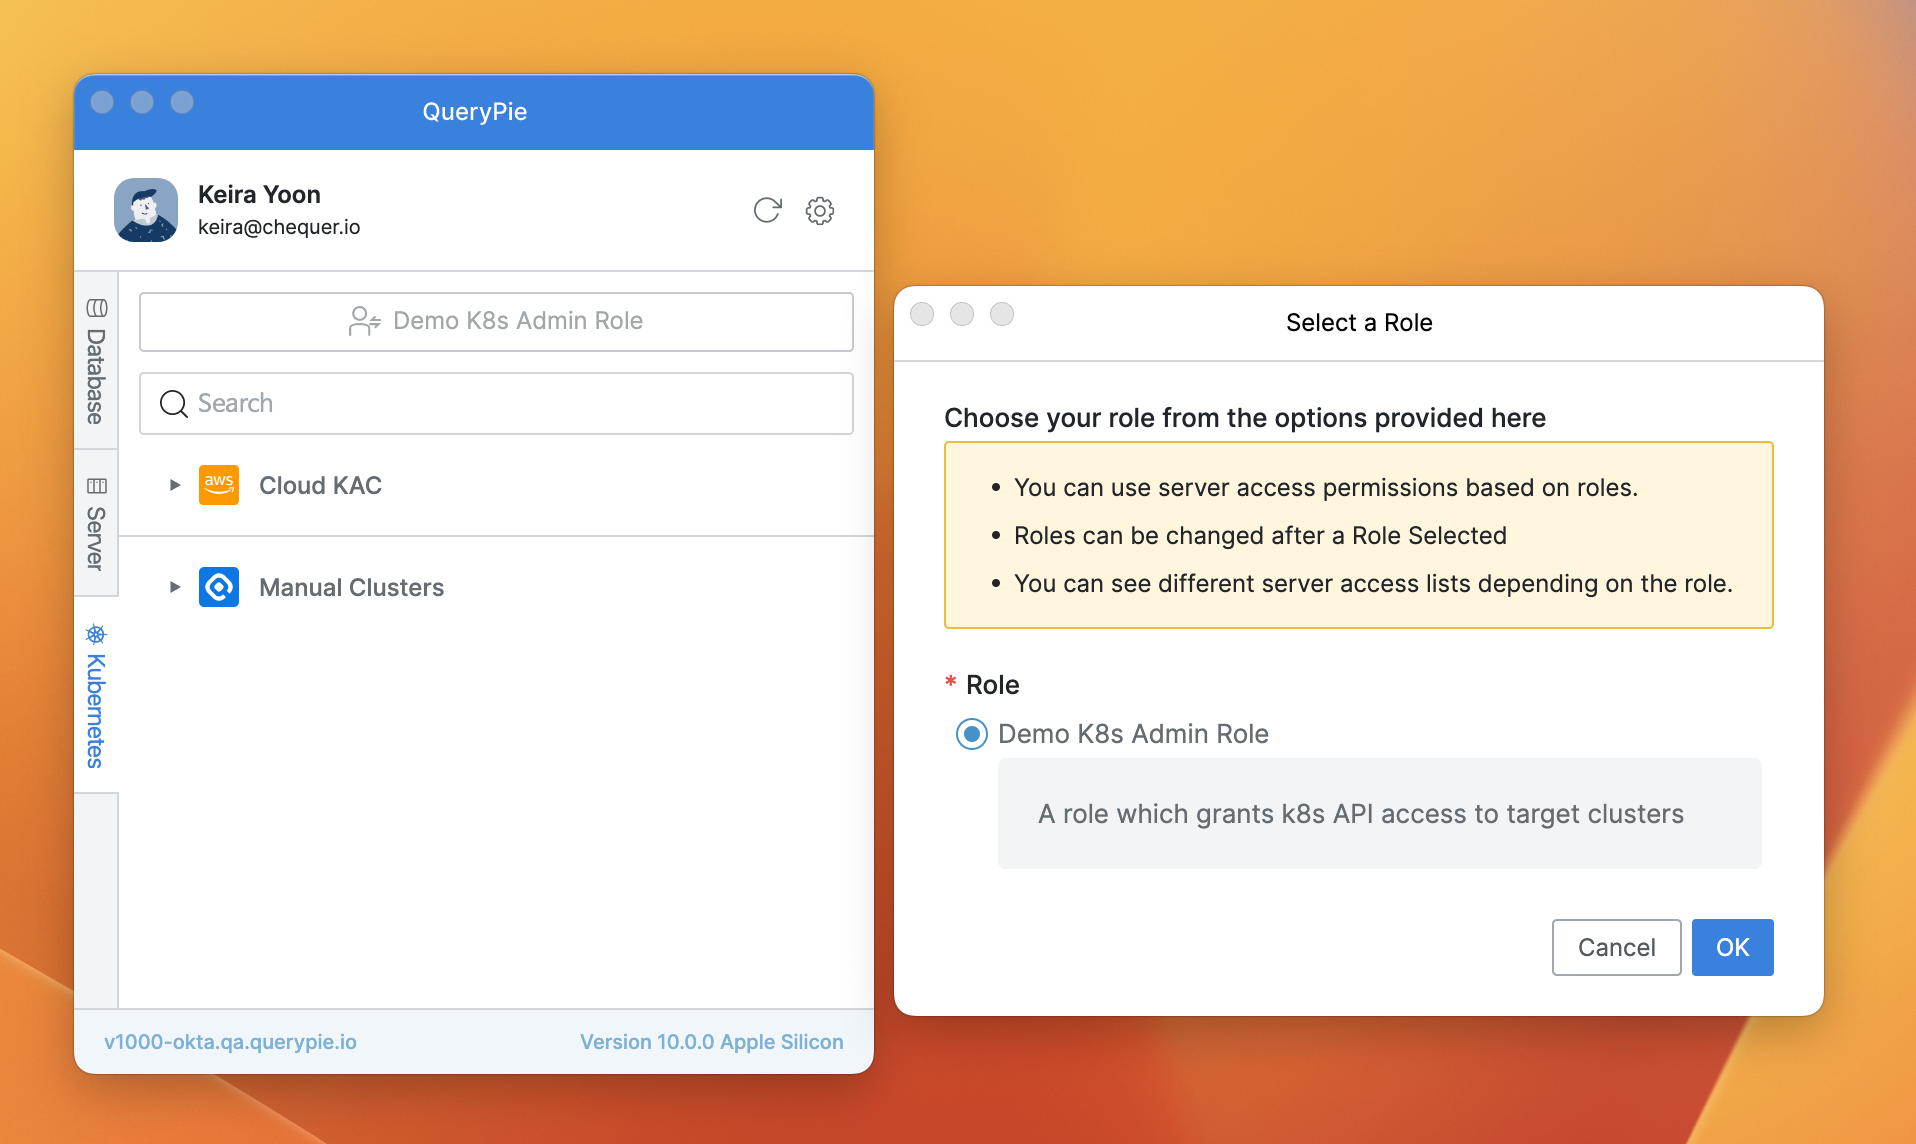
Agent > Kubernetes > Select a Role
If you have more than one role, ensure you complete the role selection before using the Kubernetes features in the Agent.
2. View Policies
After selecting a role, the resources you can access will be displayed according to the chosen role. Clicking the 🔍 button on the right side of each cluster will open the Policy Information popup. In the Policy Information popup, you can view detailed lists of policies applied to the selected cluster.
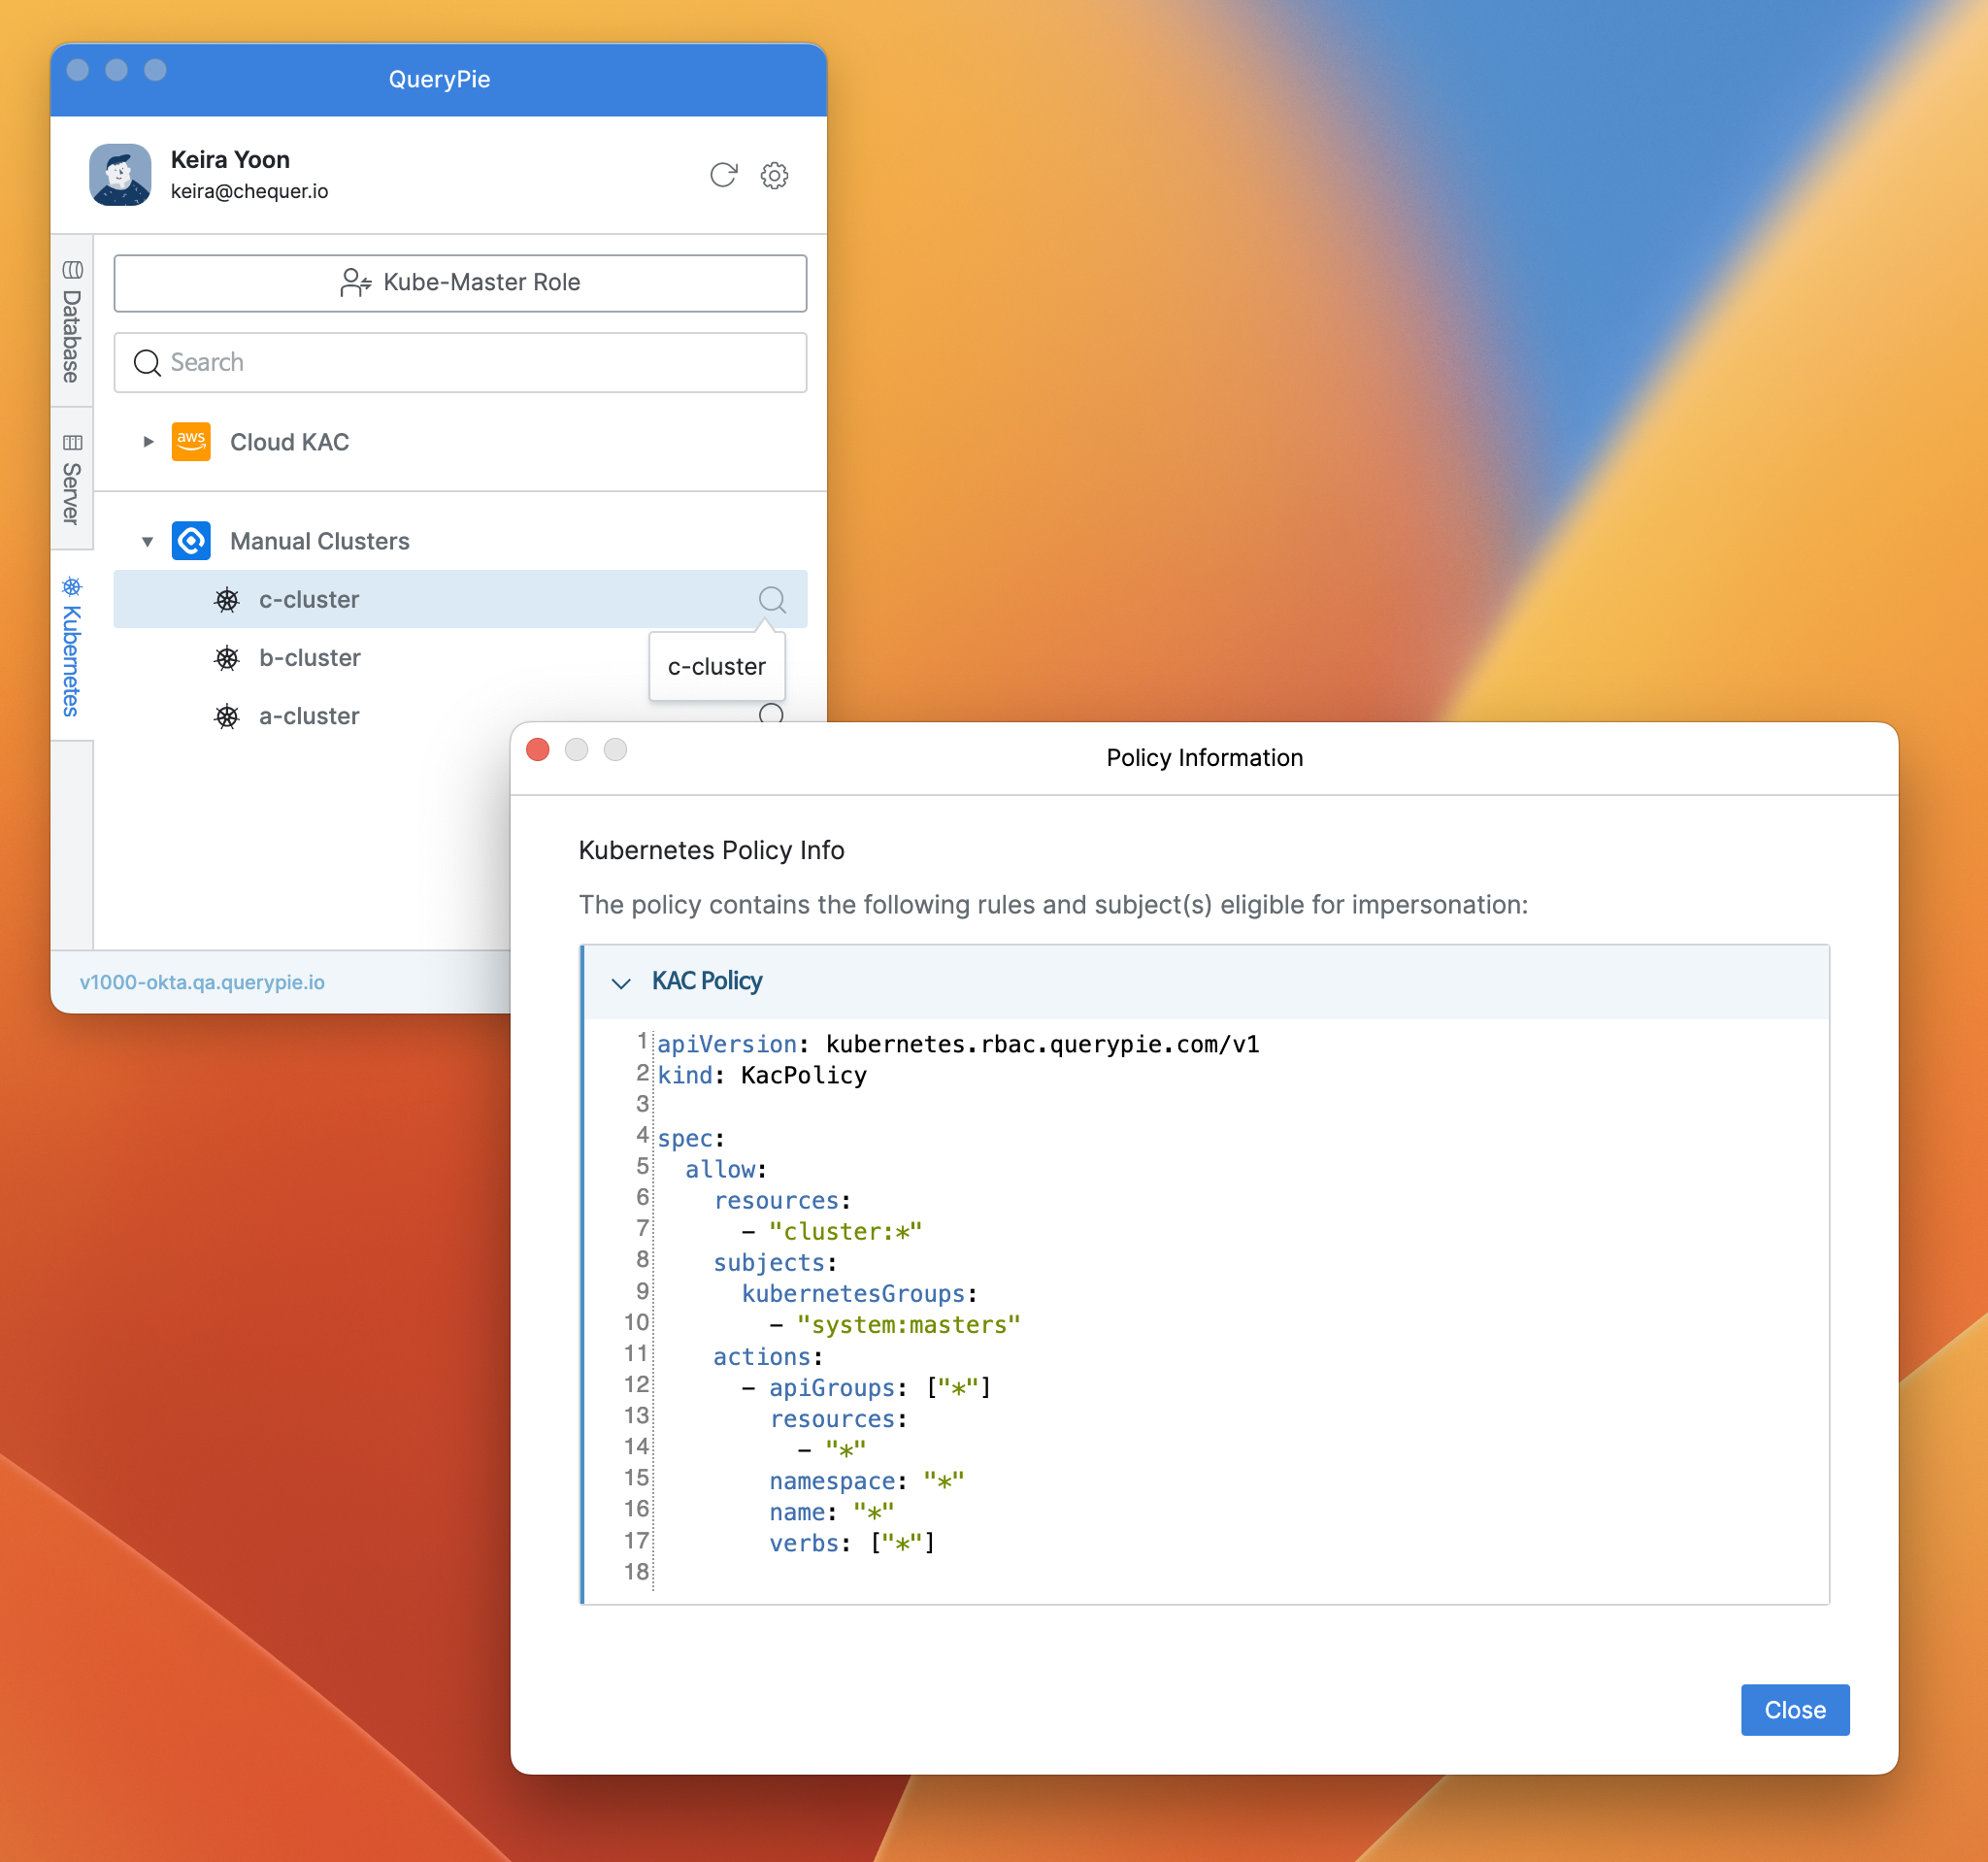
Agent > Policy Information
3. Set the Kubeconfig Path
In the Agent, click the ⚙️ button in the settings menu. Then, click the KubeConfig Path button to open the Kubeconfig Path configuration modal.
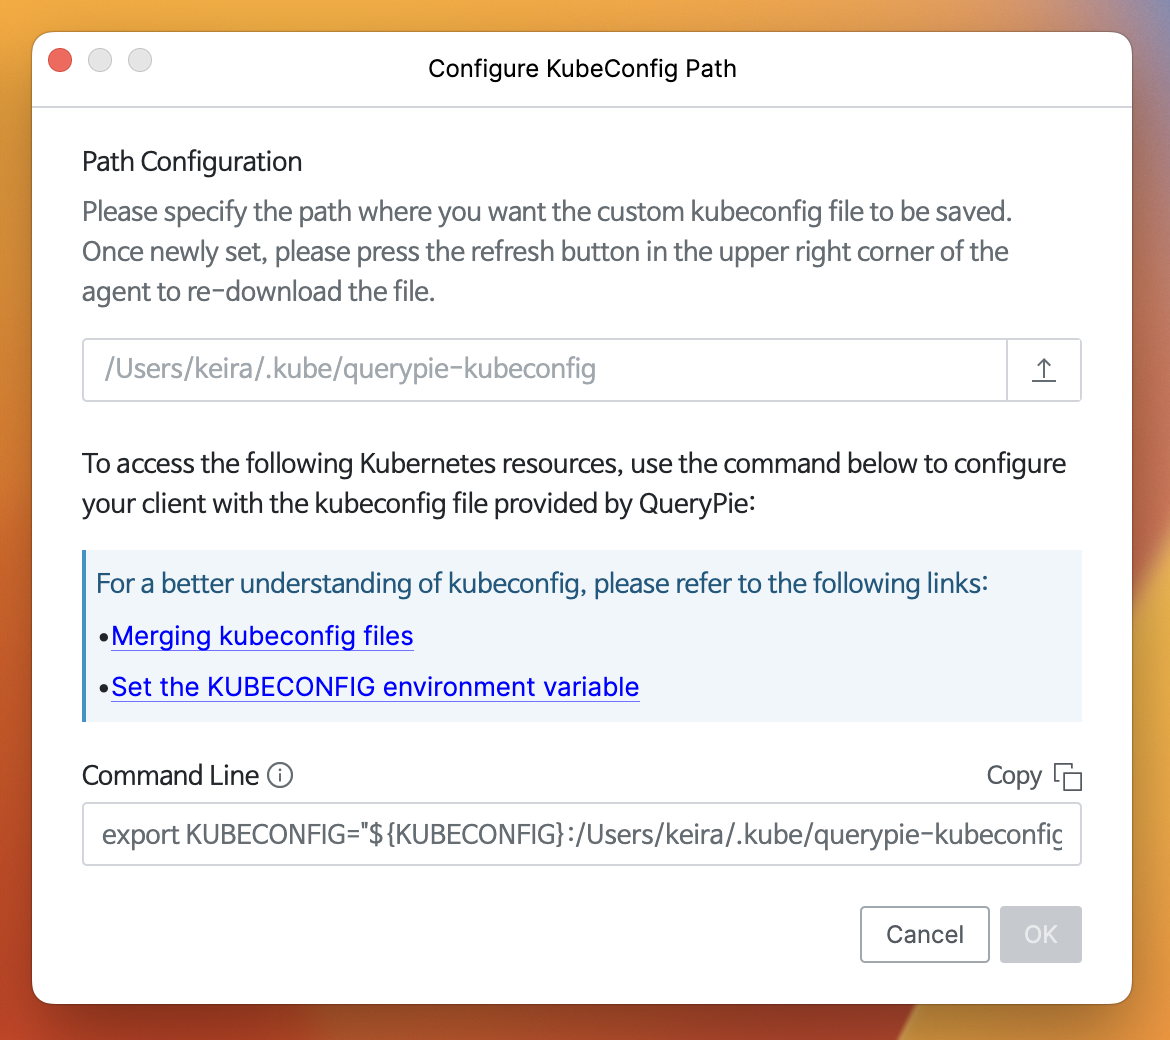
Agent > Settings > Kubeconfig Path
Path Configuration : In the Kubeconfig Path configuration modal, you can specify the save path for the kubeconfig file.
The default path is
$HOME/.kube/querypie-kubeconfig.To set a custom path, click the
Uploadbutton next to the path field to open a popup where you can specify the local file path.
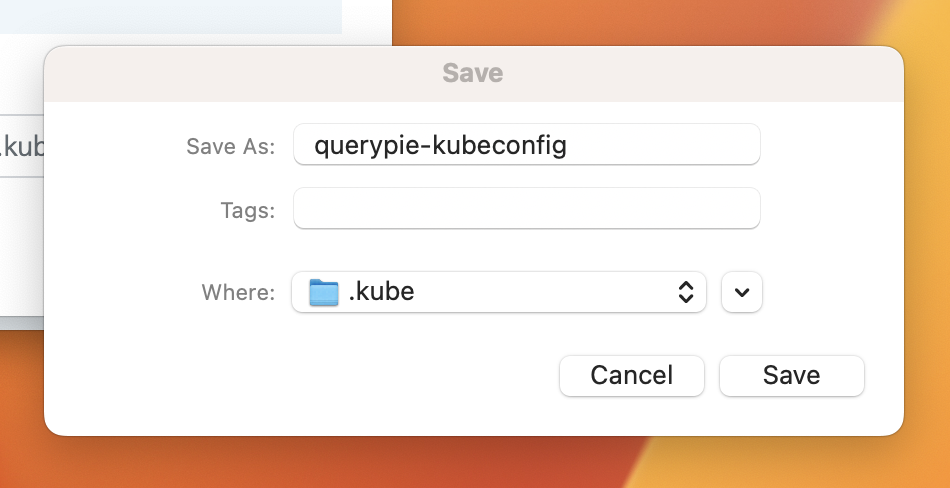
Path Popup
Where : Click the dropdown button (
🔽) on the right to choose the desired folder.Save As : Enter the name for the kubeconfig file. If unchanged, the default name is used.
Command Line : The modal provides a command line to declare the KUBECONFIG environment variable.
1) If setting the KUBECONFIG environment variable for the first time, change the default "${KUBECONFIG}" value to "${HOME}/.kube/config" before use:
export KUBECONFIG="${HOME}/.kube/config:${HOME}/.kube/querypie-kubeconfig"2) If you change the path provided by QueryPie, declare the environment variable again with the new path:
export KUBECONFIG="${KUBECONFIG}:<custom path>"3) For more details on kubeconfig file merging and KUBECONFIG environment variable setup, refer to:
4) Copy the command line provided to declare it in your client and switch the context to an accessible cluster:
export KUBECONFIG="${KUBECONFIG}:${HOME}/.kube/querypie-kubeconfig"Resetting QueryPie Agent Settings
Resetting the settings will clear the previously entered QueryPie Host information, allowing you to re-enter it.
Reset Settings within the Agent
Click the ⚙️ button in the profile area to open the settings menu.
Click the Reset All Settings button to reset the settings.
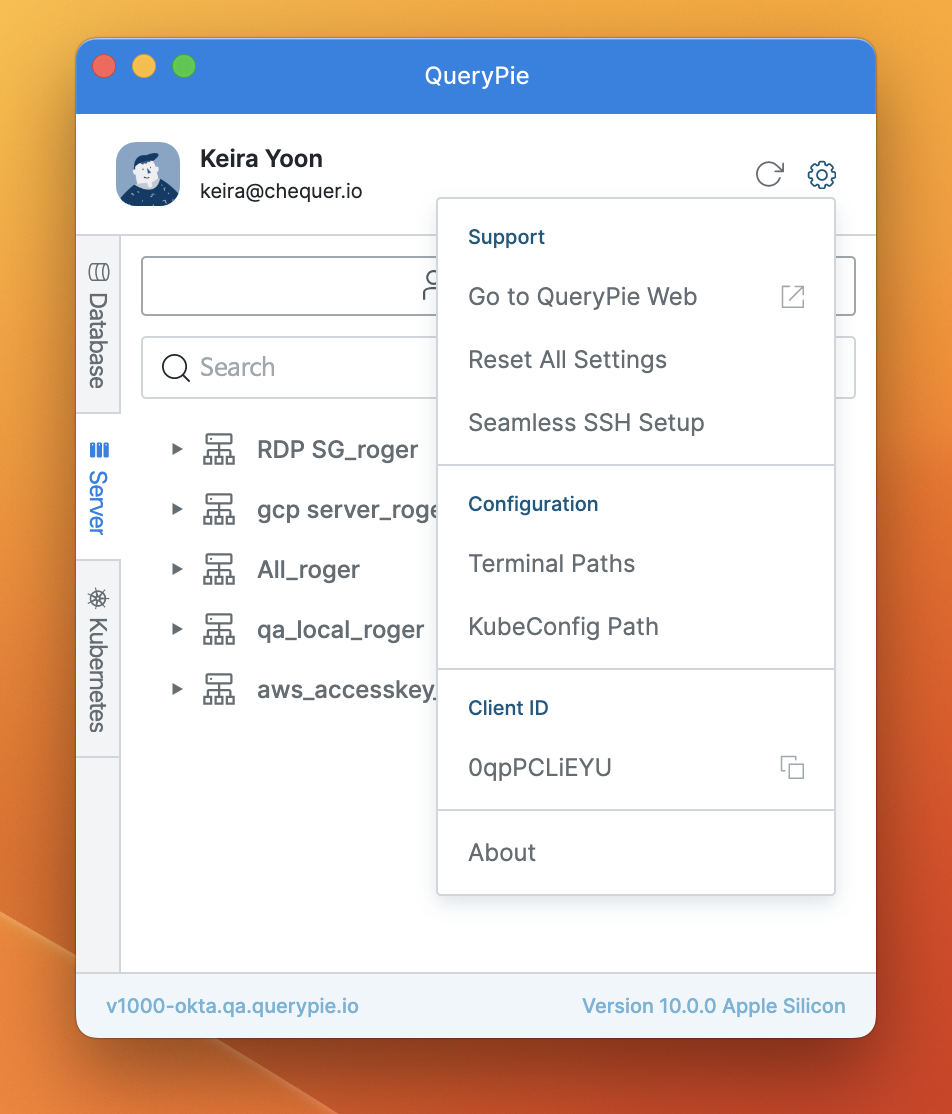
Agent > Settings
(Mac) Reset Settings from the App Menu
Click the QueryPie Agent icon in the menu bar to open the app menu.
Click the Reset All Settings button to reset the settings.
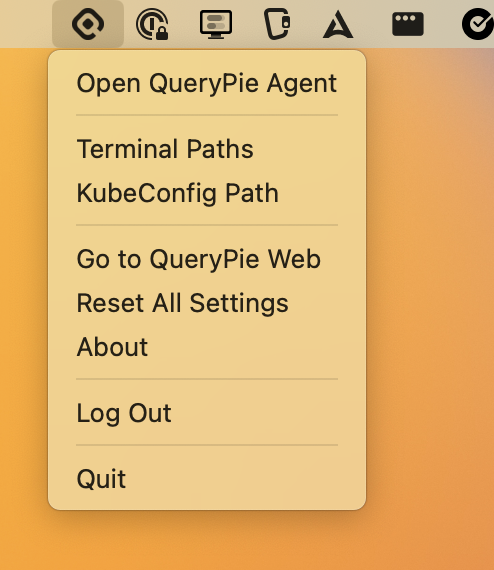
Agent > App menu
%201.png)