Users
Overview
The Users page allows you to view the list of registered users in QueryPie and perform various management tasks.
Viewing the User List
On the Users page, you can view the list of users and utilize search and filter options to refine the displayed results.
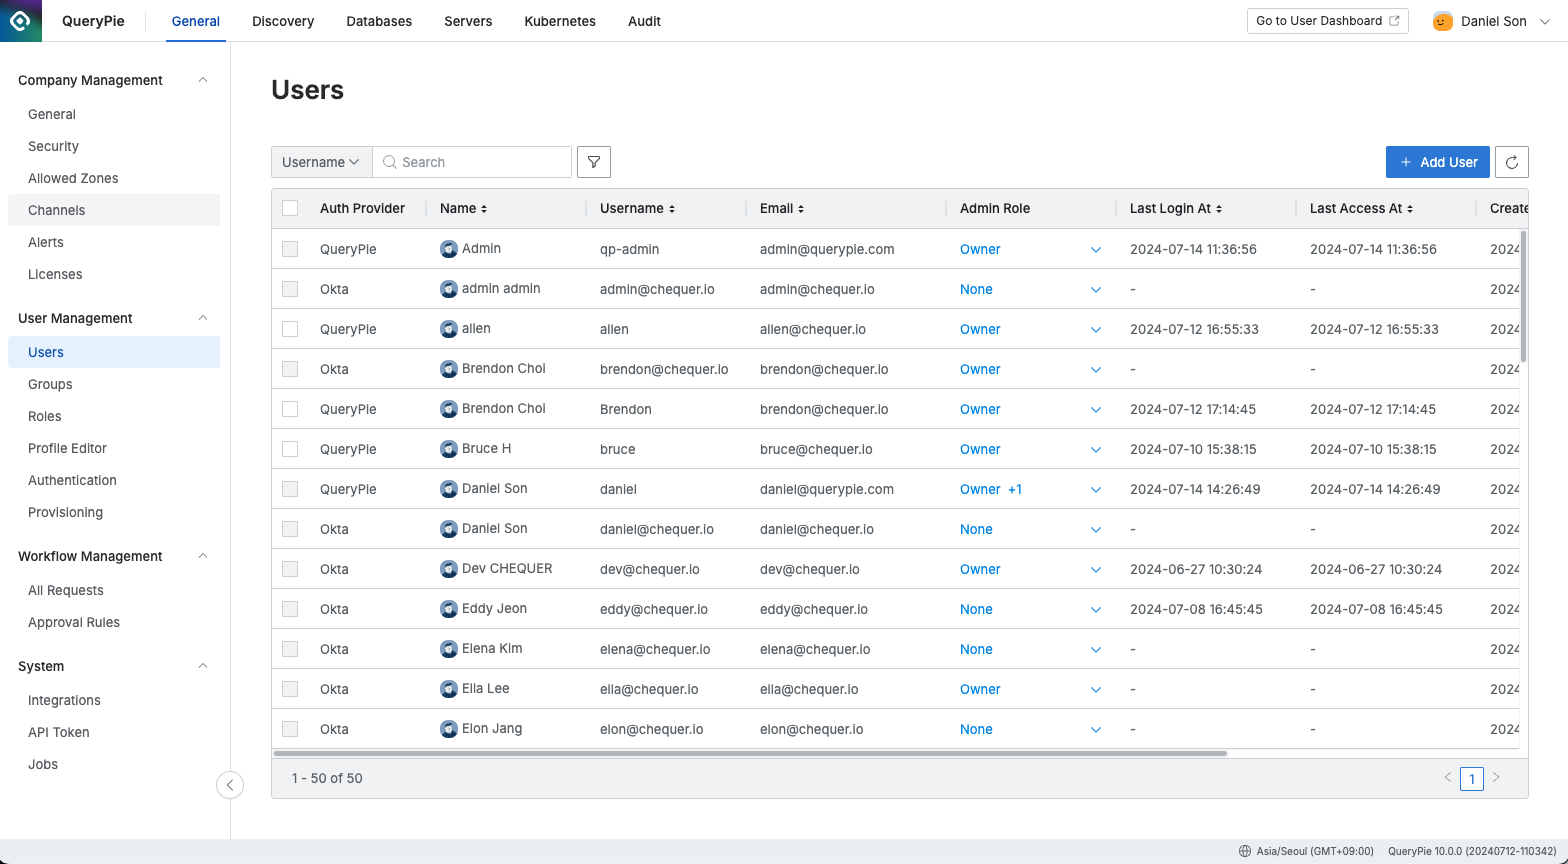
Administrator > General > User Management > Users
Information available in the users list.
Auth Provider : The authentication provider for the user.
Displays the IdP Type configured in QueryPie or User Management > Authentication.
Users manually registered will be shown as QueryPie.
Users integrated via IdP will be displayed with the respective ID Provider's name.
For detailed information on authentication, refer to the Authentication document.
Name : Display name of the user.
Username : User login ID.
Email : User email address.
Admin Role : Administrative privileges assigned to the user.
Last Login At : Timestamp of the last login.
Last Access At : Timestamp of the last resource access.
Created At : Timestamp of the user account creation.
Description : Information related to the account status.
Account Locked Manually : Account disabled by an administrator or API.
Account Expired : Account expired due to prolonged inactivity.
Account Locked : Account locked due to multiple failed login attempts.

Displayed Description Types
Status : The activation status of the account (Active or Inactive).
Adding Users Manually
Add new users to the organization manually. After adding a user, you can assign them to groups and policies, and grant them permissions.
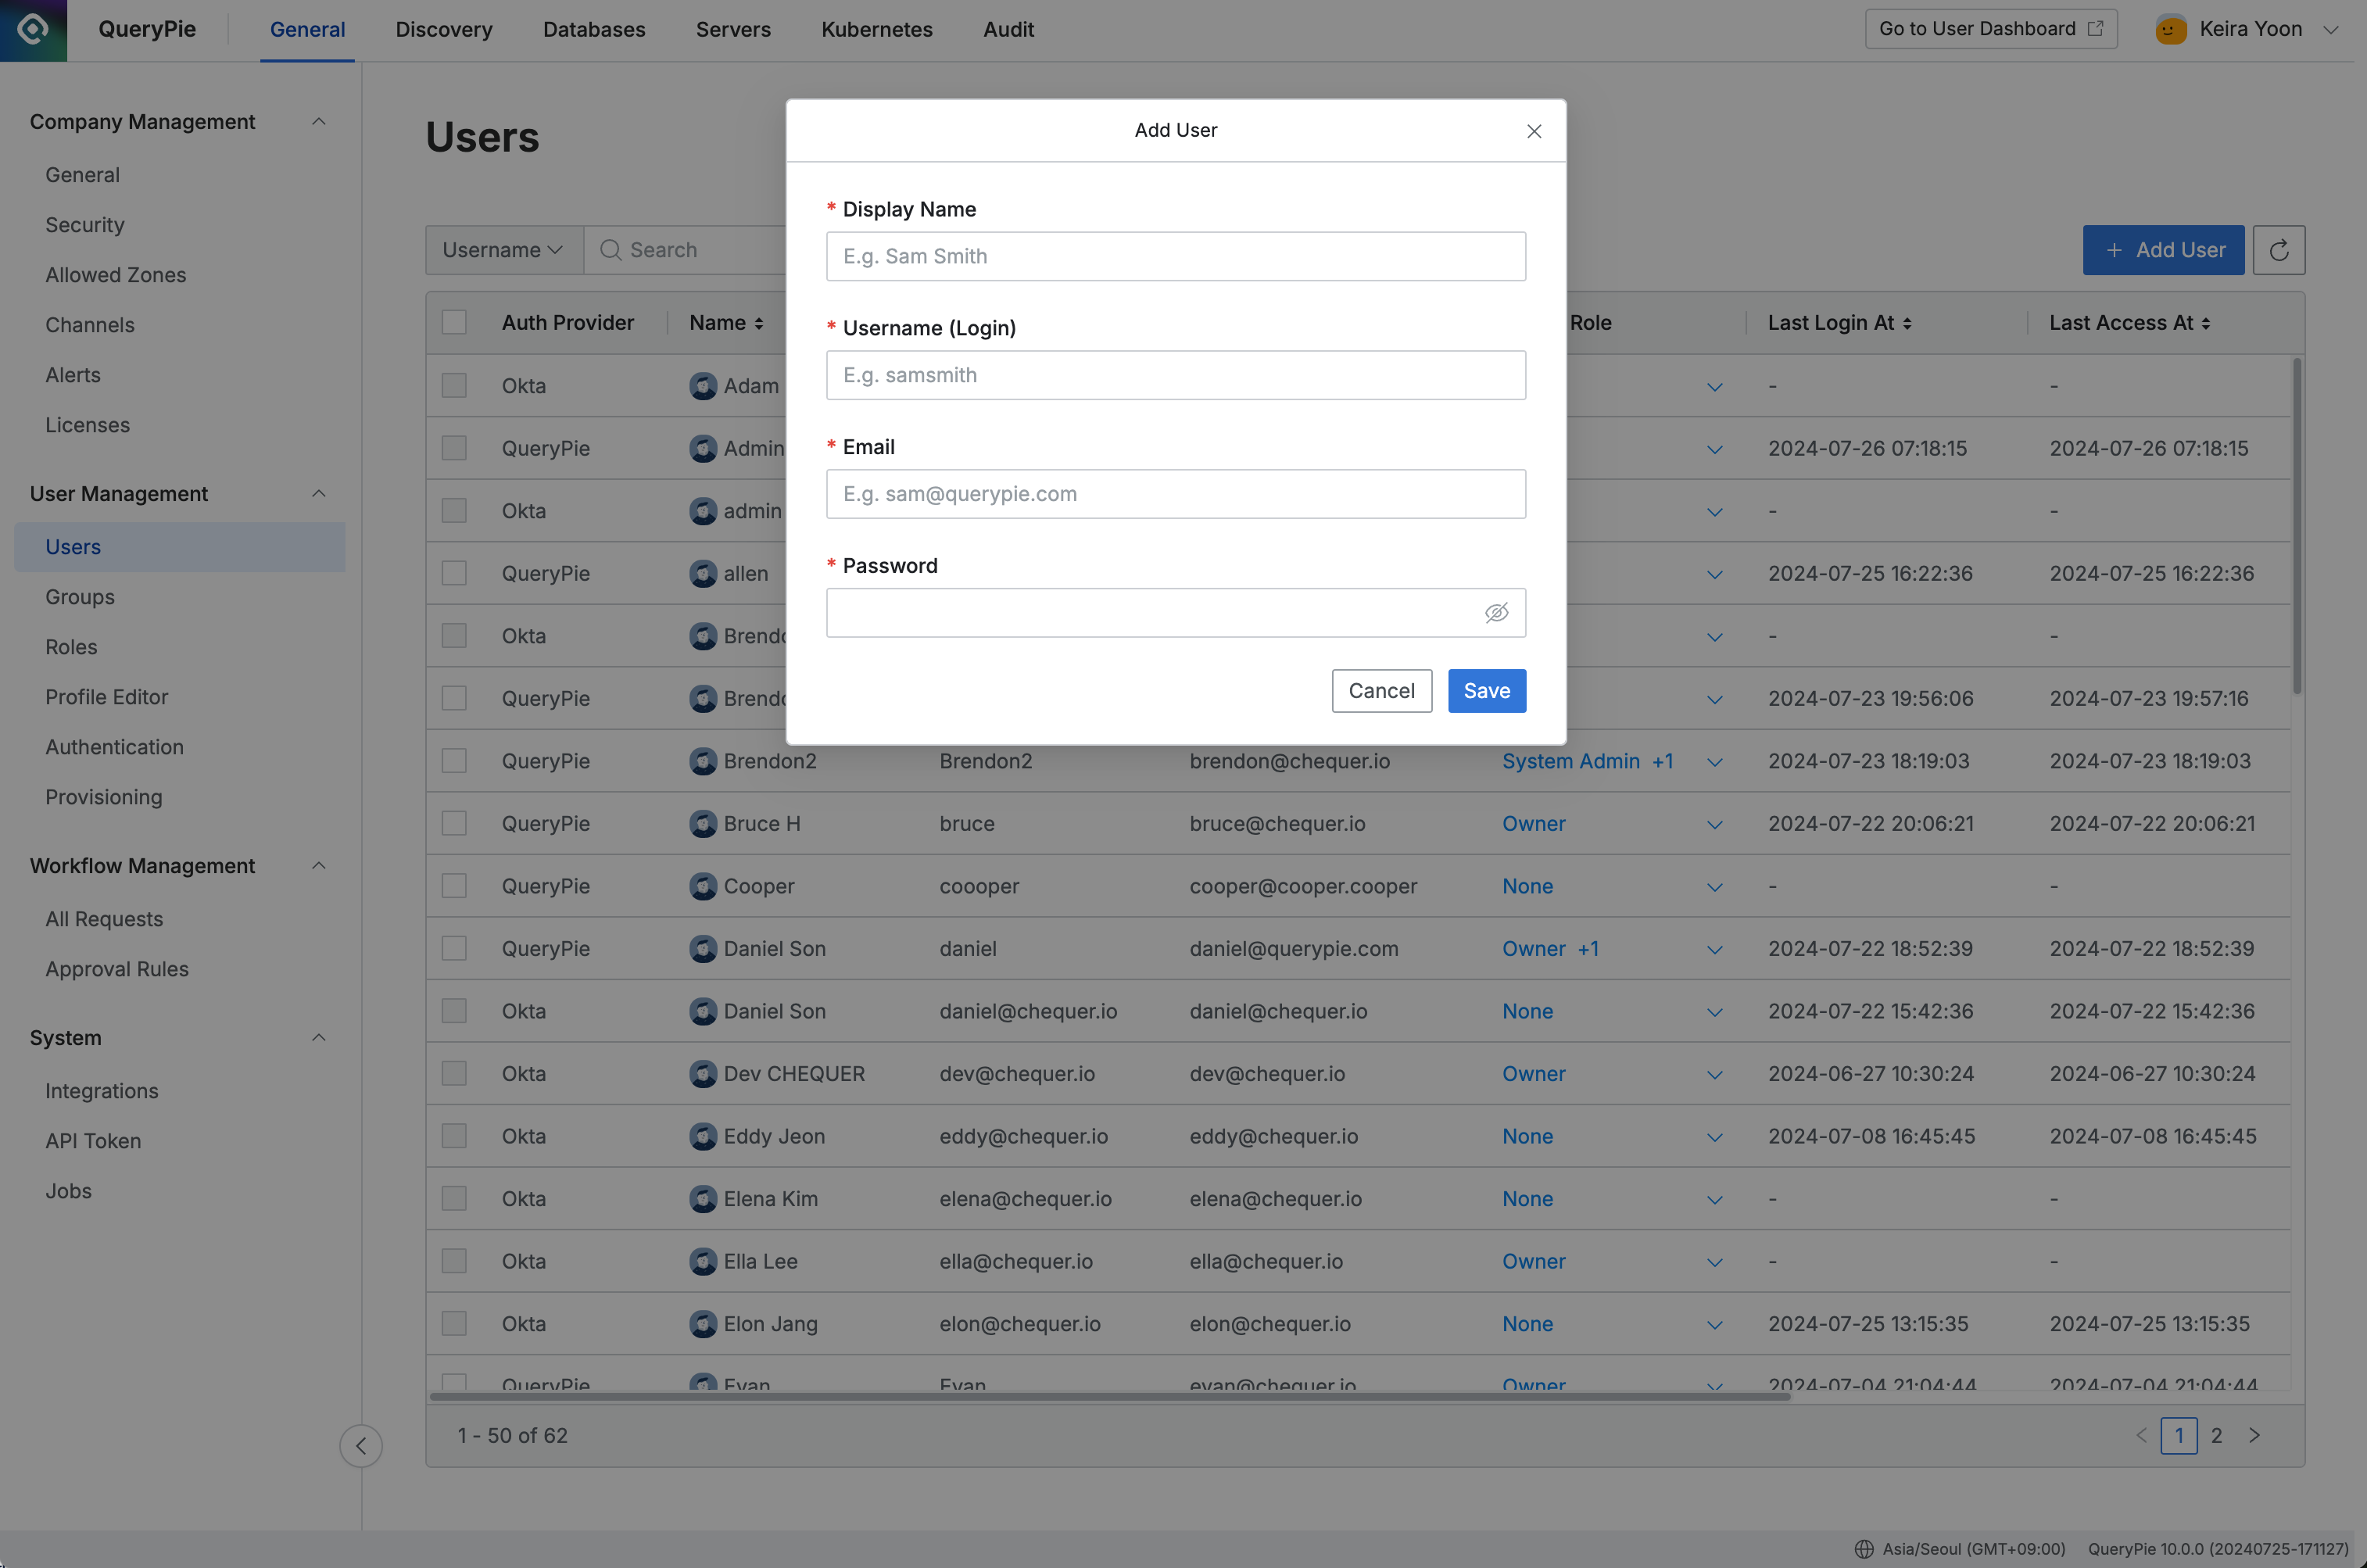
Administrator > General > User Management > Users > Add User
Navigate to the Administrator > General > User Management > Users menu.
Click the
Add Userbutton at the top right.Enter the following information to add a user.
Display Name : Enter the name that will be displayed for the user in QueryPie.
Username: Enter a unique login ID for the user, typically in the form of a name or email address.
Email: Enter a unique email address used to identify the user within QueryPie.
Password: Set an initial password for the user. Please instruct the user to change it upon their first login.
Click the
Savebutton to save the changes.
The Username field must be unique and cannot be modified after the initial addition.
You can verify that the user has been added to the Users list in QueryPie Provider. By default, the user is registered as a basic User without administrative privileges.
Assigning or Revoking Administrative Roles for a User
Only users with the Owner role can assign or revoke Admin Roles.
Predefined administrative roles (Admin Roles) can be granted or revoked for users by those with Owner privileges.
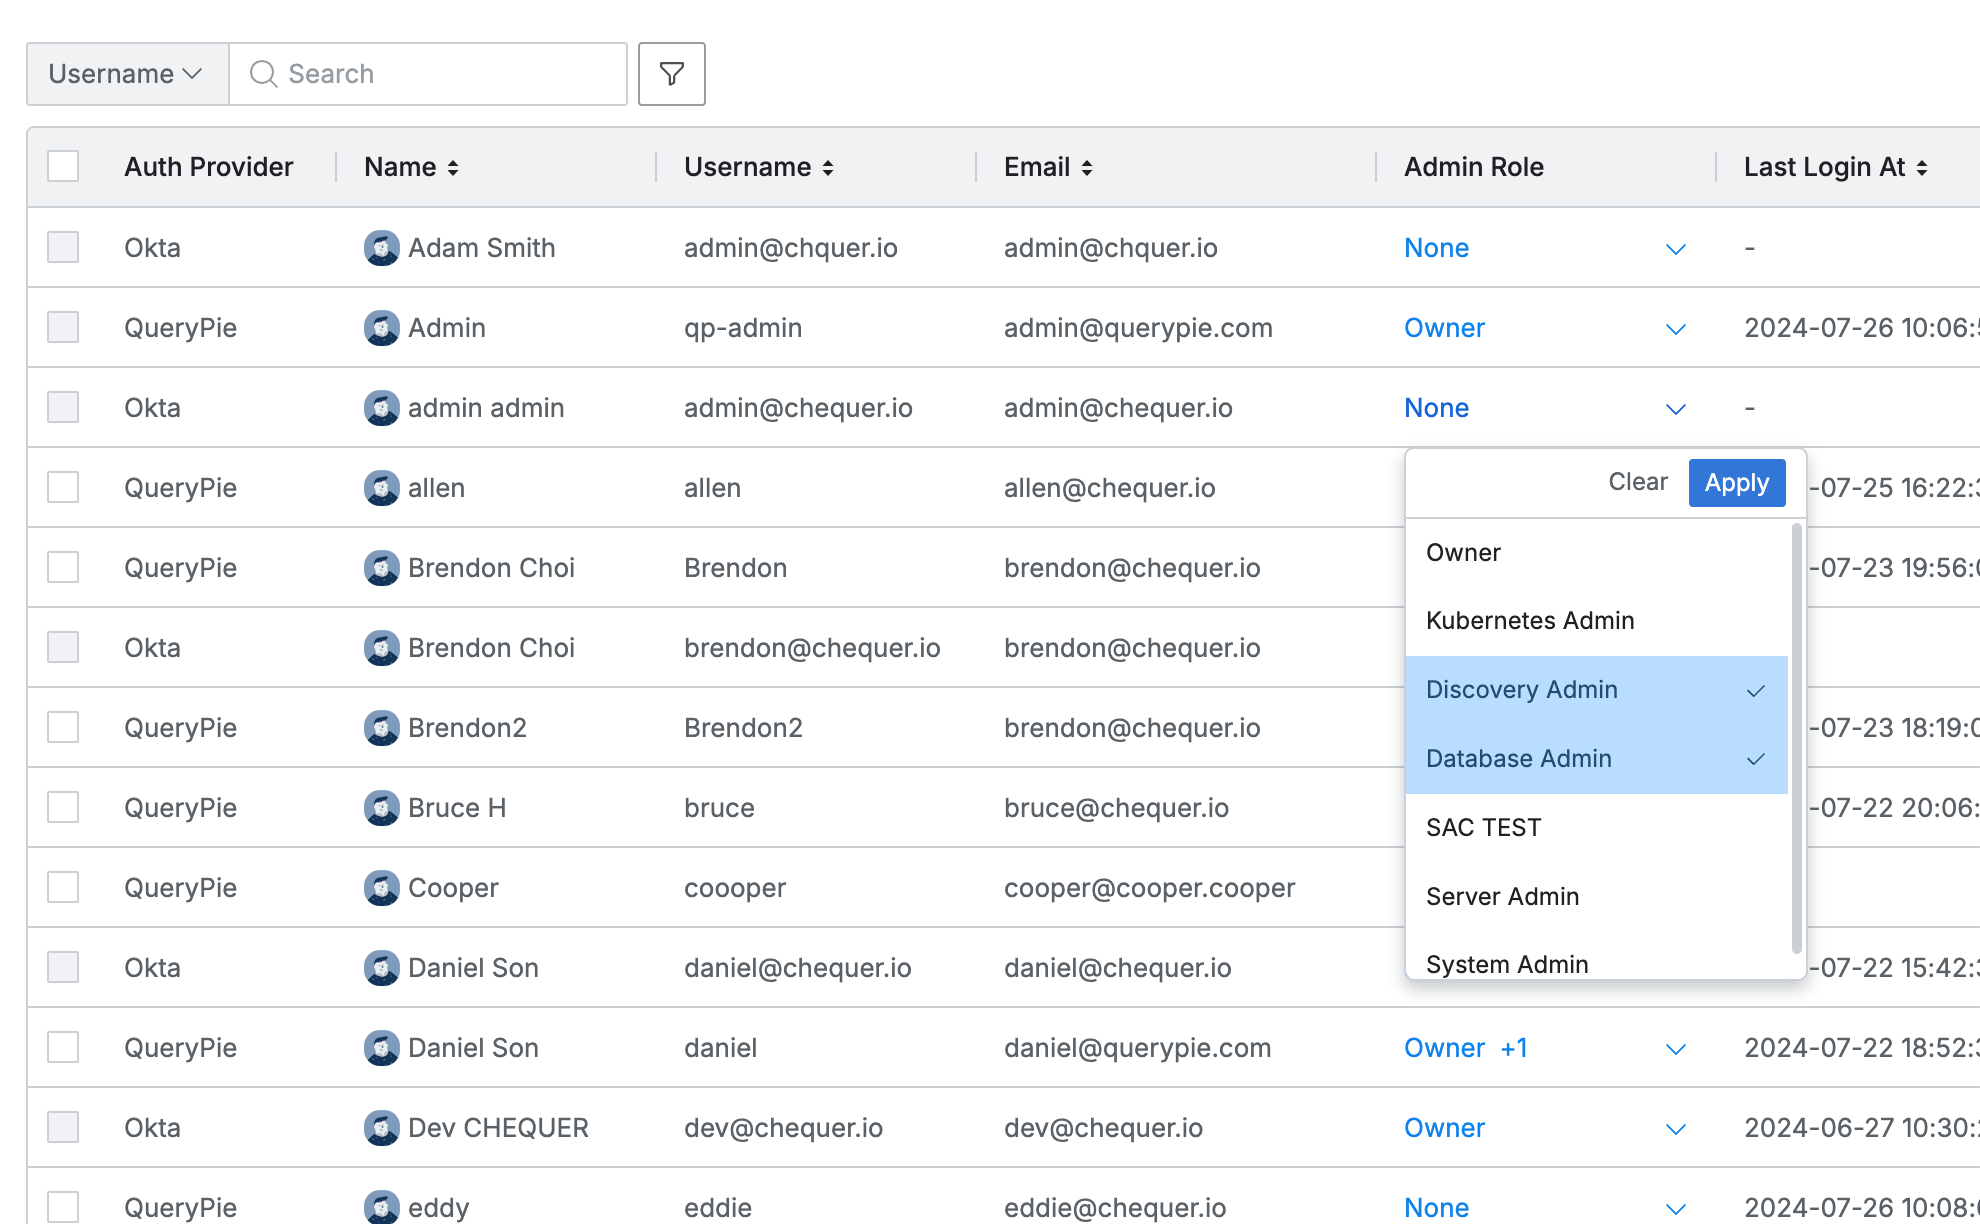
Administrator > General > User Management > Users
In the Admin Role column, the dropdown menu displays the current administrative roles.
None: Indicates no roles are assigned.
Role Names: Displays the assigned roles. If multiple roles are assigned, they are shown in the format +N.
Click the dropdown to add or remove roles. Multiple roles can be selected simultaneously.
Click the
Clearbutton to reset all role selections.Click the
Applybutton to save the changes.
For information on managing administrative roles themselves, please refer to the Roles document.
Viewing User Details
On the Users page, click on a user to access their detailed information page, where you can view registered information and perform user management tasks. User profiles include attributes that support Attribute-based Access Control (ABAC). The user details are organized into tabs such as Profile, Groups, Admin Roles, Allowed Zones, and Tags. For detailed descriptions of each tab and its contents, please refer to the User Profile document.
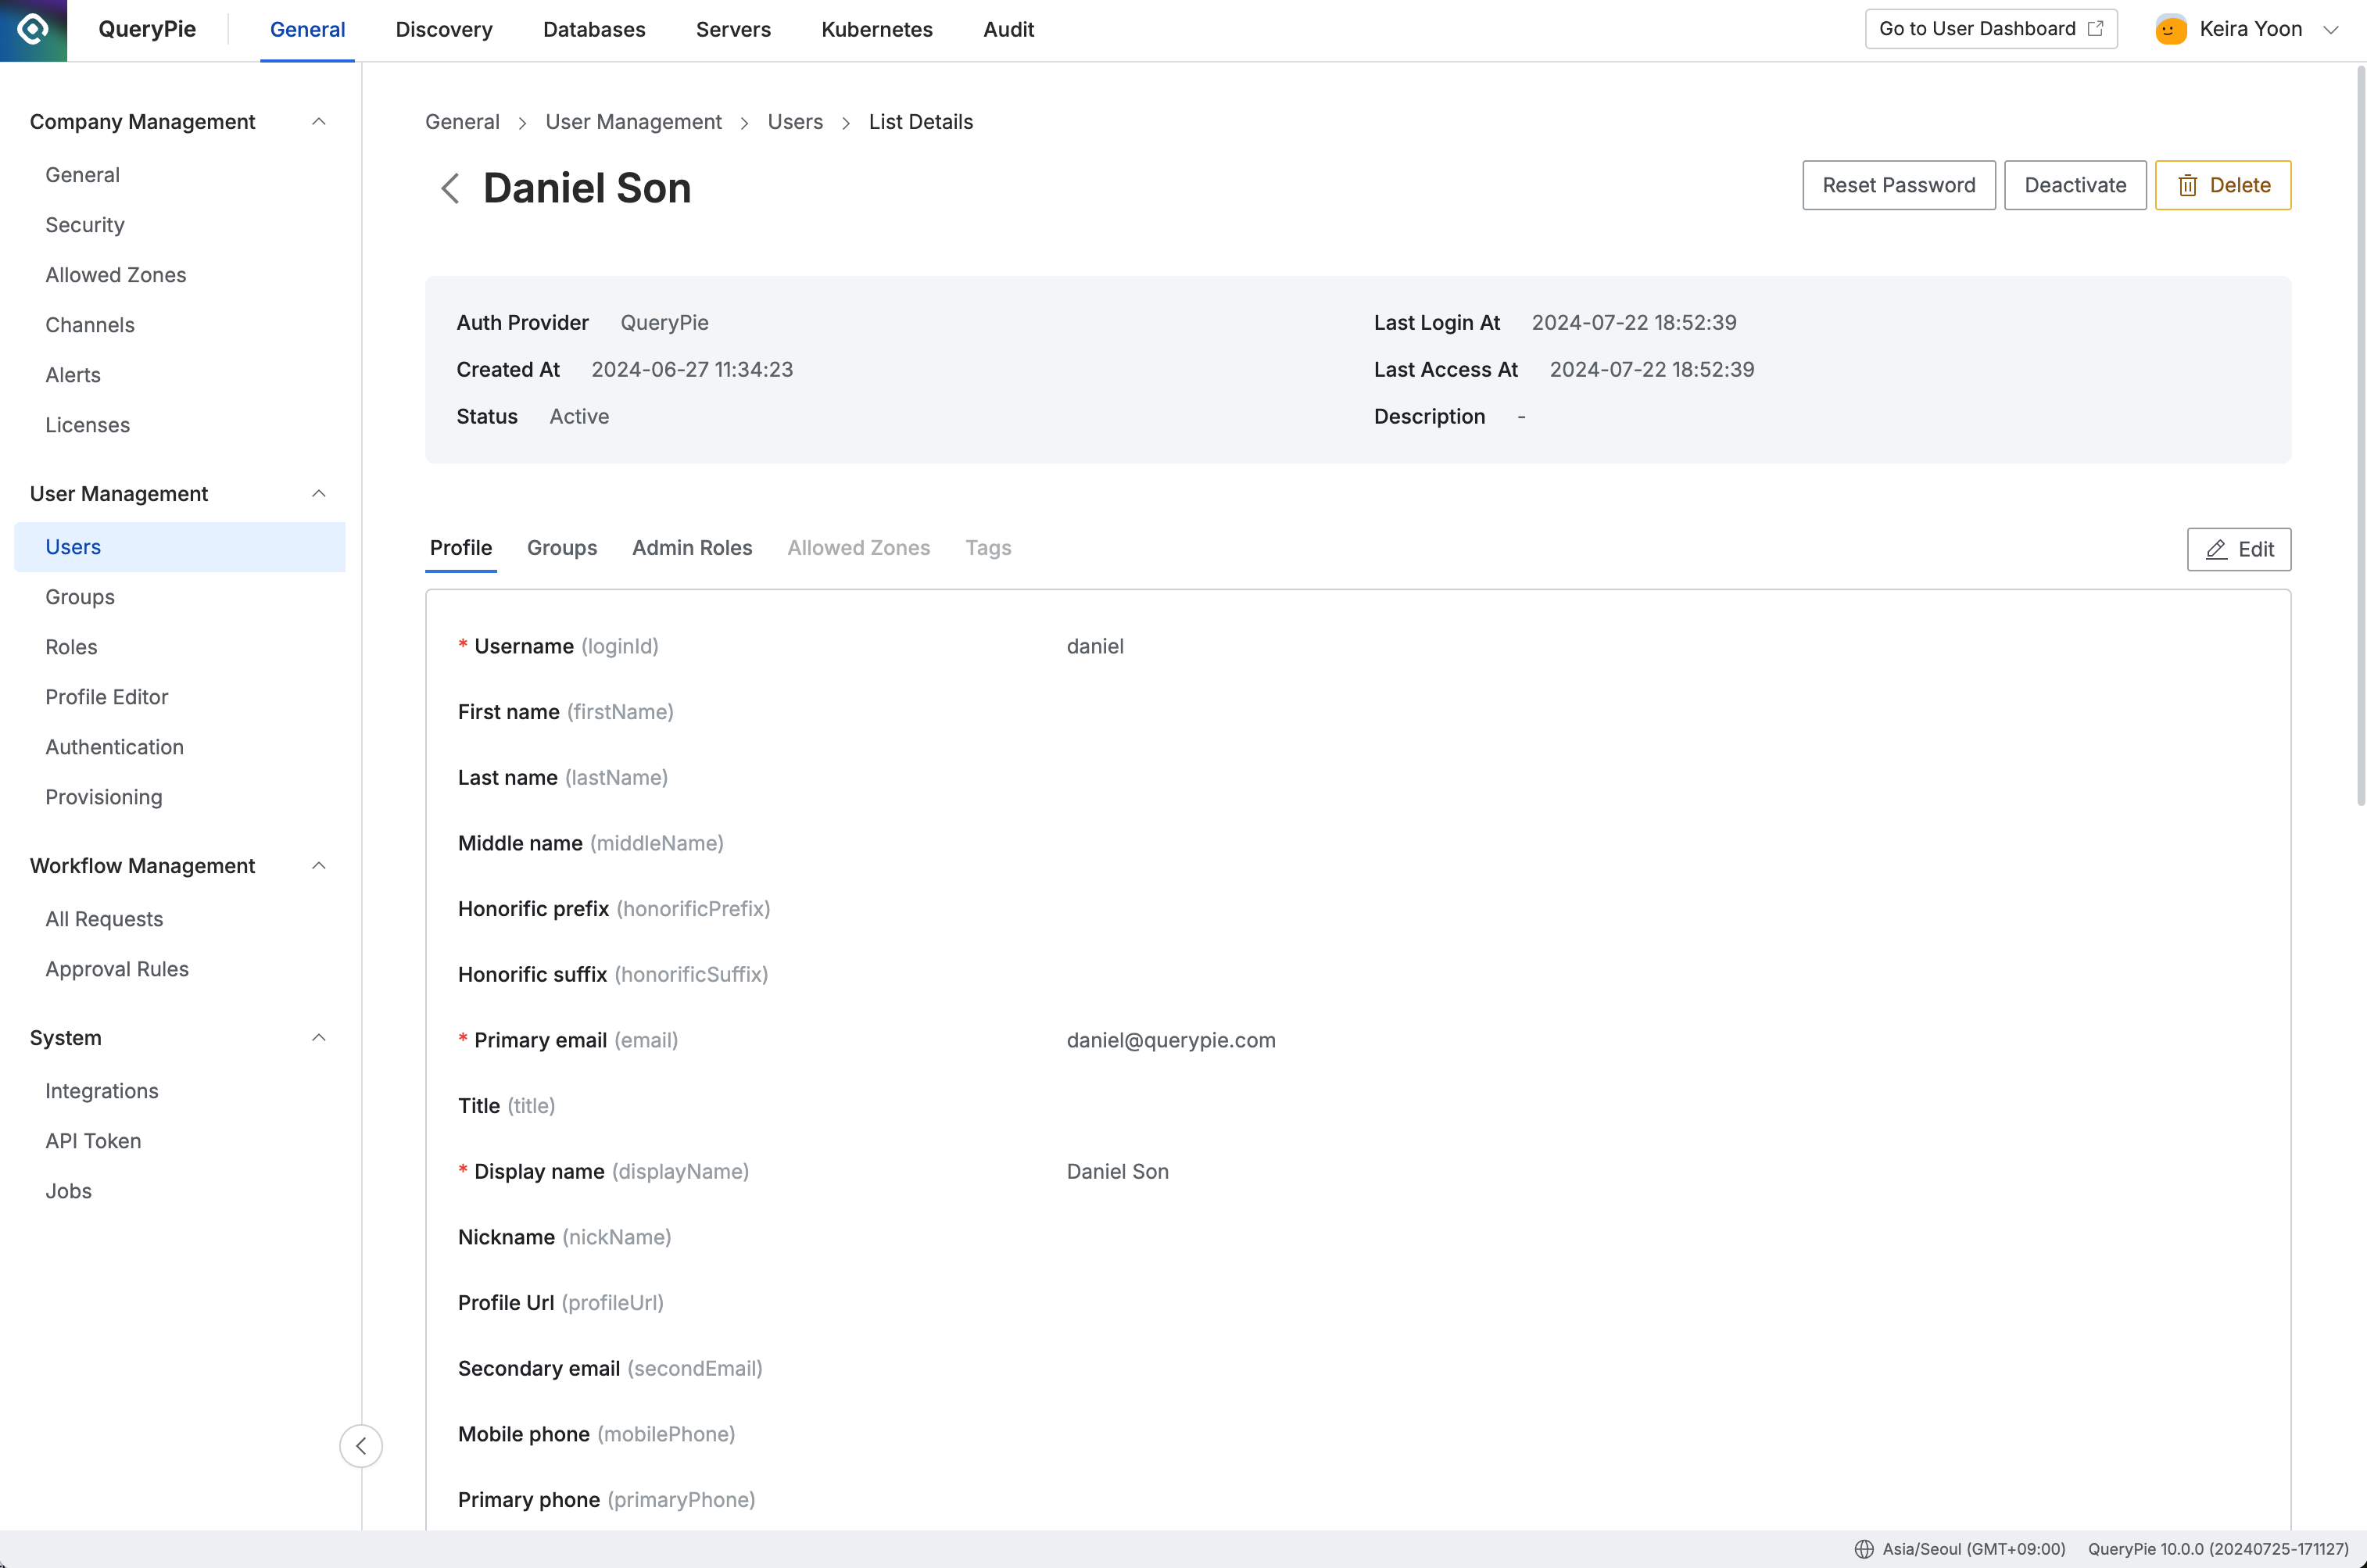
Administrator > General > User Management > Users > List Details
Only users registered through QueryPie can edit profile information and delete users. For users integrated via SCIM, any changes must be reflected through updates to the master data.
Deactivating a User
To deactivate a user account for any reason, you can follow one of two methods.
Deactivating a User from the Users Page
In the Status dropdown on the Users page, change the status of the user you want to deactivate to Inactive.
When the input modal appears, enter the reason for the change and click OK to complete the update.
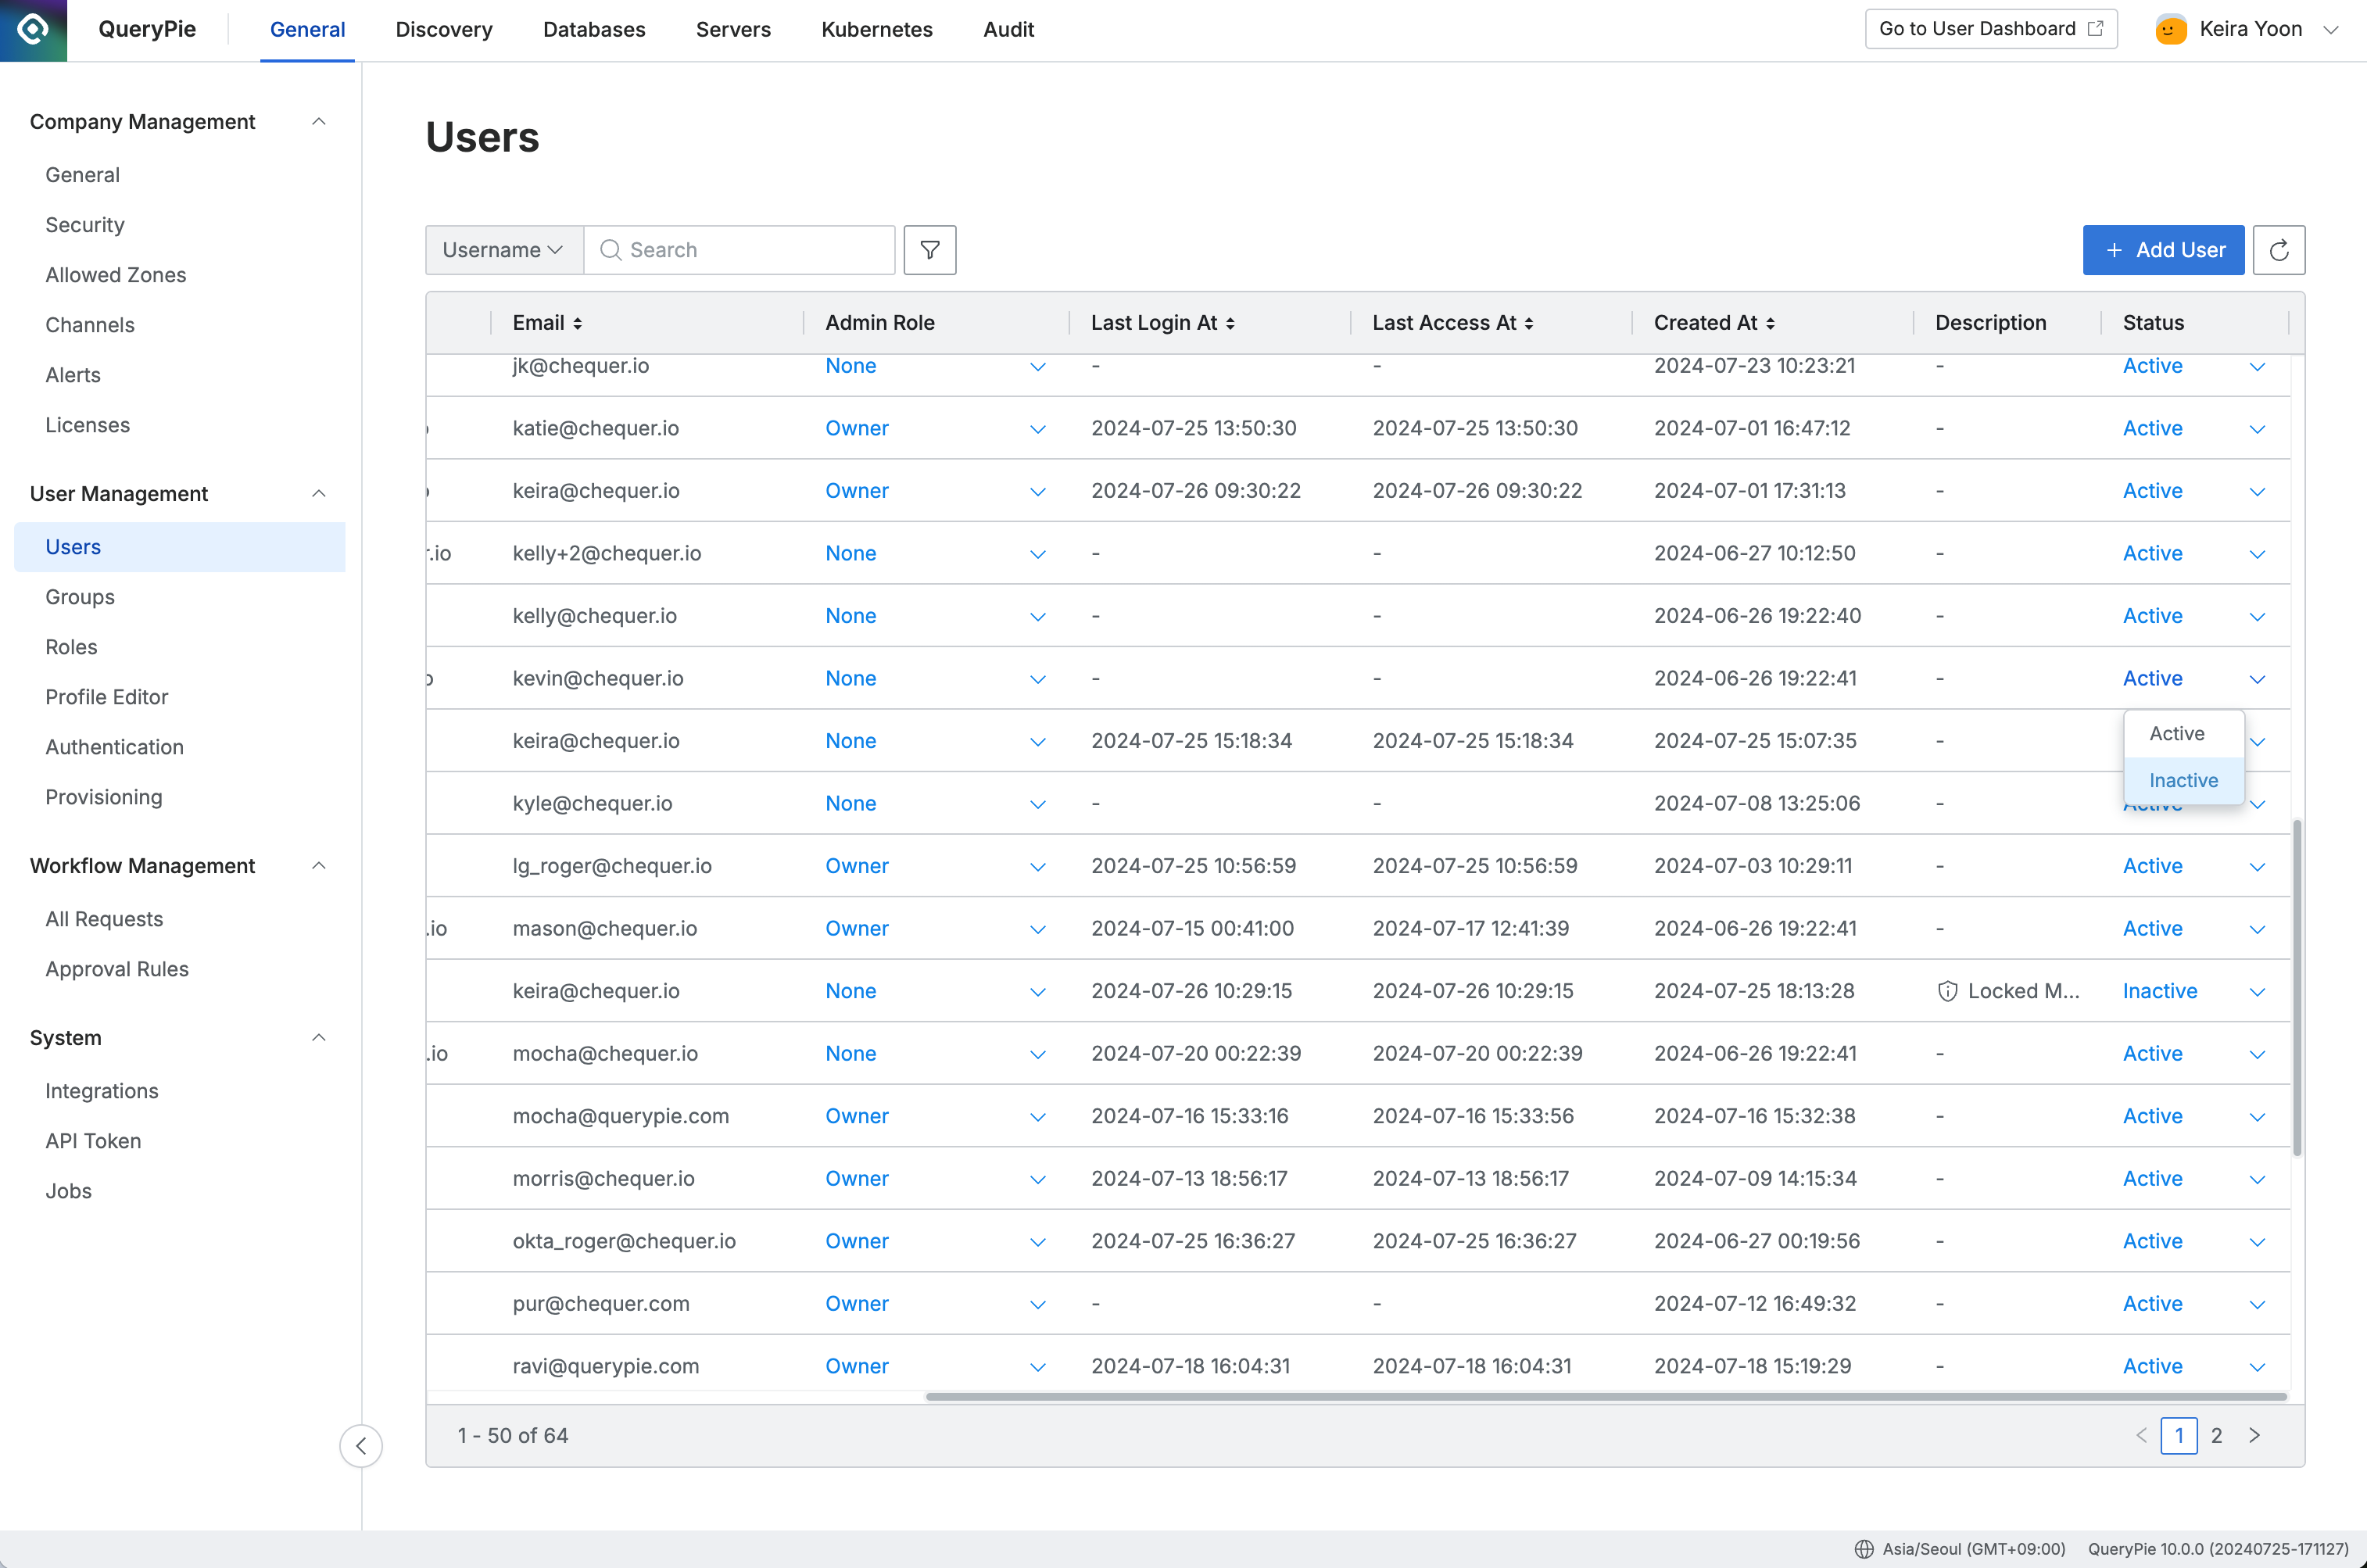
Administrator > General > User Management > Users
Deactivating a User from the Detailed Page
When you click the Deactivate button on the user’s detailed page, an input modal will appear.
After entering the reason, click the OK button to complete the user deactivation.
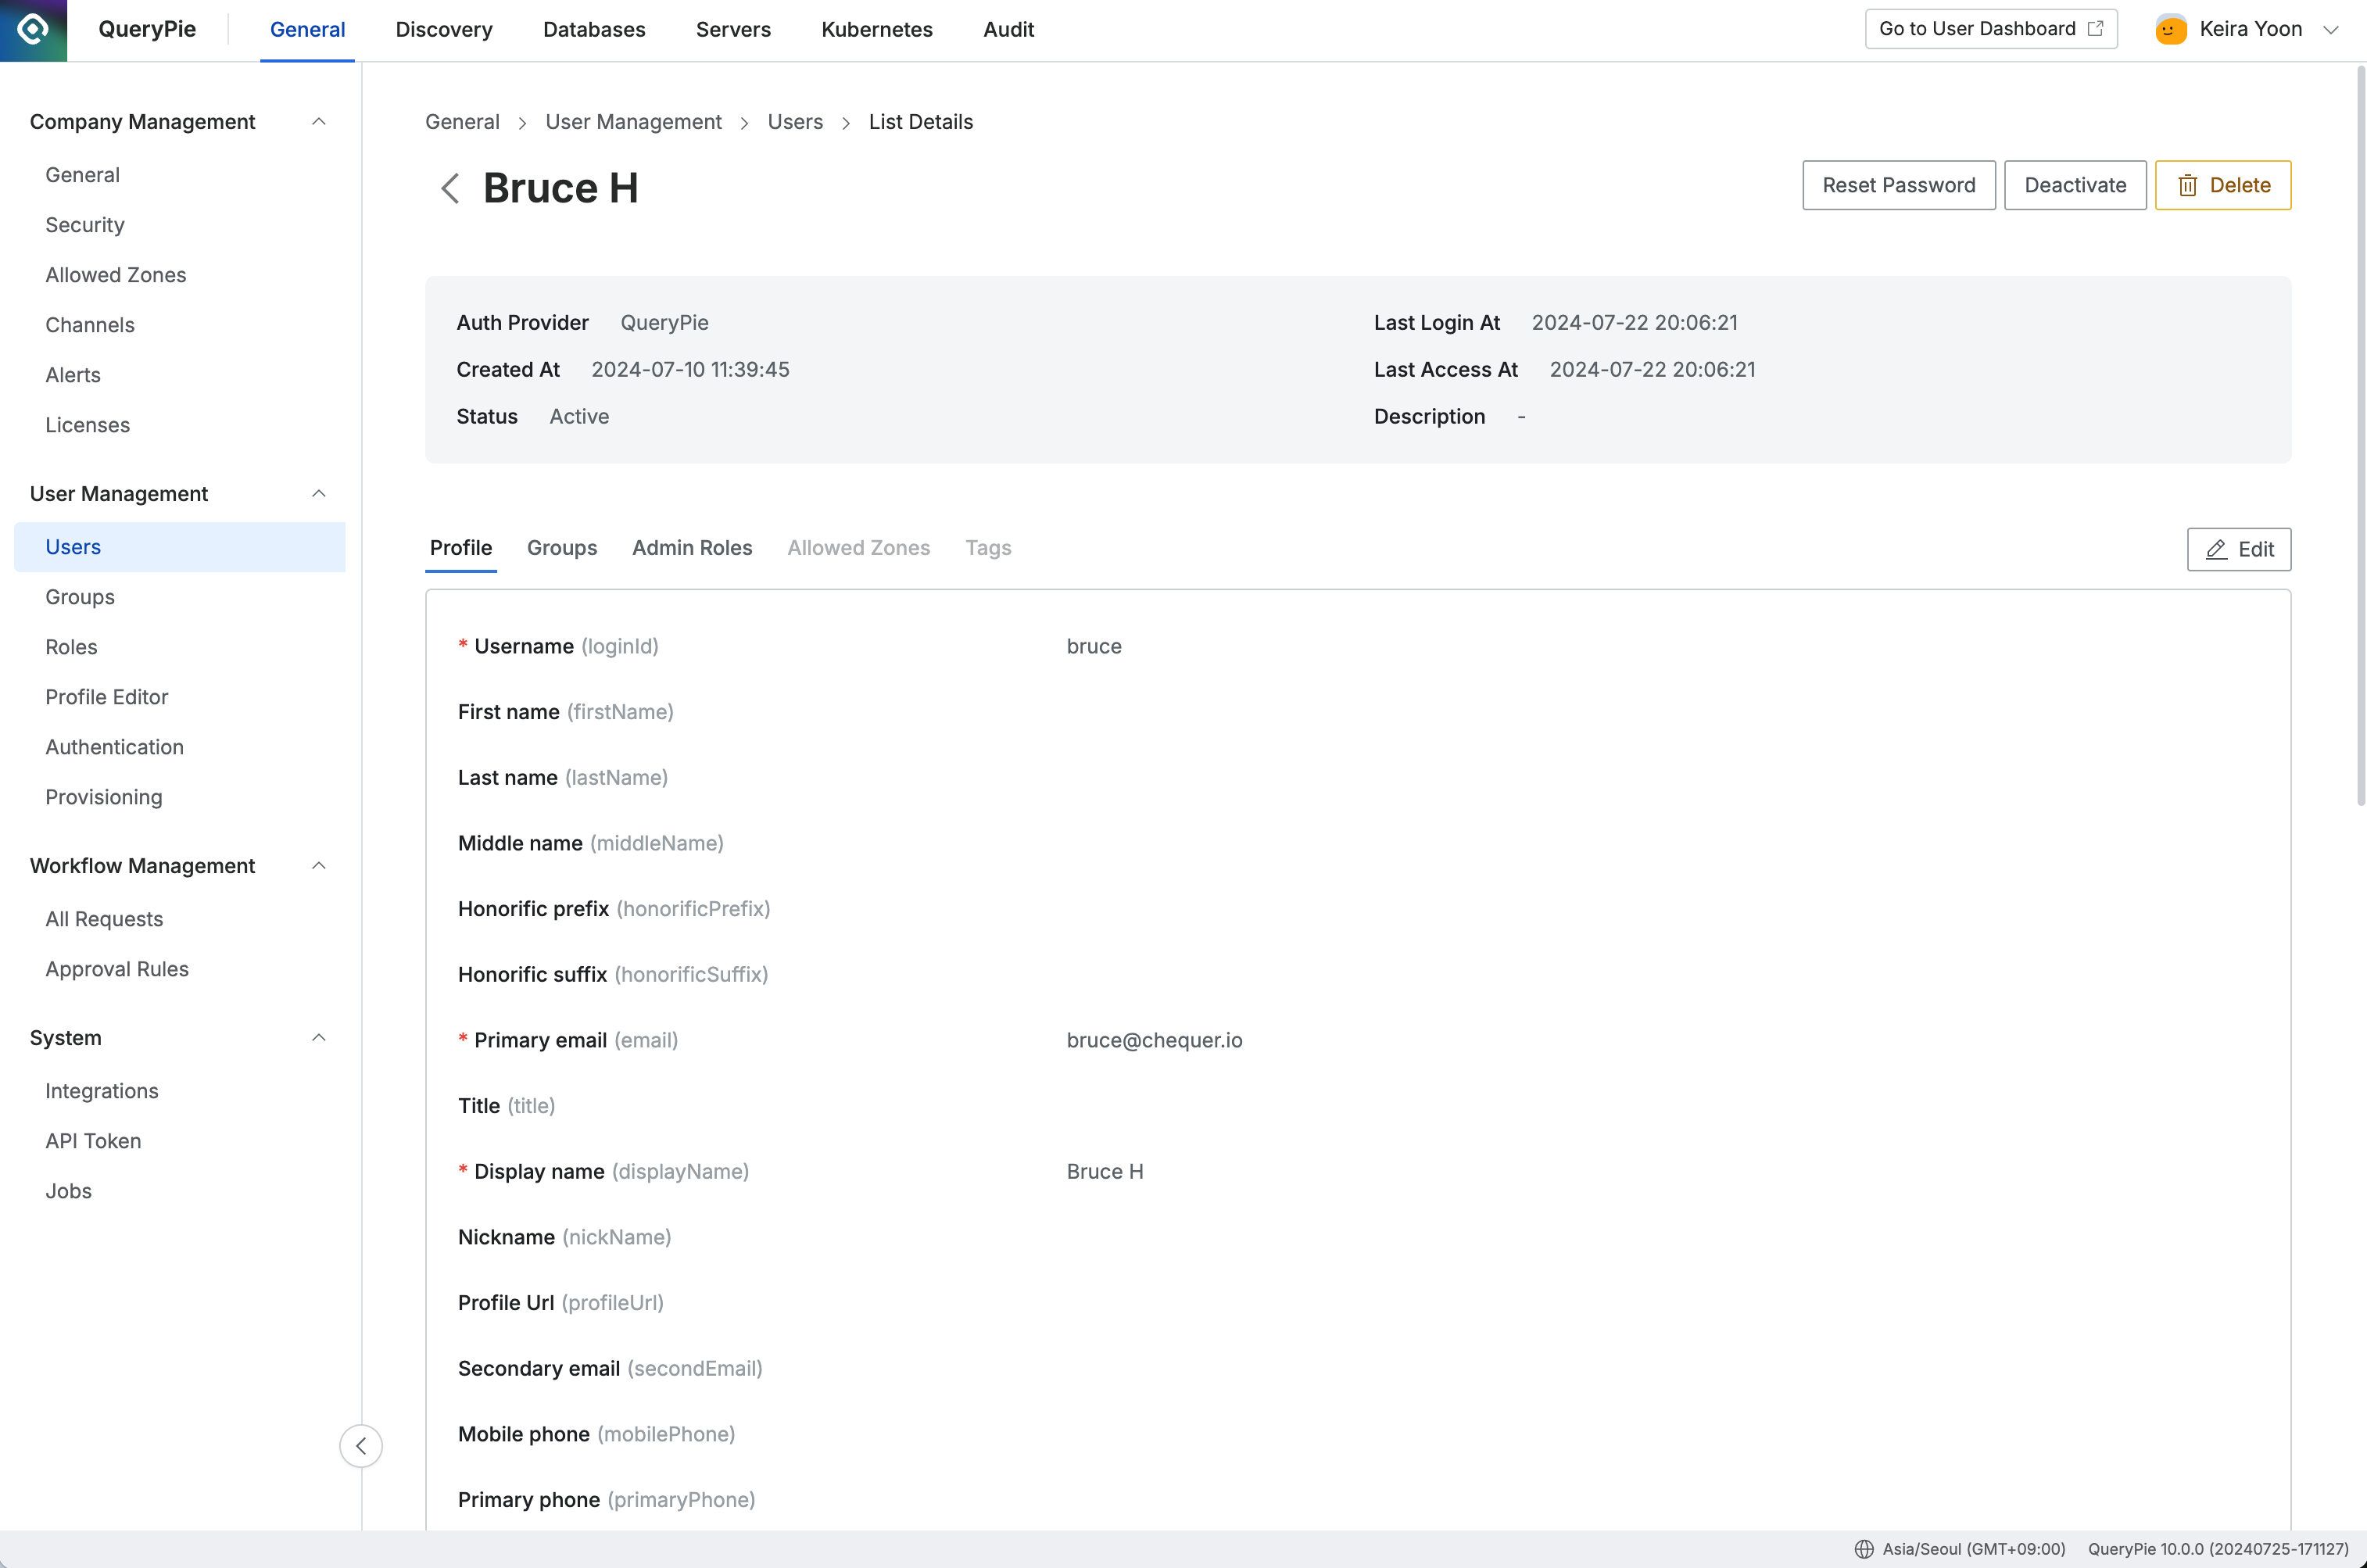
Administrator > General > User Management > Users > List Details
For deactivated users, the account status will show as Inactive, and the Description will indicate Locked Manually.
Reactivating a User
To reactivate a user account that has been manually deactivated by an administrator or deactivated due to long-term inactivity, you can follow one of two methods.
Reactivating a User from the Users Page
On the Users page, change the status of the user you wish to reactivate to Active in the Status dropdown. When prompted by the reason input modal, enter the reason for reactivation and click OK to complete the process.
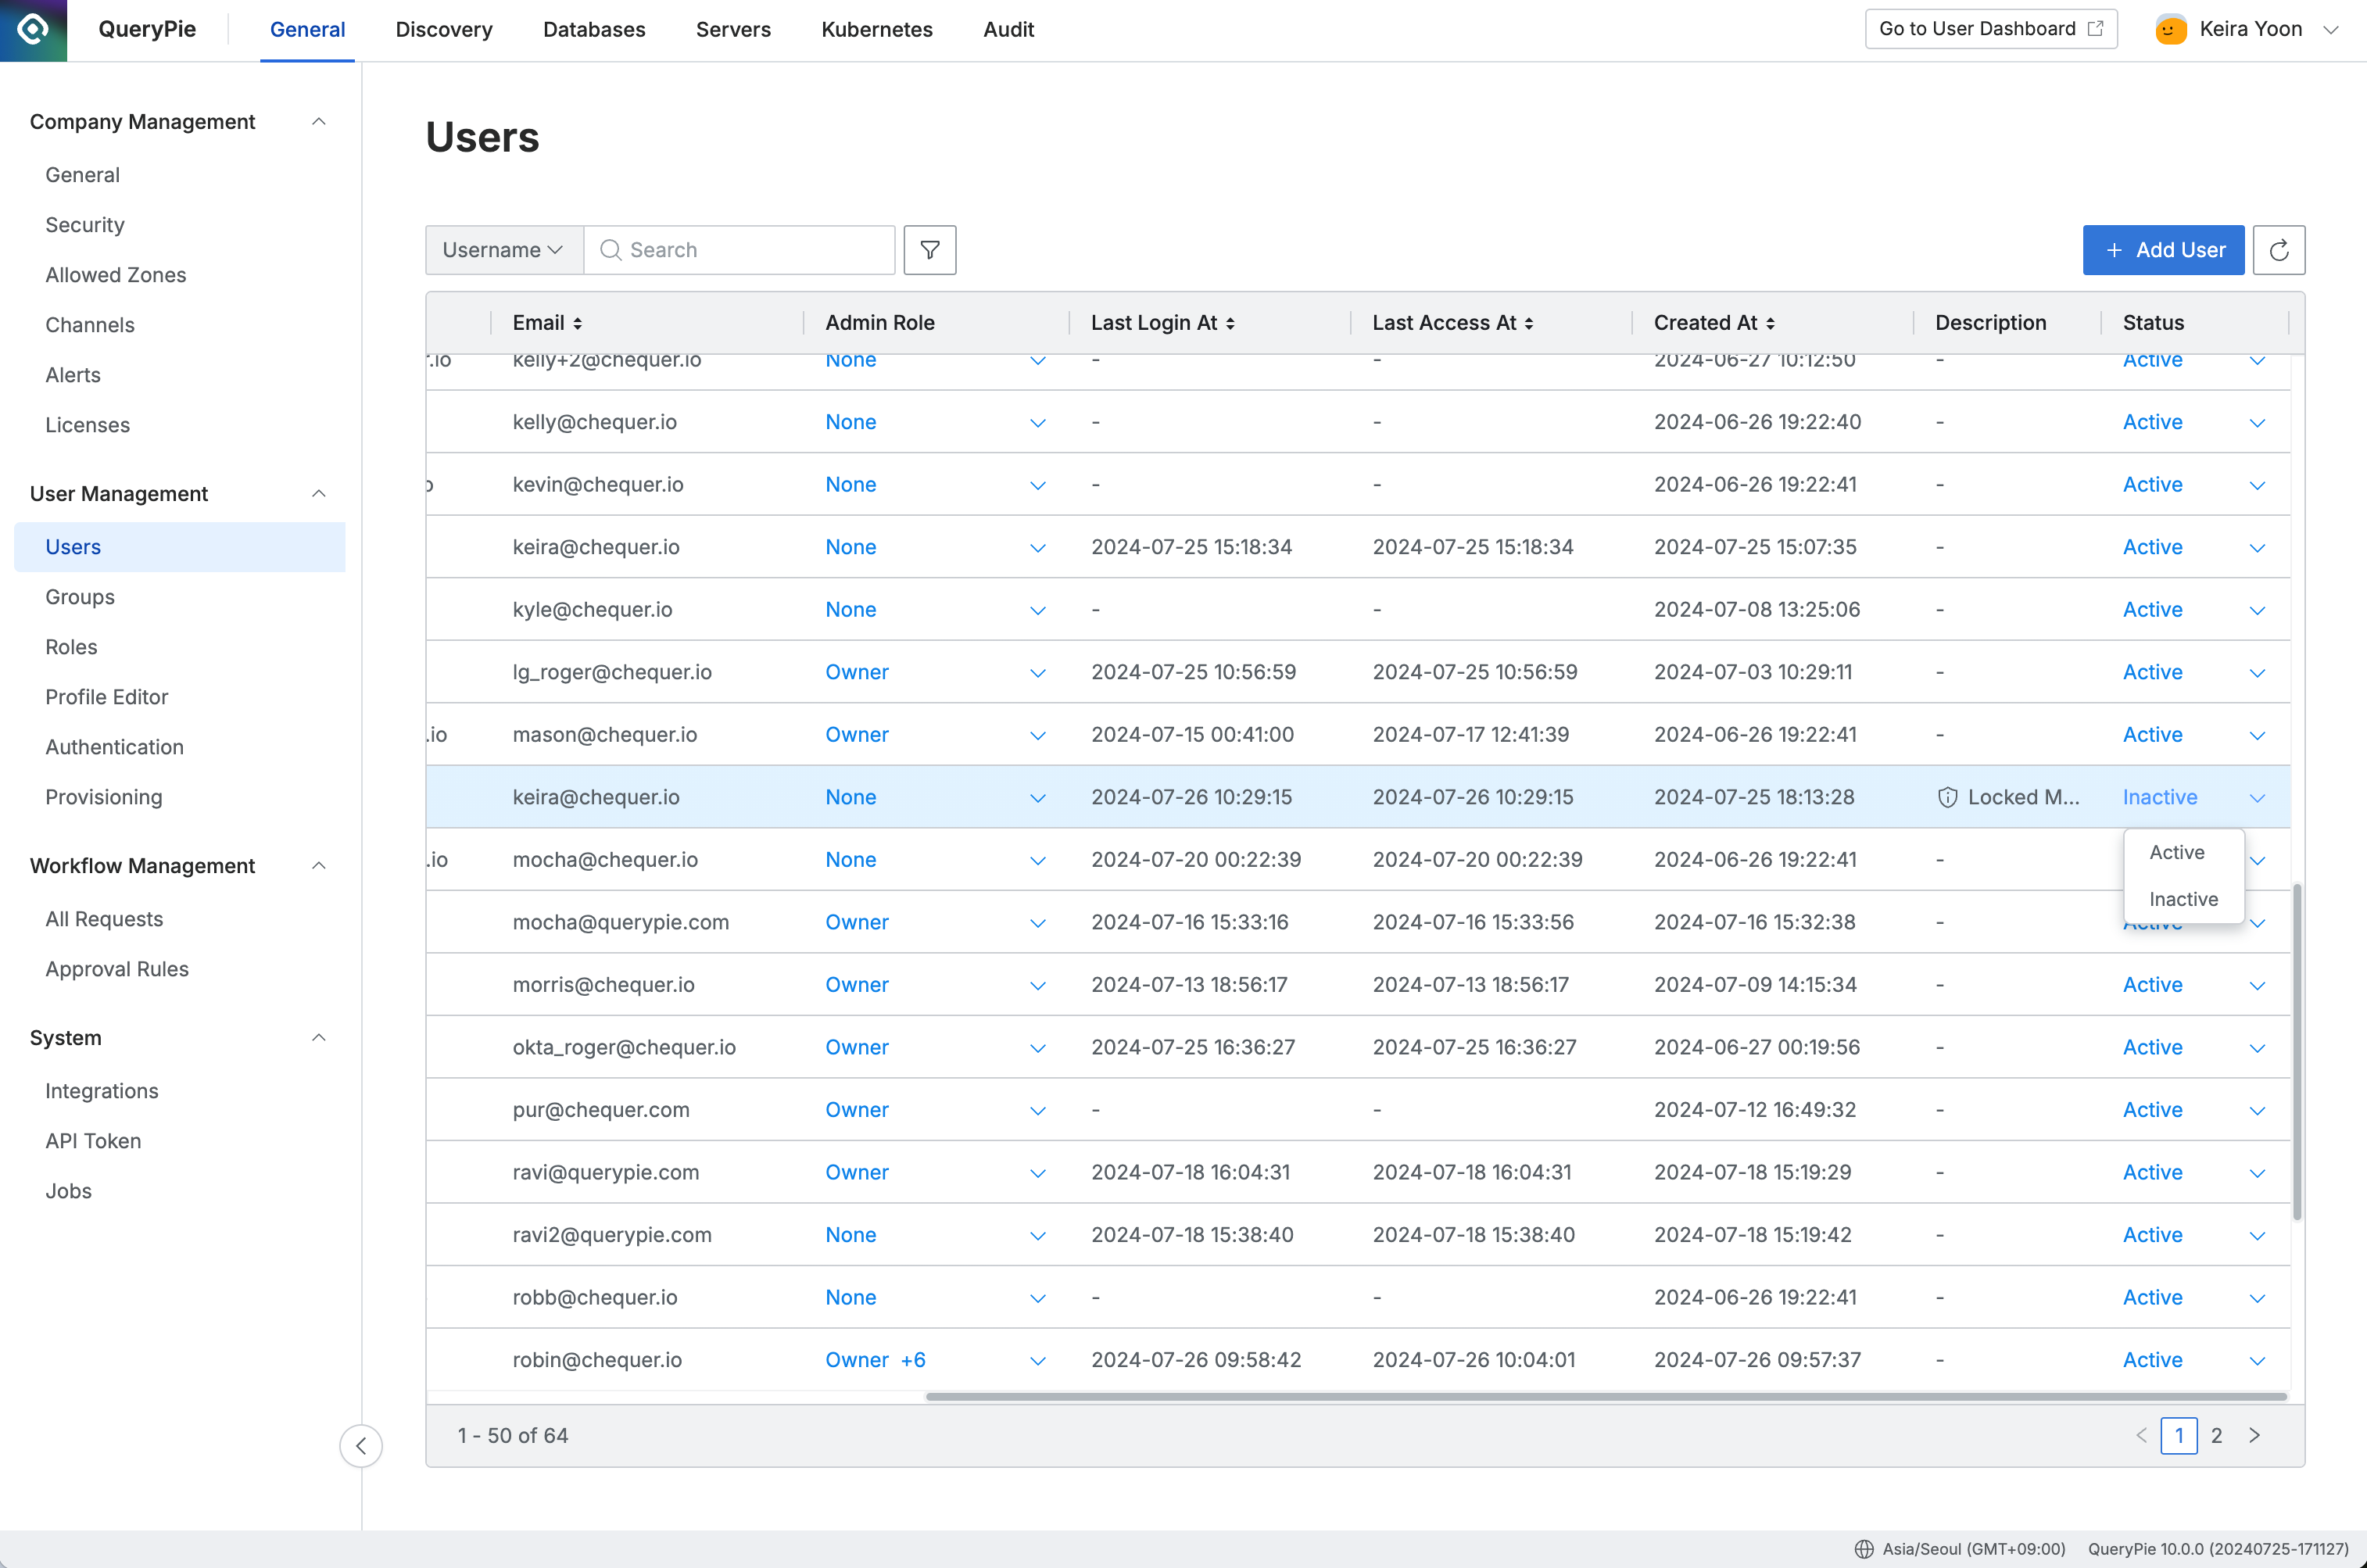
Administrator > General > User Management > Users
Reactivating a User from the Detailed Page
On the detailed page of the deactivated user, click the Reactivate button. When the reason input modal appears, enter the reason for reactivation and click OK button to complete the process.
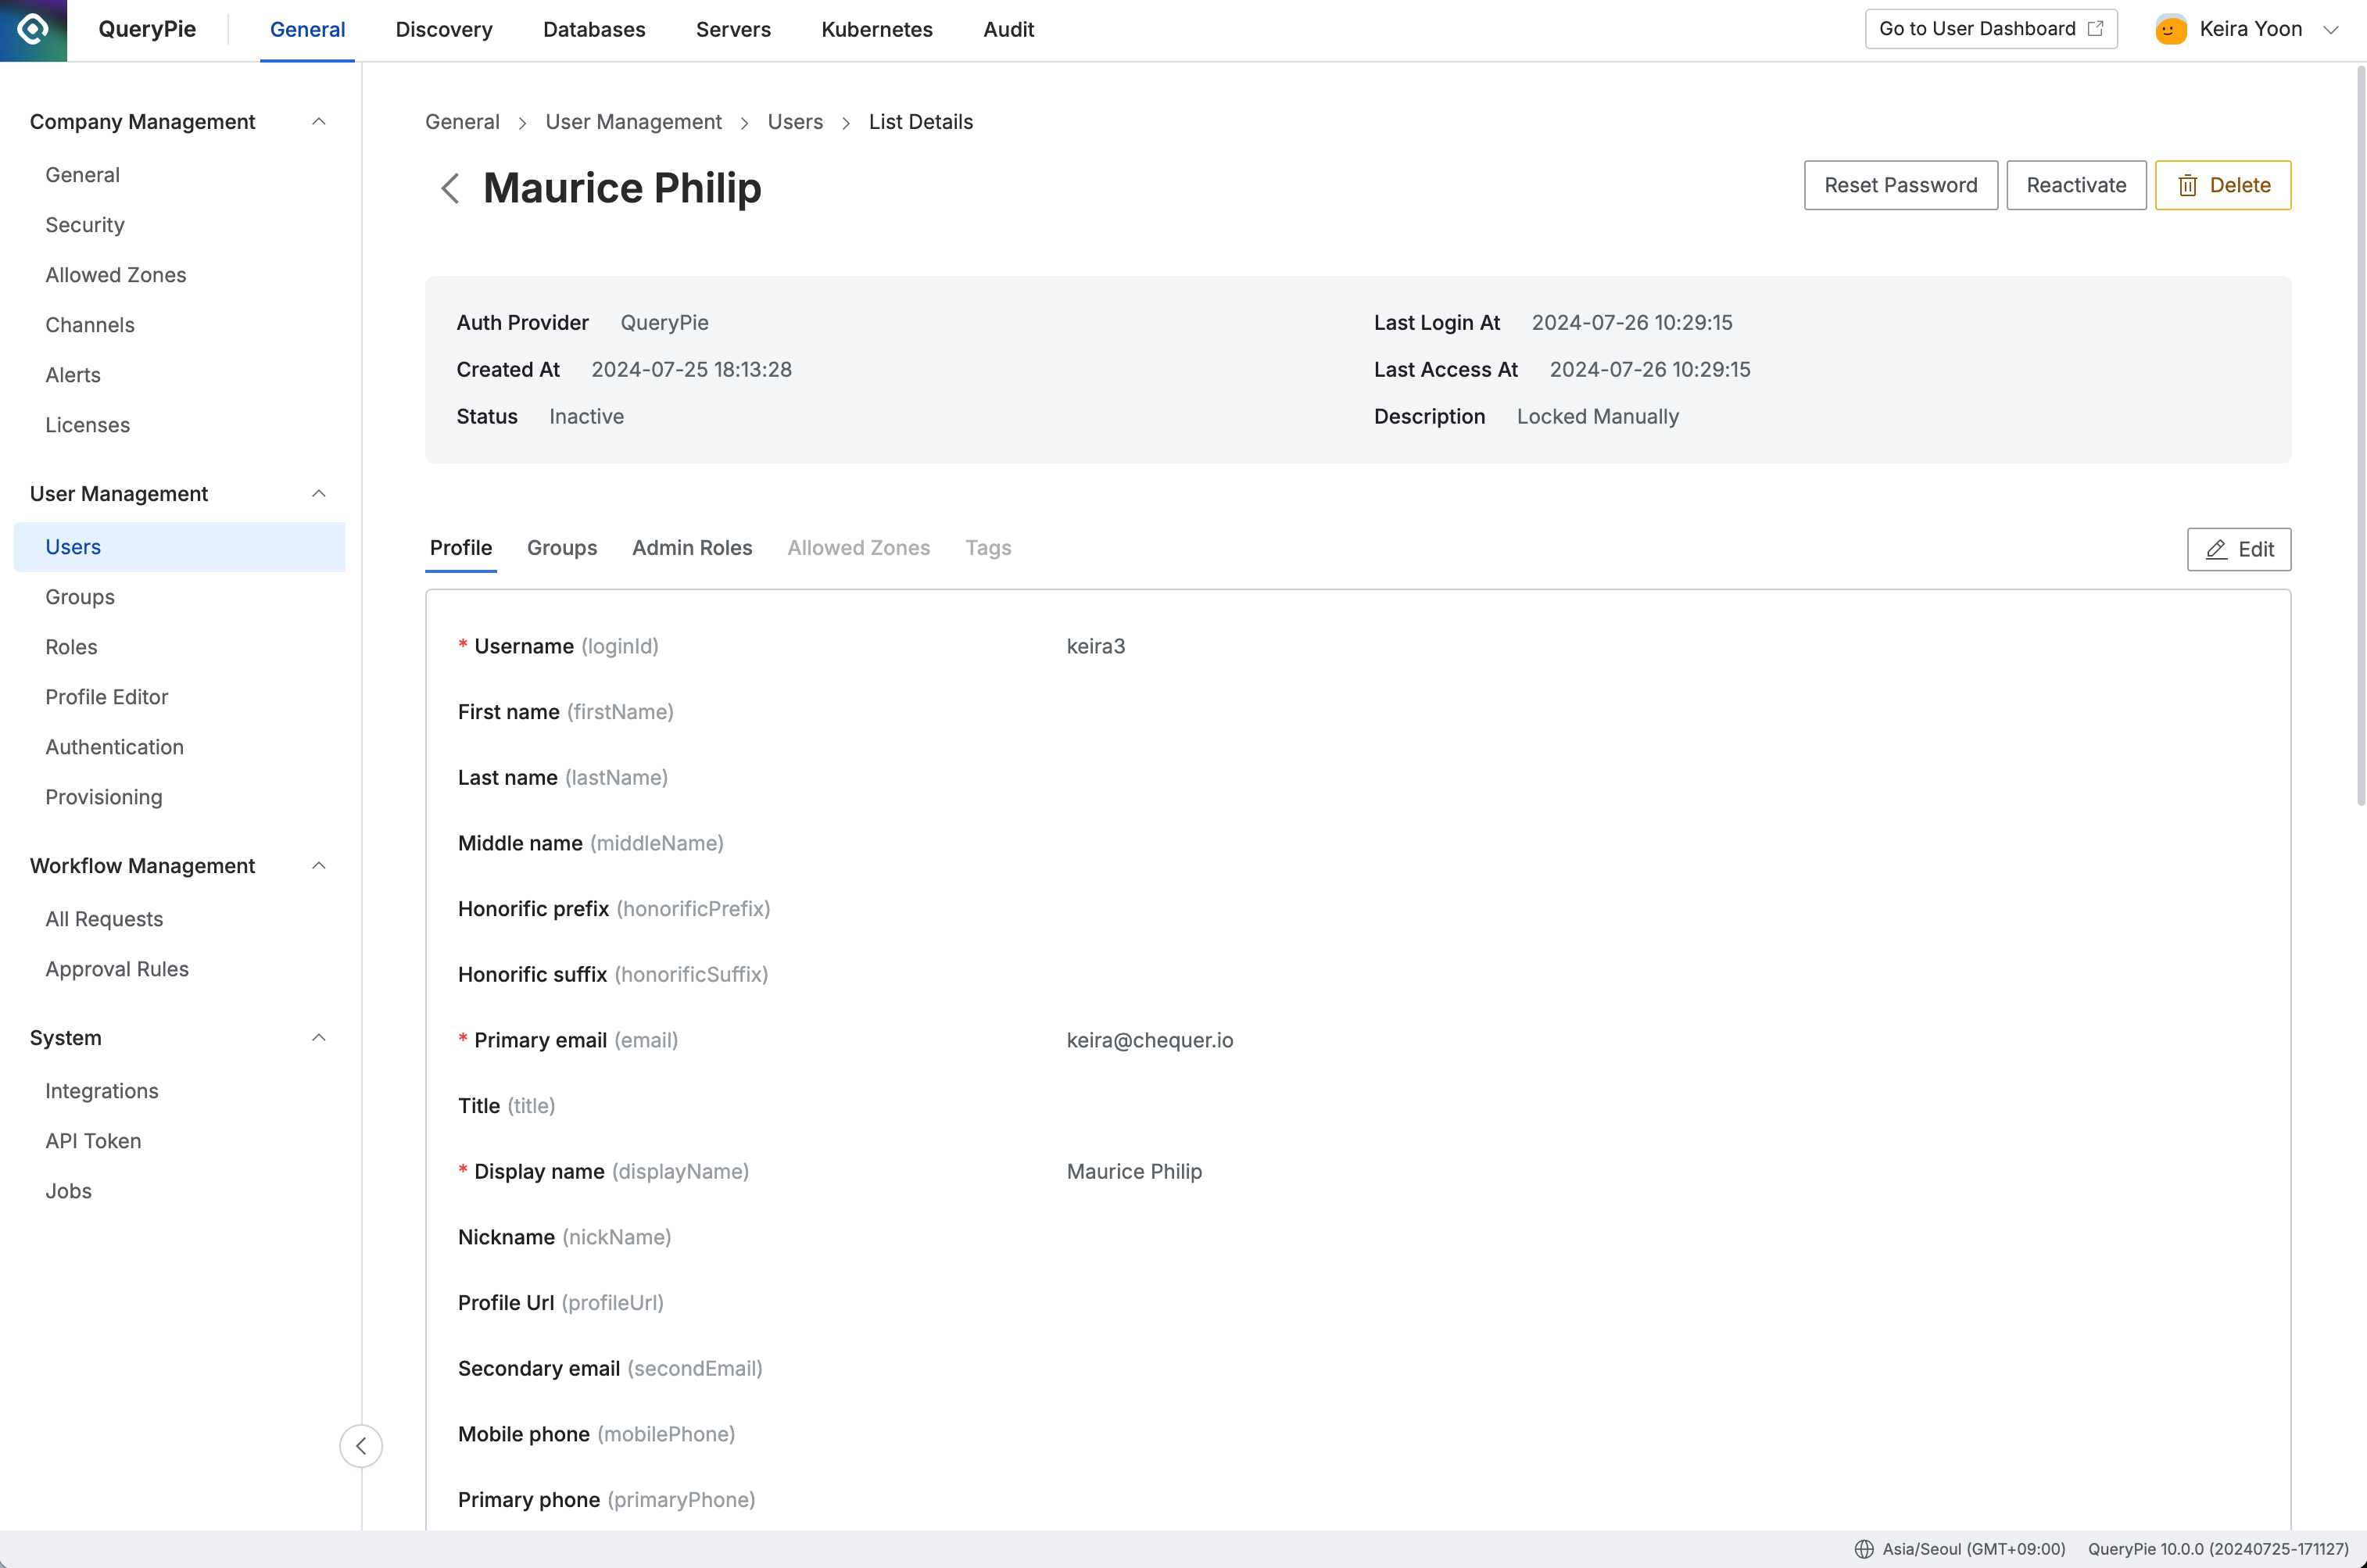
Administrator > General > User Management > Users > List Details
Editing User Information
In QueryPie, you can only edit the information of users manually registered within the system. For users integrated via SCIM, modifications must be made in the source directory, followed by synchronization to update the information in QueryPie.
On the user’s detailed page, click the Edit button to enter edit mode. The fields that can be modified will become active. After making the necessary changes, click Save to complete the update.
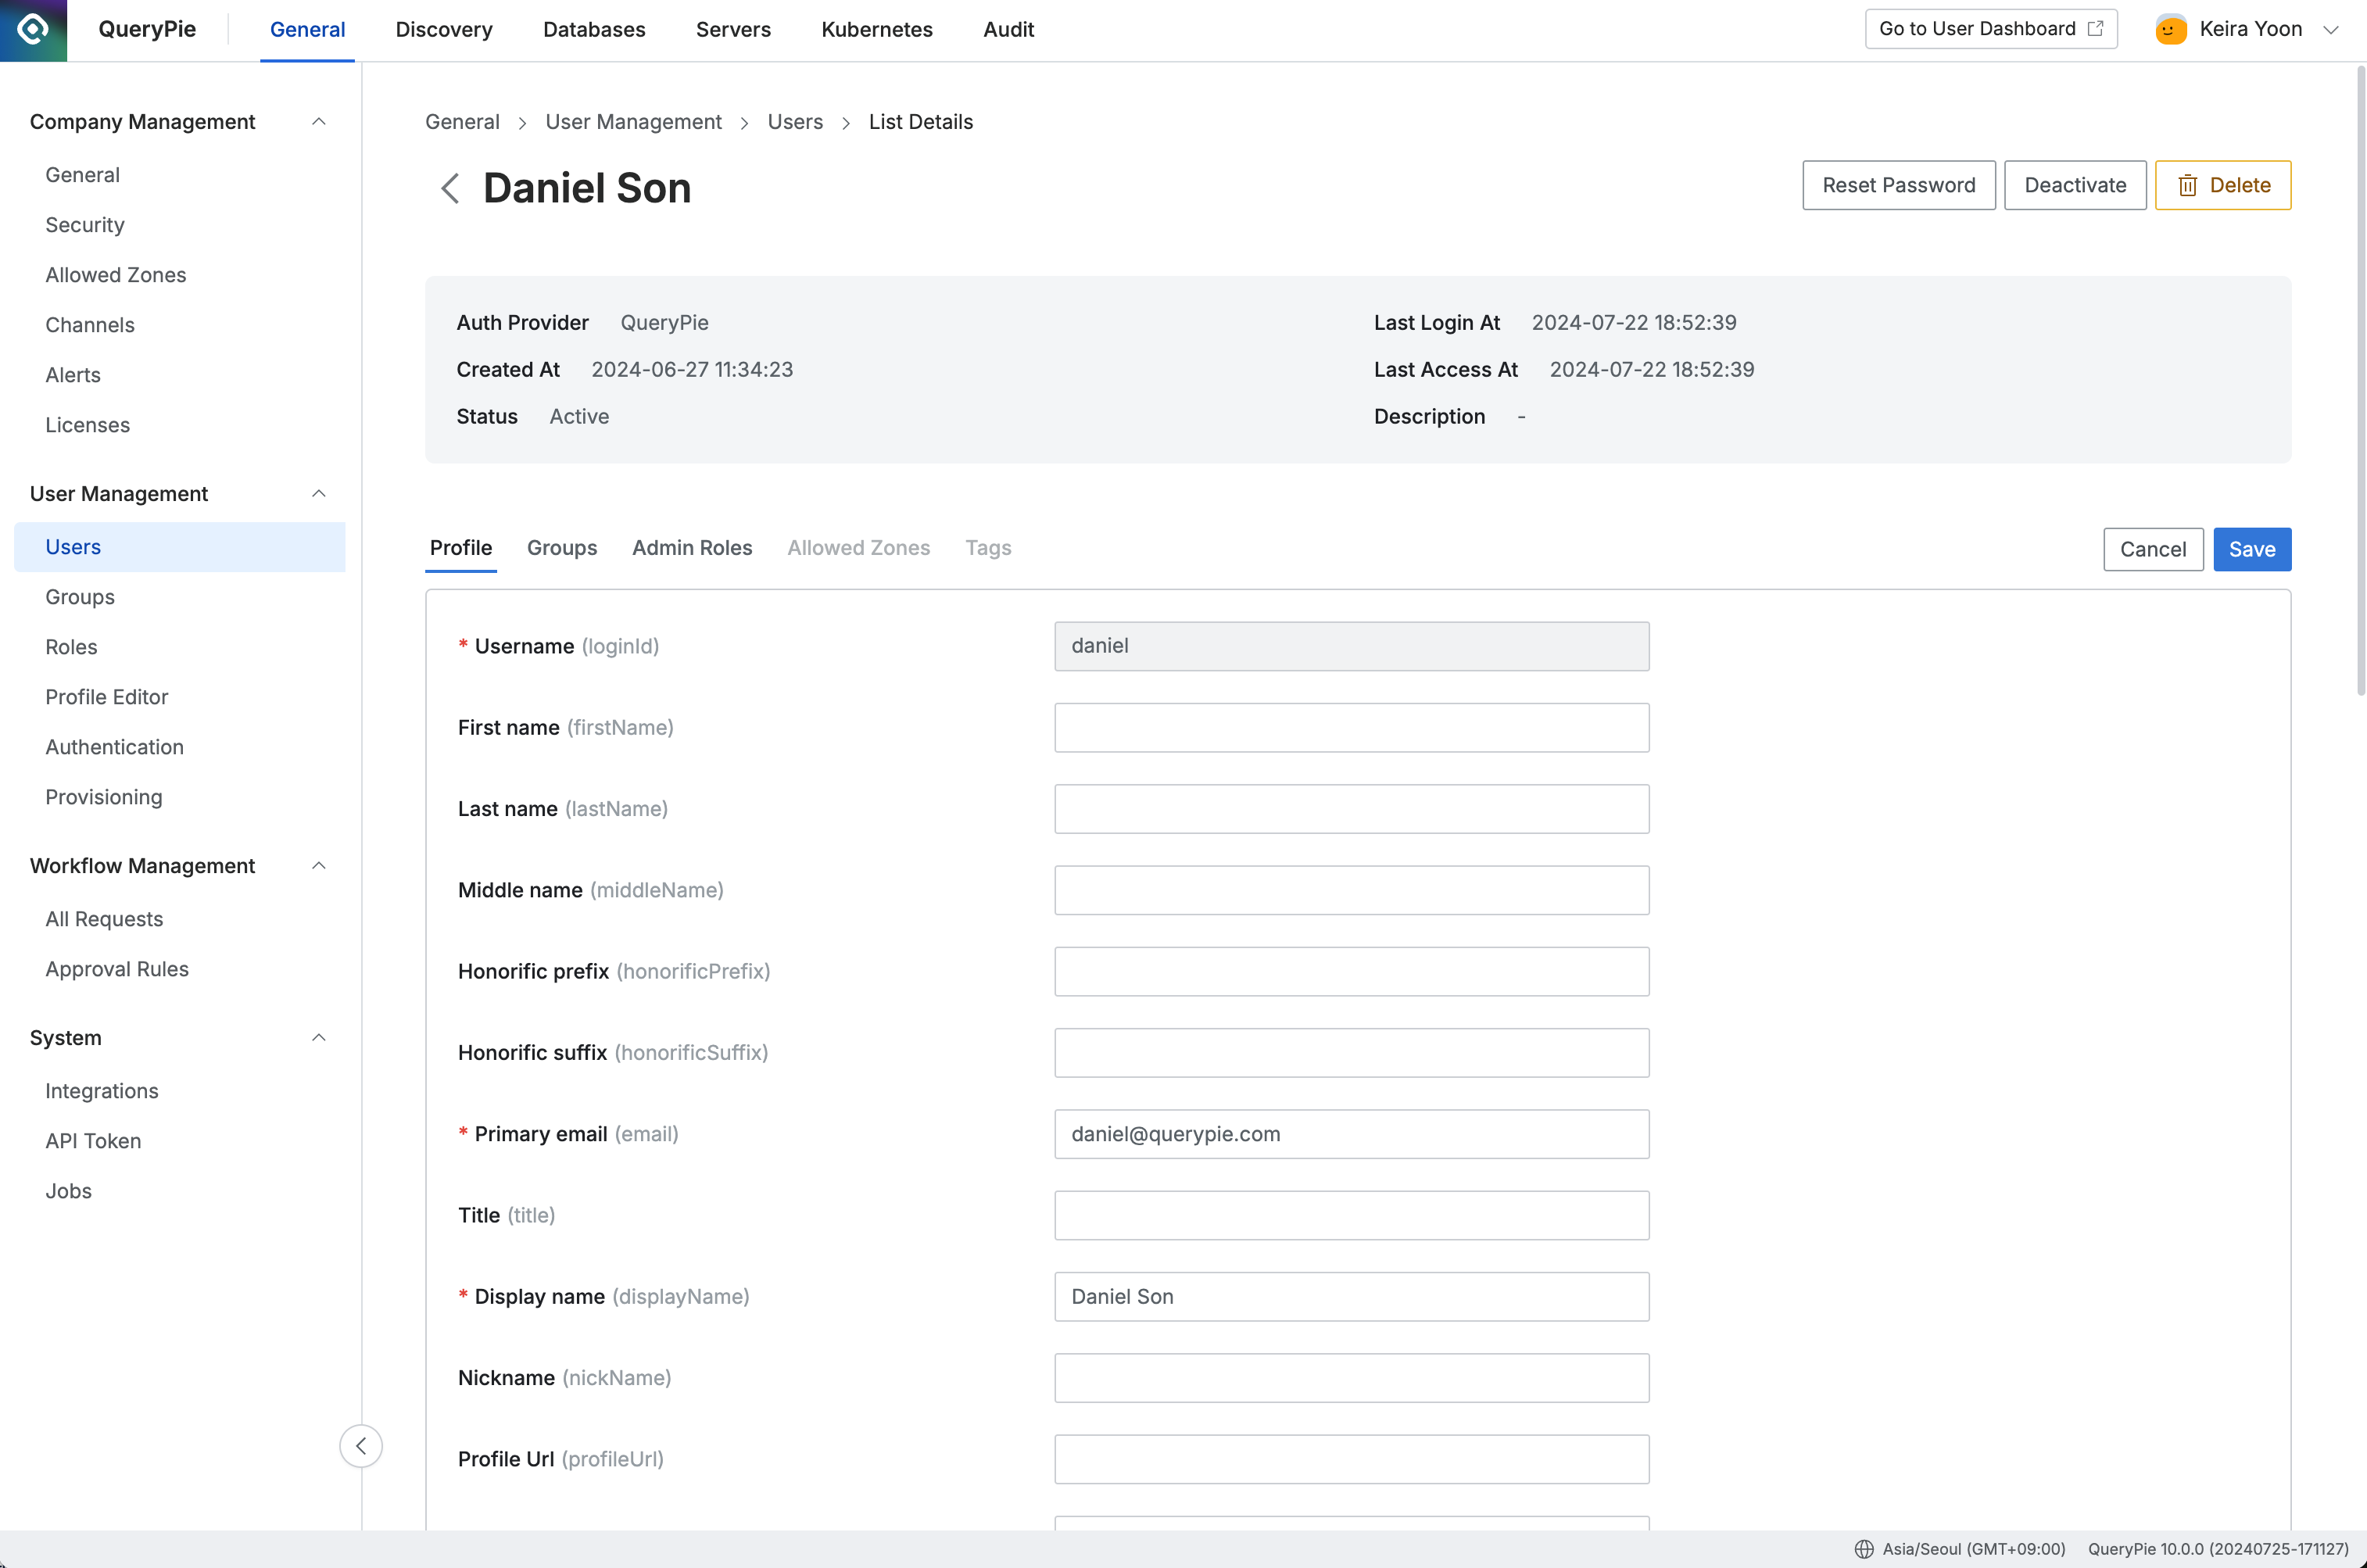
Administrator > General > User Management > Users > List Details > Edit
Deleting a User
In QueryPie, only users manually registered within the system can be directly deleted. For users integrated via SCIM, deletion must be performed in the source directory, followed by synchronization to reflect the changes in QueryPie.
On the user’s detailed page, click the Delete button to open the delete user confirmation modal.
Enter "DELETE" in the confirmation field, then click Delete button to complete the deletion.
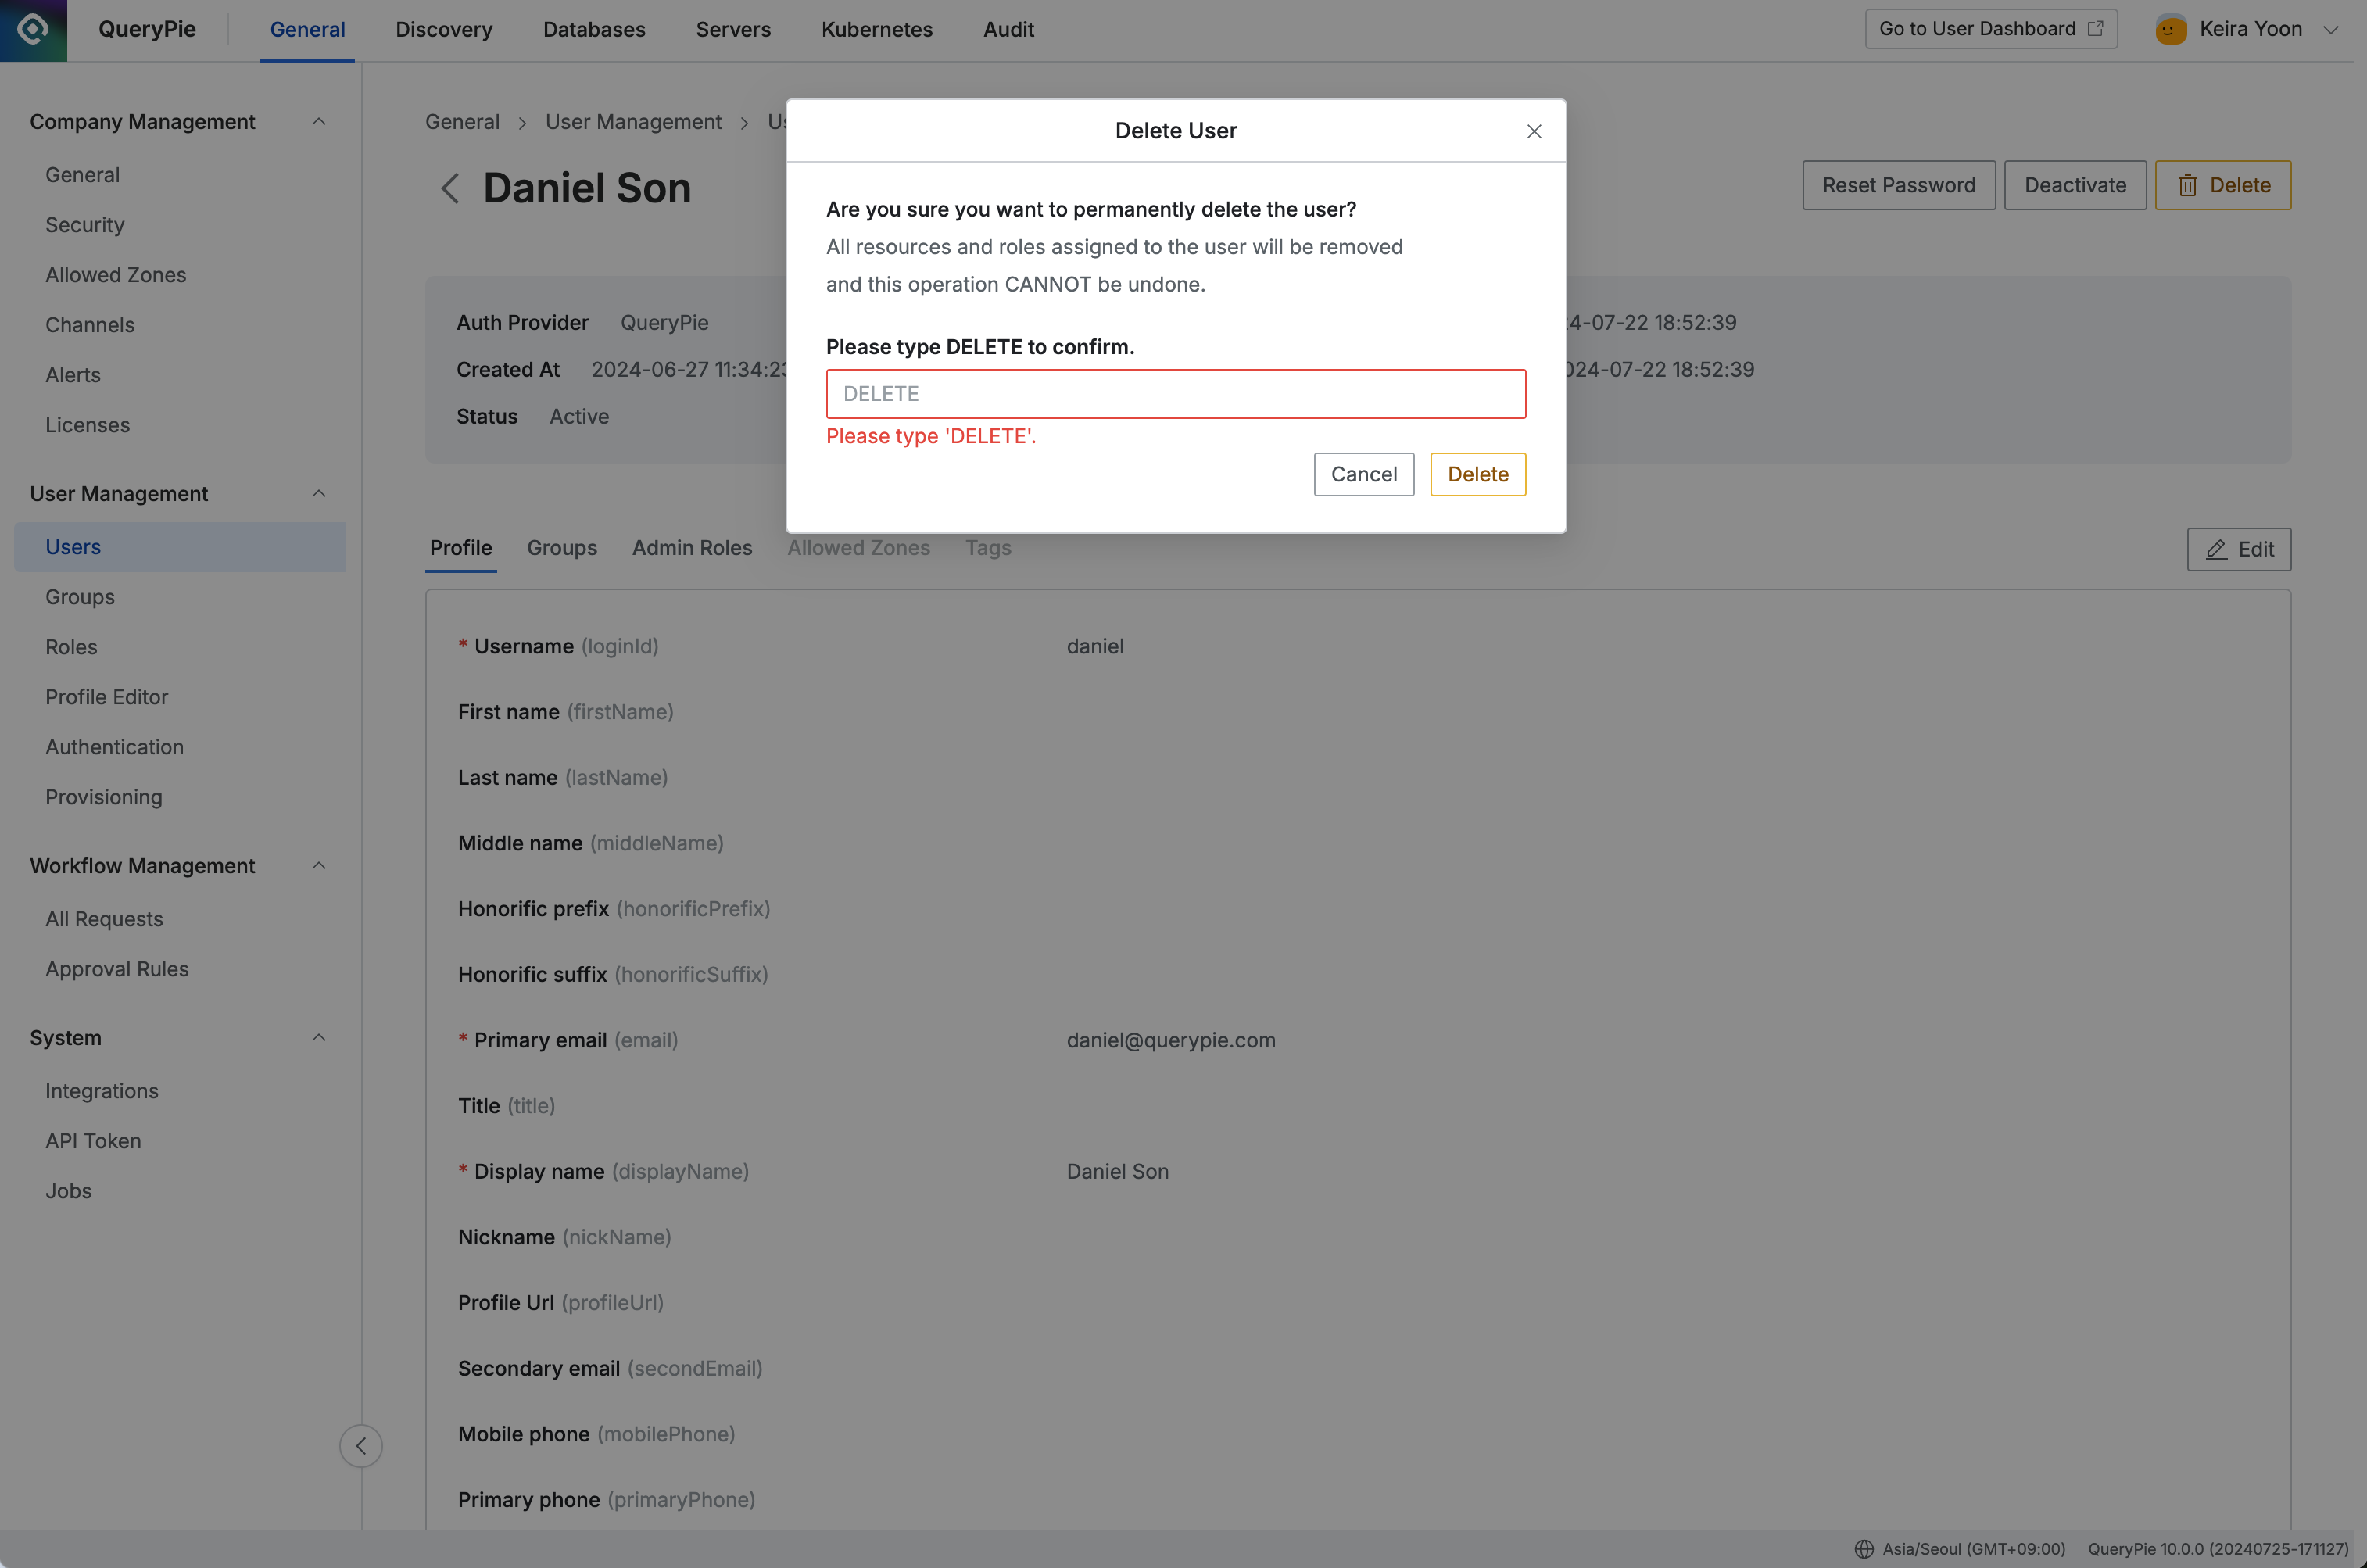
Administrator > General > User Management > Users > List Details > Delete User
Resetting a User Password
Warning In QueryPie, password resets are only available for users manually registered within the system. For users integrated via SCIM, their authentication methods are managed through SCIM and not directly through QueryPie.
Password resets are handled through the issuance of a temporary password. The administrator must generate a temporary password from the user's detailed page and then provide this temporary password to the user.
Issuing a Temporary Password
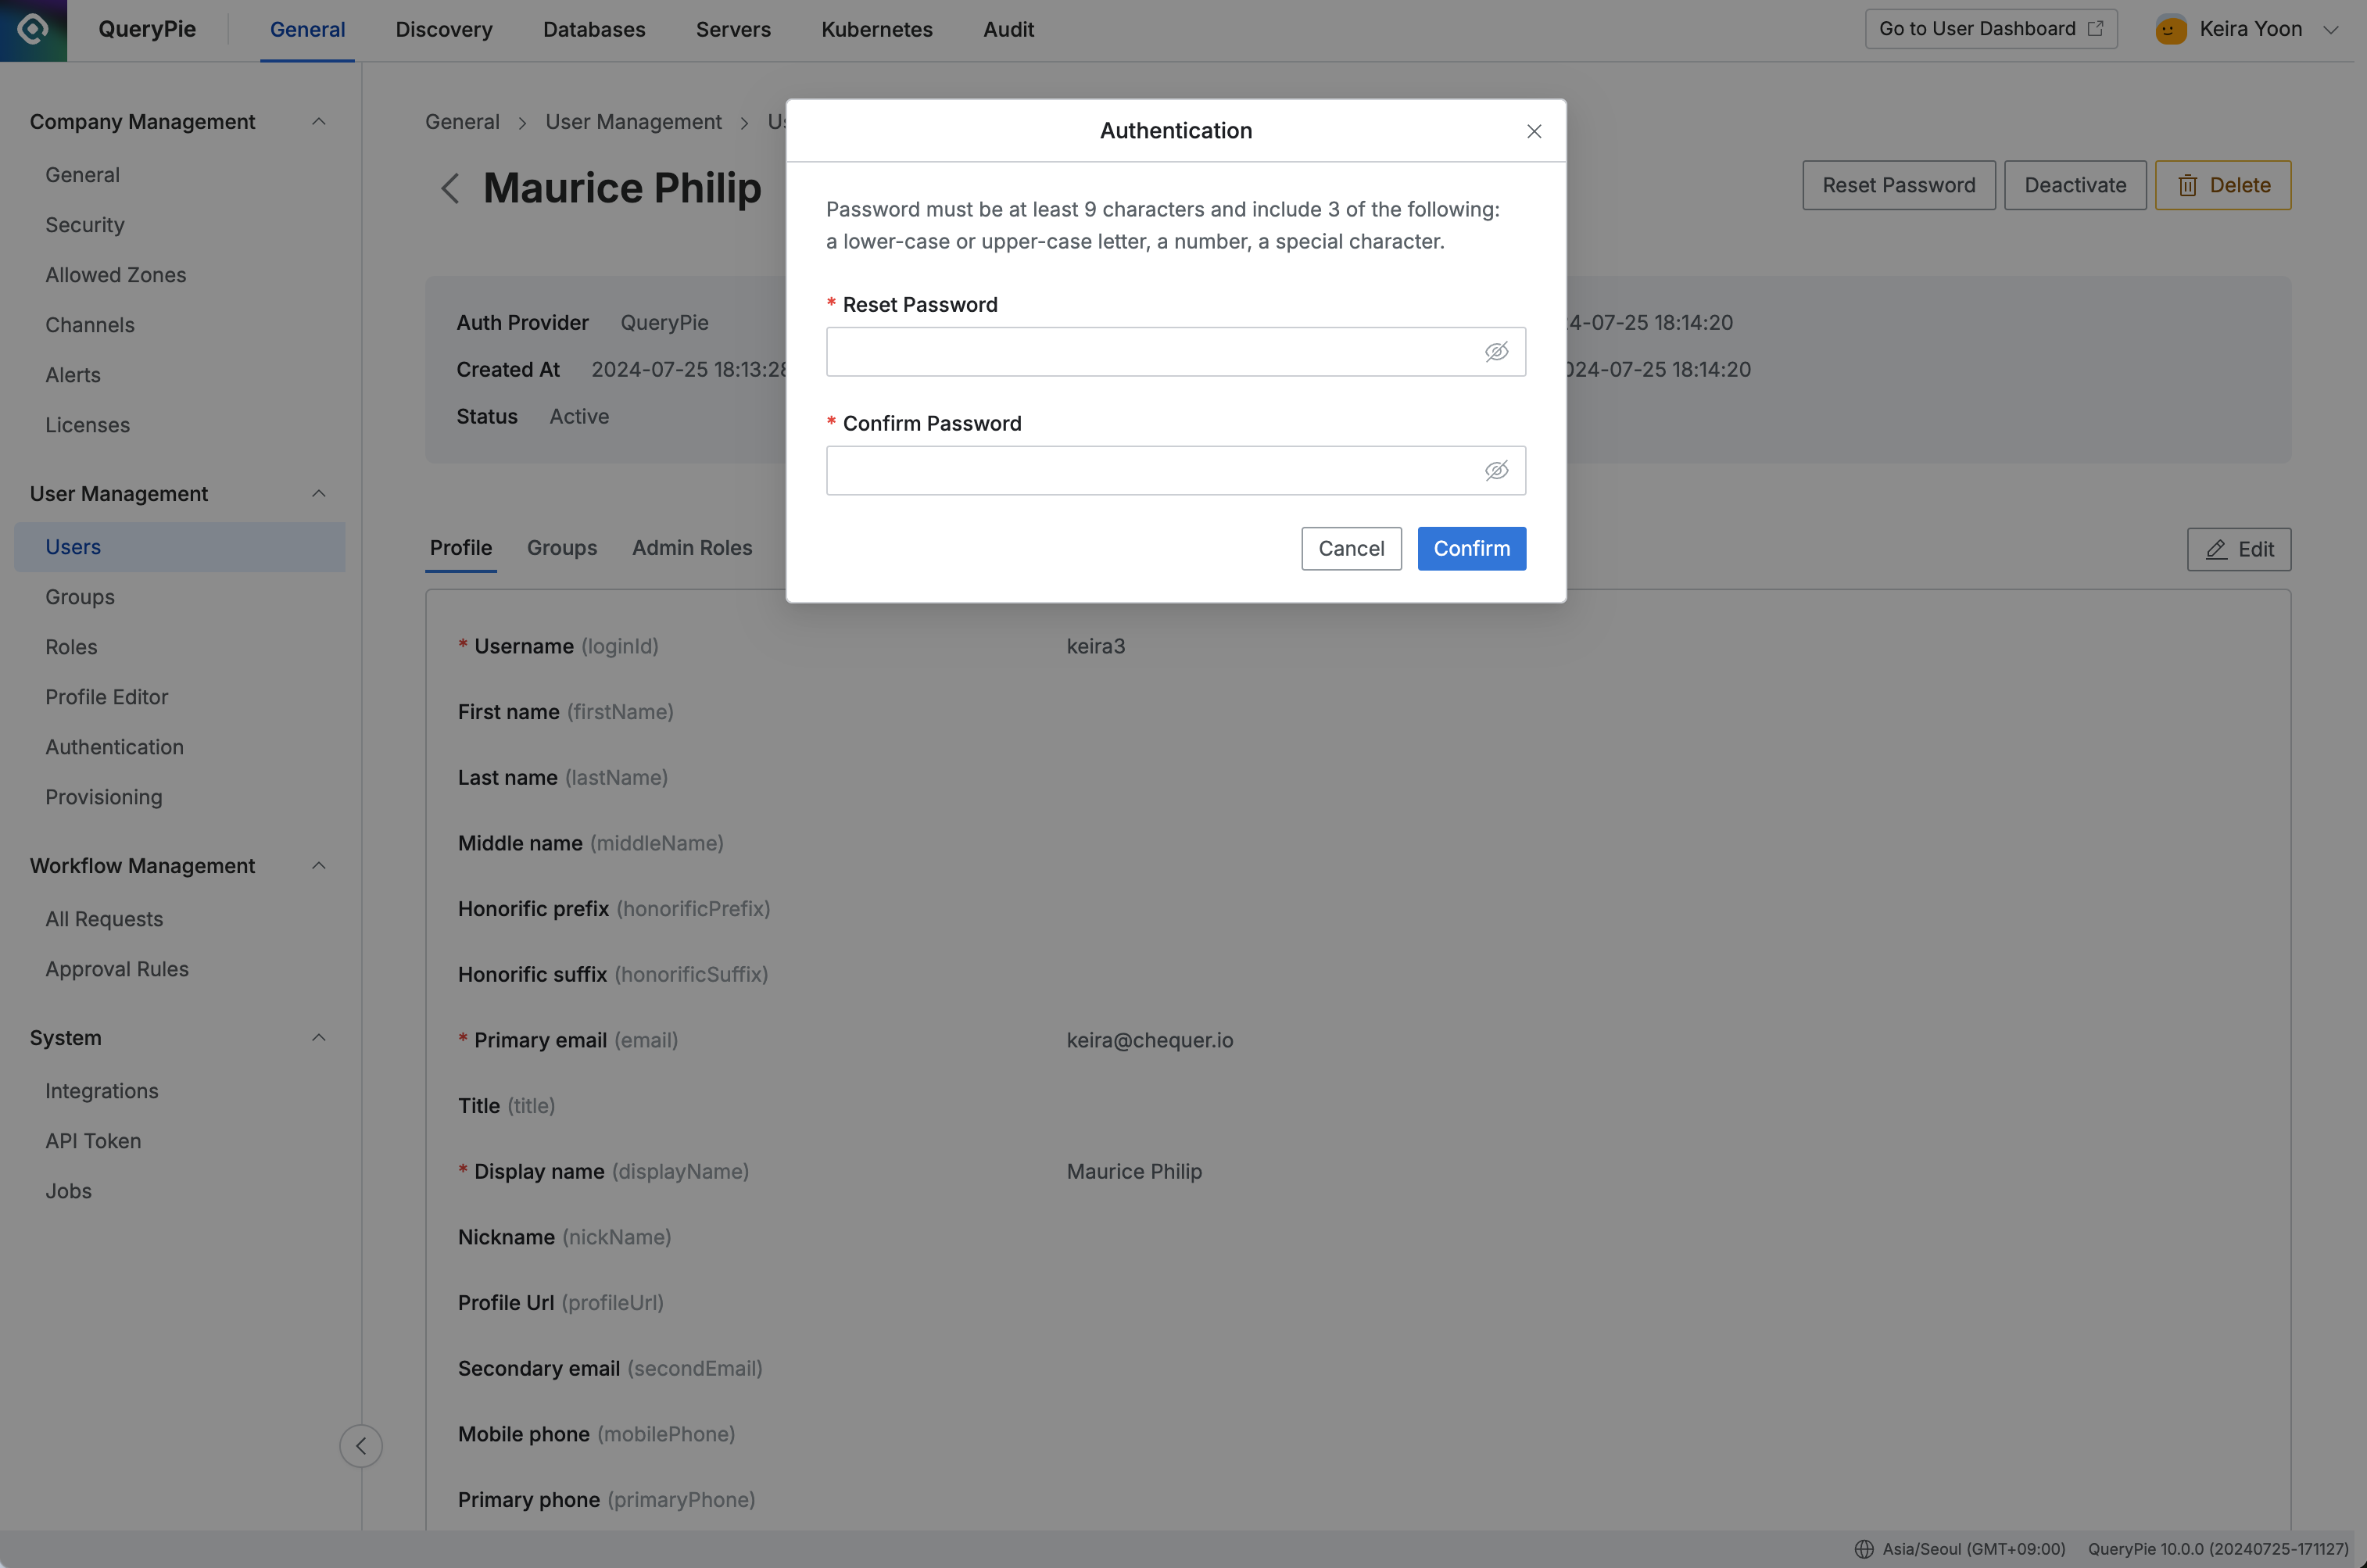
Administrator > General > User Management > Users > List Details > Authentication
On the detailed page of the user whose password you want to reset, click the
Reset Passwordbutton. This will bring up a confirmation modal.Enter the temporary password and click the
Confirmbutton to complete the issuance of the temporary password.
Resetting a Password (User)
When the user logs in with the temporary password issued, they will be directed immediately to the password reset screen. After entering a new password and clicking the Change Password button, the password change will be completed. The user can then log in using the new password.
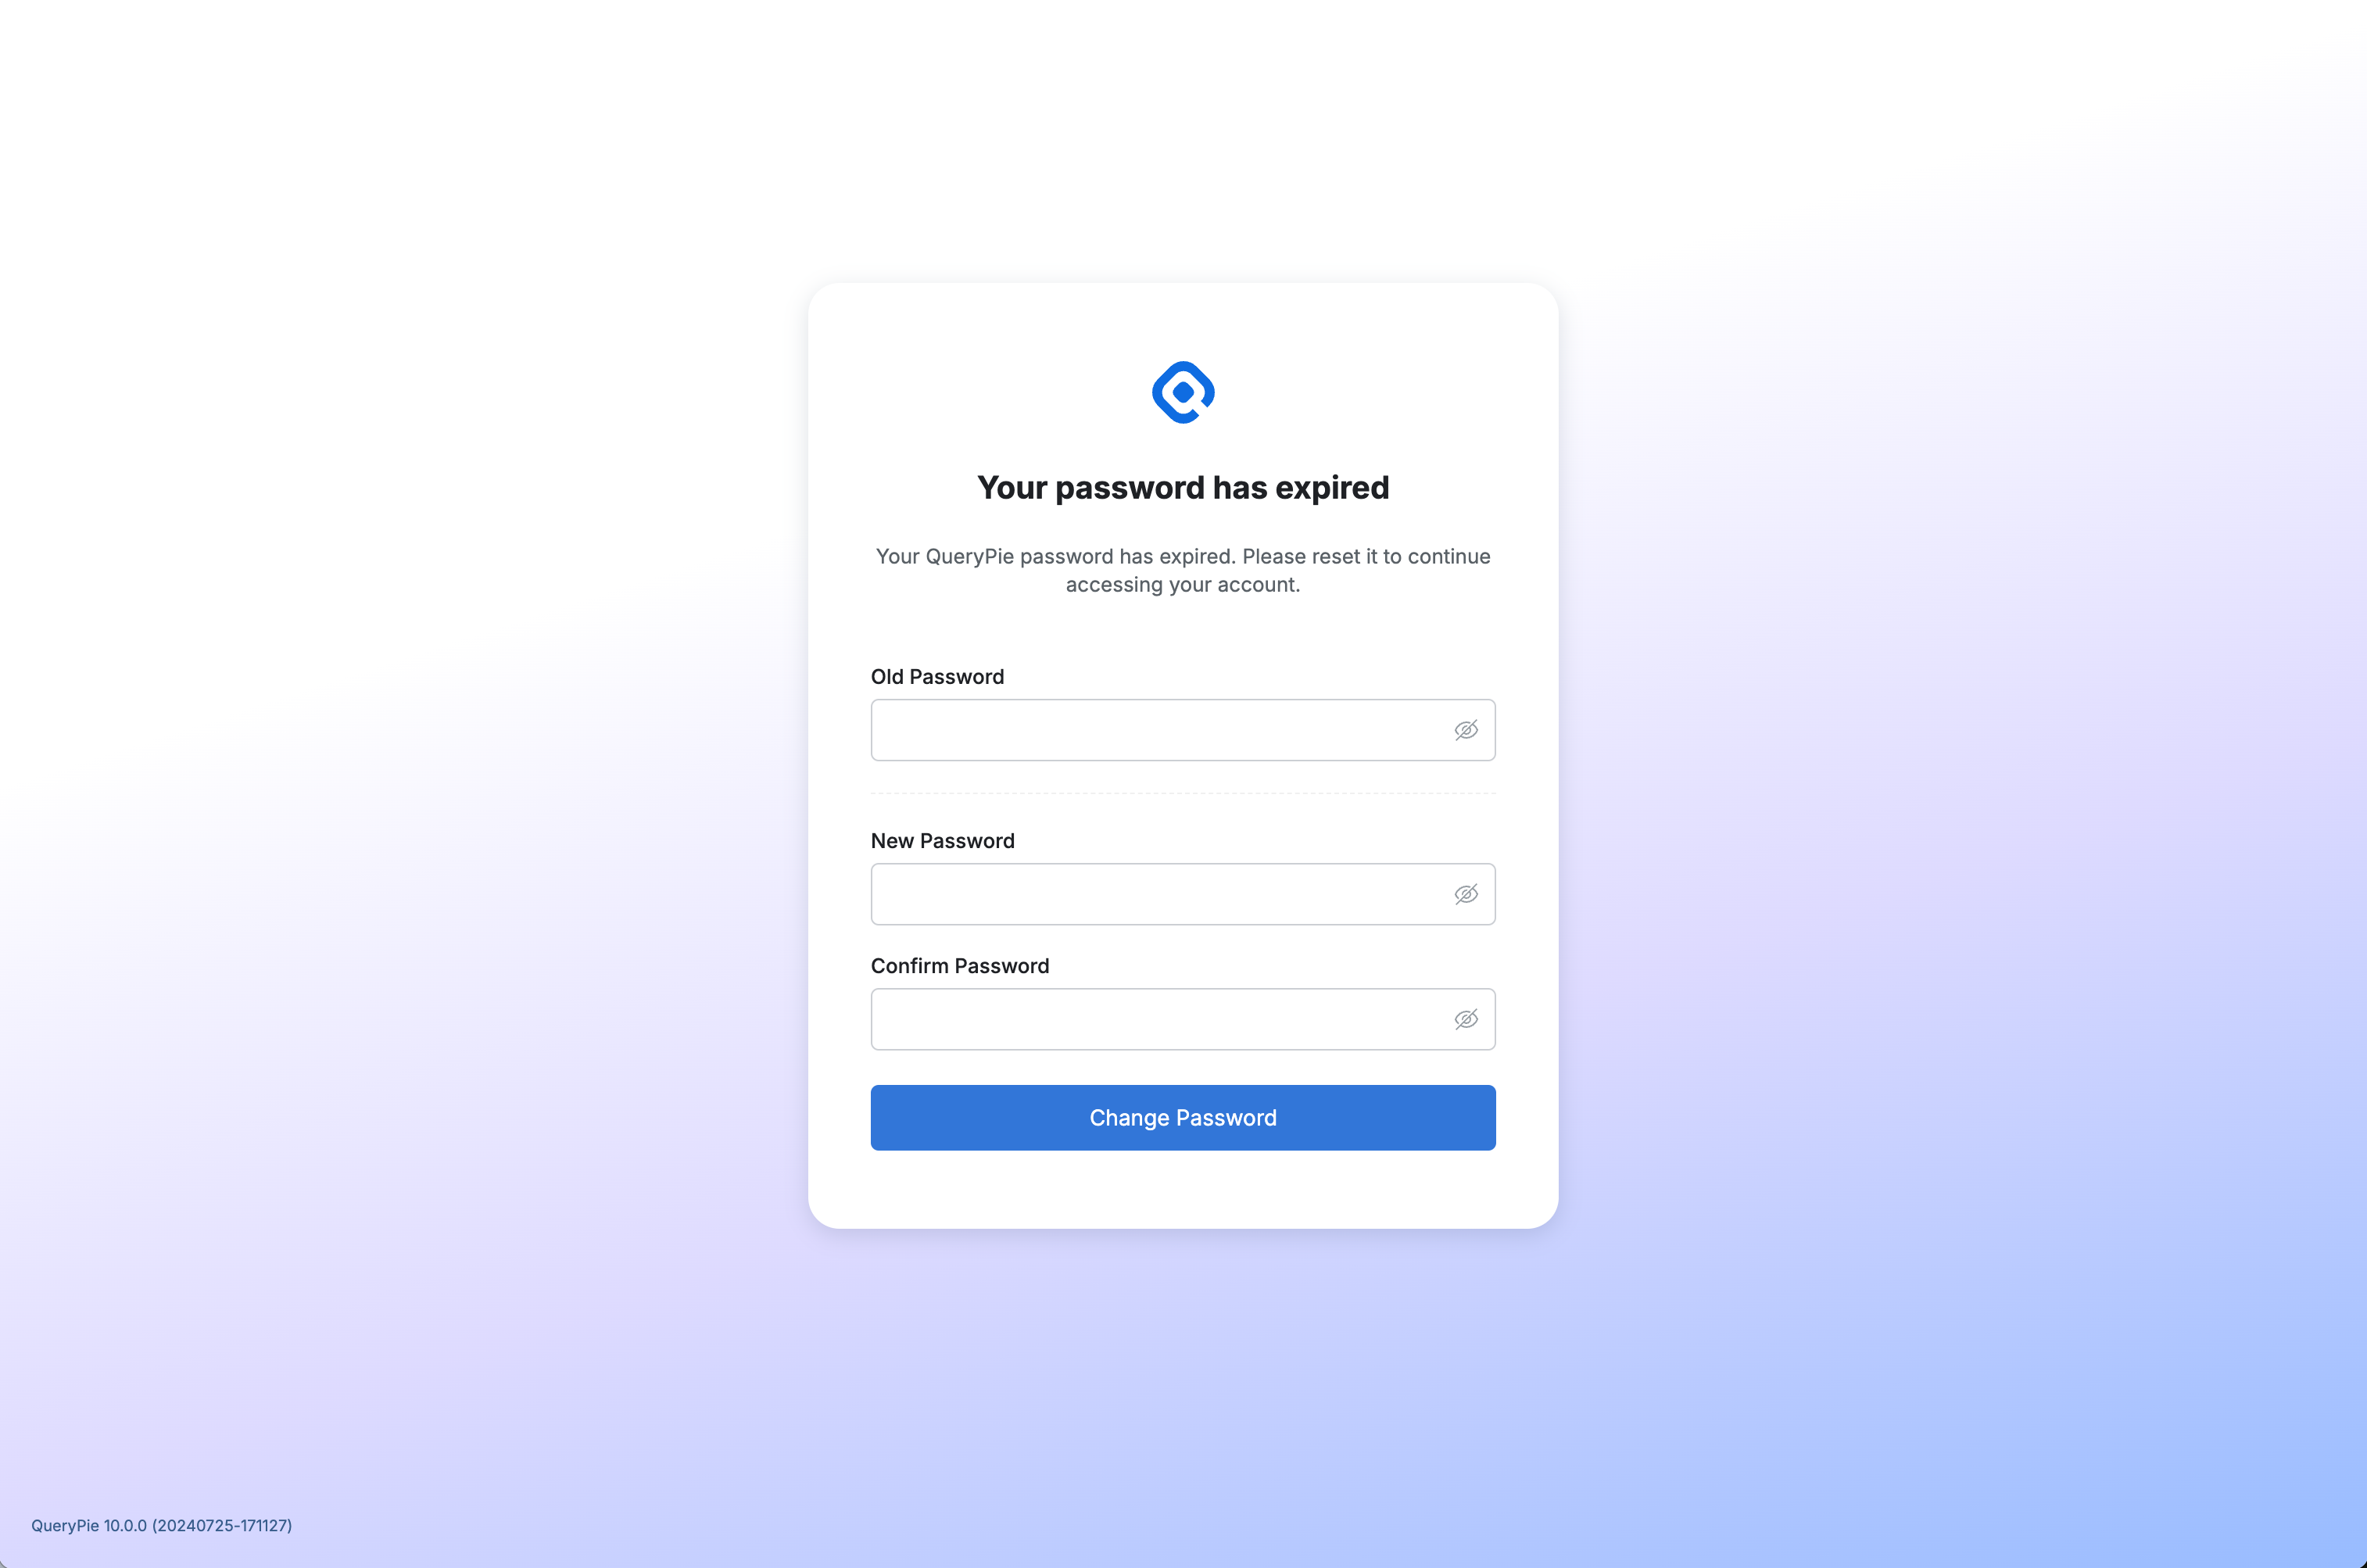
Password Reset Screen