Multi Agent
Overview
QueryPie Multi Agent is an enhanced Proxy Agent that allows the simultaneous use of multiple QueryPie Hosts. Within the Agent UI, you can view the resources available from a specific Host. By simply installing the Agent and logging into each Host, you can access resources through two or more QueryPie Proxies without additional configuration.
Supported Versions
Multi Agent supports QueryPie Host version 10.2.5 or later. If you are using version 10.2.4 or earlier, please use the existing User Agent.
It is possible to install both the existing User Agent and Multi Agent on the same PC. However, they will not operate correctly if run simultaneously.
For QueryPie Host versions 10.2.5 to 10.2.7, the support scope is:
Service: DAC, KAC
Client OS: MacOS, Windows
For QueryPie Host version 10.2.8 or later, the support scope is:
Service: DAC, KAC, SAC
Client OS: MacOS, Windows, Linux
Agent App Download and Initial Setup
After logging into QueryPie, navigate to the Profile (user icon) > Download & Support > Multi-Agent menu by clicking your profile icon in the top-right corner.

QueryPie Web > Profile menu
When the QueryPie Multi-Agent Downloads pop-up window appears, download the installation file appropriate for your PC's operating system from Step 1. Then, copy the QueryPie URL provided in Step 3 referring to the image below.
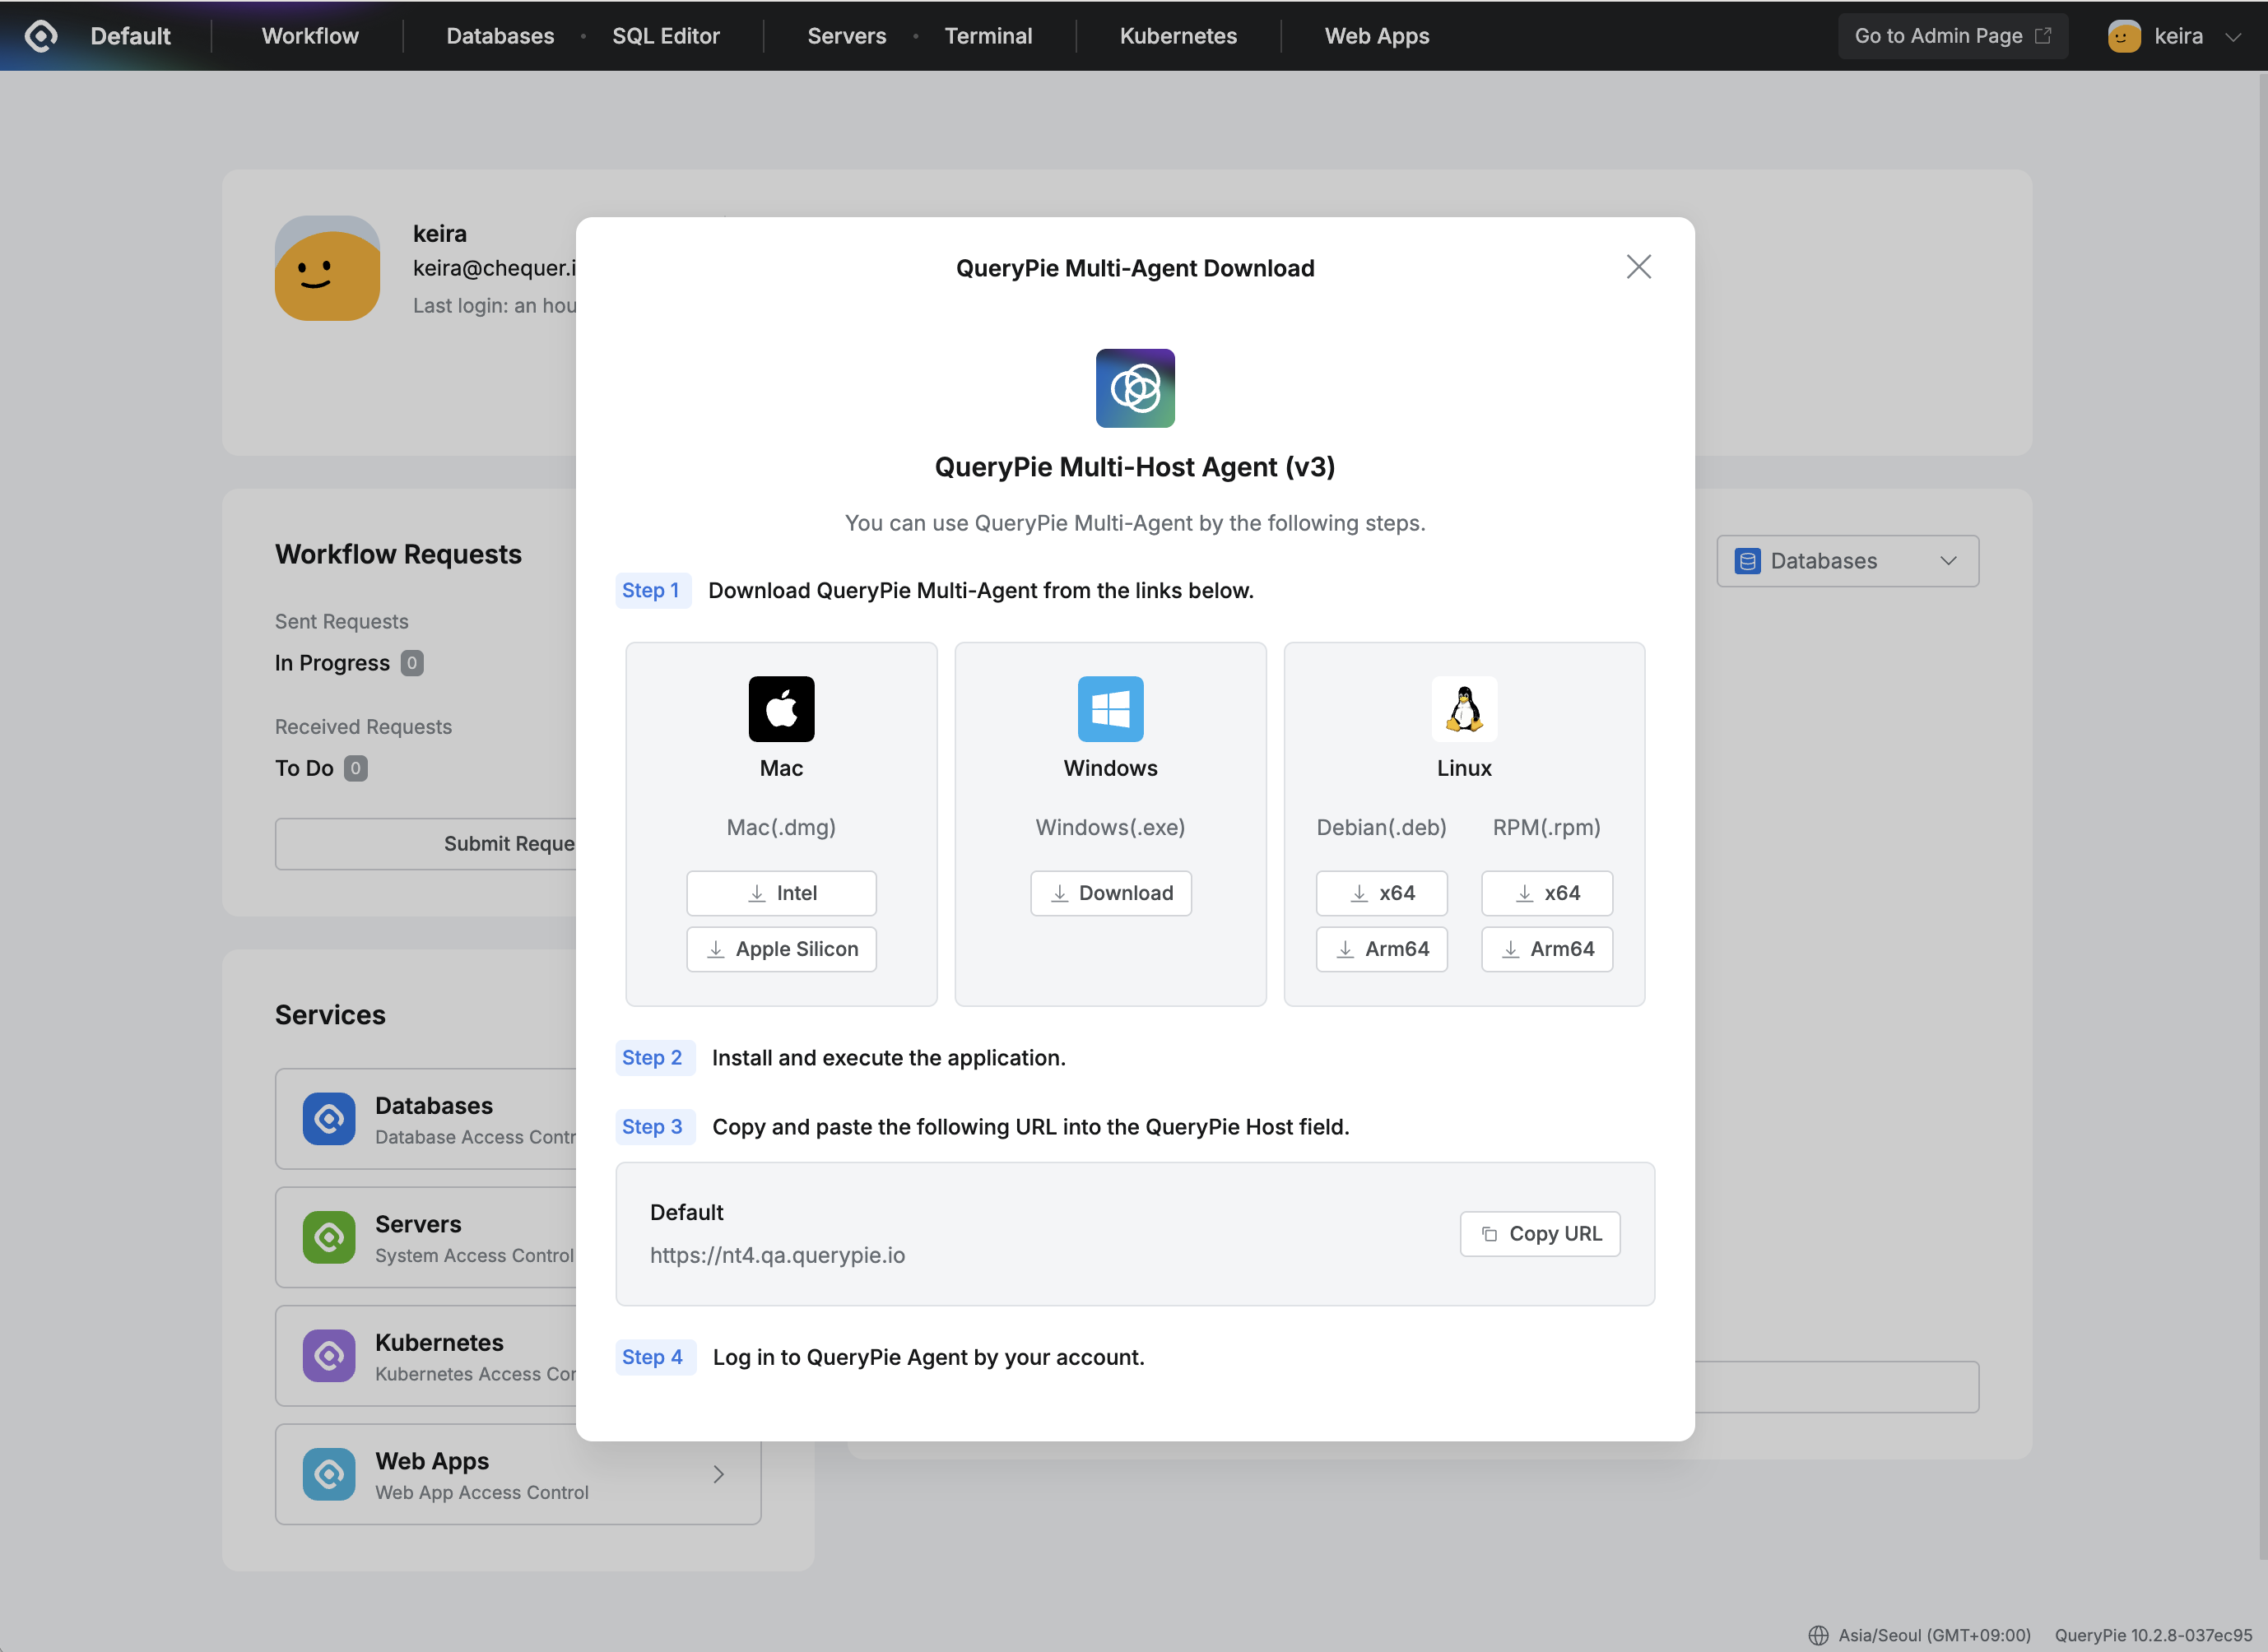
QueryPie Web > QueryPie Multi-Agent Download
Run the downloaded QueryPie Multi-Agent installer. For macOS, copy the .app file to the Applications folder to complete the installation. For Windows, follow the installer prompts.

Mac OS Installation Program
Launch the installed QueryPie Agent. The initial Host registration page will open.
In the QueryPie Host input field, paste the QueryPie URL you copied earlier and click theNextbutton. This will take you to the login screen for that Host.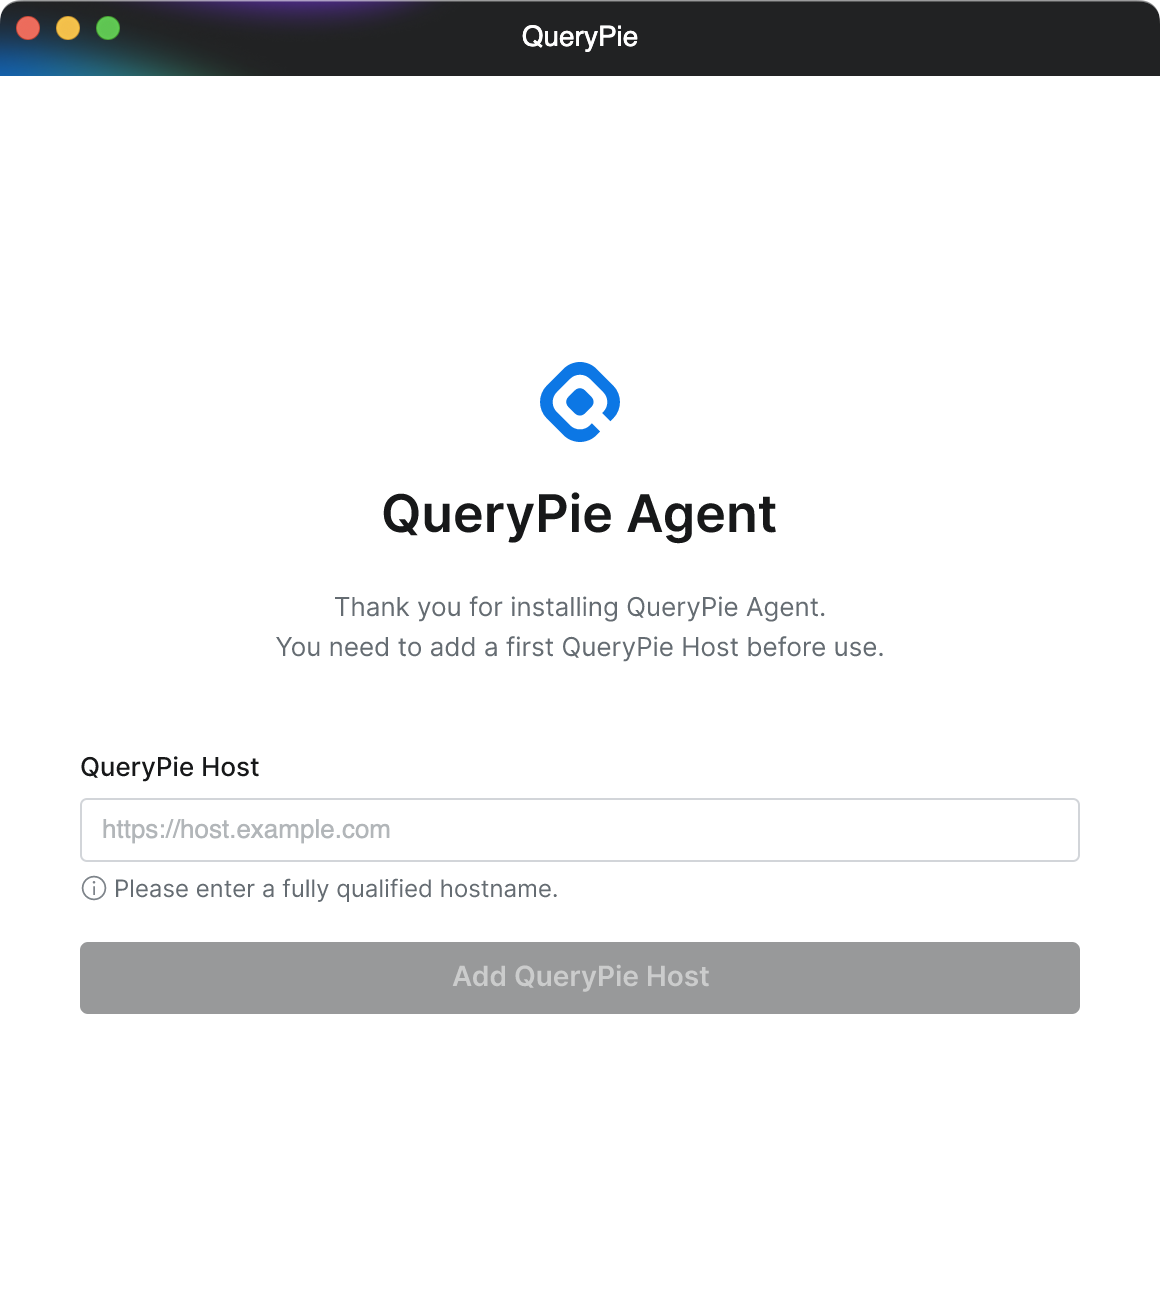
Multi-Agent > Host Setting
On the login page for the entered Host, enter your authentication credentials and click the
Continuebutton.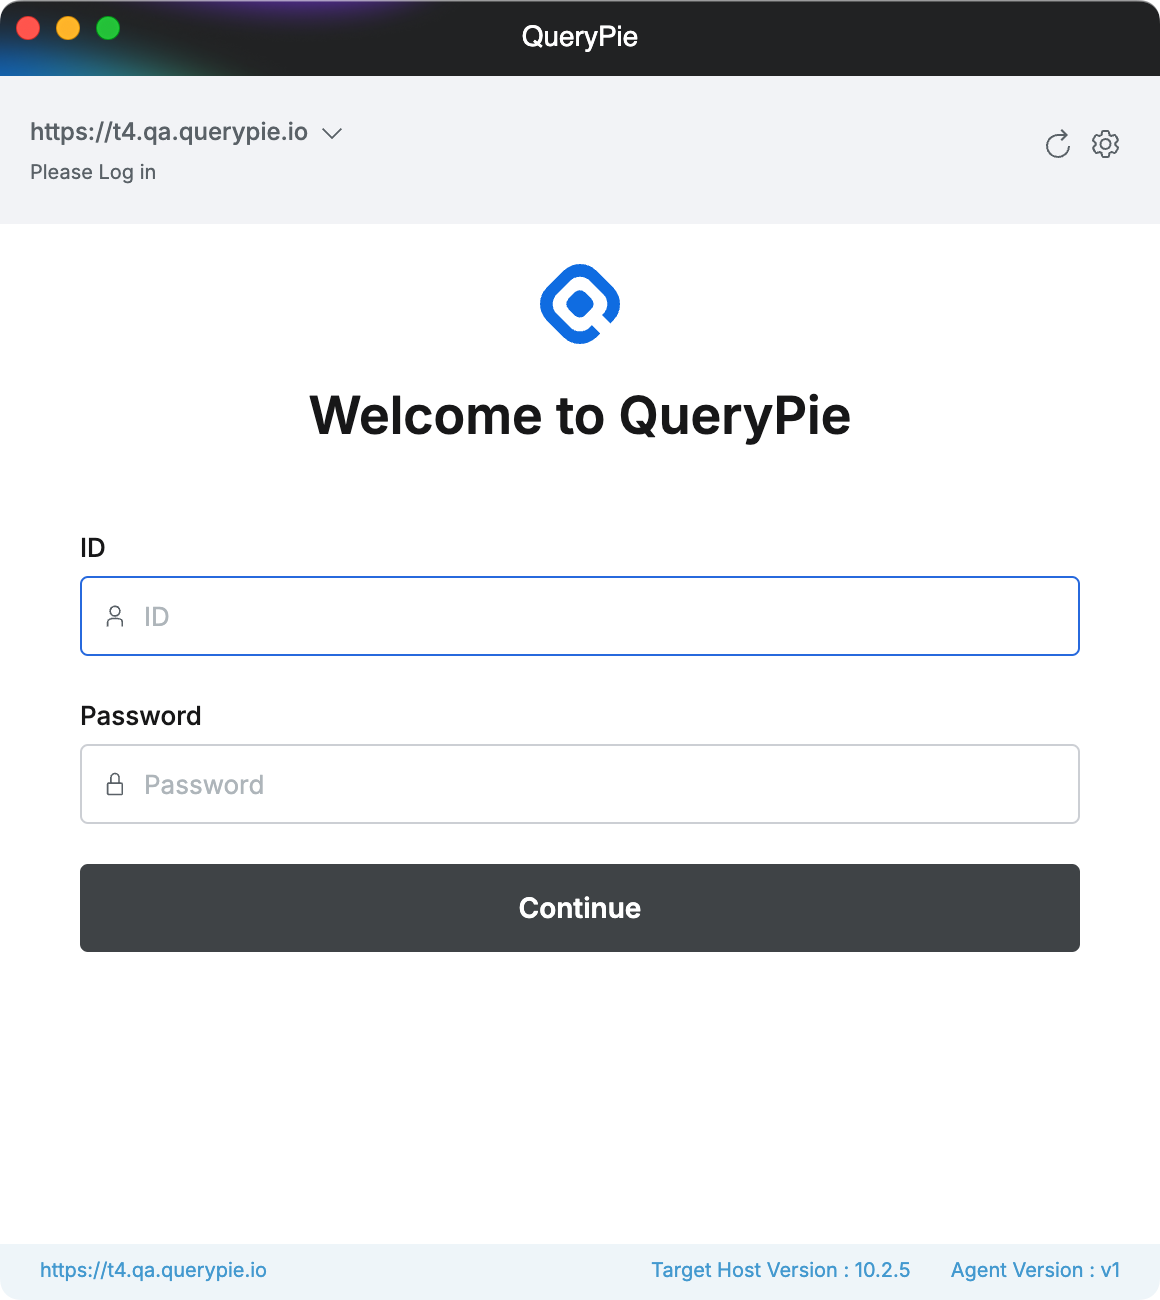
Multi-Agent > Login
DAC
Connecting to Databases via the Agent
In the Database tab, you can view a list of Database Connections for the selected QueryPie Host for which you have been granted privileges and for which Proxy use is enabled.
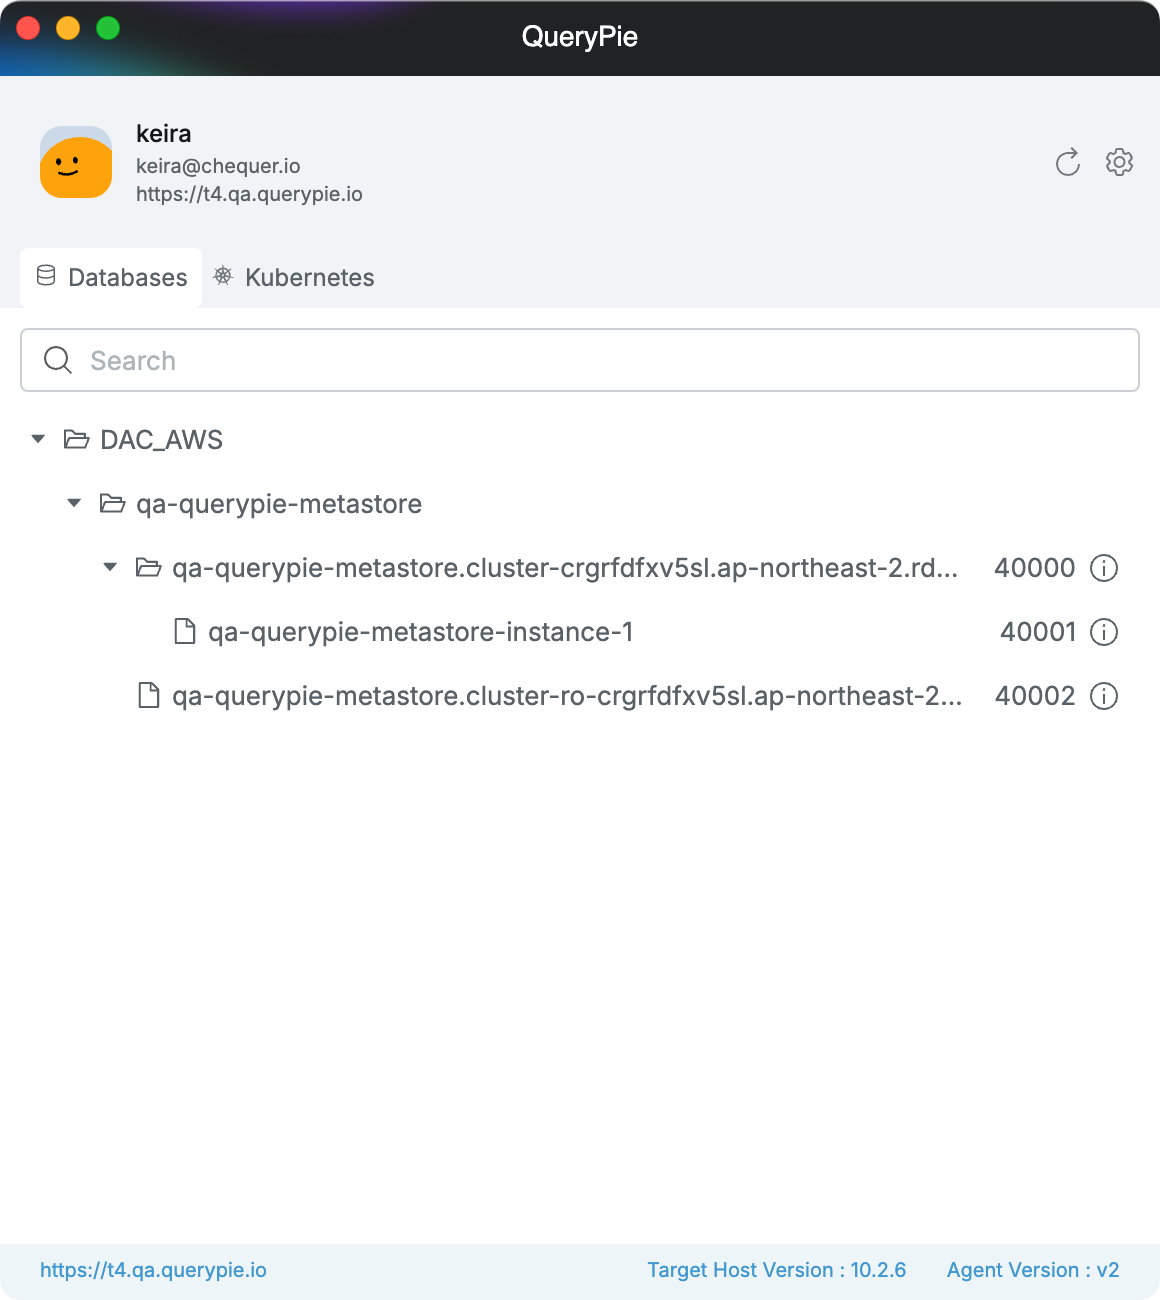
Multi-Agent > Databases
Select the connection you wish to access and right-click to open the context menu.
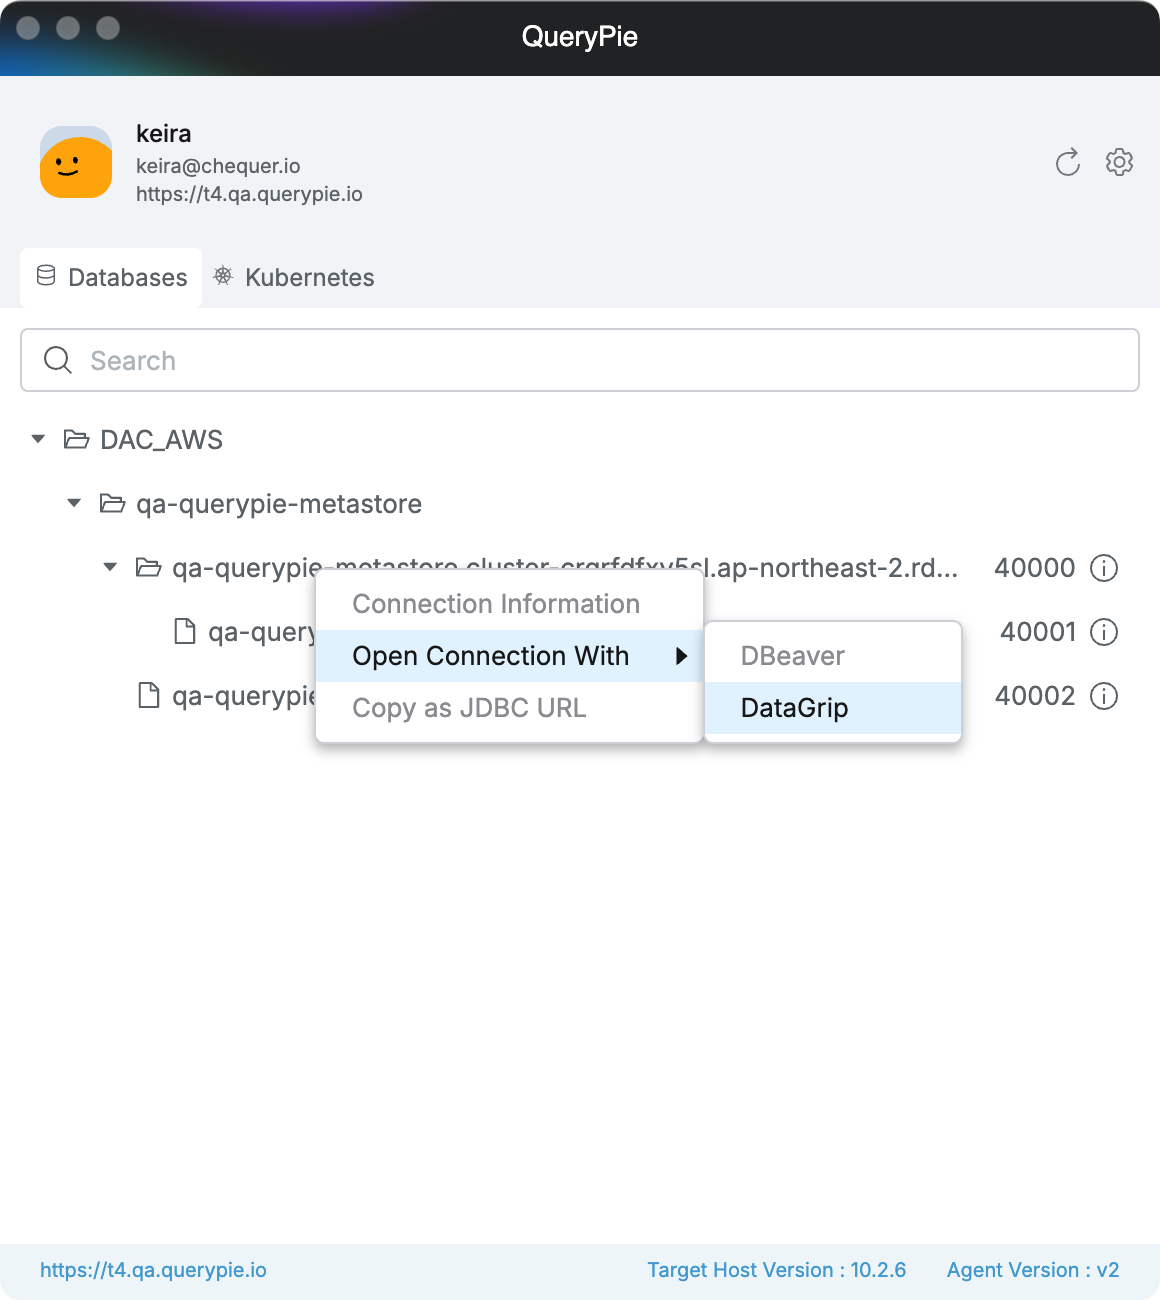
Multi-Agent > Databases > Context-menu
Connection Information: Allows you to view the information required for a Proxy connection.
Open Connection With 10.2.6~: Allows you to connect to the database using a 3rd party tool.
DBeaver: Opens DBeaver and populates the connection information
(A one-time DBeaver path recognition process is required. It is recommended to run this function while DBeaver is already running.)DataGrip: Copies connection information that can be pasted into DataGrip.
SQLGate for Oracle (Windows only): Opens SQLGate for Oracle and populates the connection information.
Copy as JDBC URL 10.2.6~: Copies the JDBC URL of the selected connection.
Open Connection With, Copy as JDBC URL is available in 10.2.6 and later versions.
Managing 3rd Party Database Tool Settings in the Agent
You can manage settings related to 3rd party database tools by navigating to Settings > Databases.
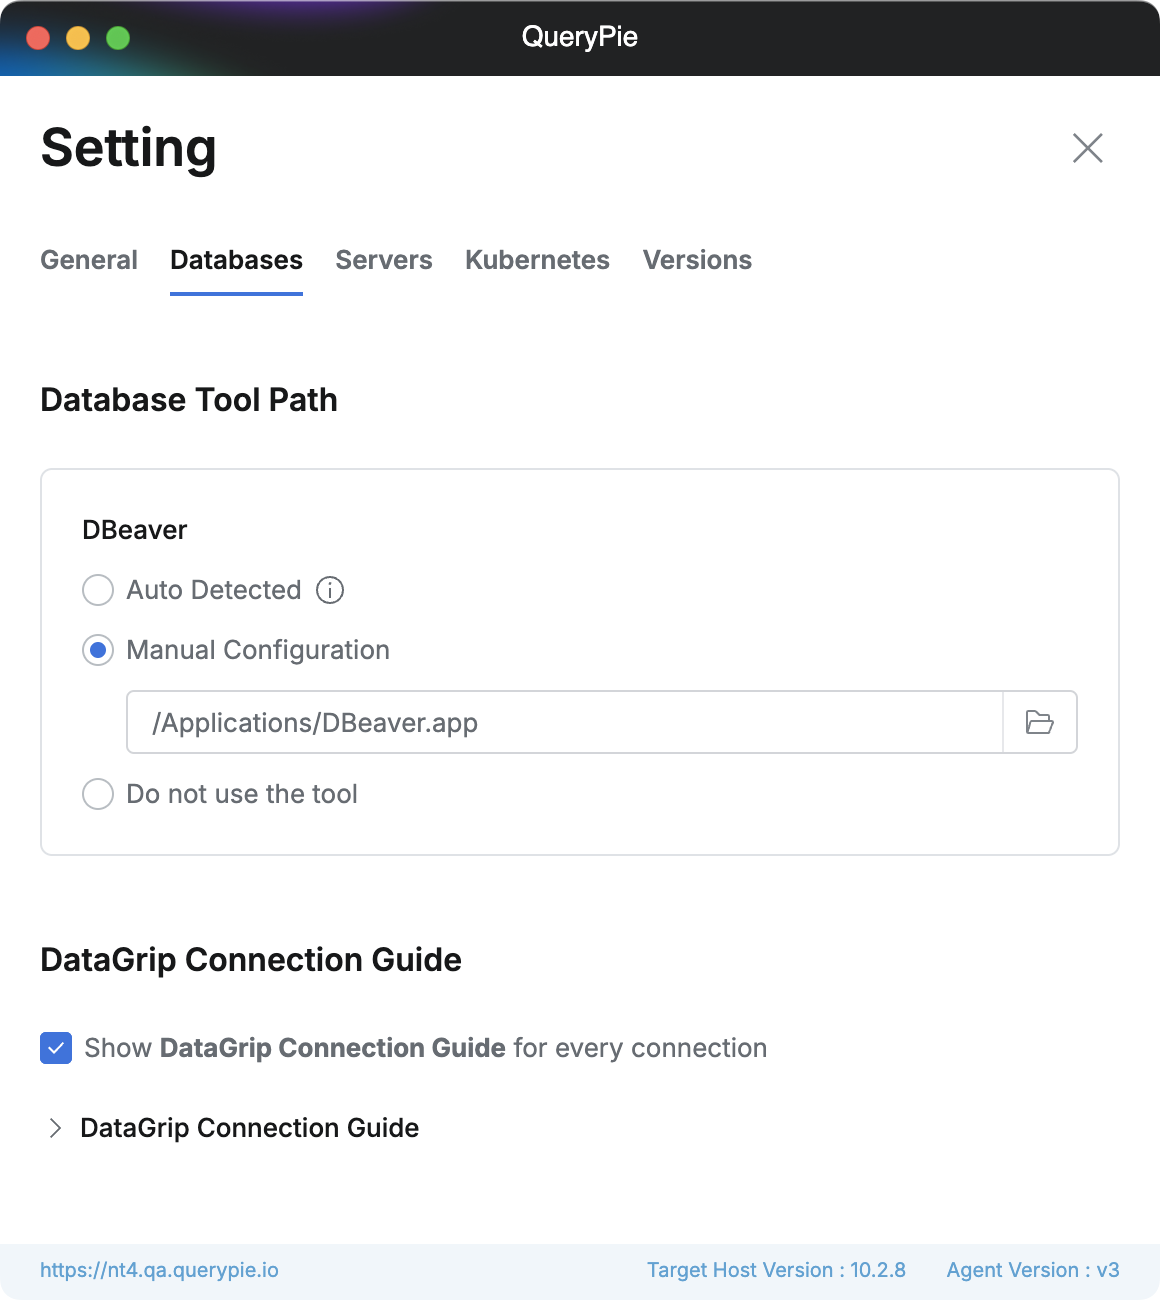
Multi-Agent > Settings > Databases
Database Tool Path: Configure the path for supported 3rd party tools.
Auto Detected: Automatically finds the tool's path each time you select a tool via Open Connection With.
If the tool does not open correctly, it is recommended to manually specify the path using Manual Configuration.
Manual Configuration: Manually specify the installation path of the tool.
Do not use this tool: Disables the use of the tool. The tool will be hidden from the context menu in the connection list.
DataGrip Connection Guide: Configure whether to continuously display the guide modal when opening a connection with DataGrip.
Selecting Default Privilege in the Agent
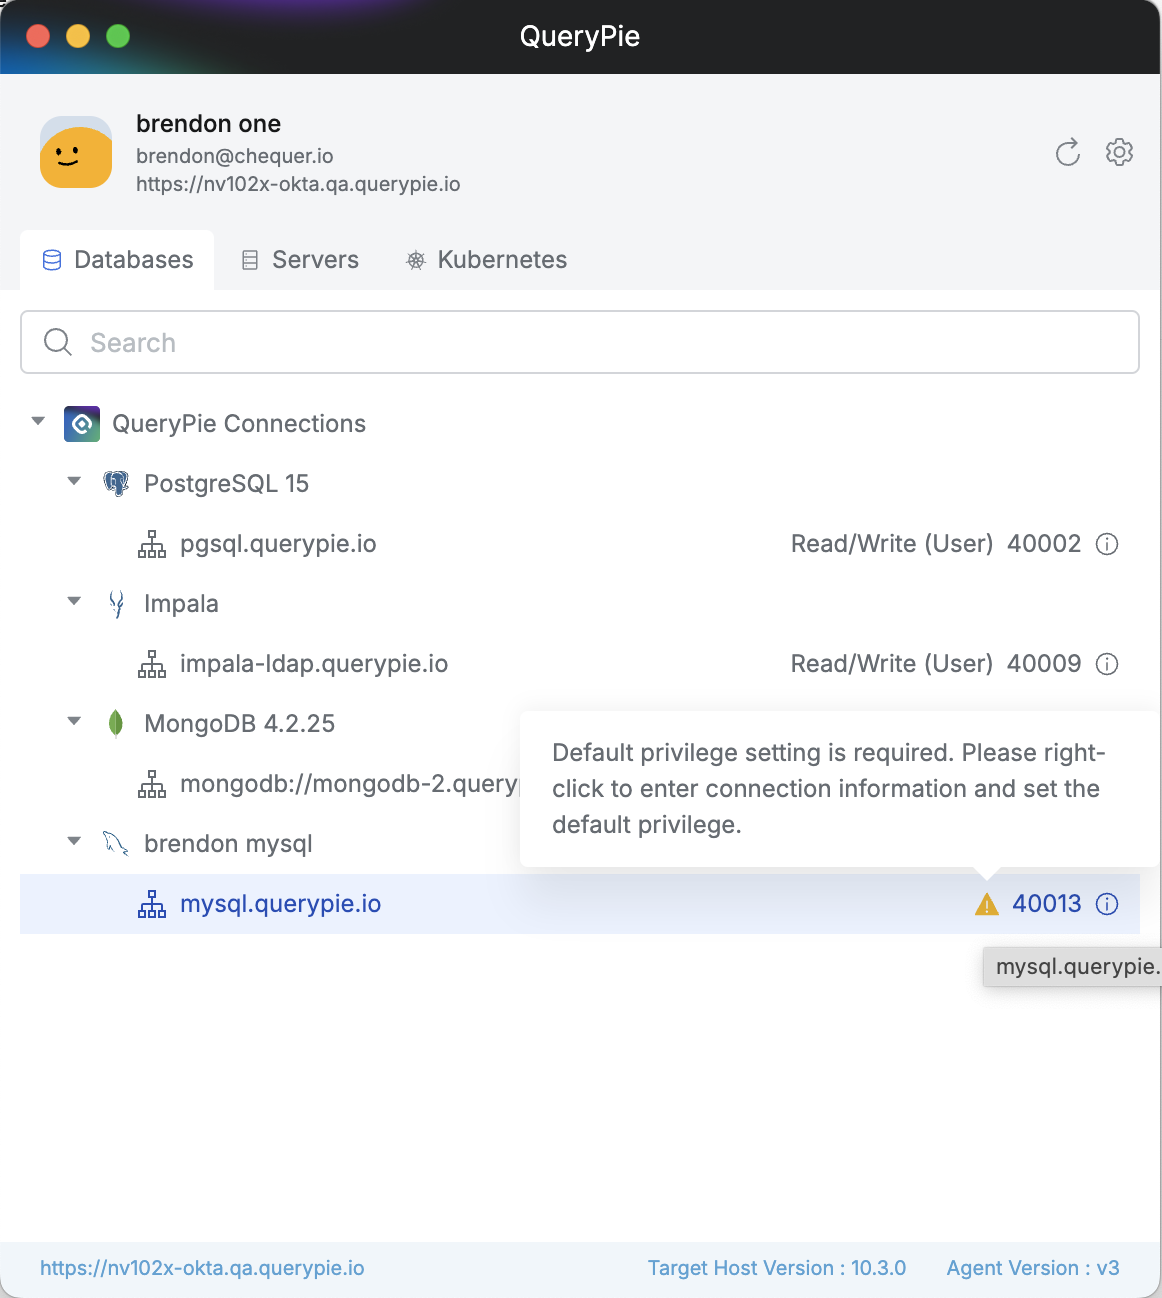
n QueryPie Database Access Control, a user can be granted more than one privilege for a connection. If a user with access to a specific connection belongs to multiple groups, and different access rights are granted to these groups, the user may be assigned multiple privileges. In such cases, you can select the Privilege to be used for proxy connections within the agent screen (supported from version 10.3.0).
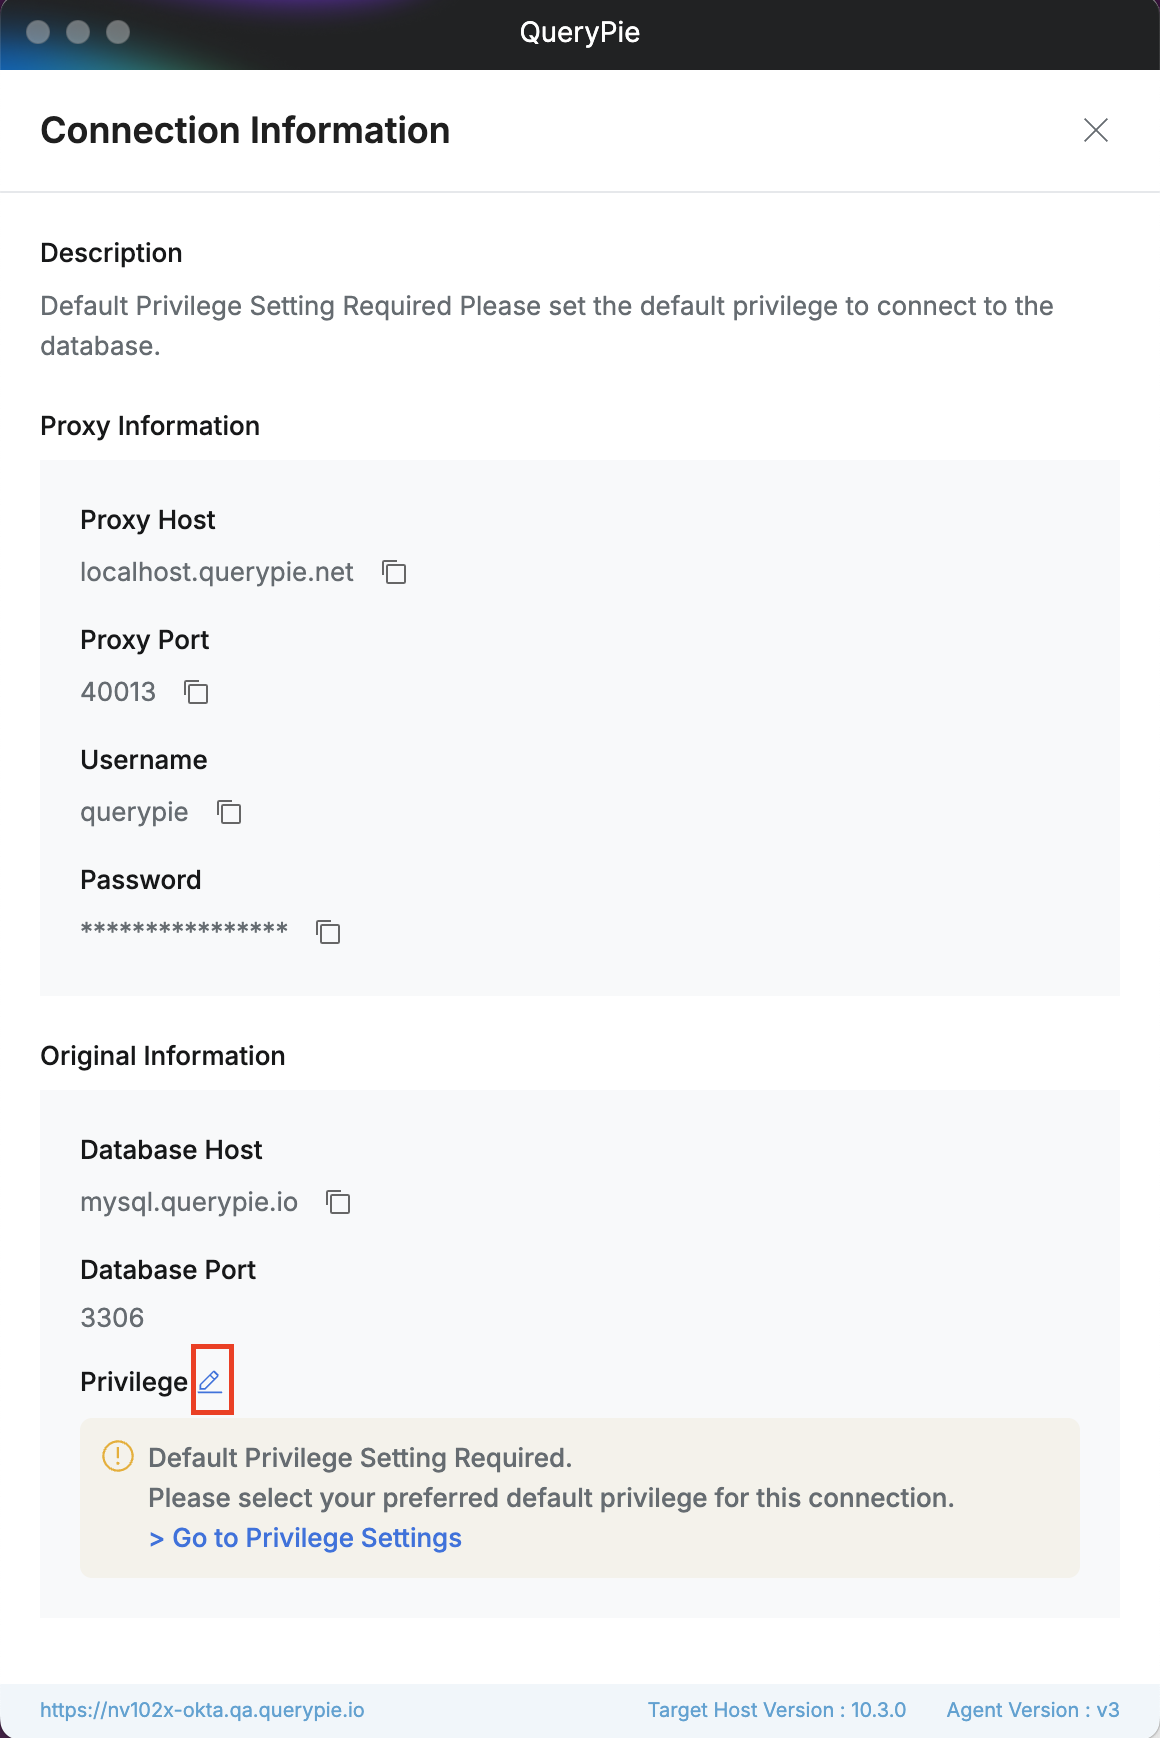
If multiple privileges are granted and the user has not set a default privilege, connection will not be possible. If a default privilege is not set, a warning icon will be displayed next to the connection, as shown below.
Right-click on a connection for which multiple privileges are assigned to open the context menu.
Select Connection Information from the menu.
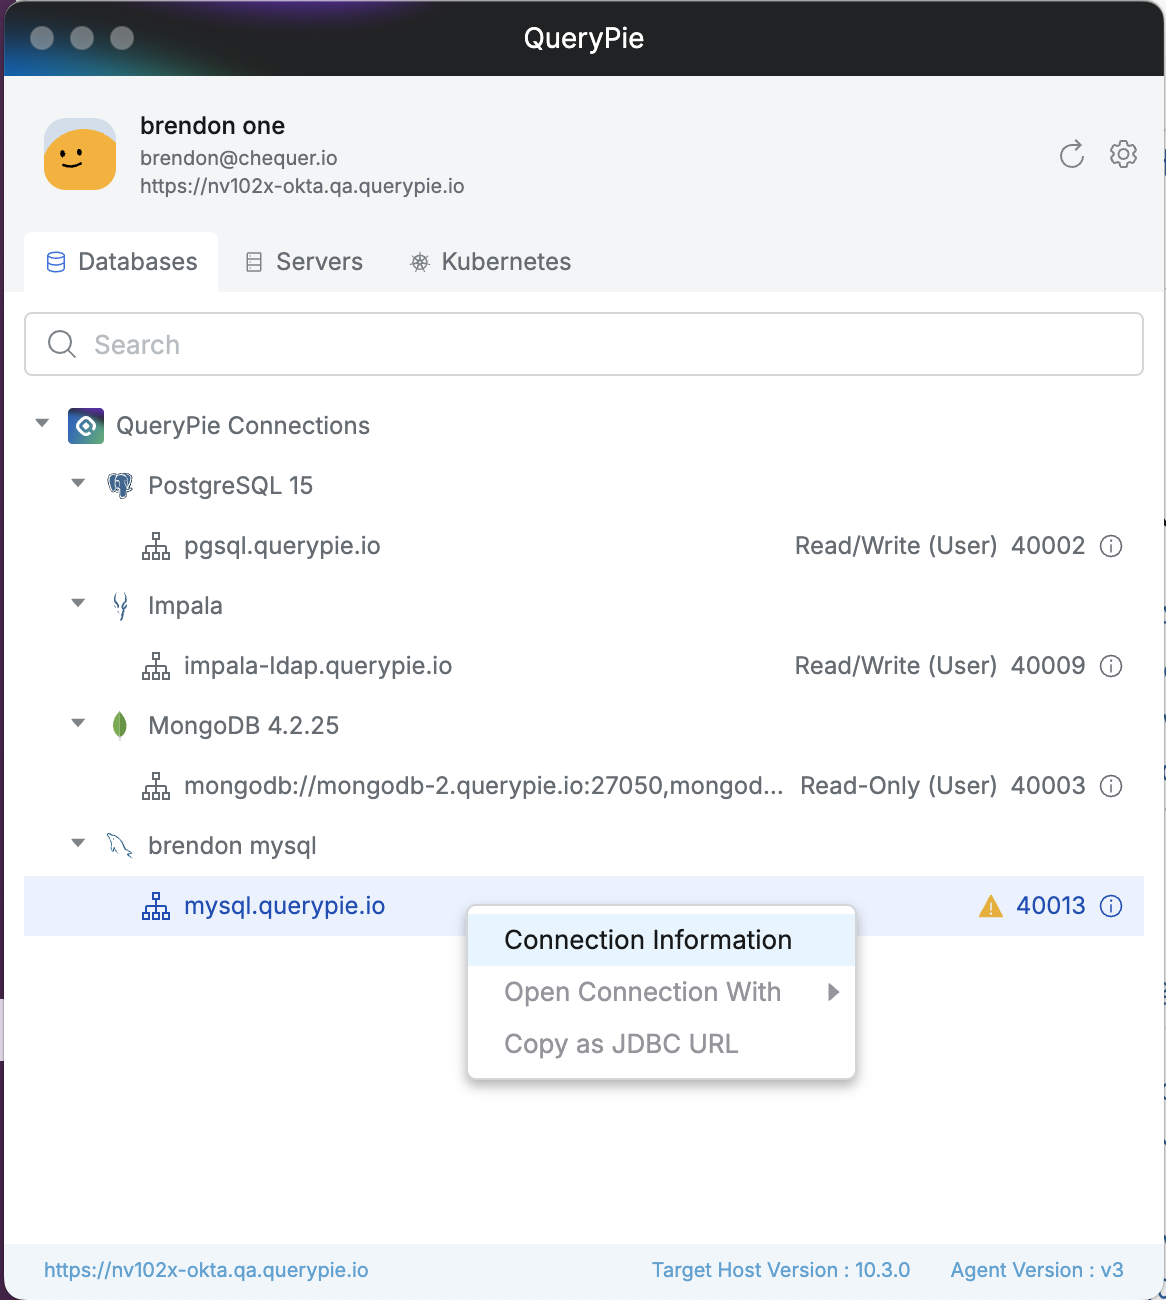
Connection Information
In the Original Information section, click the edit (pencil icon) button next to Privilege.
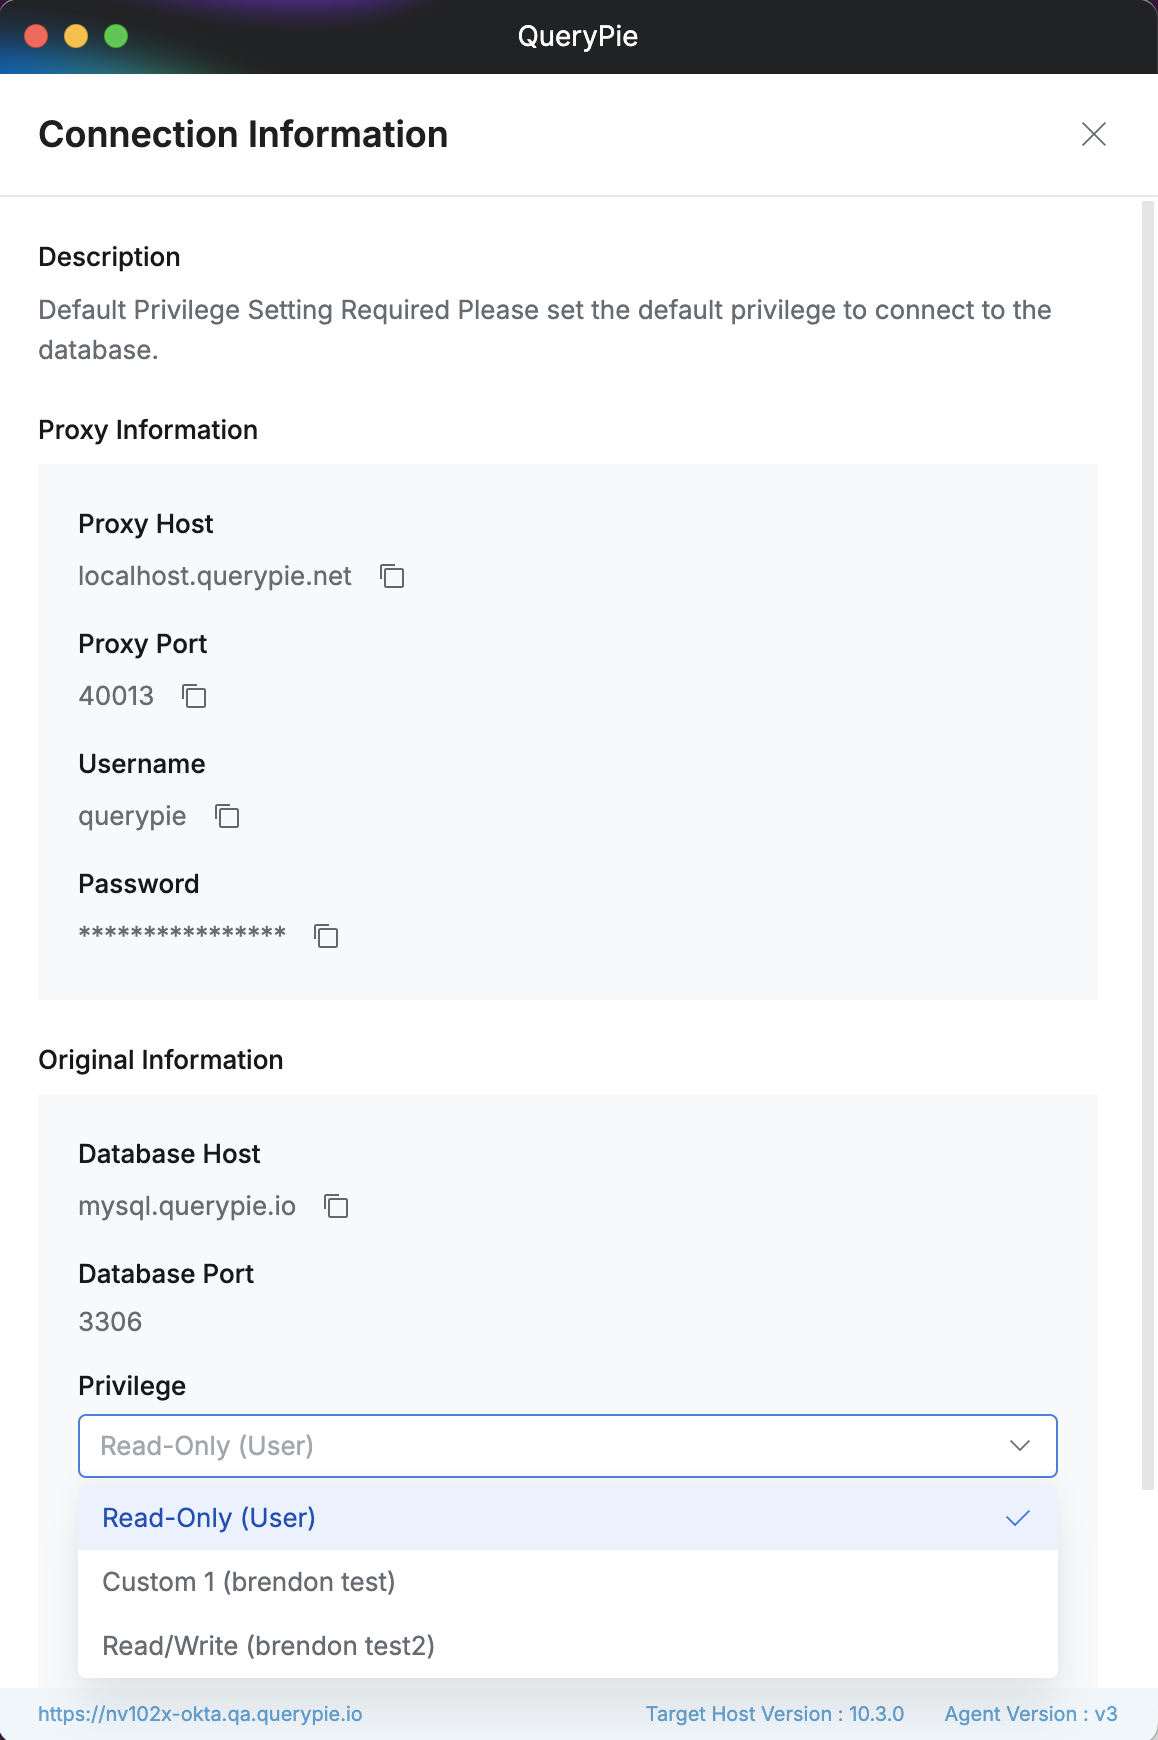
Select one of the items under Privilege Name and save your selection.
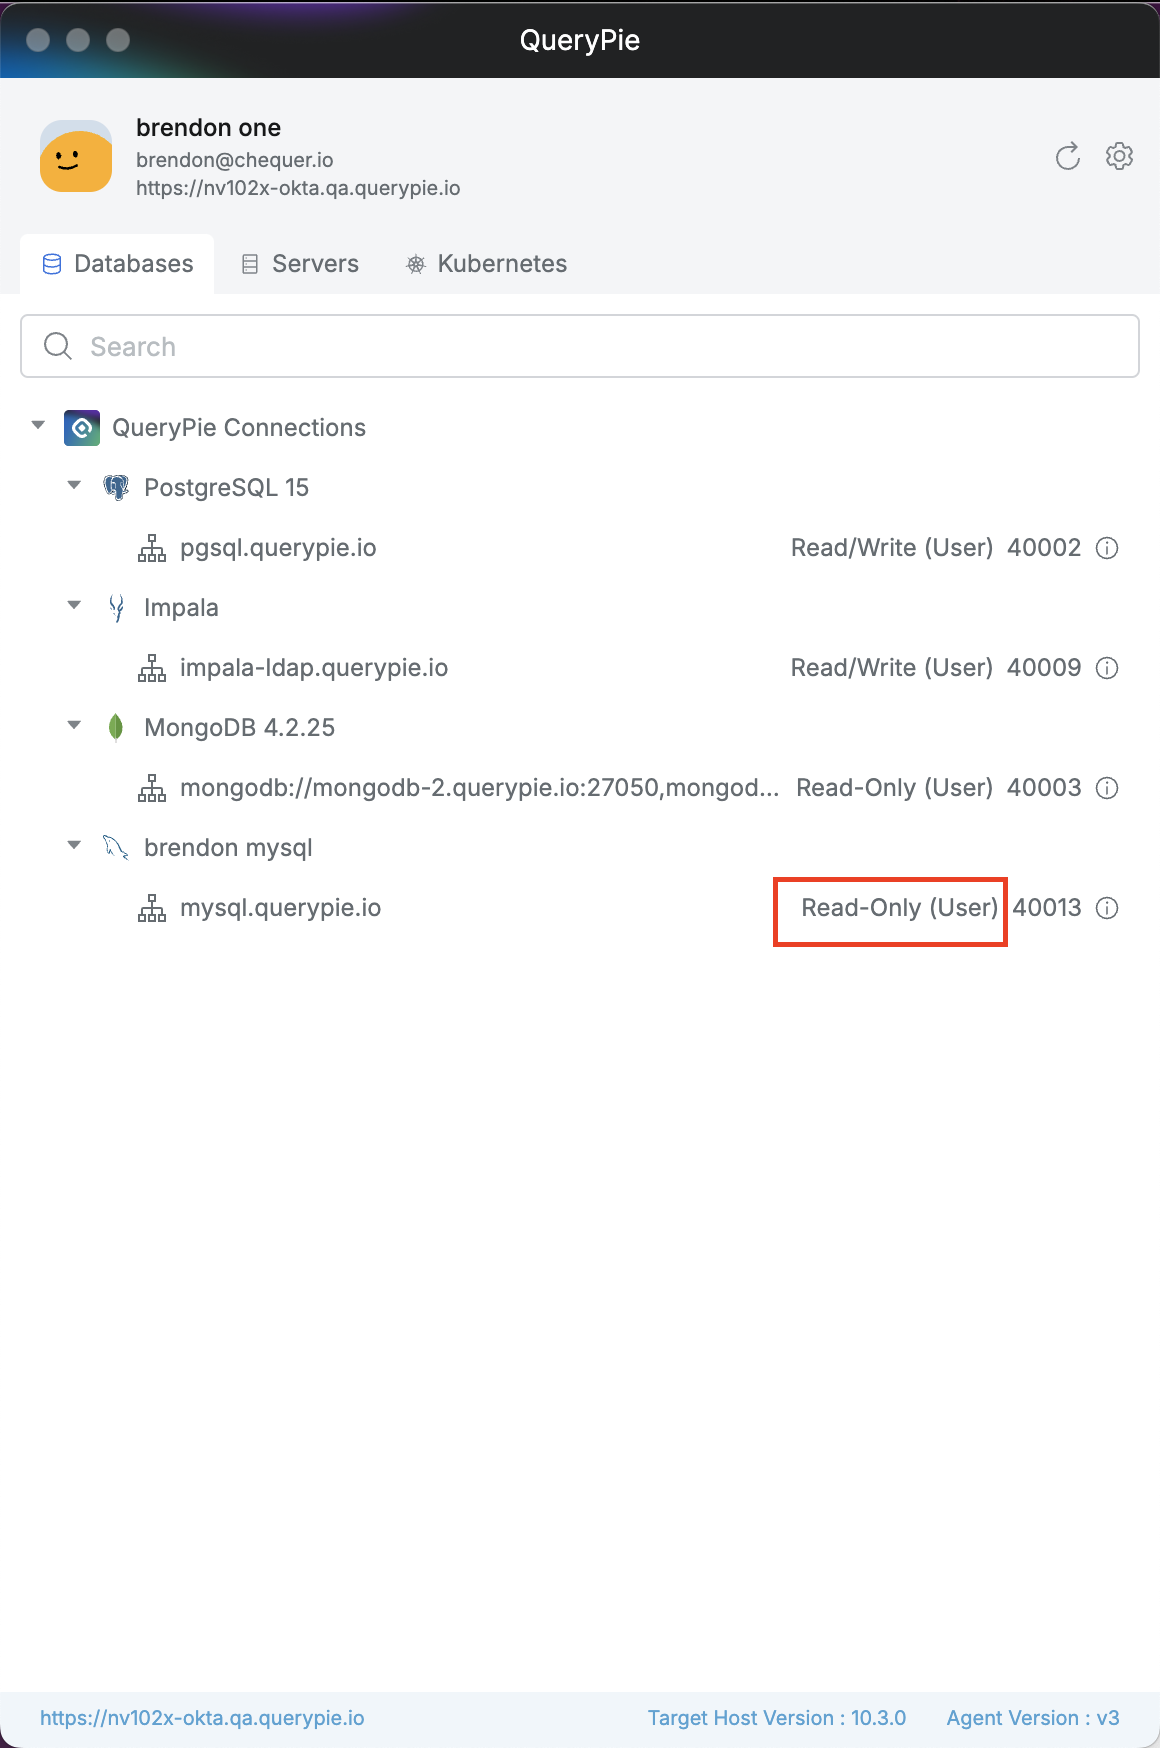
Verify that the warning icon disappears and the name of the assigned default privilege is displayed for that connection.
KAC
Viewing Kubernetes Cluster List by Role in the Agent
From the Role selector, choose one of the Roles assigned to you. Then, the list of K8s Clusters for which the selected Role has been granted privileges will be displayed.
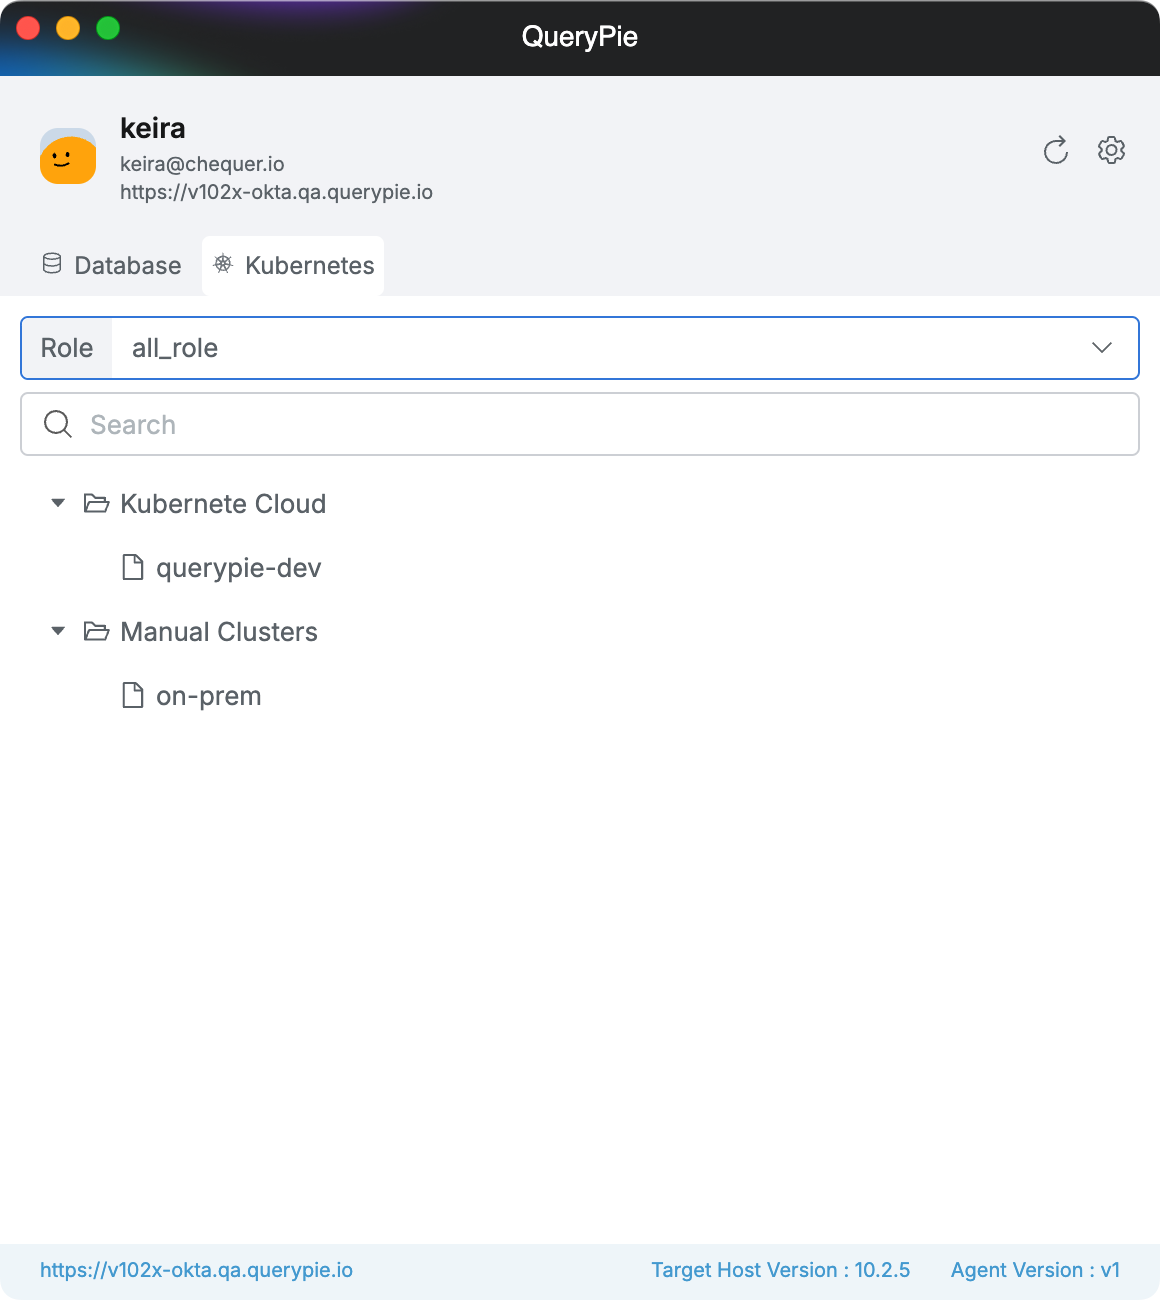
Multi-Agent > Kubernetes
Checking Kubeconfig Setup Guide in the Agent
A one-time Kubeconfig setup is required to use kubectl commands through the Proxy.
Click the gear icon (Settings) in the top-right corner of the Agent to enter the Settings page.
Select the Kubernetes tab. Here, you can manage the Kubeconfig file save path and copy the Kubeconfig setup command.
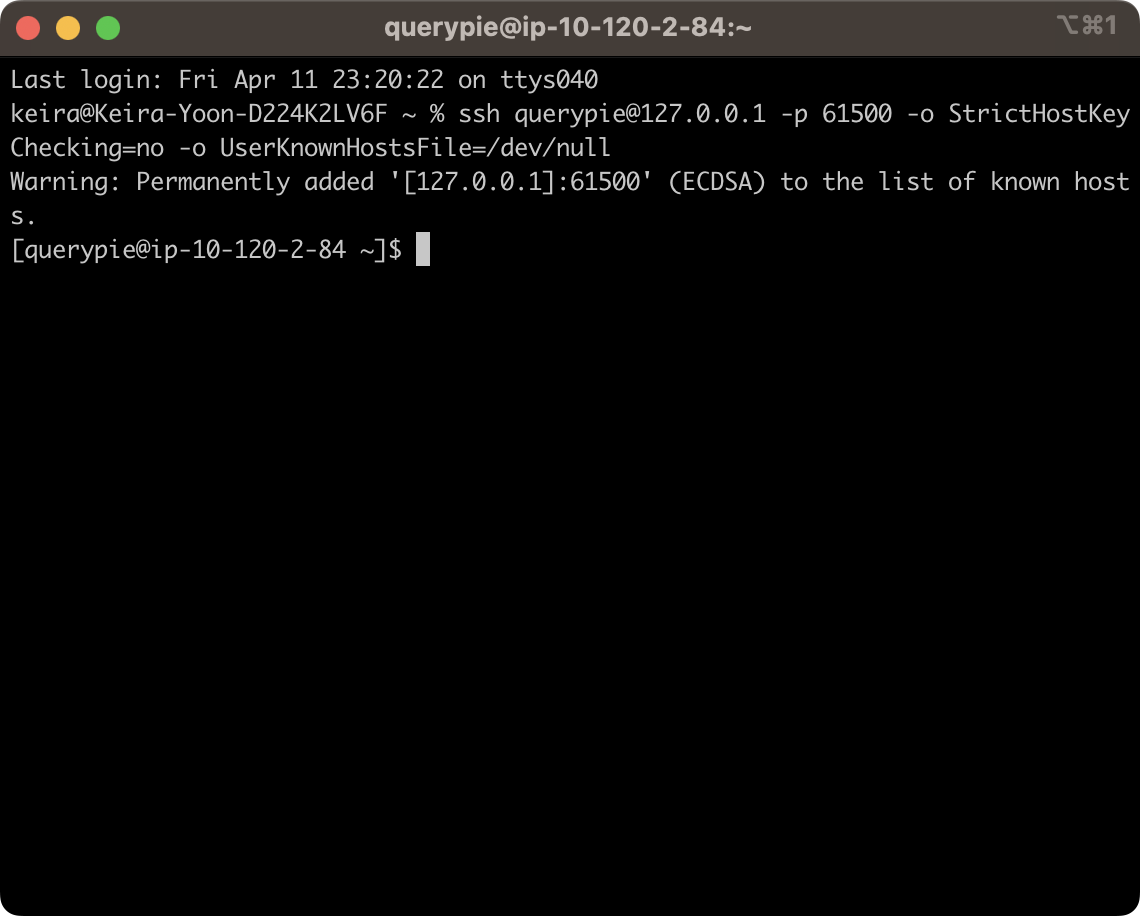
Paste the copied command into your terminal and execute it.
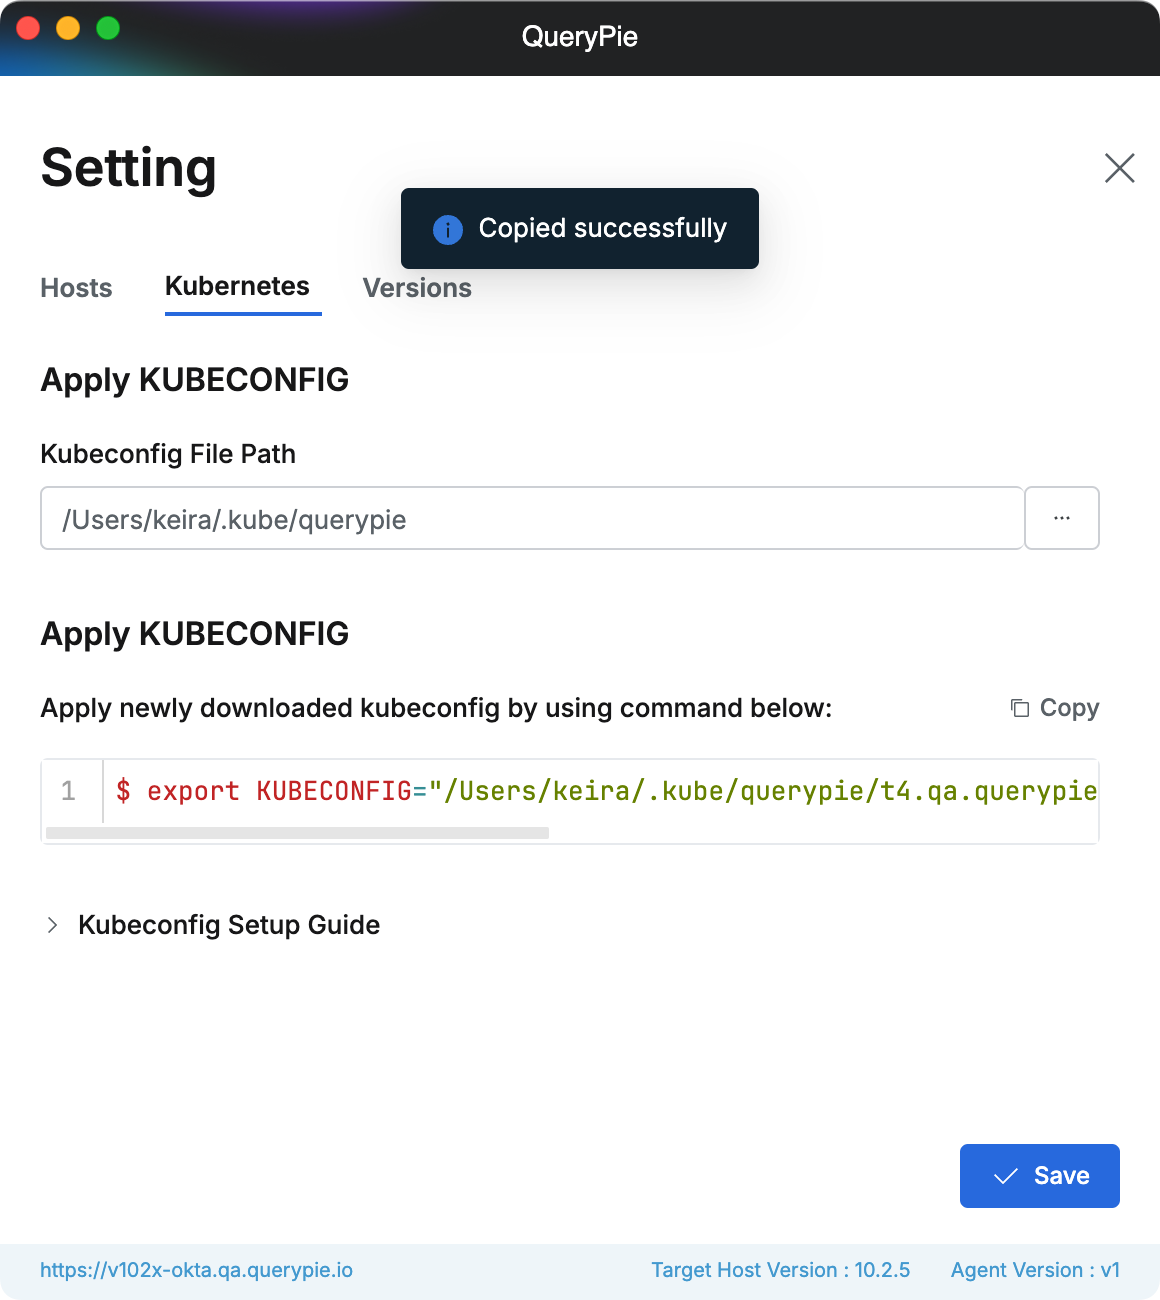
Multi-Agent > Setting > Kubernetes
SAC 10.2.8~
Connecting to Servers via the Agent
Select a Role from the Role dropdown menu. This will display a list of servers accessible with the selected Role.

Multi-Agent > Servers
Select a server, right-click to open the context menu, and choose Open Connection With > Your Terminal Tool.

Multi-Agent > Servers
If necessary, enter Account information and click the Open button.
You can now connect to the server using your selected terminal tool.
OS Permission Modal
Terminal Tool Access (One-time request): The first time you attempt to open a connection with a specific terminal tool, the OS will request permission for QueryPie Multi Agent to control that tool. If you do not
grantpermission, the terminal tool cannot be opened.System Events (One-time request): The OS may also request permission for System Events. Granting this permission allows you to receive notifications for events such as session disconnections in your system's notification area.
Managing 3rd Party Terminal Tool Settings in the Agent
You can manage settings related to terminal tools by navigating to Settings > Servers.
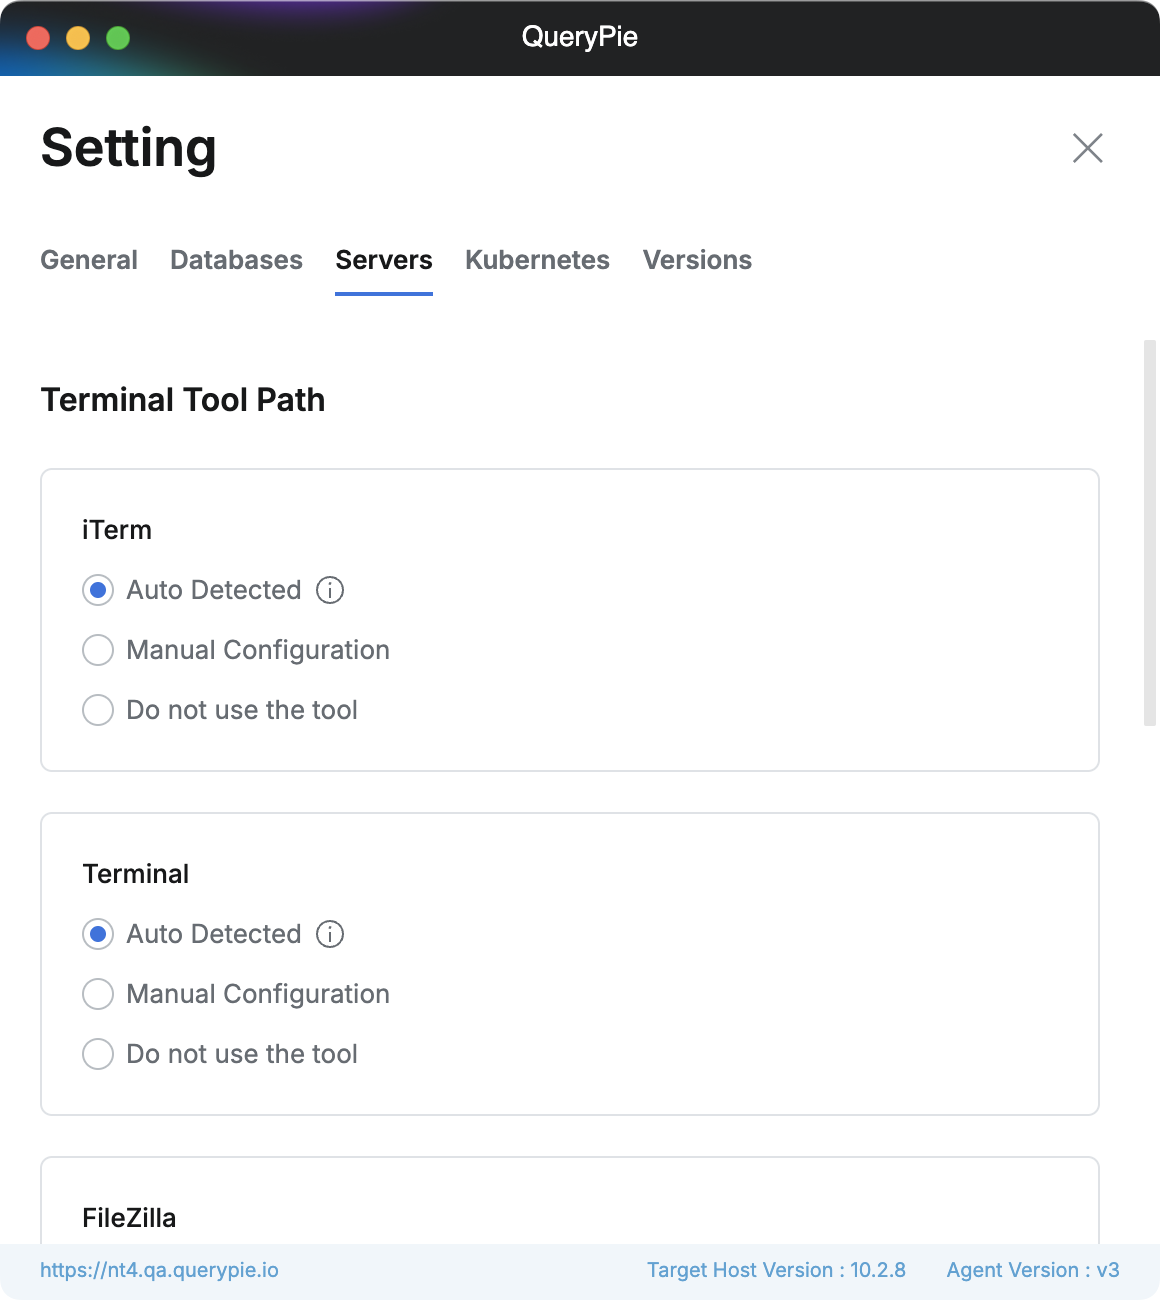
Multi-Agent > Setting > Servers
Terminal Tool Path: Configure the path for supported 3rd party terminal tools.
Auto Detected: Automatically finds the tool's path each time you select a tool via Open Connection With.
If the tool does not open correctly, it is recommended to manually specify the path using Manual Configuration.
Manual Configuration: Manually specify the installation path of the tool.
Do not user the tool: Disables the use of the tool. The tool will be hidden from the context menu in the server list.
Using Multiple Hosts in the Agent
Navigate to Settings > Hosts. Click the
+ Add New Hostbutton, enter the domain of the new Host, and save.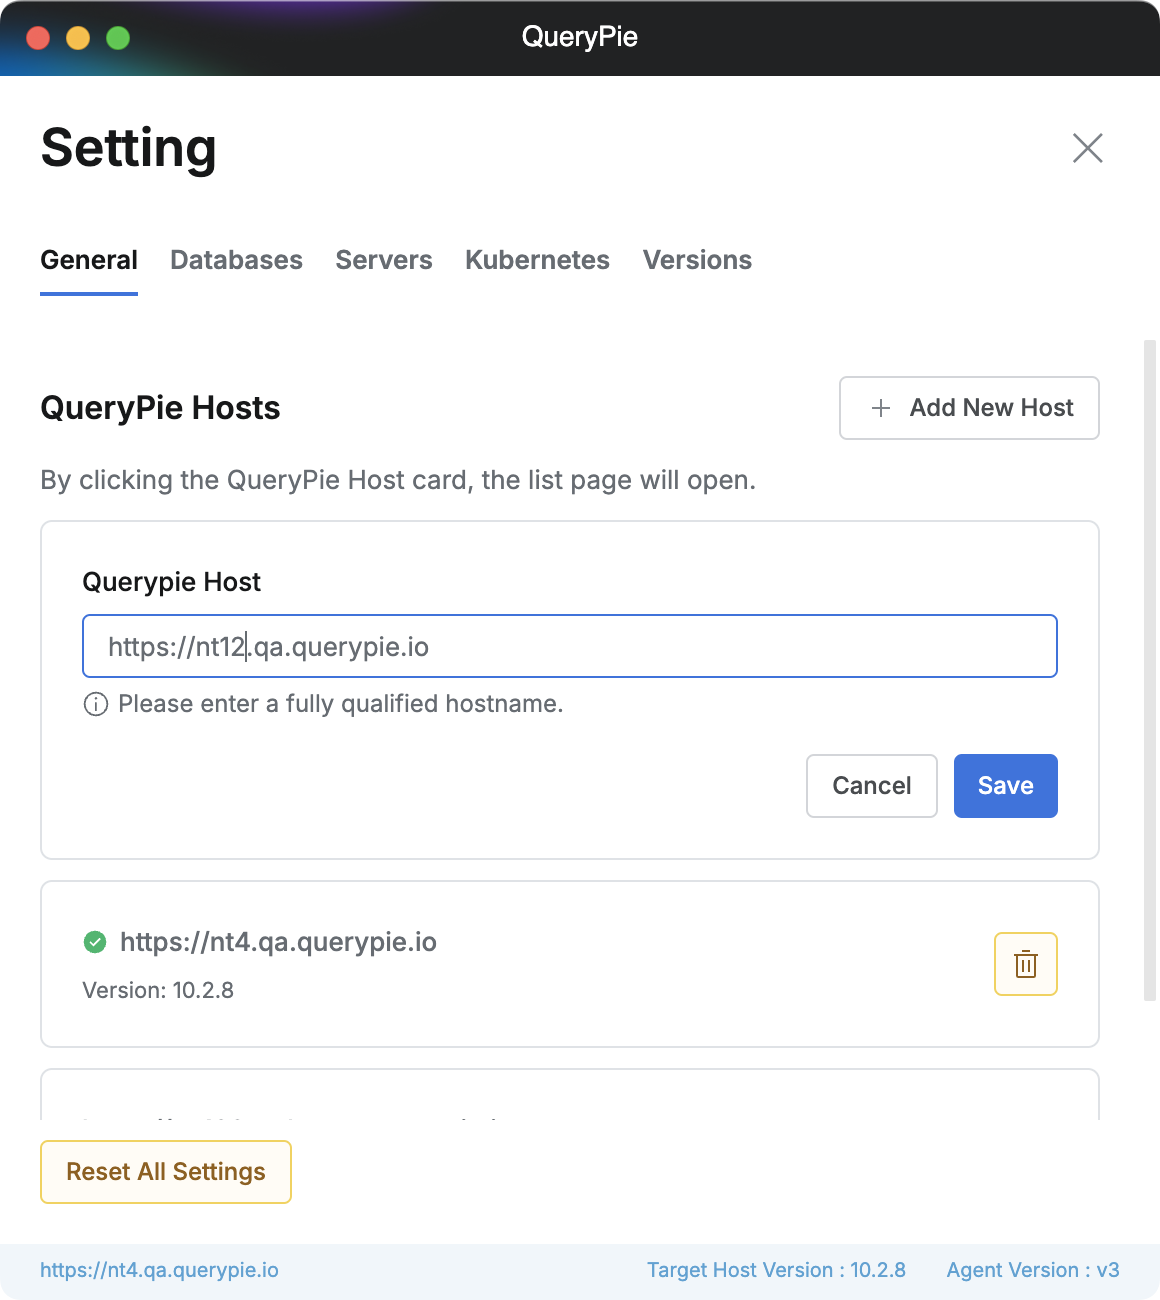
Multi-Agent > Setting > General > Add New Host
A toast notification will confirm if the new Host was successfully registered. Verify that the new Host appears in the list, then click the
Xbutton in the top-right corner to exit the settings page.You can switch between Hosts by clicking the desired Host in the list on the main agent screen.
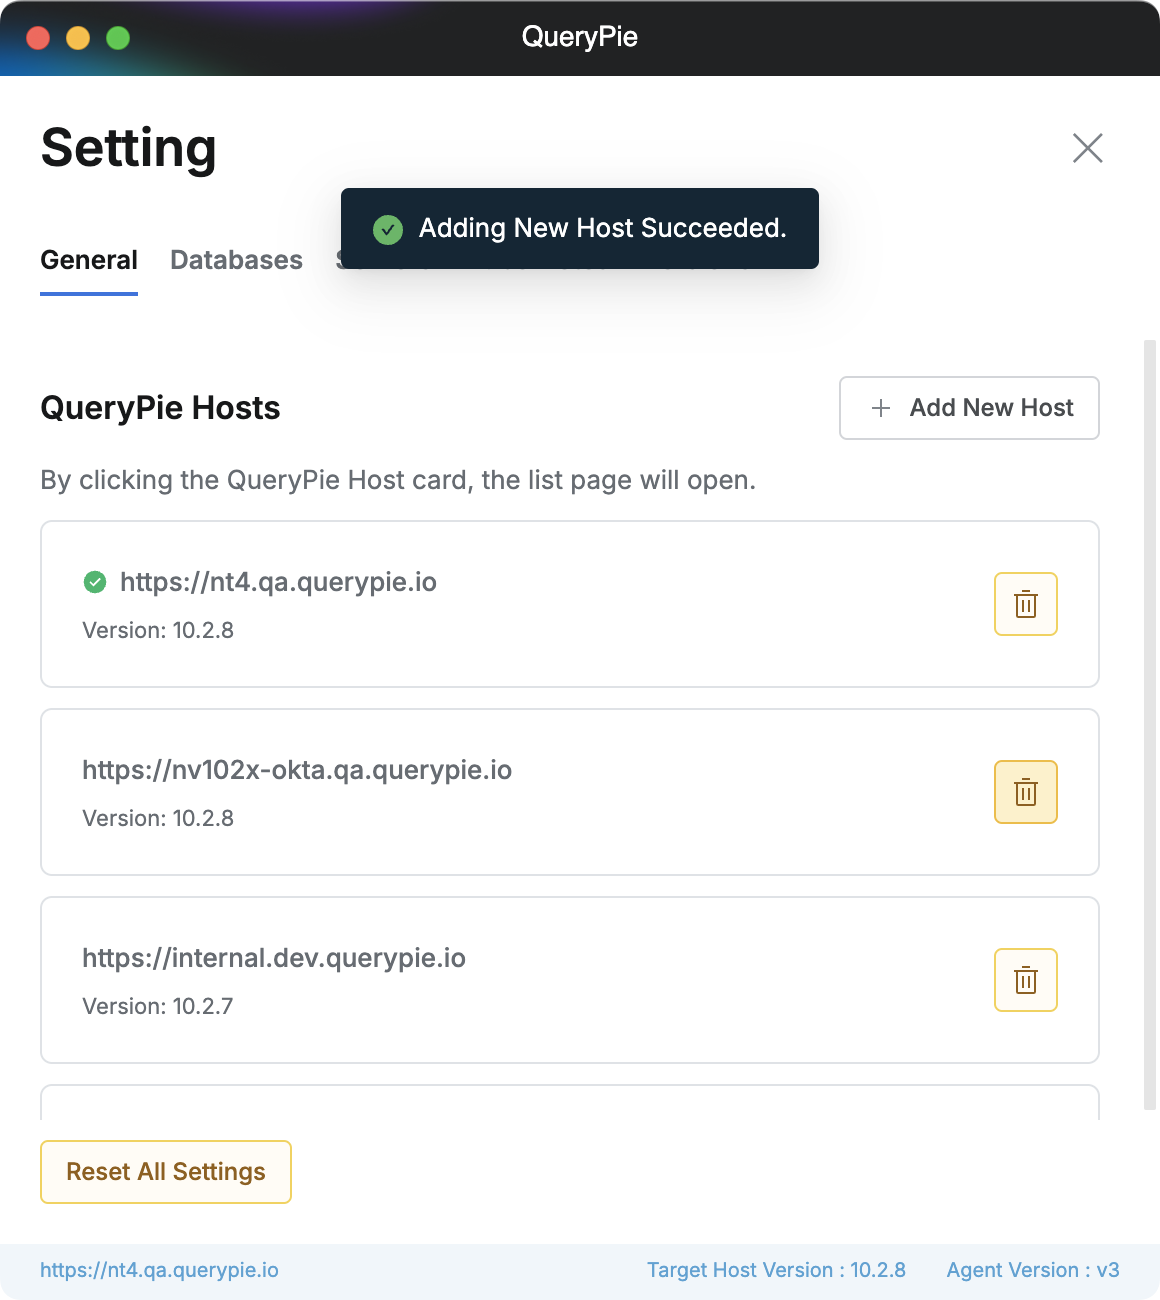
Multi-Agent > Setting > General
Alternatively, click the
profilebutton. A list of registered Hosts will be displayed, allowing you to switch between them.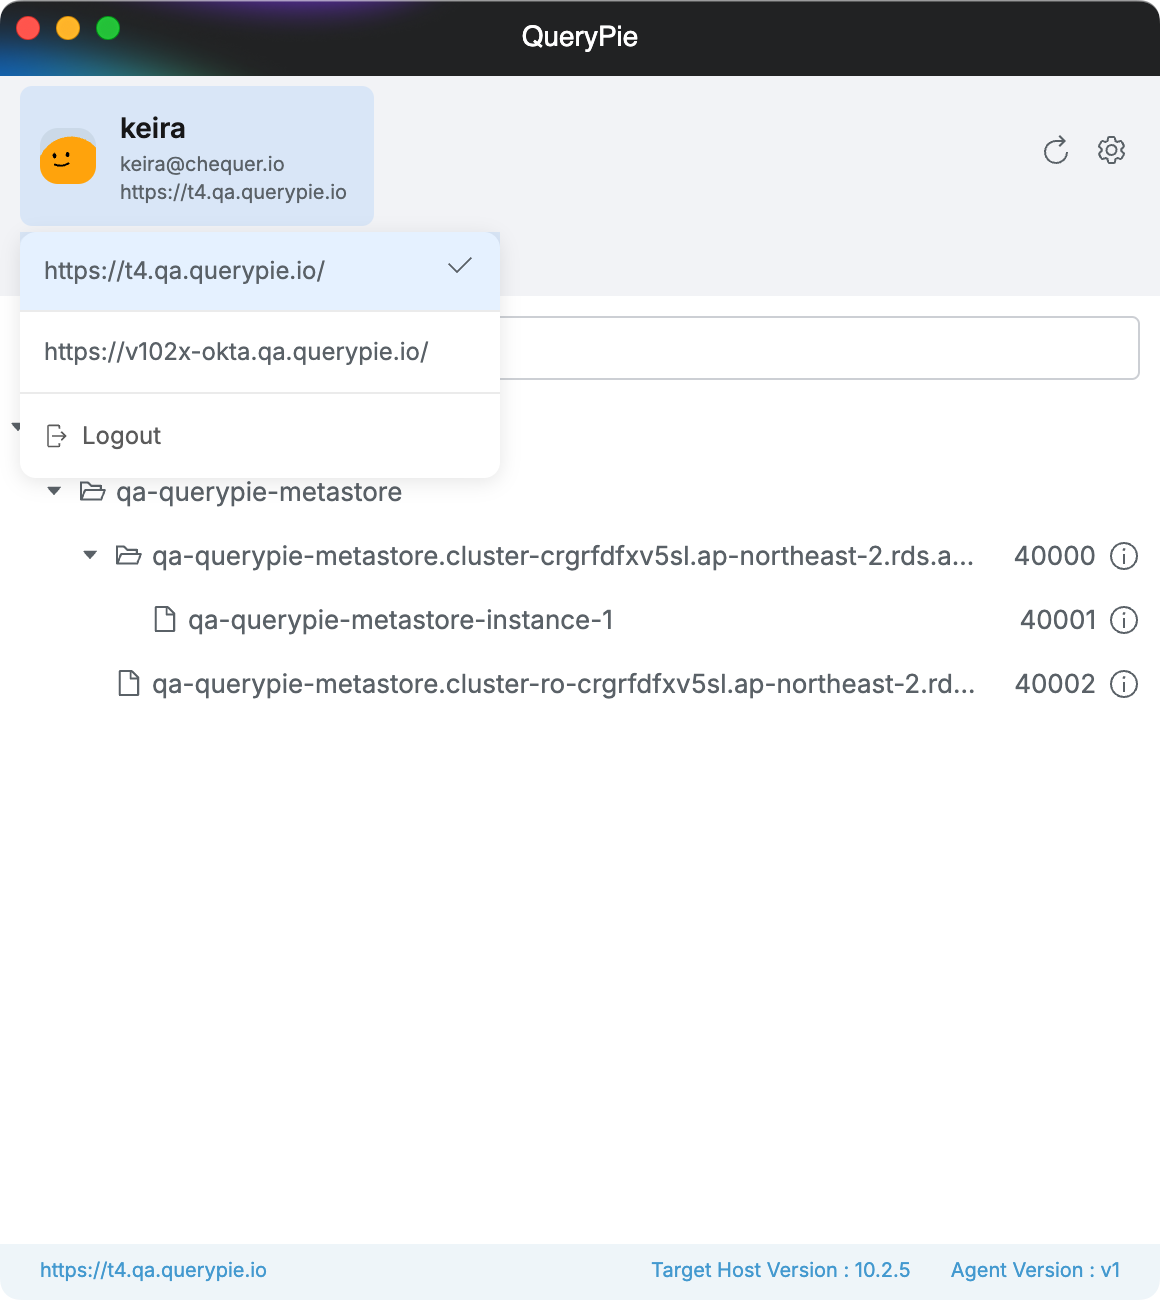
Multi-Agent > Click Profile menu
Switching Hosts is necessary for the initial login to each Host. However, once you are logged in and a proxy connection is established for a resource, you can access all registered resources from any logged-in Host without needing to switch the active Host view in the UI.
Resetting Multi Agent Settings
Click the Multi Agent icon in the system tray (Windows) or menu bar (macOS). From the menu that appears, select Reset All Settings.
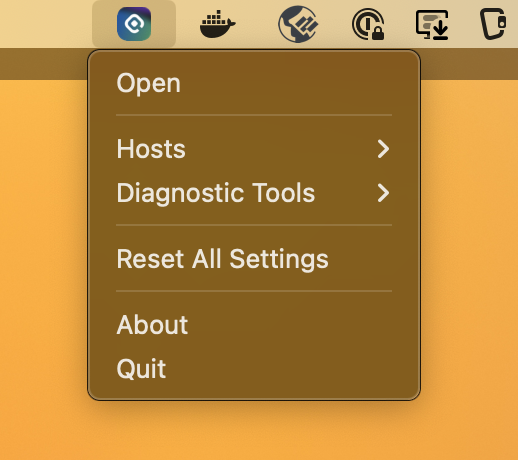
Status Bar Item (MacOS)
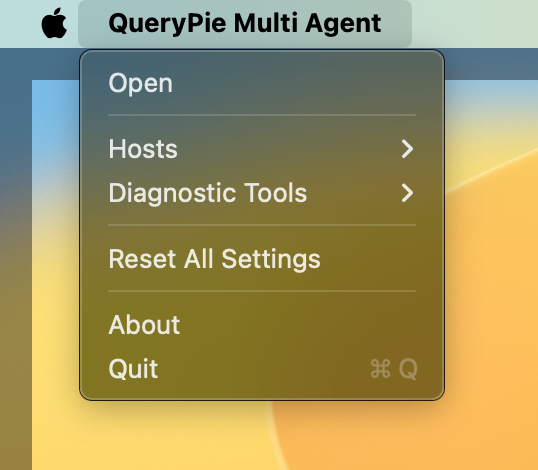
Application Menu (MacOS)
Click the gear icon (Settings) in the top-right corner of the Agent to enter the Settings page. Navigate to the Hosts tab and click the Reset All Settings button at the bottom.
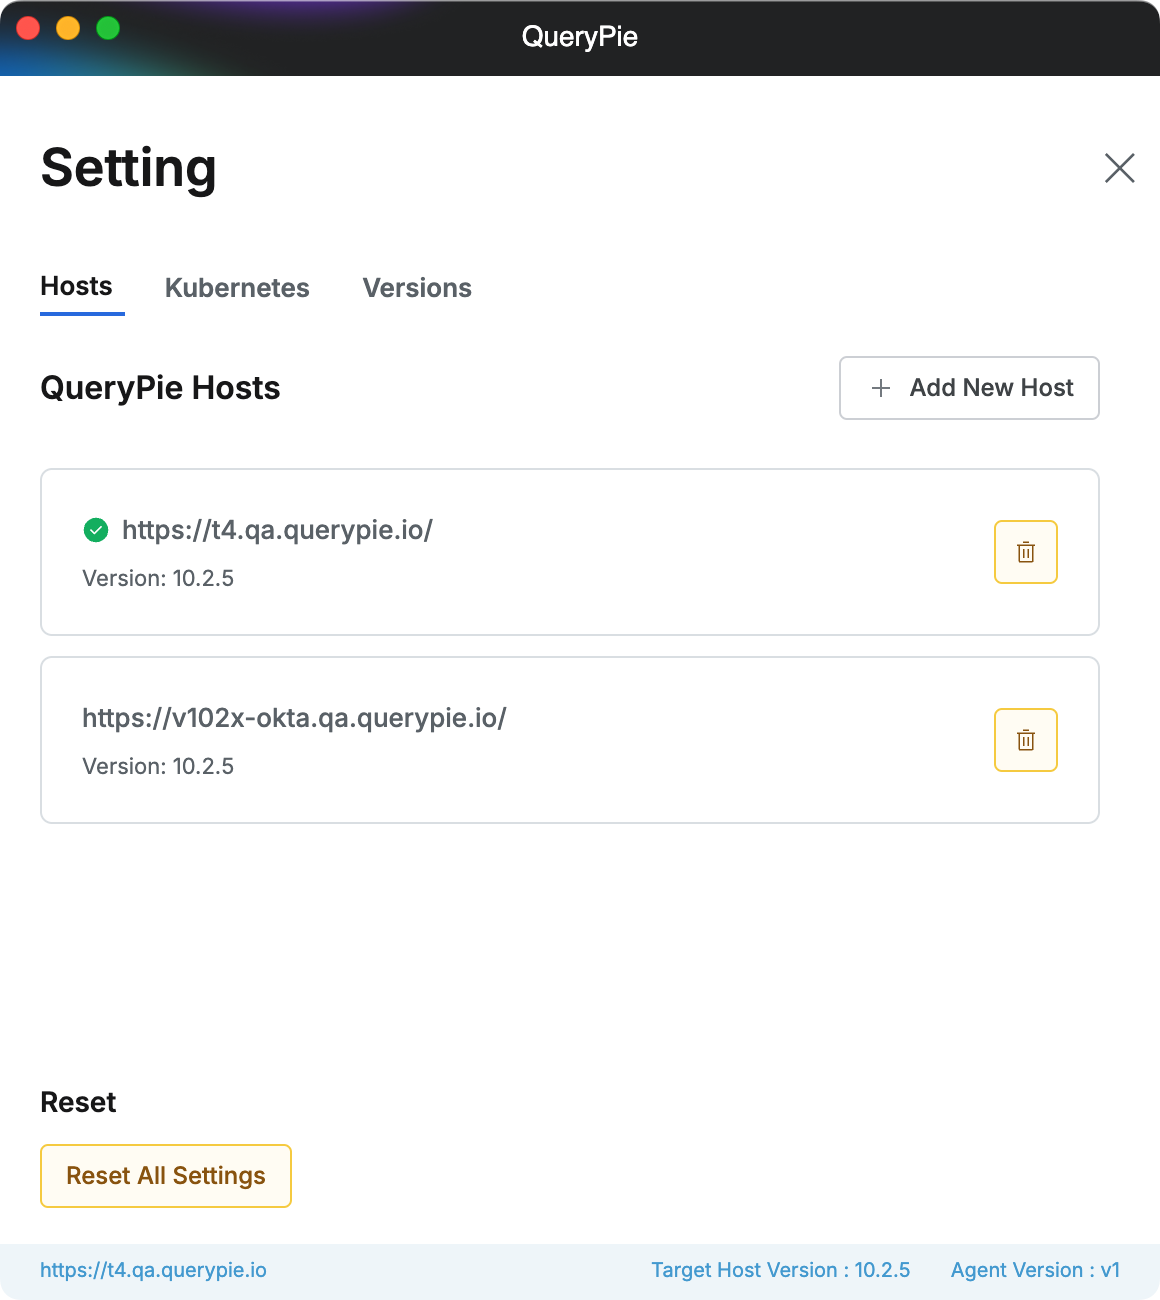
Multi-Agent > Setting > Hosts
A confirmation modal will appear. Click the
Resetbutton. All settings stored in the local folder will be initialized.
Multi-Agent > Setting > Hosts > Reset All Settings
You will be taken back to the Multi Agent initial setup page (Host registration).

Multi-Agent > Host Setting
Extracting Multi Agent Logs
If you encounter issues while using Multi Agent, please extract the logs using the following procedures:
GUI
.png?inst-v=6dadf189-2e62-4164-92e9-96a3901845ab)
MacOS
.png?inst-v=6dadf189-2e62-4164-92e9-96a3901845ab)
Windows
Click the Multi Agent icon in the menu bar (macOS) or system tray (Windows). Navigate to Diagnostic Tools > Enable Tracing.
This changes the log level to Trace, and the menu item will change to Disable Tracing.
Reproduce the issue.
Click the Multi Agent icon again, then navigate to Diagnostic Tools > Export Log.
Provide the exported log file to the support team.
macOS
Quit the Agent. Open Terminal and execute the following command:
QPMA_TRACE=1 open -a QueryPieMultiAgentReproduce the issue.
Compress the following folder and provide it to the support team:
~/.querypie-multi-agentWindows
Quit the Agent. Open Command Prompt or PowerShell and execute the following commands:
set QPMA_TRACE=1 "%ProgramFiles%\QueryPie Multi Agent\QueryPieMultiAgent.exe"Reproduce the issue.
Compress the following folder and provide it to the support team:
%USERPROFILE%\.querypie-multi-agentConstraints Document for Administrators
For information on Multi Agent constraints relevant to administrators, please refer to the separate administrator guide Multi Agent Constraints.