Custom Data Source: Configuration and Log Review
Custom Data Source is a feature in QueryPie that provides simple proxy-based access control for data sources not natively supported. This allows users to securely access a wider variety of data sources. This feature was added in QueryPie version 10.2.6.
Key Features
Support for Various Data Sources: Enables access to data sources not natively supported by QueryPie.
TCP-Based Access Control: Provides user and IP-based access control.
Agent-Based Connection: Allows connection via the QueryPie Agent using third-party SQL tools.
Creating a Custom Data Source Connection
Warning
Administrators cannot manage ID/Password or SSL/TLS settings within the Custom Data Source configuration.
If authentication is required, users must enter these credentials directly in their third-party SQL tool.
Only simple, non-clustered structures can be registered manually.
Query Audit and statement control features are not supported for Custom Data Sources.
Navigate to DB Connections Menu
Go to Admin > Databases > Connection Management > DB Connections
Click the
+ Create Connectionbutton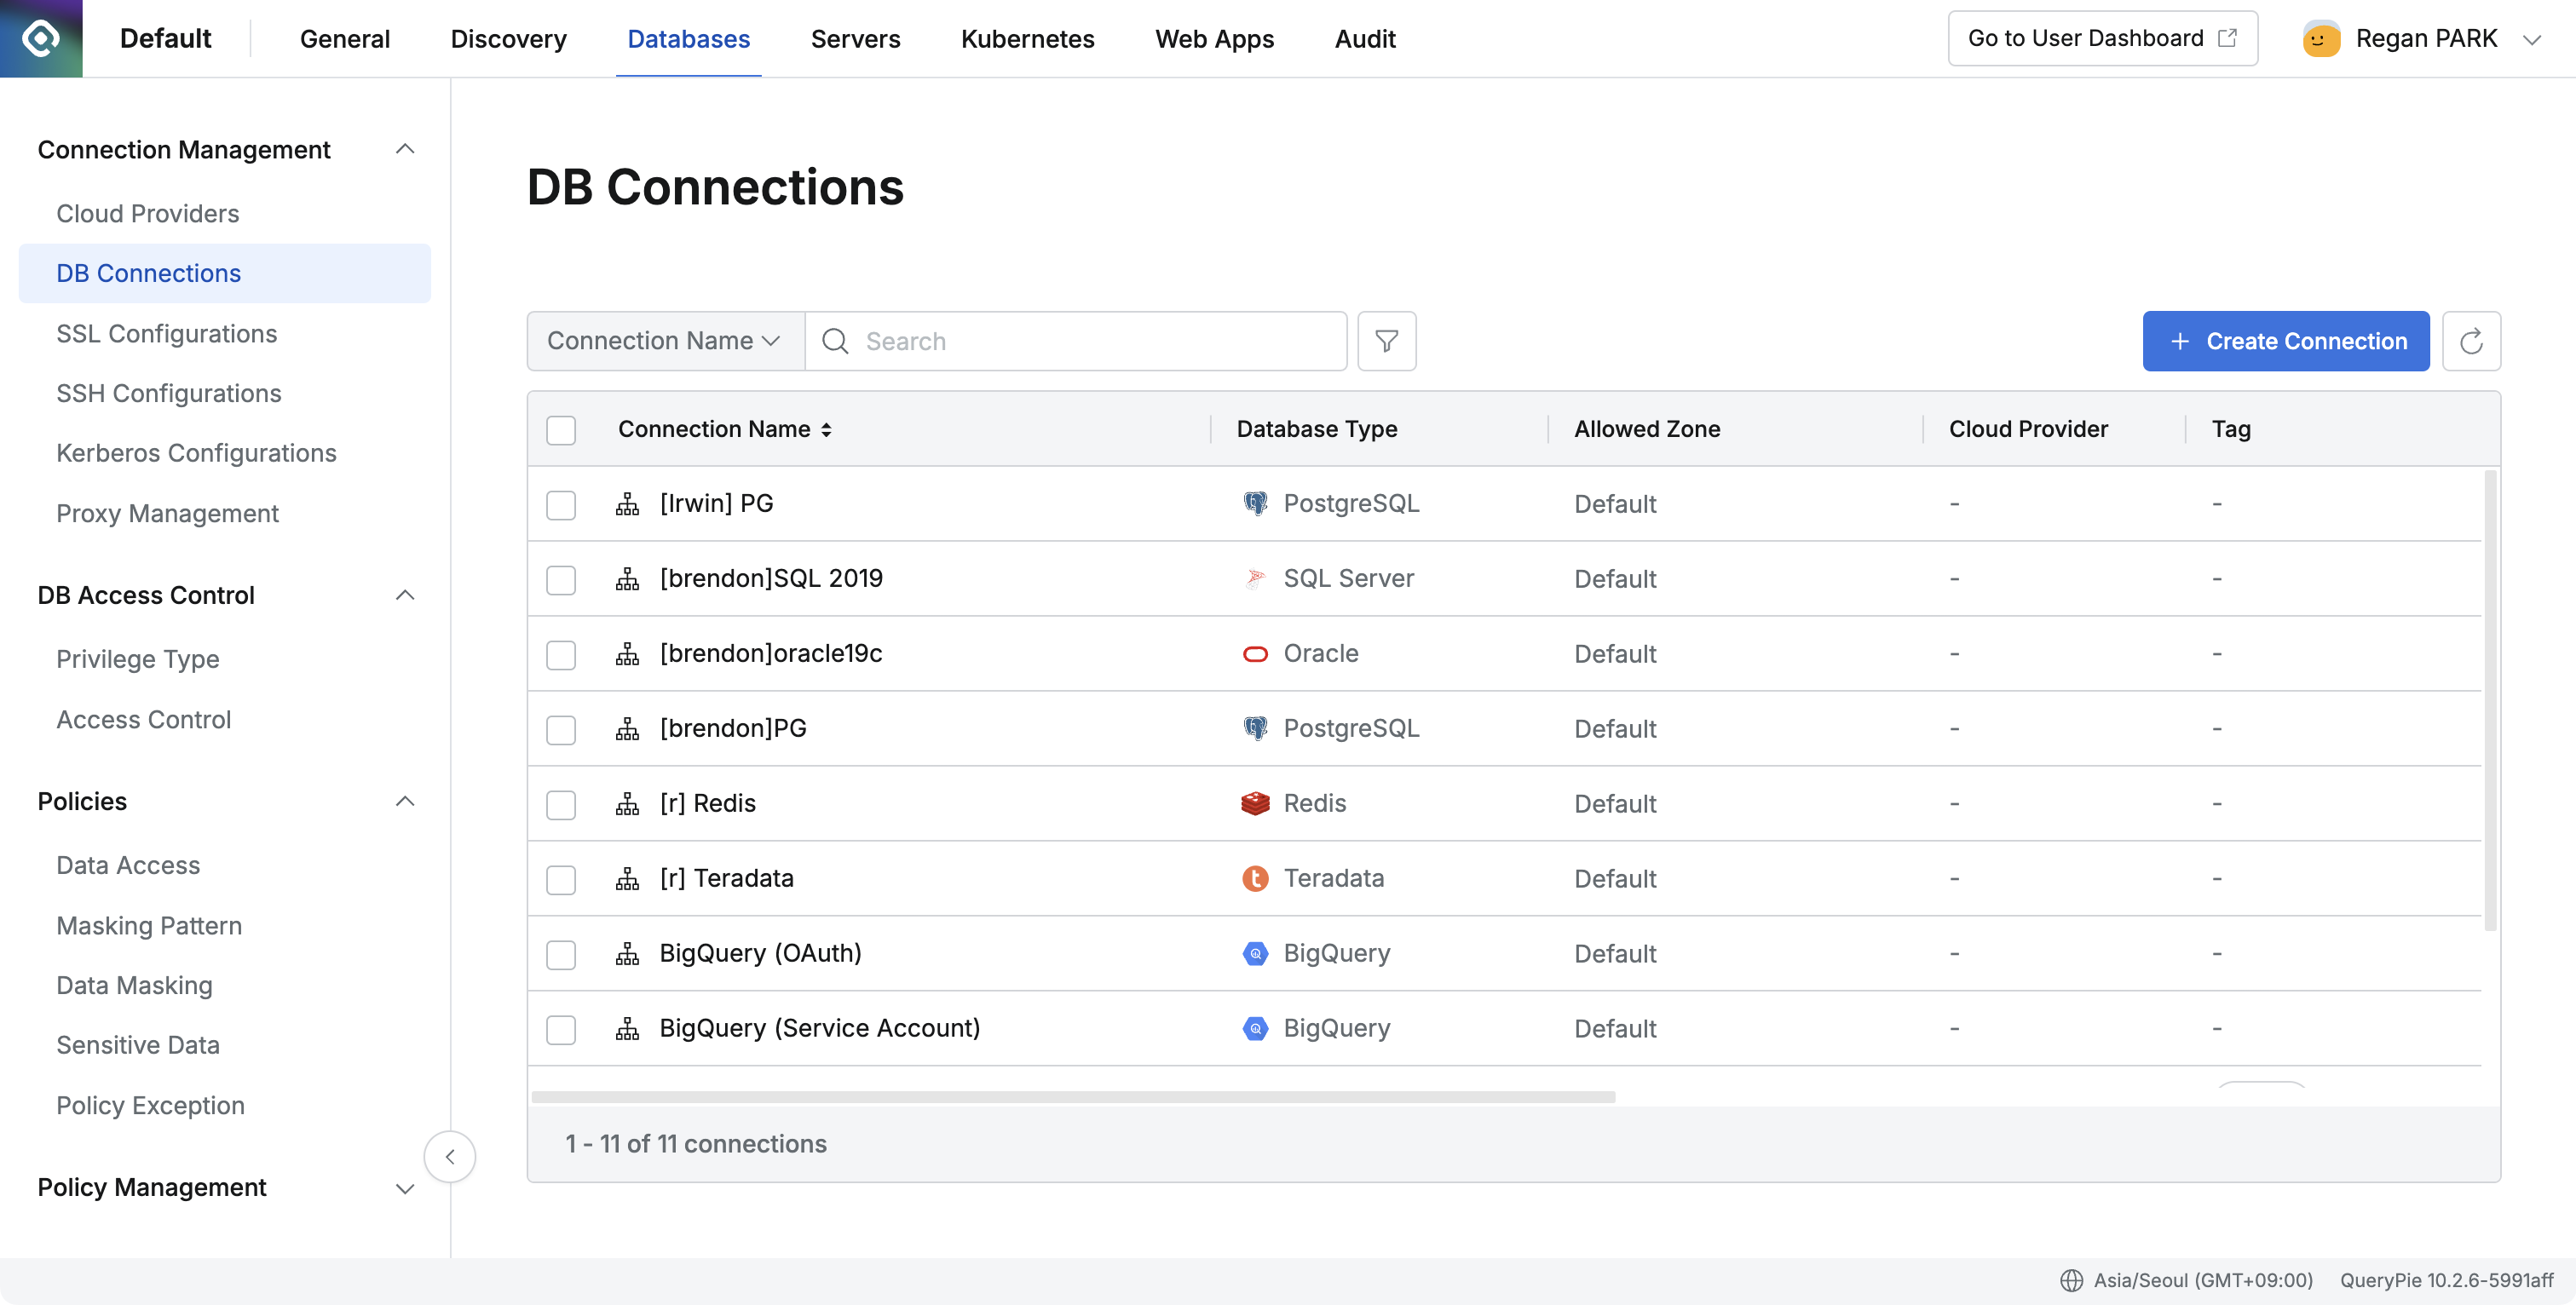
Create Custom Data Source
Click the Custom Data Source icon
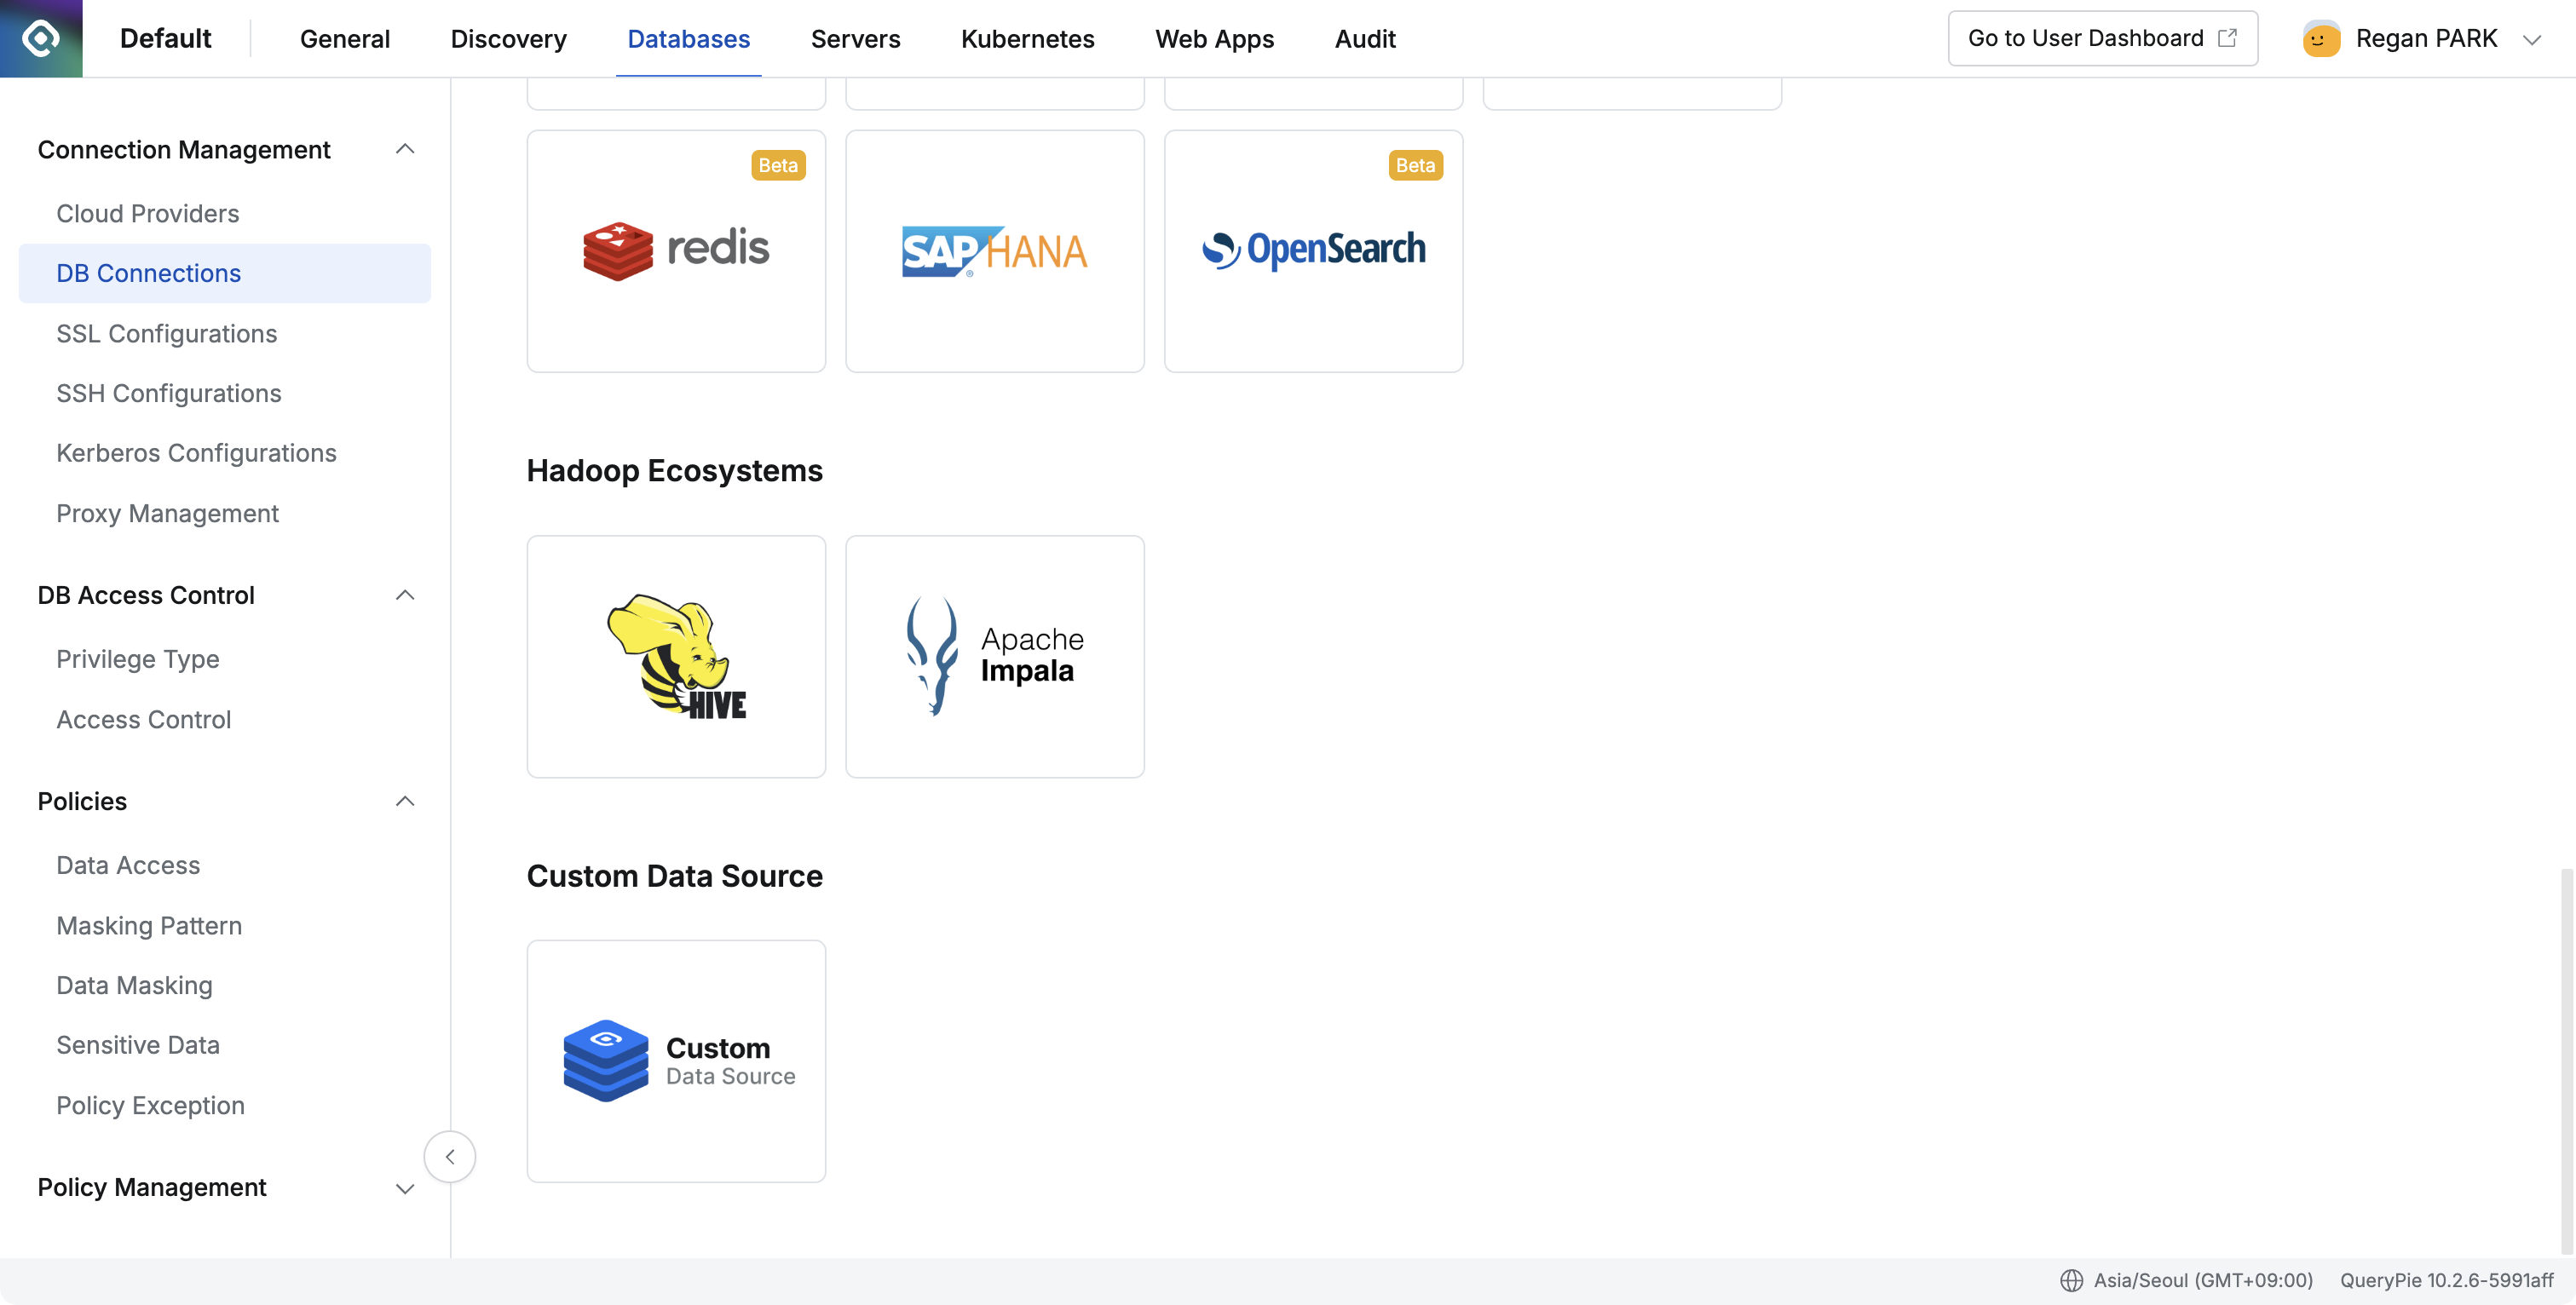
Upon selection, the following warning message will be displayed:
Restrictions:
Only TCP access control is available; Privileges controland Query Audit are not supported.
Access is only possible through a proxy; it cannot be accessed via the web editor.
Enter the connection information according to your desired settings:
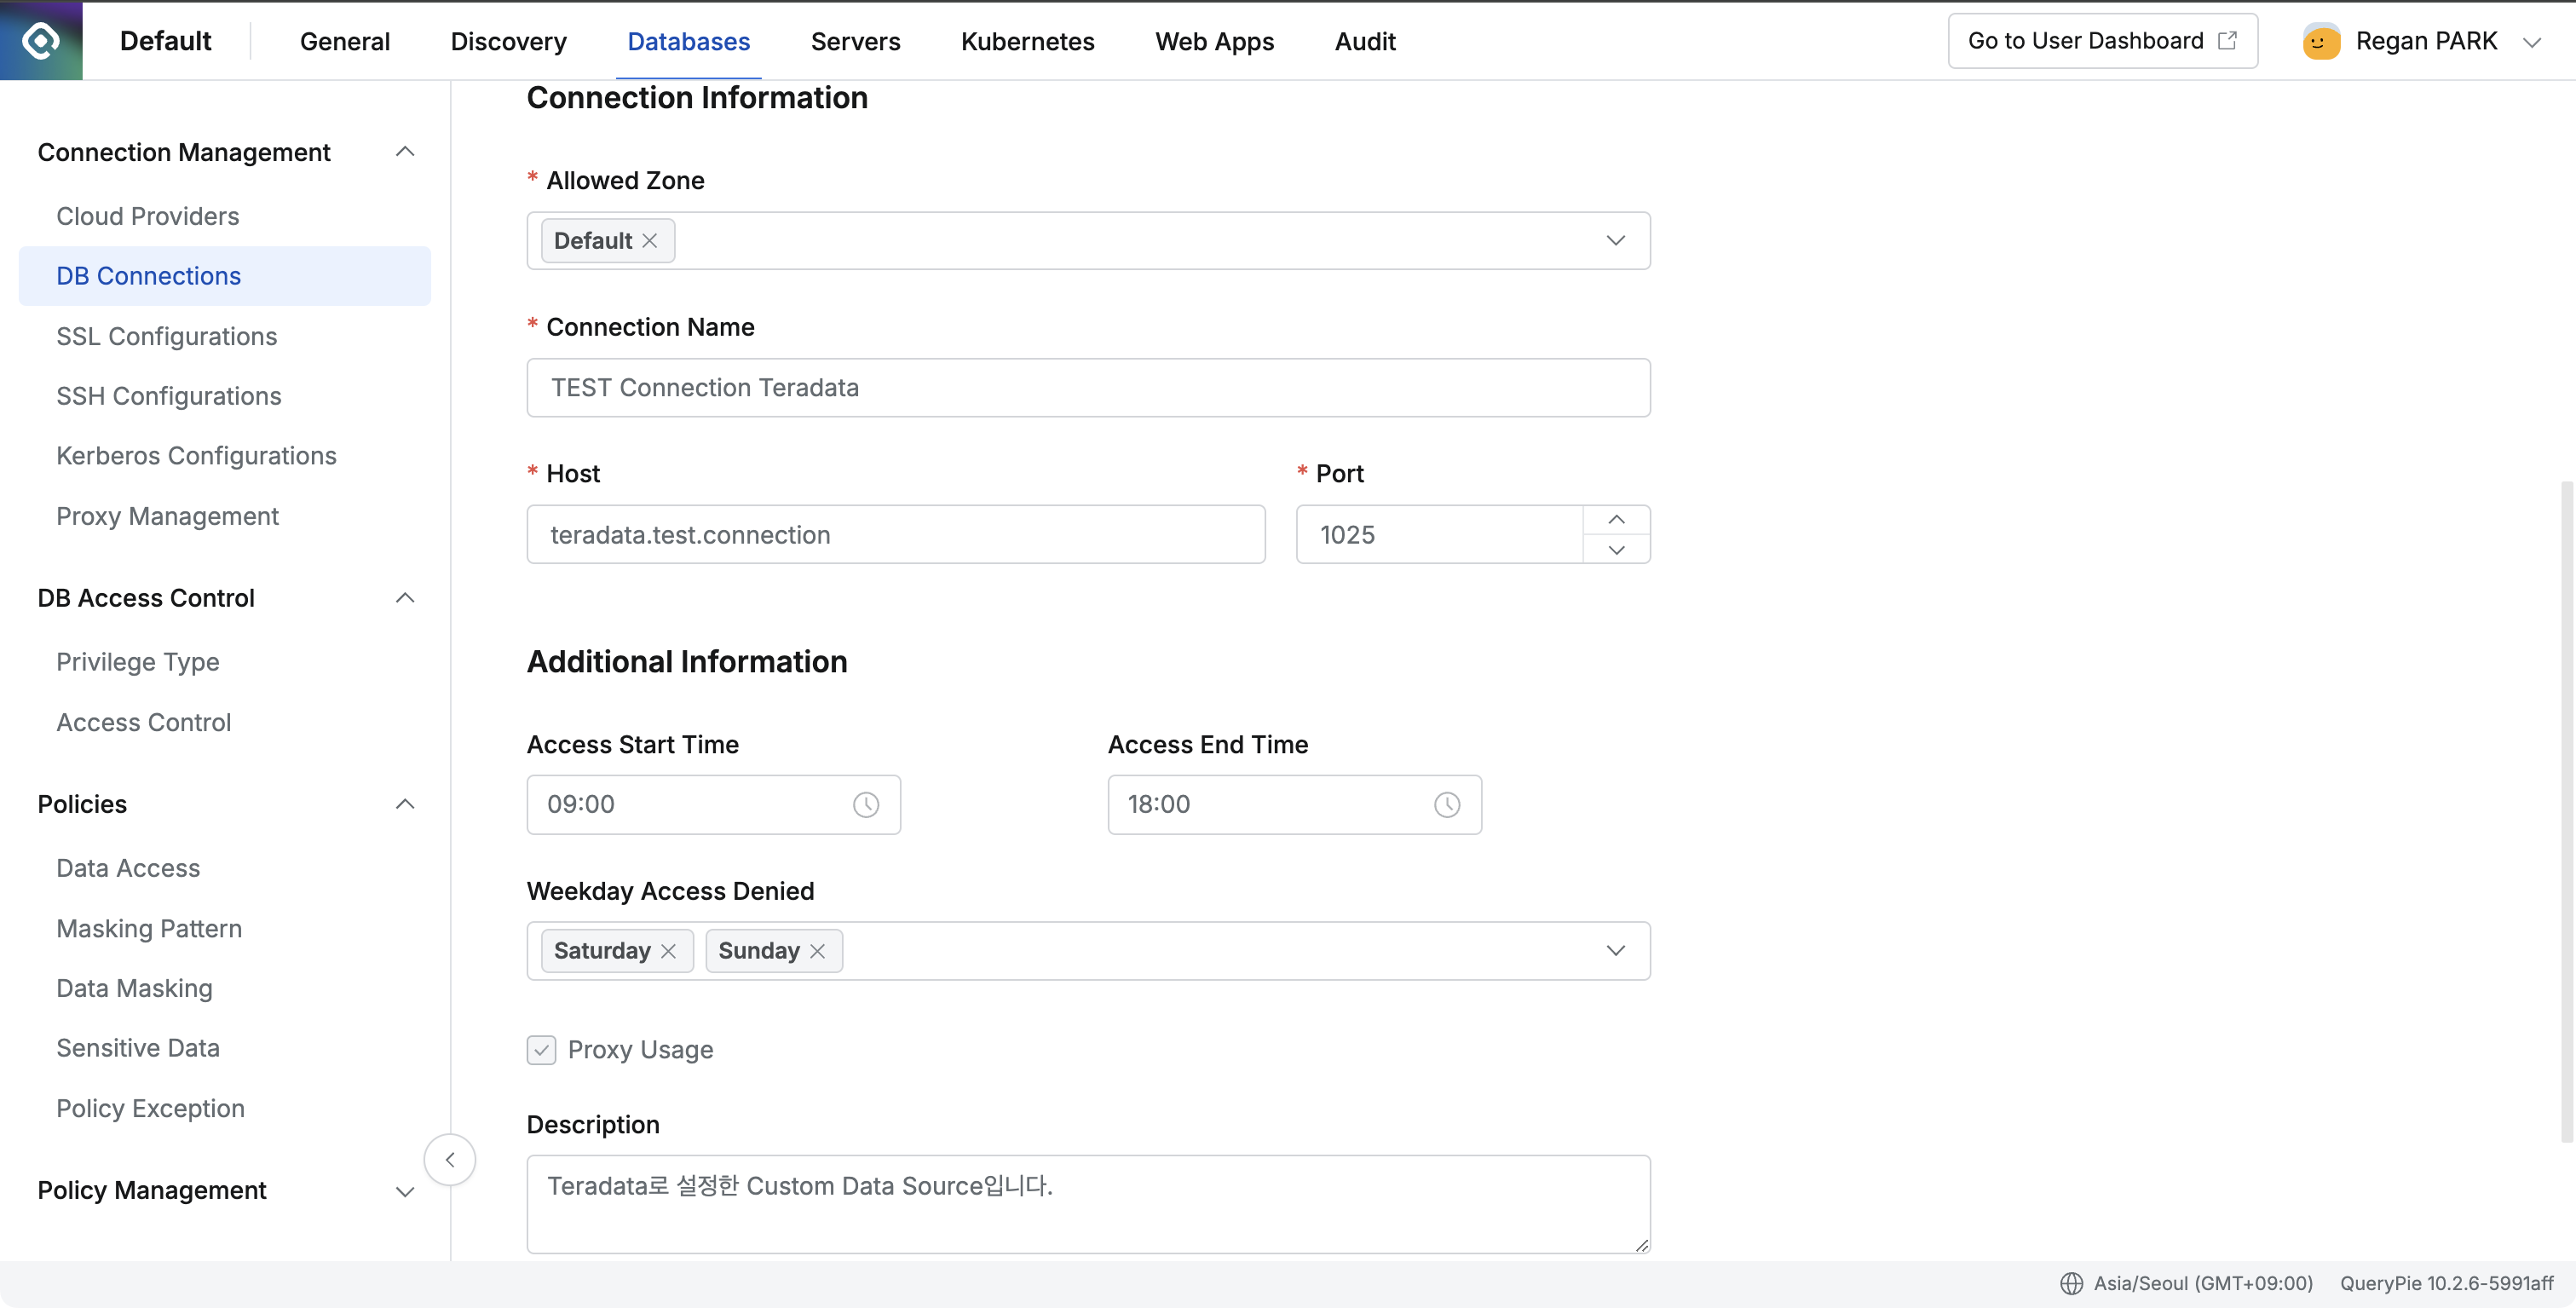
Connection Name (Required): Enter a name for the connection.
Host (Required): Enter the host address of the target data source.
Port (Required): Enter the port number of the target data source.
Allowed Zone (Required): Configure the IP range allowed to access this connection.
Access Time (Optional): Configure the allowed access times.
Weekday Access (Optional): Configure the allowed days of the week for access.
Proxy Usage: This is always enabled and cannot be deactivated for Custom Data Sources.
Description (Optional): Add a description if needed.
After entering the information, click the Next button at the bottom to complete the creation
Creation Complete
After creation, the connection will appear in the DB Connection list with the Database Type shown as Custom Data Source.
Editing and Deleting Custom Data Sources
Edit
Navigate to Admin > Databases > Connection Management > DB Connections. Select the Custom Data Source you wish to edit from the list.
You can modify the desired fields and add Tags.
After making changes, click the
Save Changesbutton in the top-right corner to save.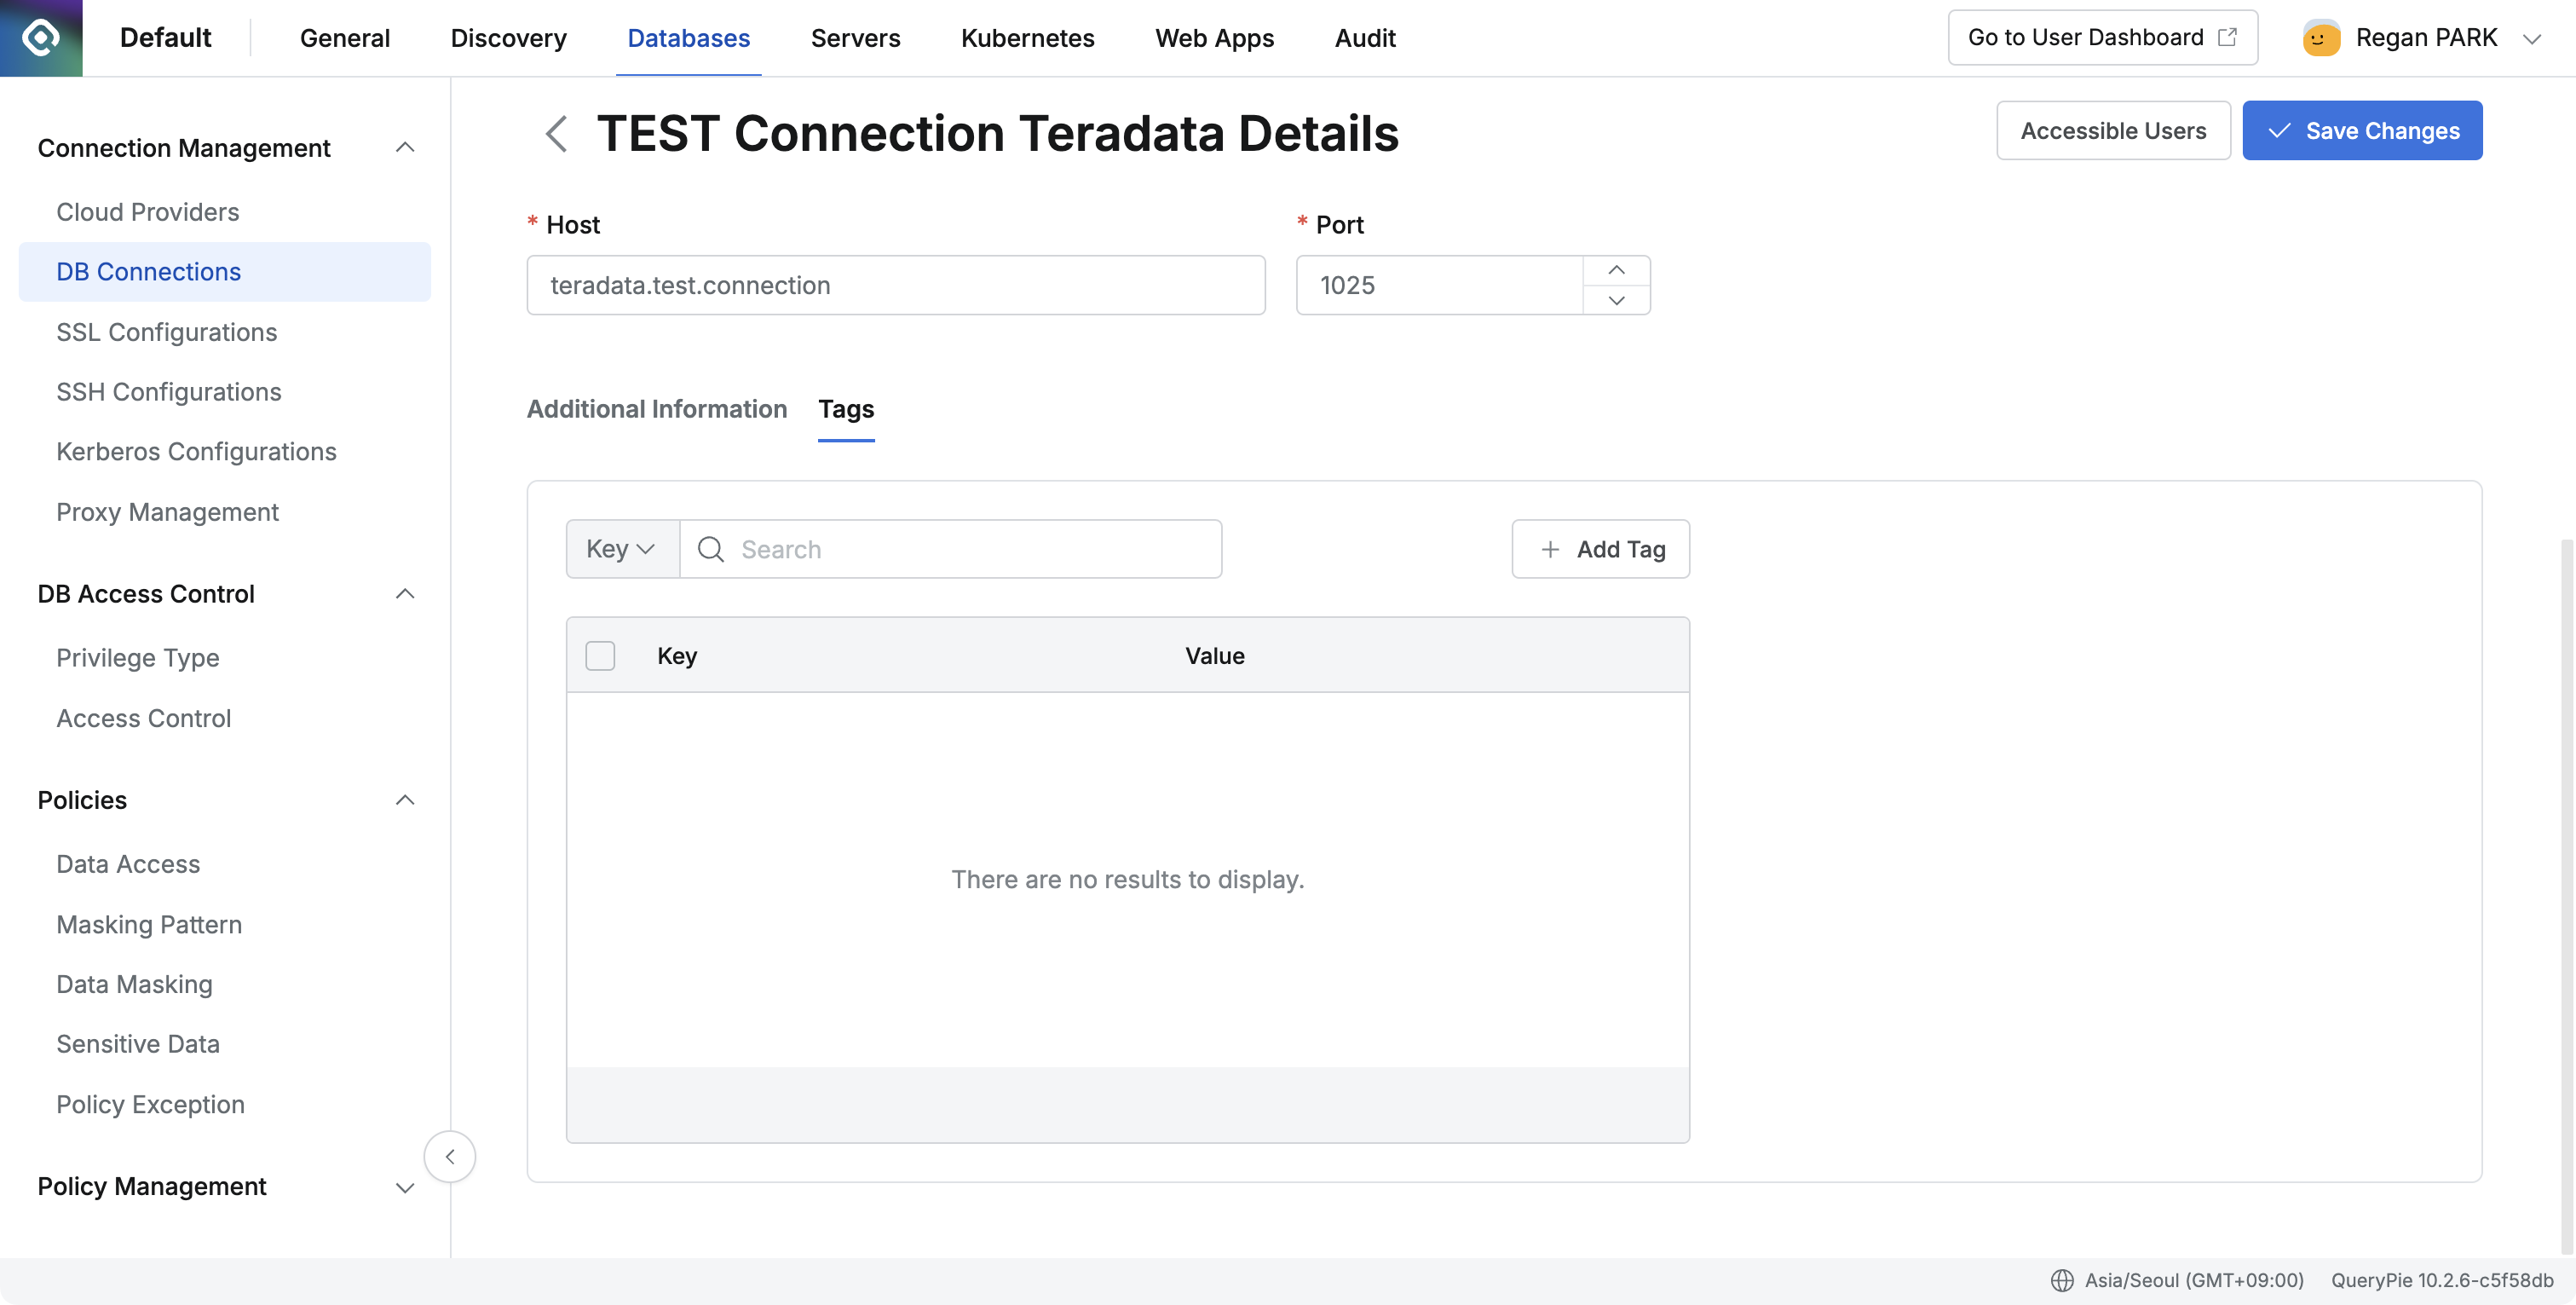
Delete
In the DB Connections list, select the checkbox to the left of the connection(s) you wish to delete. Click the
Deletebutton.When the confirmation message “Are you sure you want to delete?” appears, click the
OKbutton to delete the connection.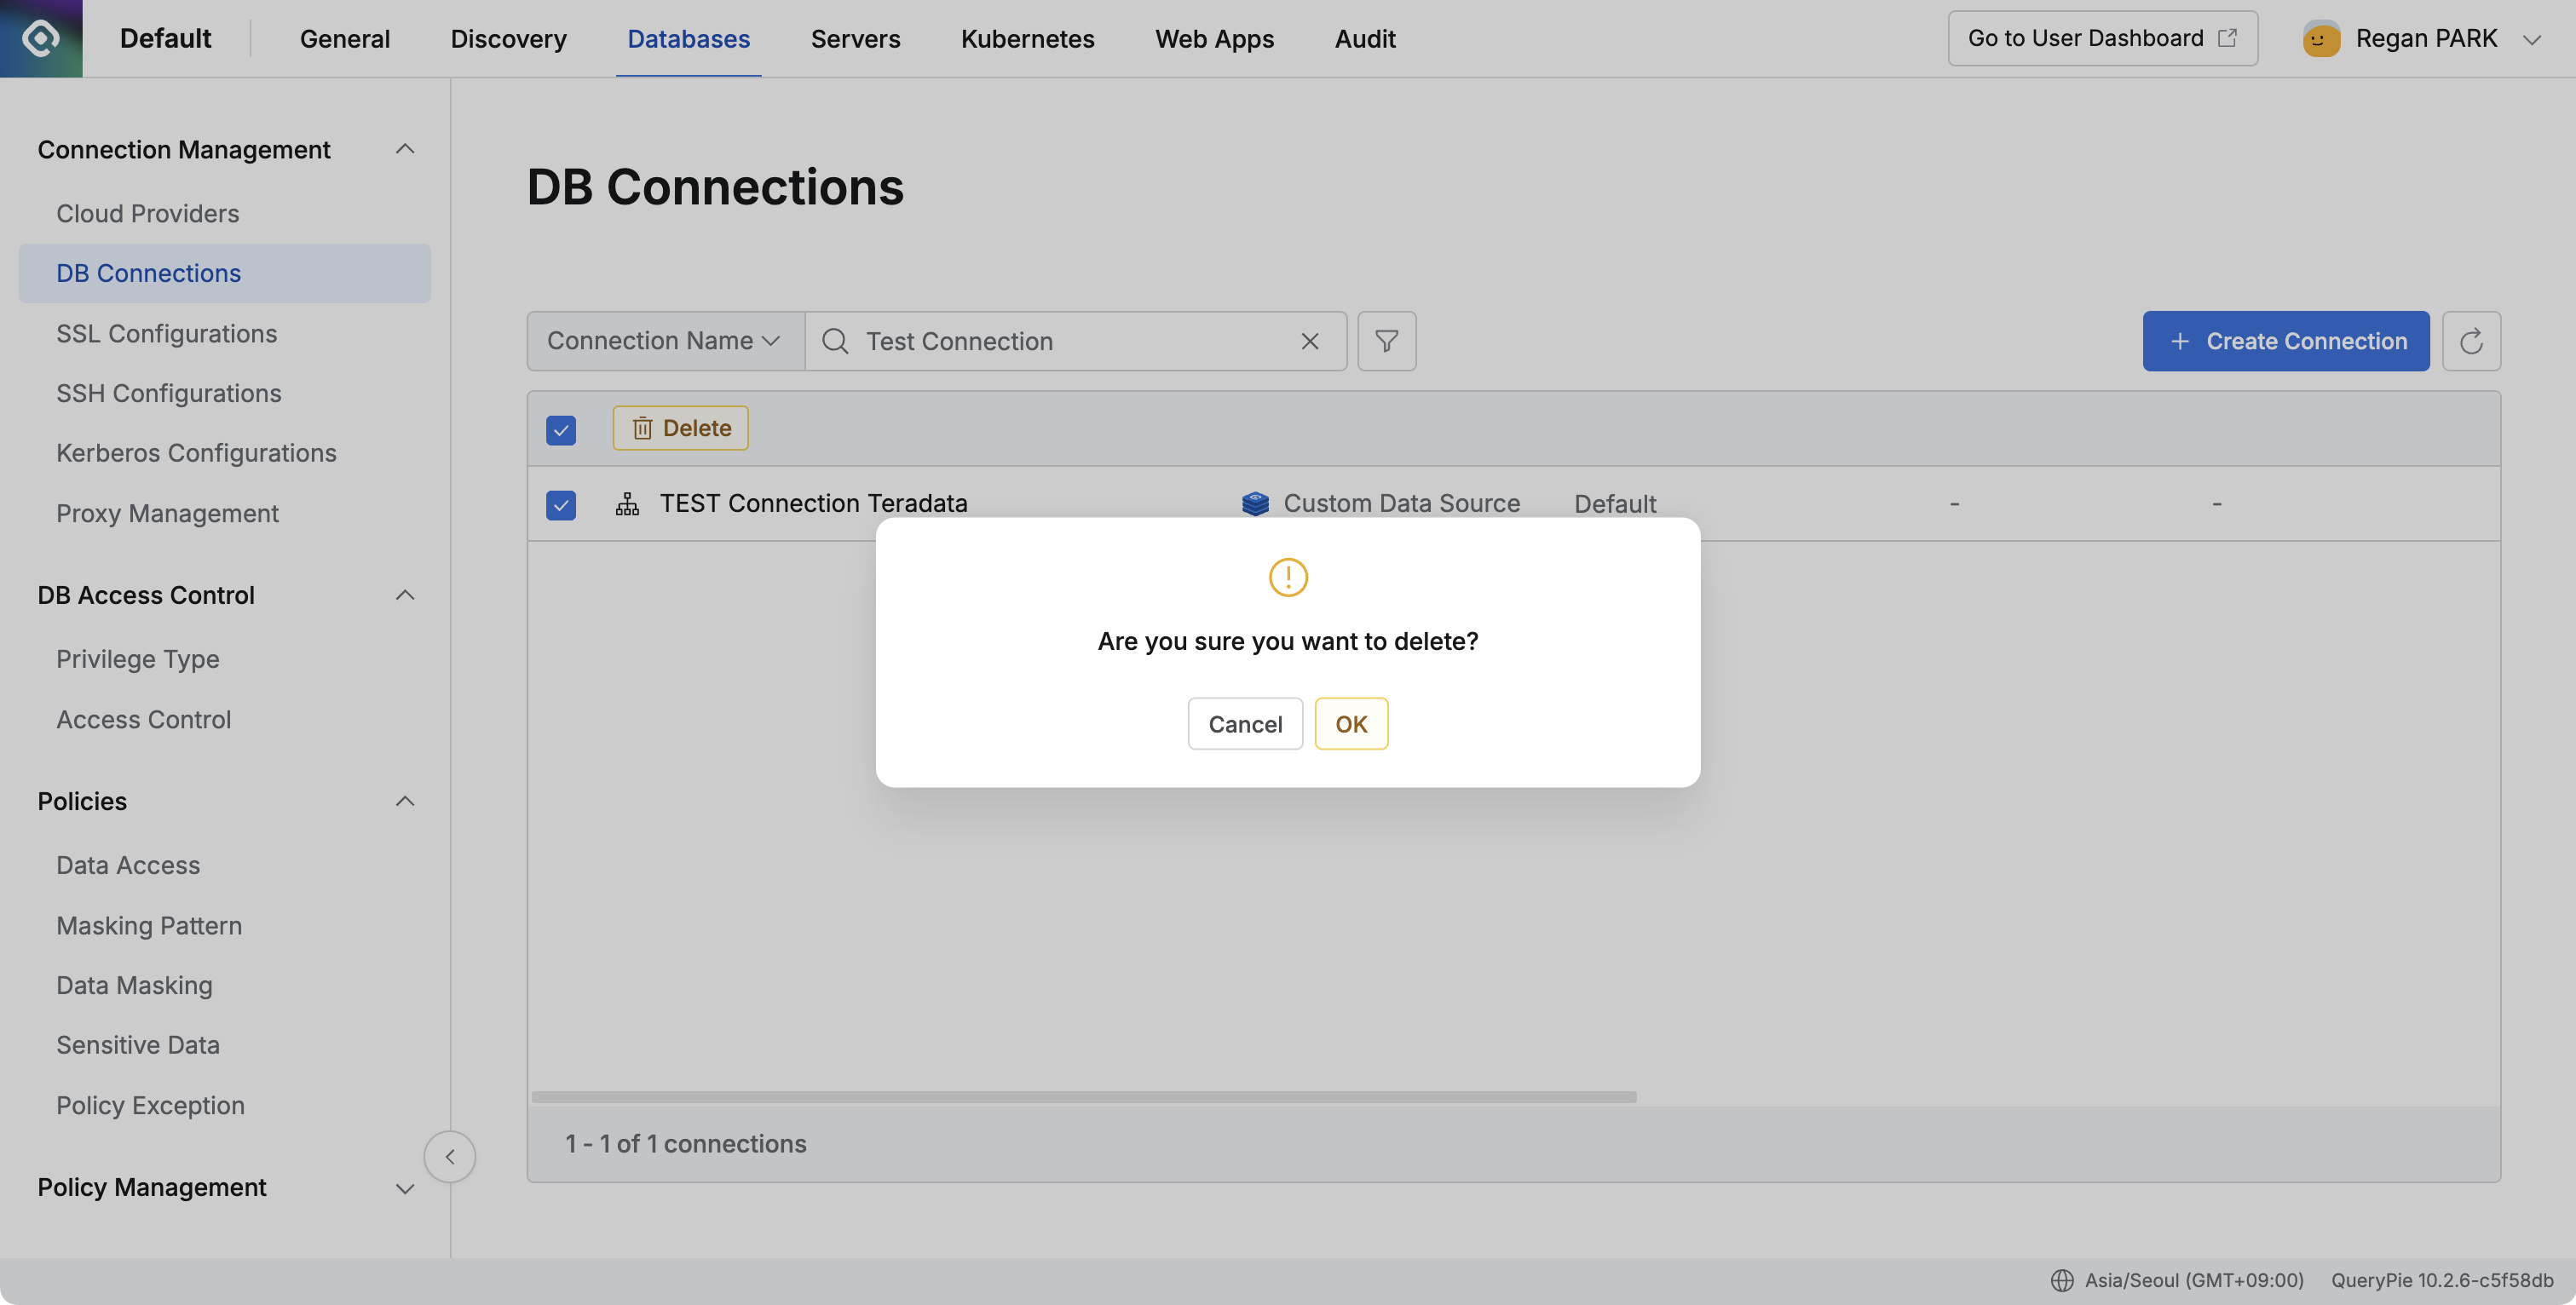
Access Control Configuration
Navigate to Grant Privilege Modal
Go to Admin > Databases > DB Access Control > Access Control.
Click on the user to whom you want to grant privileges to go to their Detail page.
Click the
+ Grant Privilegebutton located in the middle-right section.
Grant Privilege
In the Grant Privilege modal, select the Custom Data Source(s) using the checkboxes on the left.
The Privilege for a Custom Data Source is displayed as "-", indicating no specific privilege type (it's an access grant).
You can set an Expiration Date when granting the privilege.
After making your selections, click the
Grantbutton to assign the privilege.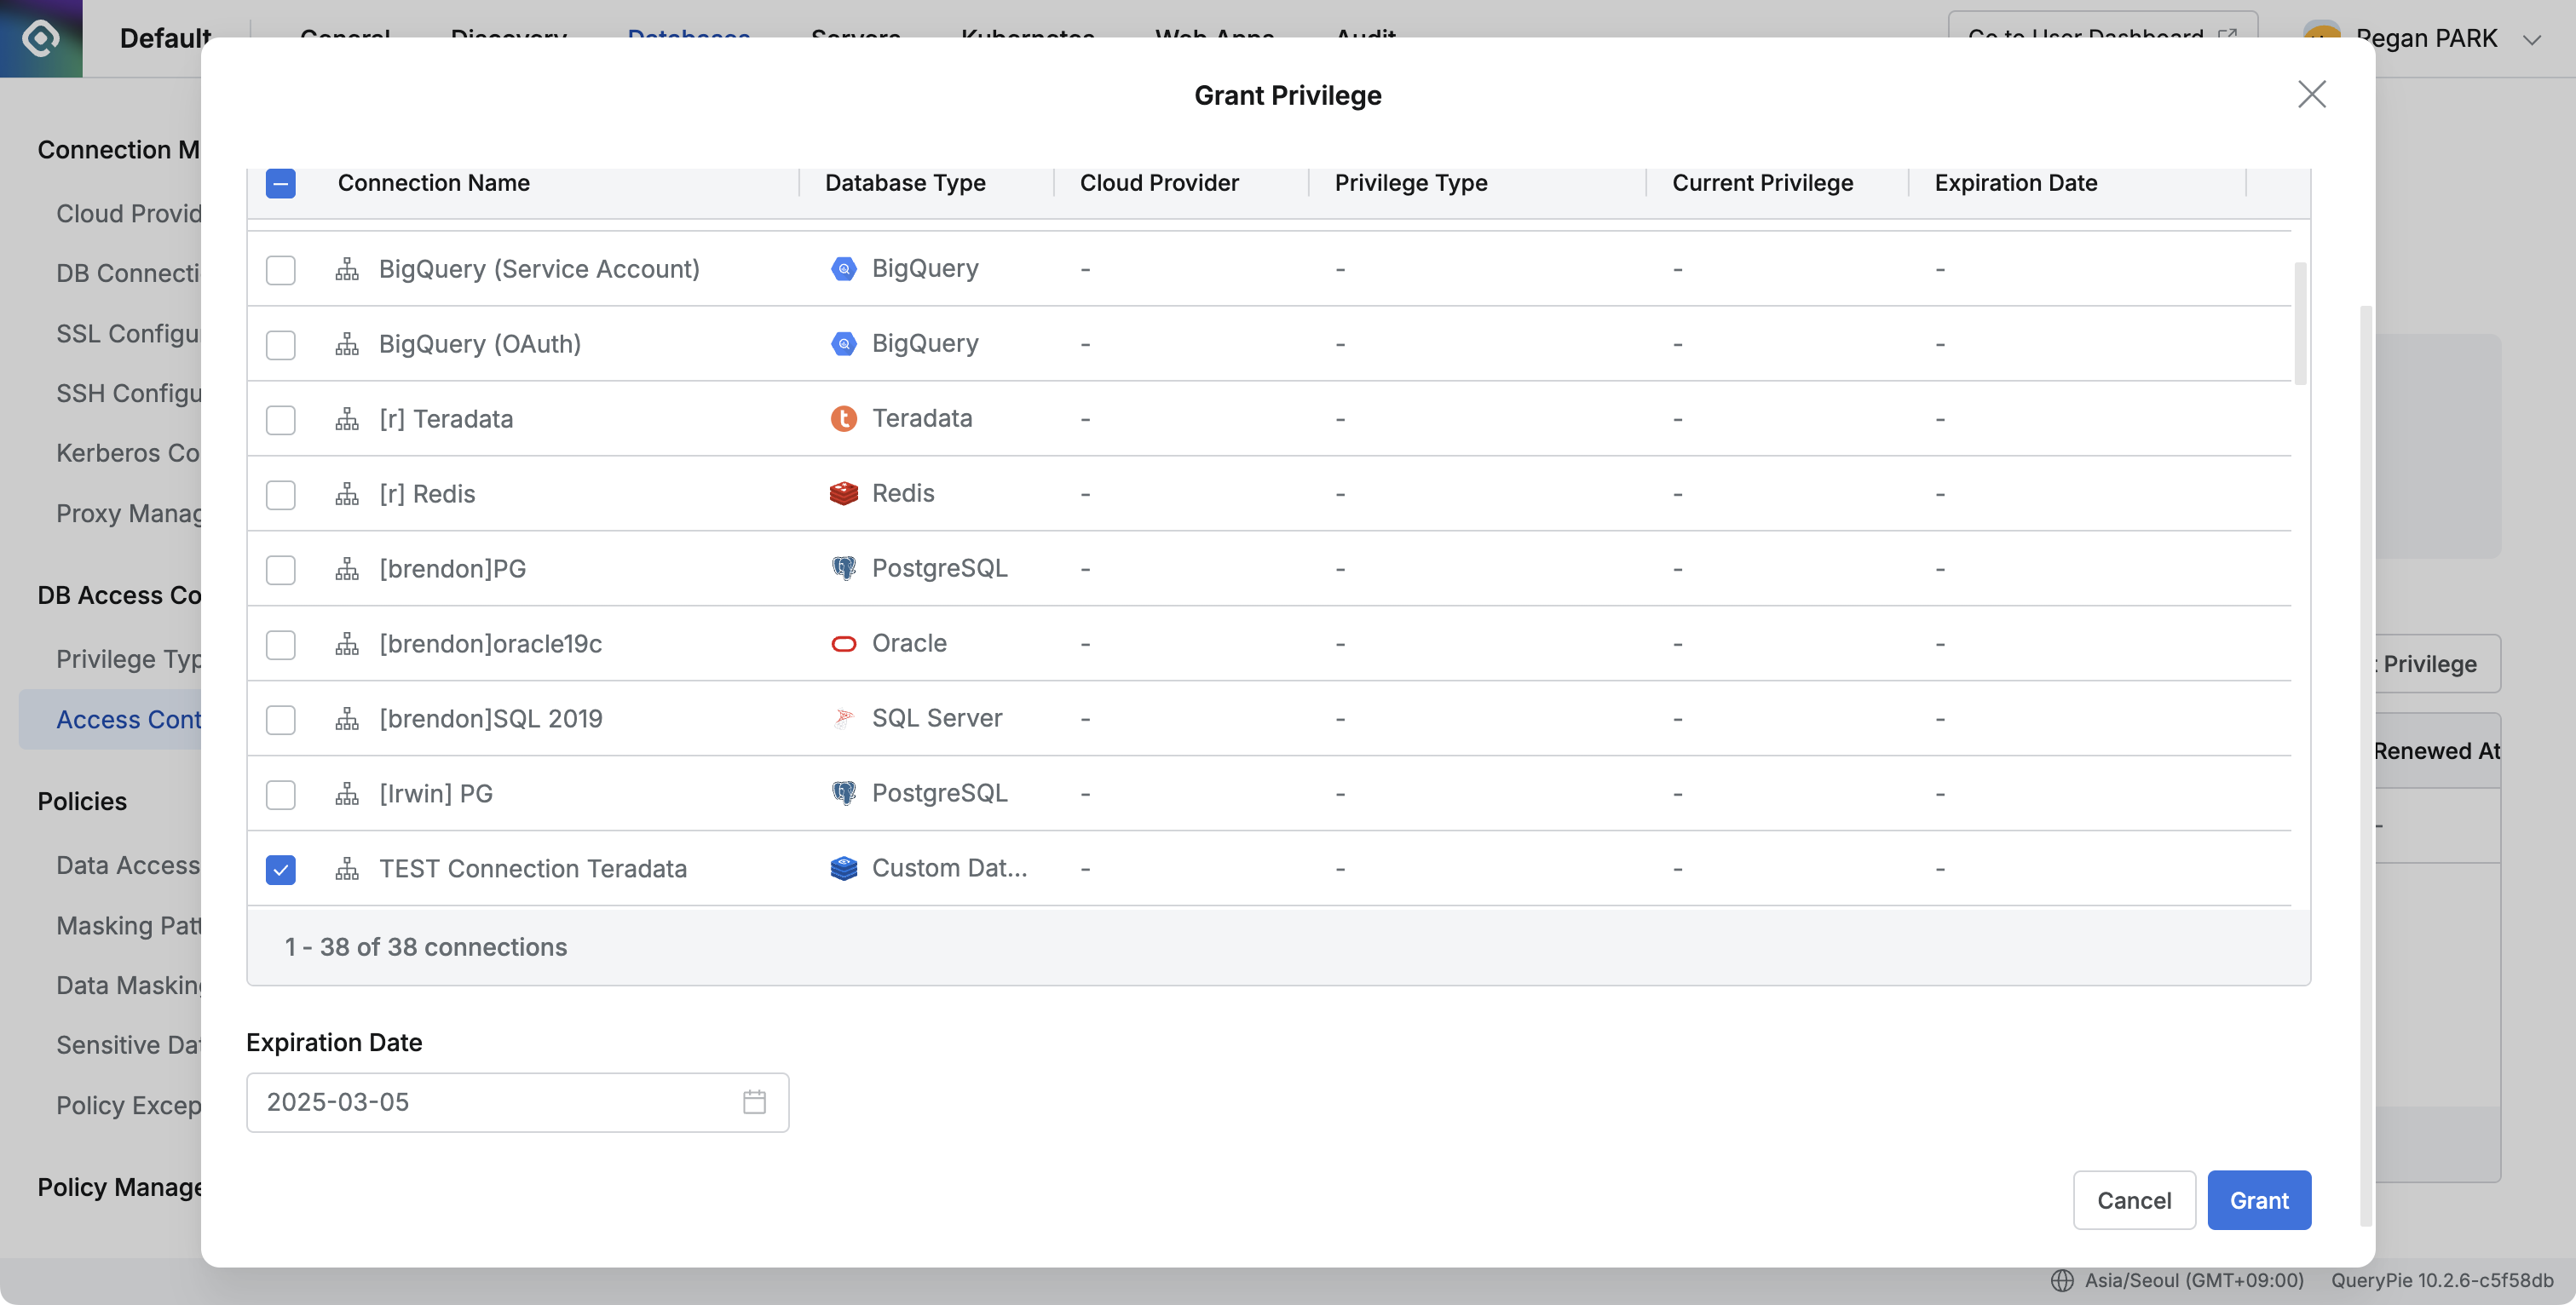
Revoke Privilege
By default, granted privileges remain active until the specified Expiration Date. To revoke a user's privilege before this date:
Navigate to Admin > Databases > DB Access Control > Access Control. Select the User.
On the user's Detail page, select the connection for which you want to revoke the privilege, then click the
Revokebutton.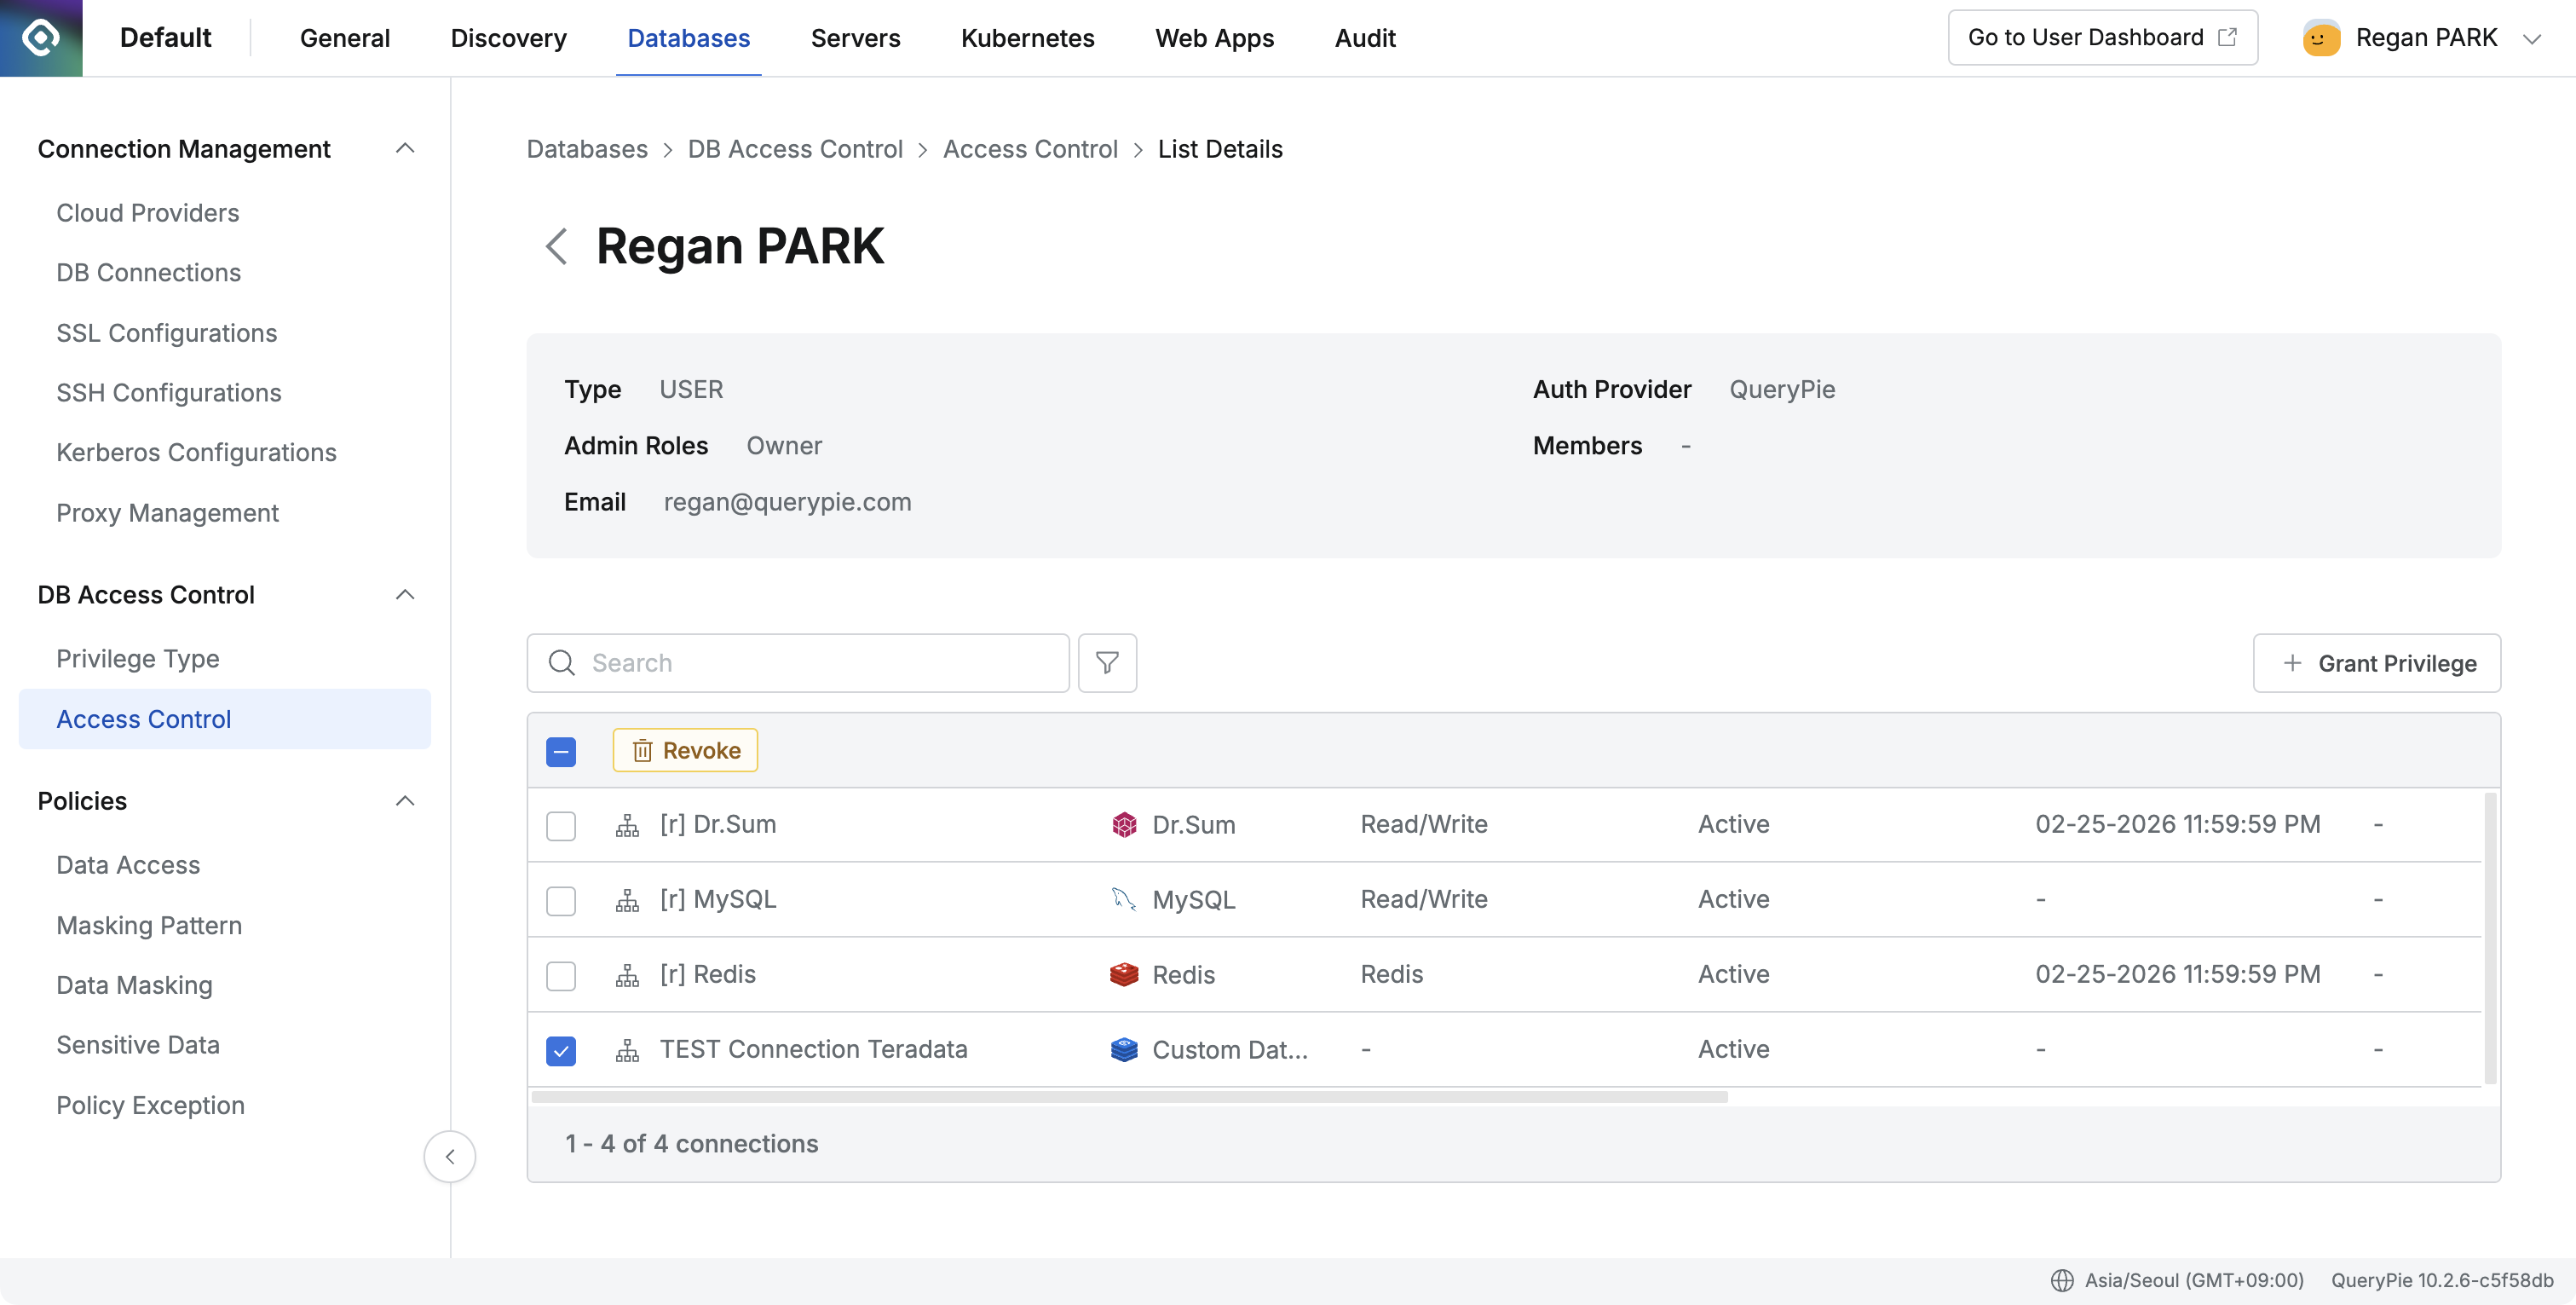
Check Audit Logs
DB Access History
Navigate to Admin > Audit > DB Access History.
Log Details:
Database Type: Displayed as 'Custom Data Source'.
Connected From: Displayed as 'Proxy'.
You can verify Success/Failure information for Connect/Disconnect events.
If a connection attempt is made outside the allowed access hours, the following message is displayed (consistent across all data source types): "This connection is not accessible at this time. Please ask your administrator."
Activity Logs
Records are kept if an administrator creates, modifies, or deletes Custom Data Source connection information.
Warning
If a user attempts to connect via a SQL Tool with incorrect authentication details, the log may still record 'Connect success, Disconnect success' due to the nature of proxy connections
Due to vendor-specific recovery protocols, if a connection attempt is made after the allowed access time has passed, the connection might be dropped, and logs could be recorded more than once for a single attempt.
%201.png)