Connecting to a Custom Data Source
Requesting Access to a Custom Data Source
Navigate to the Workflow menu at the top of the user screen.
Click the
Submit Requestbutton in the top-left corner and select DB Access Request.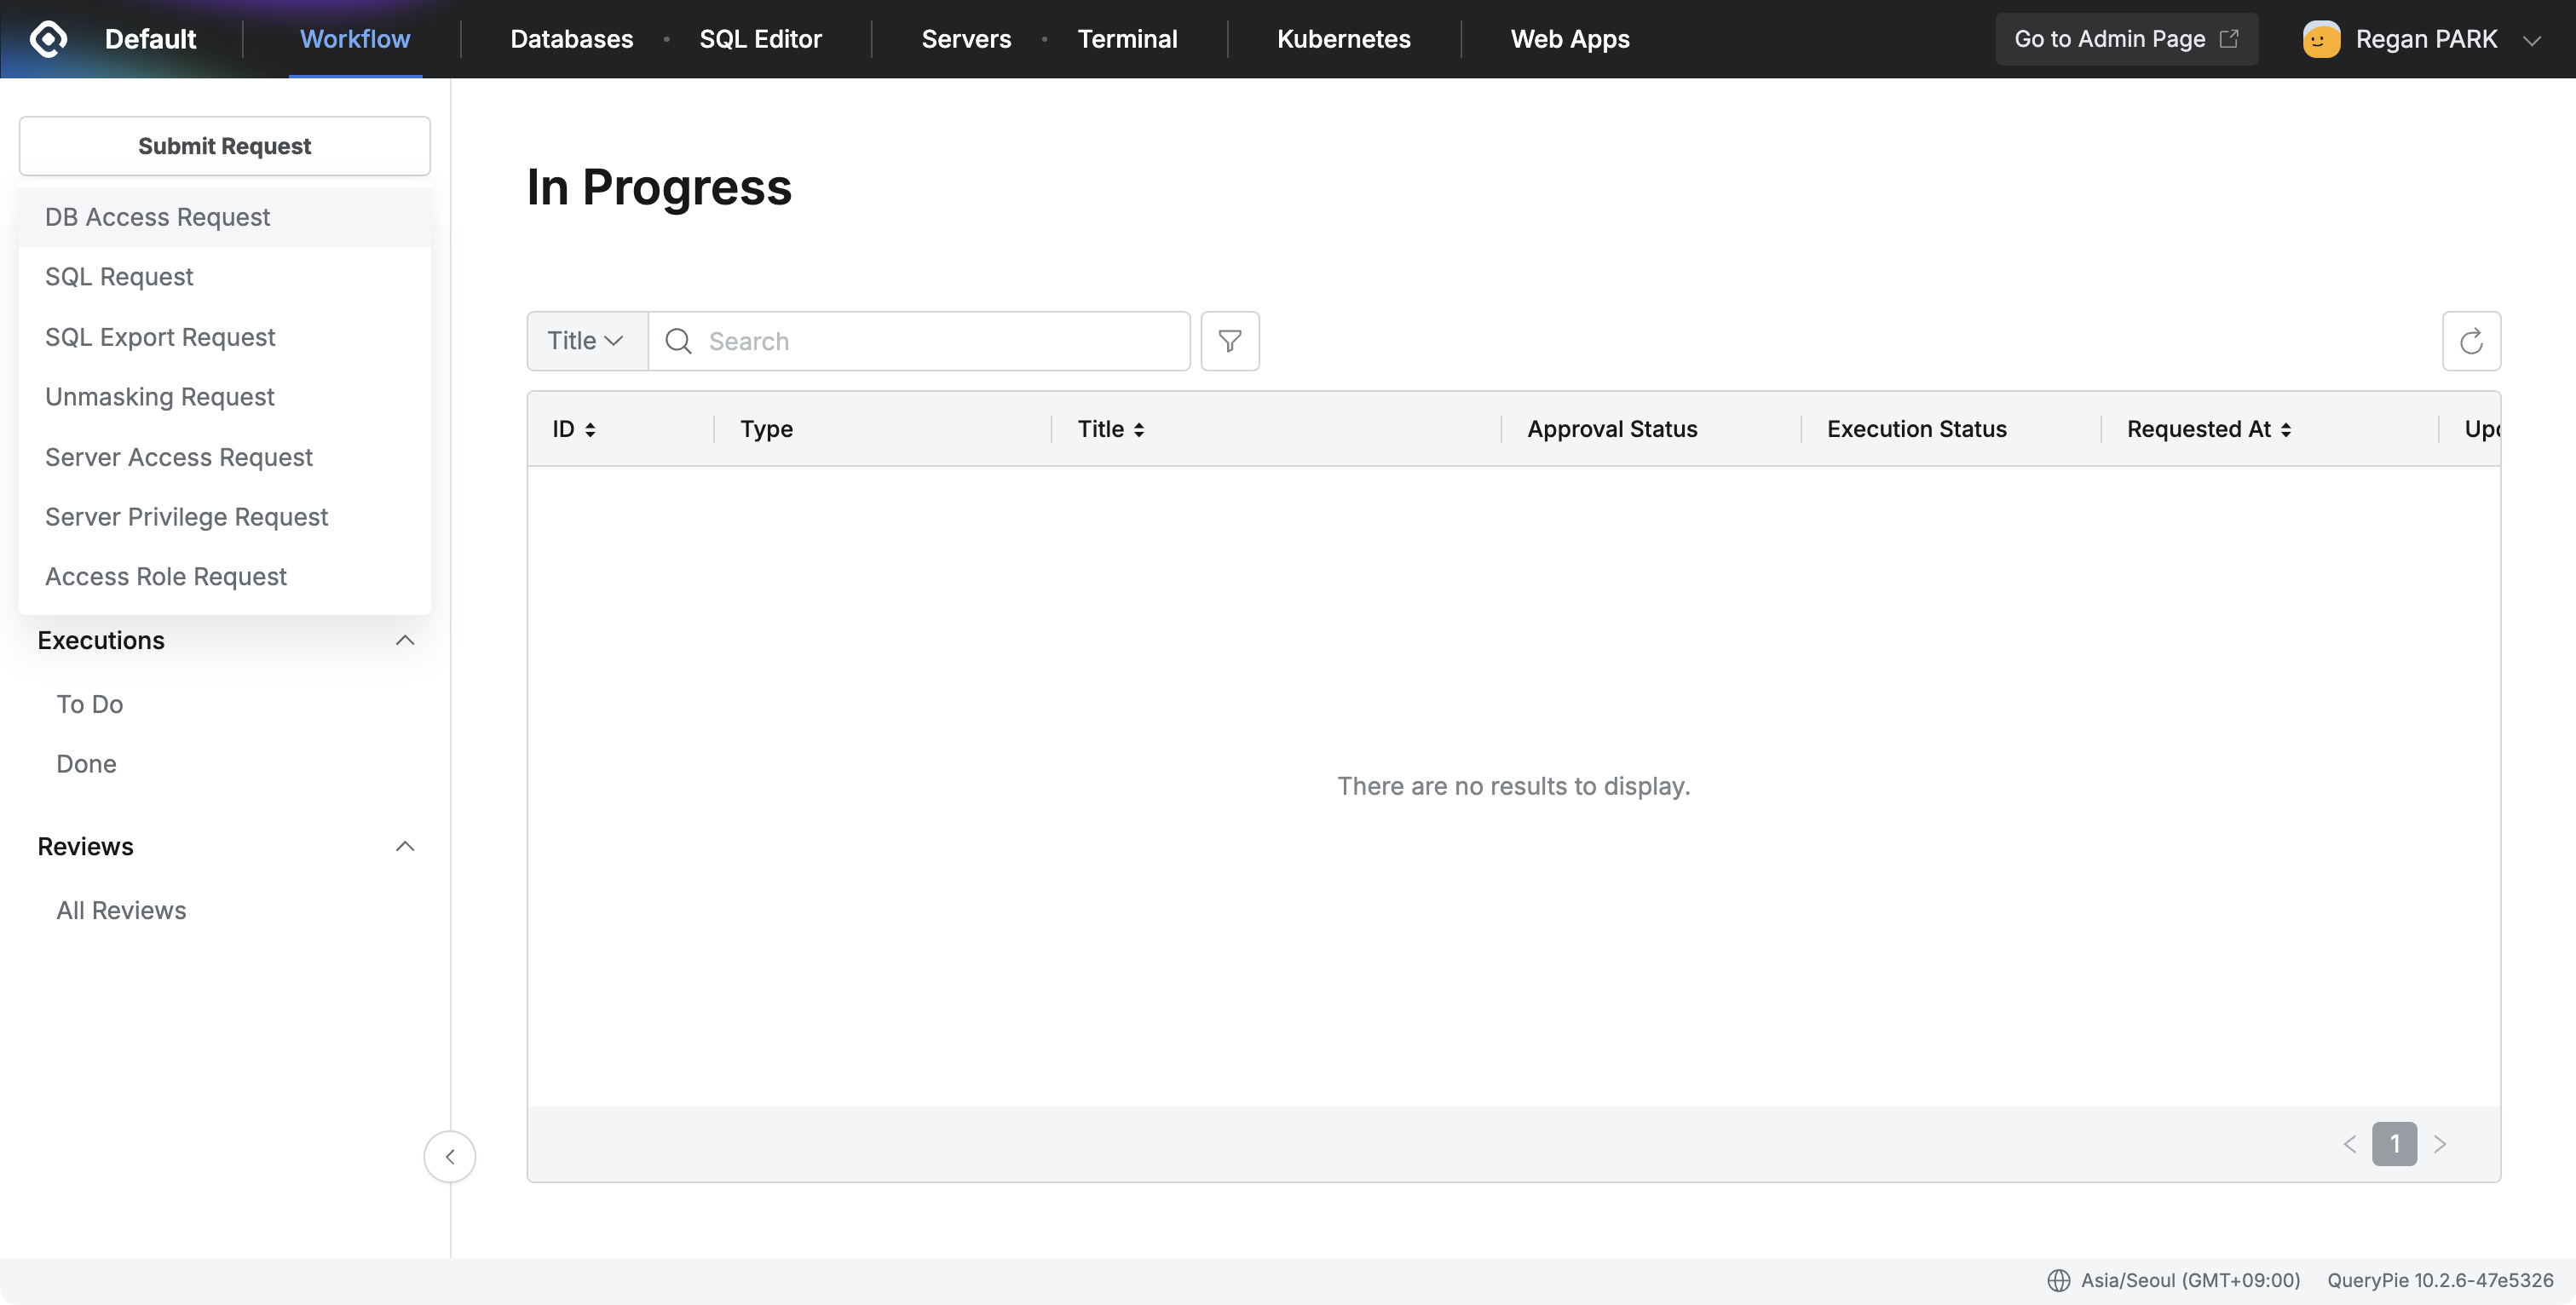
Configure the Approval Rule according to your needs and enter a Title for the request.
From the DB Connection list, select an item where the Type is 'Custom Data Source'.
Unlike other vendor types, Privilege cannot be selected for a Custom Data Source and is therefore displayed as “-”.
Set the Expiration Date and enter the Reason for Request as appropriate for your situation.
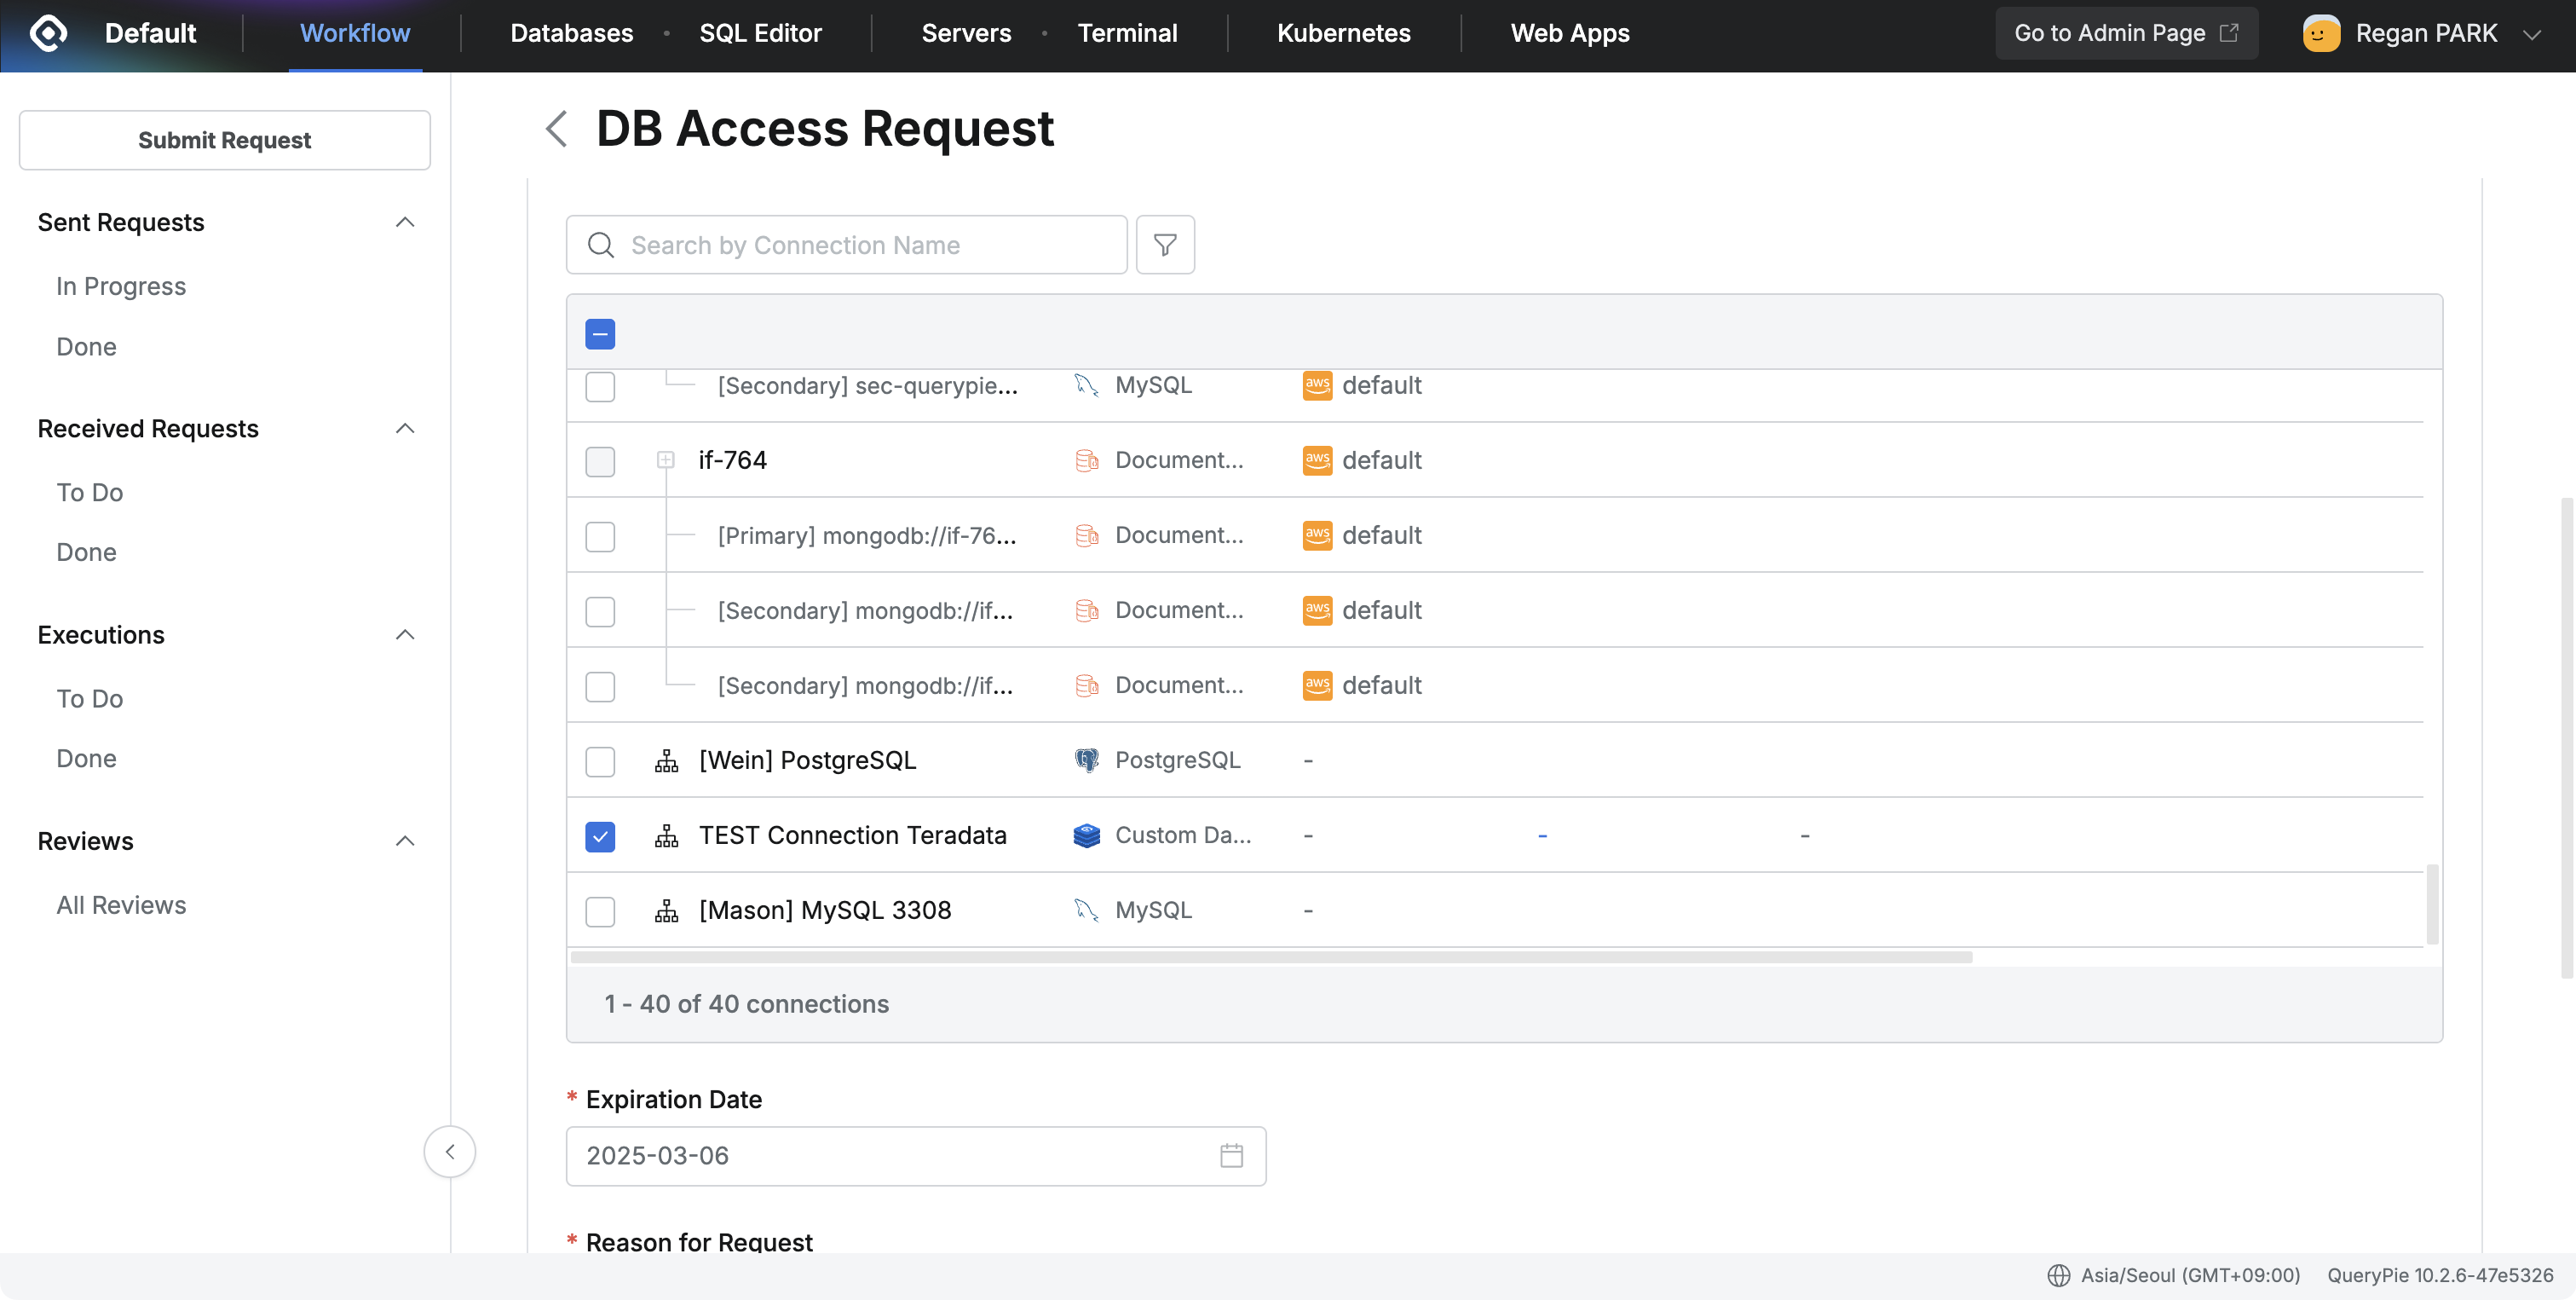
Once you have completed all fields, click the
Submitbutton at the bottom to finalize the request.After your request has been approved by an administrator, you can verify its status by navigating to the Workflow > Sent Request > Done menu on the left.
Note on Multiple Requests Including Custom Data Source Types
If you select a Custom Data Source along with other vendor types in a single access request, you cannot assign privileges collectively because their privilege types differ.
In this case, the following message will be displayed: "Privileges cannot be applied across different types at once (e.g., General, Redis, Custom Data Source). Please assign privileges separately for each connection."
Bulk privilege application is possible only for connections of the same privilege type.
Connecting via Agent
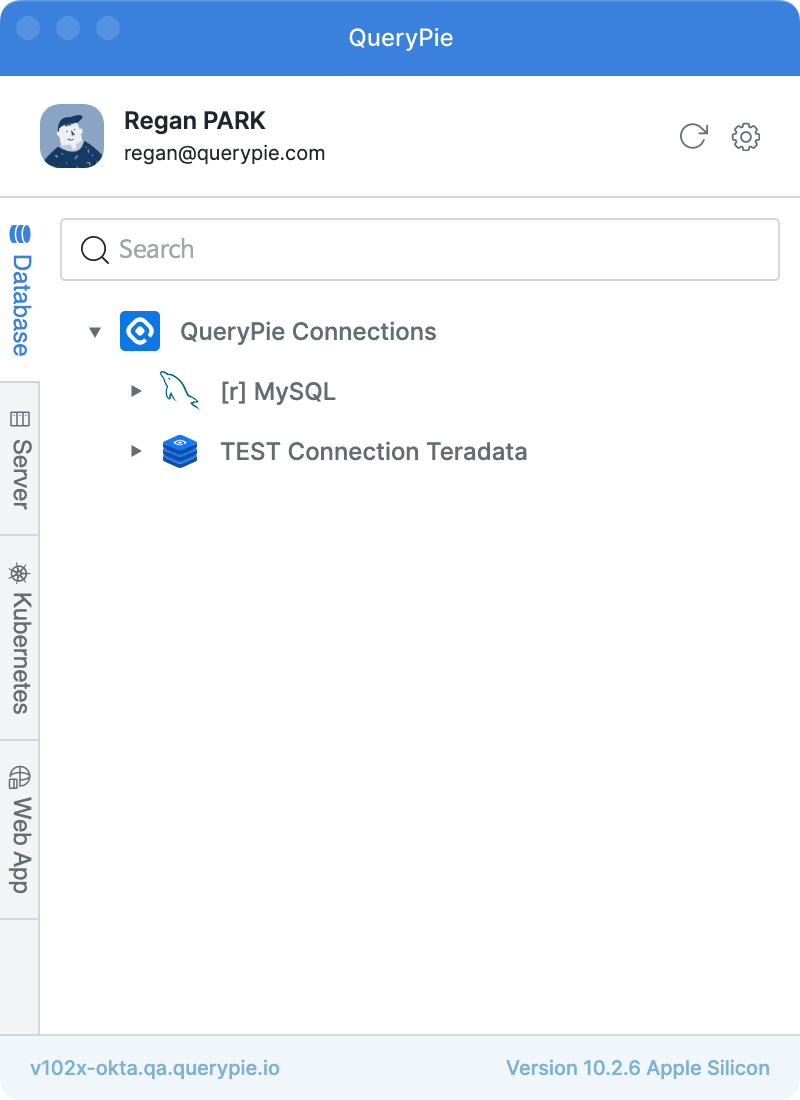
Run QueryPie Agent
Launch the QueryPie Agent.
You can find the accessible Custom Data Source connections under the Database section within the Agent.
Check Connection Guid
In the QueryPie Agent, click the row corresponding to your Custom Data Source connection. This will display detailed information, including Port details.
Right-click this row and then select Connection Guide from the context menu to view the full connection information.
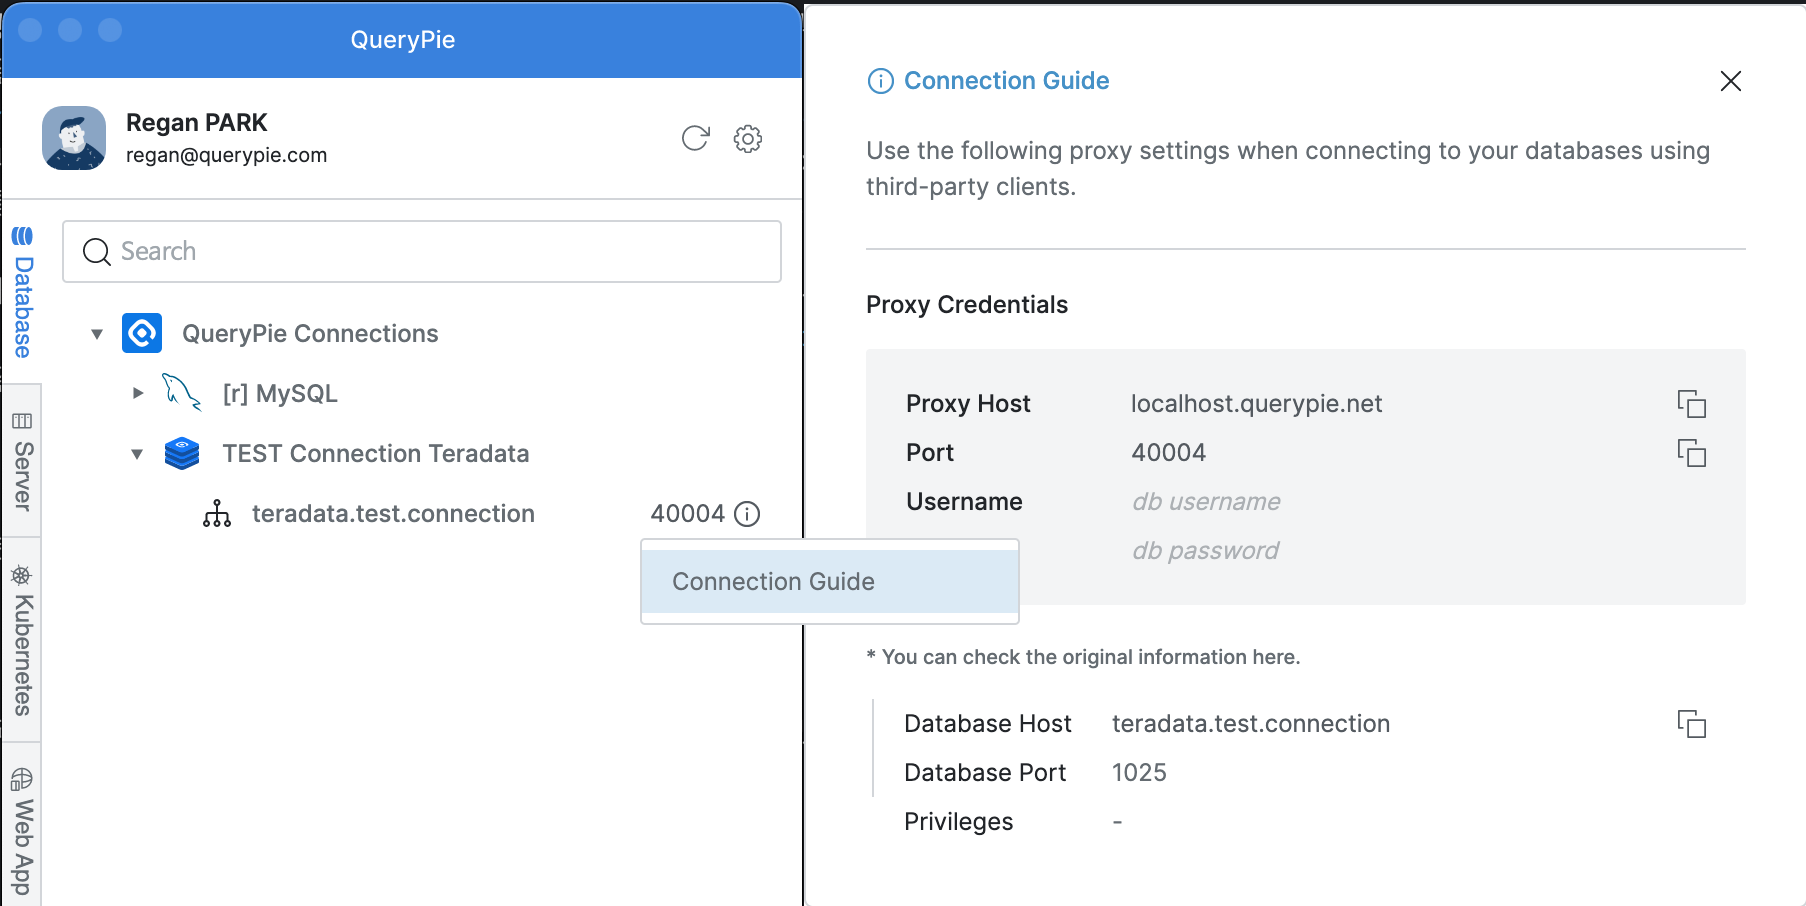
UID/PW will be displayed as non-editable values, typically db username and db password.
Privileges will be displayed as “-”.
Connect from SQL Tool
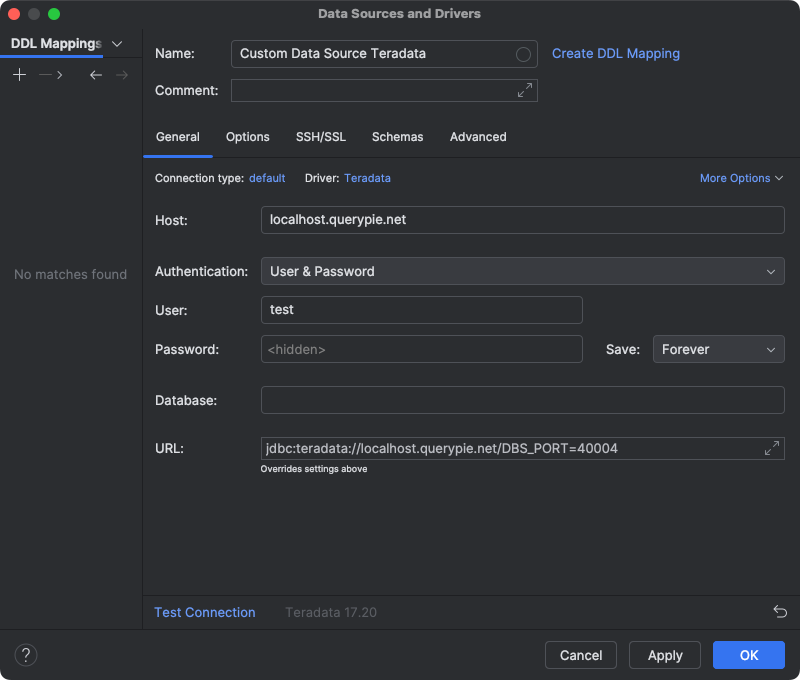
Launch your preferred SQL tool (e.g., DataGrip).
In your SQL tool's connection settings, enter the Host and Port information as specified in the QueryPie Agent's Connection Guide.
Enter any additional information required by the specific data source vendor.
Warning
If you attempt to connect outside the access hours configured by the administrator, an error message will be displayed, and the connection will fail.
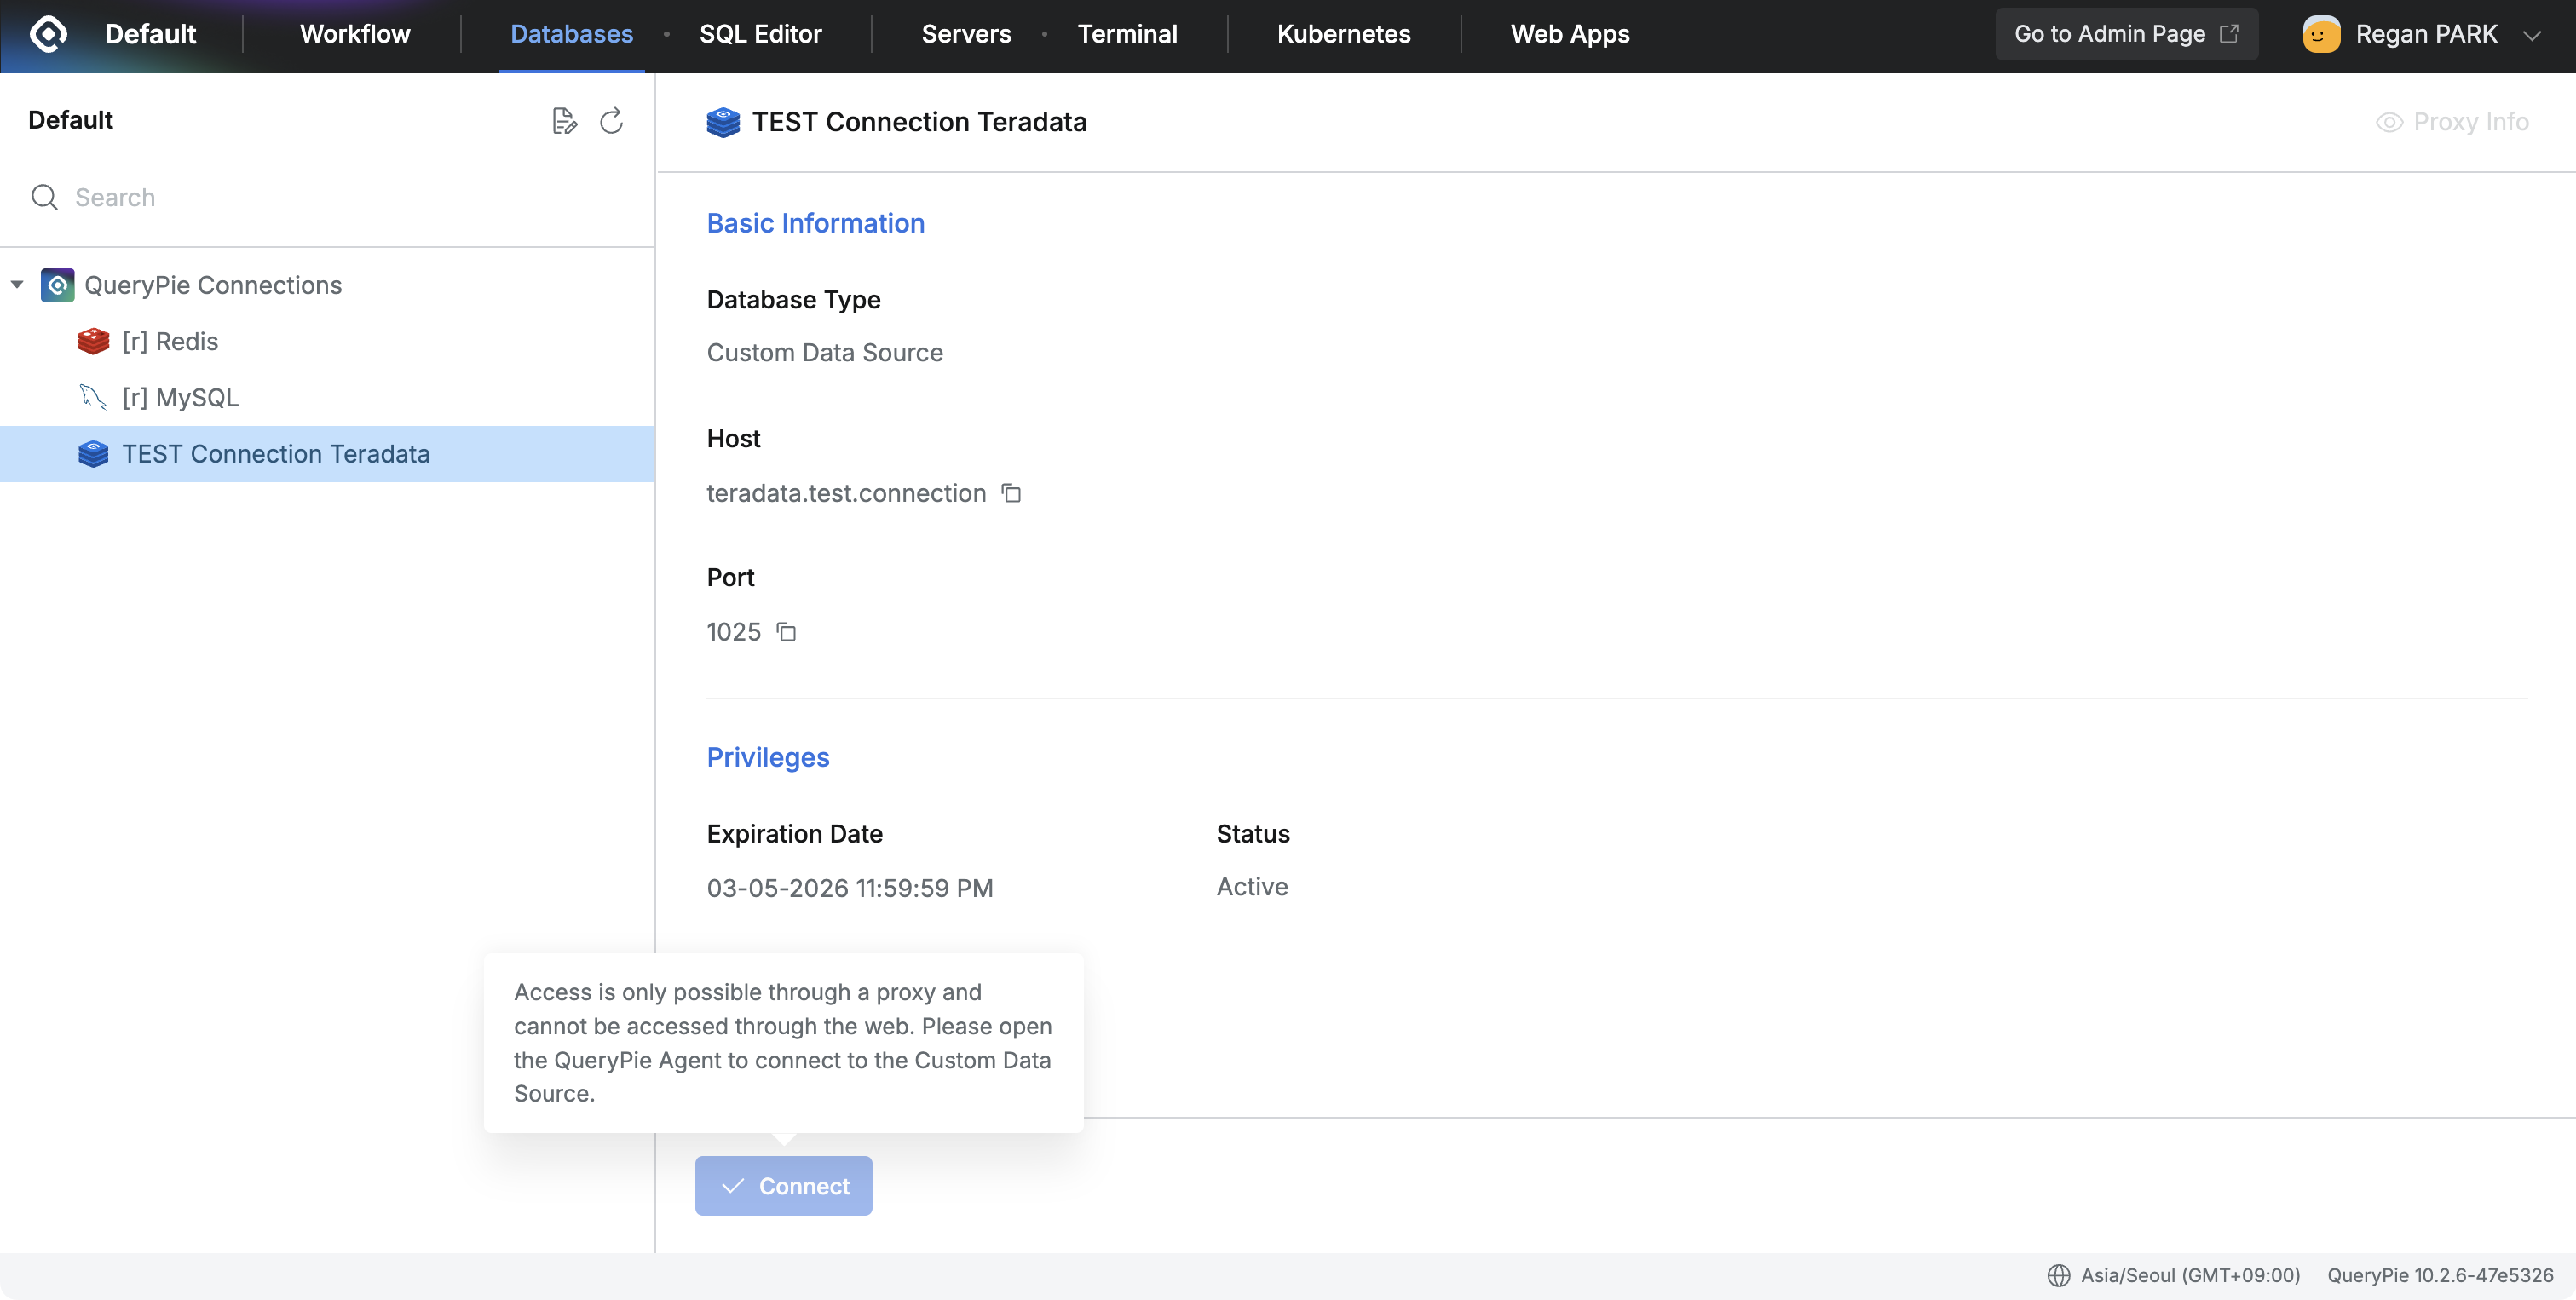
Attempting to Connect via Web
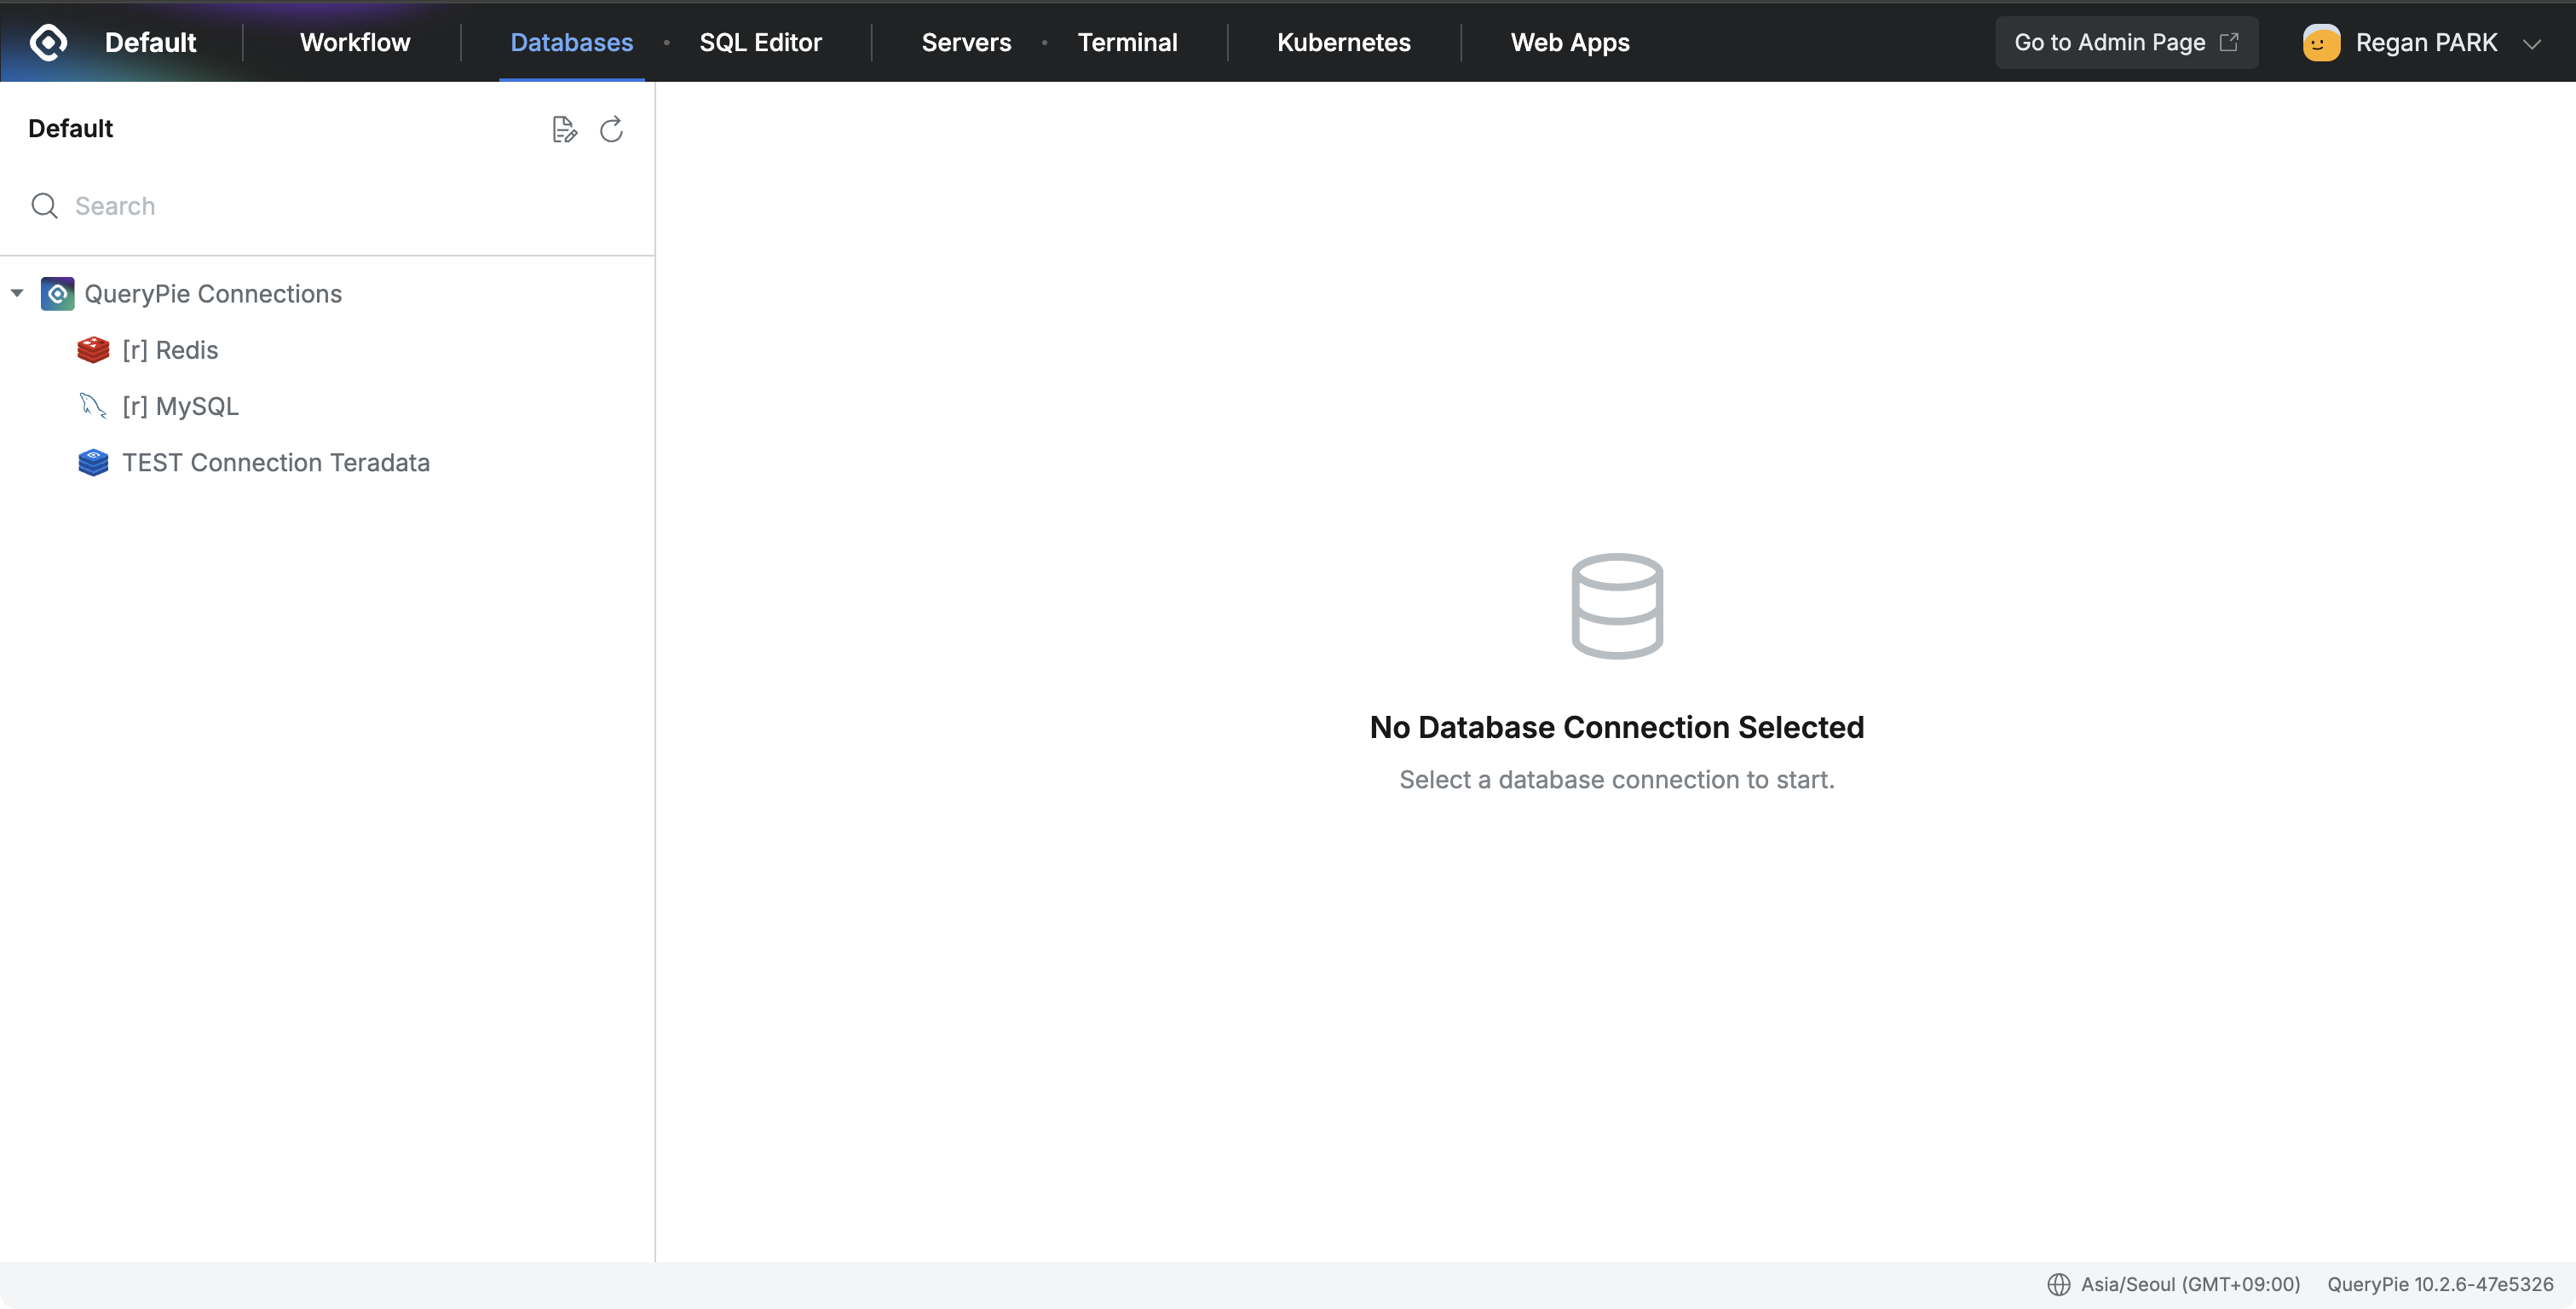
Check Web Connection List
Click Databases at the top of the user screen.
In the connection list on the left, click QueryPie Connections. Custom Data Sources to which you have access will be displayed.
Connection Not Possible Guide
The Connect button will be disabled.
The following tooltip will be displayed, indicating that web access is not possible:
"Access is only possible through a proxy and cannot be accessed through the web. Please open the QueryPie Agent to connect to the Custom Data Source."