Exception Management
Overview
Policy exceptions can be handled in two ways:
By submitting a policy exception request through a Workflow
By having an administrator manually configure the policy exception
In previous DAC policies, policy exceptions could only be requested through workflows (Unmasking or Restricted Data Access). With the new policy framework, administrators can now directly configure exceptions and manage them alongside workflow-approved exceptions in a single view.
Managing Policy Exceptions via Workflow
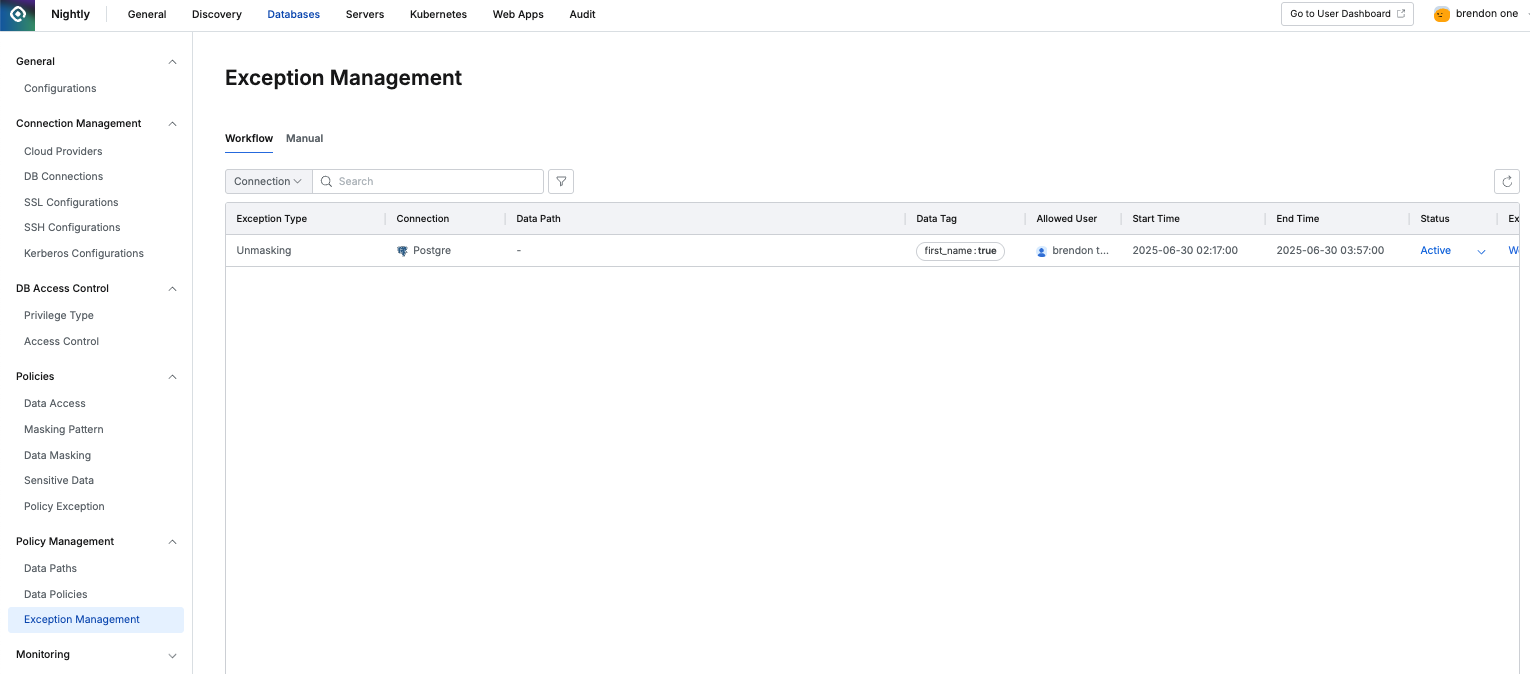
Databases > Data Policies > Exception Management
In Databases > Data Policies > Exception Management, the Workflow tab shows temporary policy exceptions that have been submitted and approved through the workflow.
Exception Type: Shows the type of exception, such as Unmasking or Restricted Data Access.
Connection: Displays the DB connection to which the exception applies.
Data Path: Shows the specific path requested in the workflow. If the request was made using a tag, the target can change dynamically, so Data Path may not be displayed.
Data Tag: Shows the tag specified in the request form if applicable.
Allowed User: Shows the user or group temporarily approved for the exception.
Start Time / End Time: Shows the exception period.
Status:
Active: Indicates the exception is active; administrators can change it to Inactive.
Inactive: Indicates the exception was manually deactivated by an administrator.
Excepted By: Click the link to view the workflow that approved the exception.
Manually Configuring Policy Exceptions
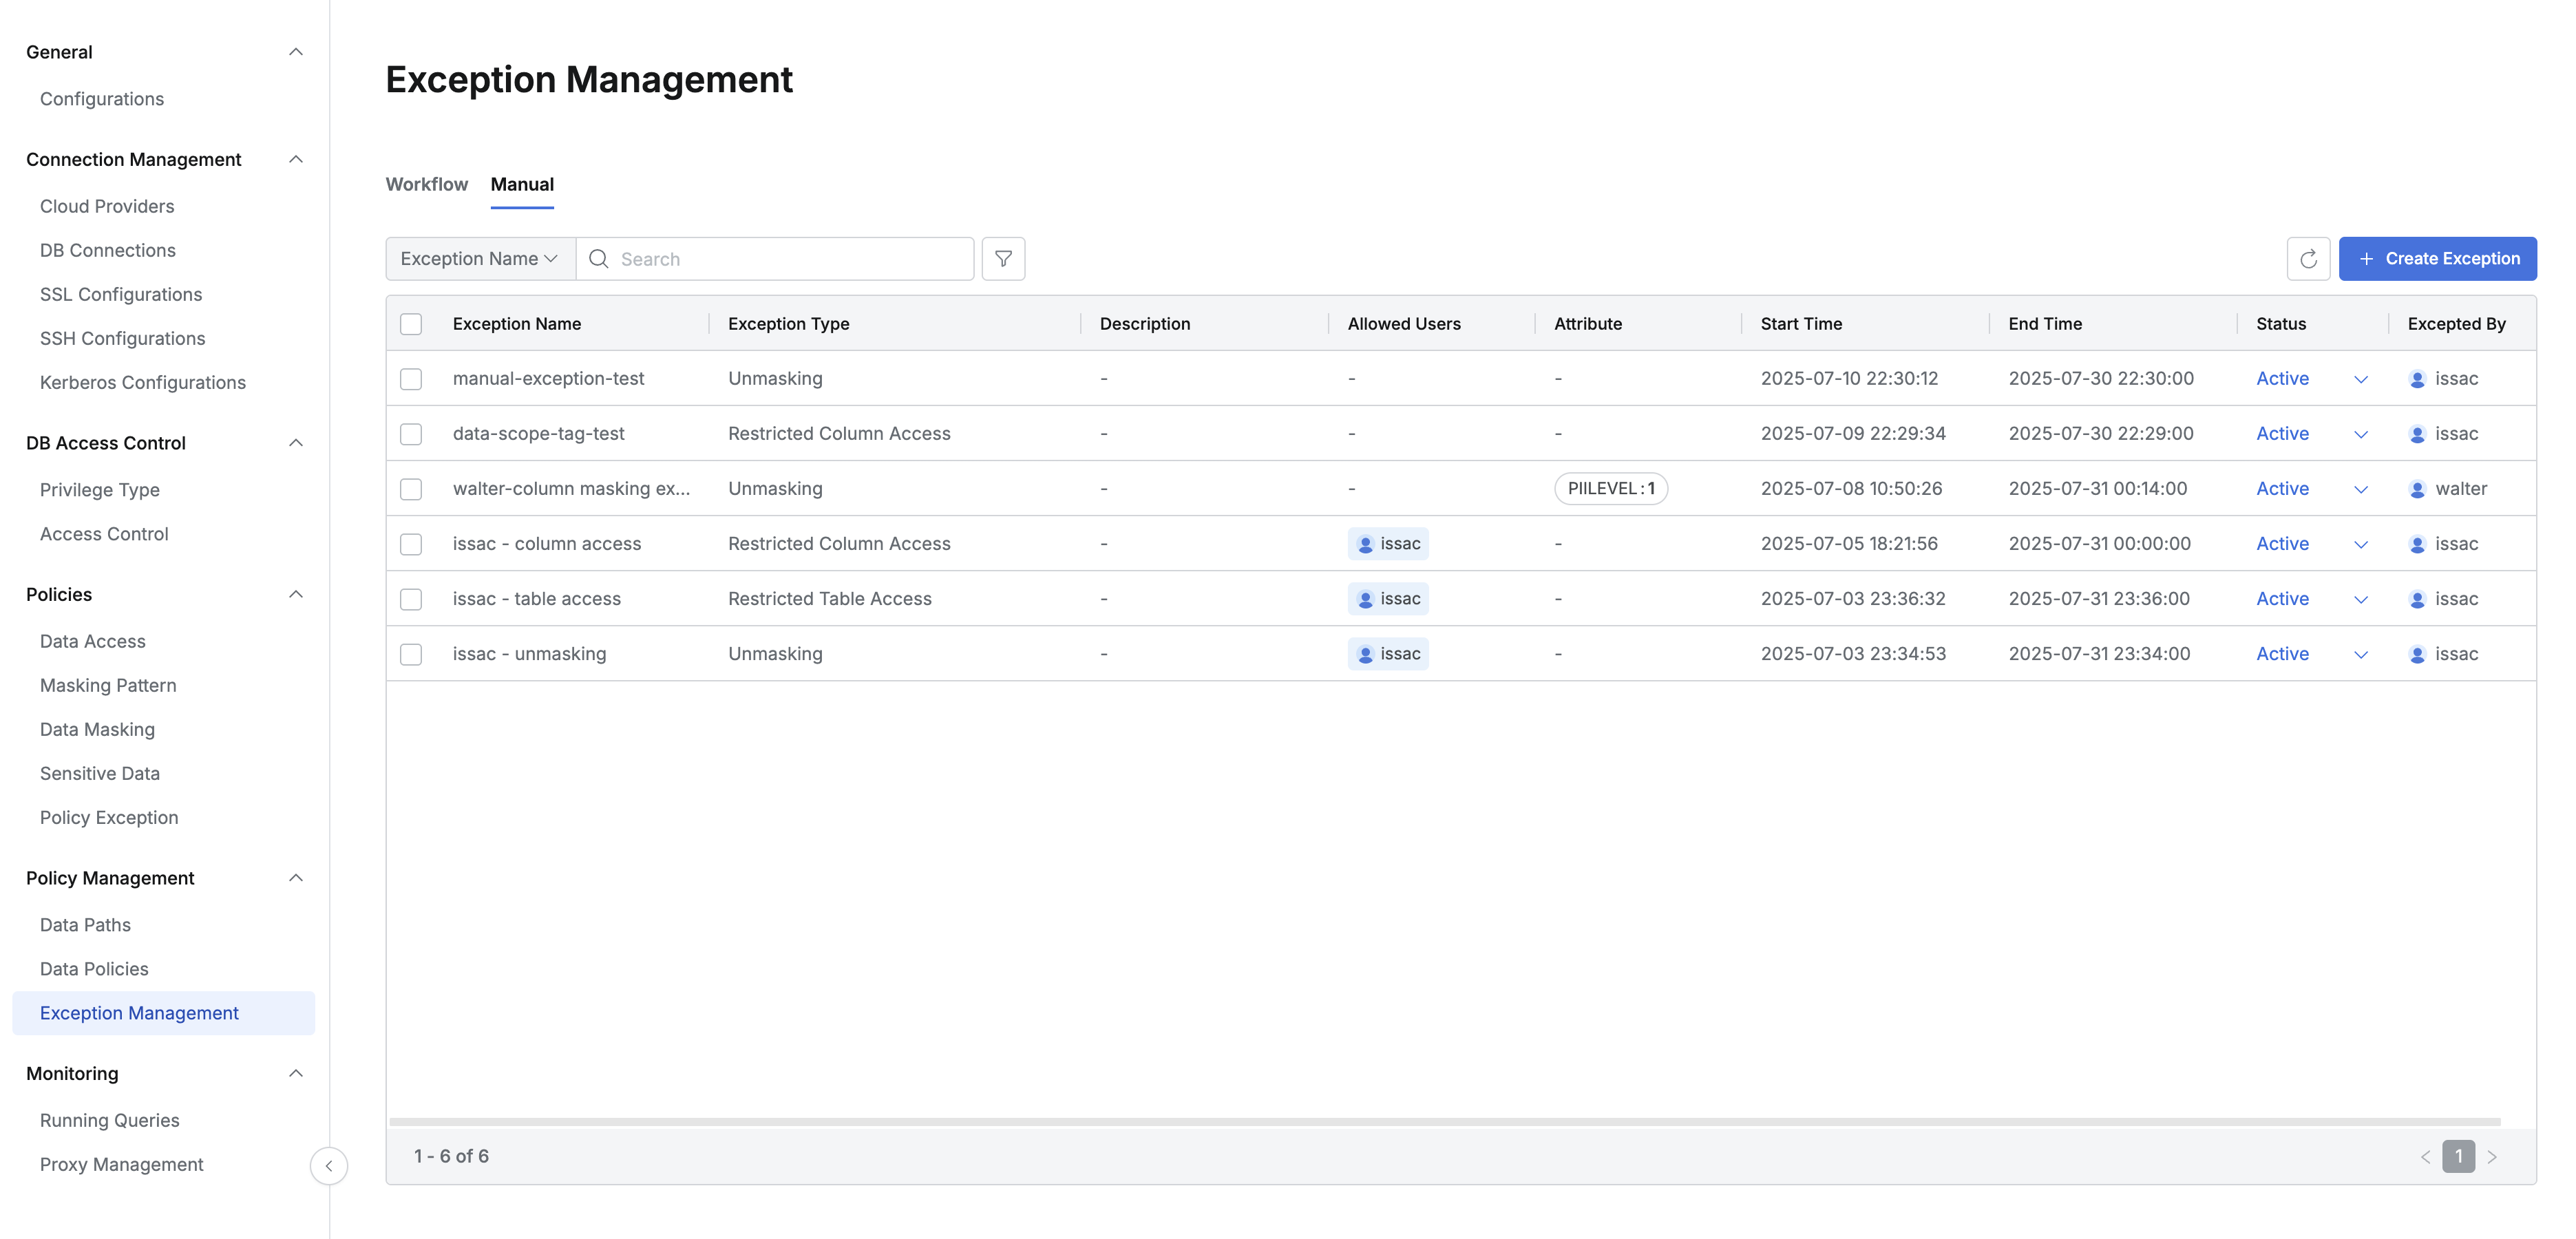
In Databases > Data Policies > Exception Management, go to the Manual tab to manually add a policy exception.
Creating a Policy Exception
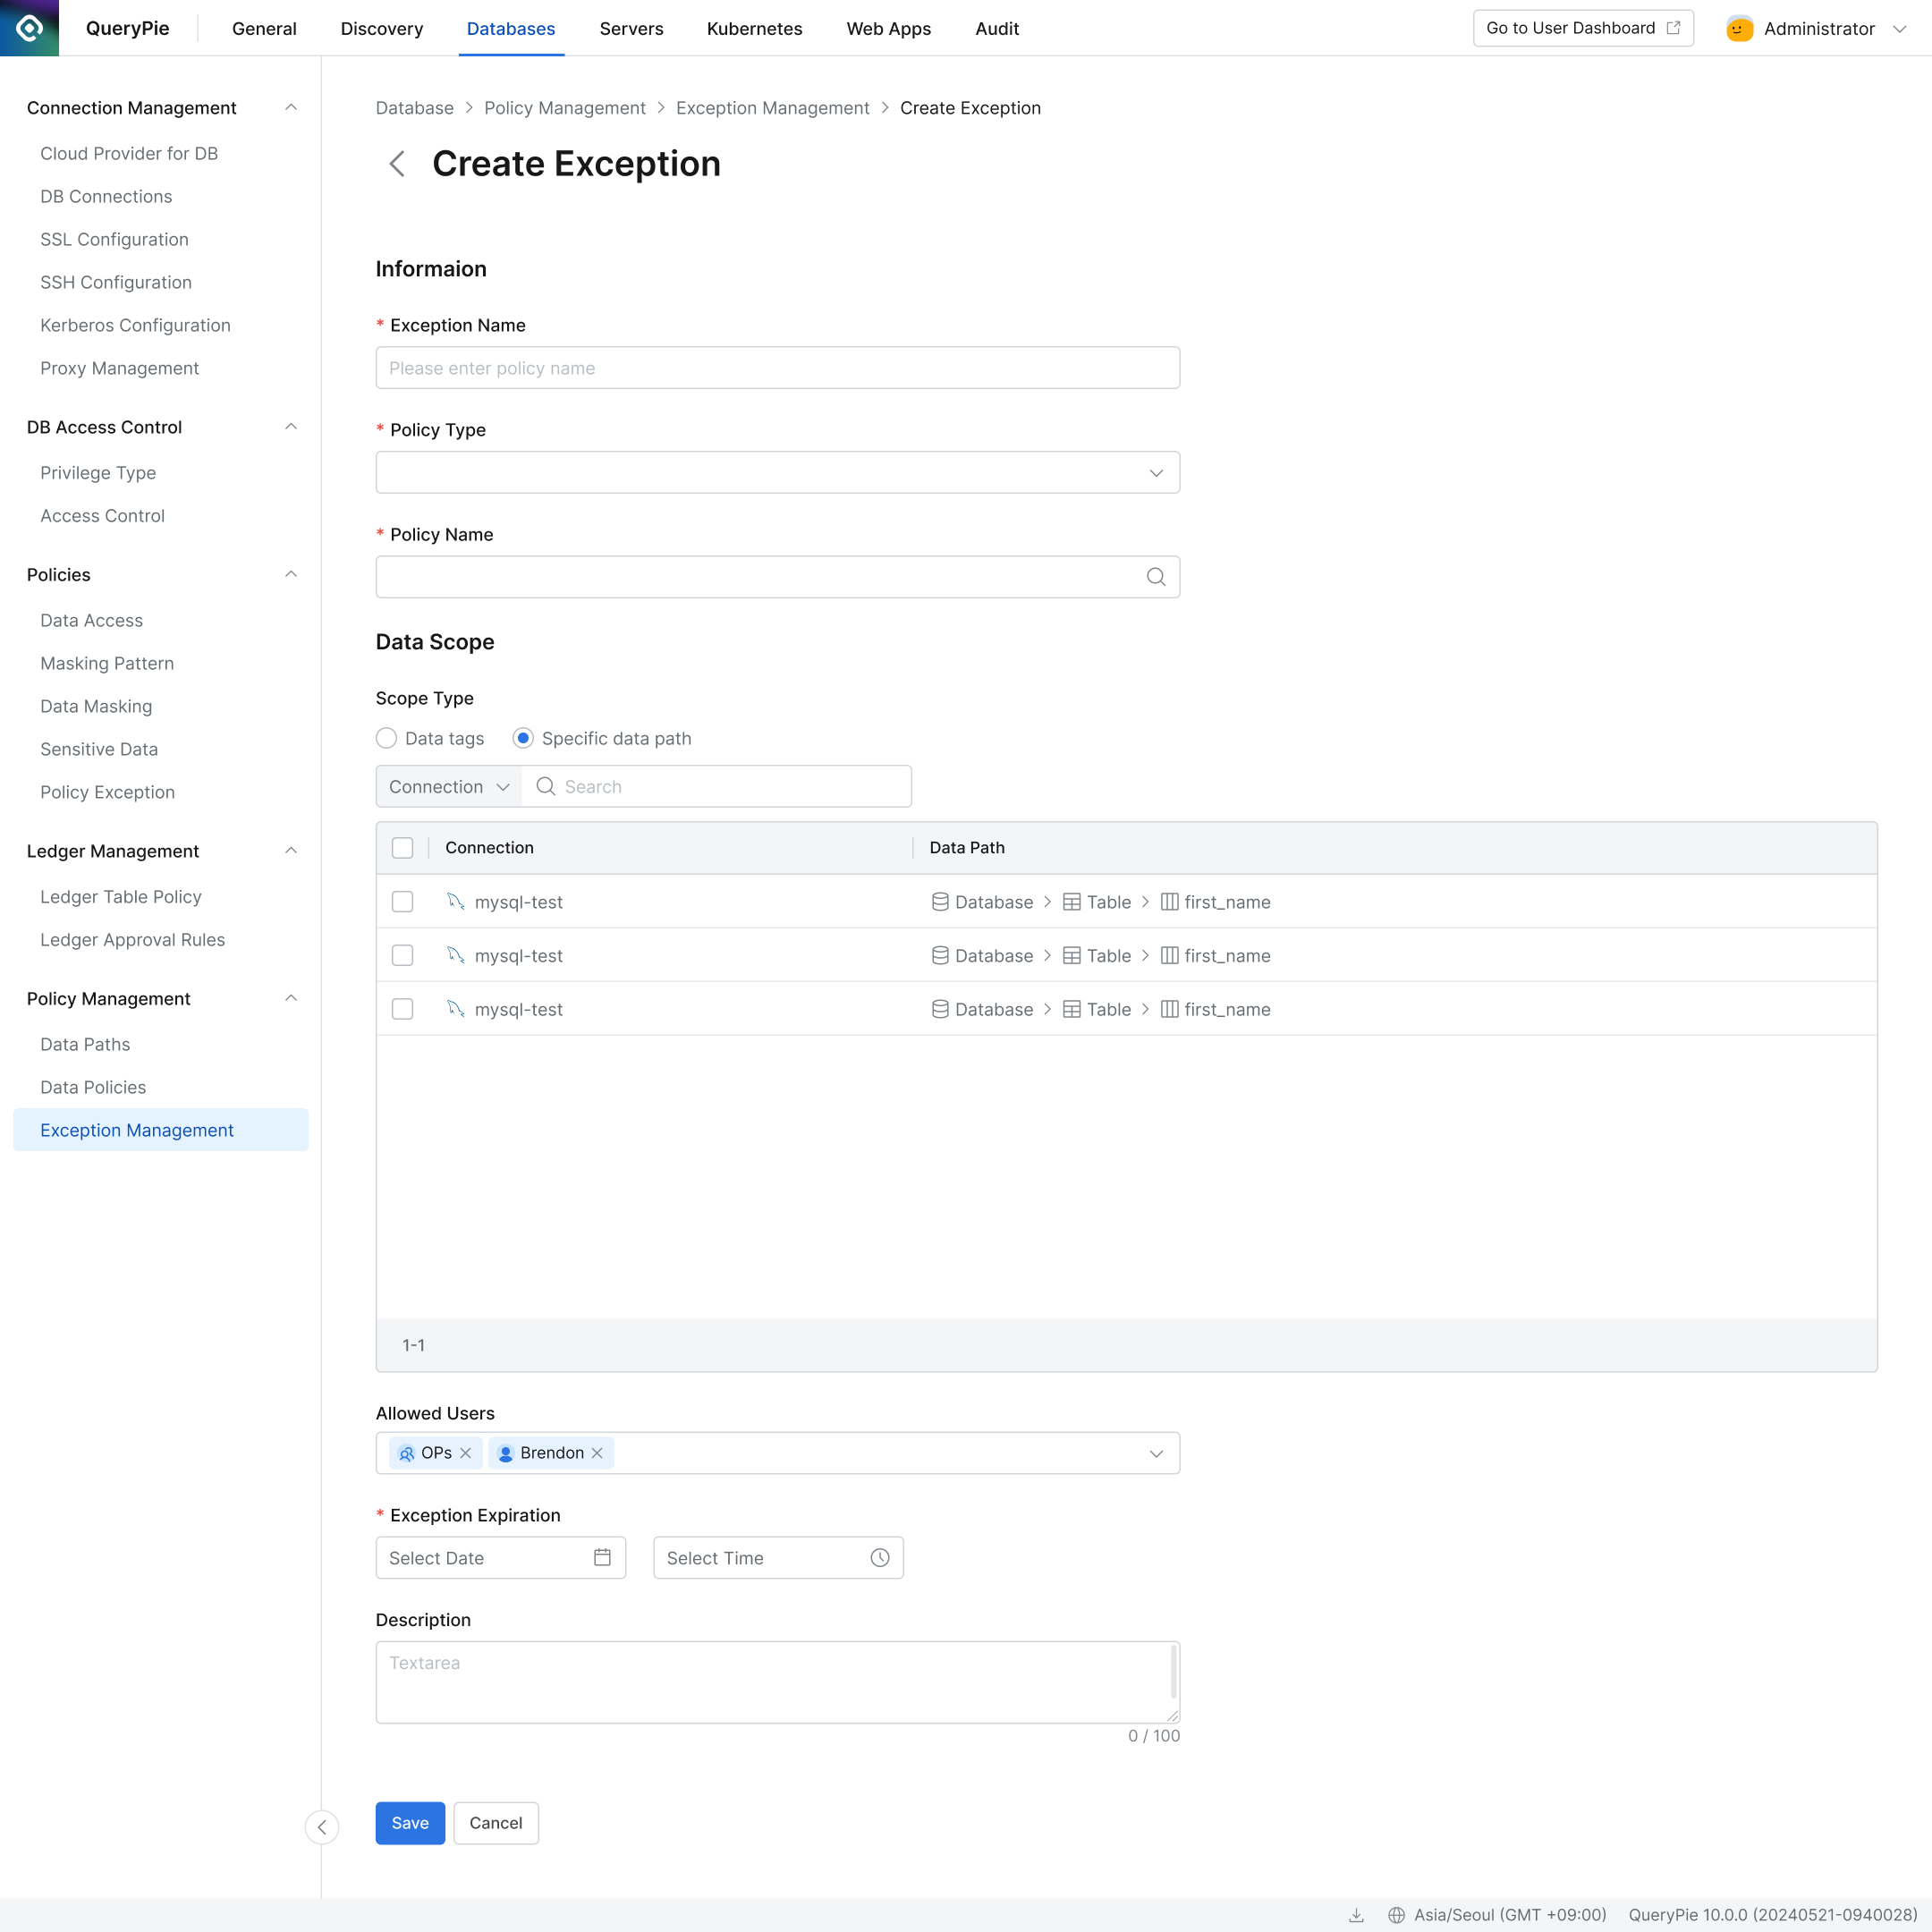
Click the + Create Exception button and enter the exception settings:
Exception Name: Enter a name for the policy exception.
Exception Type: Select the type of exception, such as Unmasking, Restricted Column Access, or Restricted Table Access.
Data Scope: Specify the target tables or columns for the exception.
If using Data Tag, only tags configured under Databases > Policy Management > Data Paths can be used. Tags with the same key are combined with an OR operator; tags with different keys use an AND operator.
If using Specific Data Path, specify the exact table or column. Regular expressions are not supported.
Allowed User: Specify the user or group who will have temporary access.
Exception Expiration: Set the expiration time for the exception.
Description: Add a brief description of the exception.
Changing the Exception Status Immediately
While the exception remains valid until the Exception Expiration date, there may be cases where you need to deactivate it immediately. You can do this by selecting Active or Inactive in the Status column without deleting or recreating the exception.
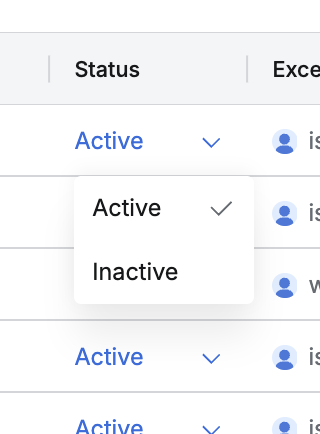
Instant Remediation
Editing a Manually Created Policy Exception
Click any manually created exception in the list to edit its settings. (Note: The Exception Type cannot be changed once created.)
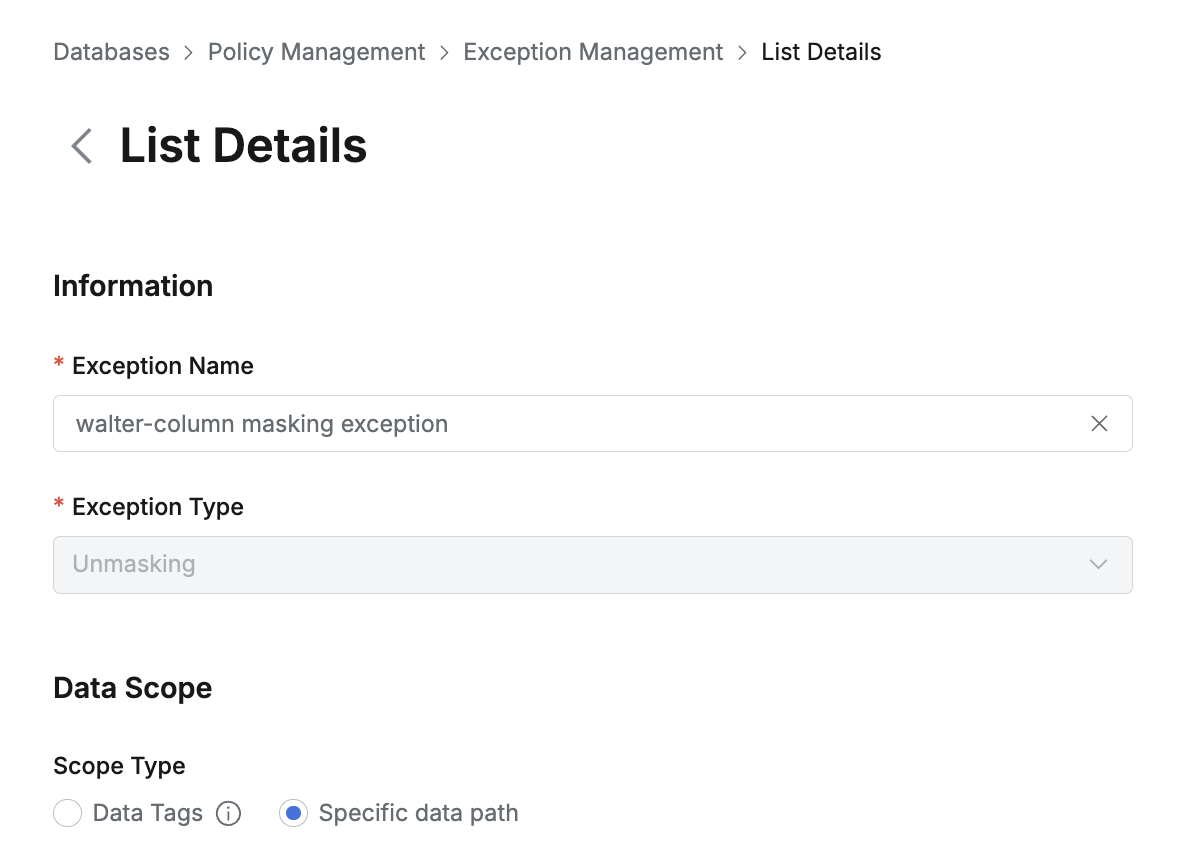
Exception Type Unchangeable
Deleting a Manually Created Policy Exception
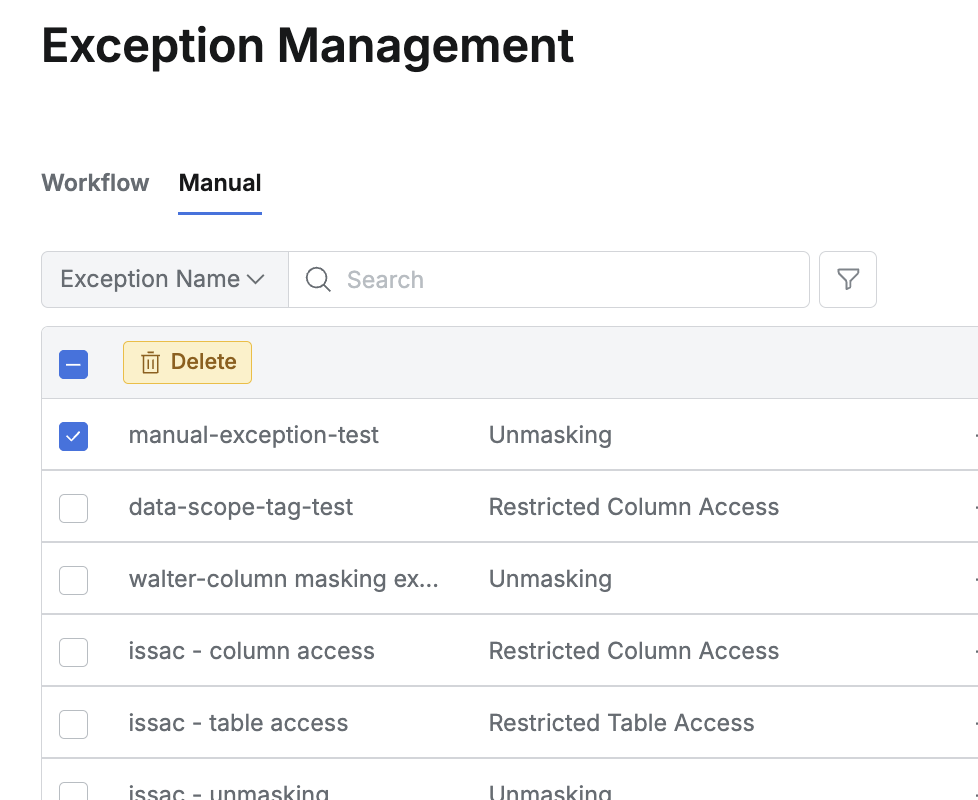
Deleting Manual Exception
Although policy exceptions expire automatically at the specified time, administrators can manually delete any exception at any time.
Check one or more exceptions in the list.
Click the Delete button to remove them.
%201.png)