Server Privilege Request
Overview
The Server Privilege Request feature allows you to easily request temporary command execution privileges on a server. You can specify the duration for temporary command use and select when the privileges should start—either immediately upon approval or when you connect to the server. This feature only supports SSH protocol communication.
Server Privilege Request
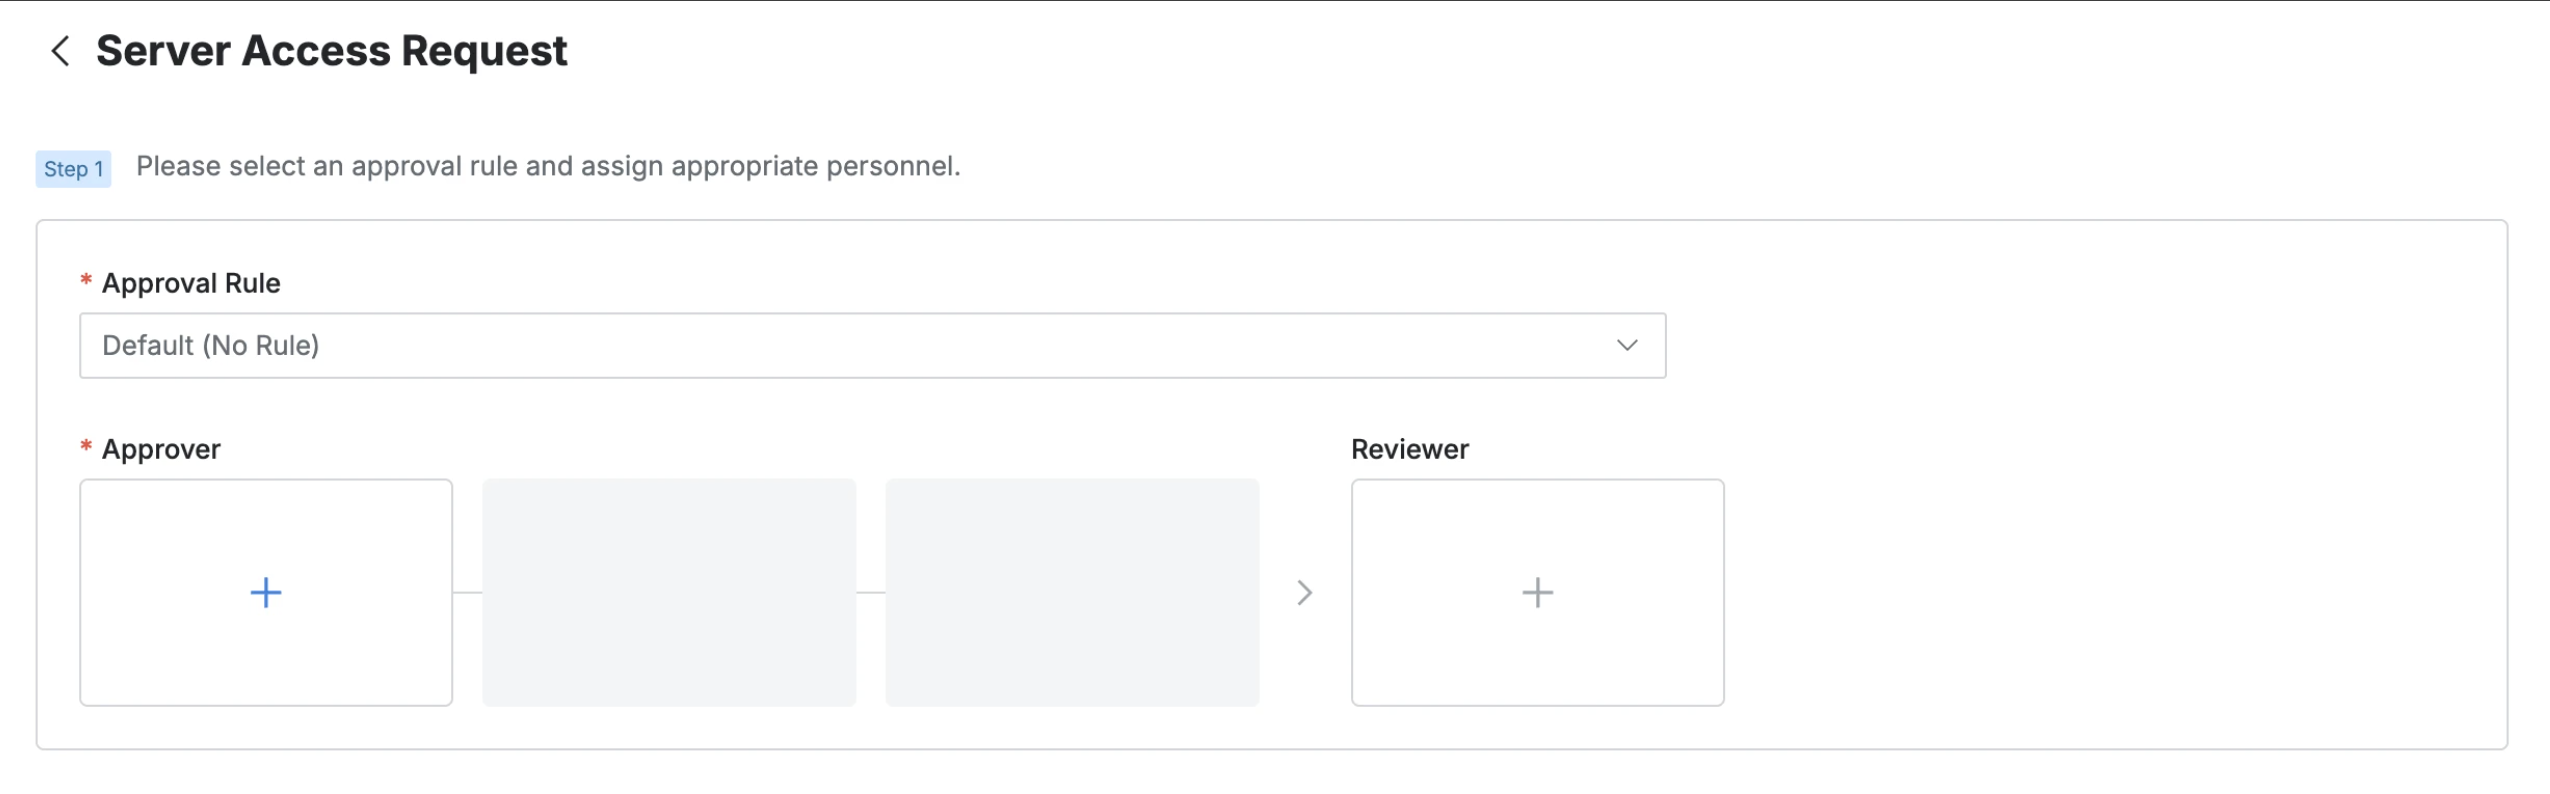
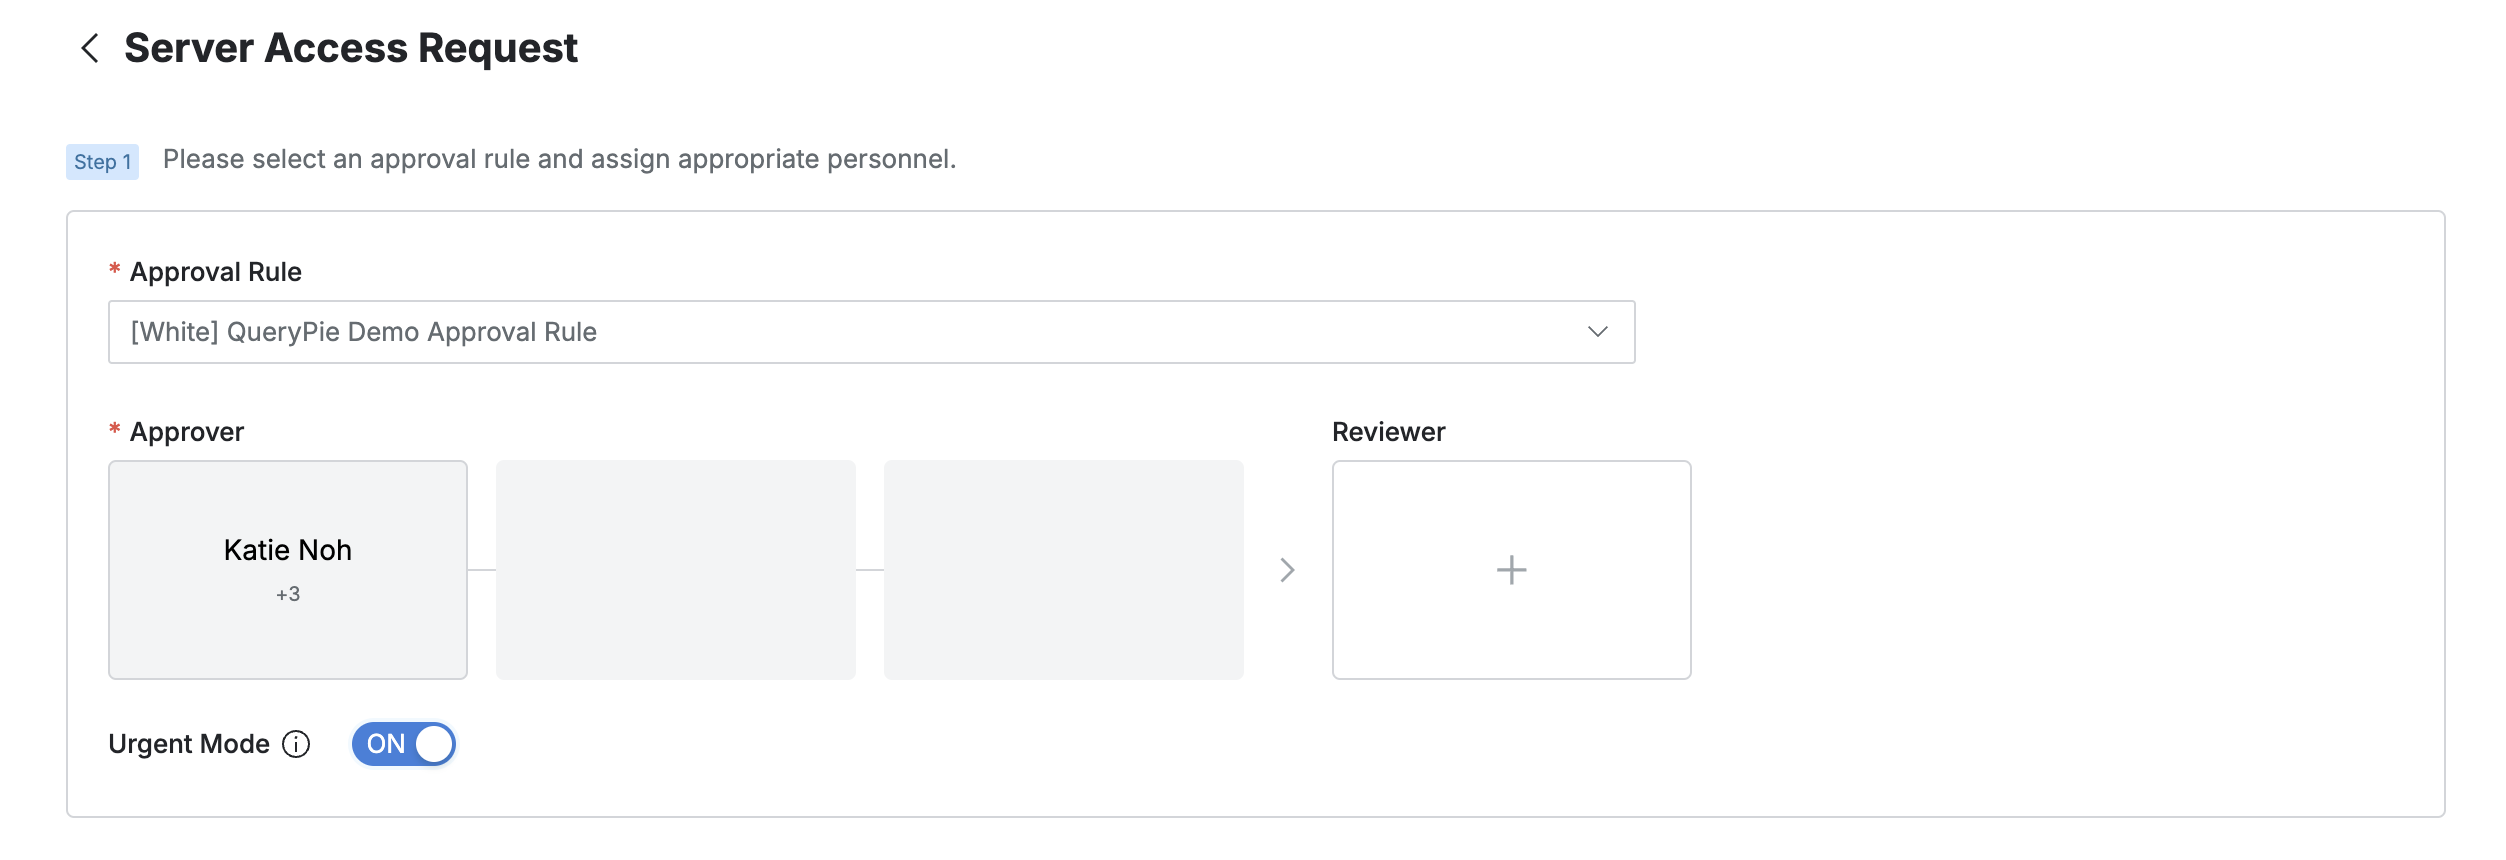
1. Select Approval Rule
Select an Approval Rule that suits your purpose. The designated approvers will vary depending on the selected rule.
If an approval rule with administrator-designated approvers is selected, the approvers are automatically assigned and cannot be added or changed.
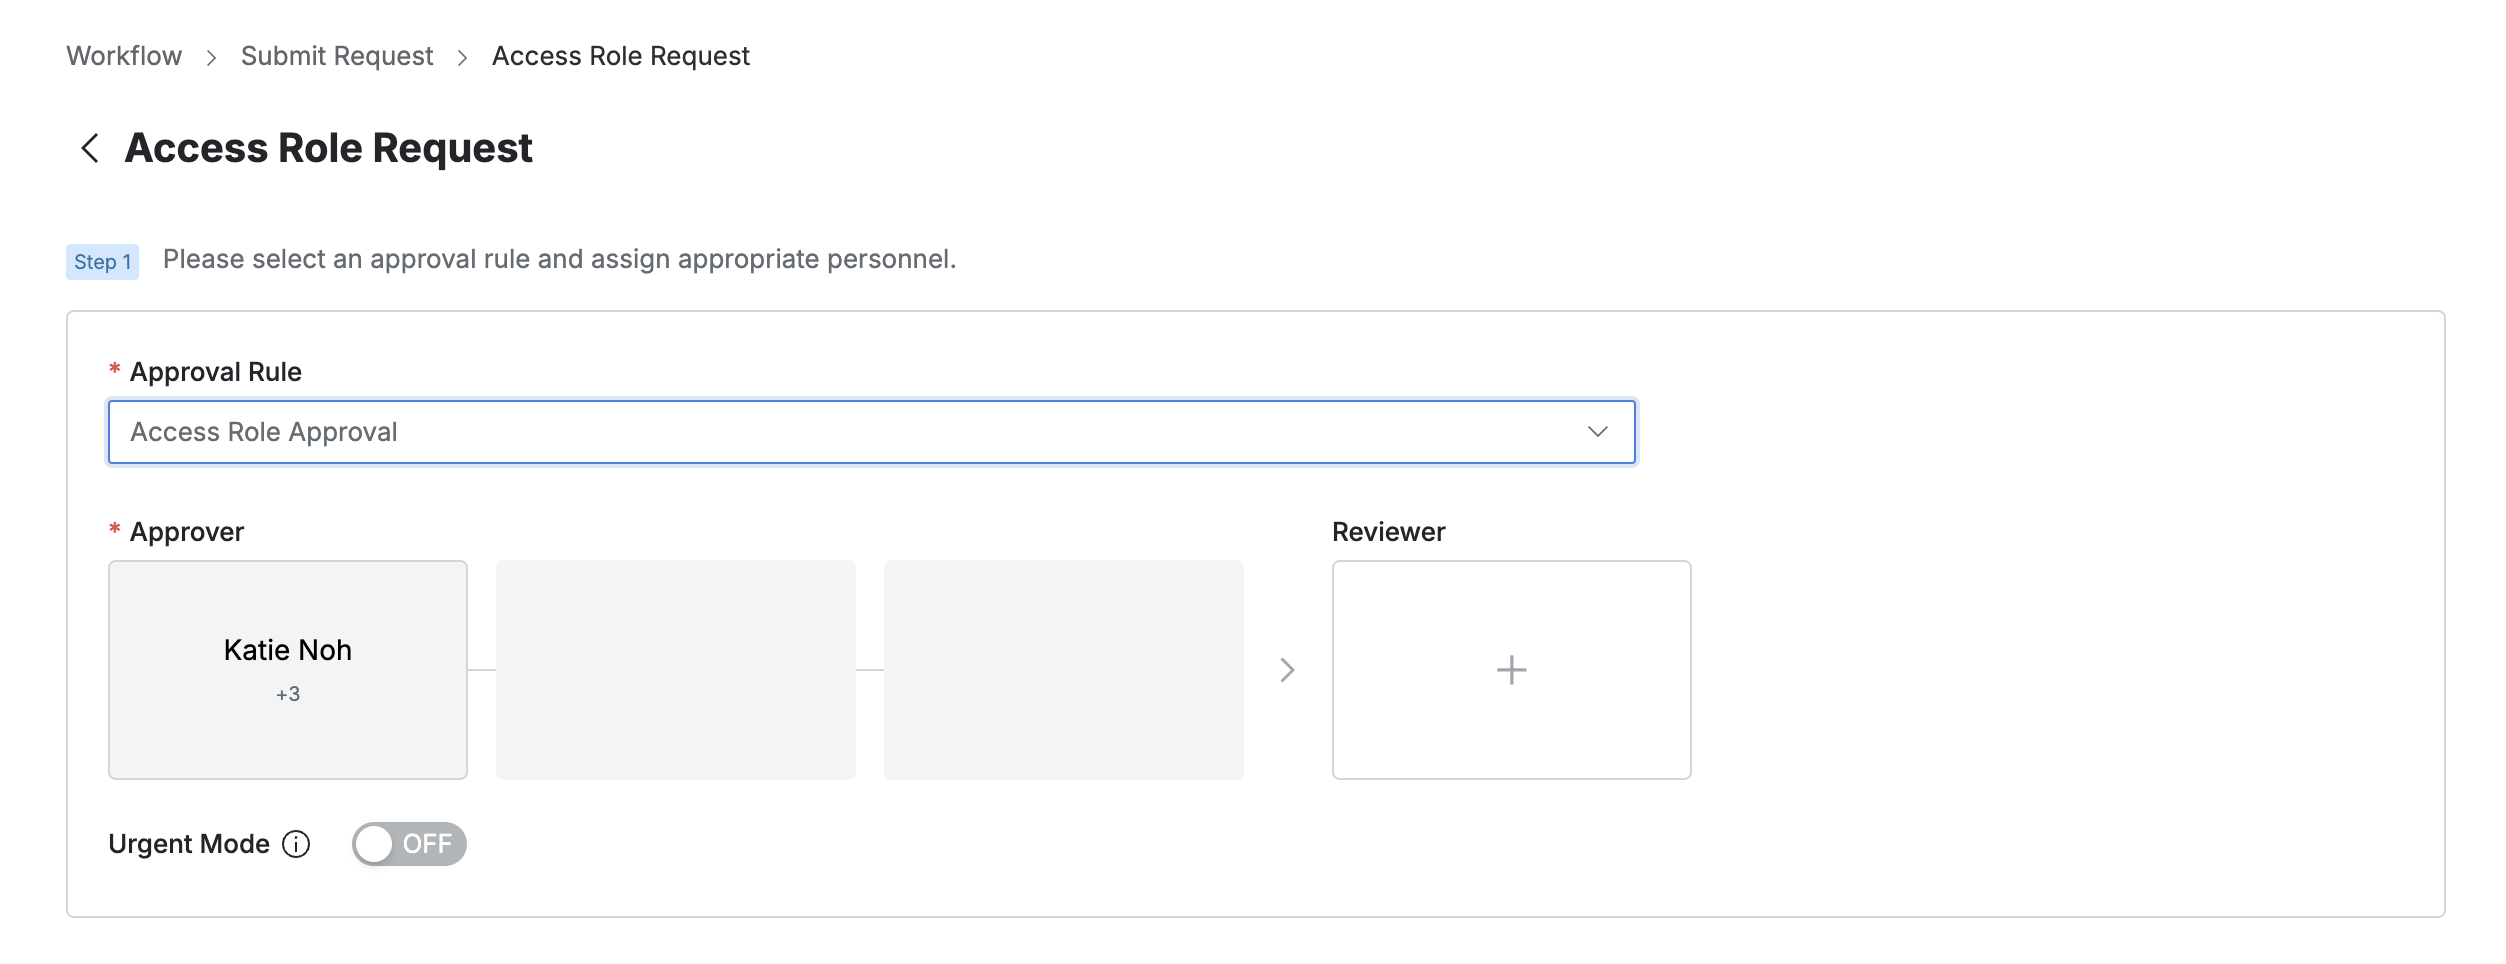
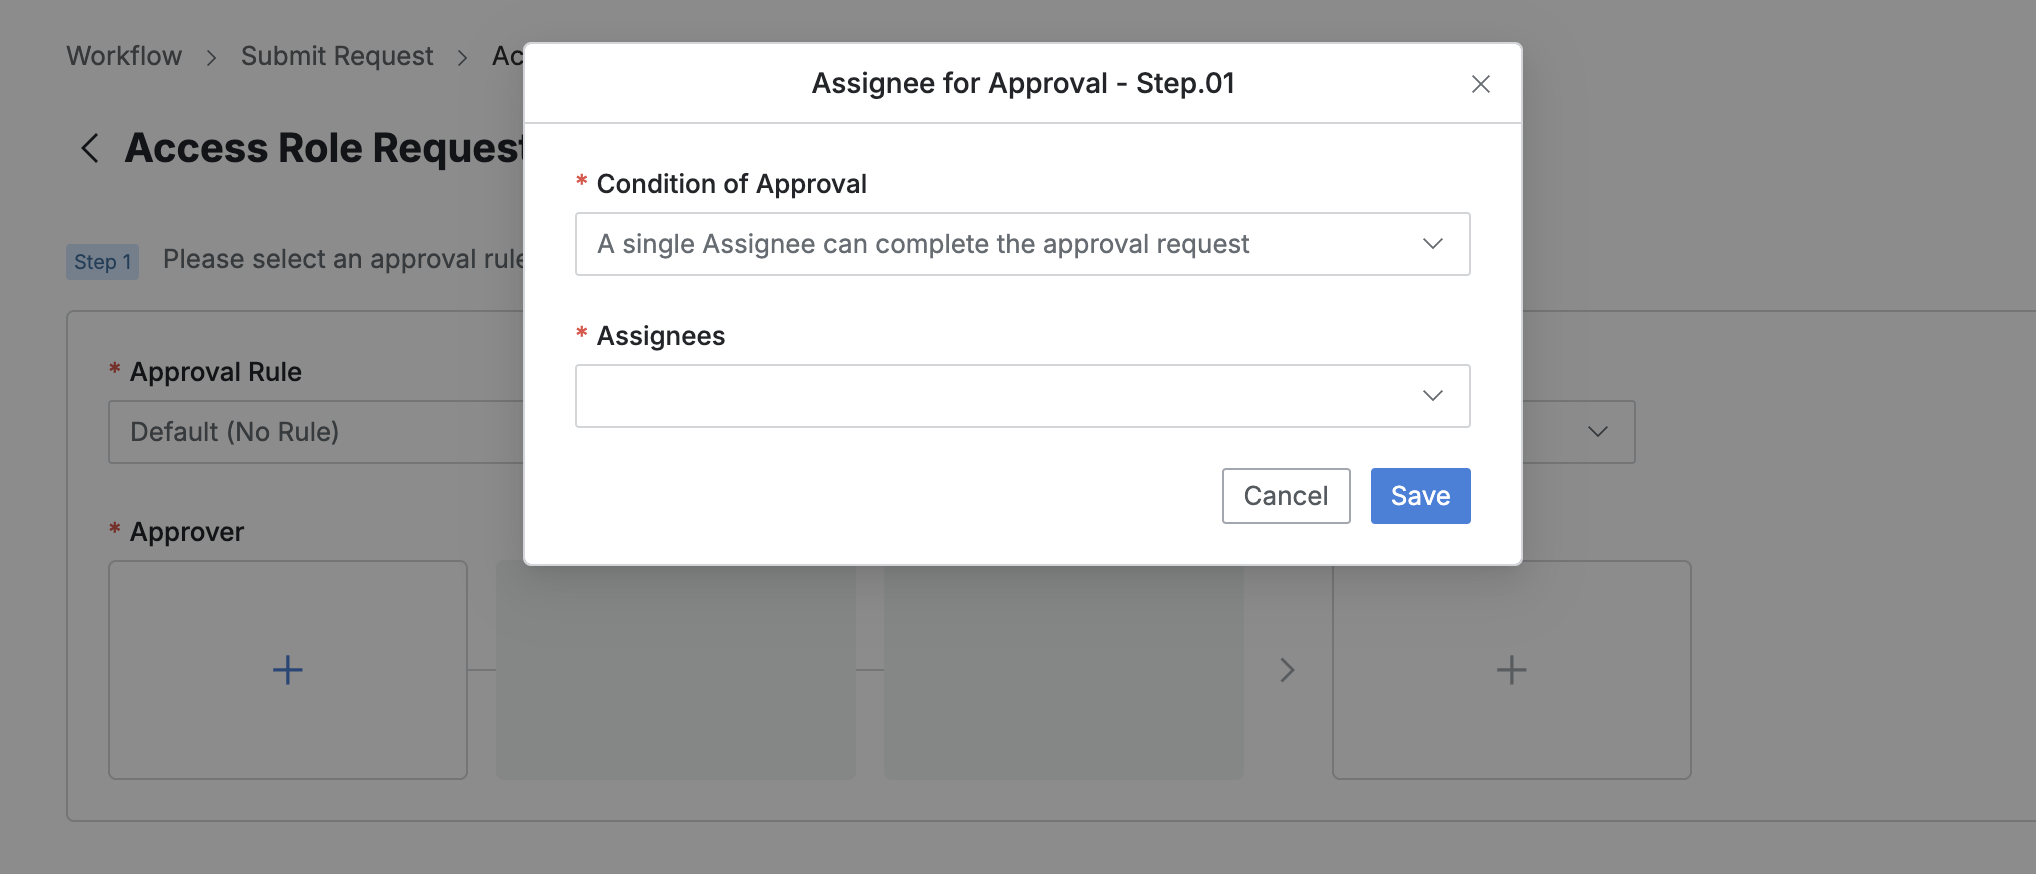
2. Designate Approver
In the approval line, click the
+button to display a pop-up window where you can designate approvers for each step.In this pop-up window, add the approval conditions and approvers, then click the
Savebutton to save the approval line.The available approval conditions are as follows:
A single Assignee can complete the approval request: The request will be approved with the approval of just one of the designated approvers.
All Assignees must approve this request: All designated approvers must approve the request for it to be processed.
3. Designate Reviewer
In the approval line, click the
+button to display a pop-up window where you can designate reviewers.If the administrator has not allowed the designation of reviewers, the Reviewer box will not be displayed.
In this pop-up window, add the reviewers.
Click the
Savebutton to close the modal and complete the reviewer designation.
4. Send Request with Post-Approval (Urgent Mode)
If an approval rule that allows the post-approval feature (Urgent Mode) is selected, the Urgent Mode switch will be displayed.
If you set Urgent Mode to On and submit the request, you can immediately receive privileges or perform tasks.
Q. The Urgent Mode switch is not visible.
A. If you have selected an approval rule for which the administrator has not enabled Urgent Mode, this switch will not be displayed.
5. Select Target Role for Request
Click the select box under Role.
Select one of the Roles assigned to you.
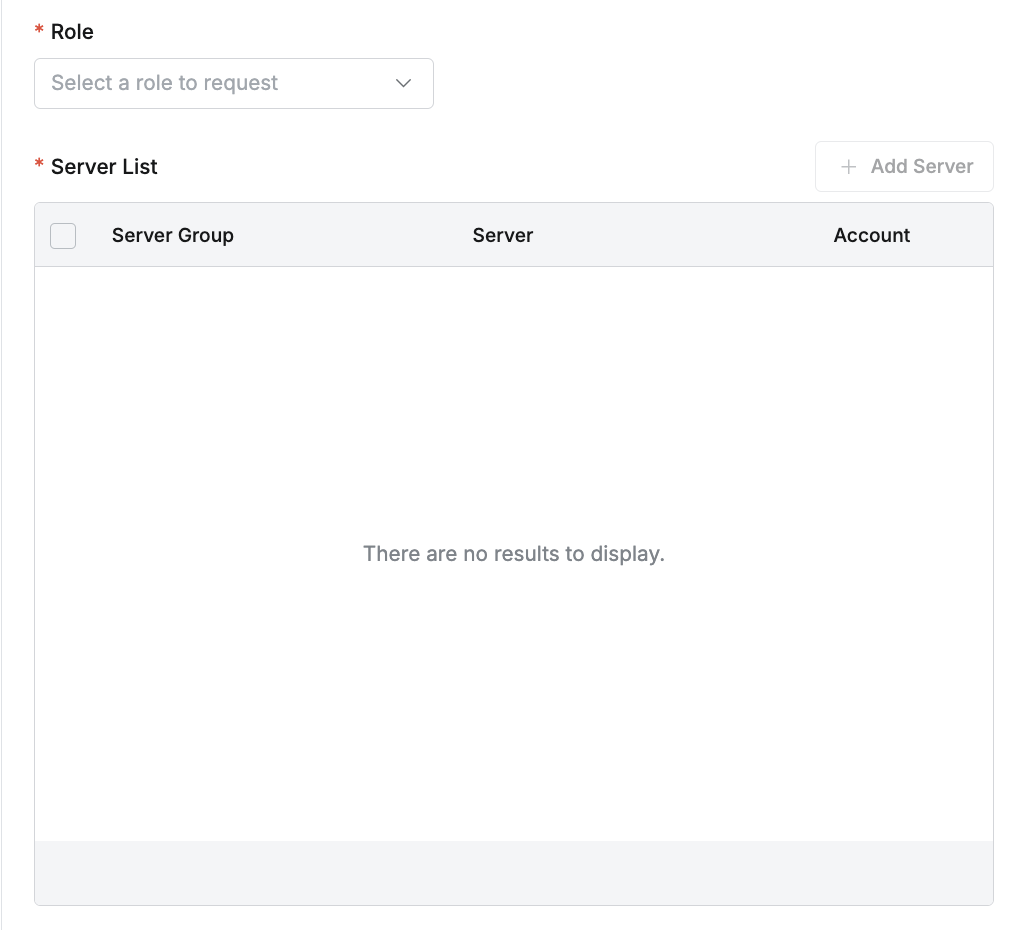
6. Select Target Server for Request
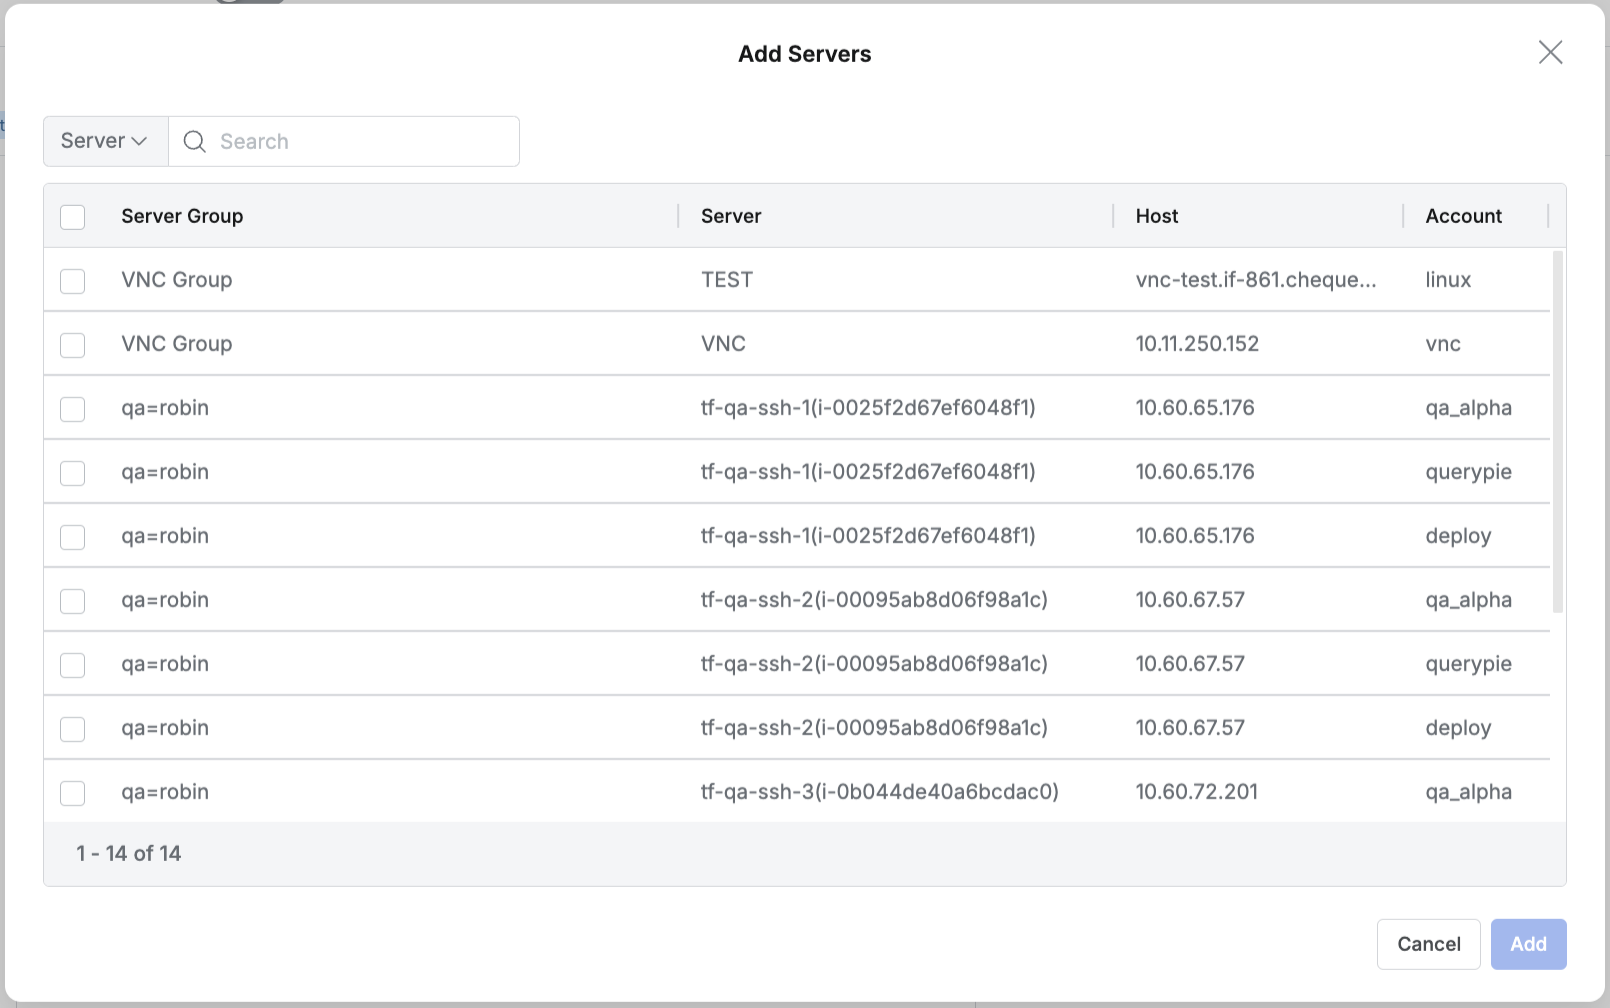
Click
Add Serverto the right of the Server List to display a pop-up window for server selection.The servers available for selection depend on the Role chosen in step '5. Select Target Role for Request'.
Click the
Addbutton to close the modal and complete server selection.
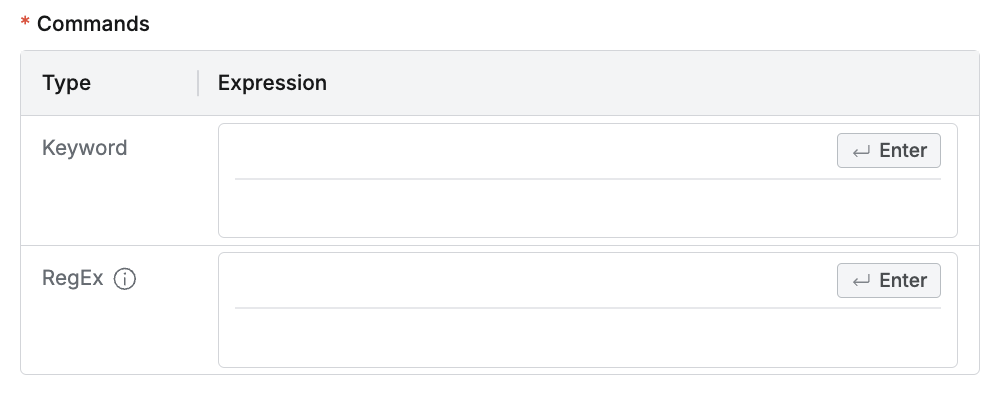
7. Enter Commands to Use
In the Commands field, enter the commands for which you are requesting temporary use.
Keyword: You can enter commands as keywords.
RegEx: You can enter commands as regular expressions.
8. Enter Server Privilege Usage Time
Privilege Start Trigger: Select the start trigger for the Privilege Duration, which is the period the Server Privilege is active.
Access to Server: After Server Privileges are applied, the duration count starts when the user connects to the server.
Grant: The Server Privilege usage time starts counting from the moment the privileges are granted. When the request is approved, QueryPie automatically grants the Server Privileges.
Privilege Duration: Set the duration for which Server Privileges will be active. You can enter the time in minutes. The actual start time depends on the Privilege Start Trigger setting.

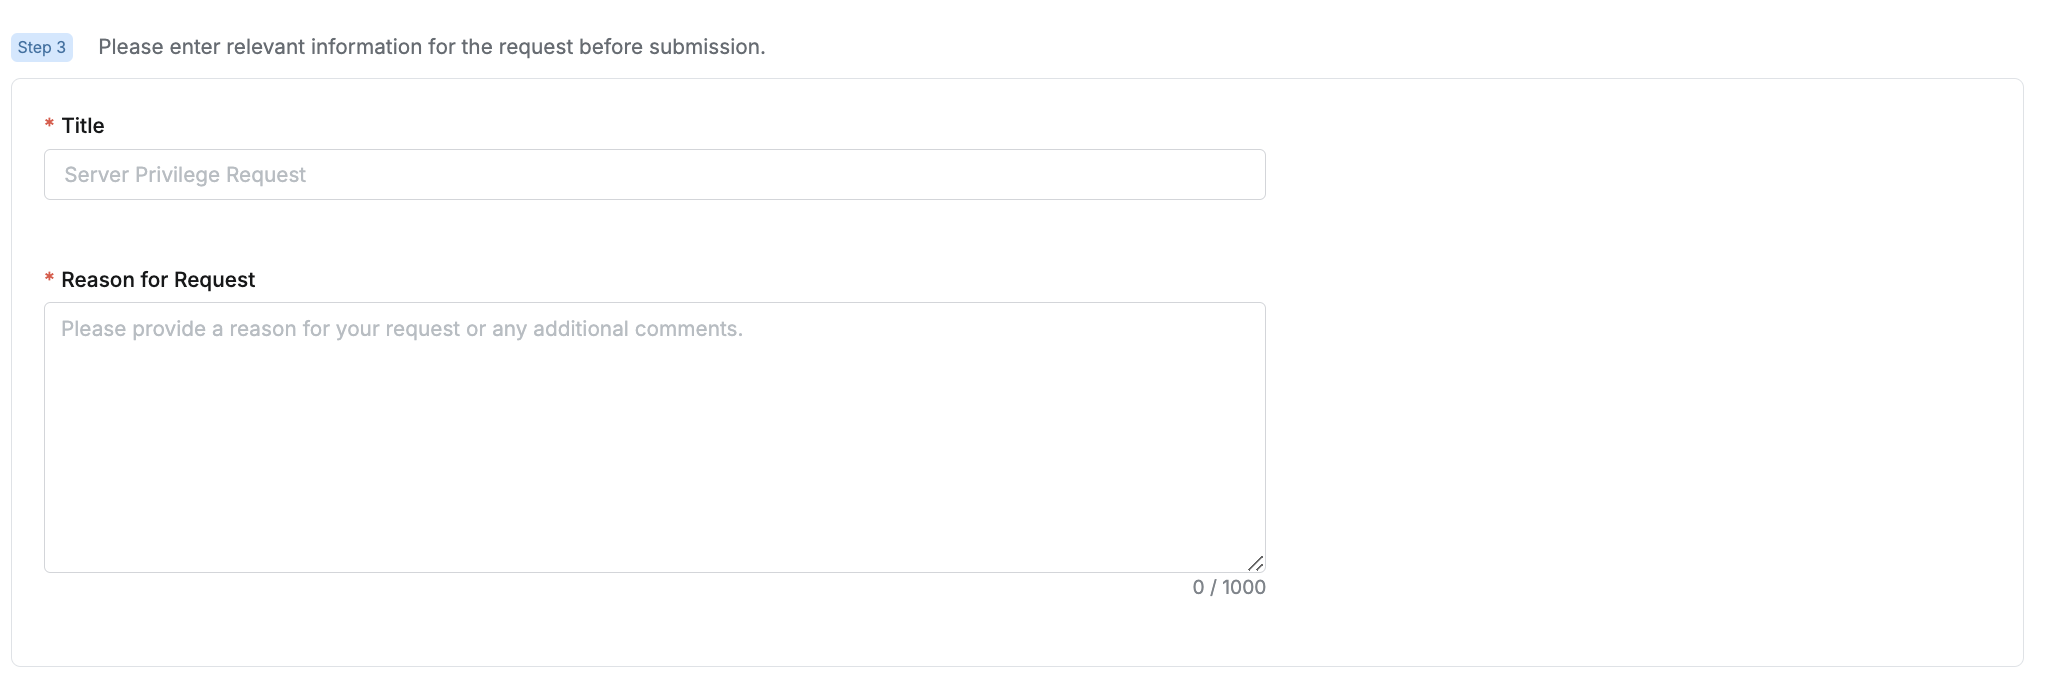
9. Enter Request Information
Title: Enter the title for the request.
Reason for Request: Enter the reason for requesting these privileges.
Submit: Once you have completed all fields, click the
Submitbutton to submit the request
For instructions on connecting to servers where you have approved privileges, please refer to the Connect to Granted Servers document.