Servers
Overview
QueryPie supports viewing, creating, modifying, and deleting server assets. All servers, whether synchronized through a Cloud Provider, registered via API, or manually, are managed on the same page.

Administrator > Servers > Connection Management > Servers
Viewing Servers
Navigate to the Administrator > Servers > Connection Management > Servers menu.
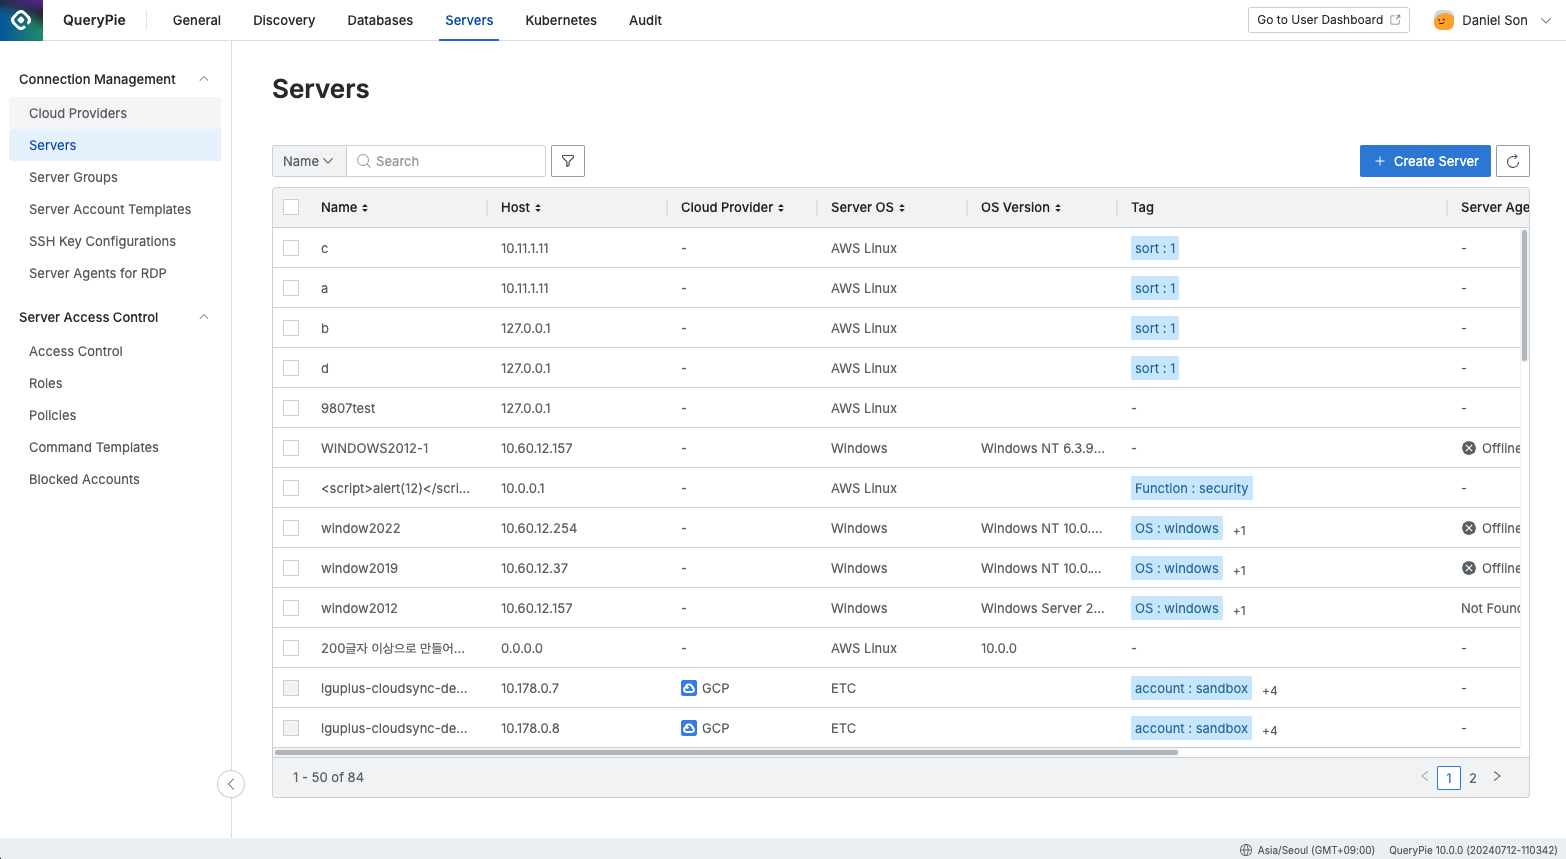
You can search for servers by name using the search bar in the upper left corner of the table.
Refresh the server list using the refresh button in the upper right corner of the table.
The table provides the following columns of information:
Name: Server name
Host: Server IP or domain
Cloud Provider: Connected platform (for manually registered servers, a hyphen is displayed)
Server OS: Operating system of the server
OS Version: Detailed version of the server OS
Tag: List of tags assigned to the server
Server Agent: (Windows Server only) Indicates whether the Server Agent is online/offline and shows version information
Created At: Date and time the server was created
Updated At: Date and time the server was last updated
Click on any row to view detailed server information.
Creating a Server
Navigate to the Administrator > Servers > Connection Management > Servers menu.
Click the
+ Create Serverbutton in the upper right corner.Follow the Manually Enroll Servers guide to register a server.
Deleting a Server

Navigate to the Administrator > Servers > Connection Management > Servers menu.
Check the box to the left of the server you want to delete.
Click the
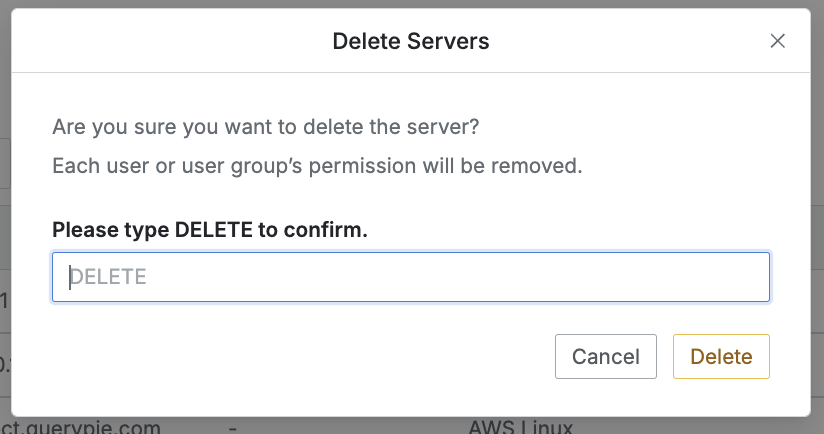
Deletebutton that appears in the table column line.When the popup appears, type DELETE and click the
Deletebutton to confirm and proceed with deletion.
When a server is deleted, all access permissions granted to users/groups for that server are also deleted in bulk.
%201.png)