Manage Servers in Groups
Overview
You can group multiple servers to apply accessible accounts and policies at once. By creating server groups according to specific purposes, you can conveniently manage policies in bulk and grant the permissions for these grouped servers to individual users or user groups all at once.
It is recommended to pre-register the necessary resources for creating server groups.
Administrator > Servers > Connection Management > Server Account Templates
Administrator > Servers > Connection Management > SSH Key Configurations
Creating a Server Group
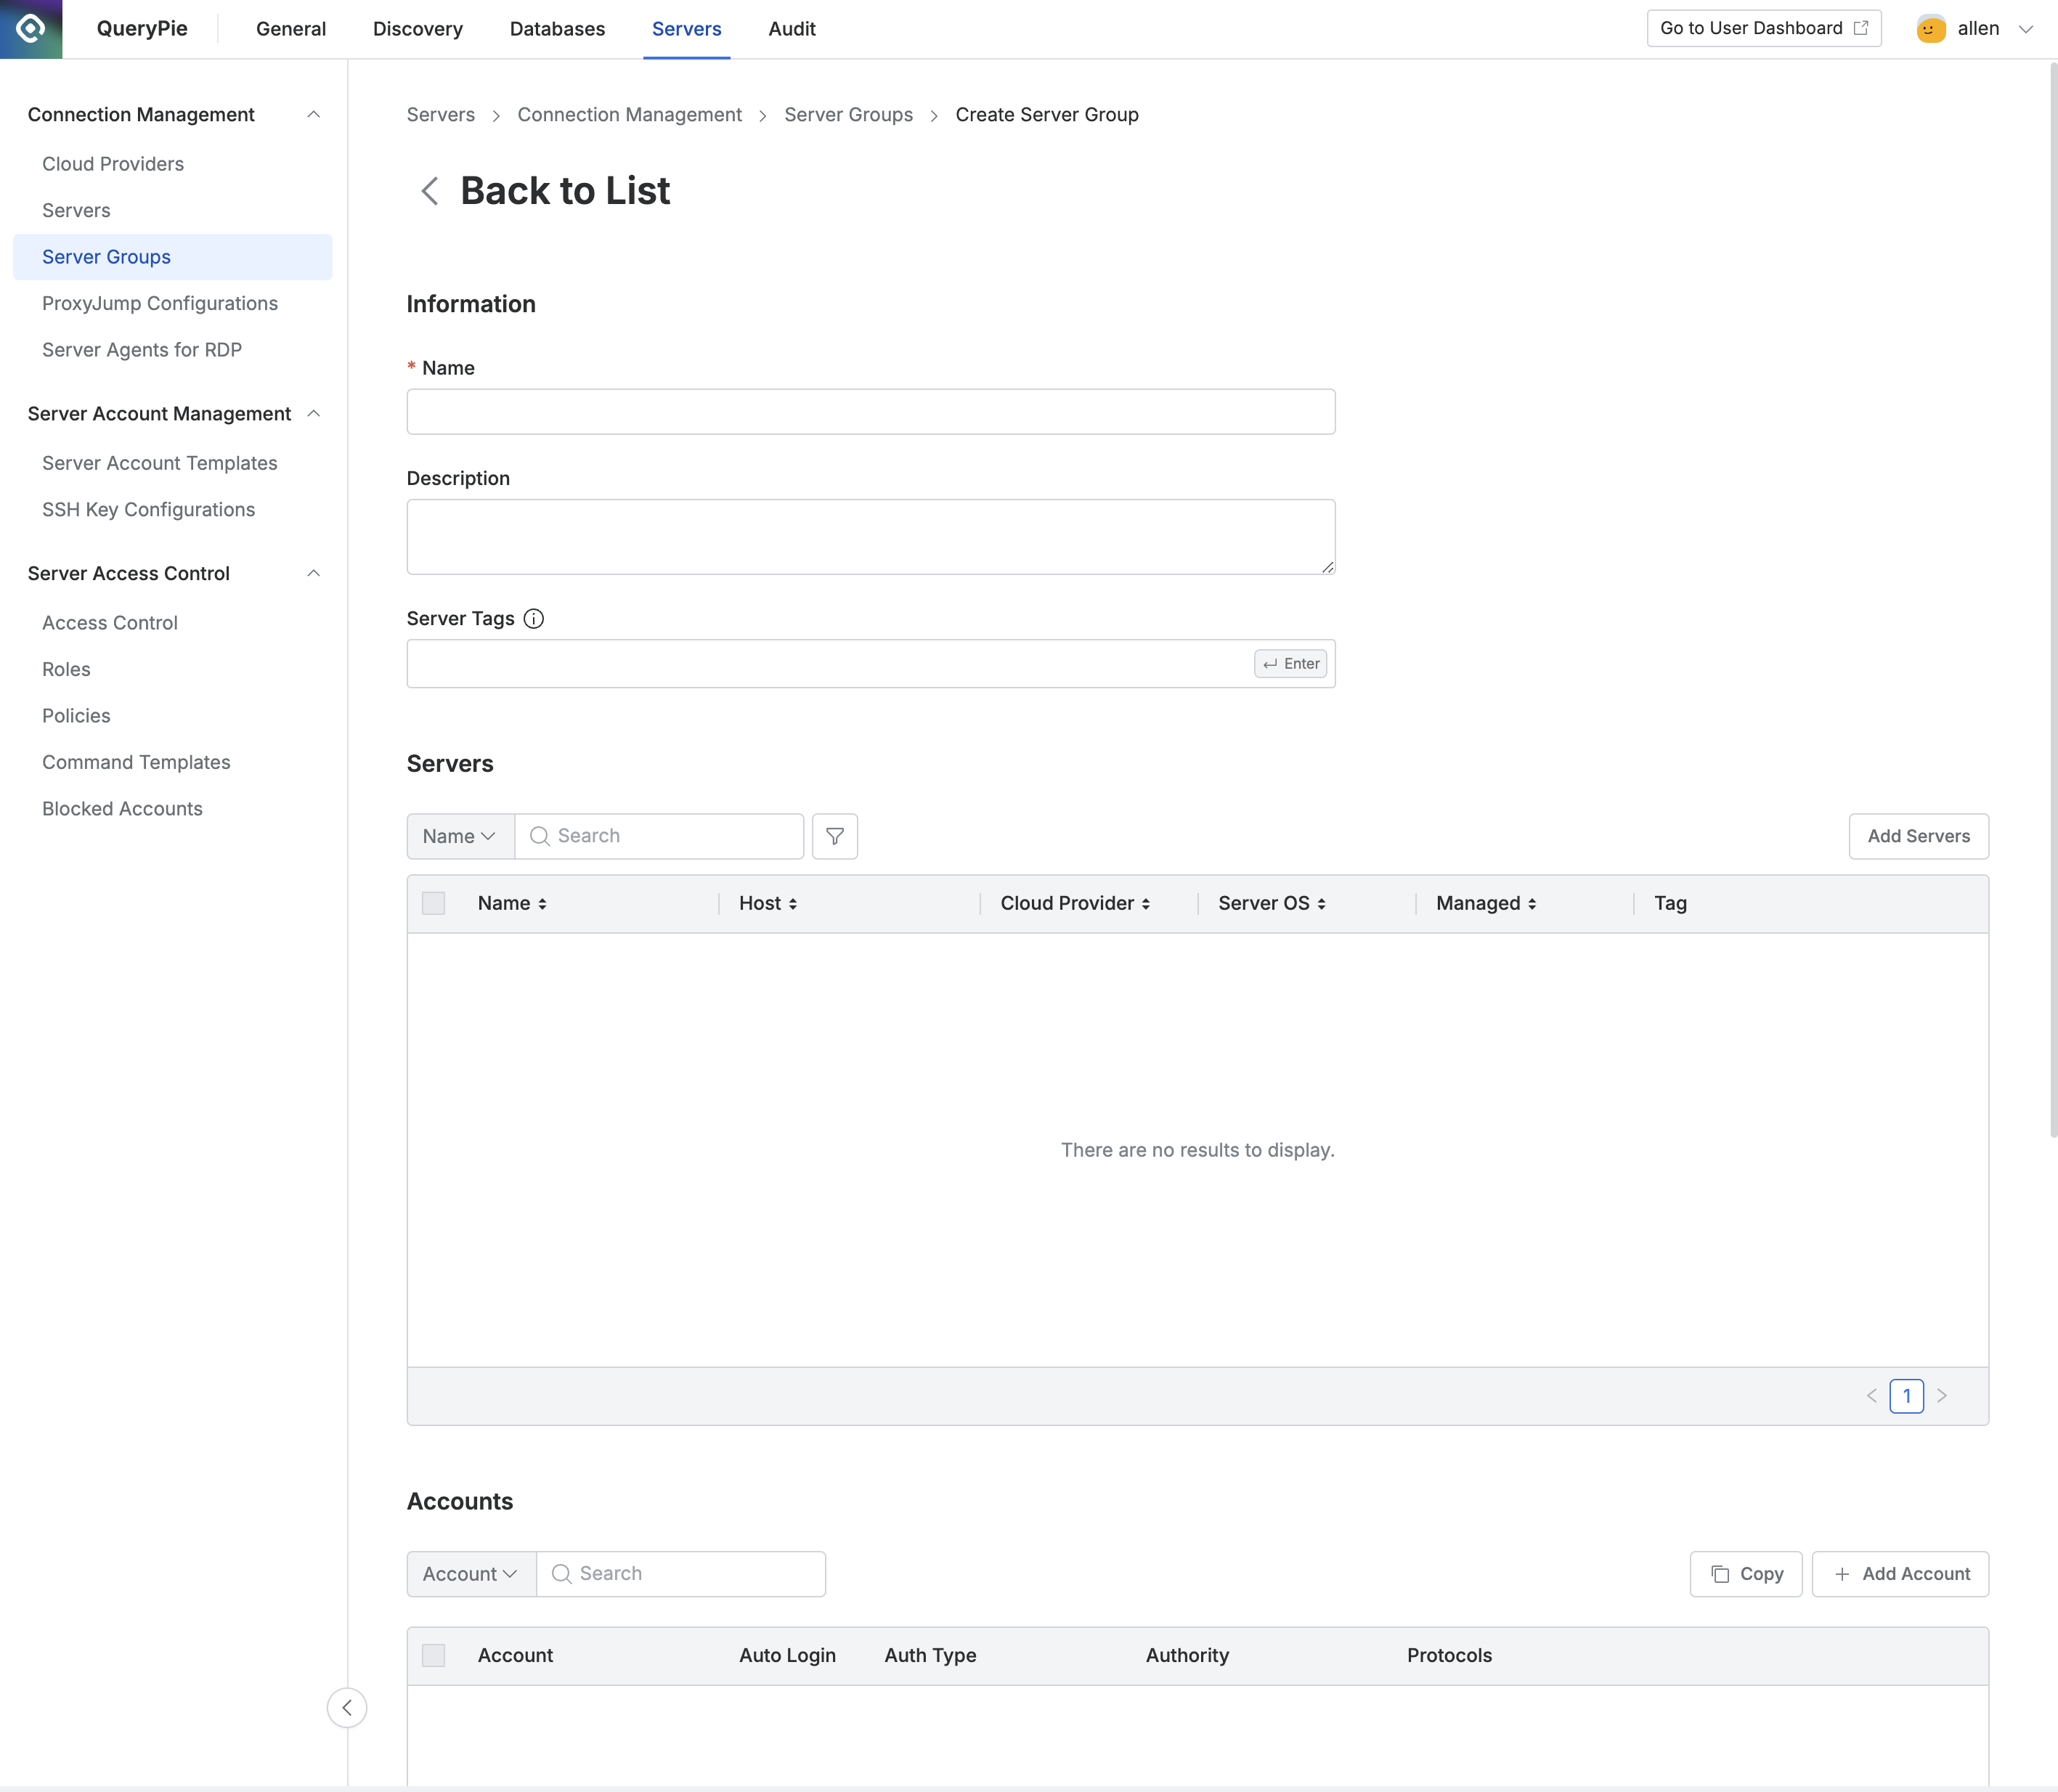
Administrator > Servers > Connection Management > Server Groups > Create Server Group
Navigate to the Administrator > Servers > Connection Management > Server Groups menu.
Click the
+ Create Groupbutton in the upper right corner.Enter the following information to create the group:
Name: Enter a name to distinguish the server group on the screen.
Description: Enter additional information about the server group.
Server Tags: Filter and add servers to be included in the server group using Server Tags.
Click the
Savebutton to save the group.
Server groups can be managed based on tags. By specifying a specific tag in the Server Tags of the server group, all servers with that tag can be dynamically included in the server group.
Creating/Editing a Server Group
You can create a server group by entering the information below. Some items can be edited after creation.
1. Entering Basic Information and Add Servers Using Tags
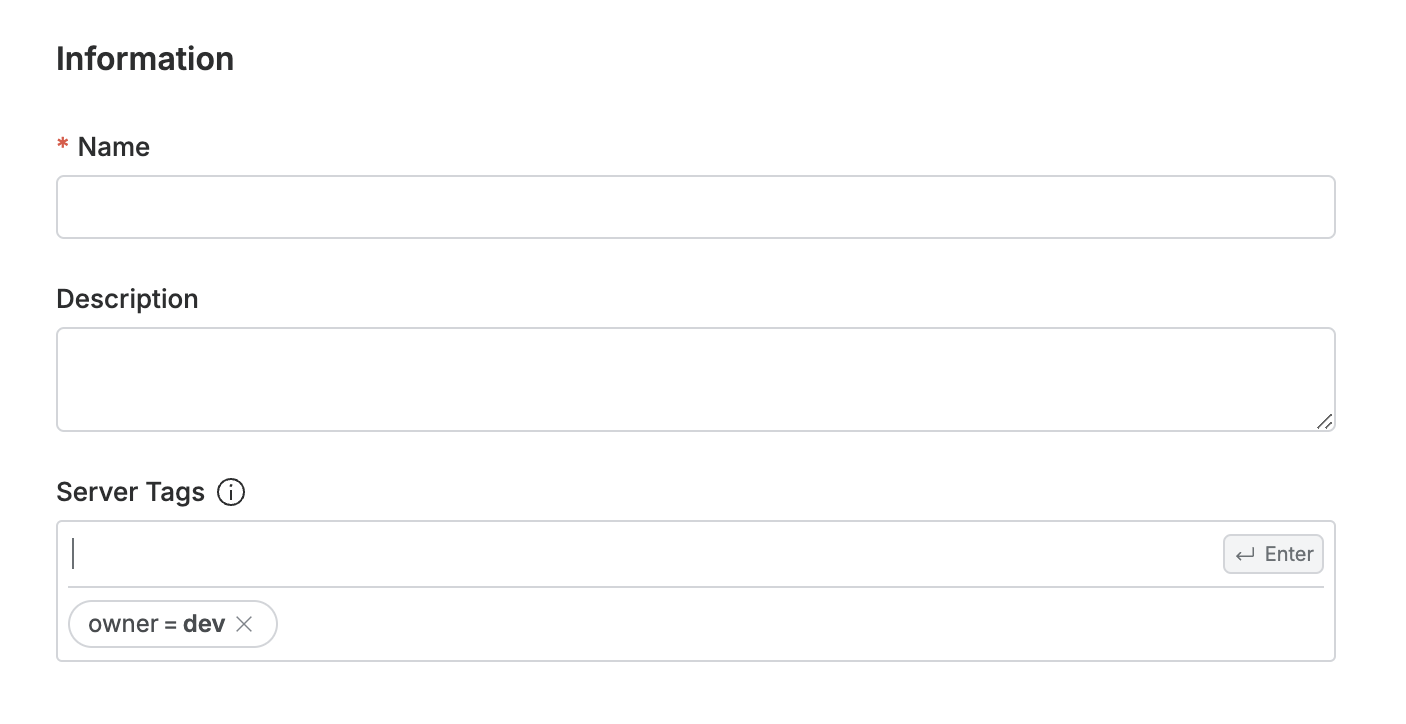
Name: Enter the name of the server group.
Description: Enter a description that explains the server group. When multiple administrators are involved, it is recommended to enter the name and description in detail according to the purpose for easy identification of server groups.
Server Tags: Specify the tags of the servers you want to group to dynamically manage the targets in the server group. Servers added through tags cannot be manually deleted from the server table; you must modify the tags in Server Tags.
2. Adding Servers Manually
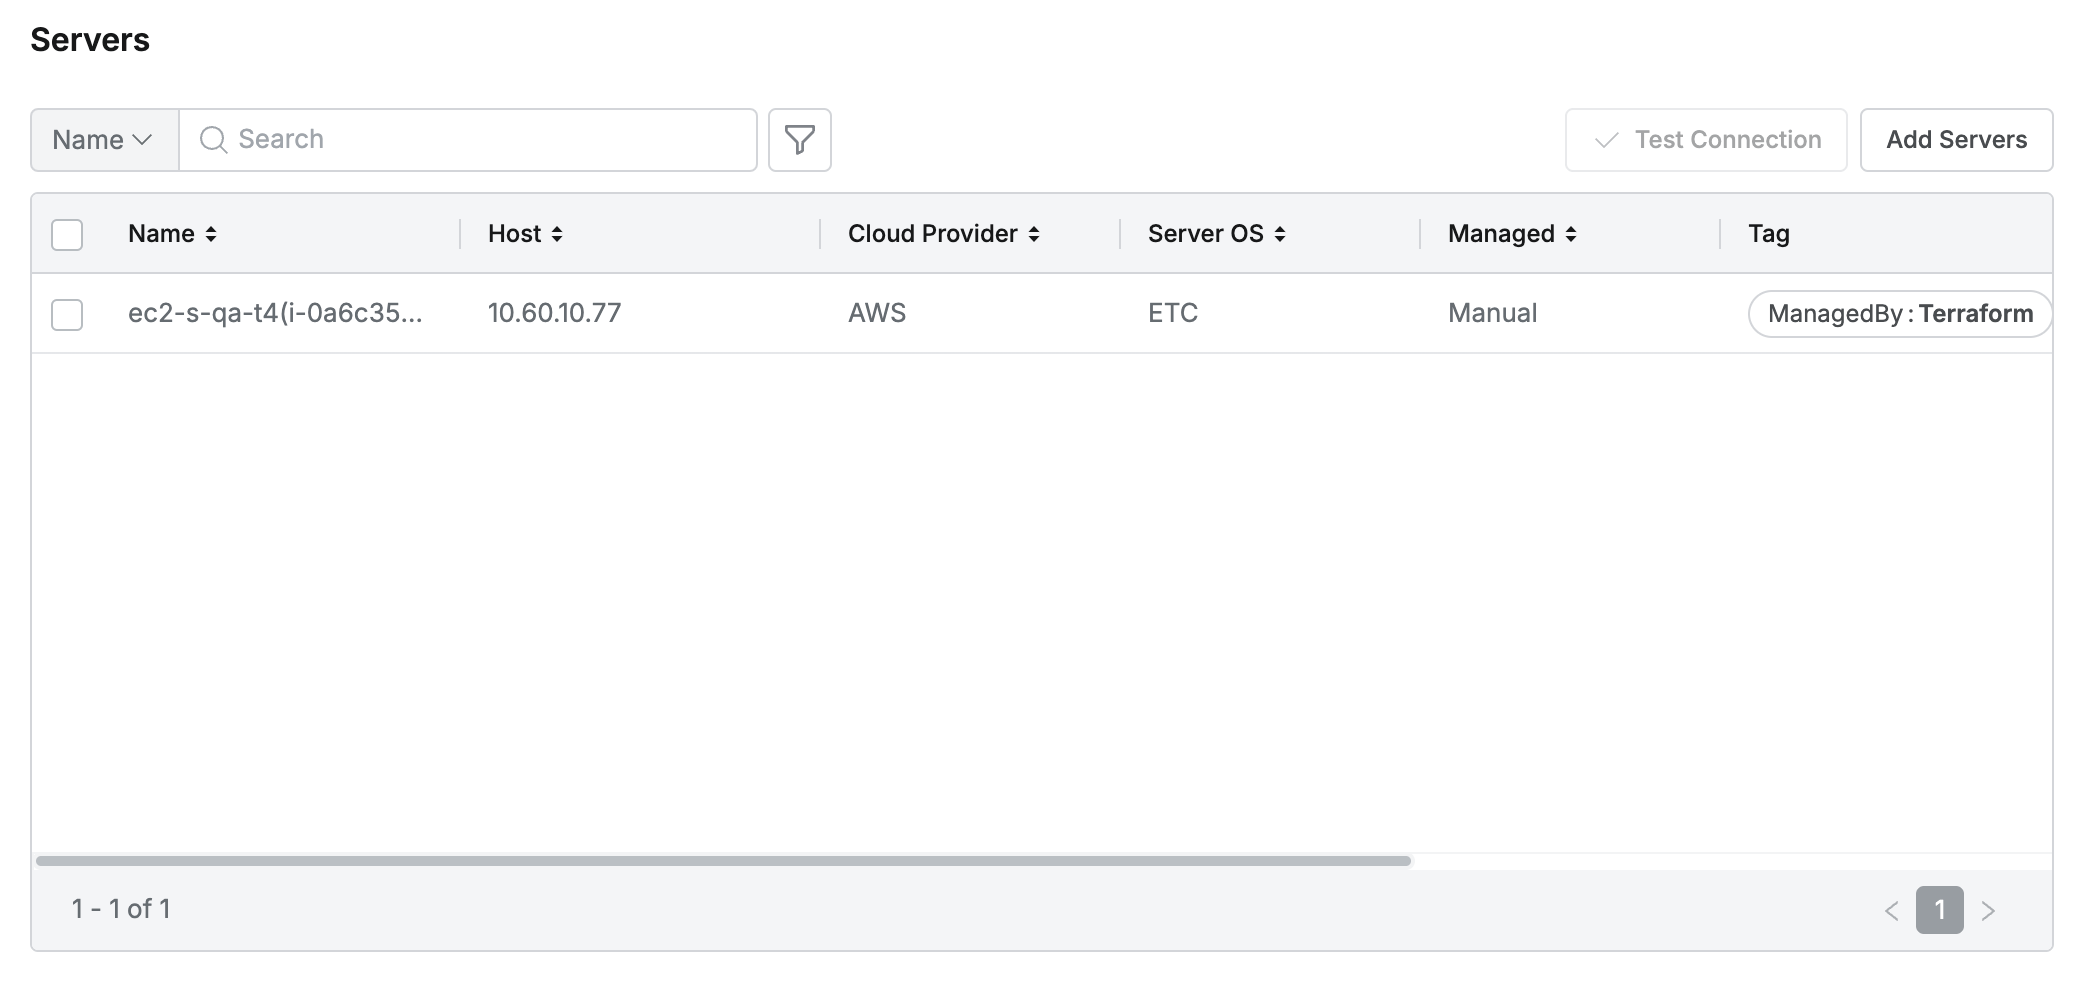
In the Servers, you can check the servers belonging to the server group or manually add servers to the group.
Click the
Add Serverbutton at the top right to display a popup with a list of servers.In the popup, select the individual servers you want to add to the server group, then click the
Addbutton.You can use the filter(:필터:) function in the popup to filter servers based on various conditions.
Finally, you can view the servers that have been added to the server group.
In Information's Server Tags, even if you delete the tags related to manually added servers, the manually added servers will not be excluded from the server group. Manual removal can only be done by selecting the checkbox in the Servers table and clicking the
Deletebutton.Test Connection allows you to check the account information for the servers and accounts added to the server group.
To use Test Connection, you must add at least one server and account to the server group.
Test Connection can only be used after saving the server group.
3. Registering Accounts
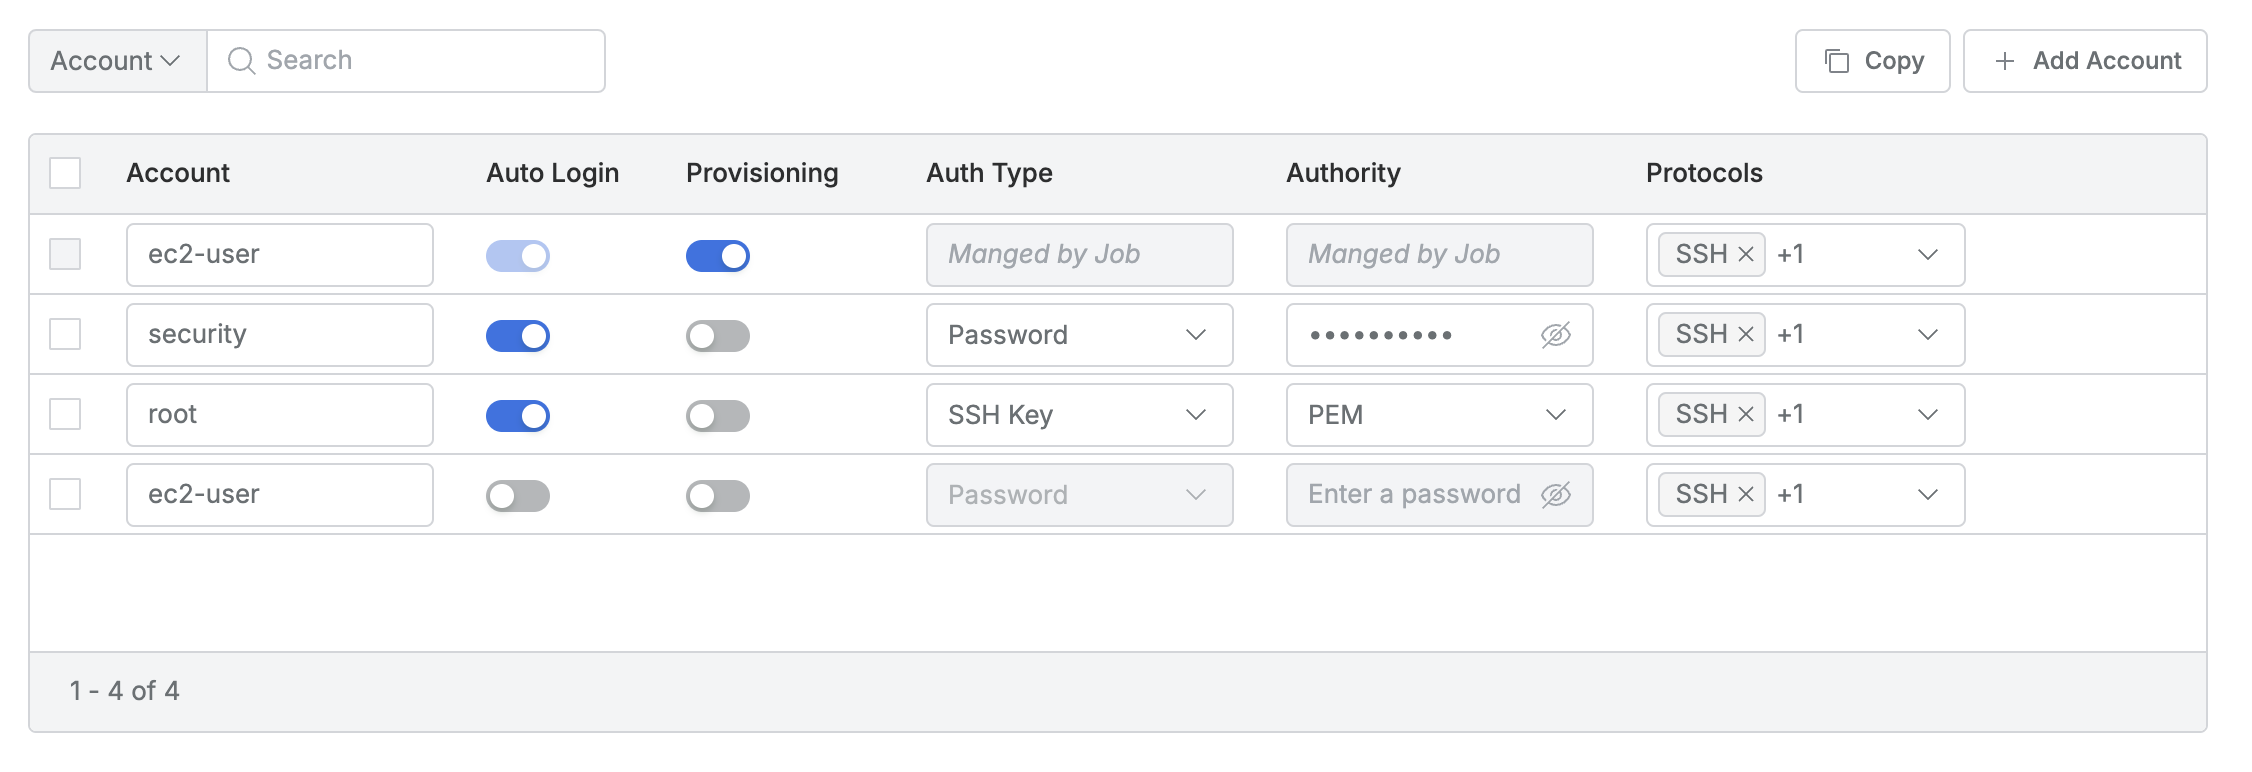
Enter the account information required to access the connection. There are two ways to add accounts:
Click the
Copybutton to import already registered accounts from the Server Account Templates menu.Refer to Server Account Templates for instructions on how to register a server account template.
Or, use the
Add Accountto manually add an account.
The following information must be entered or configured for each account:
Account: Enter a name to distinguish the individual account.
Auto Login: You can set auto-login. If set to Off, only password authentication can be used.
Provisioning : Allows you to designate server accounts for automated password changes.
This option is available only when Password Provisioning is enabled under Administrator > General > Company Management > Security > Server Connection Security.
It will only appear when Secret Store is set to QueryPie.
Auth Type: Select the authentication method for the individual account. You can choose between Password and SSH Key methods. If you want to select the SSH Key method, first change the Auto Login setting to On.
Authority: If the authentication method is Password, enter the password for authentication. If it is an SSH Key, select a key already registered in SSH Key Configurations.
Protocols: Set whether to allow SSH or SFTP access with the account.
3-1. Configuring Authentication via Secret Store (HashiCorp Vault) in a Server Group
When registering account information in a server group, you can use Secret Store integration to connect to the connection using pre-configured Secret Store authentication information. Pre-stored server authentication information in the Secret Store enhances security by allowing users to connect to remote servers using stored server credentials. Servers defined in Server Groups are forced to use the same Secret Store as the Server Groups.
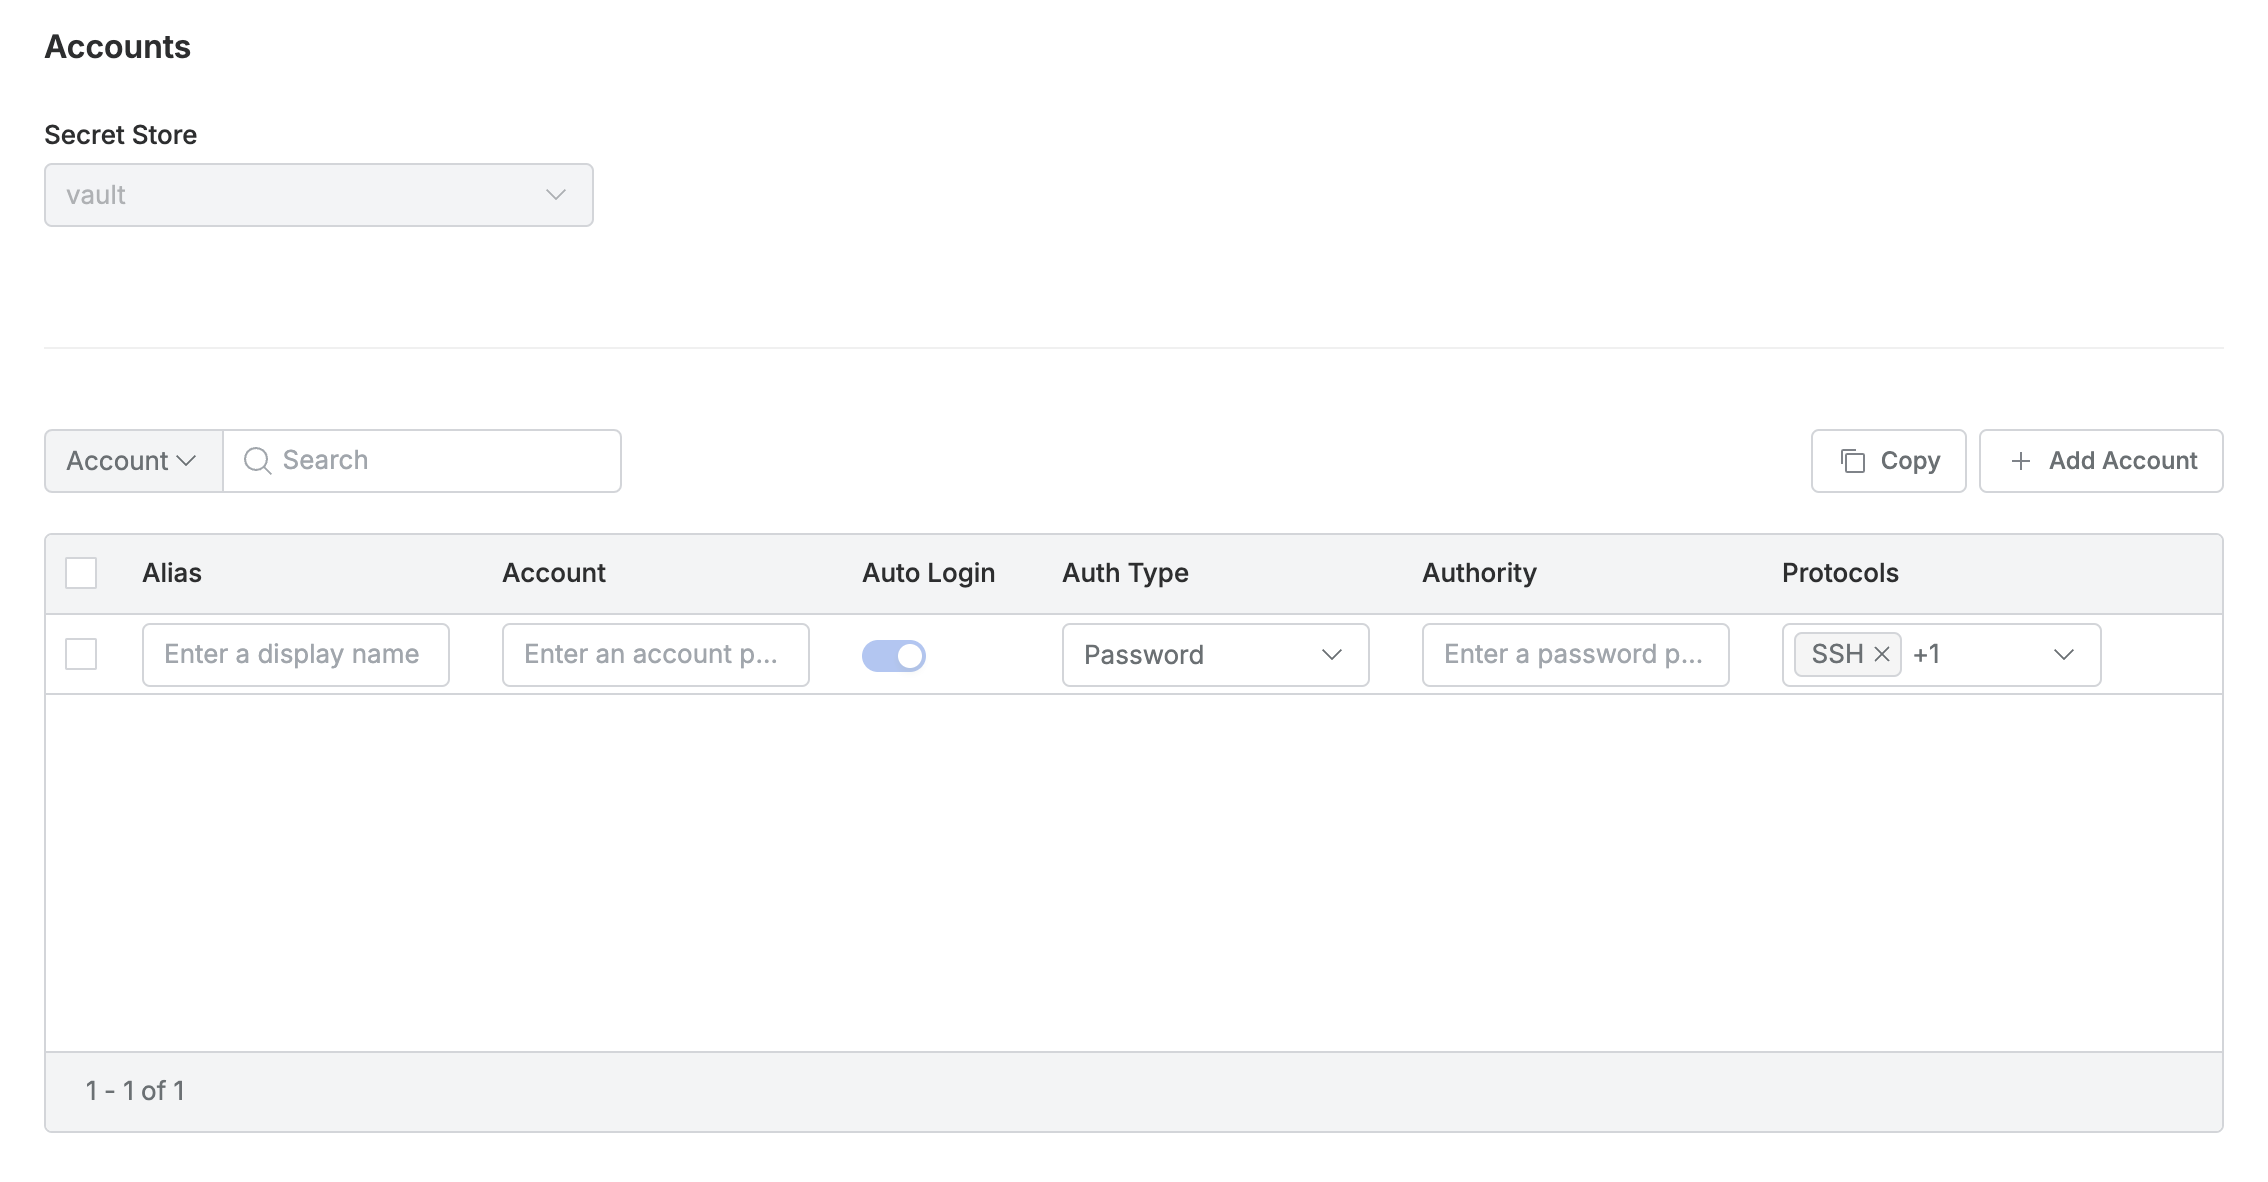
Navigate to the Administrator > Servers > Connection Management > Server Groups menu and click the
Create Groupbutton to create a new server group.This method is the same as the configuration in the Administrator > Servers > Connection Management > Server Account Templates menu.
In the Secret Store field, select a previously registered Secret Store.
Only K/V items from the Secret Engine types stored in the Secret Store are supported.
Click the
Add Accountbutton.In the Alias field, enter the server account name to be displayed to users.
Enter the Vault Path in the Account / Authority field.
The Path format can be entered as
prod_os/data/linux?account.In the example, the actual path in Vault is
prod_os > linuxwhere the key is account.The
/datapath in the middle must be added.
Click the
Savebutton to save the server group information.
3-2. Setting Up Authentication Using Secret Store in Server Groups (Based on HashiCorp Vault SSH OTP Engine)
By using HashiCorp Vault's SSH OTP engine, server accounts can be managed in a passwordless manner. However, the Vault server agent, vault-ssh-helper, must be installed on the server. Please refer to the official HashiCorp Vault guide for detailed instructions.
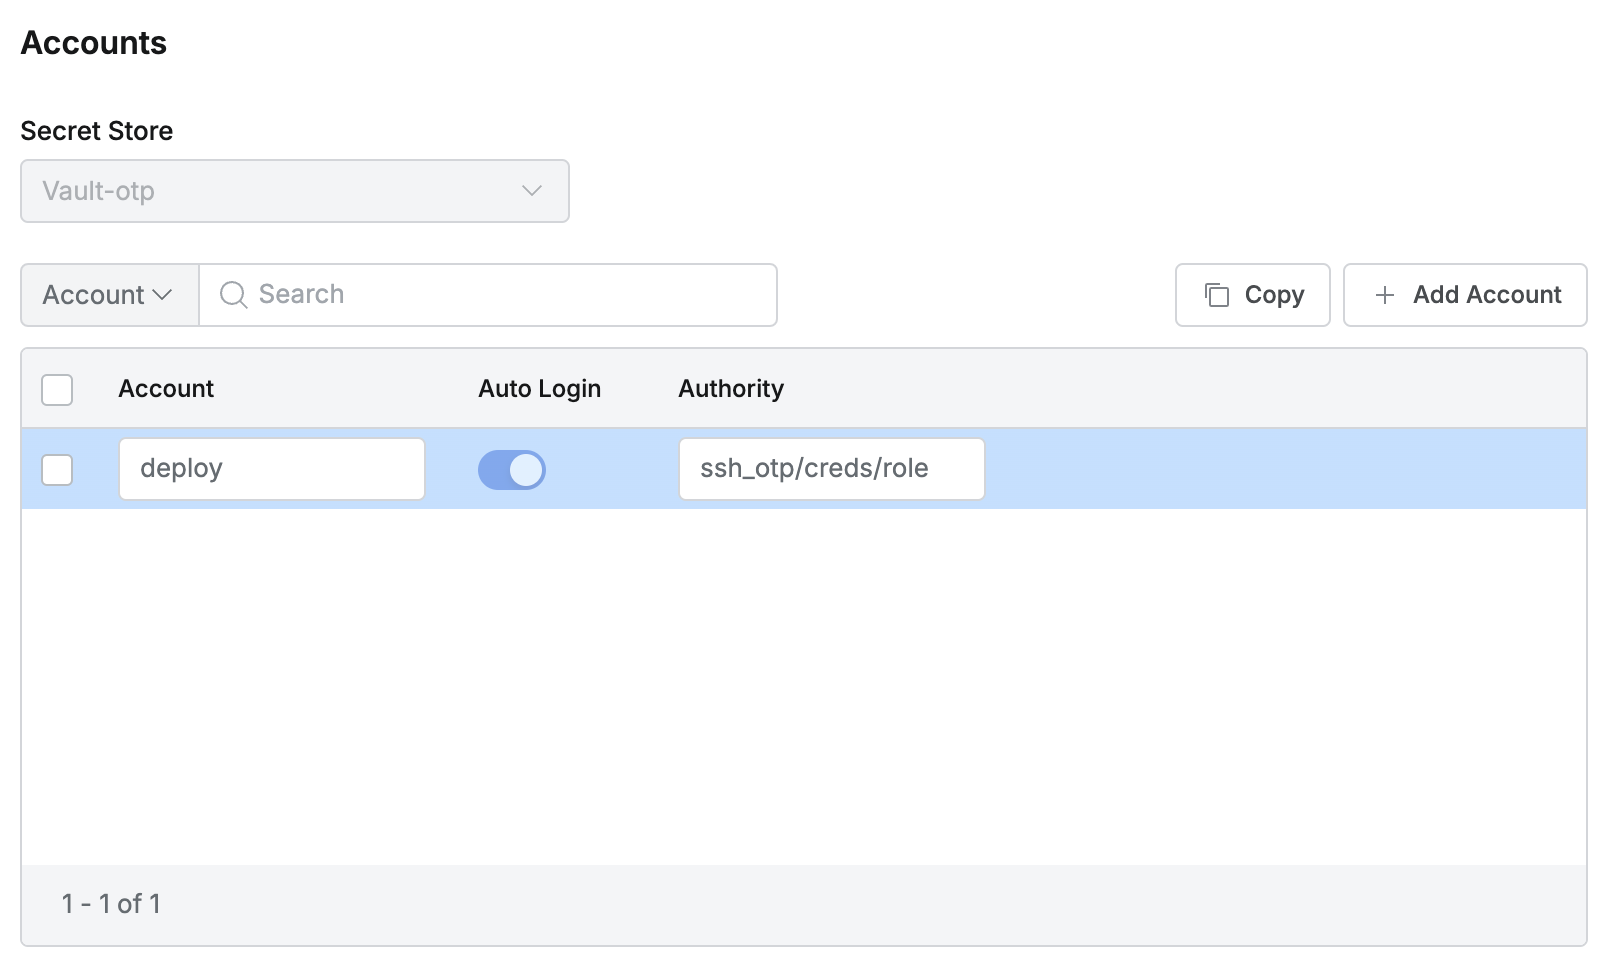
Navigate to Administrator > Servers > Connection Management > Server Groups menu and create a new server group by clicking the
Create Groupbutton.This is the same setup method as in Administrator > Servers > Server Account Management > Server Account Templates menu.
In the input fields, select the previously registered Secret Store entry in the Secret Store field.
Choose the SSH OTP entry from the available Secret Engine types stored in the Secret Store settings.
Click the Add Account button.
Enter the account you want to access. This account must be included in the Allowed users when creating the Vault OTP role.
In the Authority field, enter the Vault Path.
The path should be entered in the format of
engine/creds/role.
4. Assigning a Server Group Owner
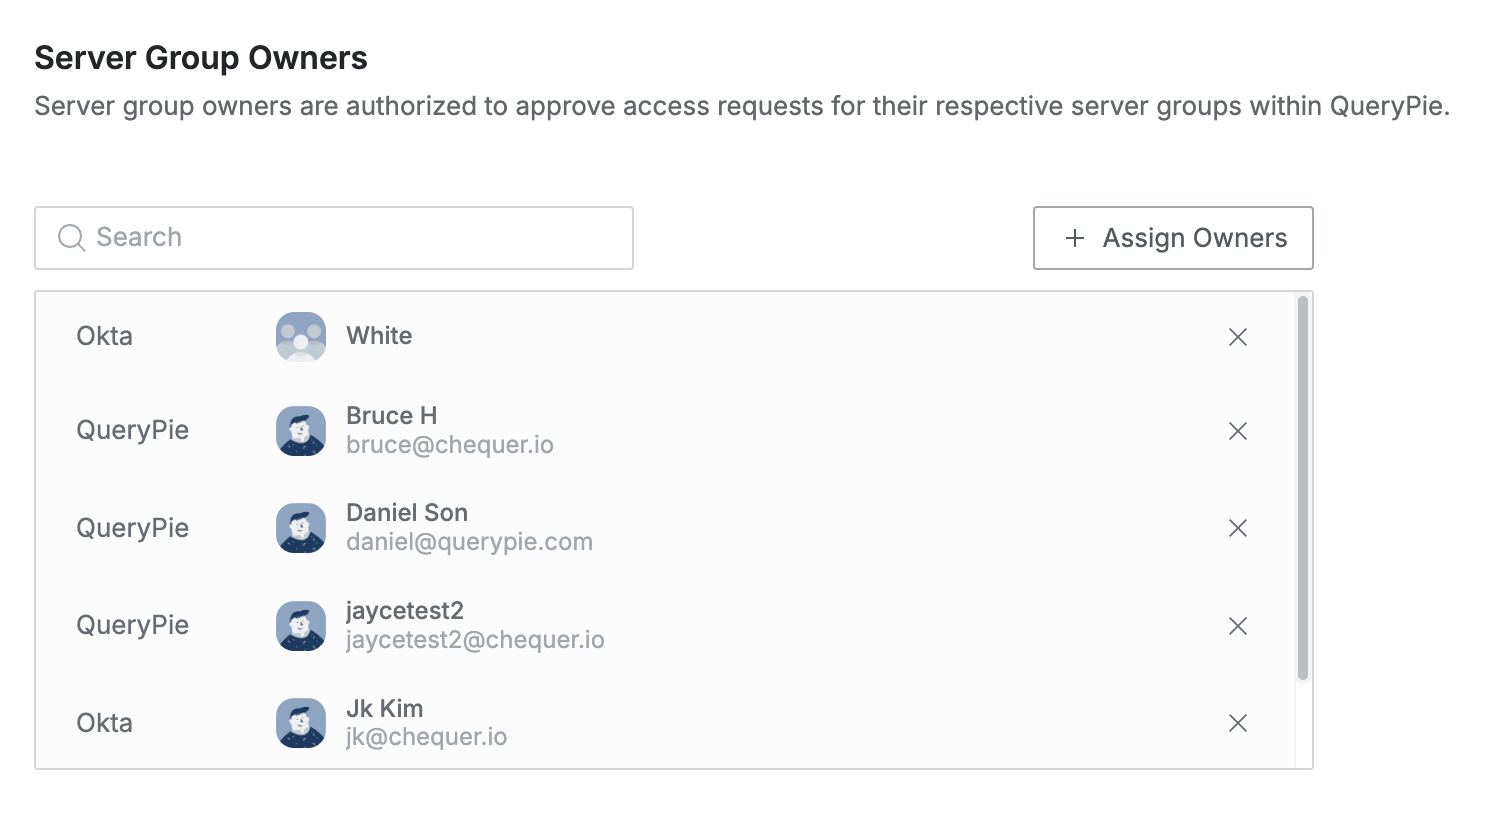
You can assign a server group owner and designate them as the approver for workflows.
Click the
Assign Ownersbutton in the upper right corner to open a pop-up displaying Users and User Groups.In the pop-up window, select the User or User Group to designate as the server group owner and click the
Savebutton.You can confirm the User or User Group designated as the owner in the server group.
Click the
Save Changesbutton to save.
%201.png)