API Token
Overview
The External API Token management page allows administrators to issue and manage API tokens for accessing QueryPie functionalities externally, beyond the web console.
What is an External API?
An External API in QueryPie enables the use of its features outside the web console. As of version 10.0, QueryPie offers two API versions: V0.9 and V2.
QueryPie API V2
Supported starting from QueryPie version 9.16.1.
Accessible via
{querypie url}/api/external/v2/without affecting API V0.9.
Required headers for API calls include:
Key | Value |
|---|---|
Content-Type | application/json |
Authorization | {querypie api token} |
Key Notes for API Token Usage:
API tokens can only be issued by users with Owner privileges or administrators with access to this menu.
The full token is only visible at the time of issuance. After that, it is masked, showing only the first 8 characters.
If a token is lost, it is recommended to delete the existing token and issue a new one.
Extending the API token's validity will reset its expiration date based on the selected validity period from the time of the update.
For a complete list of available APIs and detailed specifications, refer to the API documentation accessible by clicking API Docs in the Administrator > General > System > API Token menu.
Viewing the API Token List
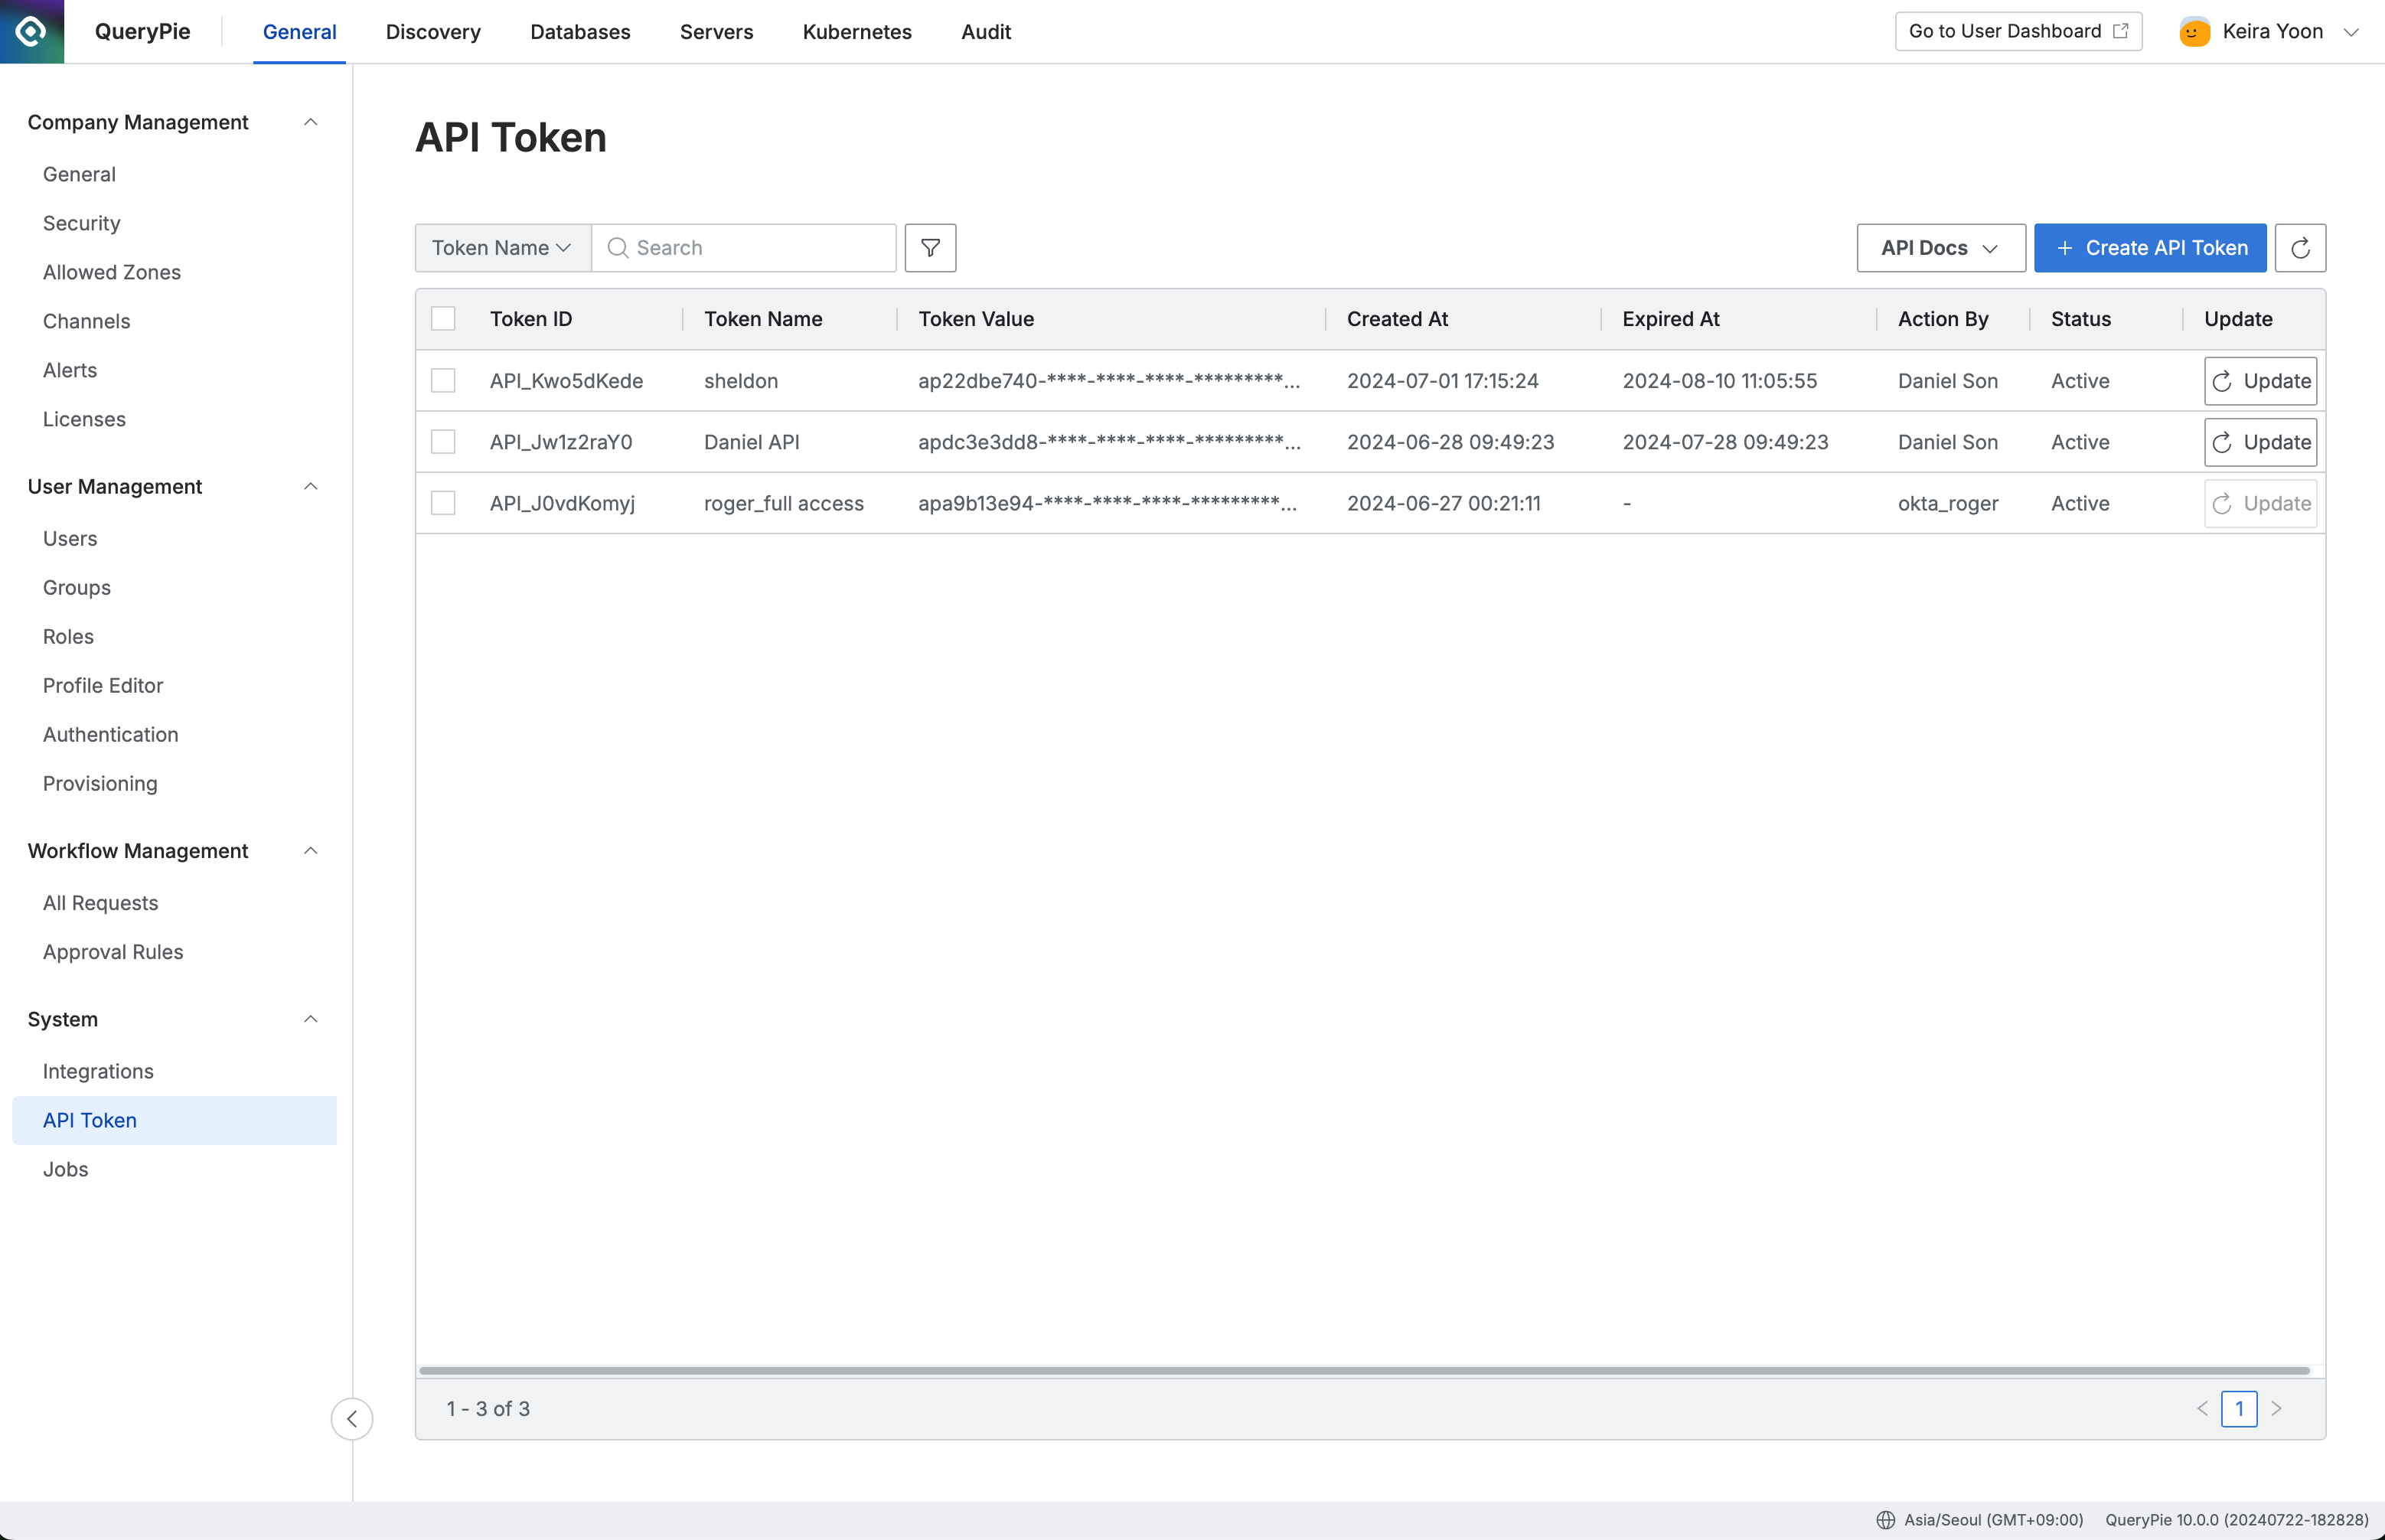
Administrator > General > System > API Token
Navigate to the Administrator > General > System > API Token menu.
Review the list of currently generated tokens, sorted by creation date (latest first).
Search and Filter:
Search tokens by
Token NameorToken Value.Filter the list by the status of the tokens.
Creating an API Token
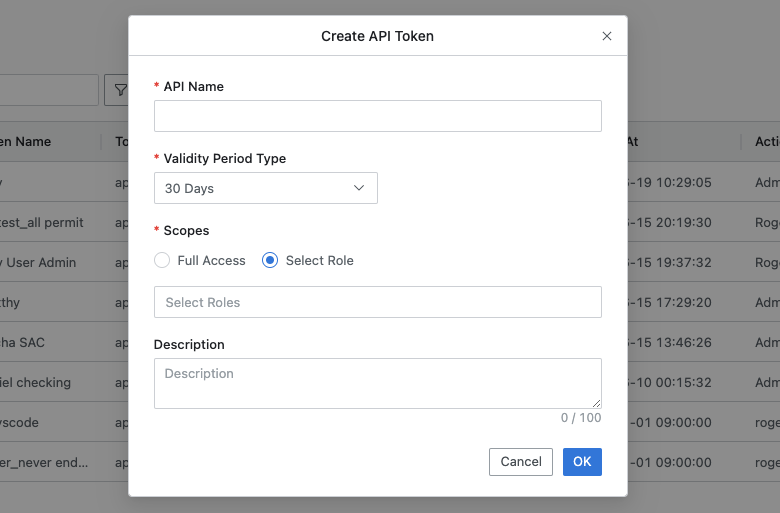
General Settings > System > API Token > Create API Token
Click the
Create API Tokenbutton located at the top right of the page.Enter the following information:
API Name: A unique and identifiable name for the API token.
Validity Period Type: Set the expiration period for the token.
It is recommended not to select "Never Expire" for security reasons.
Scopes: Define the permissions for the API token.
Full Access: Grants all administrative capabilities.
Select Role: Choose specific Admin Roles to limit the token’s access scope.
You can save the token without selecting any Admin Roles. In this case, the API token will not be able to perform any actions.
Allowed Zones: Define the IP ranges where the API token can be used.
Navigate to the Admin > General > Company Management > Allowed Zones and map the predefined Allowed Zones to configure the API call IP ACL.
Description : Provide a description for the API token.
Click
OKto complete the creation process.The token details will be displayed in a modal. This is the only time the full token value will be visible.
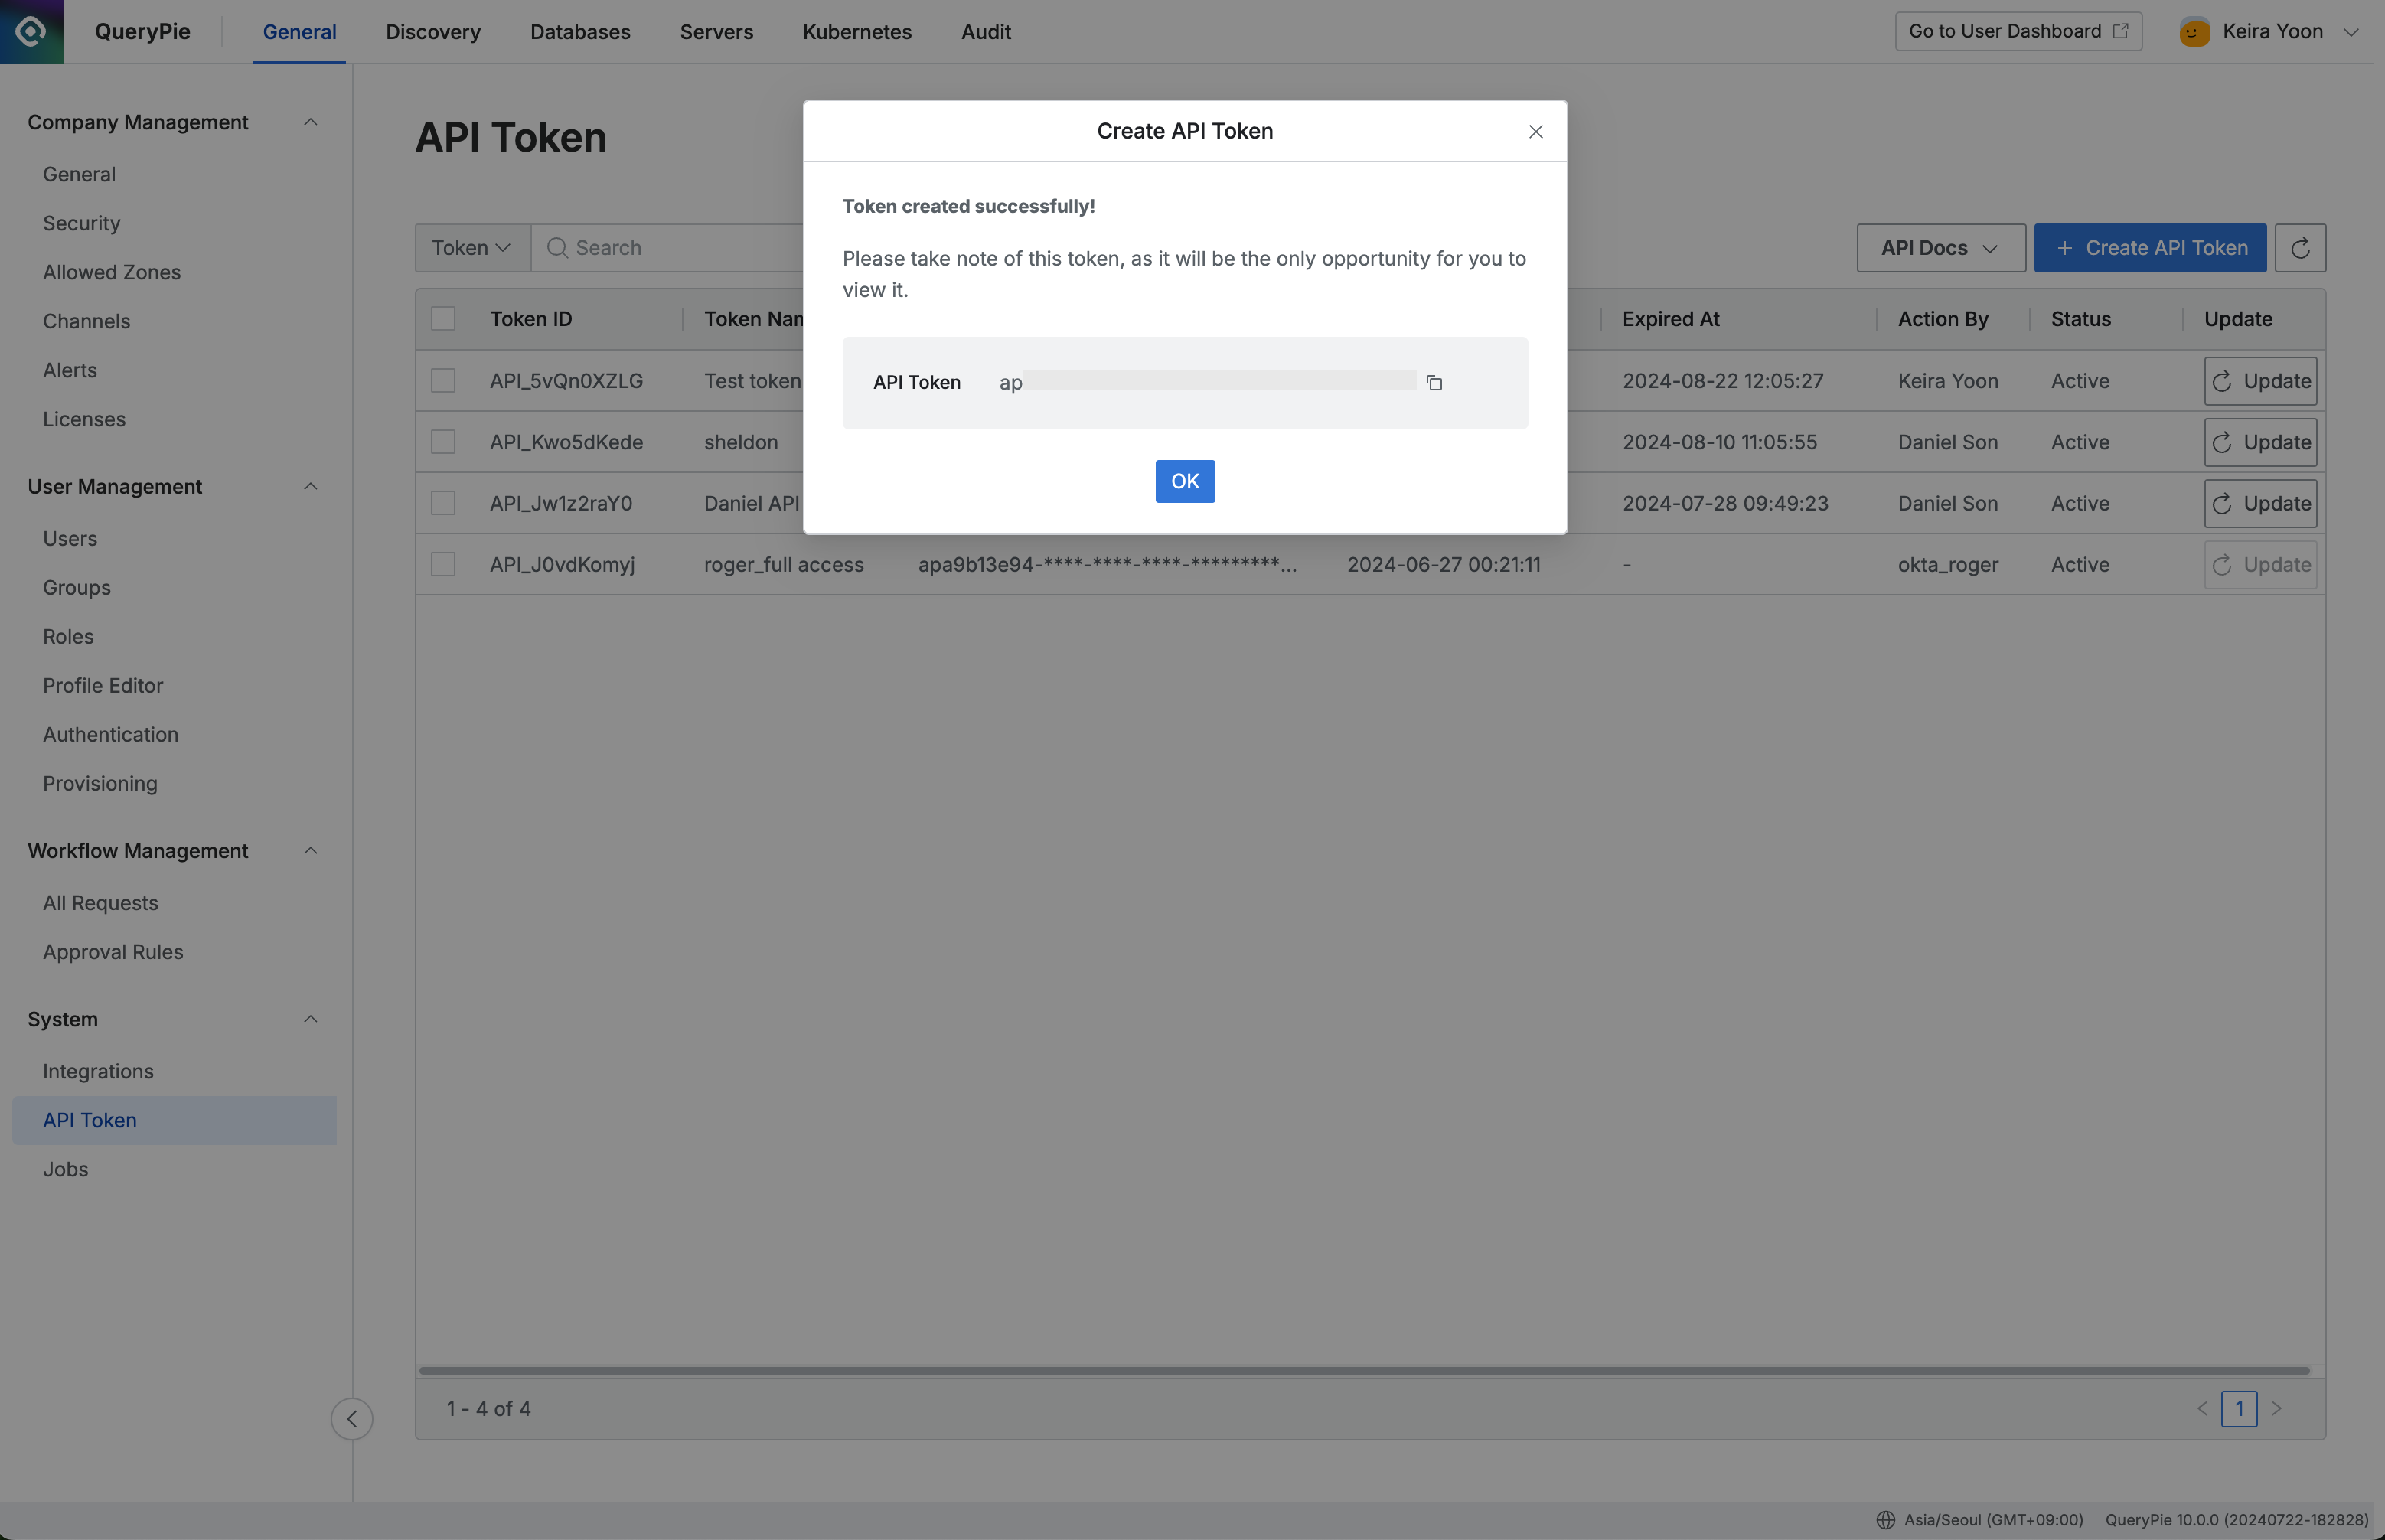
General Settings > System > API Token > Create API Token
Click the copy button to copy the token information.
Click
OKto close the modal.
Editing an API Token
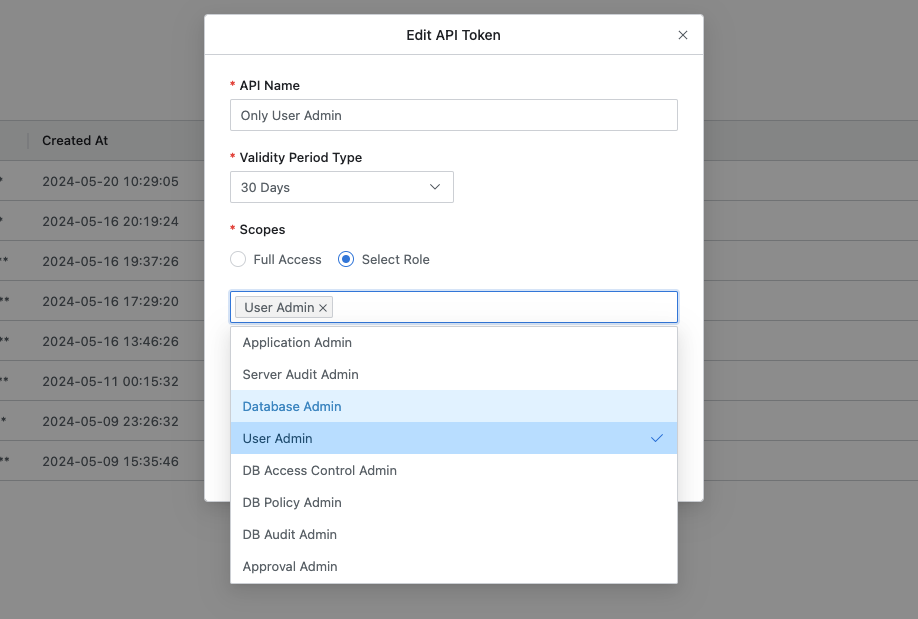
General Settings > System > API Token > Edit API Token
In the Token list, click the token you want to edit.
An "Edit API Token" modal will appear, allowing changes to the following:
API Name: Update the name if needed.
Validity Period Type: Change the token’s expiration date.
The new date will overwrite the previous expiration date based on the current setting.
Whether the remaining time until the API token expires is shorter or longer than the newly specified expiration period, the expiration date will be overwritten with the newly set value. This allows you to extend or shorten the API token's lifespan depending on the situation.
If you select "Never Expire," the expiration date will be removed. However, this is not recommended.
Scopes: Modify the permissions that the API token will have.
Full Access: Grants all administrative capabilities.
Select Role: Choose specific Admin Roles to limit the token’s access scope.
You can save the token without selecting any Admin Roles. In this case, the API token will not be able to perform any actions.
Allowed Zones: Defines the IP ranges where the API token can be used.
Navigate to the Admin > General > Company Management > Allowed Zones, map the predefined Allowed Zones to configure the API call IP ACL.
Description: Update the description if necessary.
Click
OKto save the changes.
Renewing an API Token
From the API Token page, locate the token you wish to renew and click the
Updatebutton.Upon successful renewal, a toast notification will appear, and the token's expiration date will be extended based on the Validity Period Type setting.
Deleting an API Token
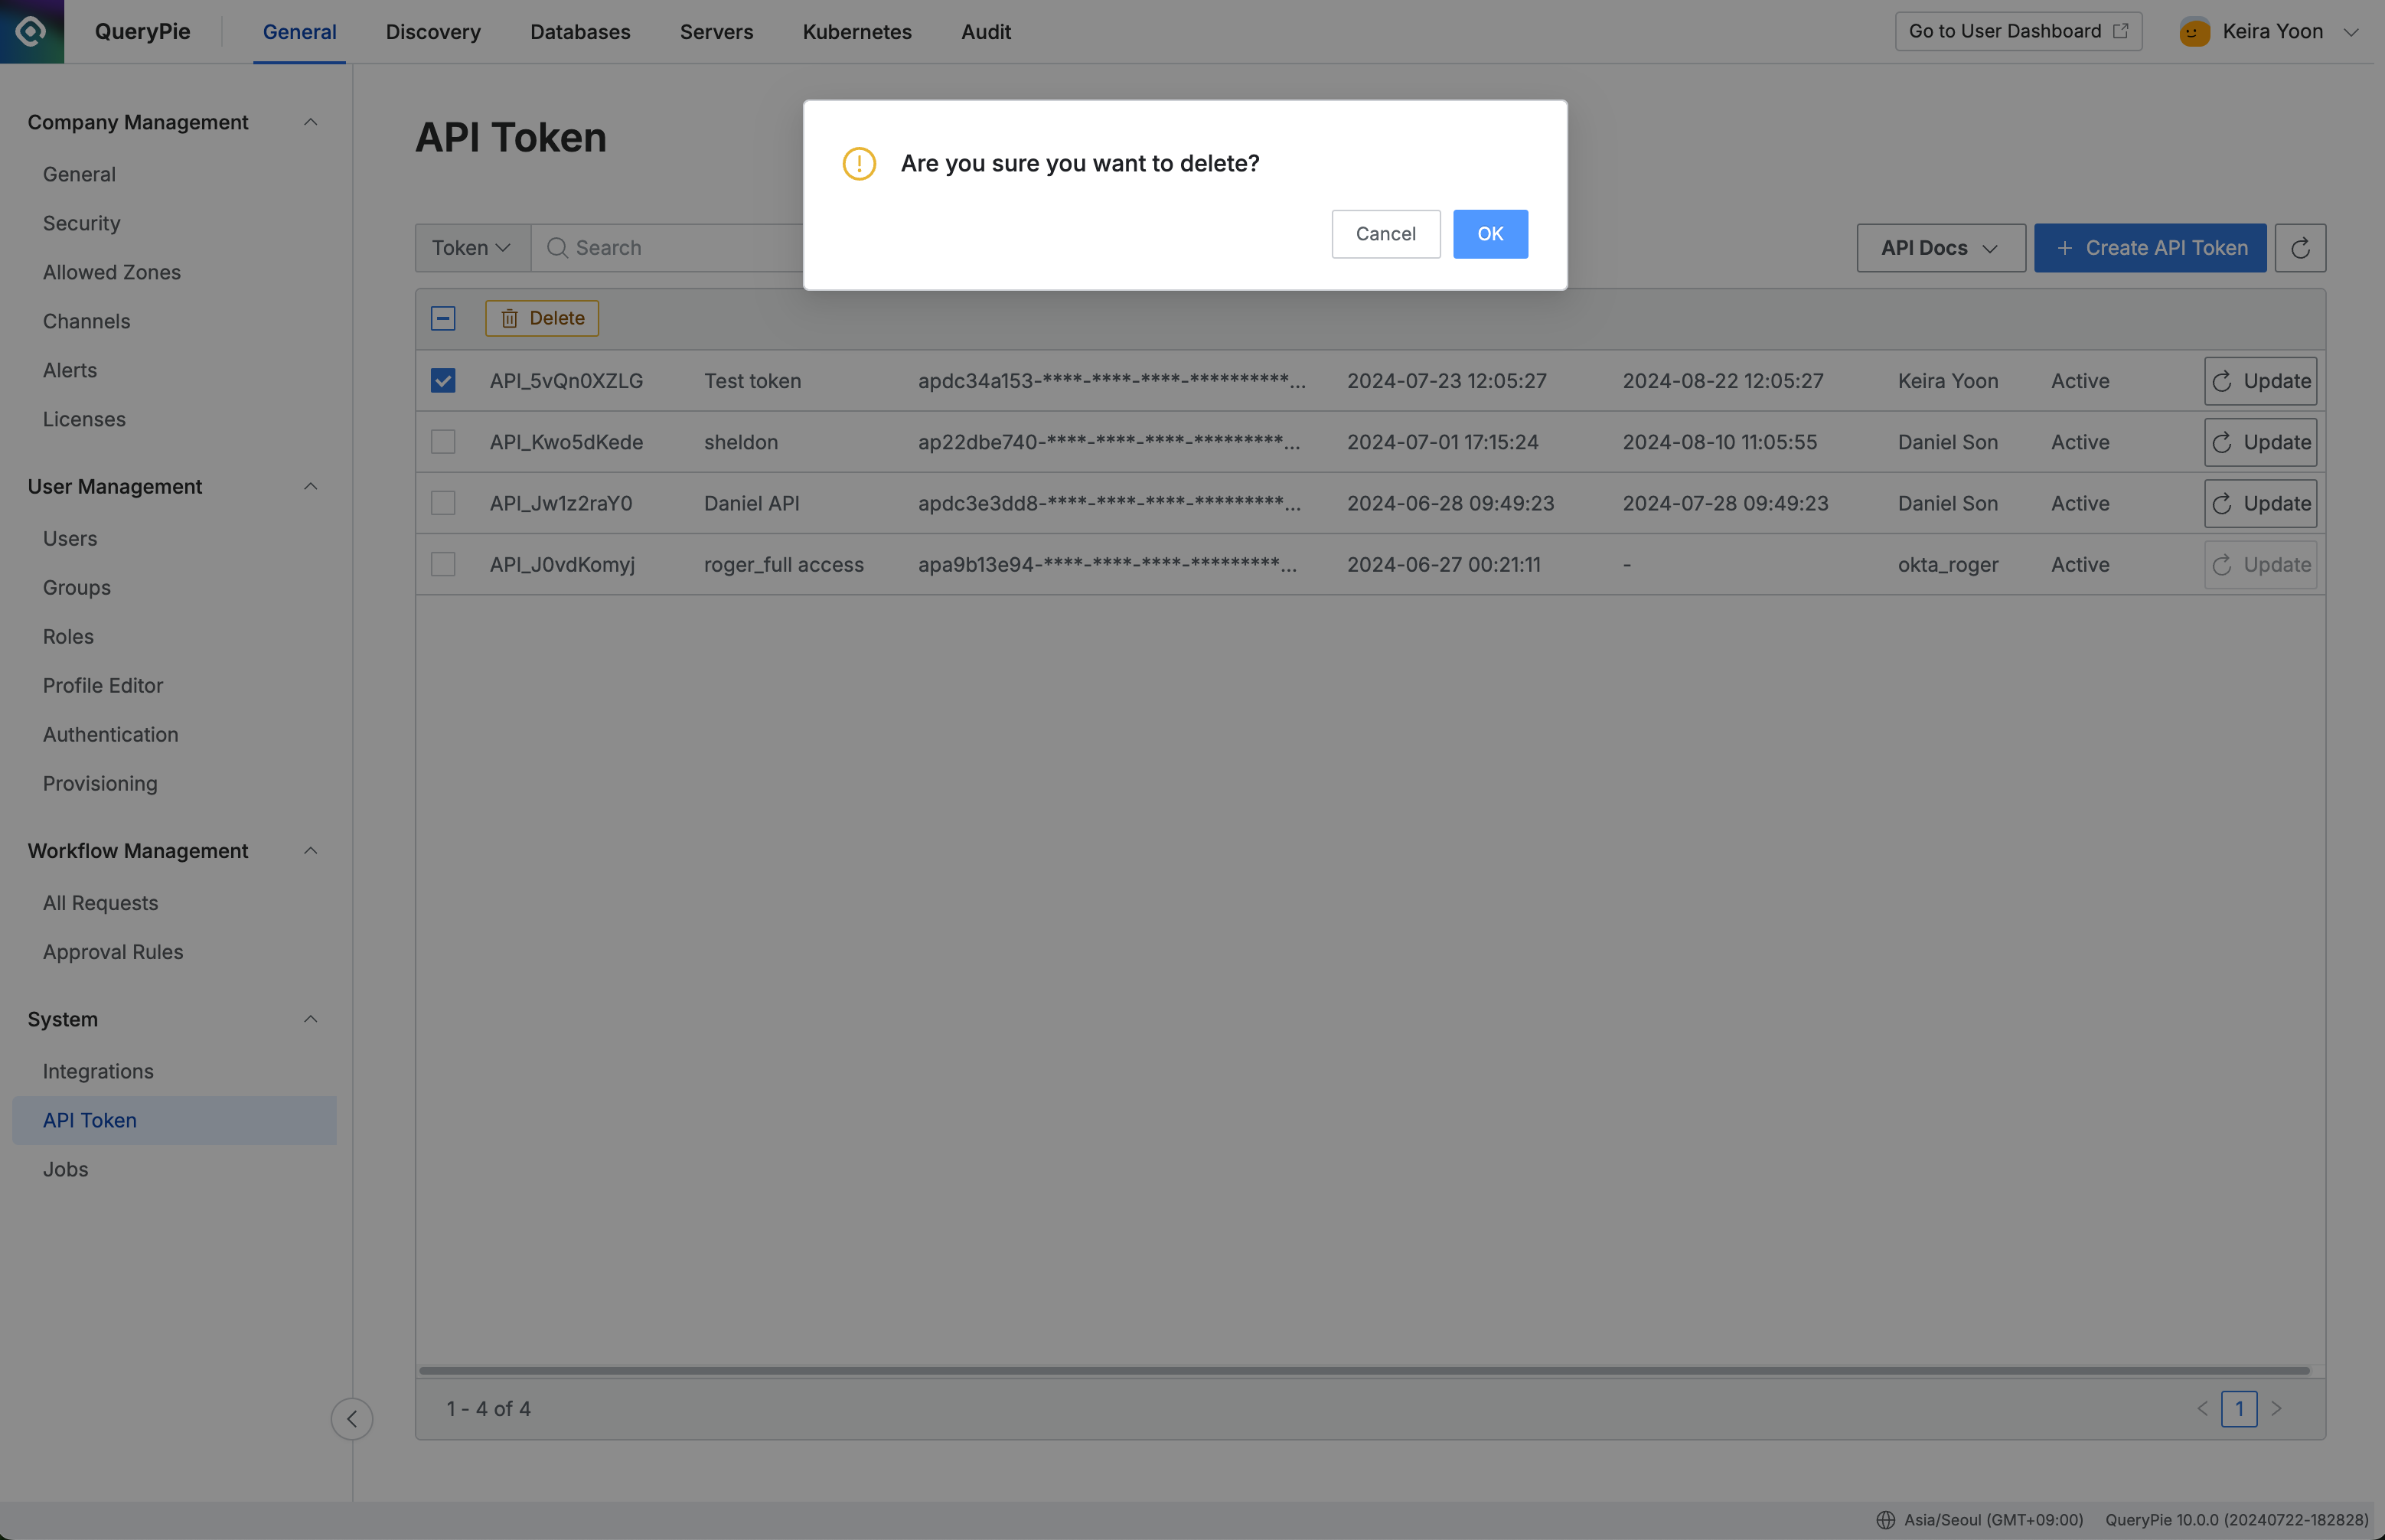
Administrator > General > System > API Token > Delete
In the API Token page, select the token(s) you wish to delete by checking the corresponding boxes.
Click the
Deletebutton in the table header.Confirm deletion in the popup by clicking the
OKbutton.Verify that the token has been removed from the list.