Synchronize Server Resources in MS Azure
Overview
QueryPie supports integration with Microsoft Azure for server registration and management. By synchronizing resources from Azure, you can register and manage servers within QueryPie, grant access permissions to users and groups, and configure policies for the synchronized servers.
Registering Azure Integration in QueryPie
Administrator > Servers > Connection Management > Cloud Providers > Create Provider
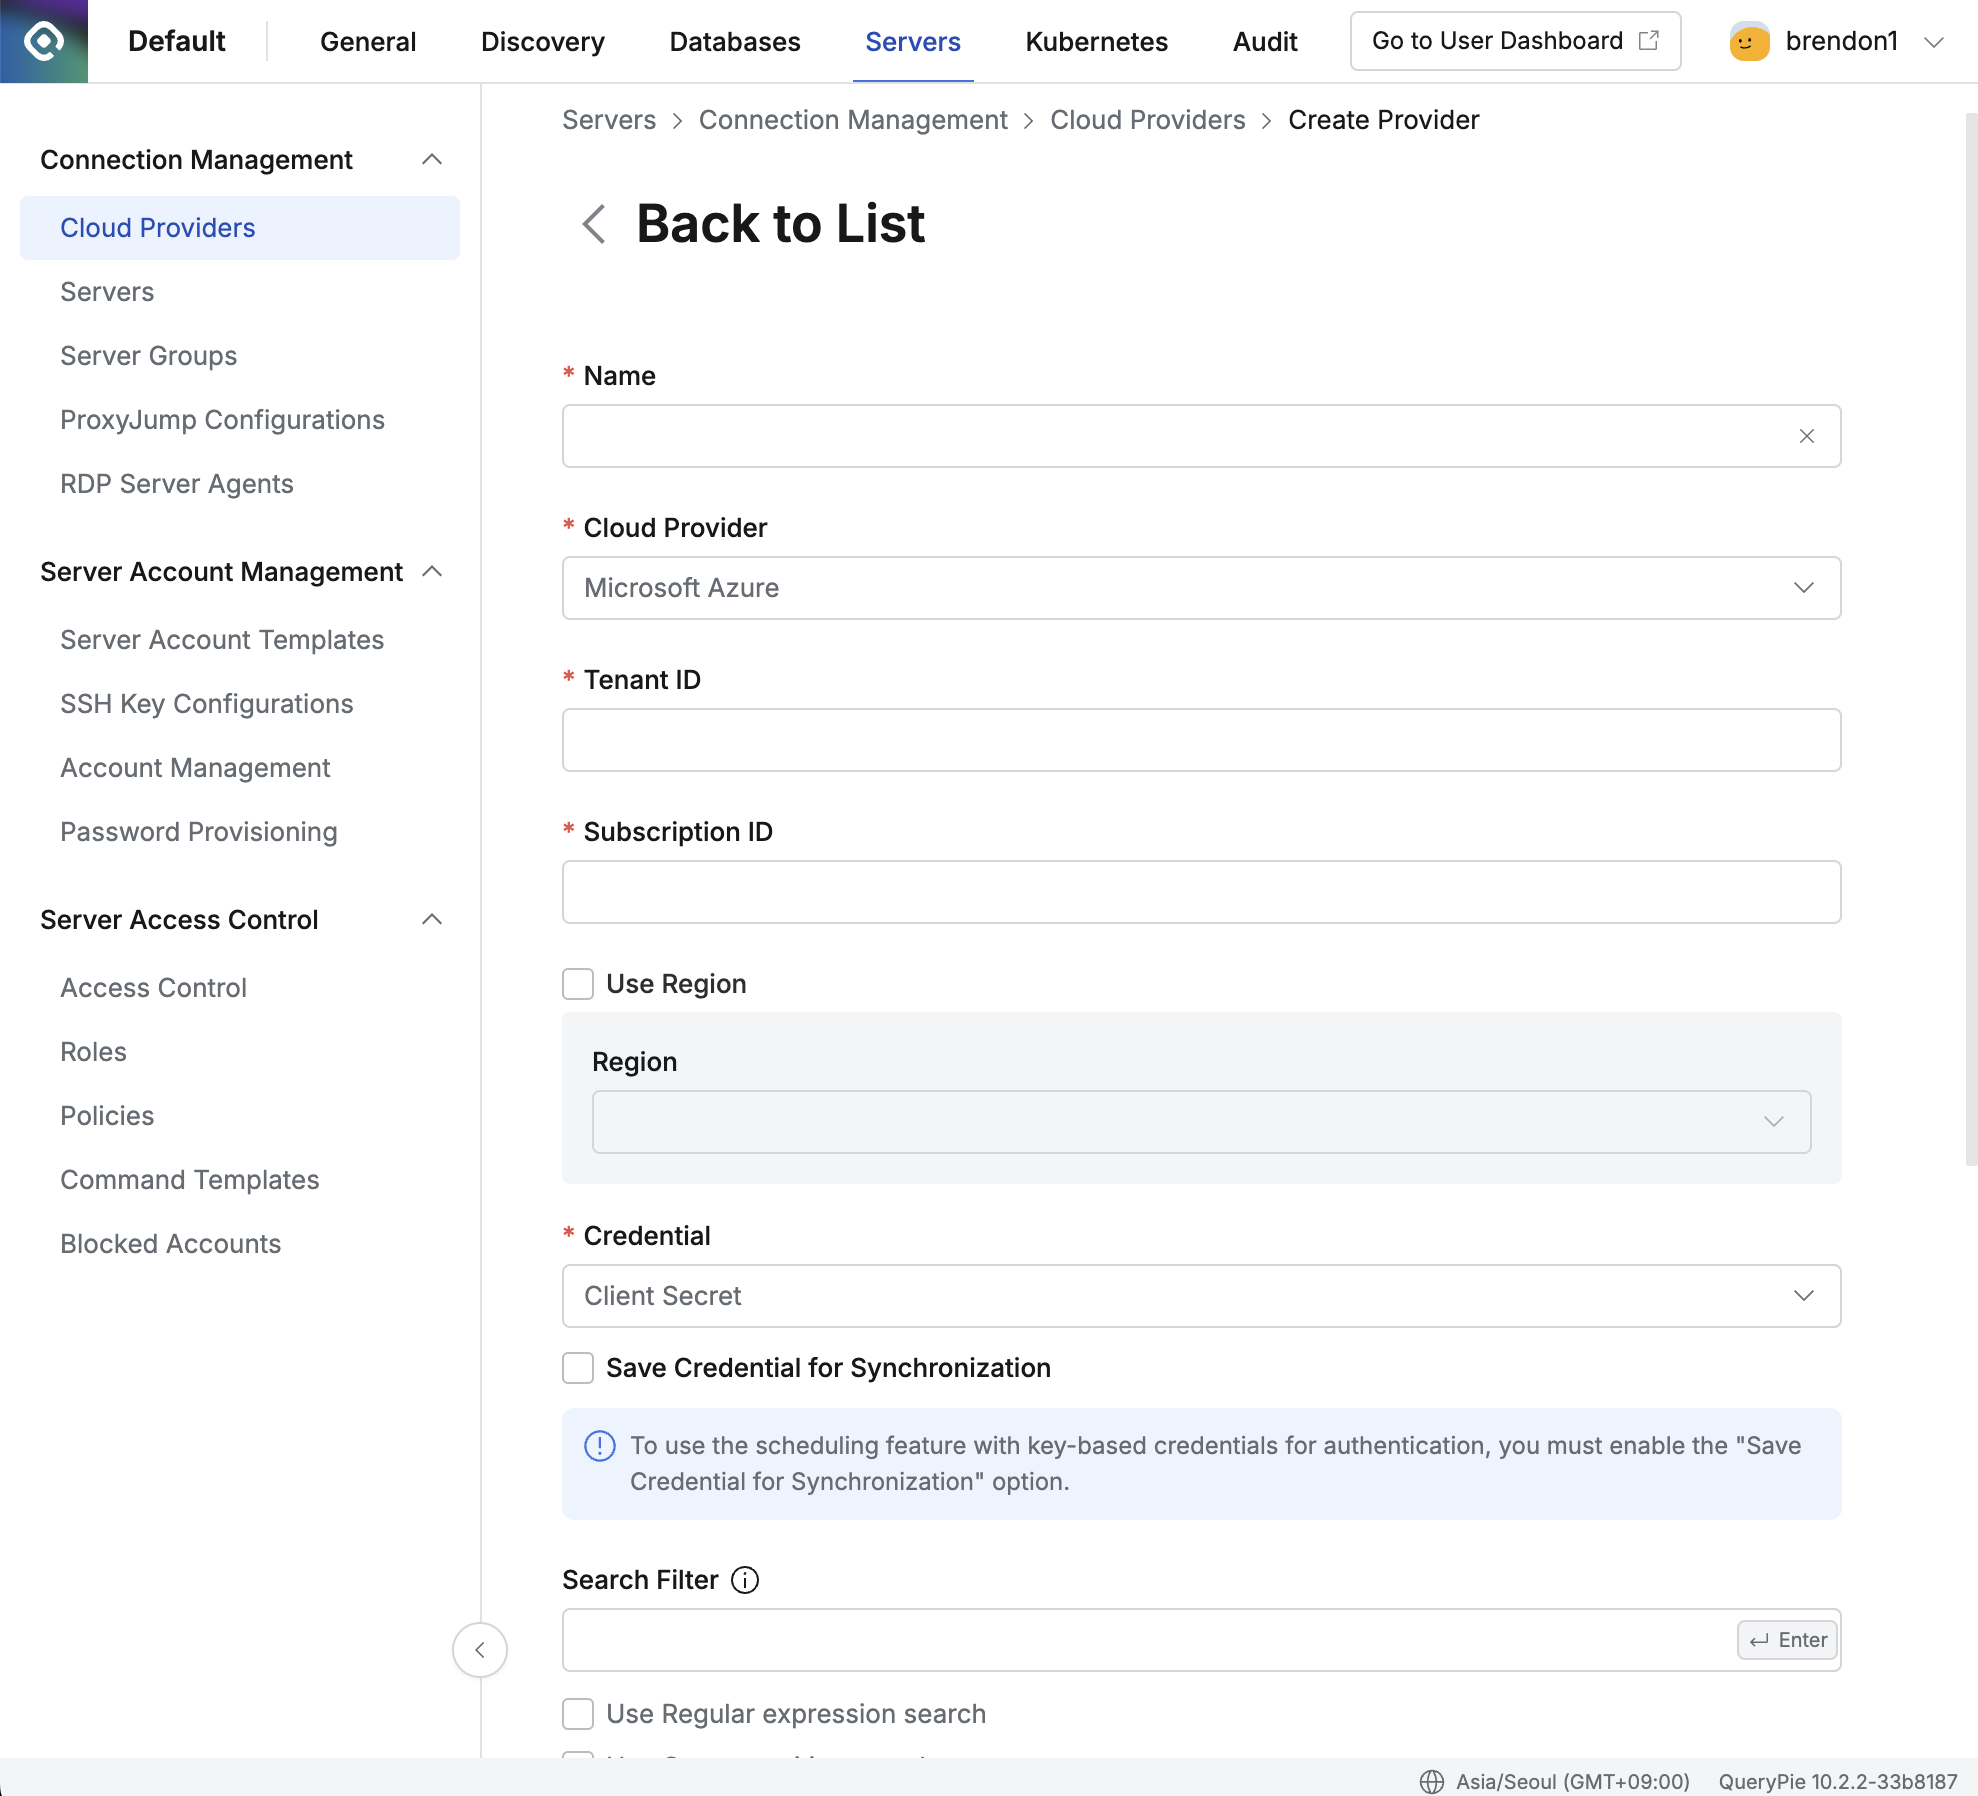
Navigate to the Administrator > Servers > Connection Management > Cloud Providers menu.
Click the
Create Providerbutton in the upper right corner.Name: Enter a name to distinguish the provider.
Cloud Provider: Select Microsoft Azure.
Tenant ID: Enter the Tenant ID for the resources to be synchronized.
If you want to synchronize resources from a specific region and zone, check the Use Region and Zone option and select the desired Region and Zone.
Subscription ID: Enter the Subscription ID.
Credential: Enter the required Credential information to synchronize the resources. Currently, only the Client Secret method is supported.
When you click the
Synchronizebutton, a manual synchronization method is provided by default, where you input the Azure Client Secret.Starting from QueryPie 10.2.2, the "Save Credential for Synchronization" option has been added, allowing synchronization through a schedule even when using Client Secret as the credential type.
Search Filter: Use this option to fetch a list of resource types you want to synchronize.
The search filter operates similarly to AWS search methods, allowing you to use values such as names and tags for filtering.
Enter the Key value → Select the search condition → Enter the Value
For more detailed usage instructions, refer to the User Guide for Linux Instances (AWS).
Replication Frequency: Choose the synchronization method.
Manual: A method where synchronization is performed manually only when desired.
Scheduling: A method that synchronizes resources through periodic scheduling. Cron expressions are provided.
Port: Allow you to specify the default ports of the servers to be synchronized when importing servers. This applies only during the initial synchronization.
Click the
Savebutton to store the Cloud Provider settings.
Save Credential for Synchronization Option

Save Credential for Synchronization
This option, once enabled and saved, cannot be disabled from the synchronization settings detail page, so it should be selected carefully. The saved credential cannot be replaced. If a different credential is needed, a new synchronization setting must be created. If a credential change is required, it is recommended to create a new credential with the same permissions, create a new synchronization setting, and then delete the existing synchronization setting.
Synchronization settings saved without this option enabled can have the option activated by checking the checkbox on the detail page.
When this option is enabled, synchronization can be done manually, or a schedule can be set.
Synchronizing and Managing Azure Cloud Providers
Administrator > Servers > Connection Management > Cloud Providers > List Details
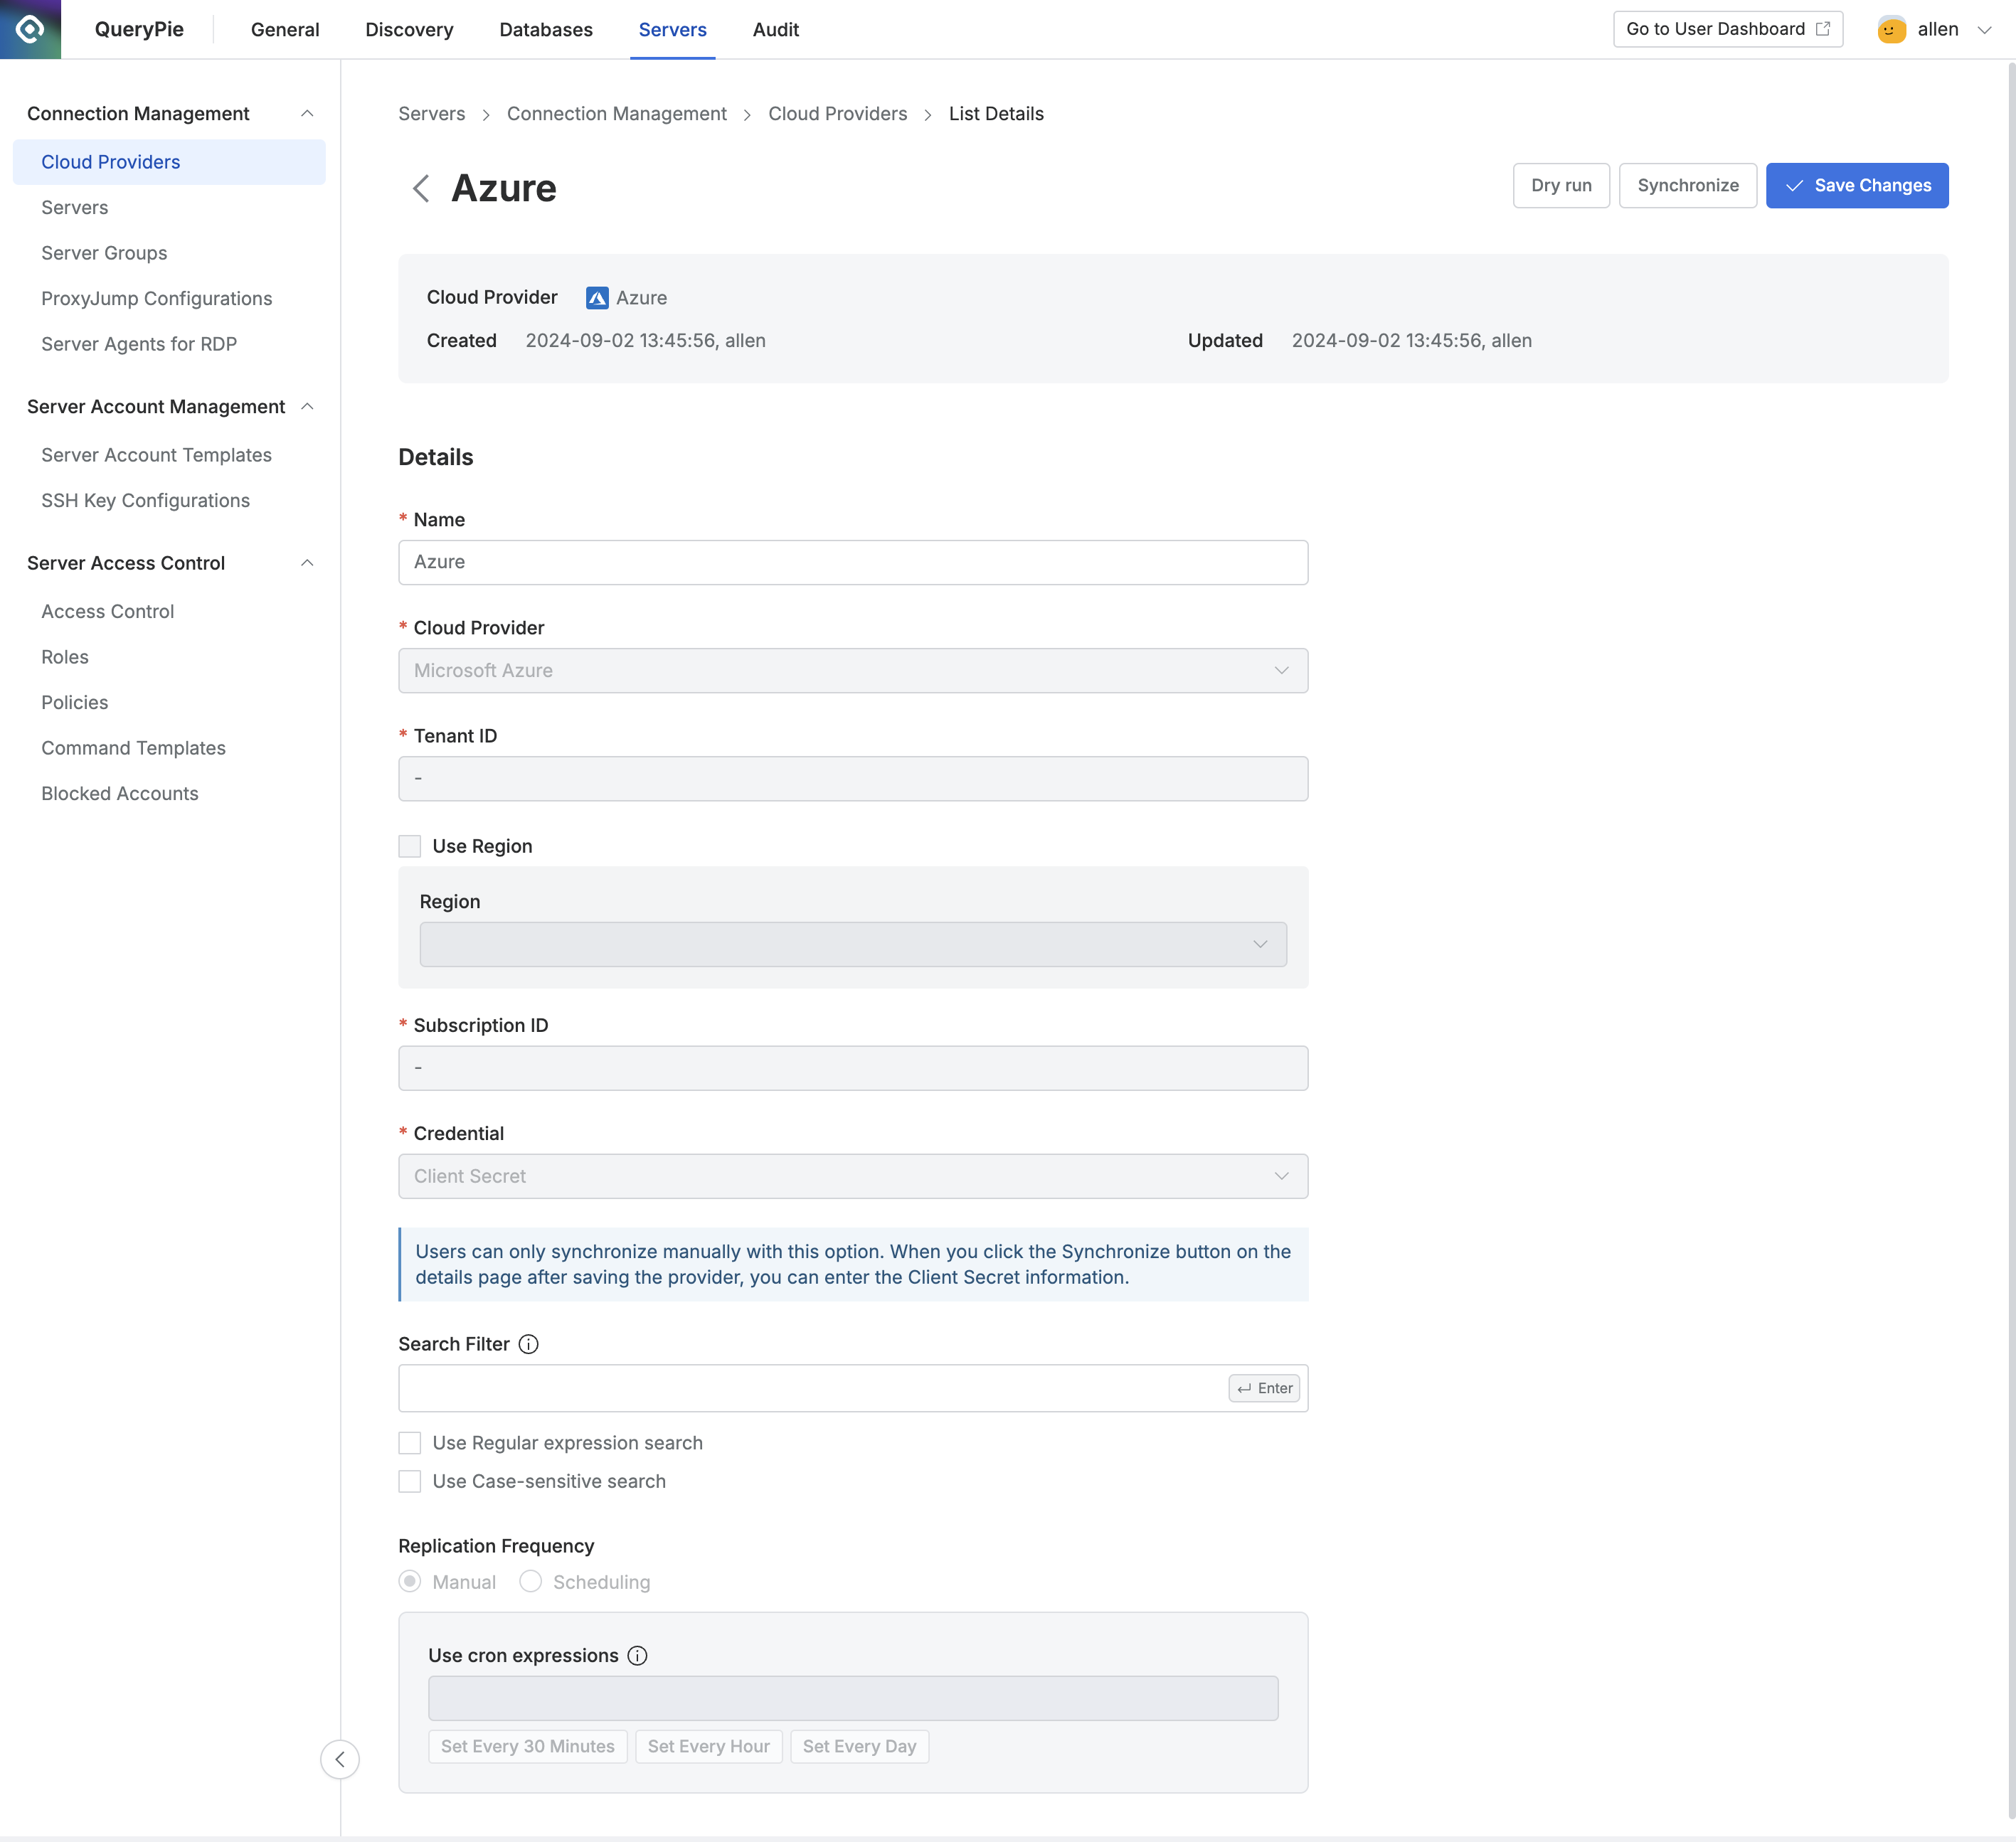
Navigate to the Administrator > Servers > Connection Management > Cloud Providers menu.
Click on the registered Cloud Provider to open the details screen.
Click the
Dry runbutton in the upper right corner to preview the servers that will be synchronized from Azure. Note that the Dry run results are not saved.Click the
Sychronizebutton in the upper right corner to sync resources from Azure.You can monitor synchronization progress in the Synchronization Log or view the history under Administrator > General > Systems > Jobs.
Once a Cloud Provider is registered, certain provider details cannot be modified:
Name: Changeable
Cloud Provider: Not changeable
Tenant ID: Not changeable
Region: Not changeable
Subscription ID: Not changeable
Credential: Not changeable
"Save Credential for Synchronization": The option can be changed from inactive to active, but it cannot be switched from active to inactive.
Search Filter: Changeable
Replication Frequency: Not changeable
Synchronization settings saved without the "Save Credential for Synchronization" option enabled can have the option activated by checking the checkbox on the detail page. Just like when creating a new setting, once this option is activated, it cannot be deactivated again, so it should be selected carefully.
Registering an Application in Microsoft Azure and Obtaining Client Secret Information
In the Azure console, navigate to the Microsoft Entra ID menu.
In the left menu, go to App registrations and register a new application.
Use the application's ID as the Client Secret ID.
In the application’s details page, navigate to Certificates & secrets.
Click the New client secret button to generate a new client secret.
Go to the IAM menu under Subscription.
Add a role assignment to assign the Reader role to the application registered earlier.