Server Access Request
Overview
Follow the steps below to request Direct Permission for the server you need access to. Upon approval, the Server Access Request grants immediate access, and you can connect to the server via the web terminal or Proxy.
Submitting a Server Access Request
1. Select Approval Rule
Choose an Approval Rule that matches your purpose. The approvers will vary based on the selected rule.
If an administrator has pre-assigned approvers for the selected rule, they will be designated automatically, and you cannot add or change them.

2. Designate Approvers
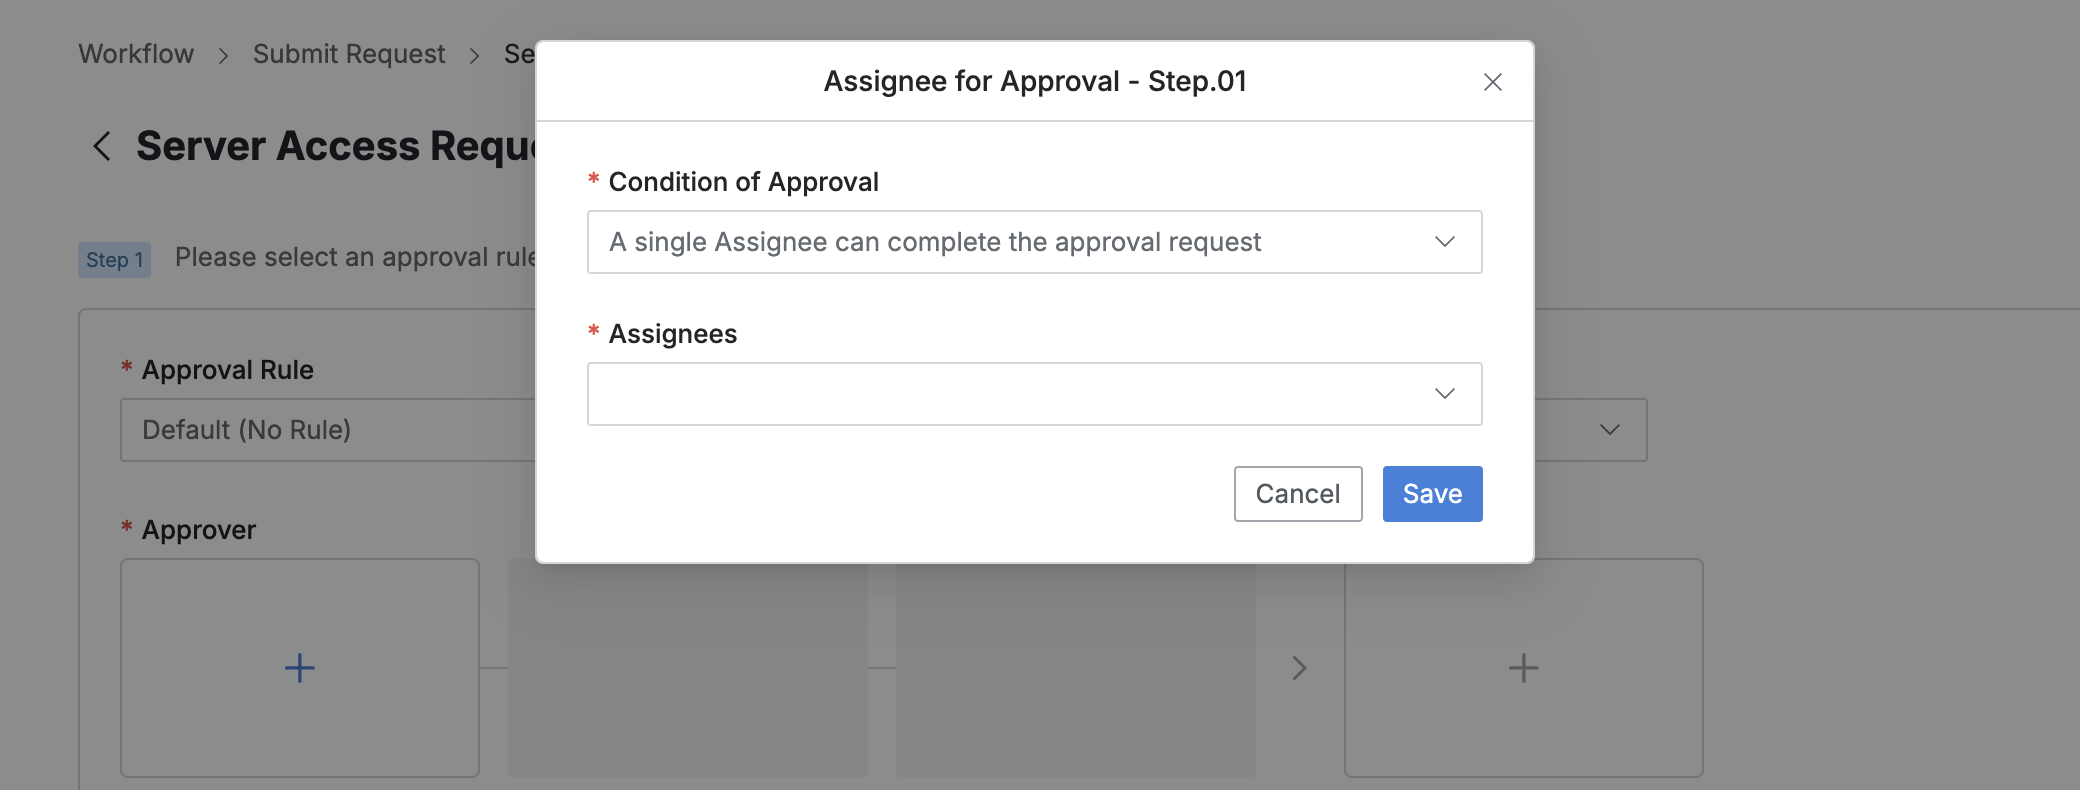
Click the
+button in the approval line to open a popup where you can designate approvers for each stage.Add approval conditions and approvers in this popup, then click
Saveto save the approval line.The available approval conditions are:
A single Assignee can complete the approval request : The request is approved with approval from any one of the assigned approvers.
All Assignees must approve this request : All assigned approvers must approve the request for it to be approved.

3. Designate Reviewers
Click the
+button in the approval line to open a popup where you can designate reviewers.If the administrator has not allowed reviewer designation, the Reviewer box will not be displayed.
Add the reviewers in this popup.
Then, click
Saveto close the modal and complete the reviewer designation.

4. Send Request with Post-Approval
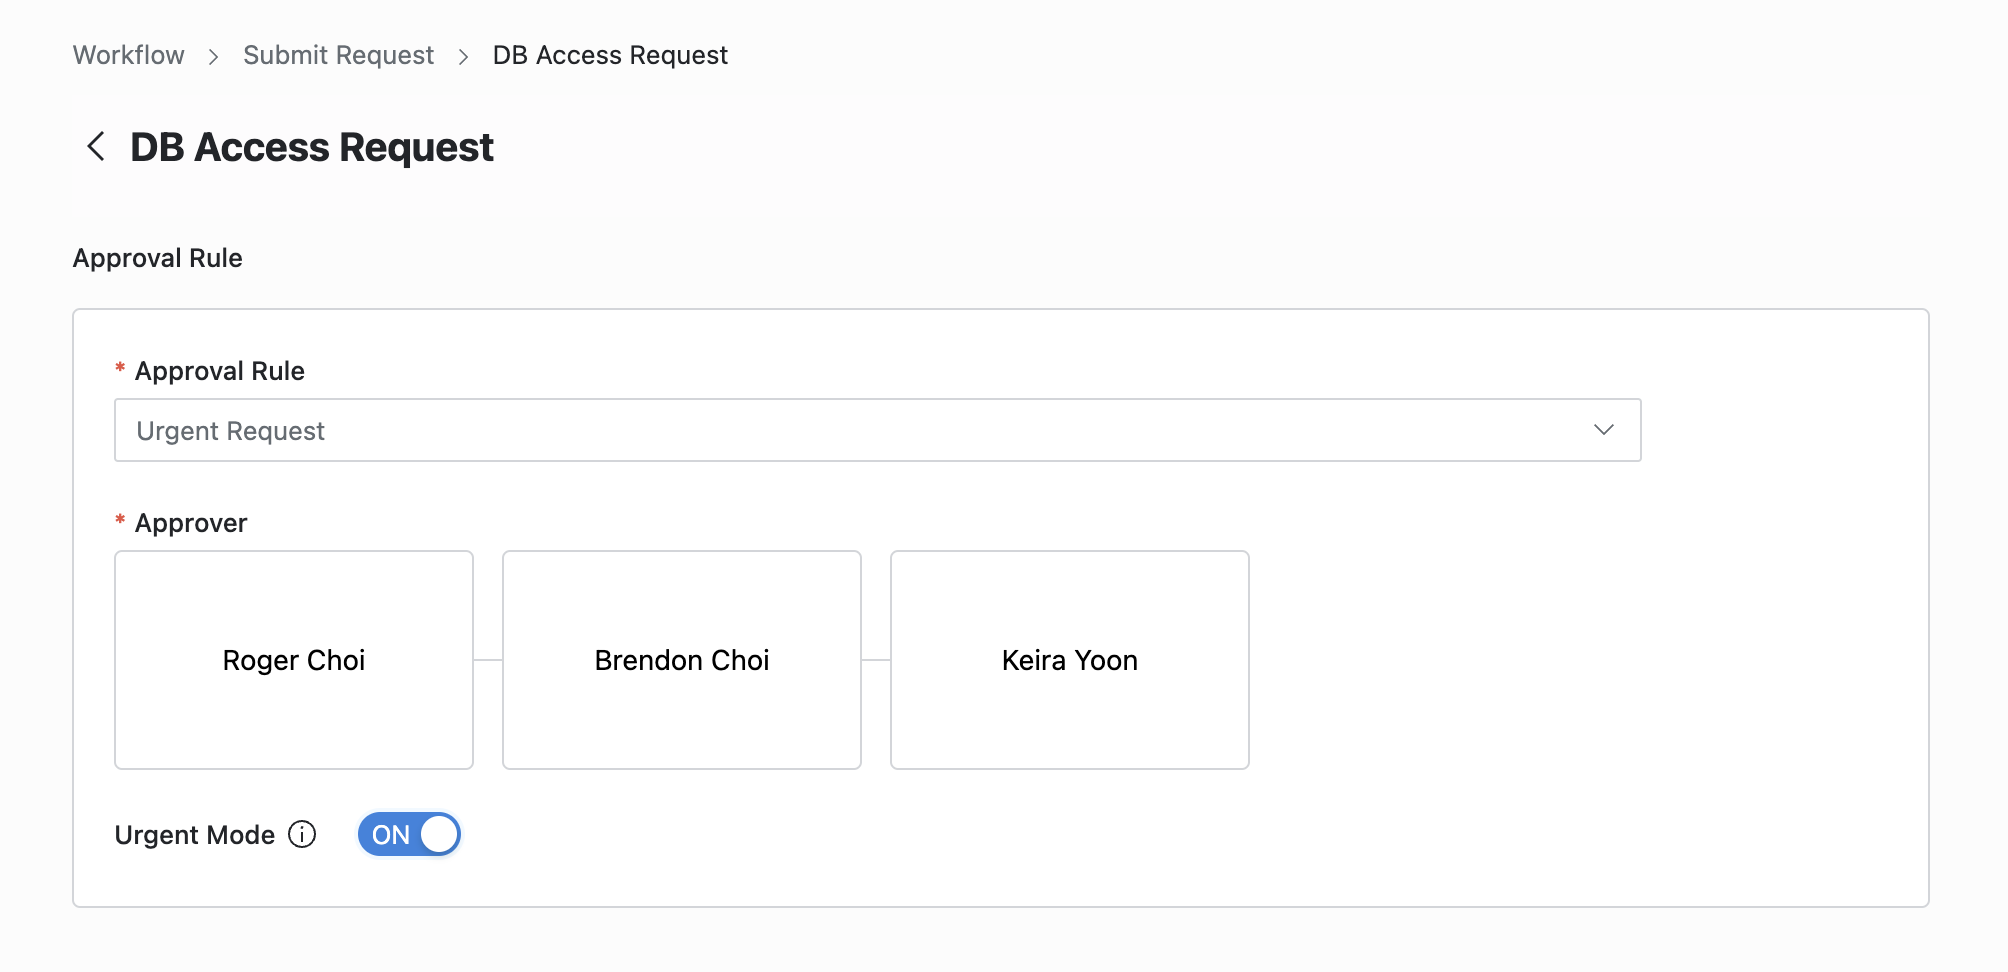
If the selected approval rule allows post-approval, the Urgent Mode switch will be displayed.
Set Urgent Mode = On, and upon submitting the request, you will immediately be granted privileges or be able to perform the task.

Q. Why don't I see the Urgent Mode switch?
A. The Urgent Mode switch is not displayed if the selected approval rule does not allow Urgent Mode.
5. Add Target Servers

Workflow > Submit Request > Server Access Request > Step 2 > Add Servers
Click
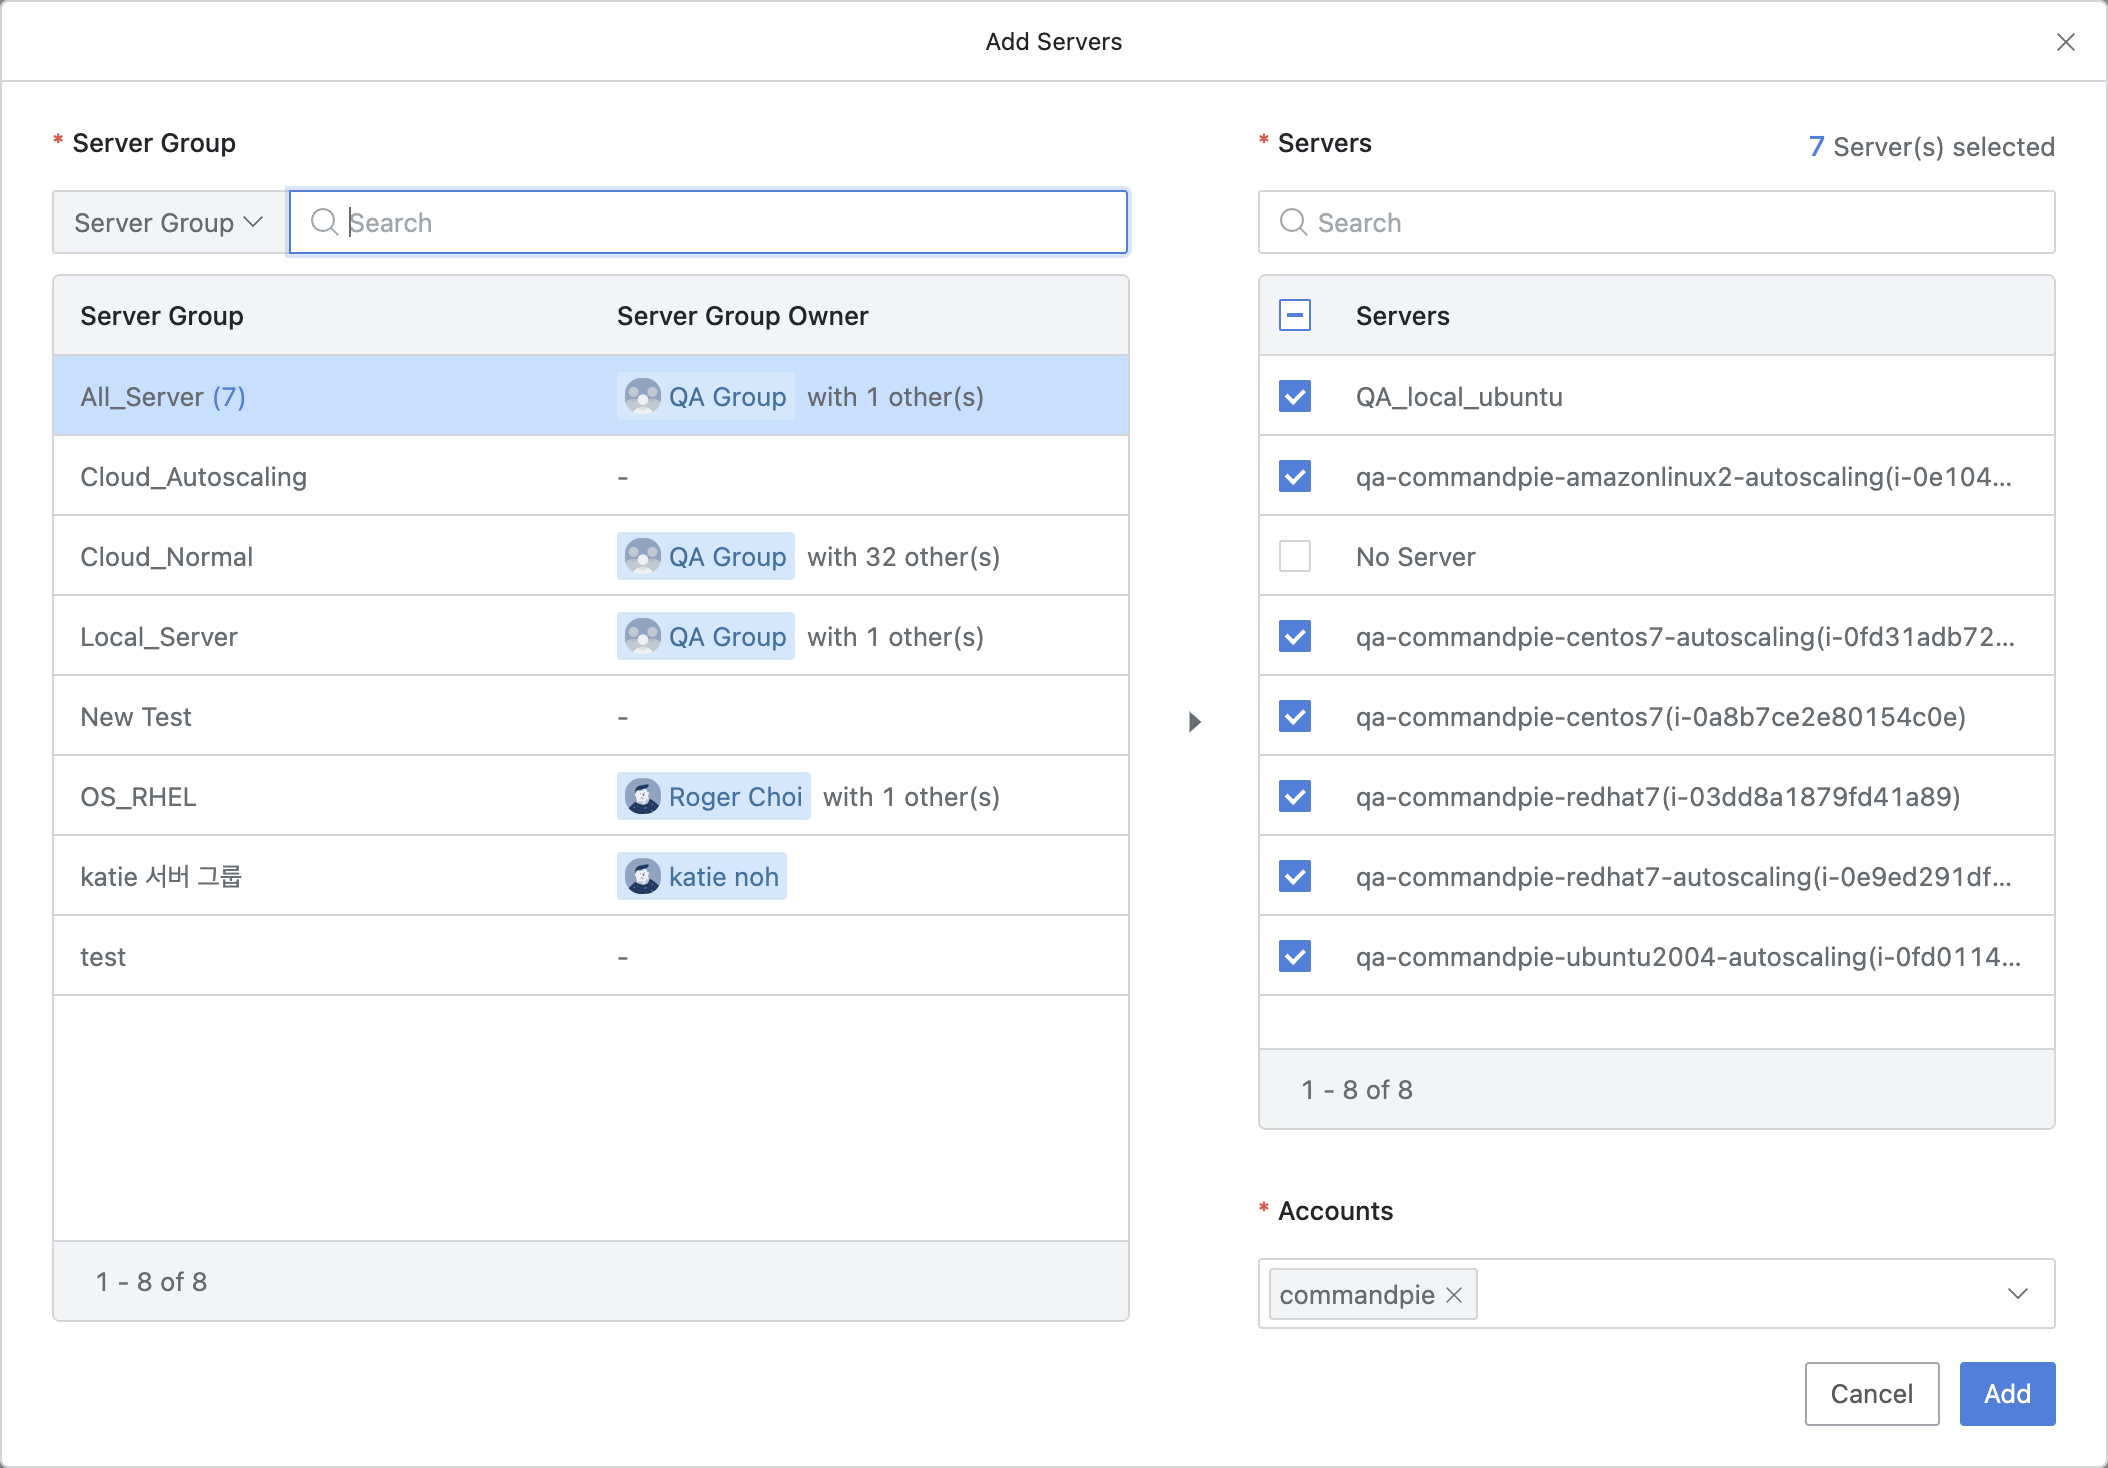
Add Serversto open a popup where you can select servers.From the Server Group list on the left, choose the group containing the servers you need access to.
Select the target servers from the Servers list on the right (multiple selections are allowed; the number of selected servers is displayed in the upper right corner).
Choose the accounts you need access for in the Accounts section (multiple selections are allowed).
Click
Addto close the modal and complete the server selection.
Note: Only one server group can be requested at a time for Direct Permission. If you open the Add Servers modal again while servers are already added to the Server List table, all previously selected content will be reset.
6. Enter Request Information

Workflow > Submit Request > Server Access Request > Step 3
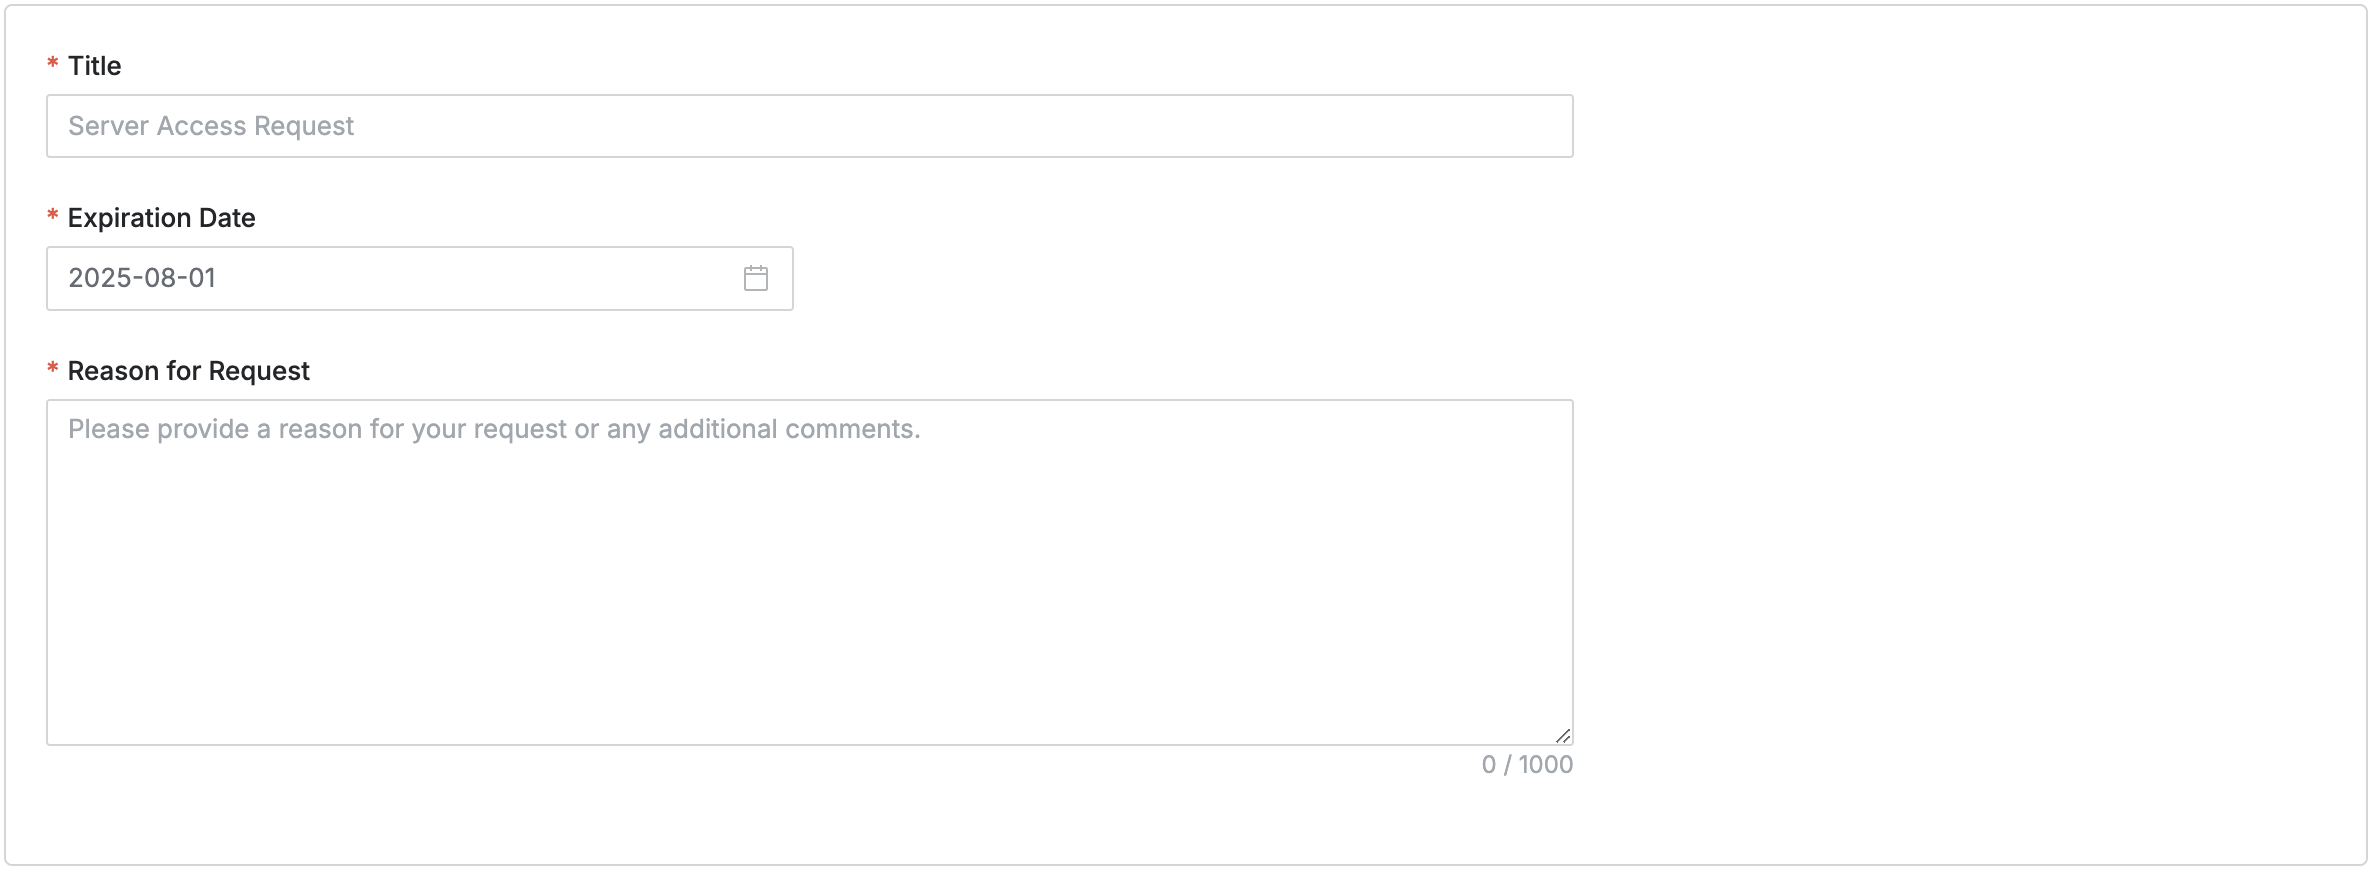
Title: Enter the title of the request.
Expiration Date: Select the expiration date when the permission will be revoked.
This is a mandatory field, and if not set, the default is one year from the request date.
It is recommended to request access only for the period needed for appropriate connection access management.
Reason for Request: Provide a reason for requesting server access.
Submit : Once you have completed the request form, click the
Submitbutton to finalize and submit the request.
For details on connecting to the server once access has been granted, refer to the Connect to Granted Servers.
Permissions granted through Direct Permission will apply when you select Default Role in the server list. The access policies set at the time of the Server Access Request will apply to the granted permissions.