Roles
Overview
Role-Based Access Control (RBAC) is used to allow or restrict user access to servers within your organization based on user roles. You can assign a predefined role to users or user groups. A role is used to combine multiple policies into a single, unified access control entity.
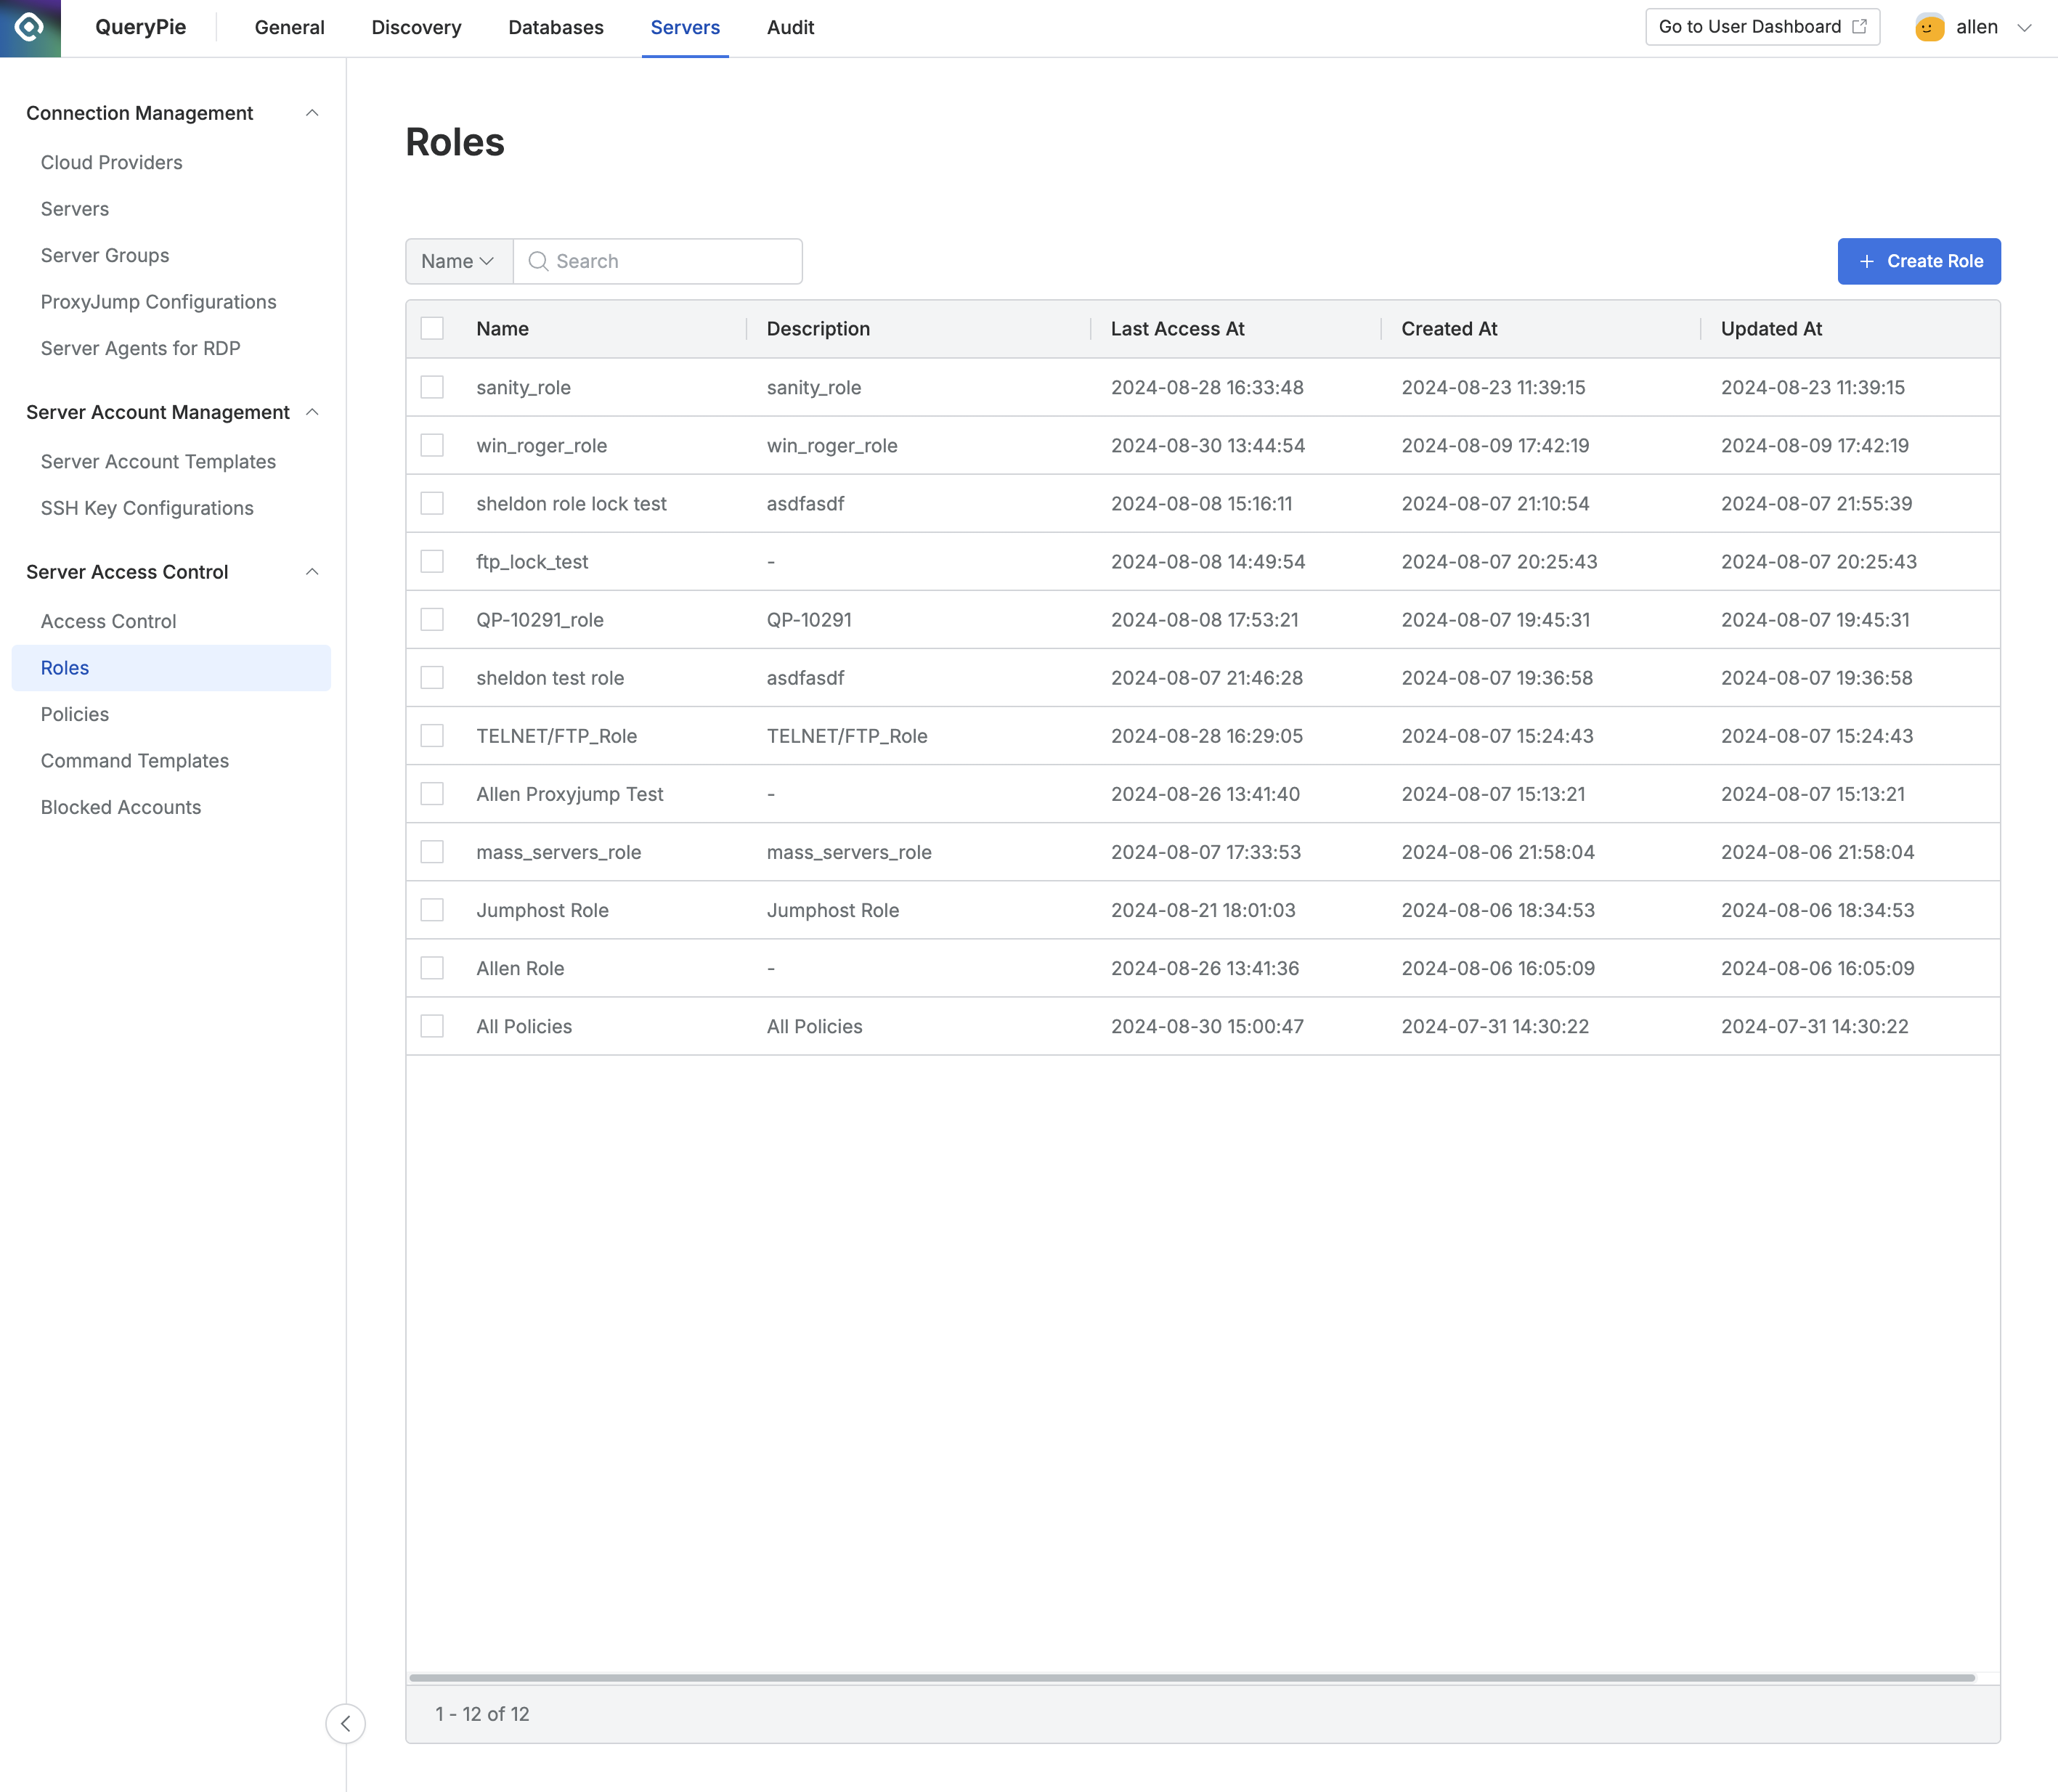
Administrator > Servers > Server Access Control > Roles
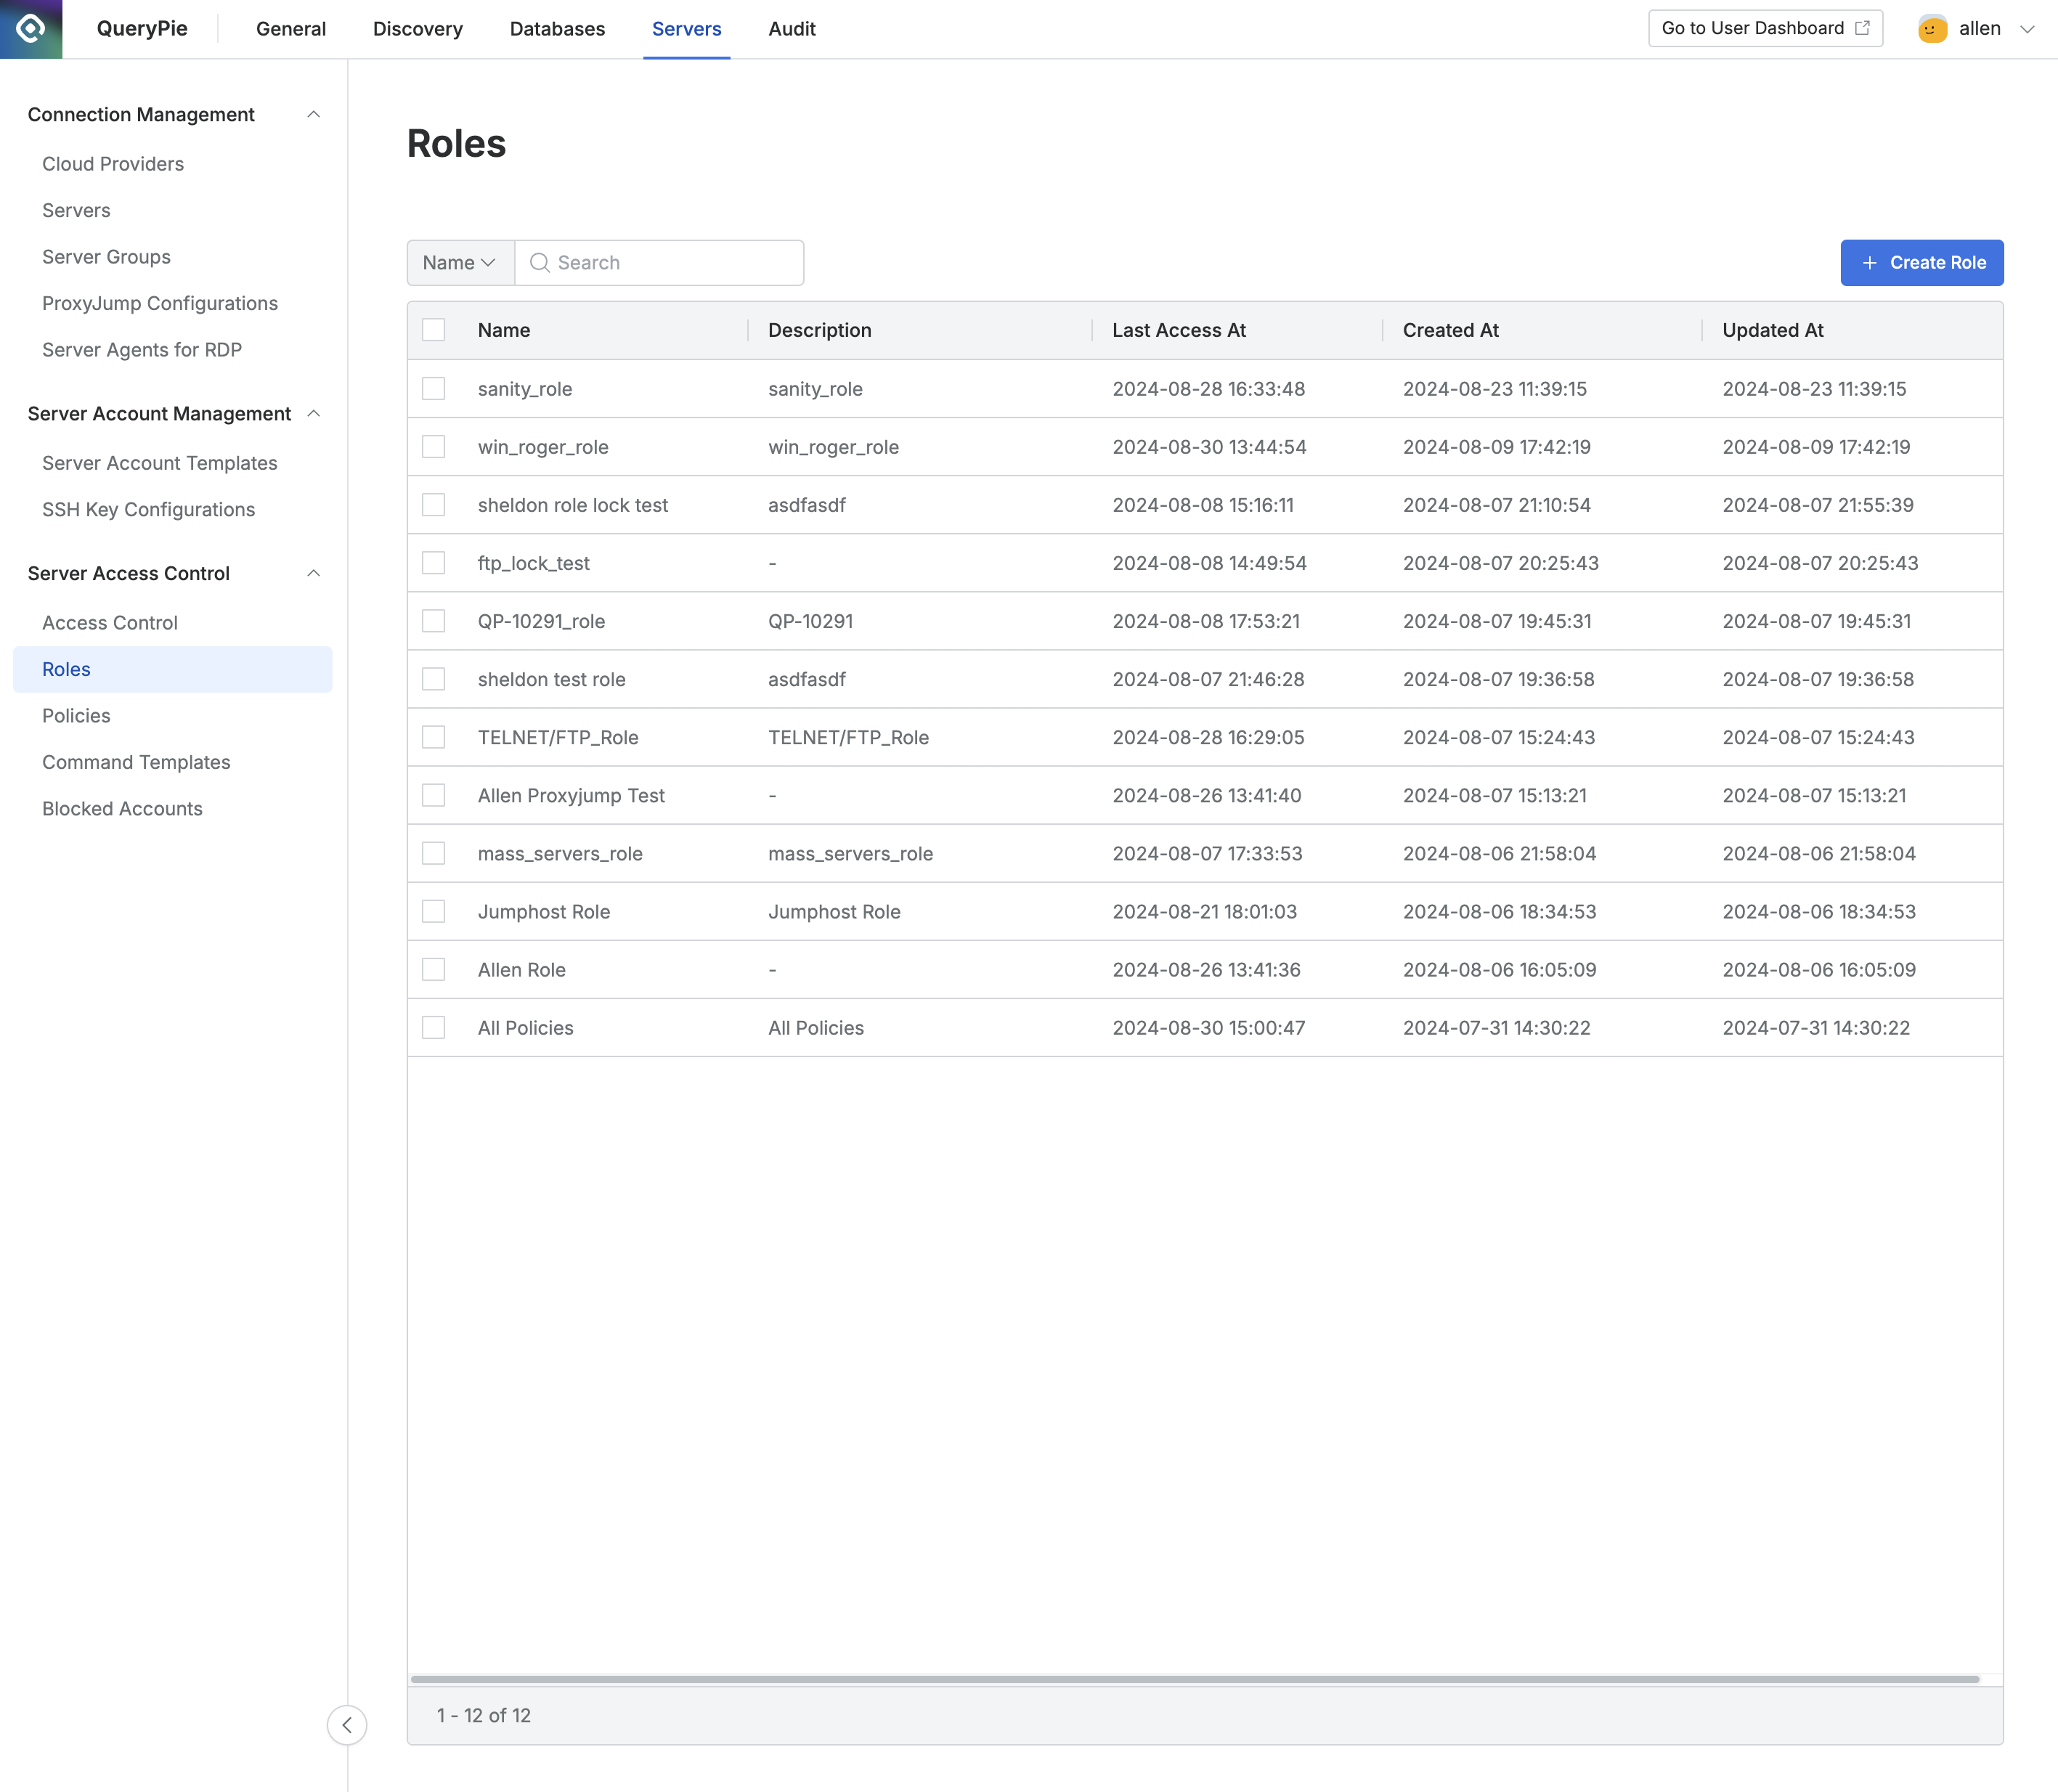
Navigate to the Administrator > Servers > Server Access Control > Roles menu.
You can search for roles using the search bar at the top left of the table by entering role names.
Use the refresh button at the top right of the table to update the list of roles.
The table provides the following column information:
Name: The role name.
Description: A detailed description of the role.
Last Access At: The last time this role was accessed.
Created At: The date and time when the role was first created.
Updated At: The last time the role was updated.
Updated By: The name of the administrator who last updated the role.
Viewing Roles
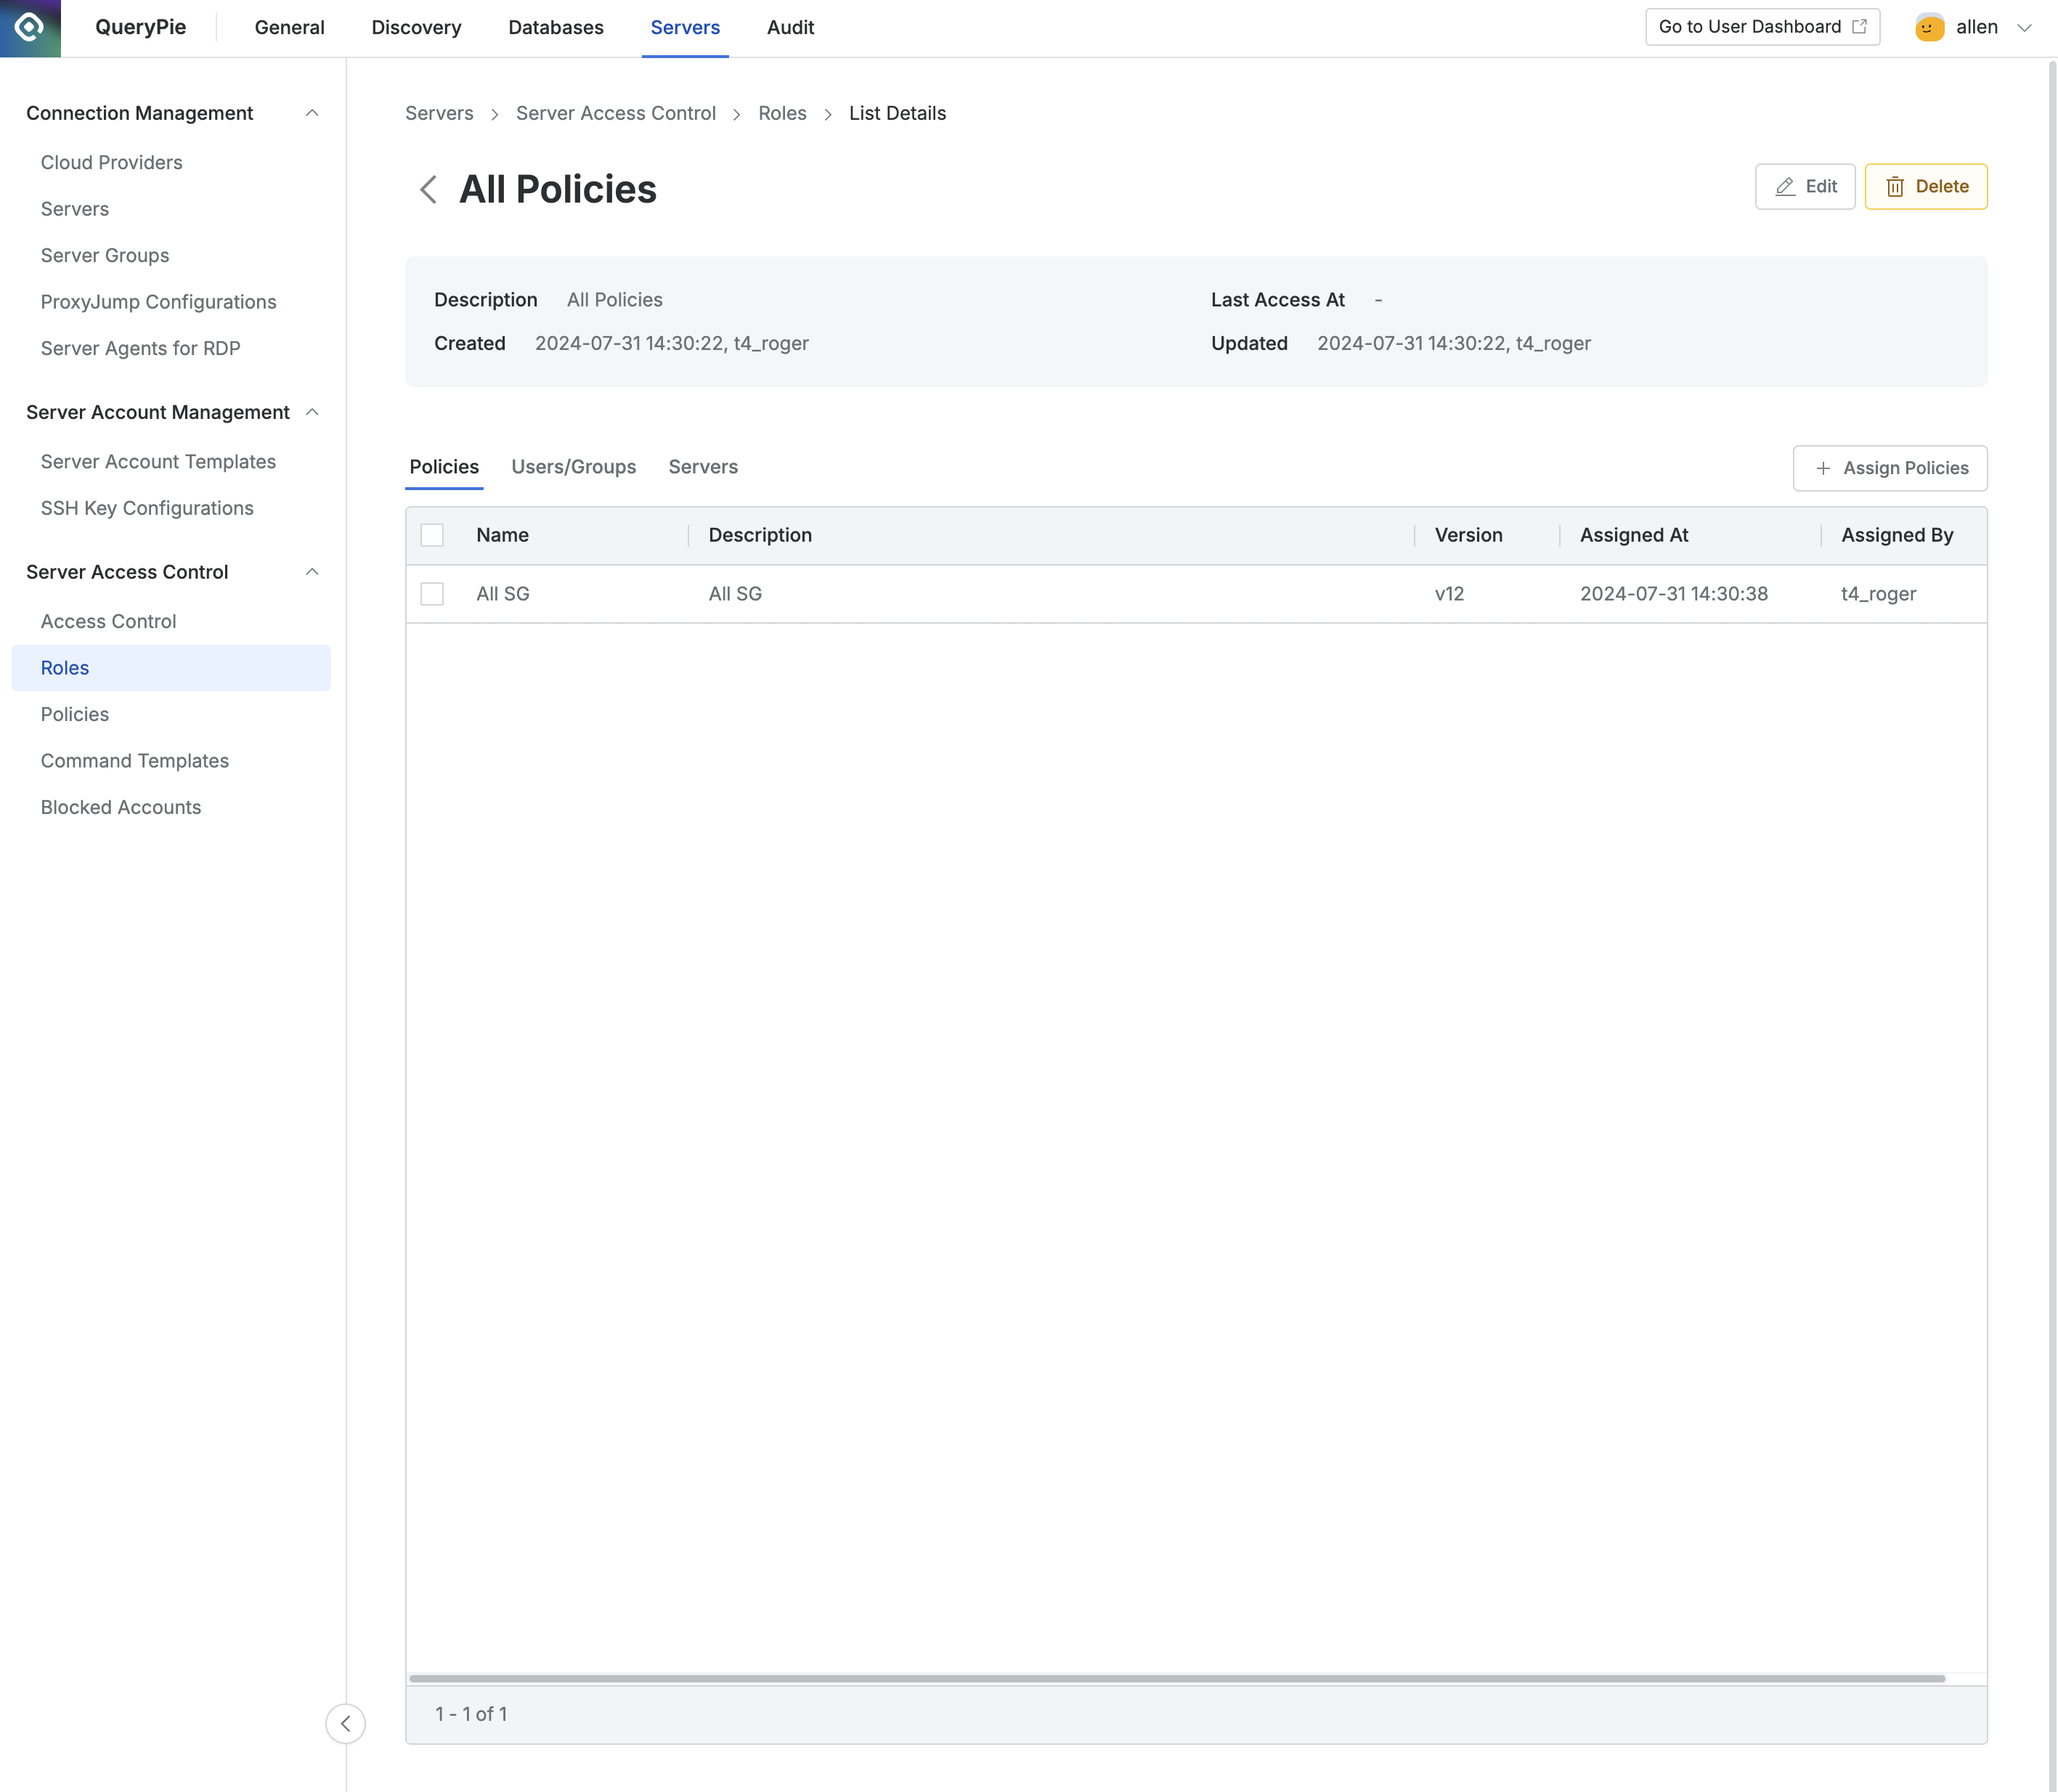
Administrator > Servers > Server Access Control > Roles > List Details
Navigate to the Administrator > Servers > Server Access Control > Roles menu.
Click on any row to view detailed information about that role.
Policies
The Policies tab is the default tab, where you can view the list of policies assigned to the role.
The table displays the following information for each policy:
Name: The policy name.
Description: A detailed description of the policy.
Version: The policy version.
Assigned At: The date and time when the policy was assigned.
Assigned By: The name of the administrator who assigned the policy.
Clicking on any policy row will open a drawer with detailed information about the selected policy.
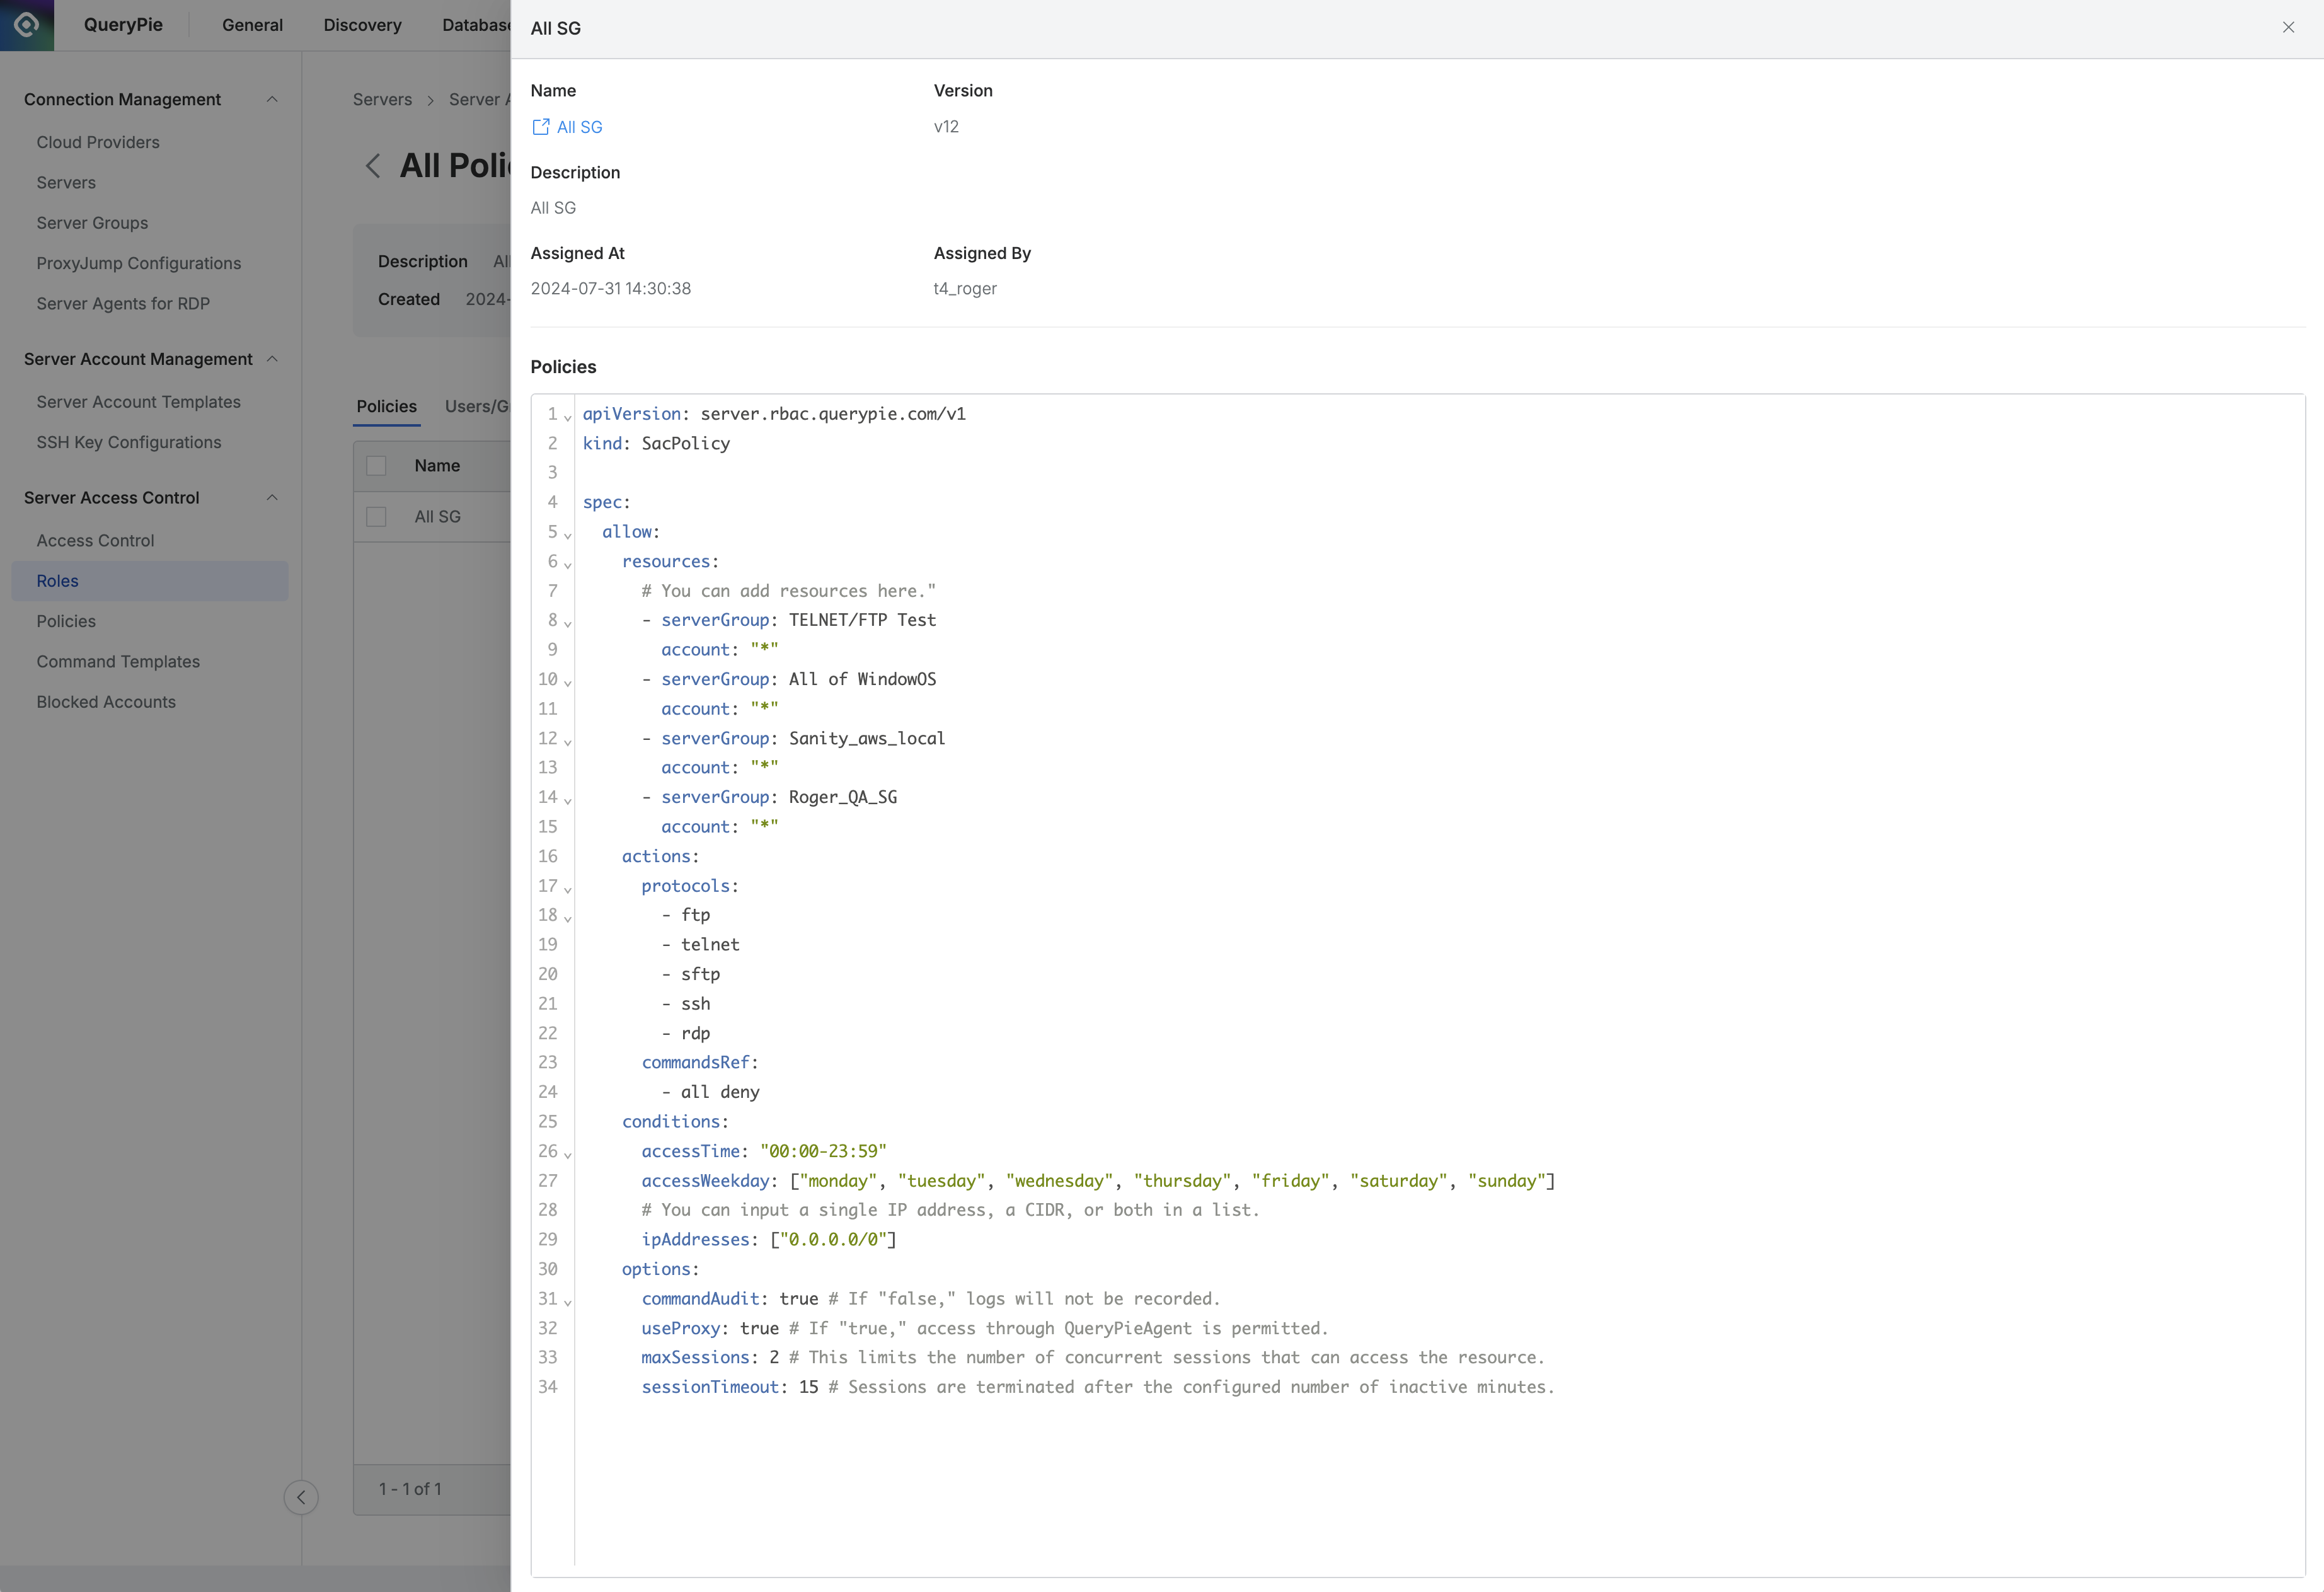
At the top, basic information is displayed:
Name: The policy name.
Administrators can also open the policy detail page in a new window.
Version: The policy version.
Description: A detailed description of the policy.
Assigned At: The date and time when the policy was assigned.
Assigned By: The name of the administrator who assigned the policy.
The bottom section displays the policy code.
Users/Groups

This tab lists the users or groups assigned to the role.
You can search by user or group name.
The list displays the following information for each user or group:
User Type: The type of user or group.
Name: The name of the user or group.
Last Access At: The last time the user or group accessed the server.
Expiration Date: The expiration date of the role assignment.
Granted At: The date and time when the role was assigned to the user or group.
Servers

This tab lists the servers accessible through the role.
You can search by server name.
The list displays the following information for each server:
Server Group: The name of the server group.
Server: The server name.
Host: The host information of the server.
Account: The account name used to access the server.
Creating a Role
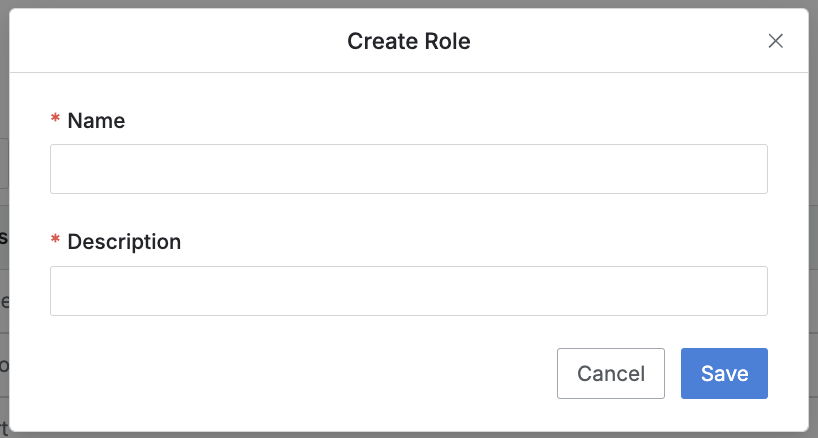
Navigate to the Administrator > Servers > Server Access Control > Roles menu.
Click the
+ Create Rolebutton at the top right.Enter the following information to create the role:
Name: A name to identify the role.
Description: Additional information about the role, which will also be displayed in the role selection screen for users.
Click the
Savebutton to create the role.
Editing a Role
Administrator > Servers > Server Access Control > Roles > List Details
After entering the role's detail page, the Policies tab will be automatically selected by default.
Navigate to the Administrator > Servers > Server Access Control > Roles menu.
Select the role you want to edit from the list.
In the Policies tab, click the
+ Assign Policiesbutton at the center right of the screen.Add a policy from the pre-created list.
Deleting a Role
Navigate to the Administrator > Servers > Server Access Control > Roles menu.
You can proceed with deletion in two ways:
Delete from the List:
Check the checkbox on the left of the role you want to delete in the table.
Click the
Deletebutton that appears on the table column line.
Delete from the Detail Page:
Click the
Deletebutton in the top right corner of the screen.
When the popup appears, click the
Deletebutton to confirm and proceed with deletion.
Deleting a role will revoke the permissions associated with that role from all users and groups.
%201.png)