Synchronize Server Resources in GCP
Overview
QueryPie seamlessly integrates with Google Cloud Platform (GCP) for efficient server registration and management. Through this integration, you can effortlessly synchronize resources from GCP and register them as servers within QueryPie. Furthermore, you have the flexibility to grant access to these servers for users and groups, as well as configure policies to ensure optimal management.
Register GCP Integration Information in QueryPie

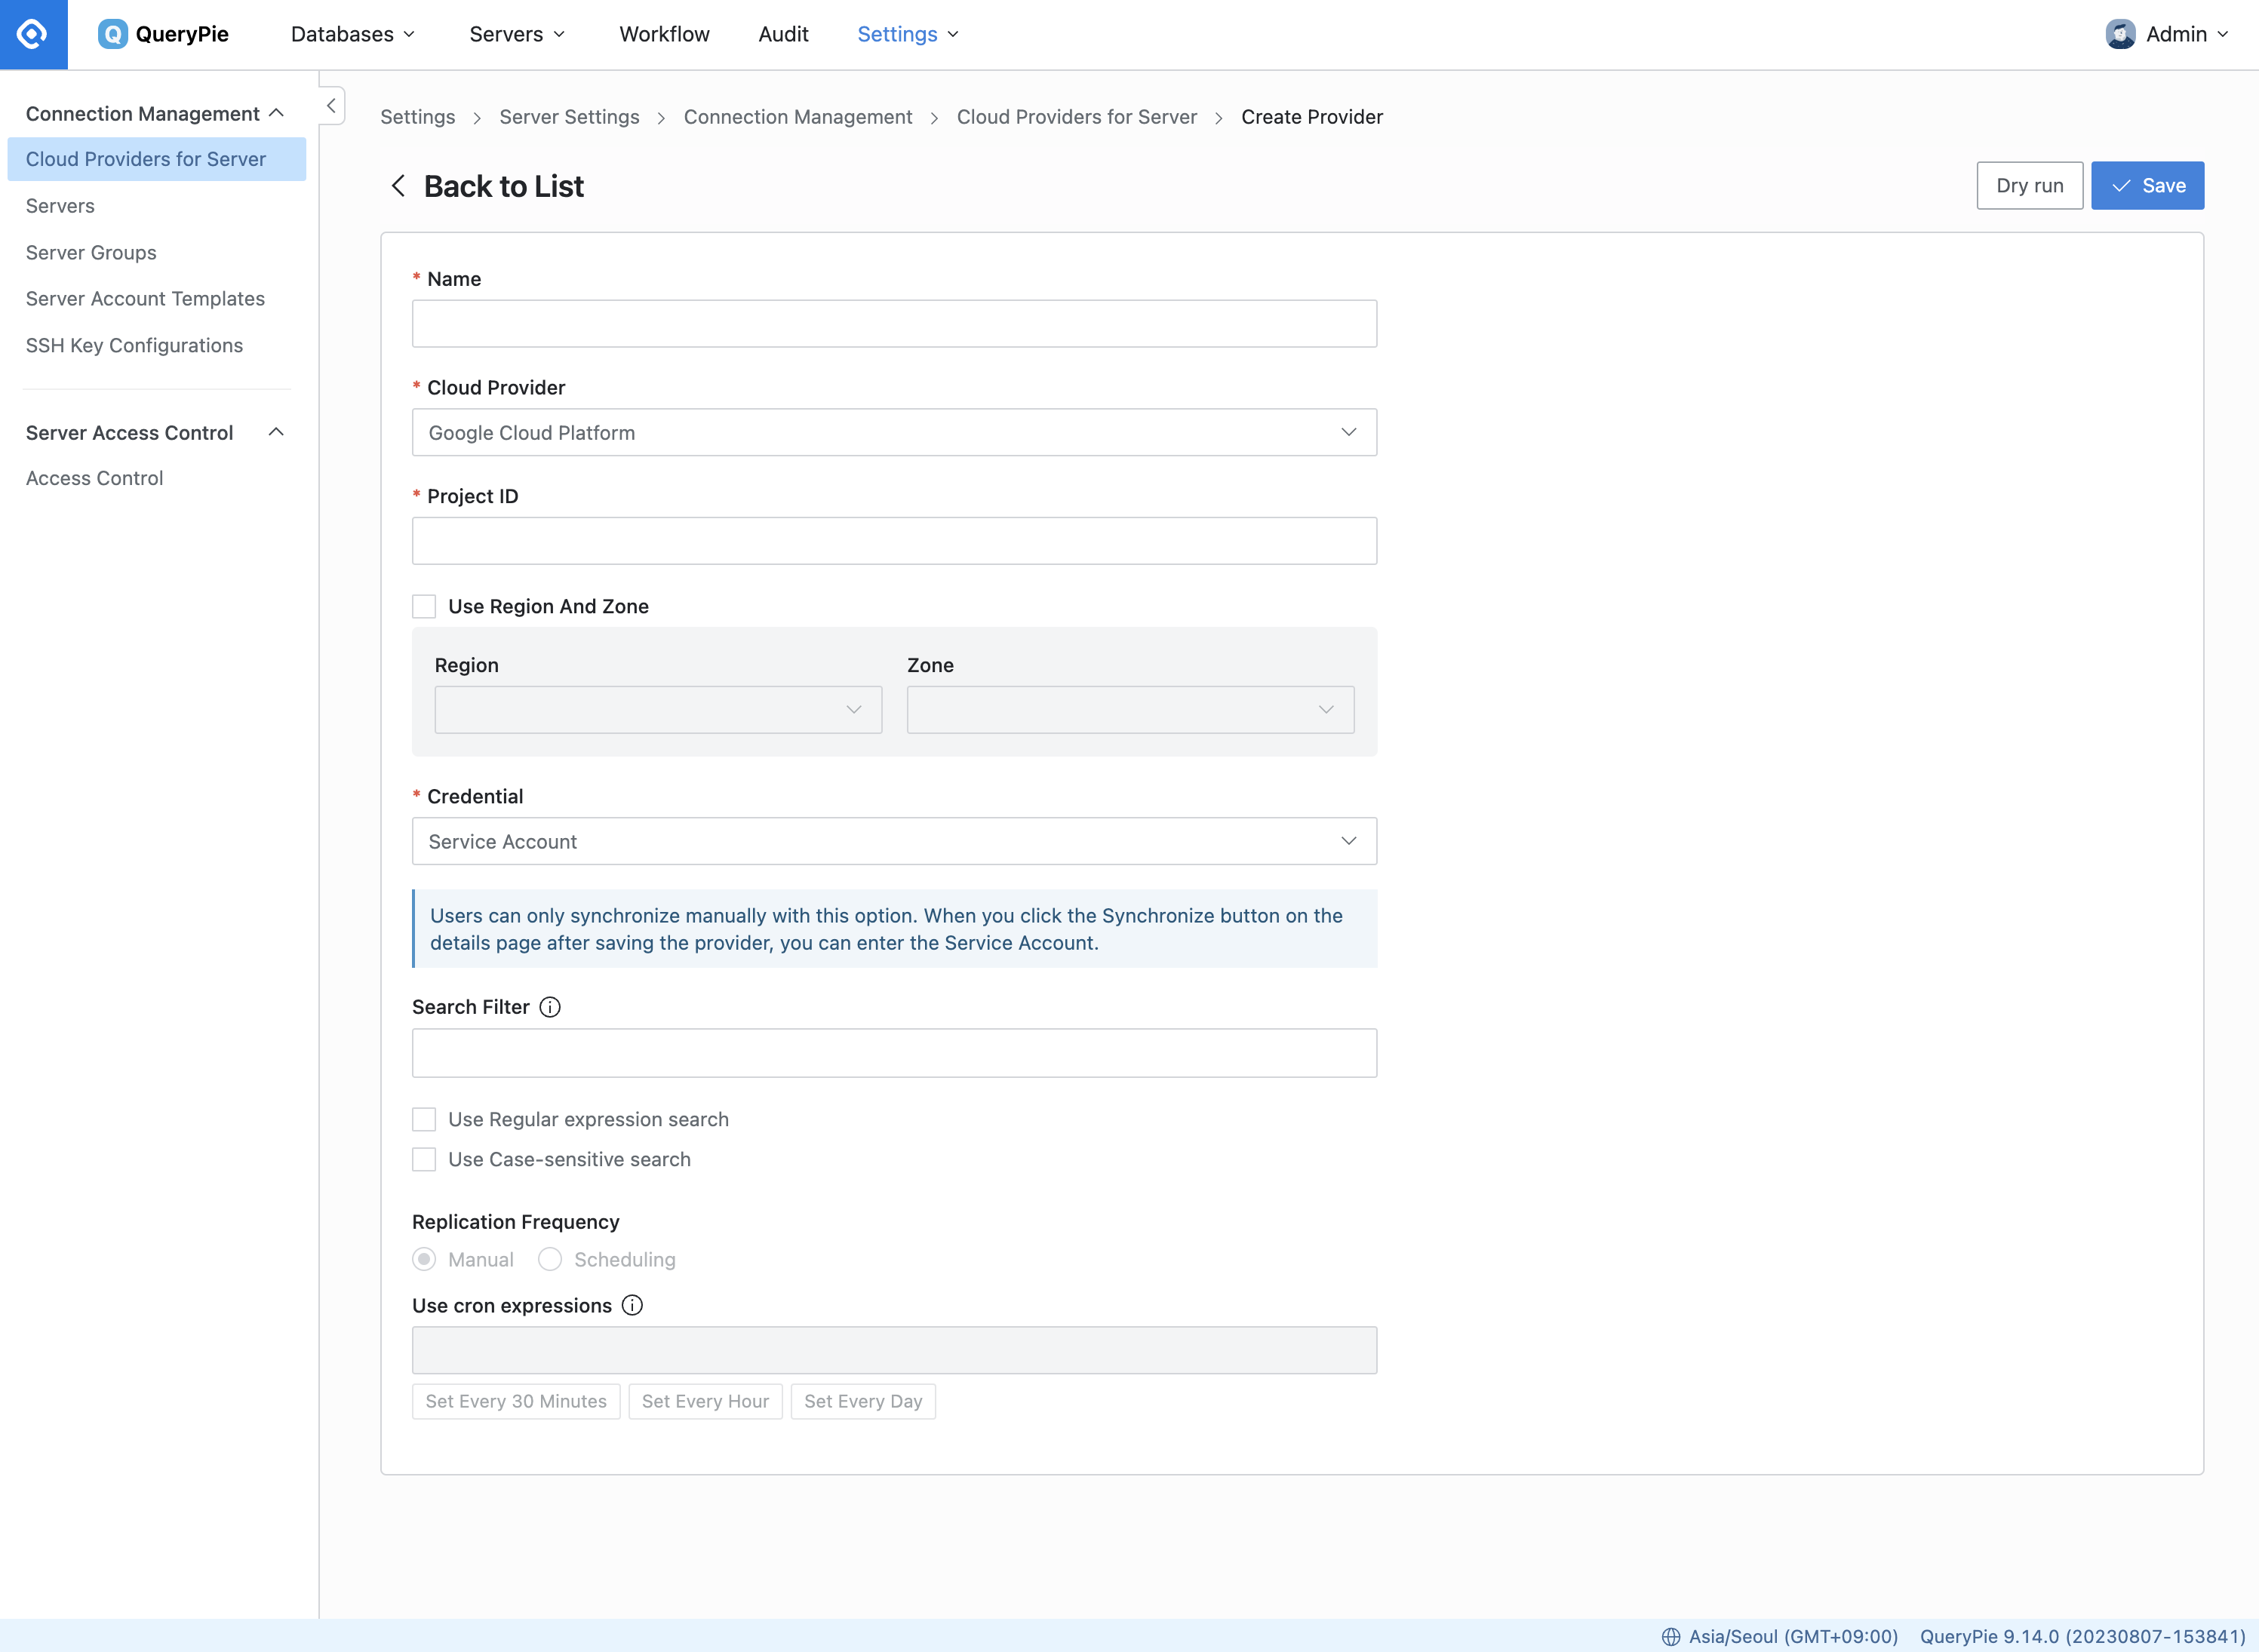
Server Settings > Connection Management > Cloud Providers for Server > Create Provider
Navigate to Server Settings > Connection Management > Cloud Providers for Server menu.
Click on the
Create Providerbutton located in the upper-right corner.In the Name field, enter a descriptive name to identify this provider.
In the Cloud Provider field, select “Google Cloud Platform”.
Enter the Project ID of the resources you want to synchronize.
If you wish to synchronize resources from a specific region and zone, enable Use Region and Zone and select the desired
RegionandZoneaccordingly.Choose the appropriate credential needed to synchronize the resources. Presently, only the Service Account method is supported.
Please note that the Service Account method allows for manual synchronization. By clicking the 'Synchronize' button on the details page, you can input the Service Account JSON and initiate a one-time synchronization.
You can use Search Filter to get a list of some types of resources that you want to synchronize.
Search Filter works the same way as search in AWS. You can use values such as name, host, OS, tags, and more as filters, and you can conveniently enter your search criteria and filters using the Enter key in the order below.
Enter a value for Key and press
Enter-> Select a search condition and pressEnter-> Enter a value for Value and pressEnter
For more detailed usage instructions, refer to the User Guide for Linux Instances (AWS).
In the Replication Frequency field, select the desired synchronization method.
Manual : Synchronize resources manually as needed.
Scheduling : Schedule periodic synchronization using Cron Expressions.
Click the
Savebutton to save the Cloud Provider.
Synchronize and Manage Registered GCP Cloud Providers

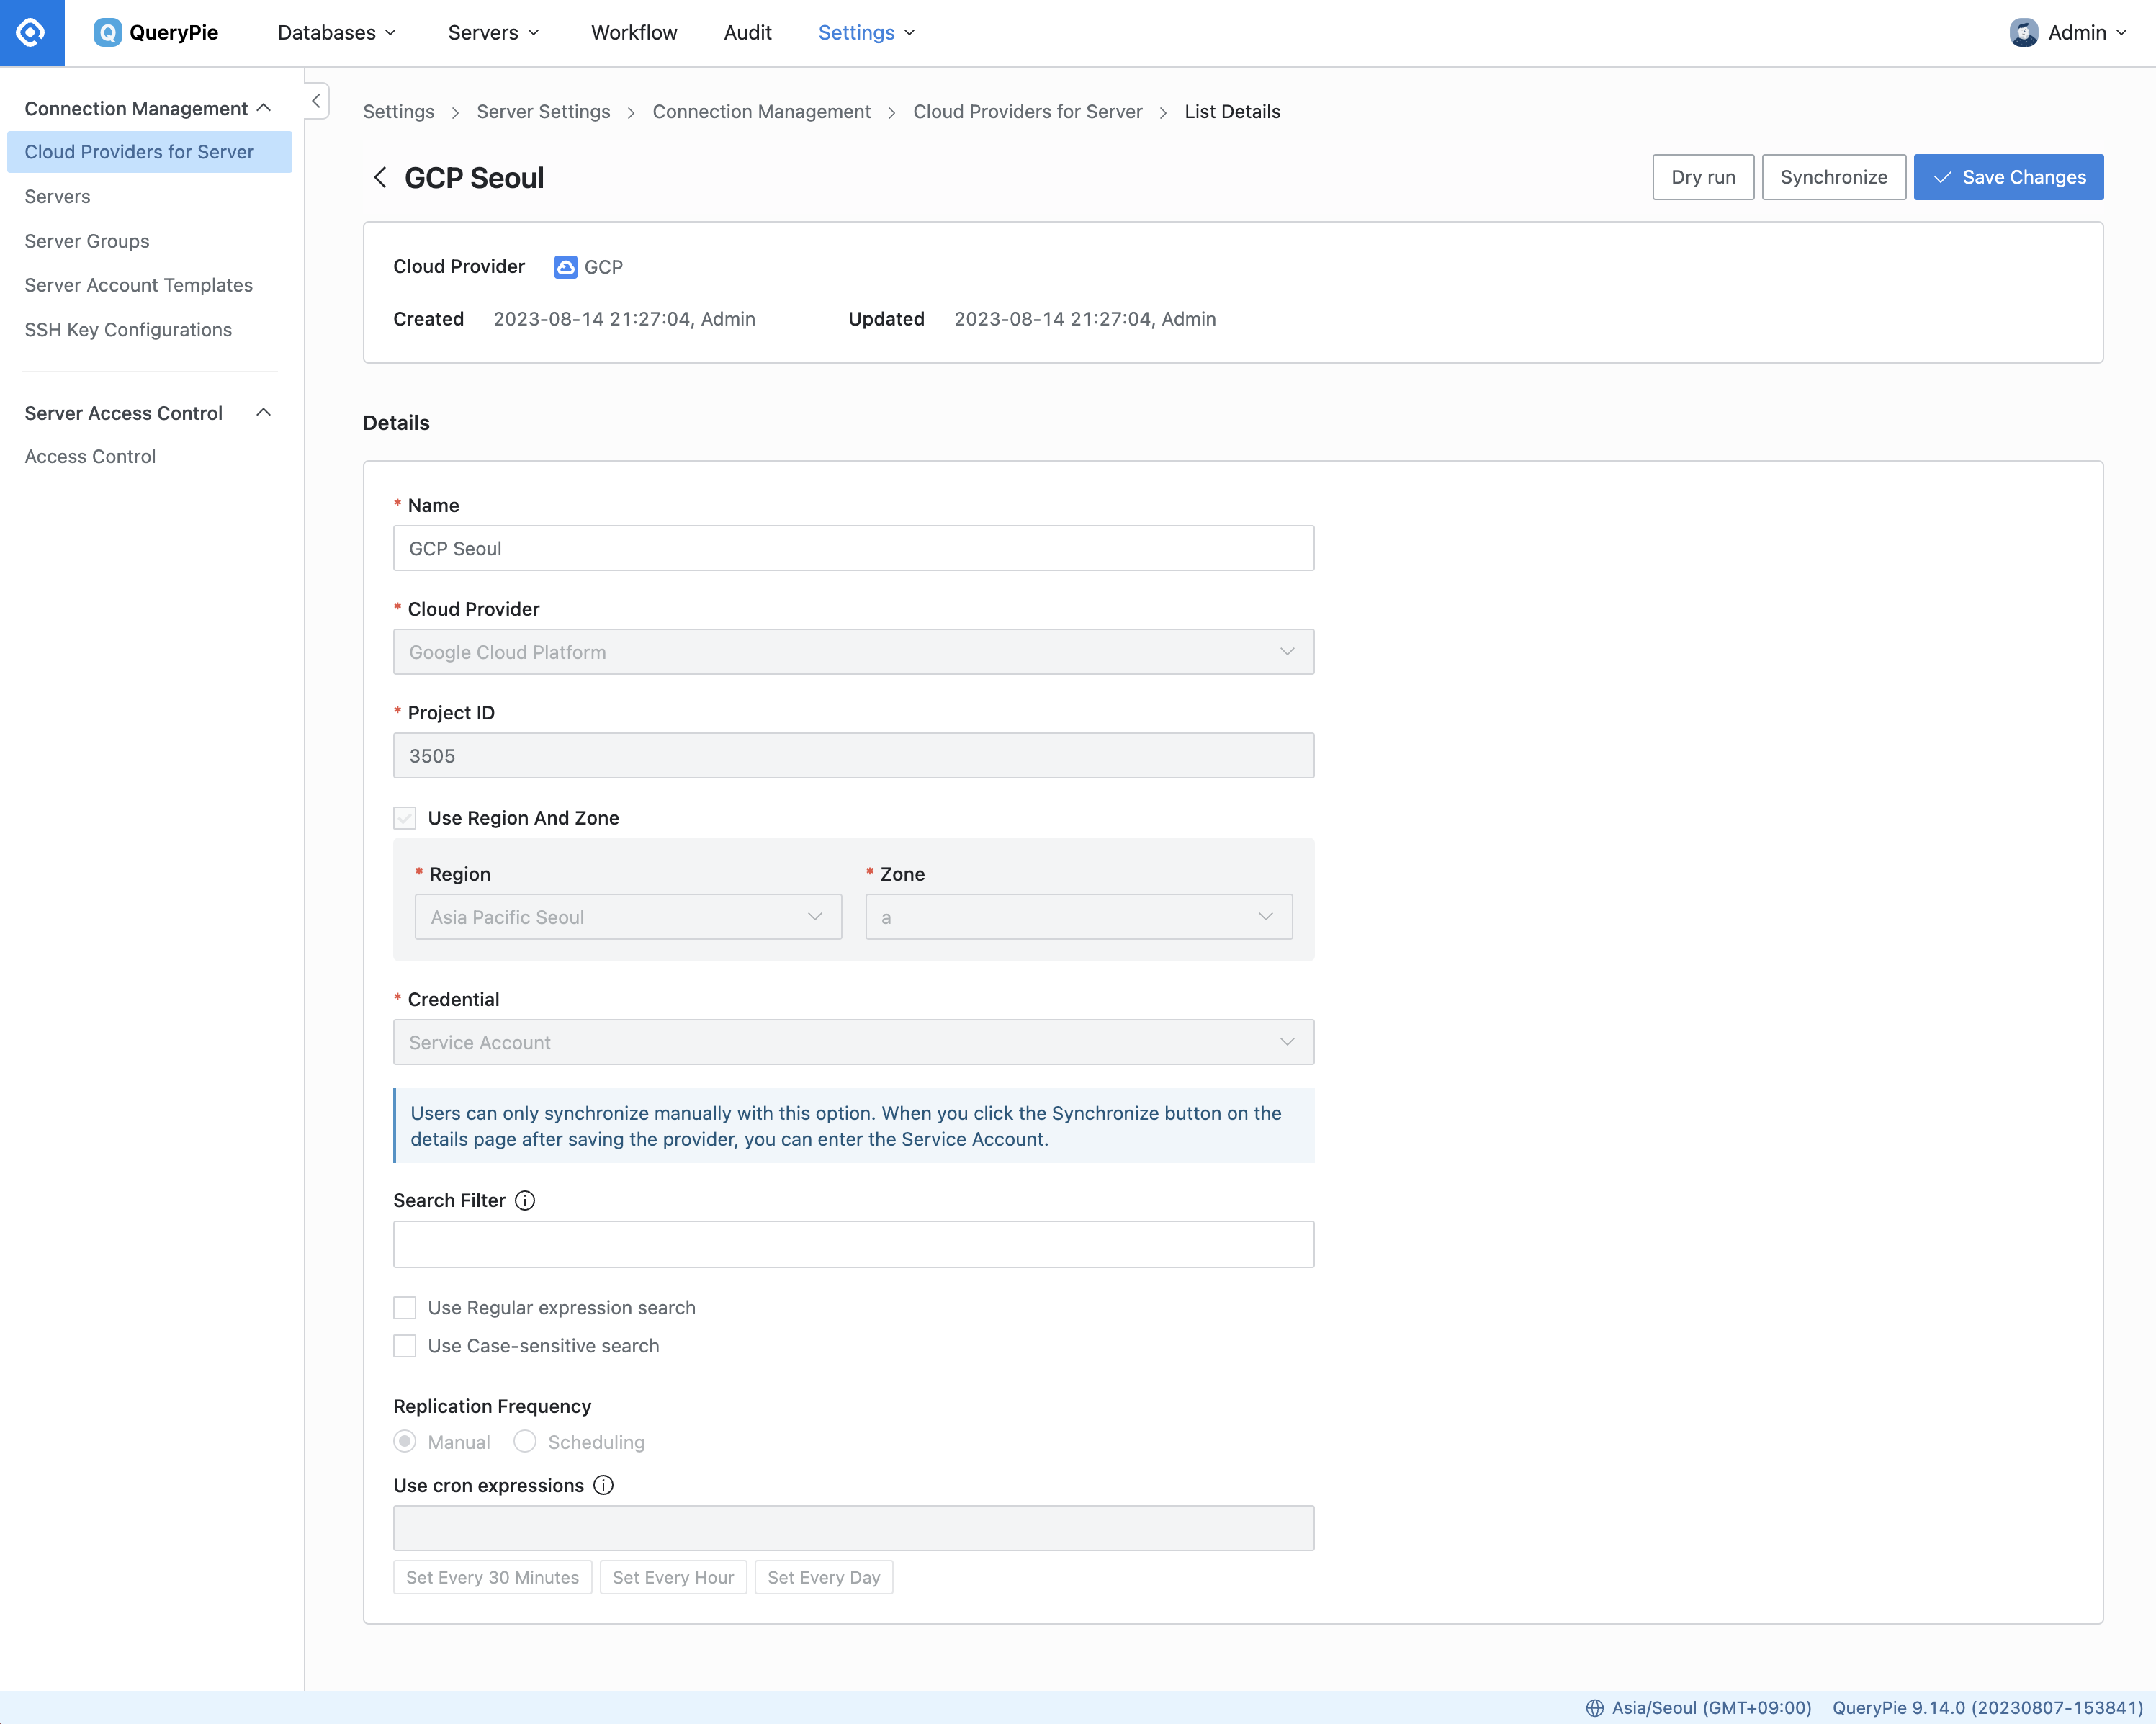
Server Settings > Connection Management > Cloud Providers for Server > Cloud Provider Details
Navigate to Server Settings > Connection Management > Cloud Providers for Server menu.
Click on the desired cloud provider you registered to access its details screen.
Click the
Synchronizebutton in the top right corner to begin synchronizing your resources with GCP.You can monitor the synchronization progress in the Synchronization Log that appears. Additionally, you can review the synchronization history in the Settings > Systems > Jobs menu.
Please note that after registering a cloud provider, certain provider information cannot be changed:
Name: Changeable
Cloud Provider: Cannot be changed
Project ID: Cannot be changed
Region and Zone: Cannot be changed
Credential: Cannot be changed
Search Filter: Changeable
Replication Frequency: Cannot be changed
Related Topics
%201.png)