WAC Quickstart
This page will guide you through using WAC with the QueryPie manual page as an example.
To apply the policy that blocks access to the QueryPie 10.1 version manual and allows access to the 10.0 and 10.2 version manuals for the current user, follow these steps:
Register the QueryPie manual page as a web app and add version-specific links under subpaths.
Create a policy that allows access to all versions and another that blocks only the 10.1 version manual.
Create a role that grants both policies and assign this role to the current user.
Admin-side
1. Registering the Web App
Navigate to the Admin > Web Apps > Connection Management > Web Apps menu.
Click the
Create a Web Appbutton.Enter the following information.
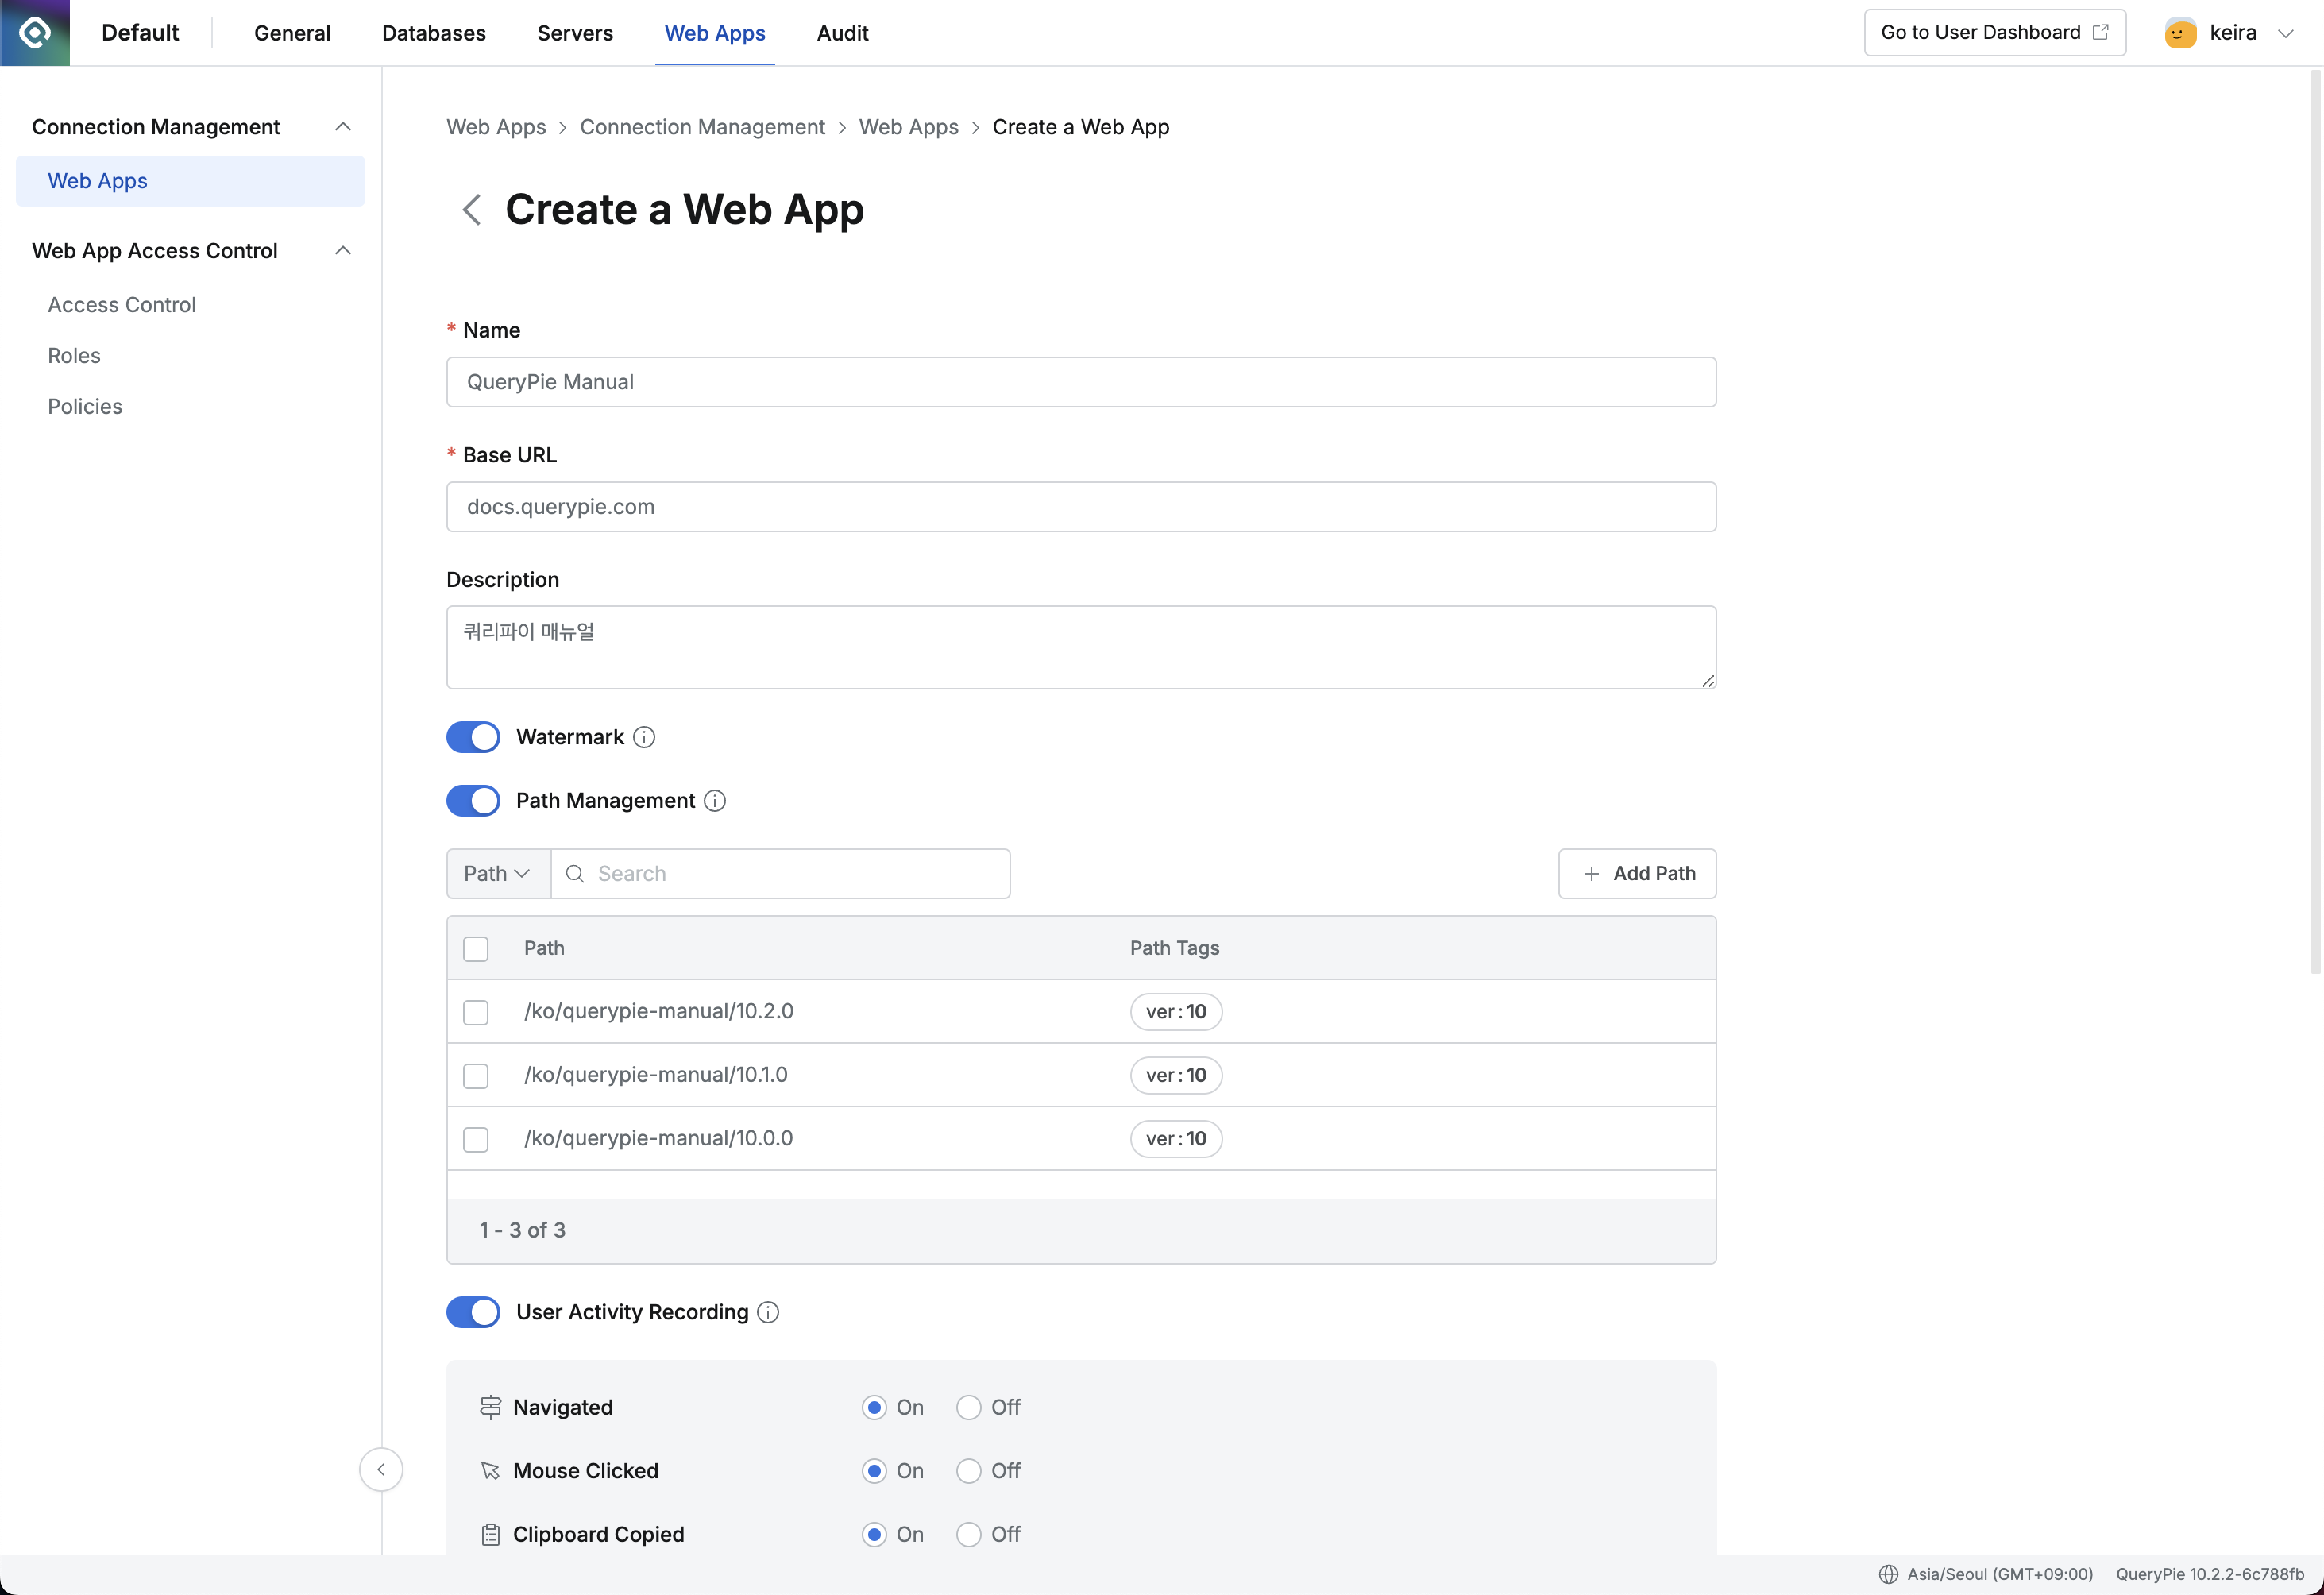
Admin > Web Apps > Connection Management > Web Apps > Create a Web App
Name : QueryPie Manual
Base URL :
docs.querypie.comThe Base URL cannot include a subpath (e.g.,
/ko).When entering the Base URL, it is recommended to exclude
https://.
Description: Enter a description for the web app (e.g., QueryPi Manual).
Watermark: Choose whether to apply a watermark to the user's browser screen upon accessing the web app.
This prevents screen leakage by displaying information such as the visitor and access time on the browser during web app access.
The guide assumes the On status for instructions.
Path Management: Choose whether to manage subpaths.
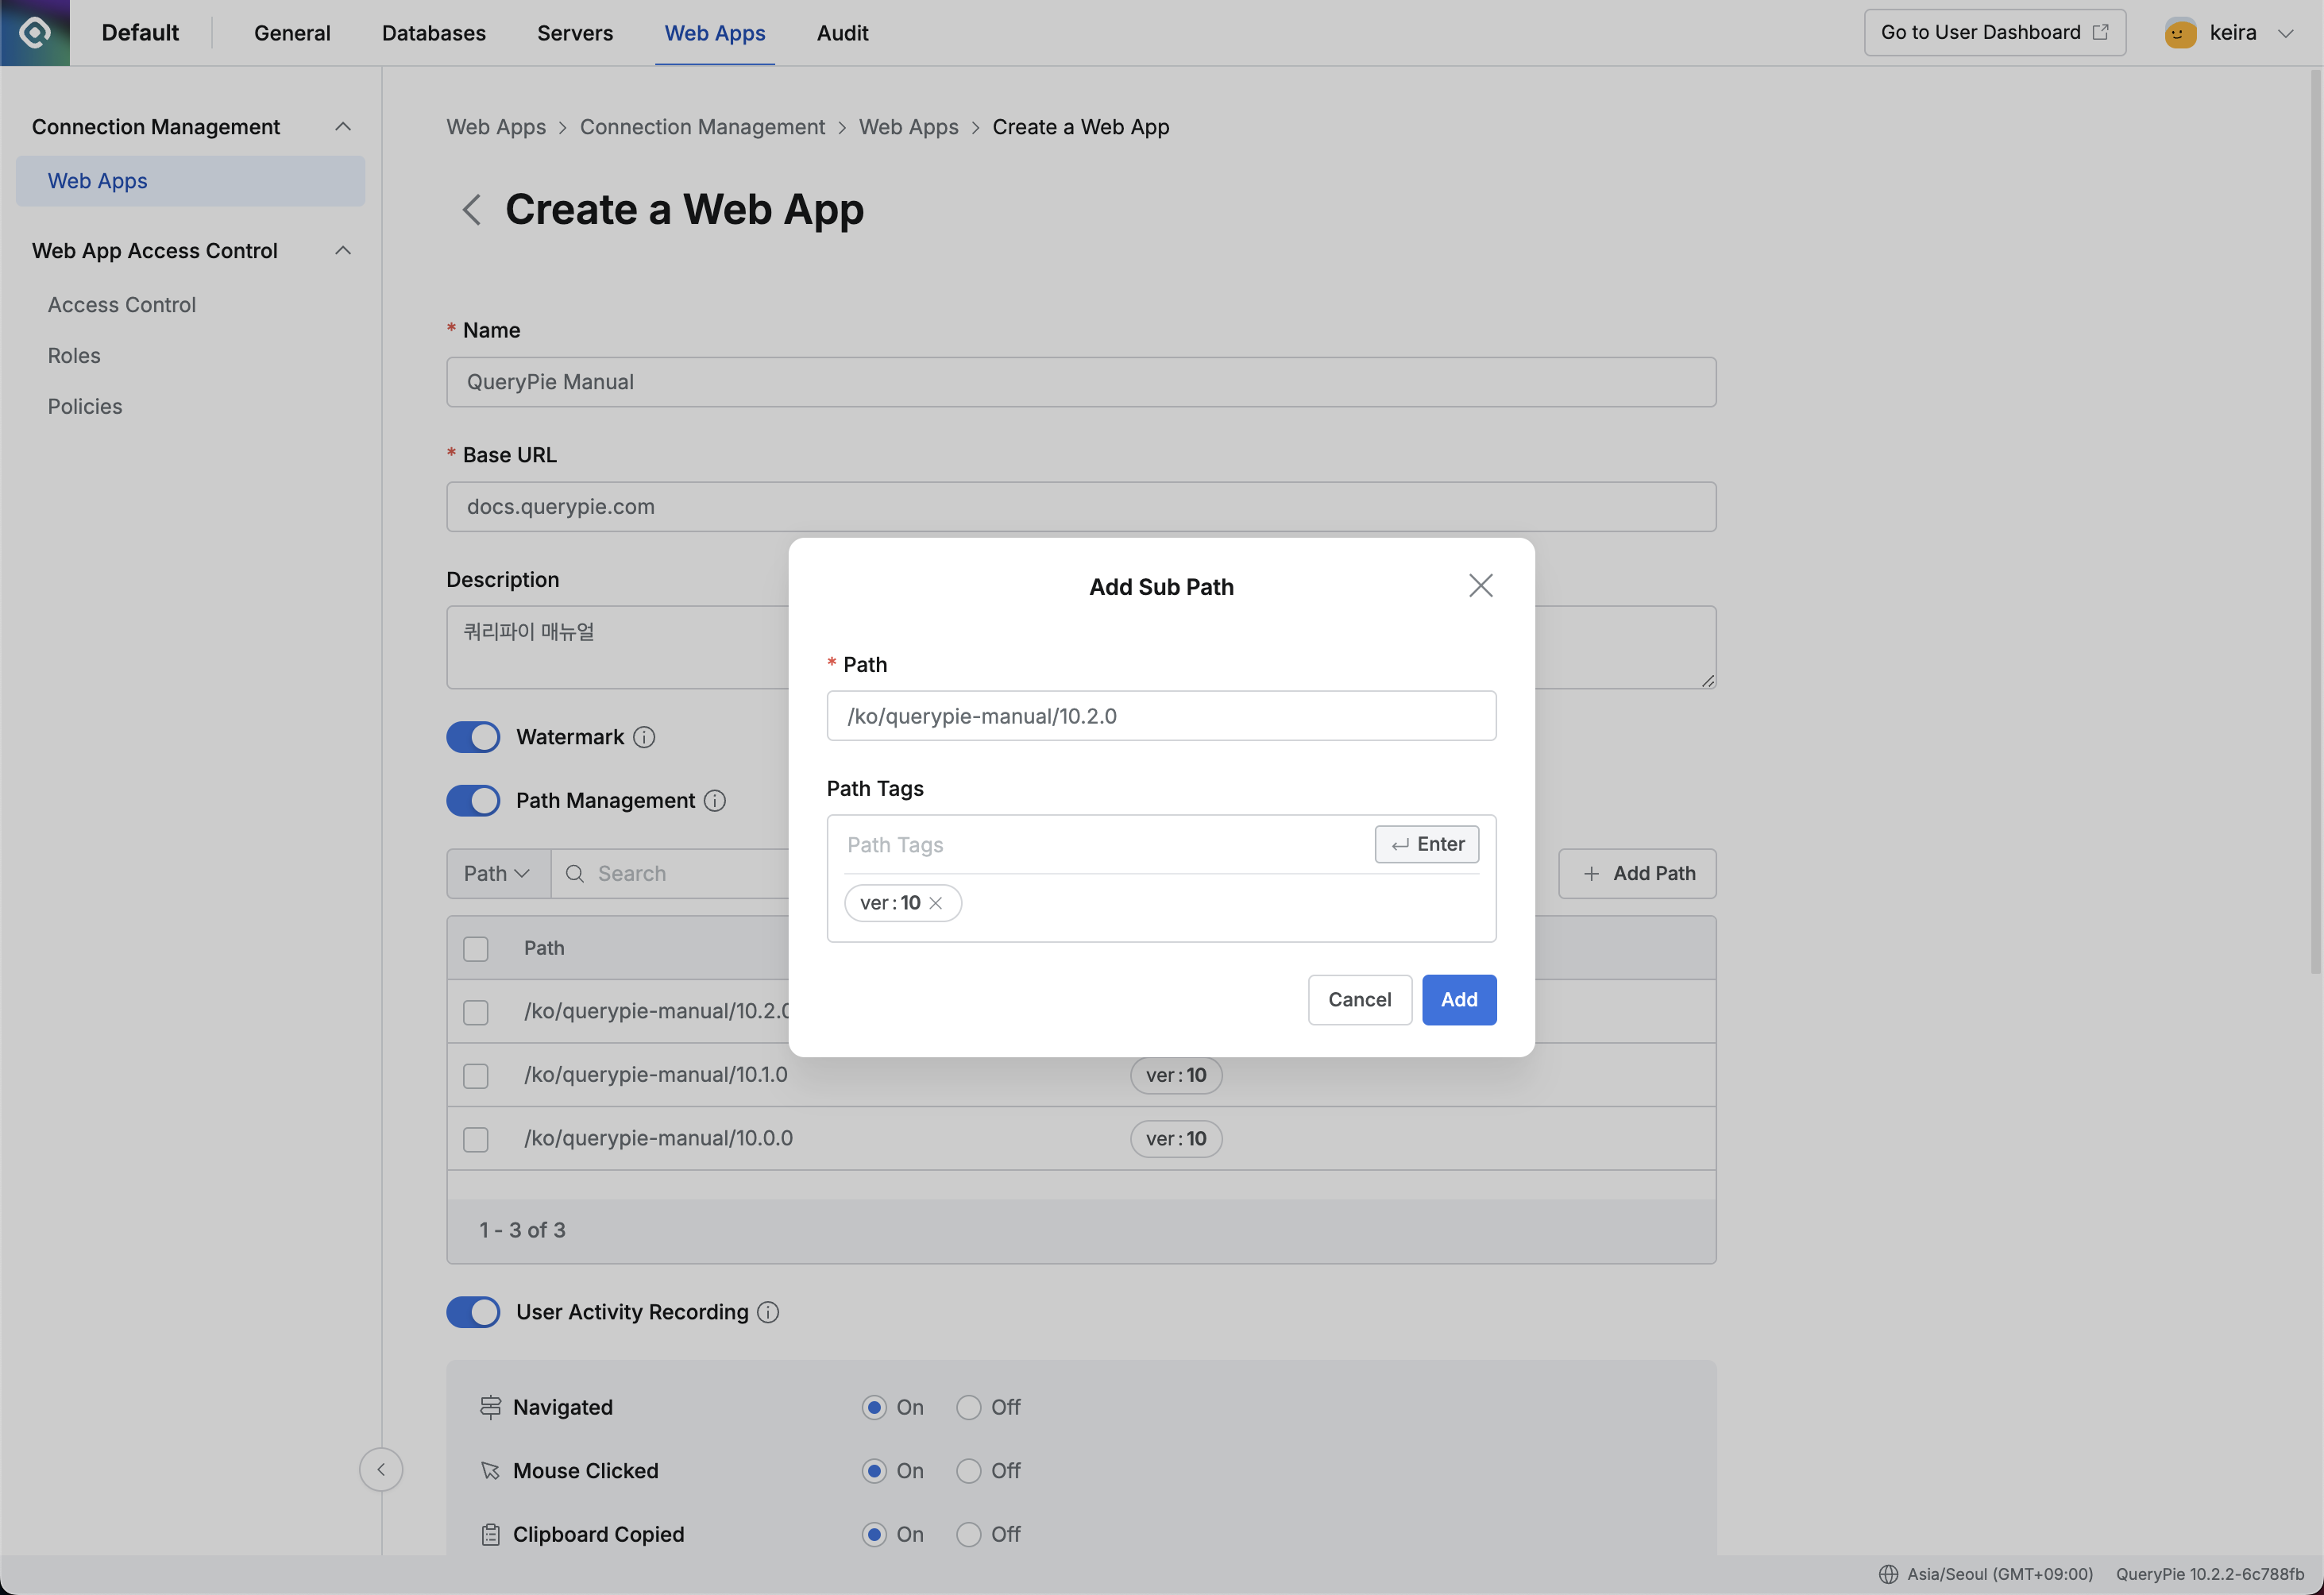
Admin > Web Apps > Connection Management > Web Apps > Create a Web App > Add Sub Path
If Off is selected, detailed access policies for subpaths cannot be specified. However, access control based on the Base URL is still possible, and logging of web app access and browsing actions is also available.
If On is selected, detailed access policies can be input only for the registered paths. Access to unregistered paths will be controlled.
In the guide, after activating the On status, click the
+ Add Pathbutton and enter the following three subpaths:Path: /ko/querypie-manual/10.0.0, Path Tag: [ver: 10]
Path: /ko/querypie-manual/10.1.0, Path Tag: [ver: 10]
Path: /ko/querypie-manual/10.2.0, Path Tag: [ver: 10]
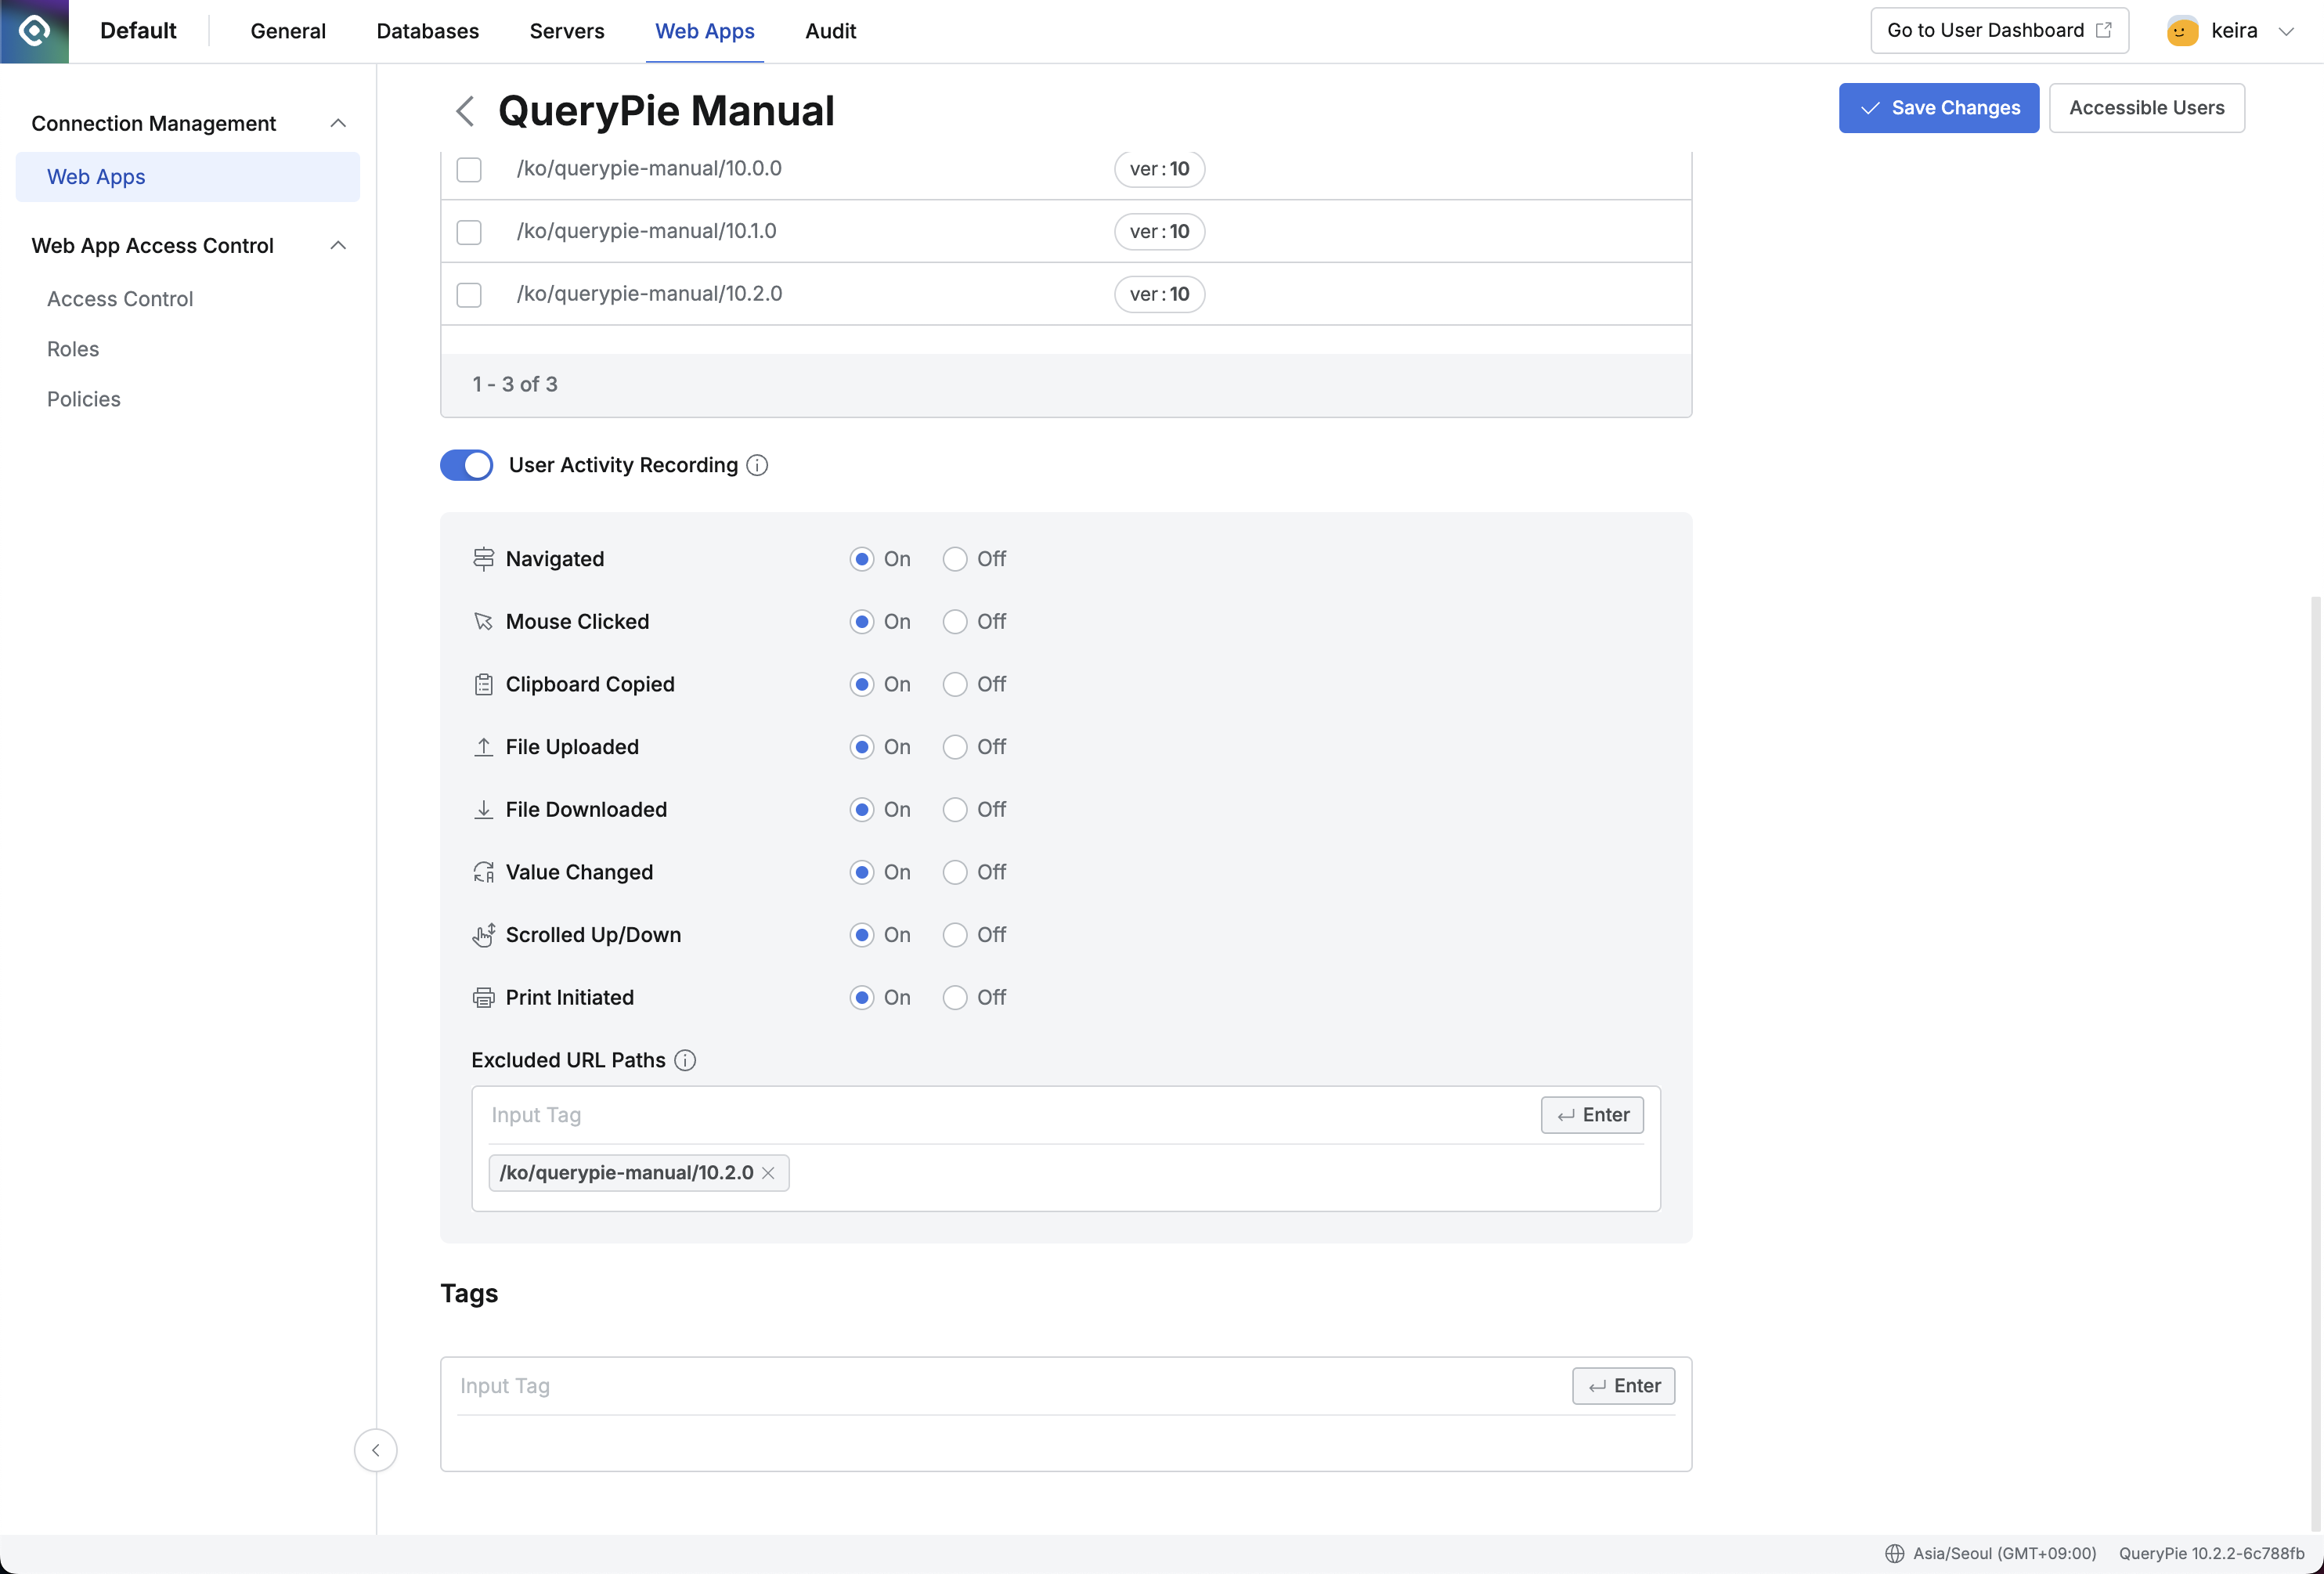
User Activity Recording: Choose whether to record user actions.
Admin > Web Apps > Connection Management > Web Apps > Create a Web App
After activating On, enable all options.
Enter the paths to exclude from user activity recording. Here, enter
/ko/querypie-manual/10.2.0.
Tag: Leave this field empty.
Click the
Savebutton to save the changes.
2. Register Policy: Allow All
Navigate to the Admin > Web Apps > Web App Access Control > Policies menu.
Click the
Create Policybutton, and enter the following in the Create Policy modal.Name : Manual-all-allow
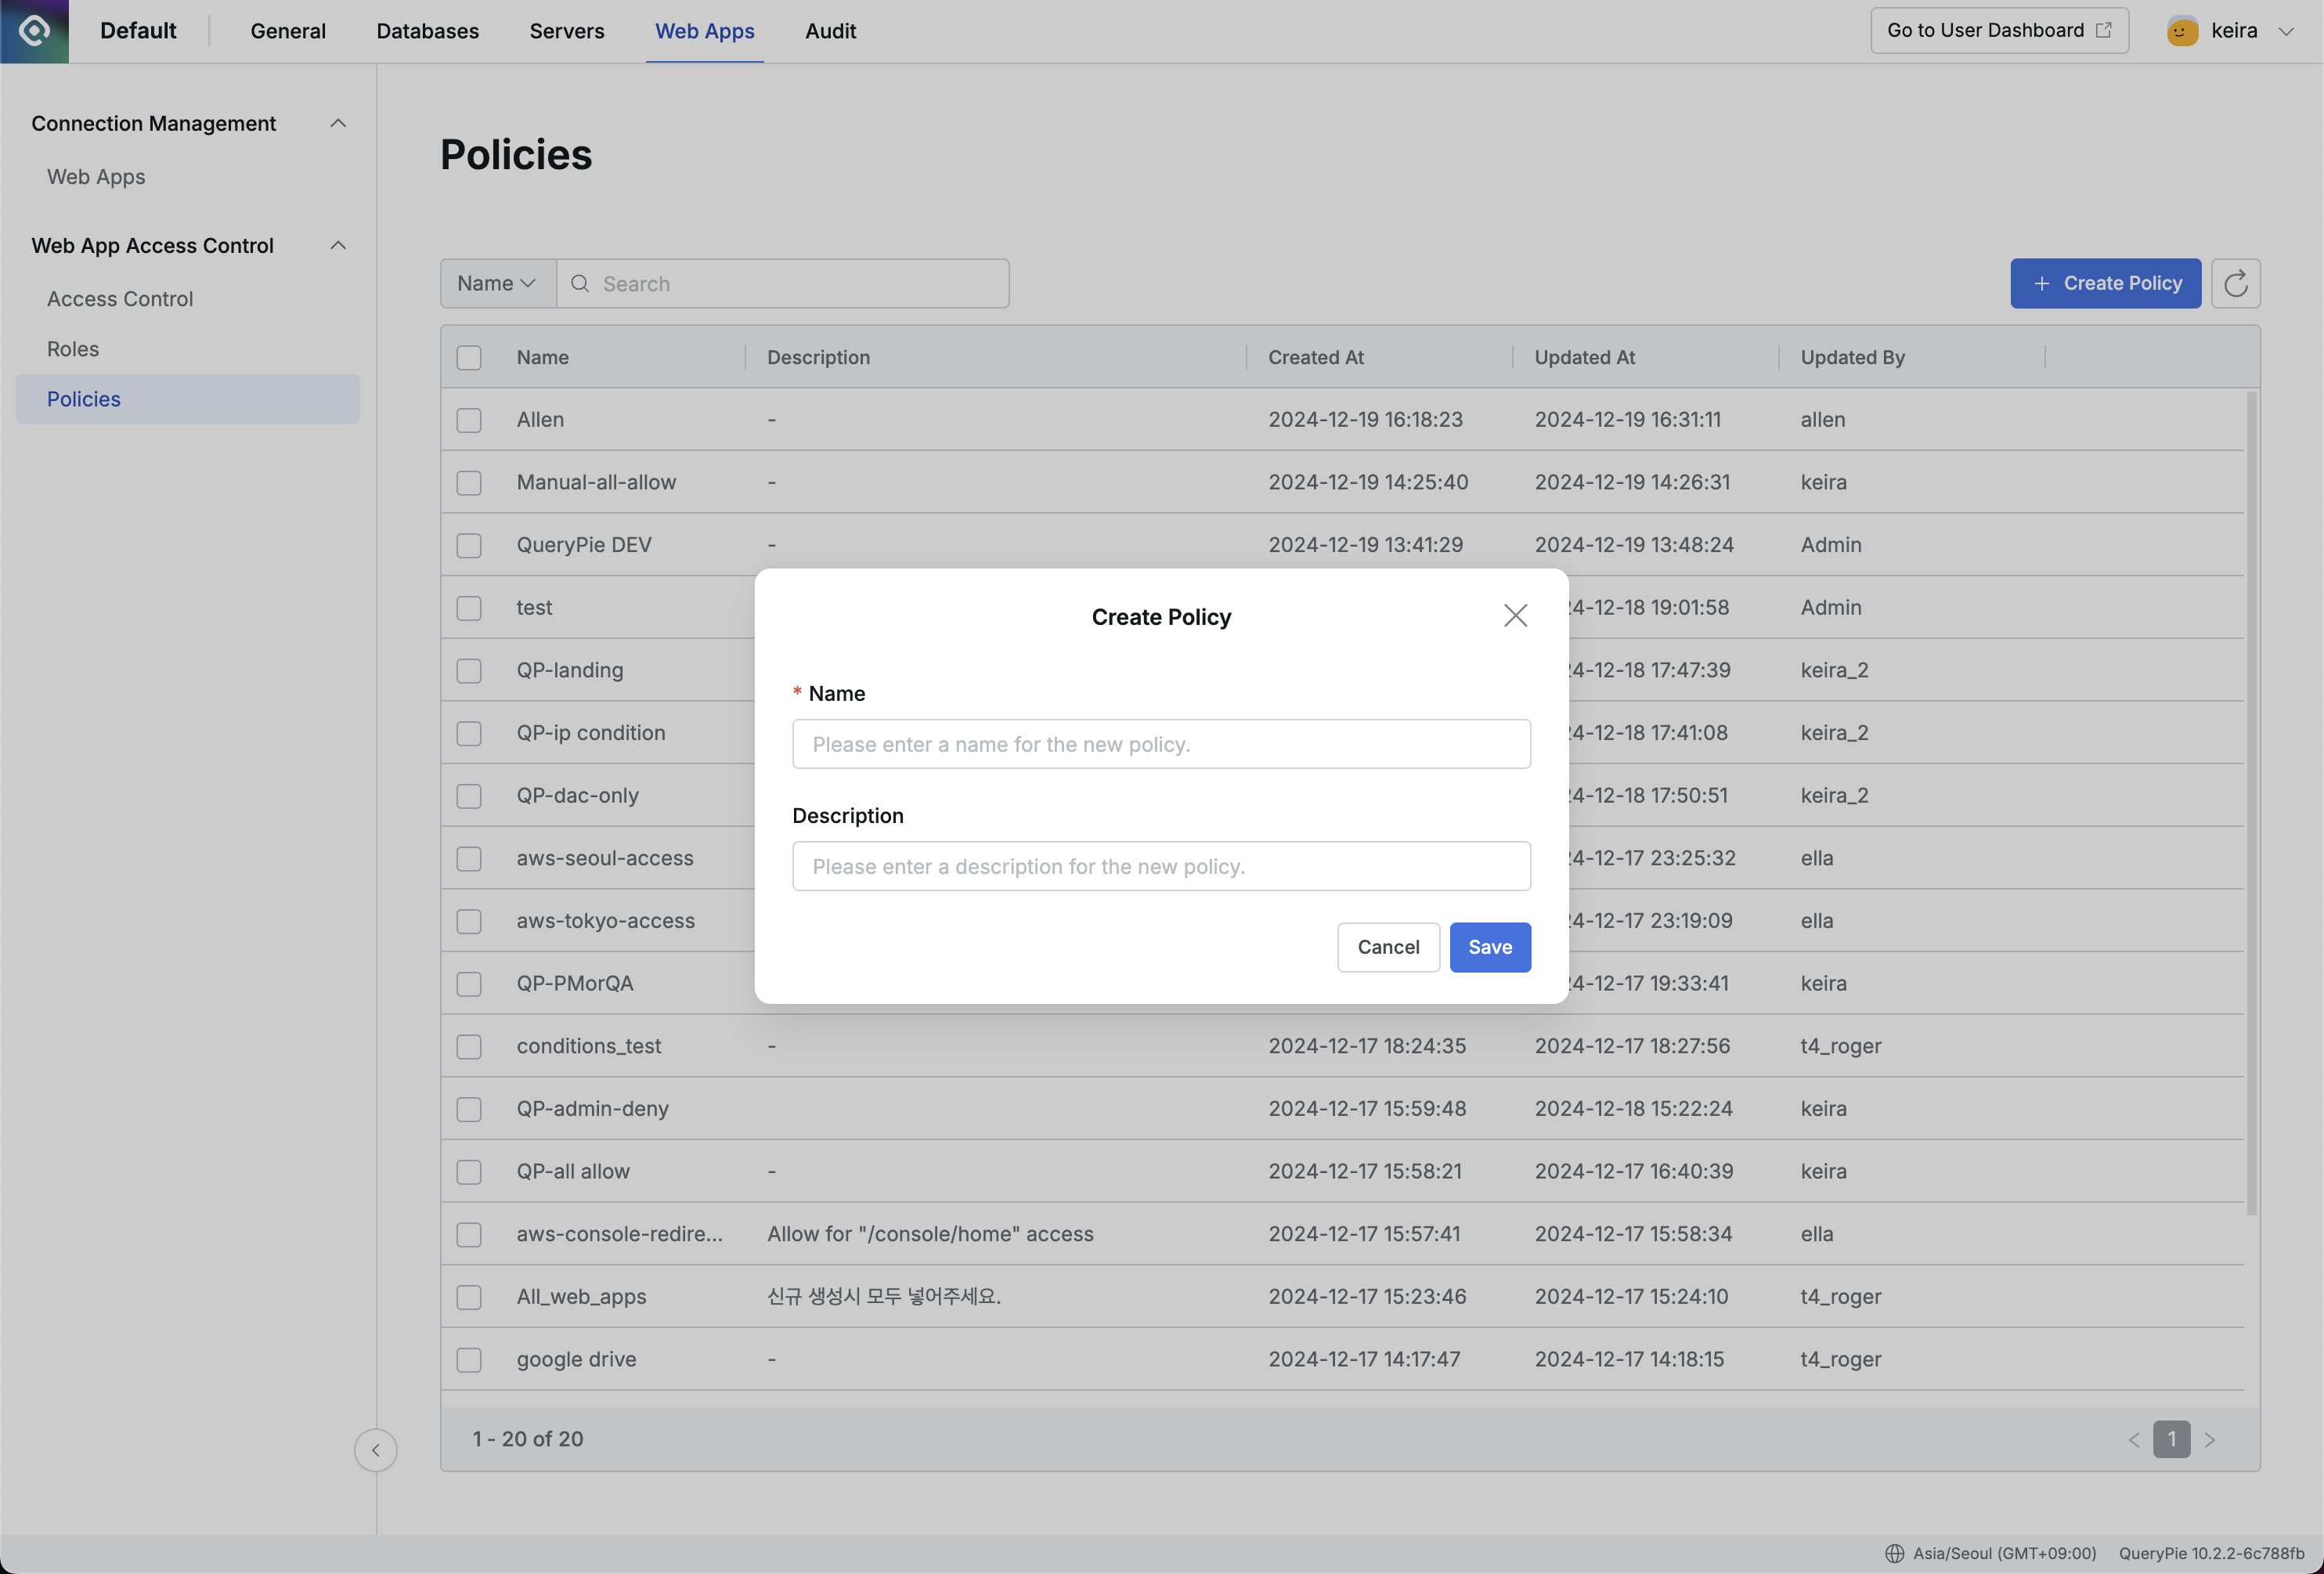
Admin > Web Apps > Web App Access Control > Policies > Create Policy
Click the
Savebutton to save the changes.Click the Manual-all-allow policy you just created to access the details page, then click the
Go to Editor Mode button.In the edit window, delete the contents of line 4 and below from the loaded policy.
On the right, under Edit Spec - Allow, click the
Addbutton next to Add Resources.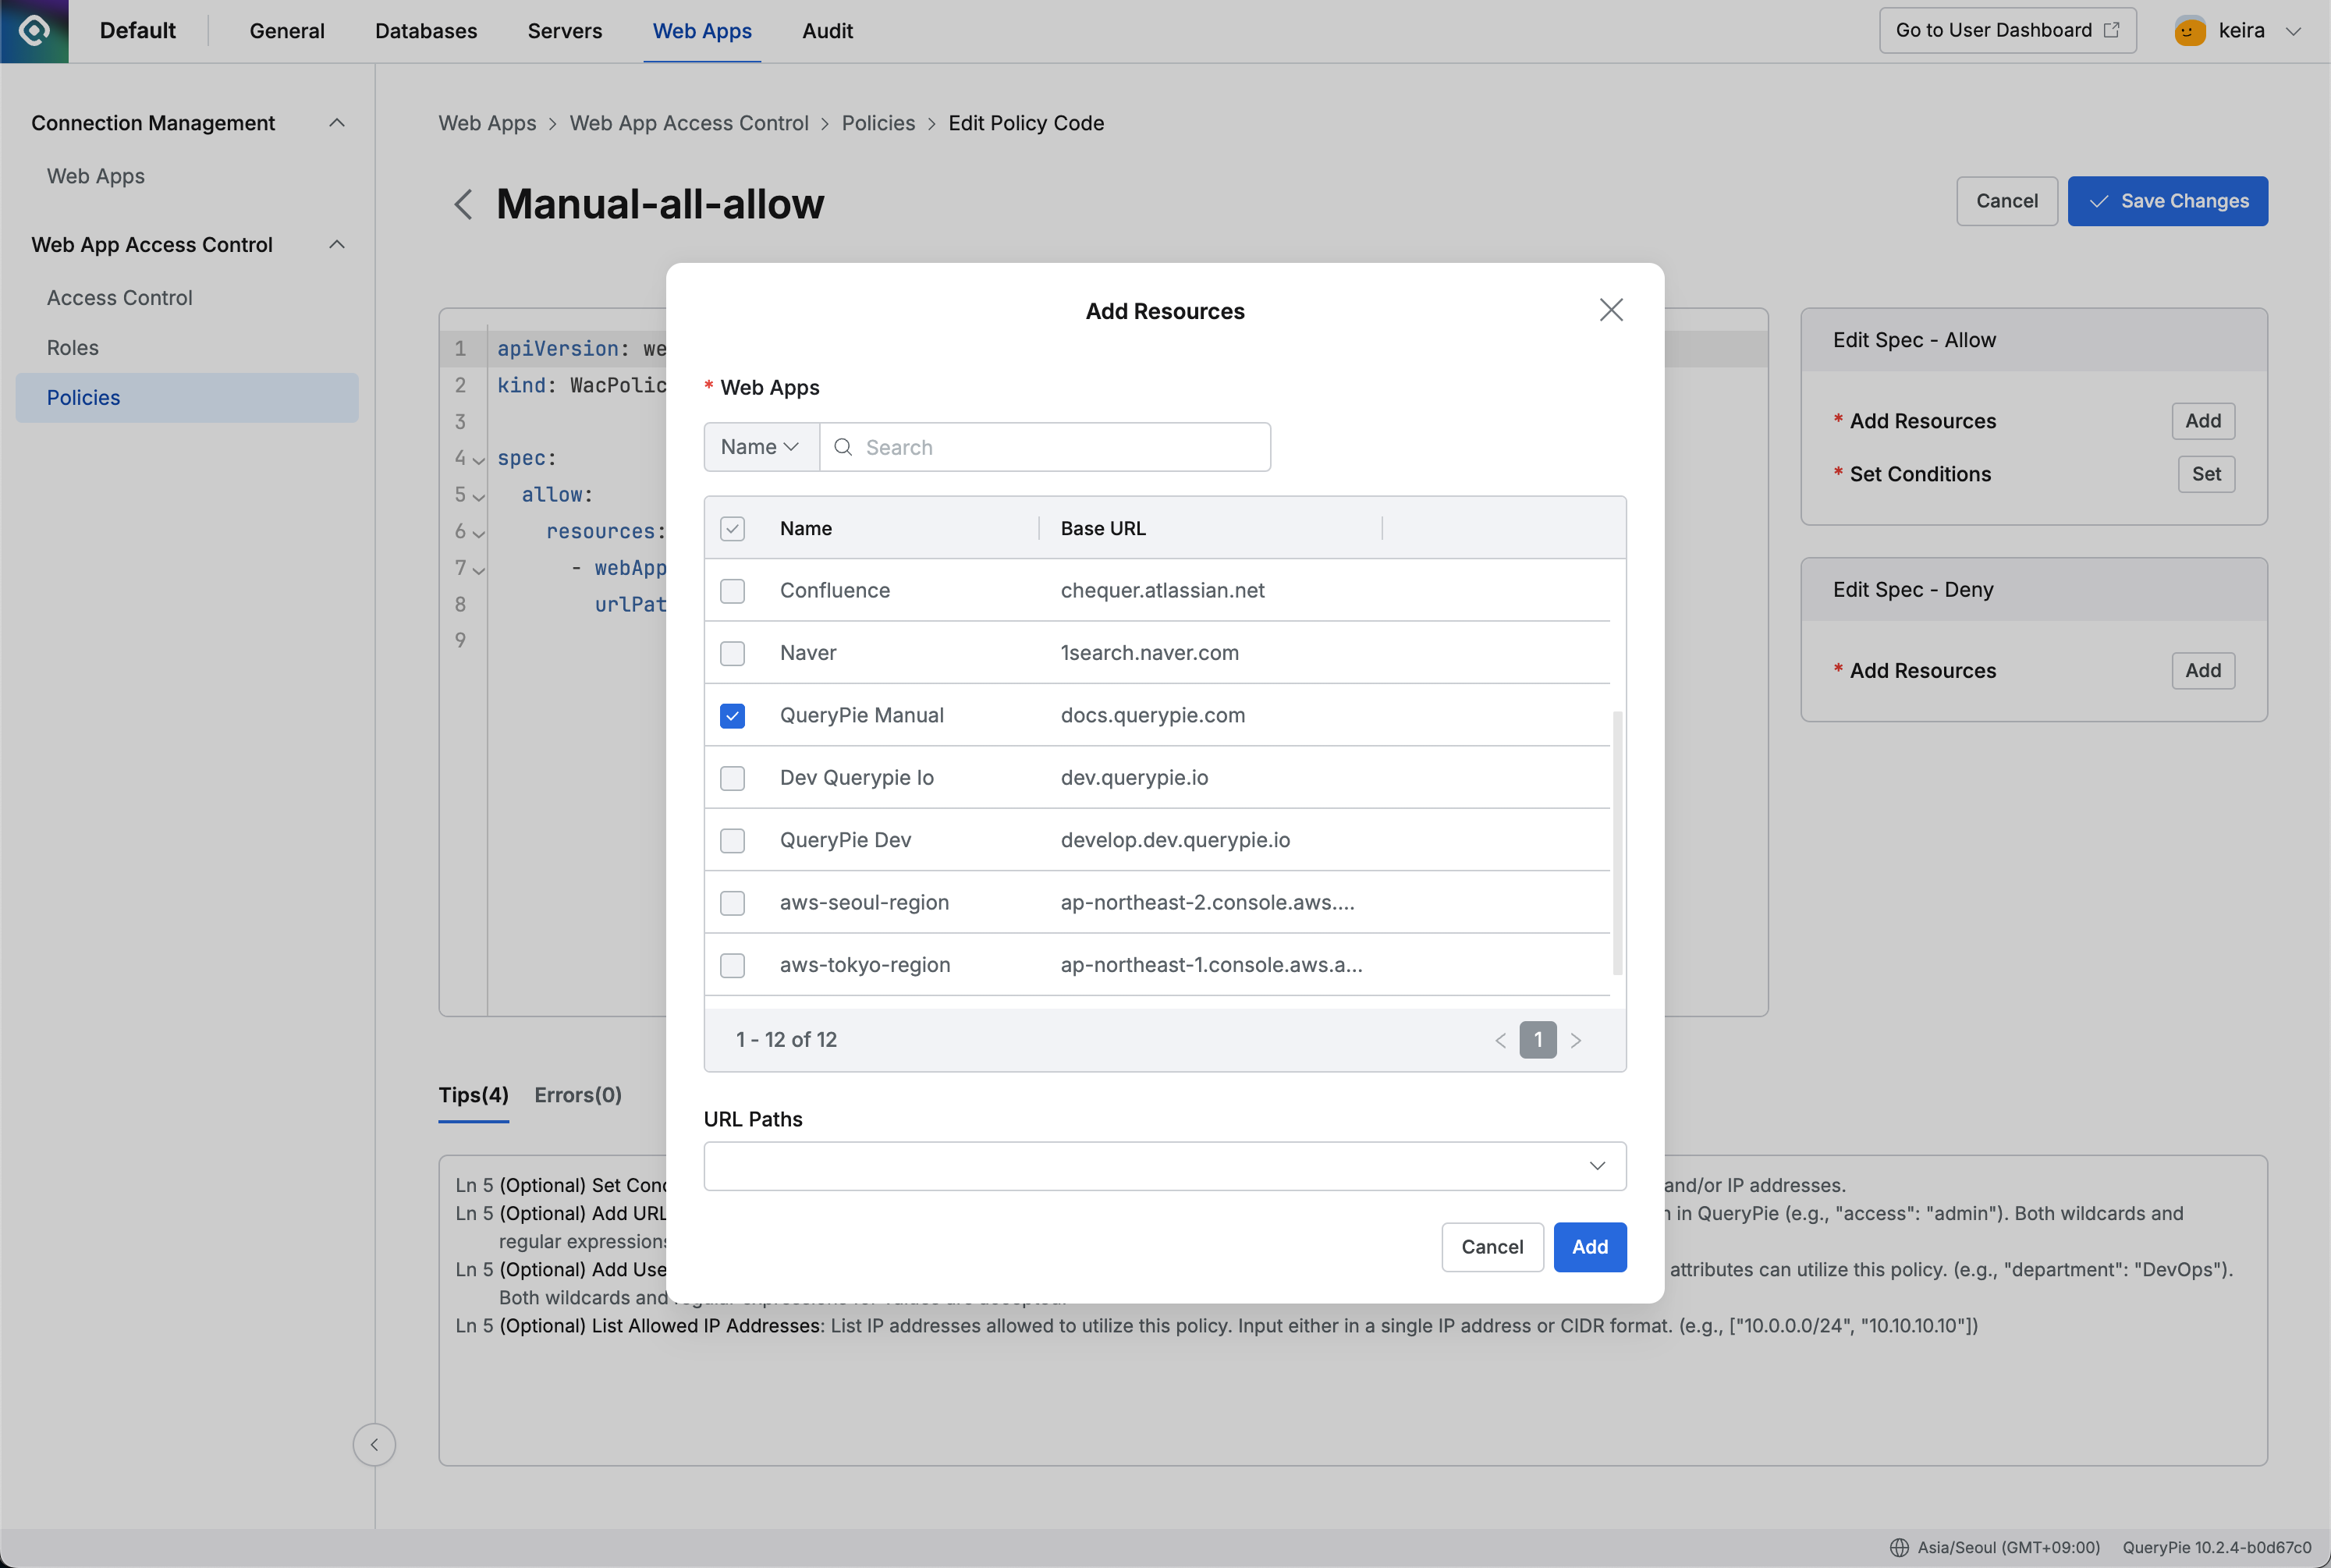
Admin > Web Apps > Web App Access Control > Policies > Edit Policy Detail
In the Add Resources modal > Web Apps, select the QueryPie Manual registered in step 1. Leave the URL Paths field empty.
Click the
Addbutton to save and close the modal.In the policy editing page, verify the newly added policy details.
CODEspec: allow: resources: - webApp: "QueryPie Manual" urlPaths: []Click the
Save Changesbutton, and in the reason input modal, click theOKbutton to save.
3. Register Policy: Block Specific Path
In the Policies menu, click the
Create Policybutton, and enter the following in the Create Policy modal.Name : Manual-deny-10.1
Admin > Web Apps > Web App Access Control > Policies > Create Policy
Click the
Savebutton to save the changes.Click the Manual-deny-10.1 policy you just created to access the details page, then click the
Go to Editor Modebutton.In the edit window, delete the contents of line 4 and below from the loaded policy.
On the right, under Edit Spec - deny, click the
Addbutton next to Add Resources.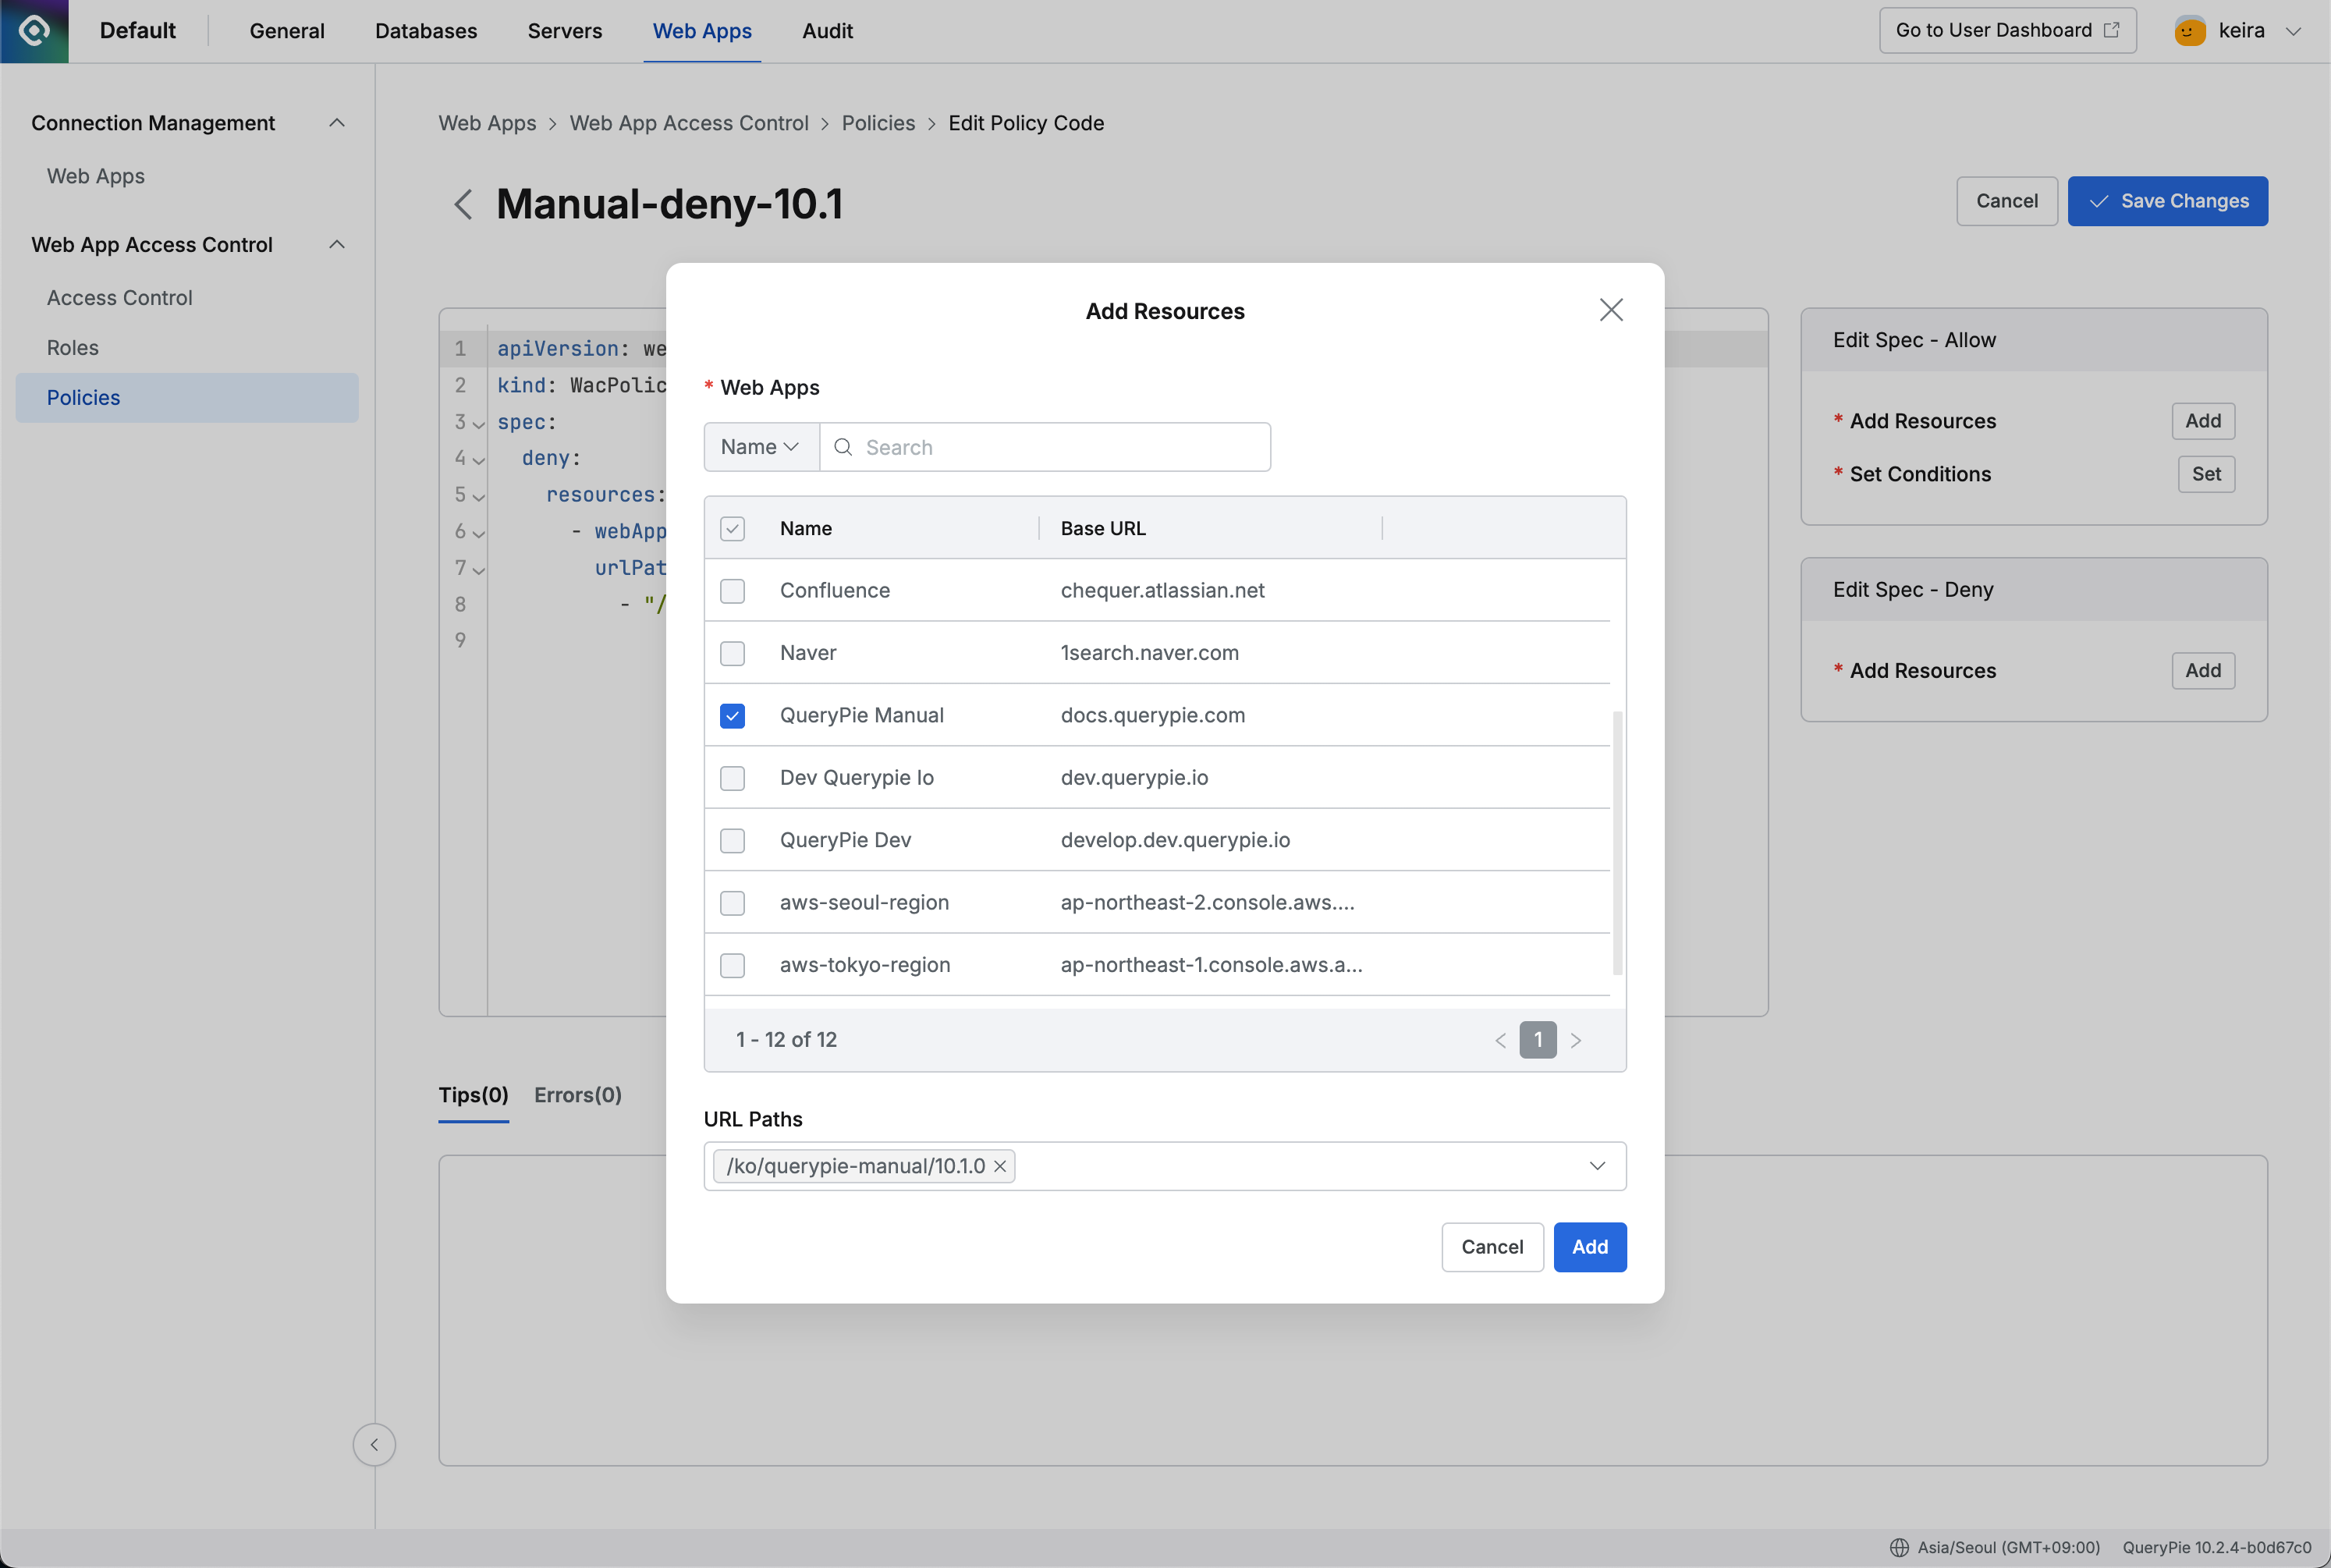
Admin > Web Apps > Web App Access Control > Policies > Edit Policy Detail
In the Add Resources modal > Web Apps, select the QueryPie Manual registered in step 1. Enter
/ko/querypie-manual/10.1.0in the URL Paths field and press Enter to apply it.Click the
Addbutton to save and close the modal.In the policy editing page, verify the newly added policy details.
CODEspec: deny: resources: - webApp: "QueryPie Manual" urlPaths: - "/ko/querypie-manual/10.1.0"Click the
Save Changesbutton, and in the reason input modal, click theOKbutton to save.
4. Creating Role
Navigate to the Admin > Web Apps > Web App Access Control > Roles menu.
Click the
Create Rolebutton and enter the following.Name : Manual-role
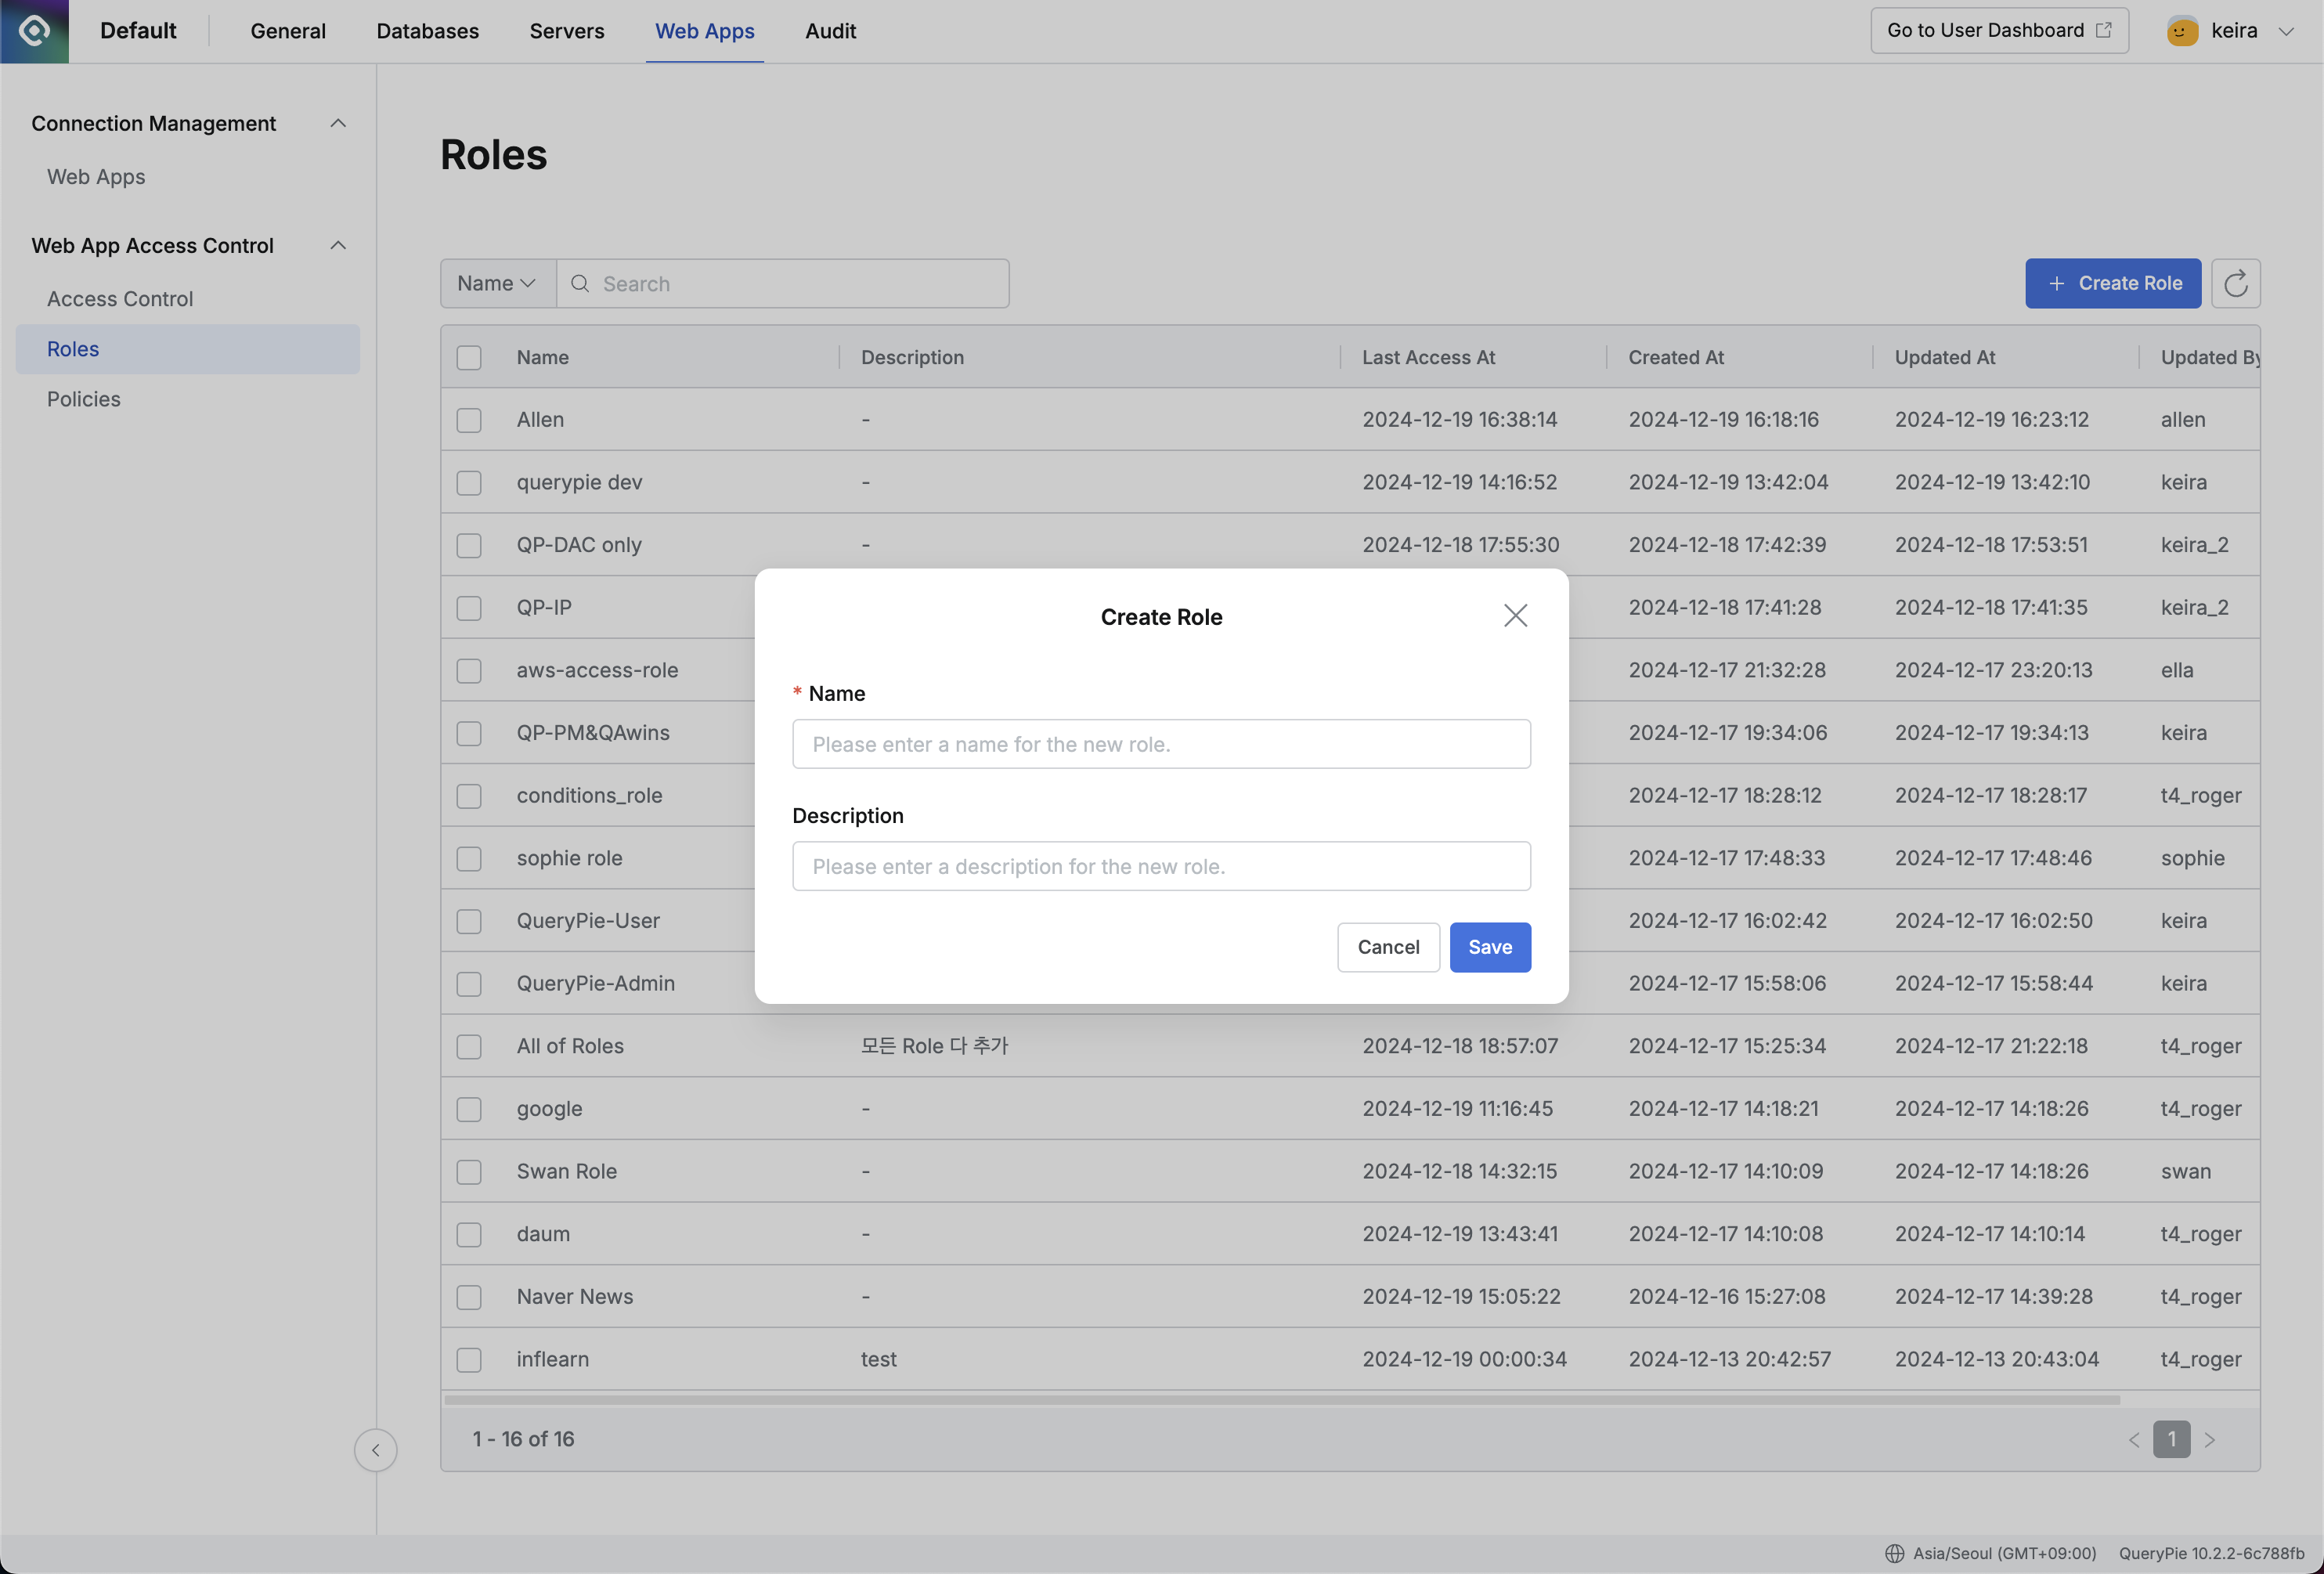
Admin > Web Apps > Web App Access Control > Roles > Create Role
Click the Manual-role role you just created to access the details page, then go to the Policies tab. Click the
Assign Policiesbutton.
Admin > Web Apps > Web App Access Control > Roles > List Details > Assign Polices
In the Assign Policies modal, select the manual-all-allow and manual-deny-10.1 policies created earlier, then click the
Assignbutton to save and close the modal.
5. Assigning Role to Users/Groups
Navigate to the Admin > Web Apps > Web App Access Control > Access Control menu.
Select the user or group to which you want to assign the role.
For now, select yourself for testing.
On the user details page, go to the Roles tab and click the
Grant Rolesbutton.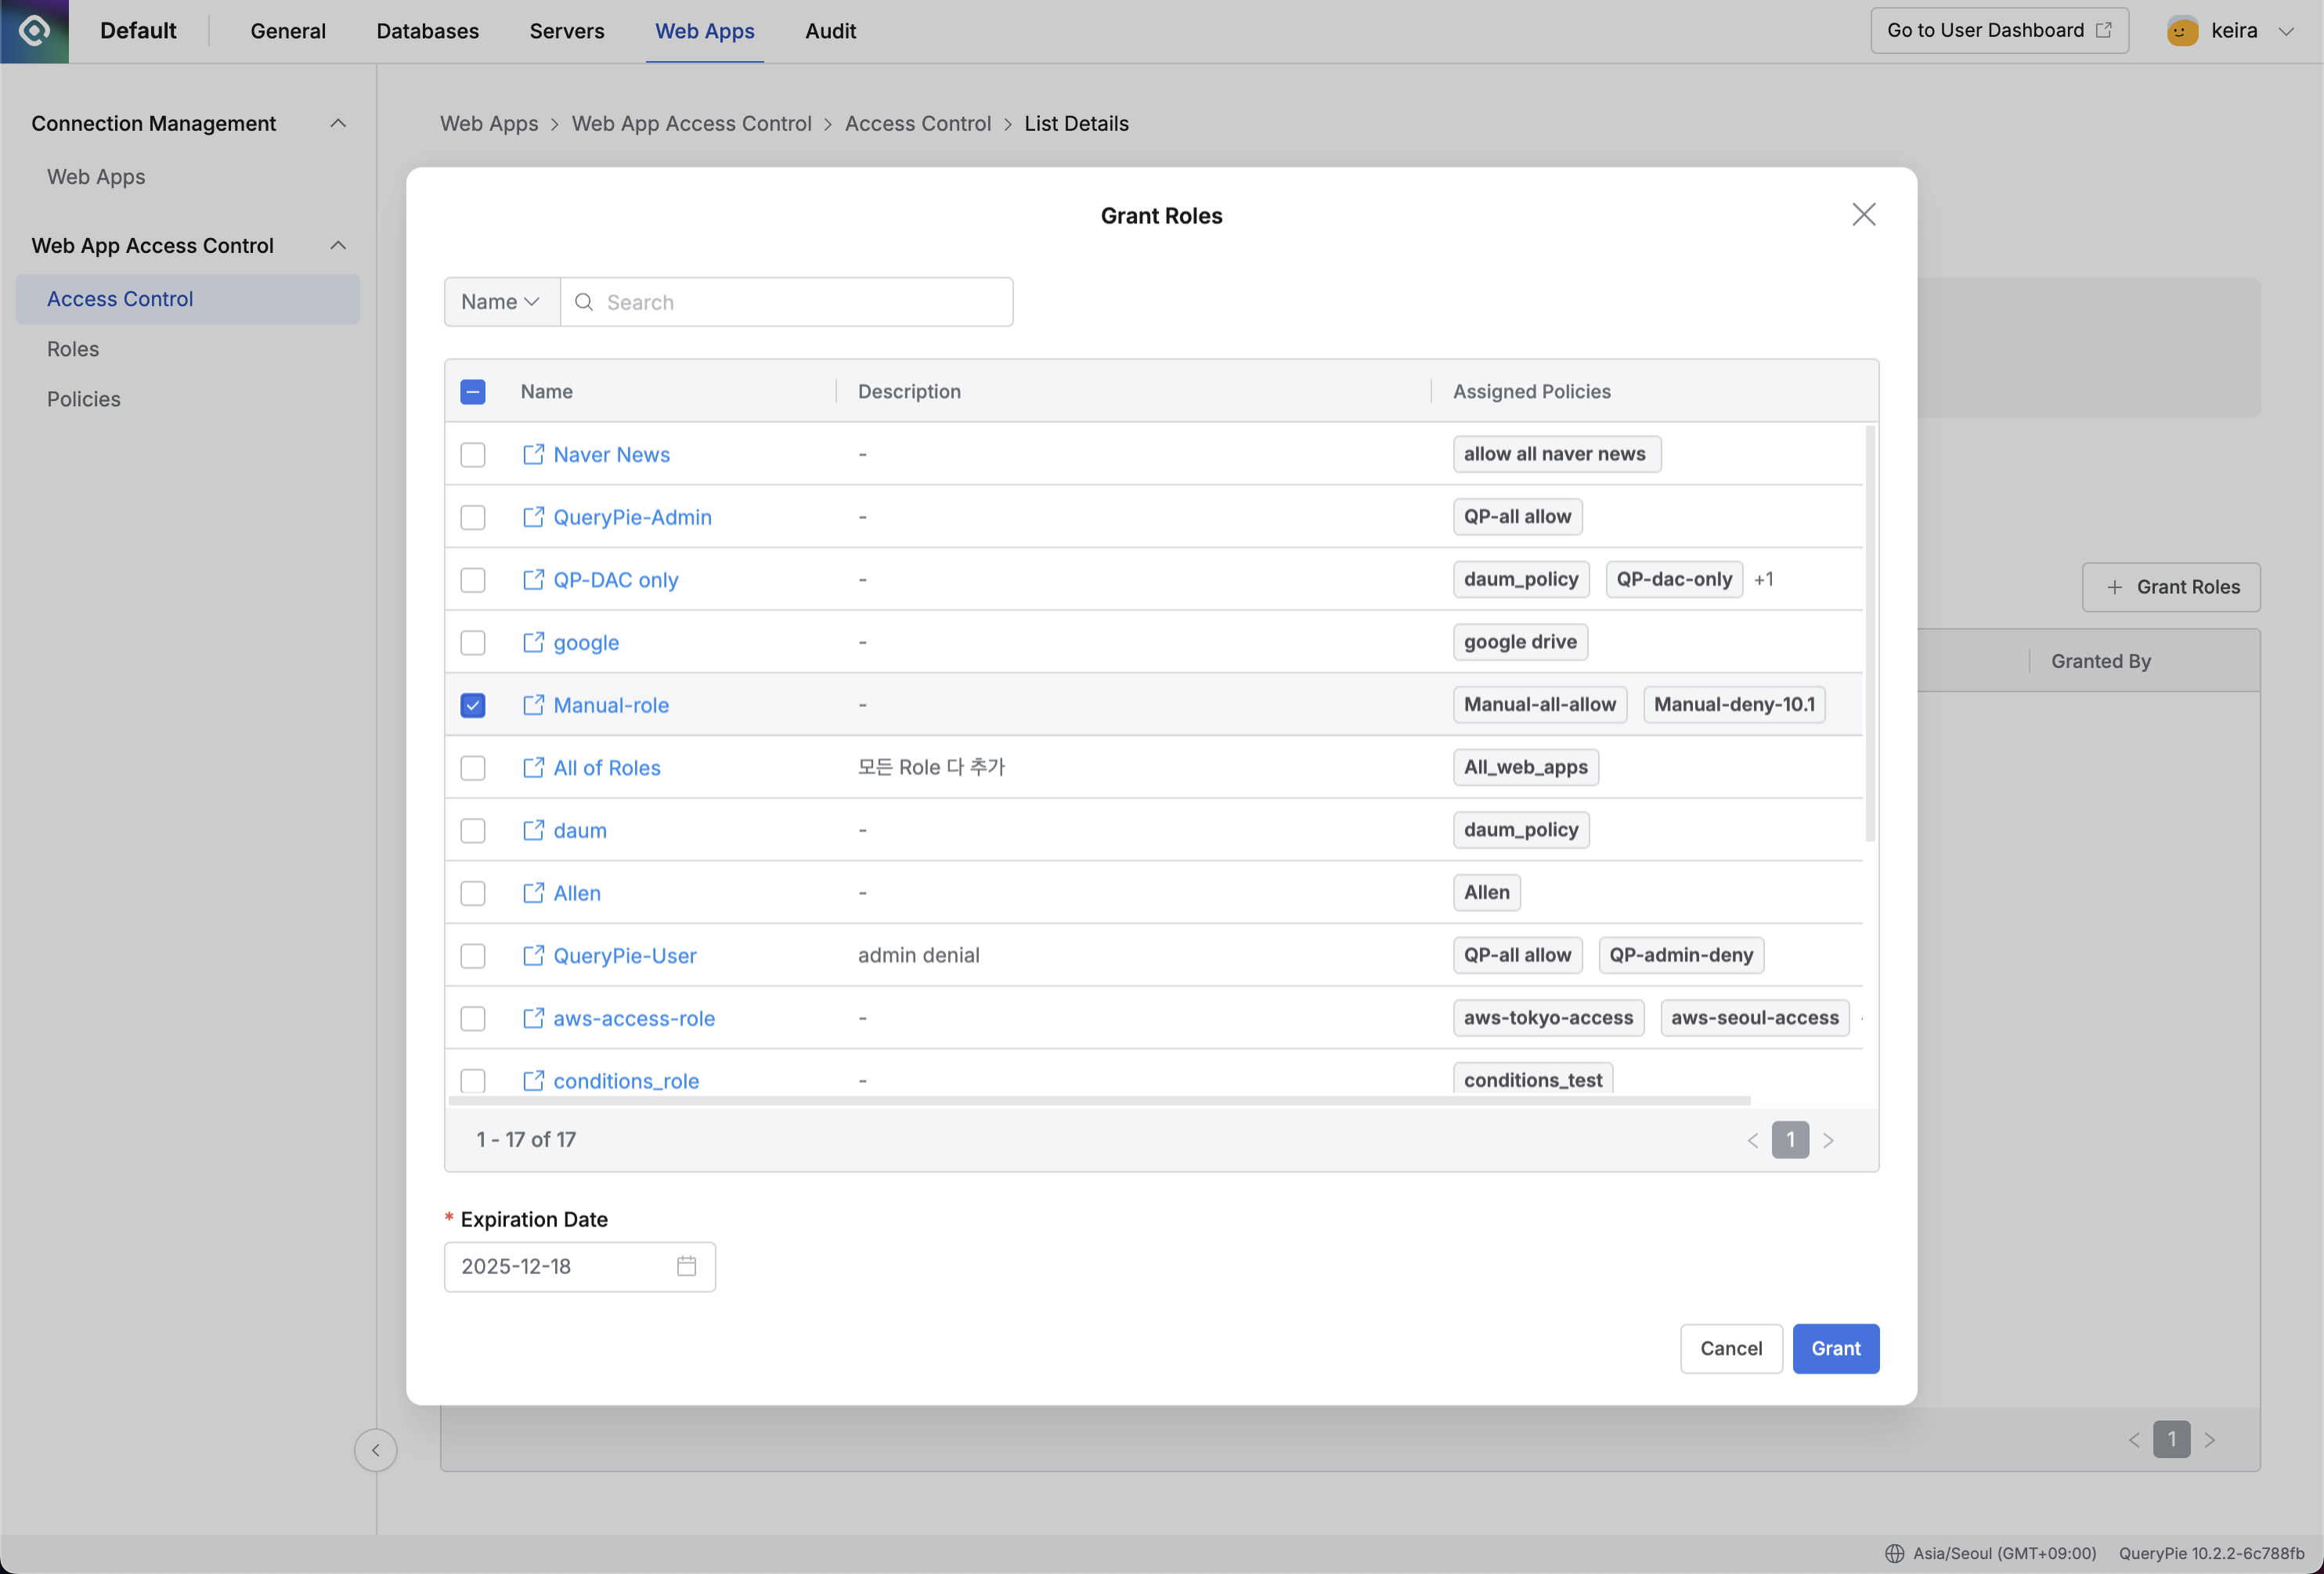
Admin > Web Apps > Web App Access Control > Access Control > List Details > Grant Roles
In the Grant Roles modal, select the Manual-role you just created, then click the
Grantbutton to save.If the expiration date is not changed, it will automatically be set to one year from today.
Next, let's proceed with the user-side settings to verify if the newly created access policy has been applied correctly.
User-side
1. Installing the Root CA Certificate
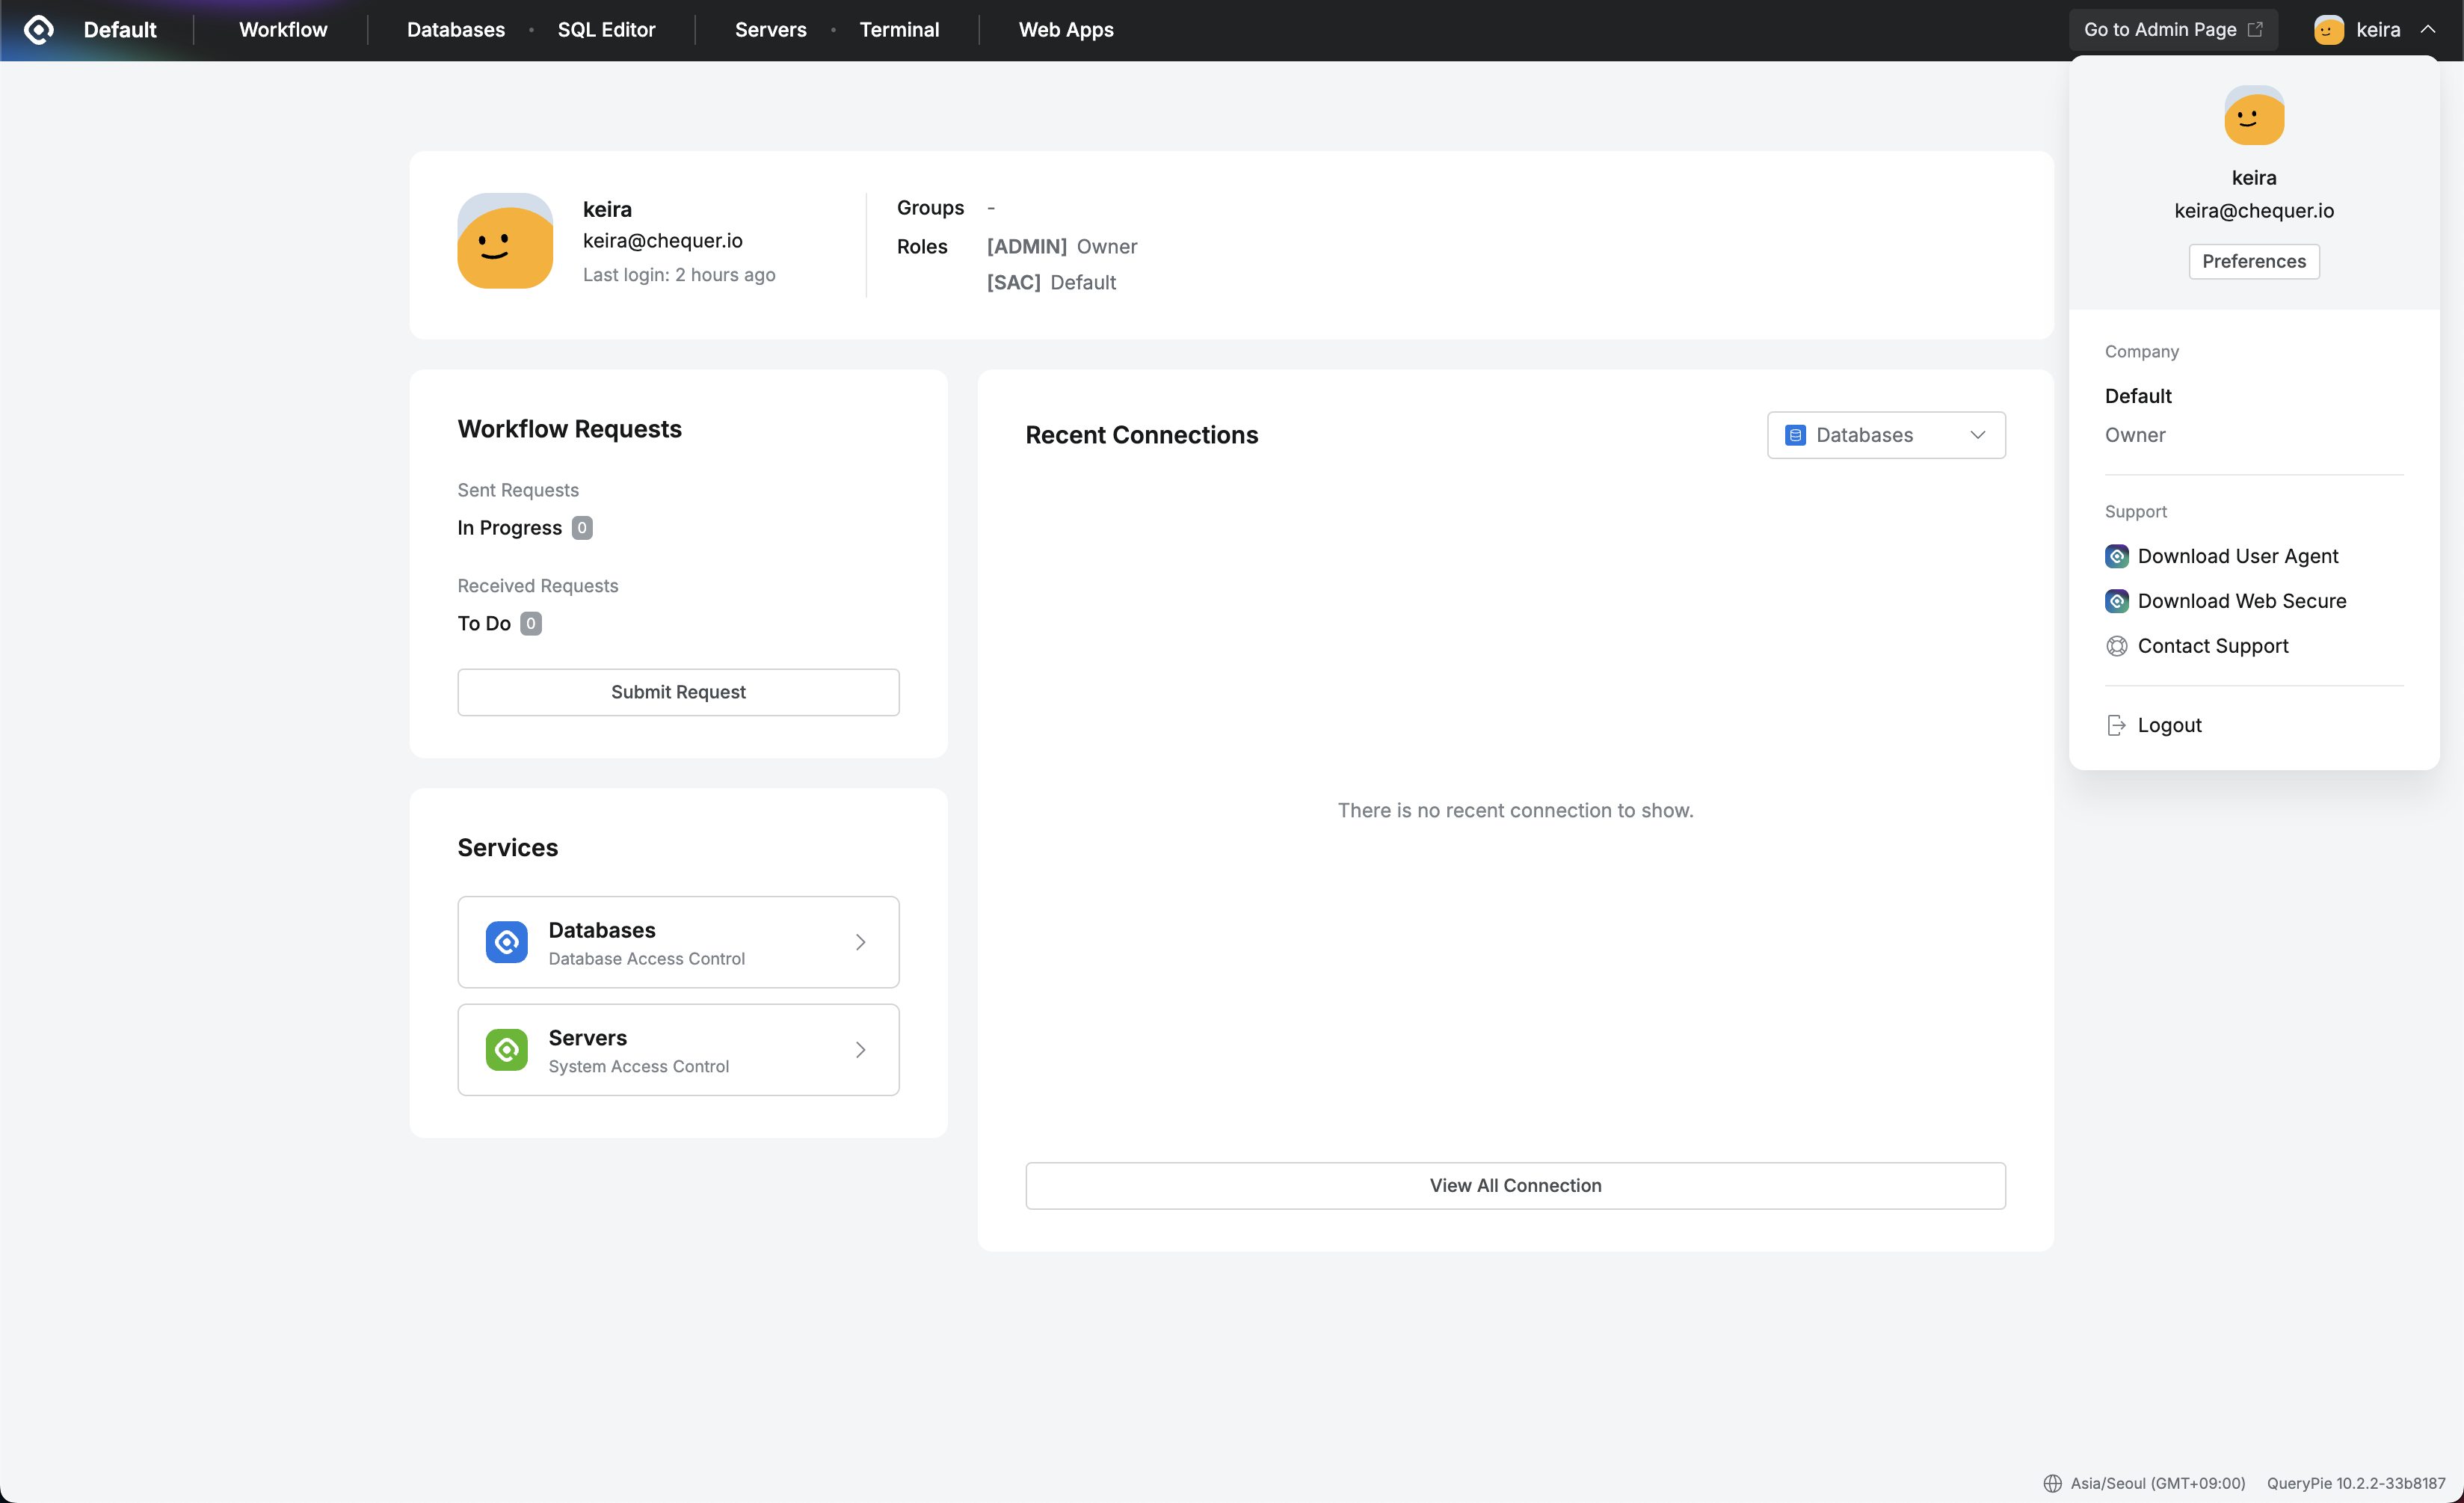
While logged into QueryPie, click the profile button at the top right, and in the profile menu, click Support > Download Web Secure.
QueryPie > Profile Menu
The QueryPie Web Secure Download modal opens. A. In Install Root CA Certificate, Step 1. Click My Download Link to start downloading the certificate file.
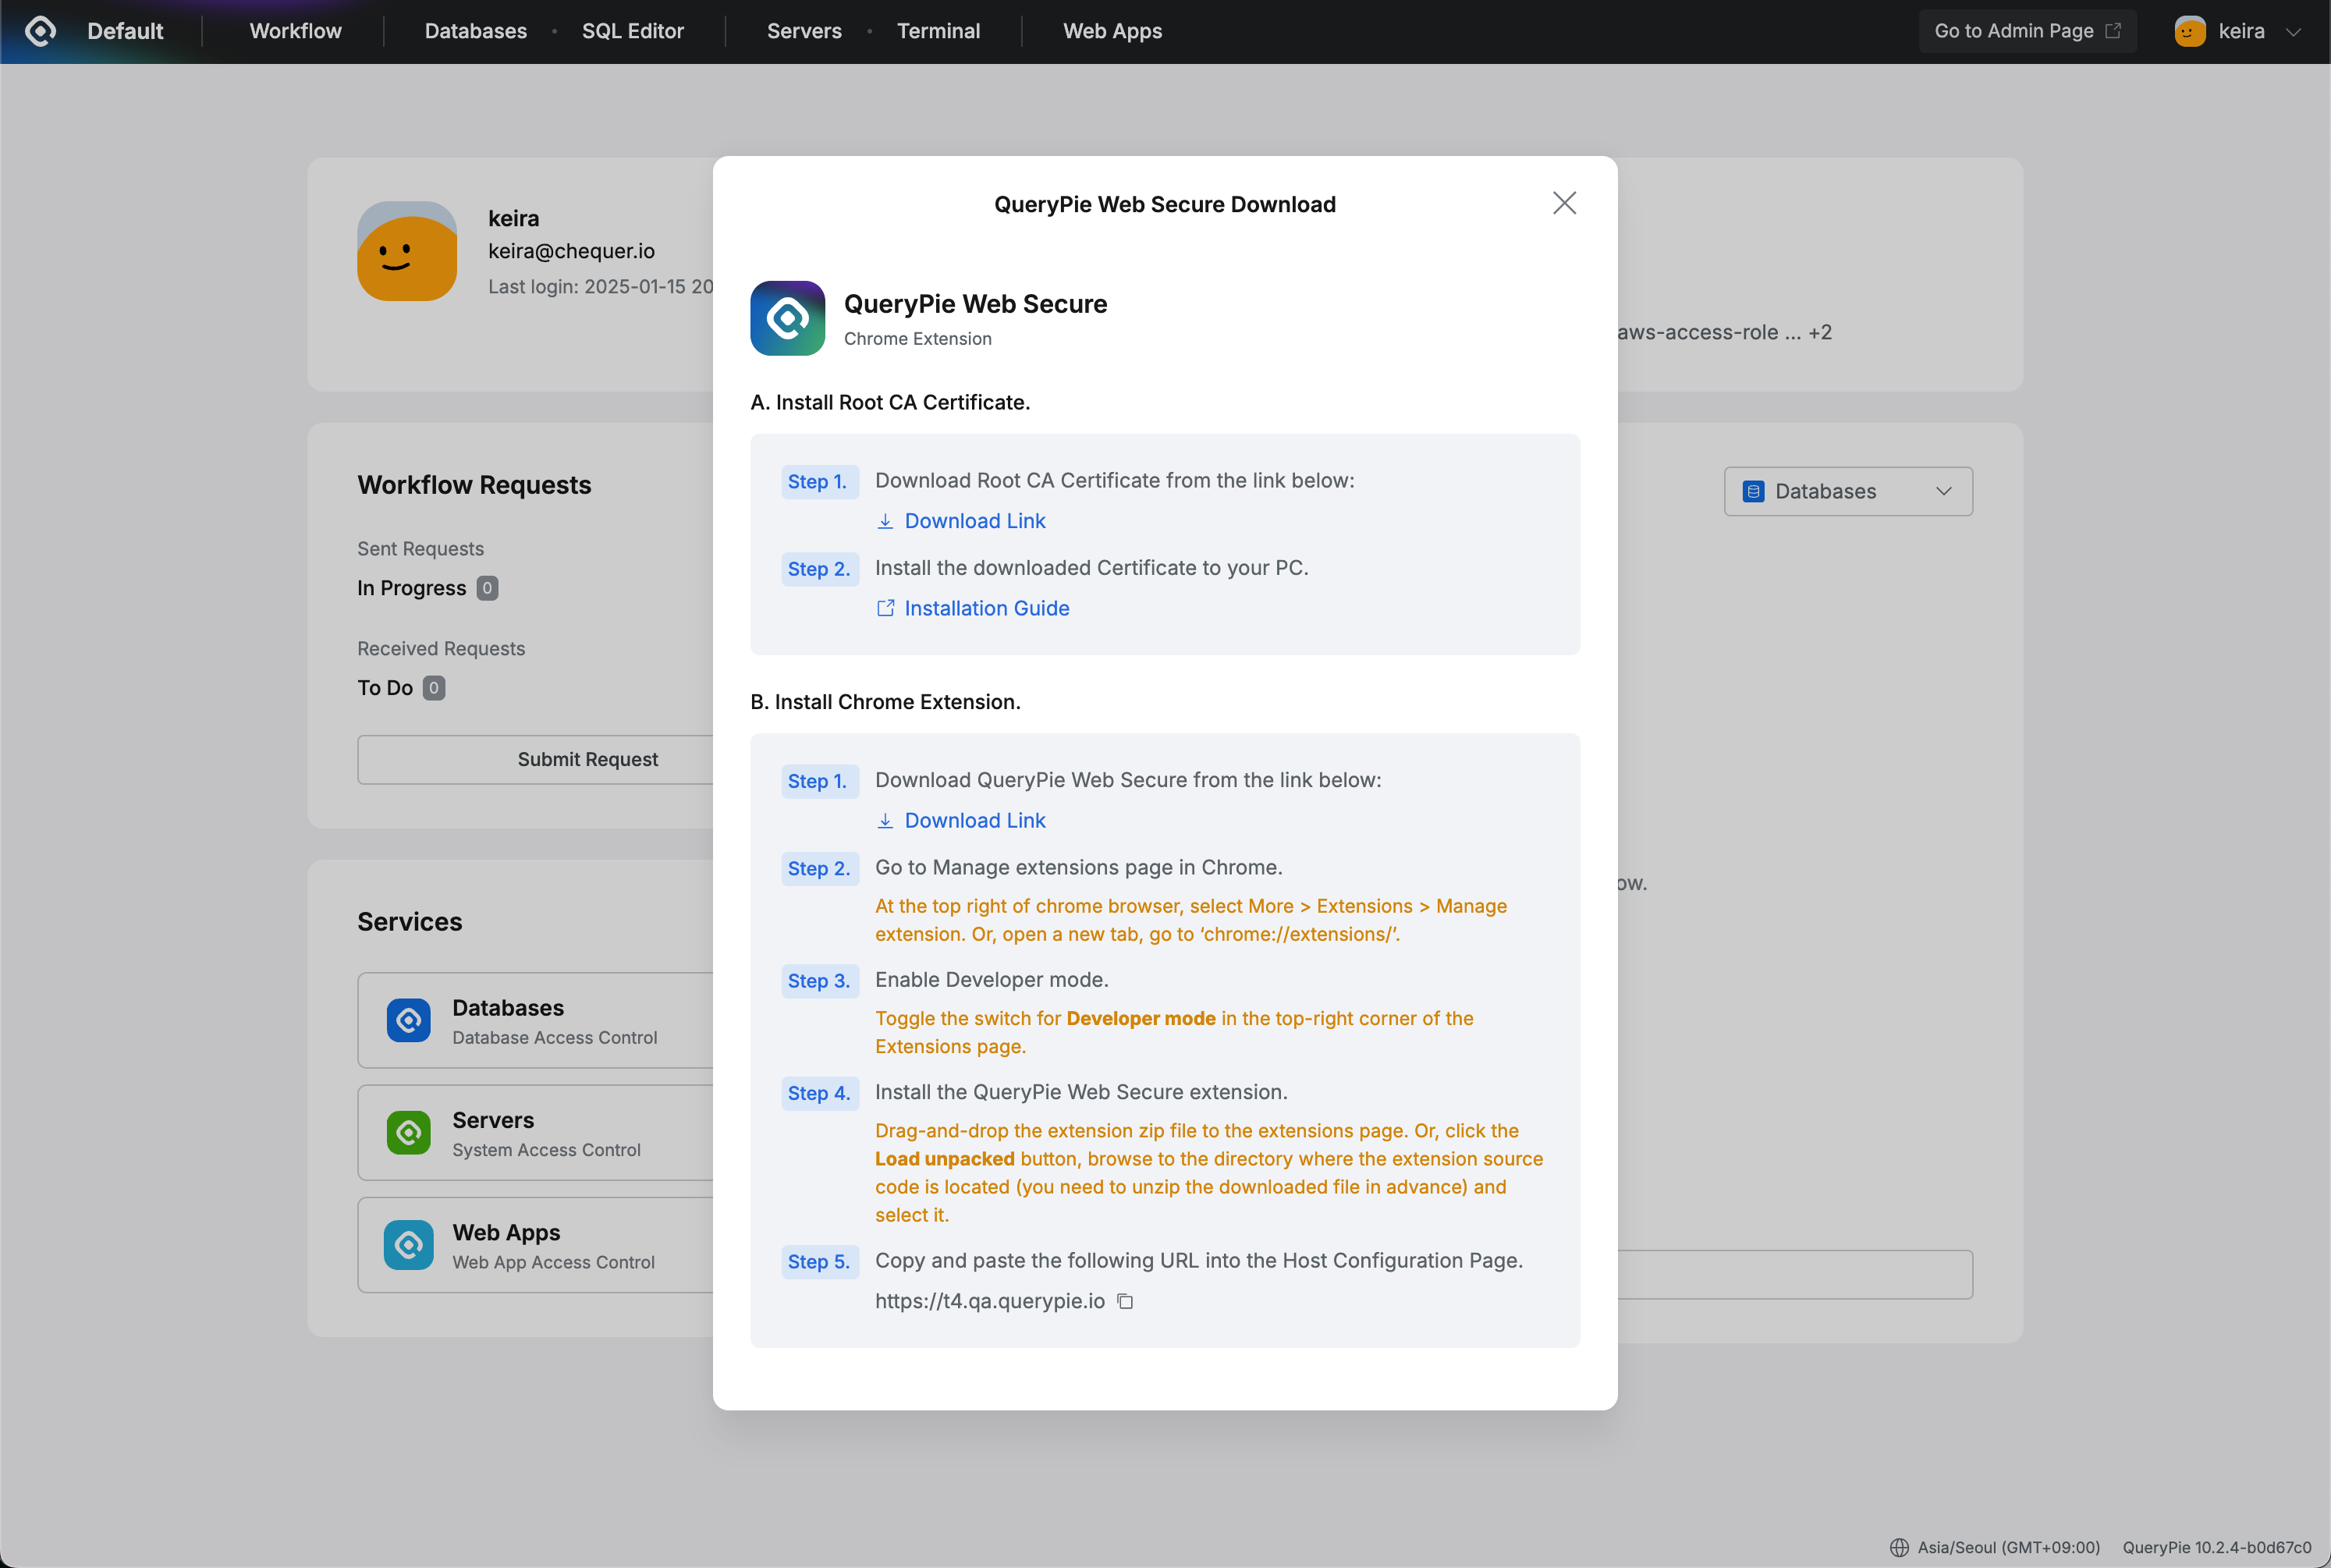
QueryPie Web Secure Download
Follow the Root CA Certificate Installation Guide to install and trust the certificate.
2. Download Extension
In the QueryPie profile menu, click Support > Download Web Secure button
In the QueryPie Web Secure Download modal, go to B. Install Chrome Extension > Step 1. and click Download Link to start downloading the extension file.
3. Installing Extension and Configuring Host
Enter chrome://extensions/ in the Chrome address bar.
Enable the Developer Mode toggle at the top right of the page.
Without extracting the downloaded Chrome extension file, drag and drop it into the extensions area.
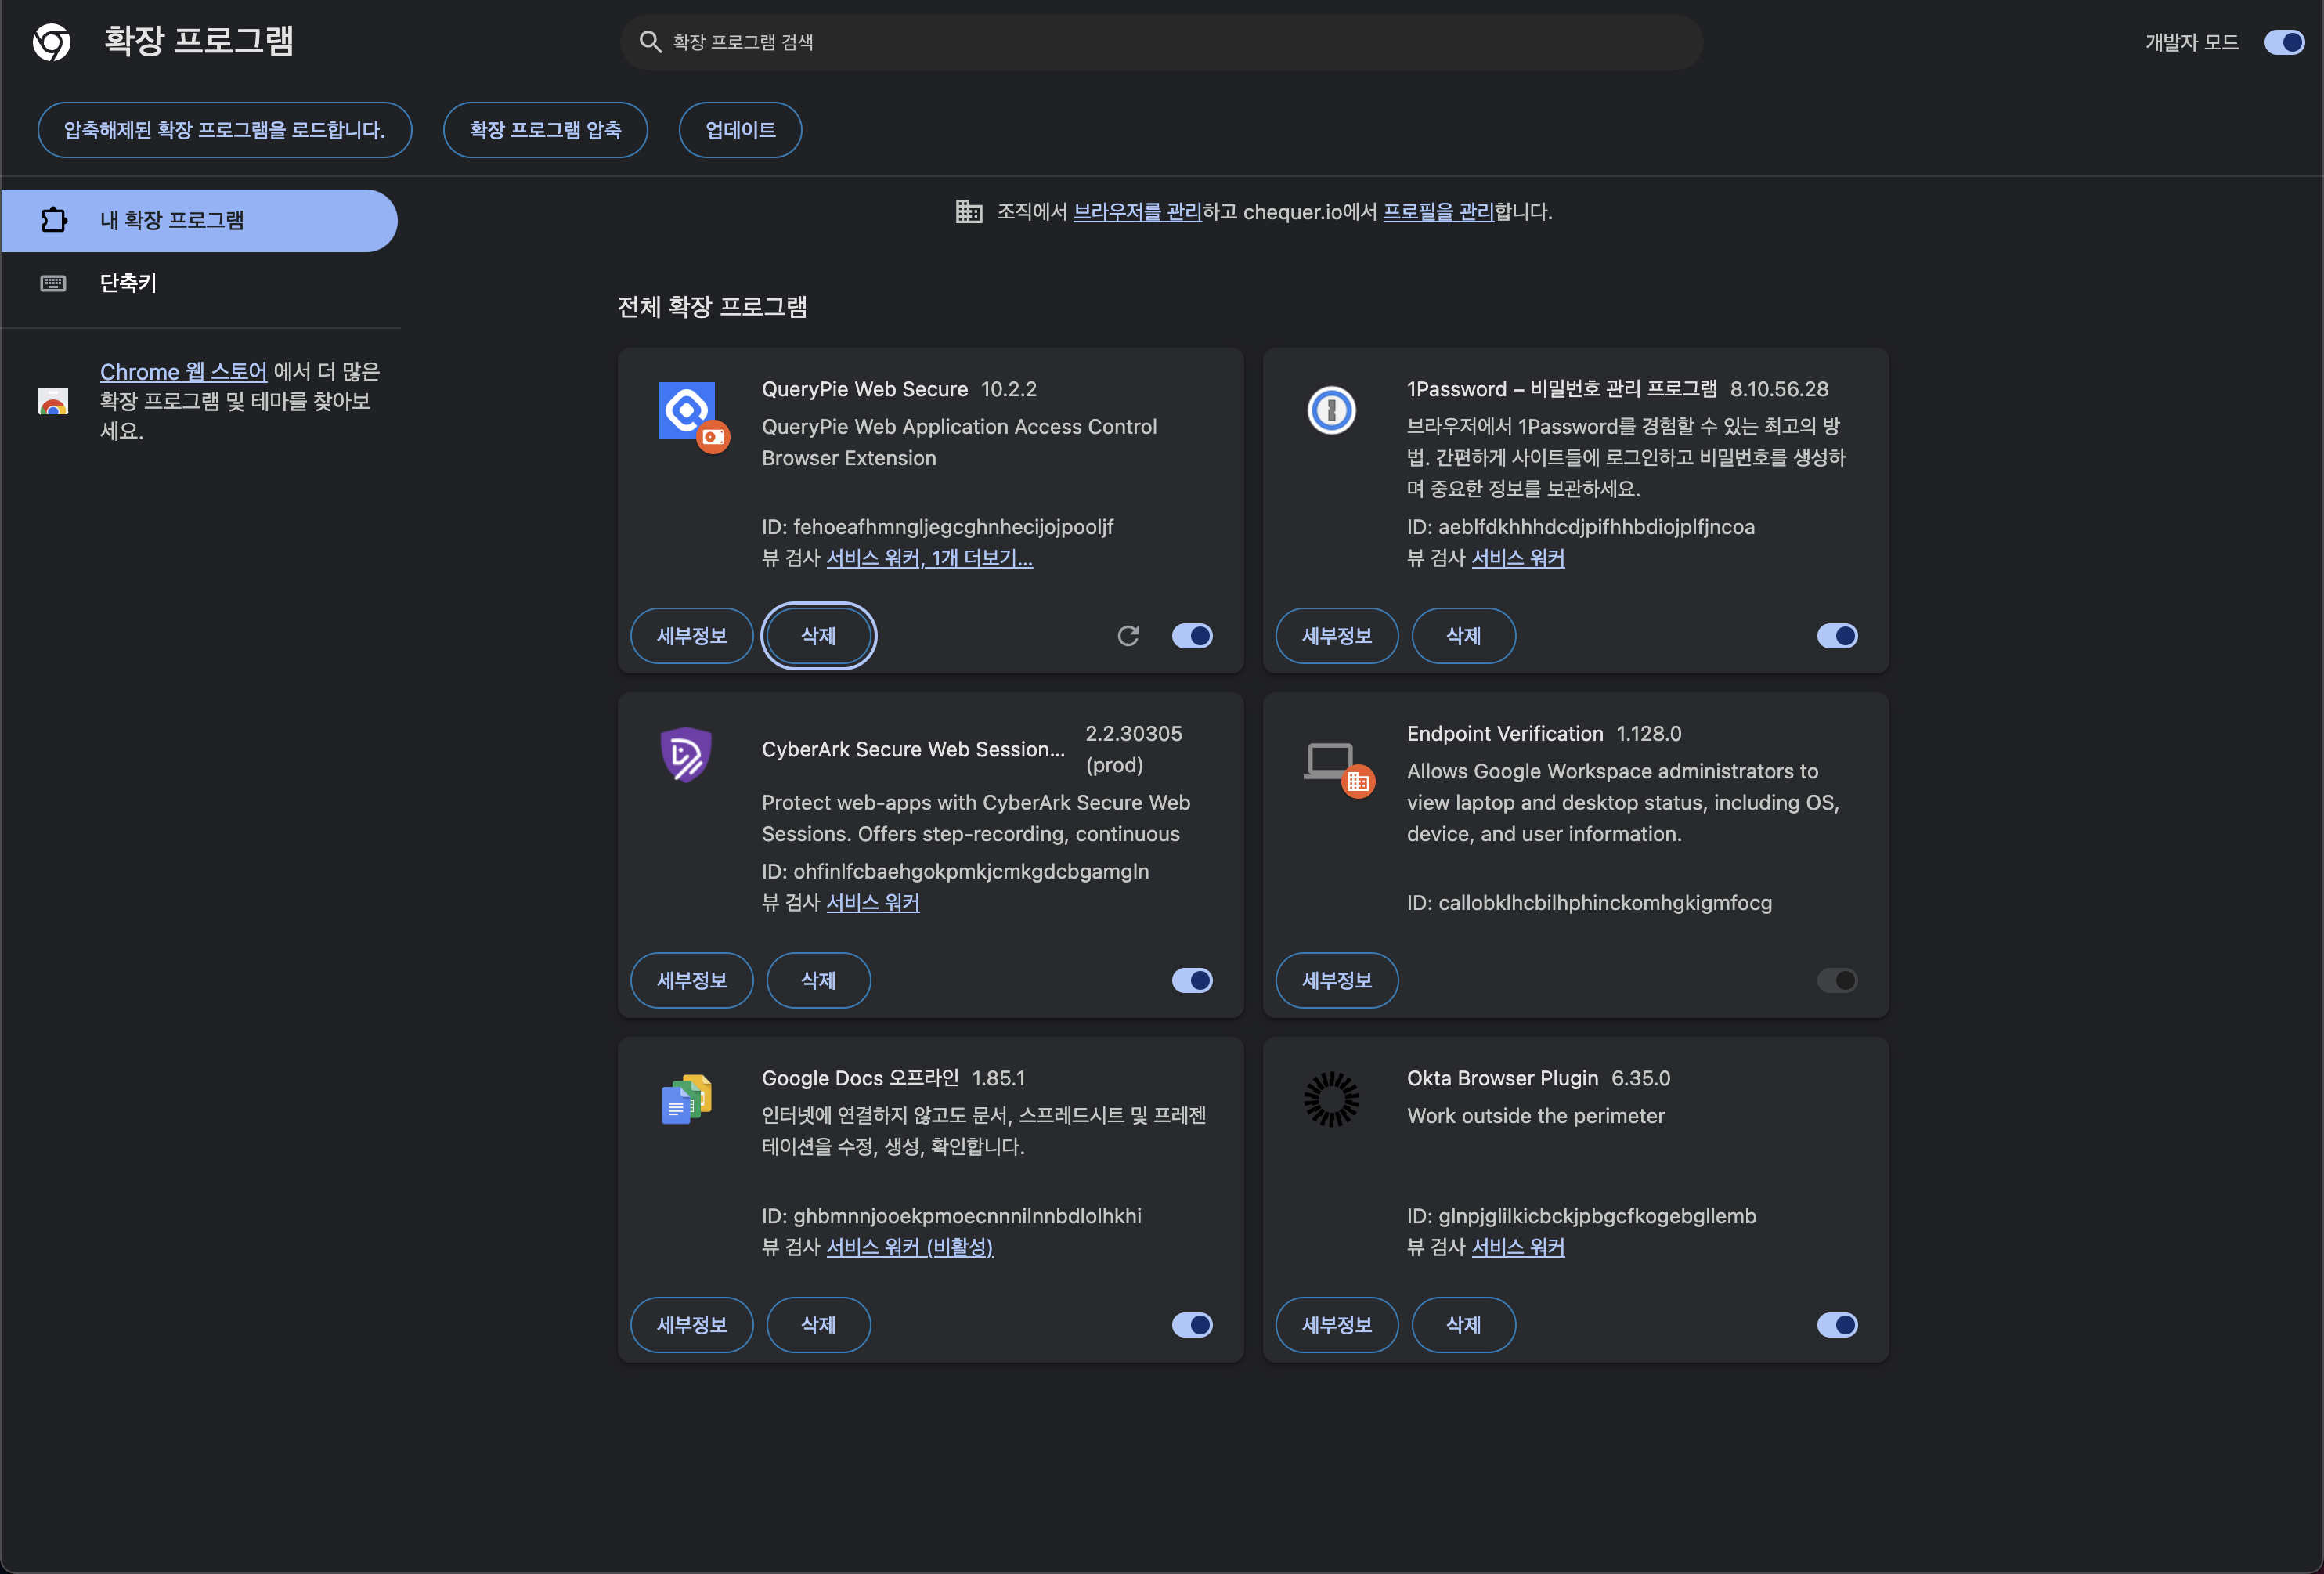
Chrome > My extensions
A Host Configuration page will open in a new tab. Paste the currently used QueryPie address into the QueryPie Host field and click the
Continuebutton.If the host information is valid, the
Go to Dashboardbutton will appear. Click it, and a new tab will open, taking you to QueryPie.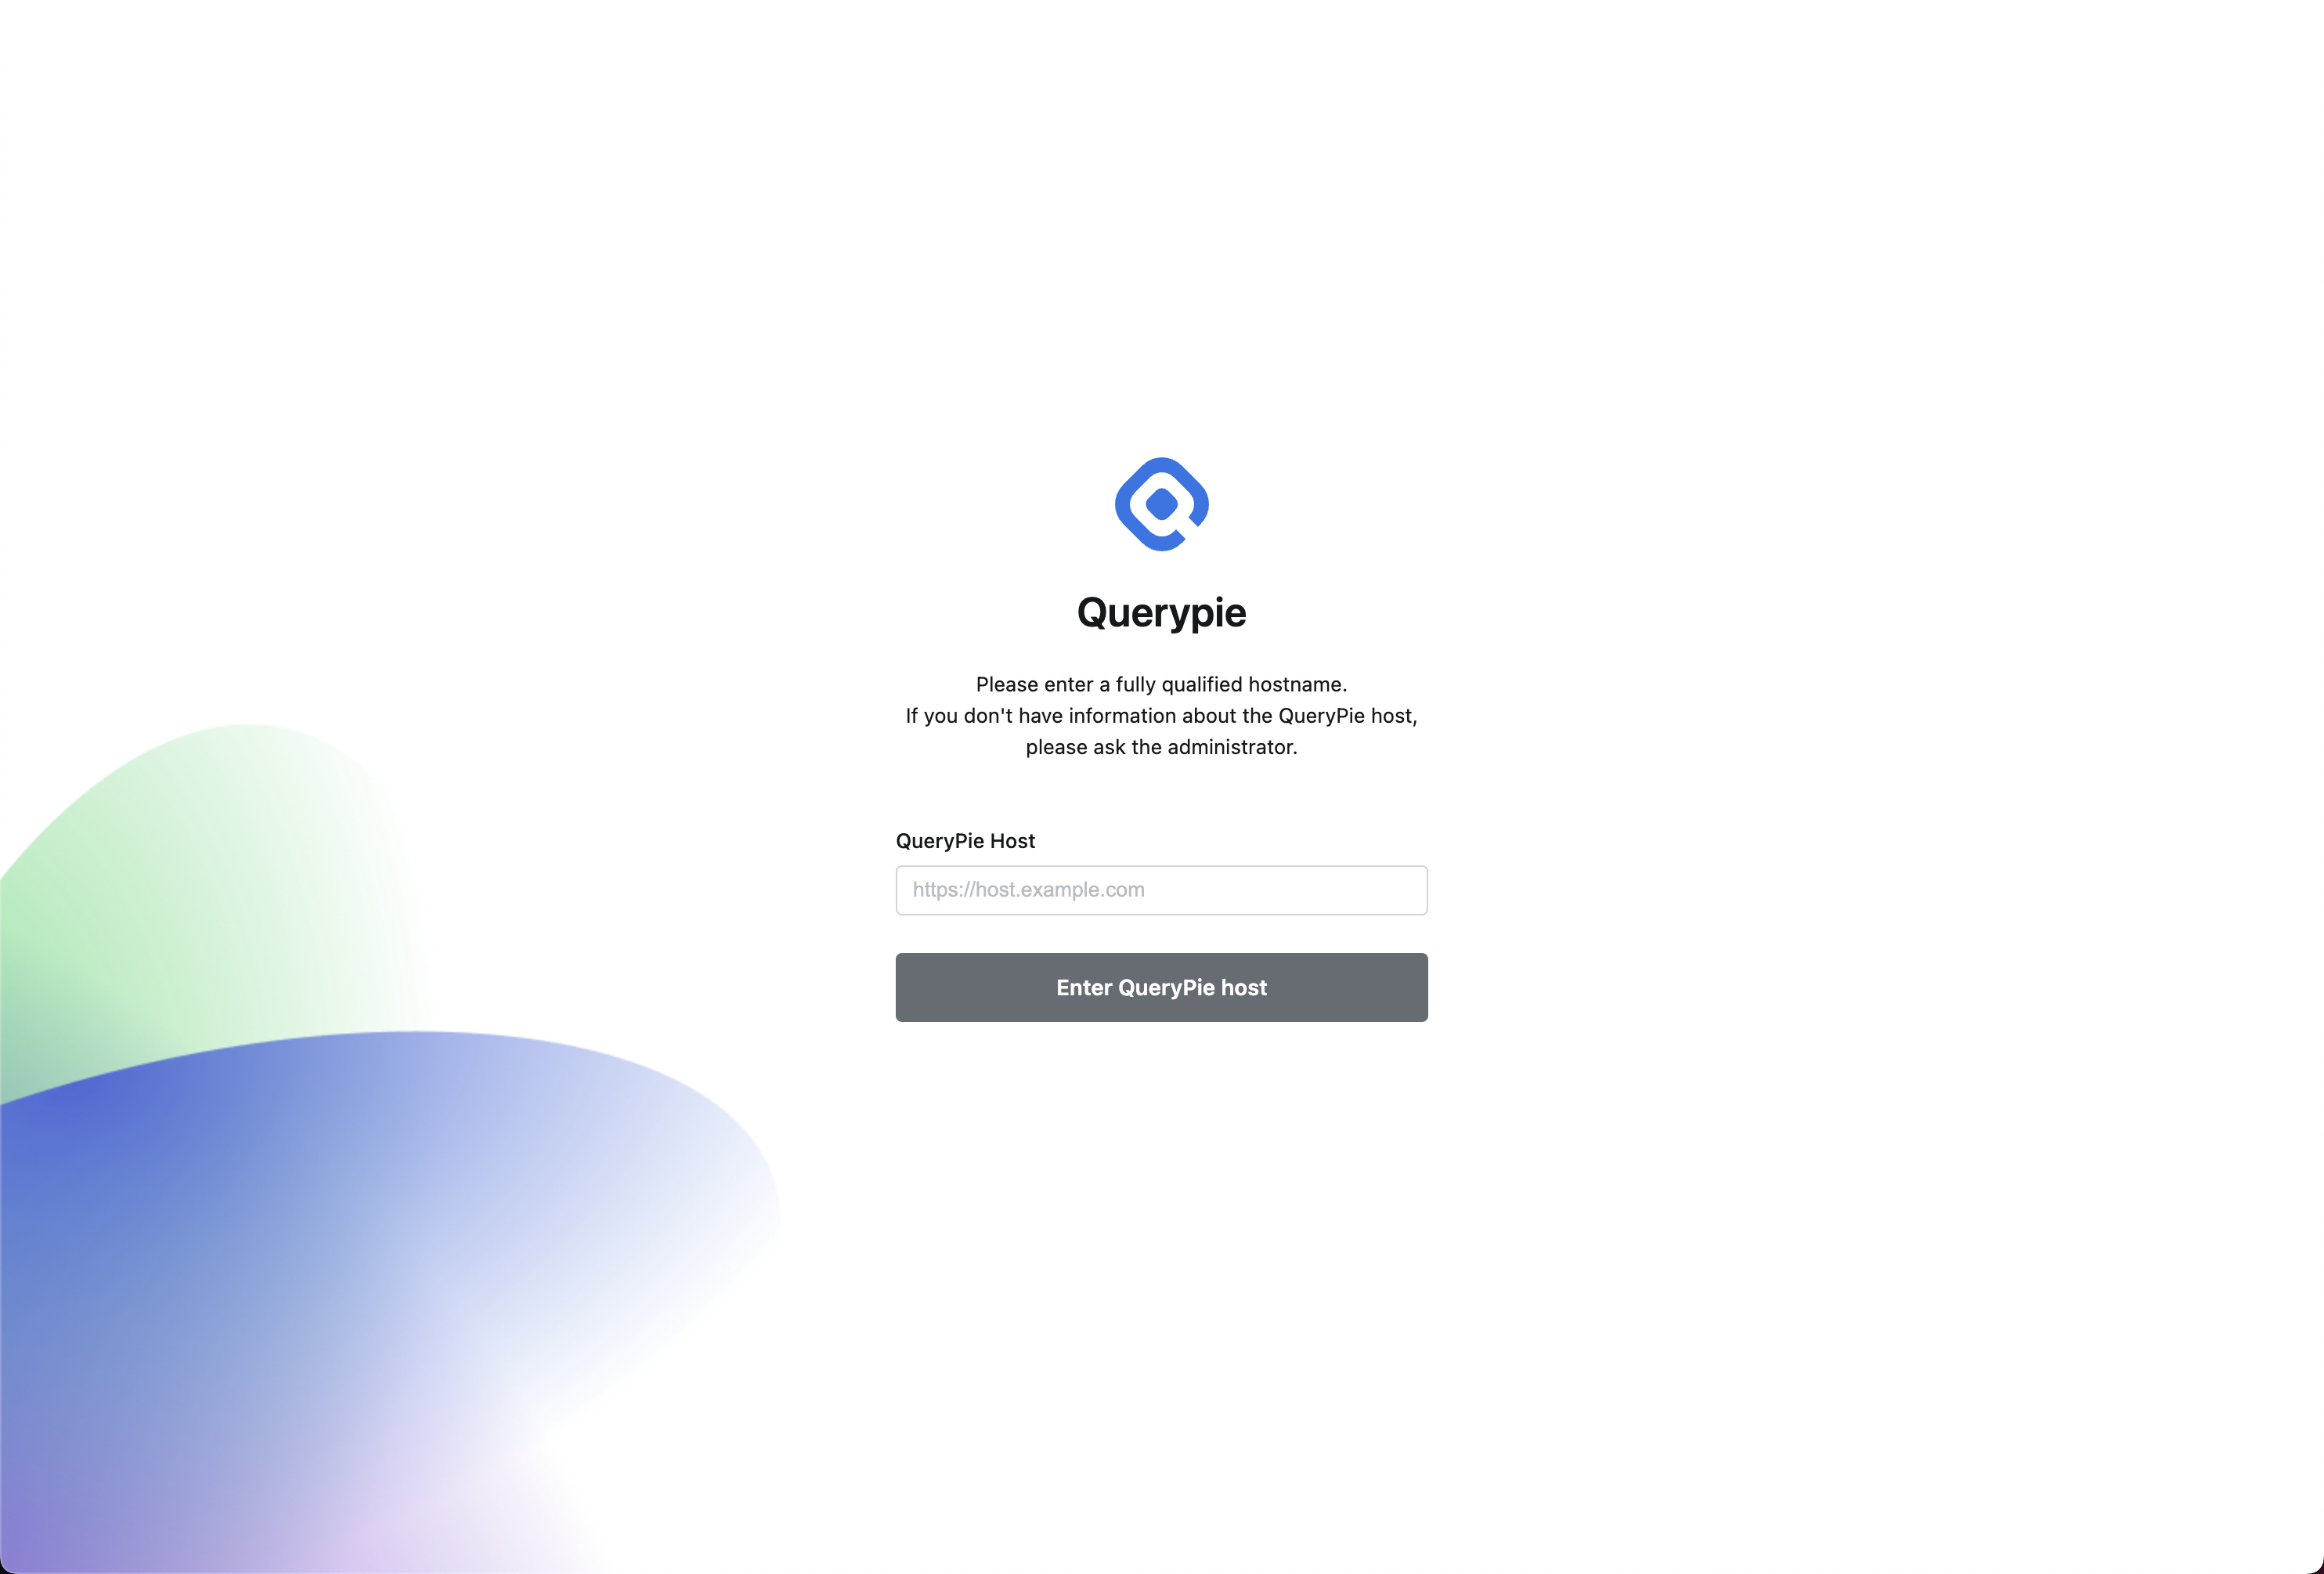
Host Configuration Page
4. Accessing Web App through QueryPie
Click the
Go to Dashboardbutton, which will open a new tab and load the QueryPie Web console.If you are already logged into QueryPie, the Web App Dashboard will open.
If not logged in, you will be redirected to the login page. Complete the login, then click Web Apps in the top menu to access the dashboard.
In the Web App Dashboard, under My Apps, the QueryPie Manual app icon registered in Admin Quickstart will be visible. Click the icon, and a new tab will open, taking you to the website.
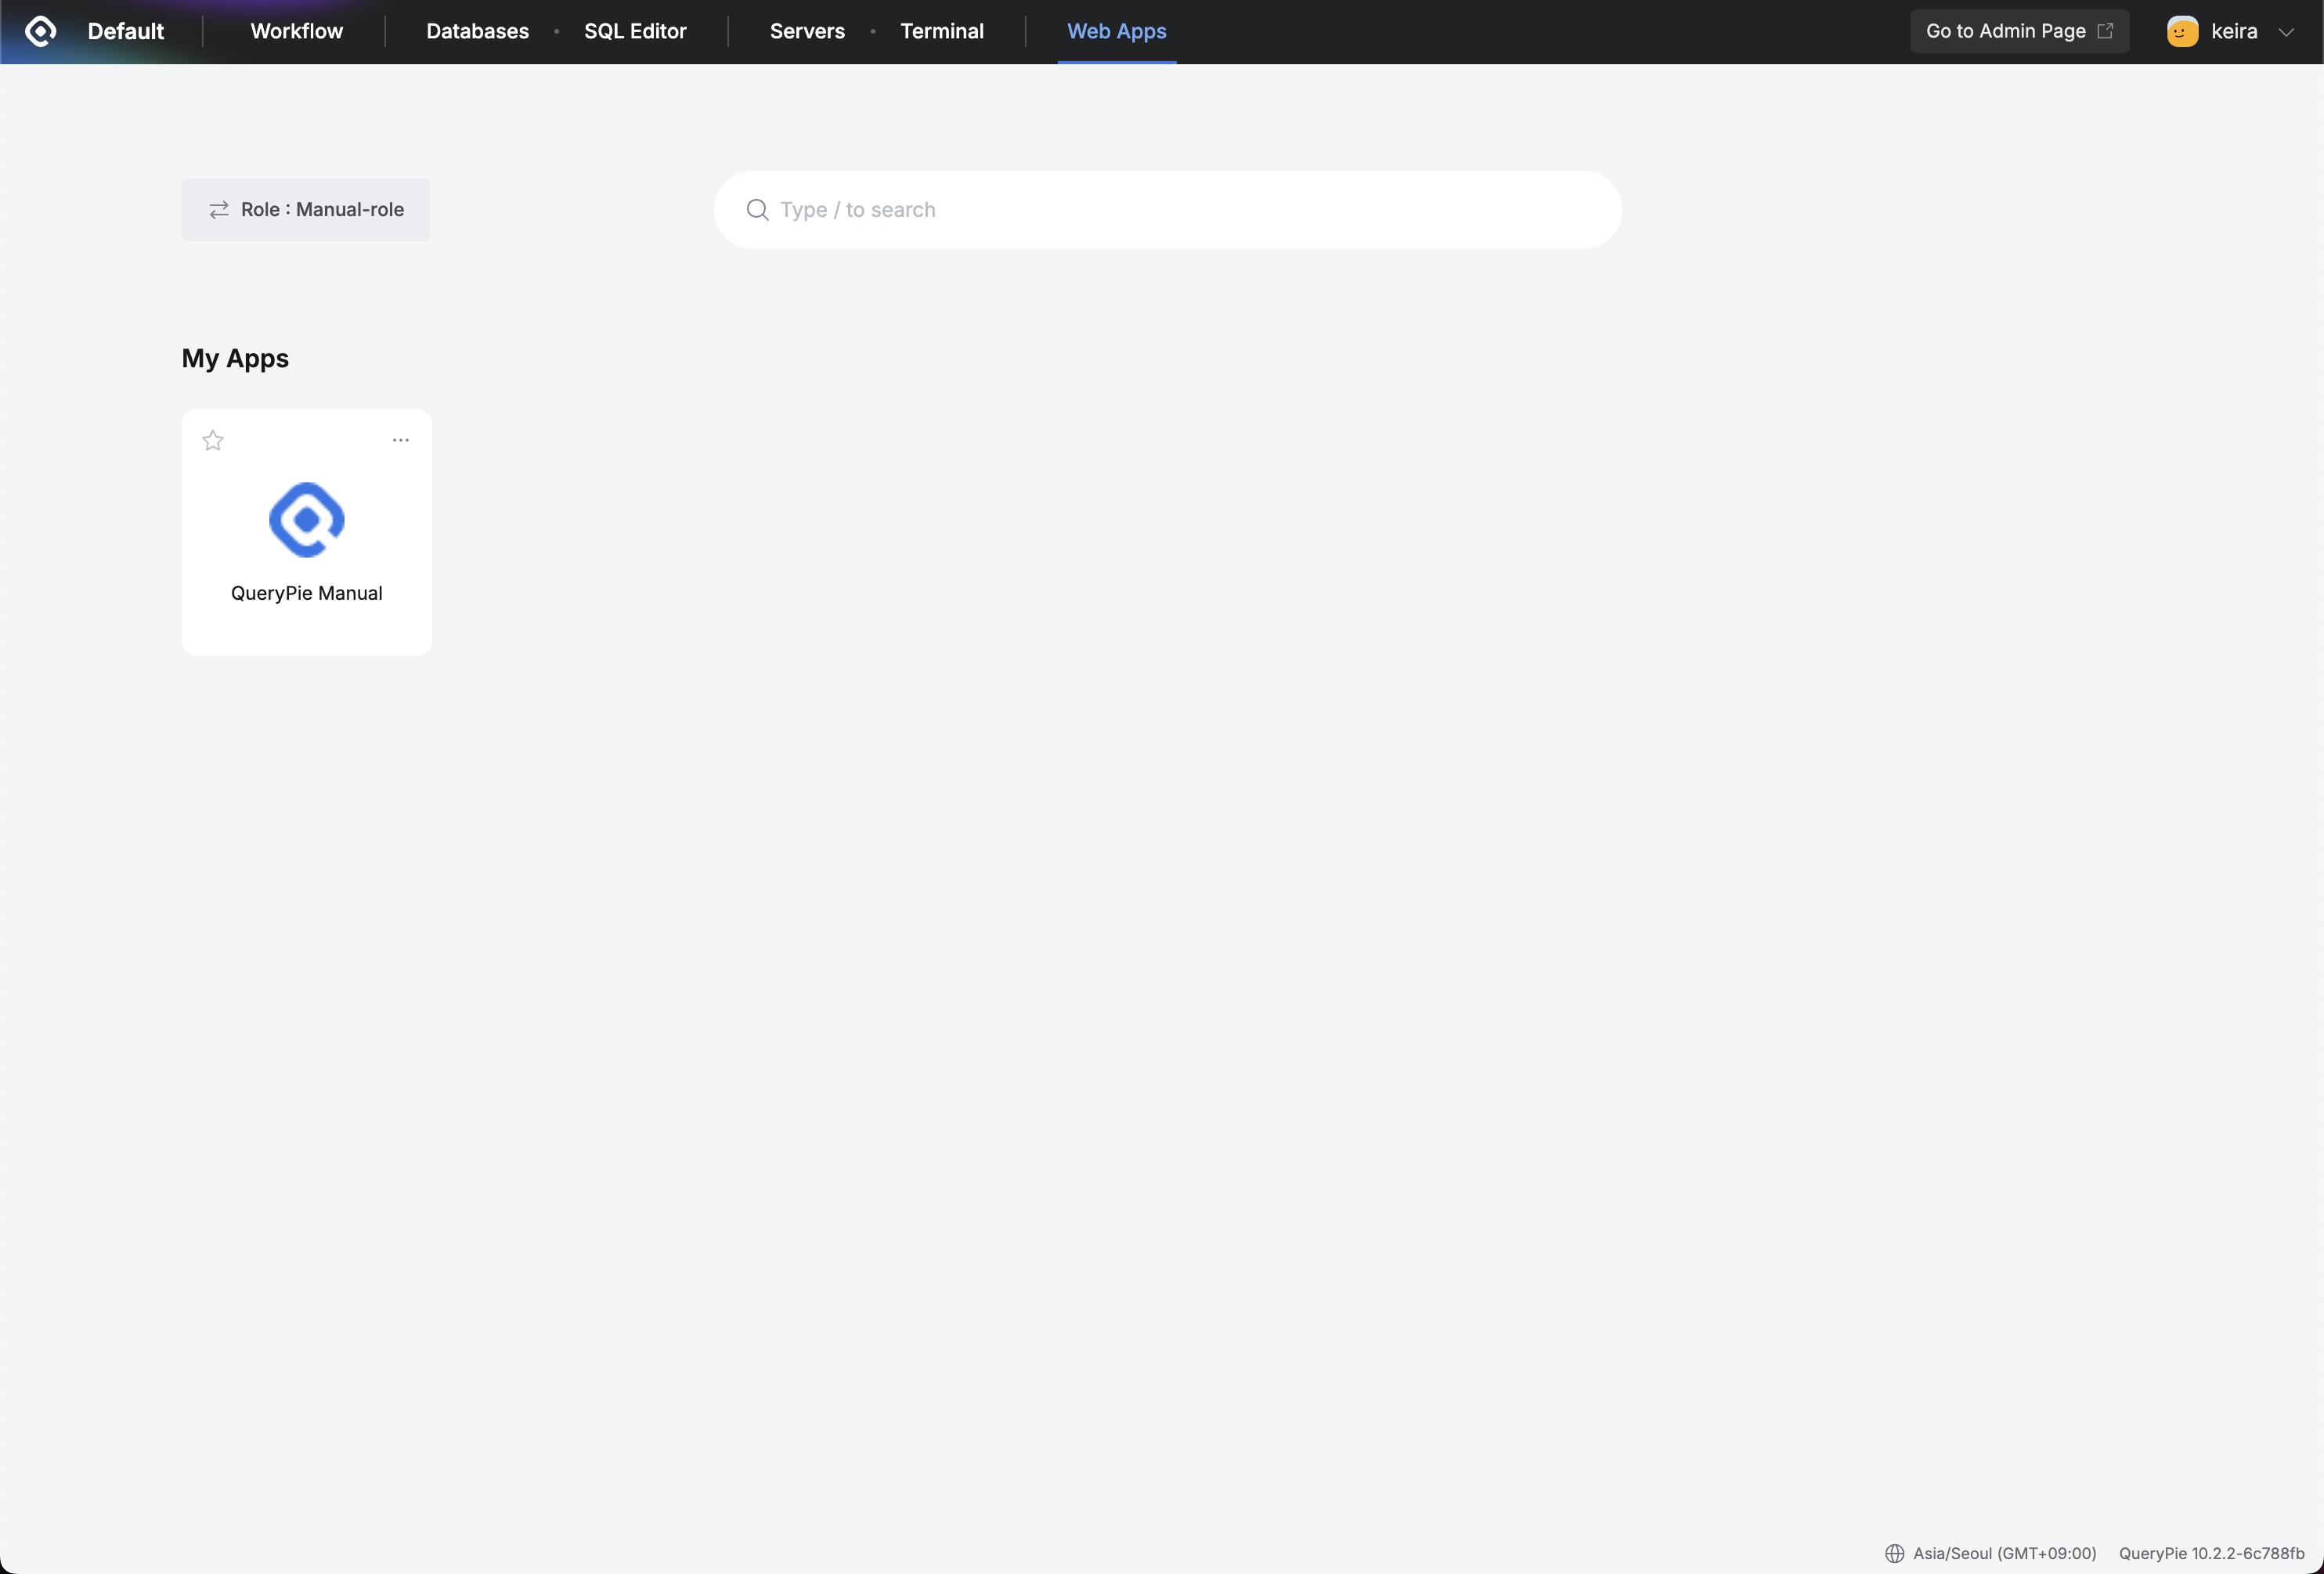
QueryPie > Web Apps > Web App Dashboard
When you first connect, a screen will appear indicating that the current web session is being recorded. This screen is displayed when a new session begins. Click the
Continuebutton to access the website.
Web Session Monitoring Notification
A watermark will be applied according to the Web App settings when accessing the manual page.
If you attempt to access a website with a blocked policy, you will be redirected to a block notification screen.
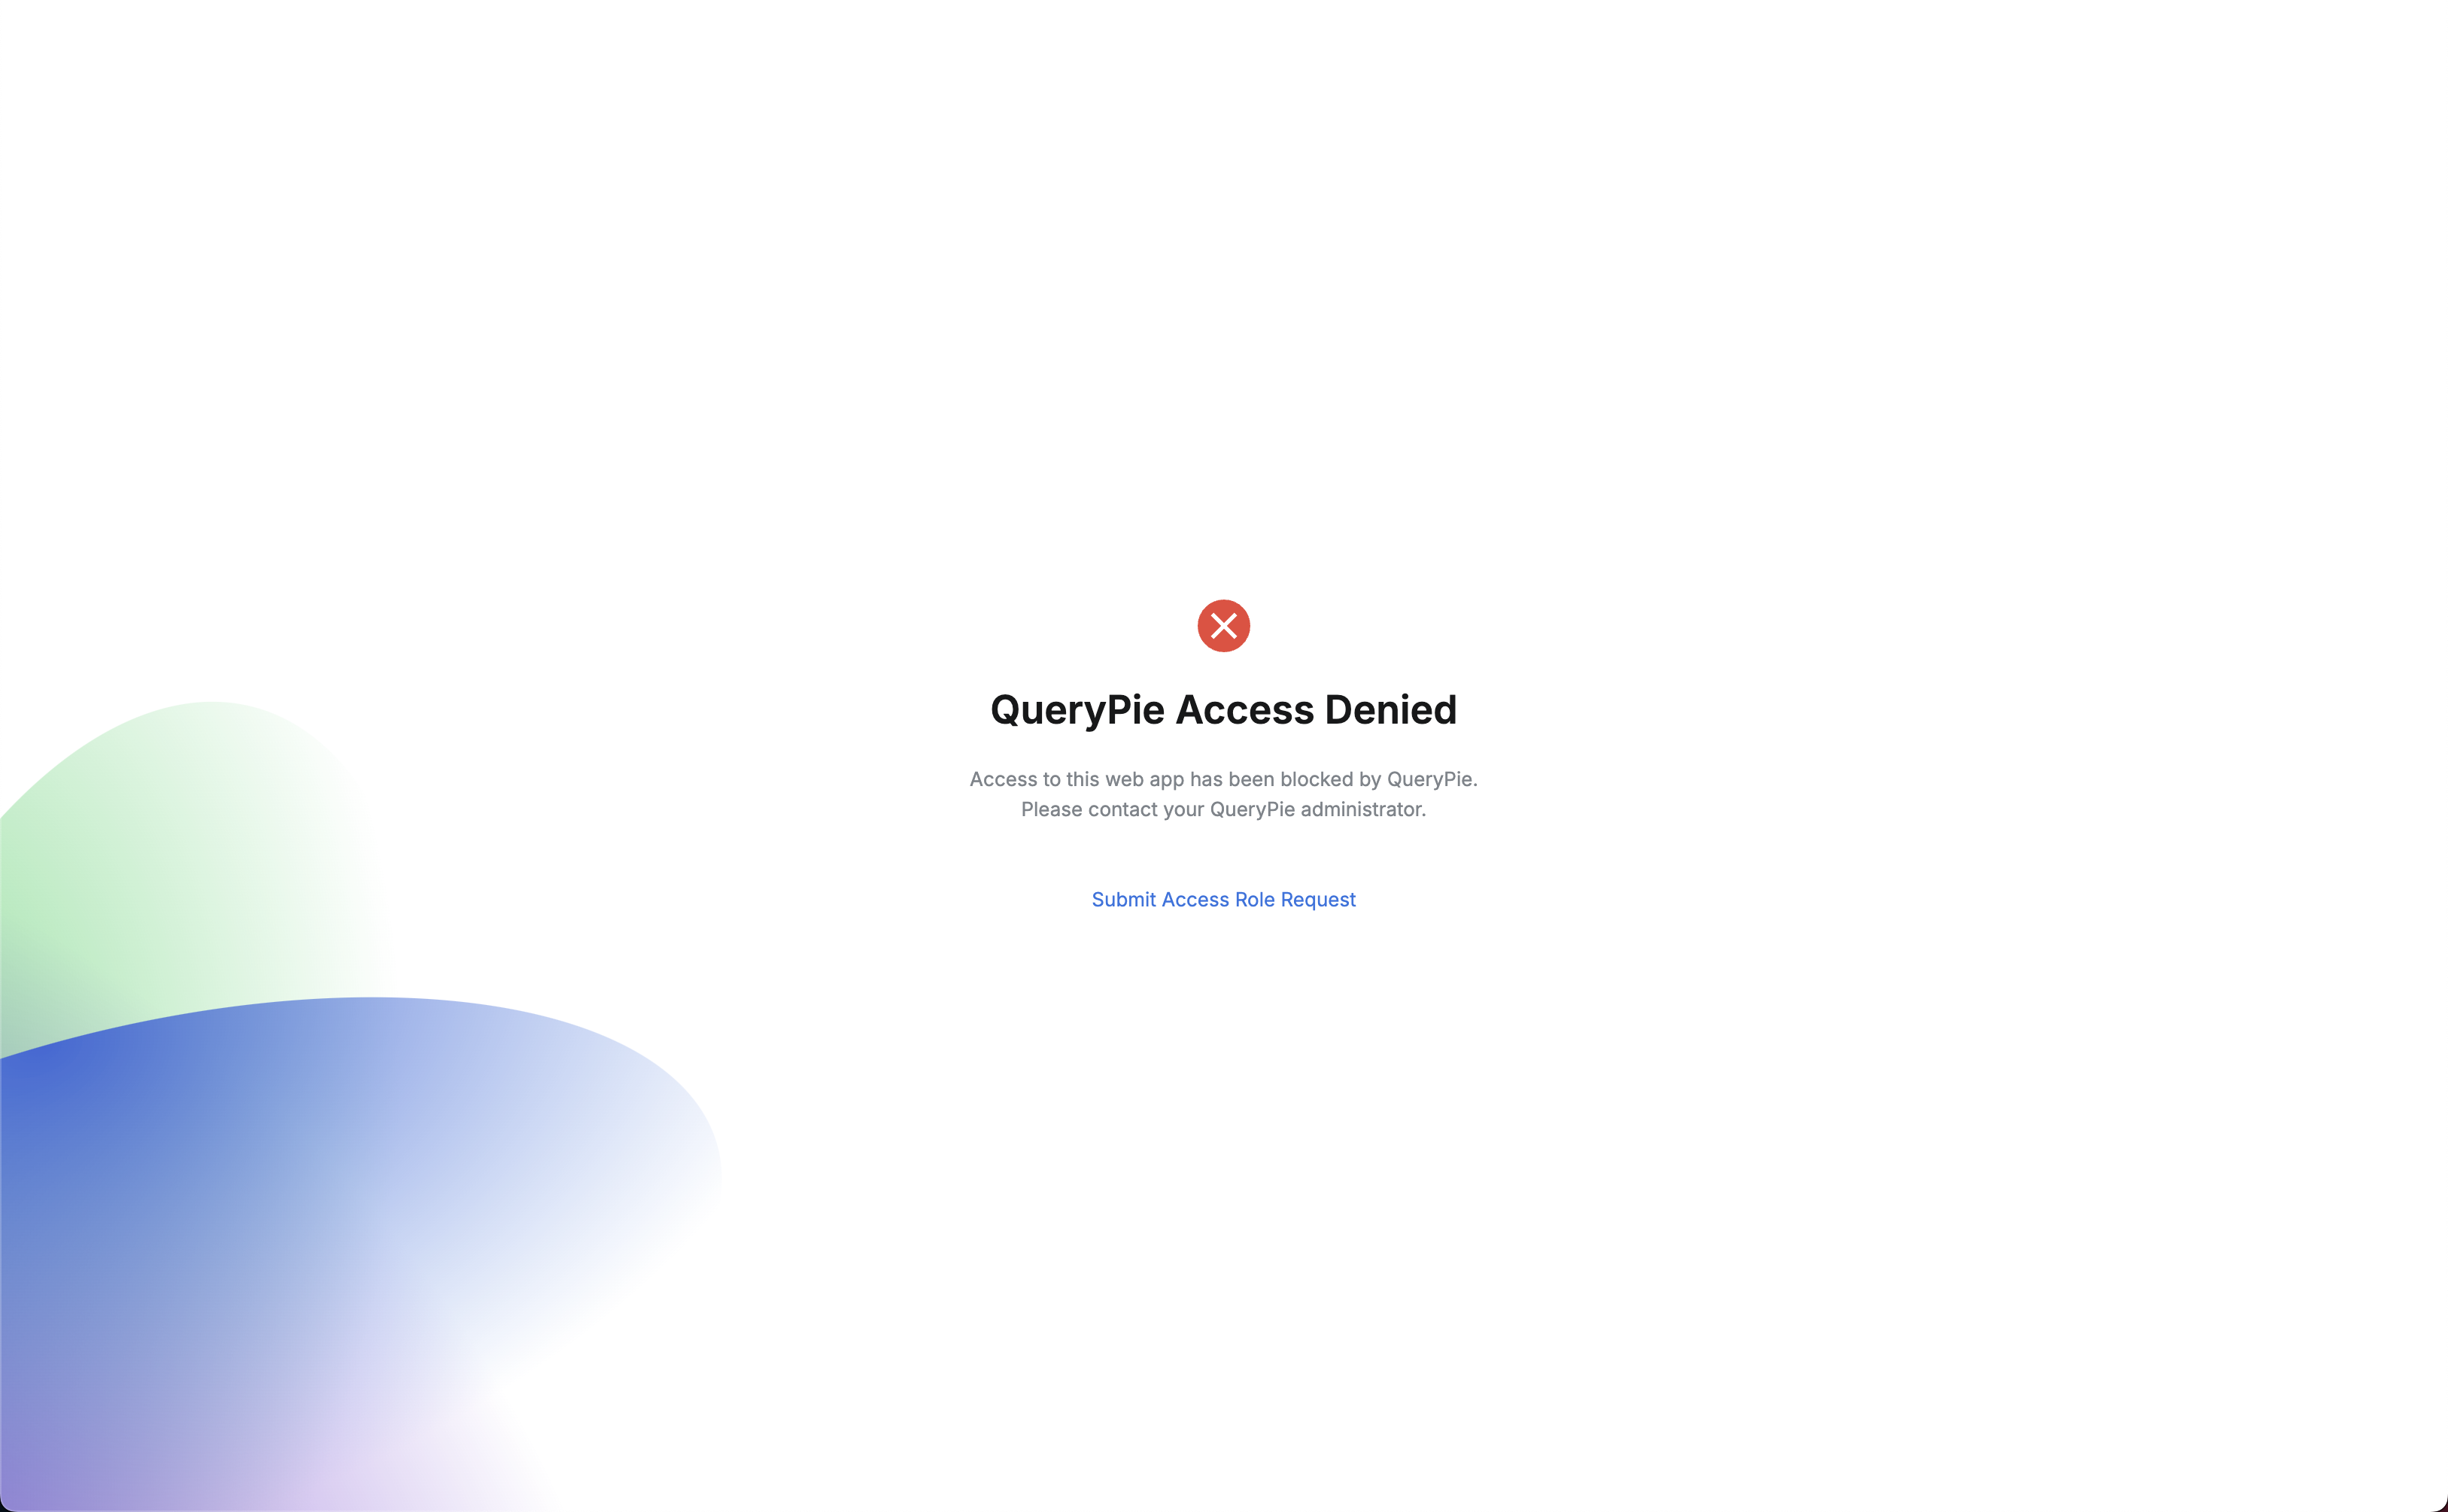
QueryPie Access Denied
The following steps outline how to verify that access control for the version 10.1 manual, performed in Admin Quickstart, is functioning correctly:
Click on QueryPie Docs for v10 on the QueryPie Manual page.
From the dropdown in the top-right corner of the QueryPie Docs for v10, select 10.1.0.
Verify that the block notification screen appears.
Admin-side (again)
1. Viewing Web App Access Logs
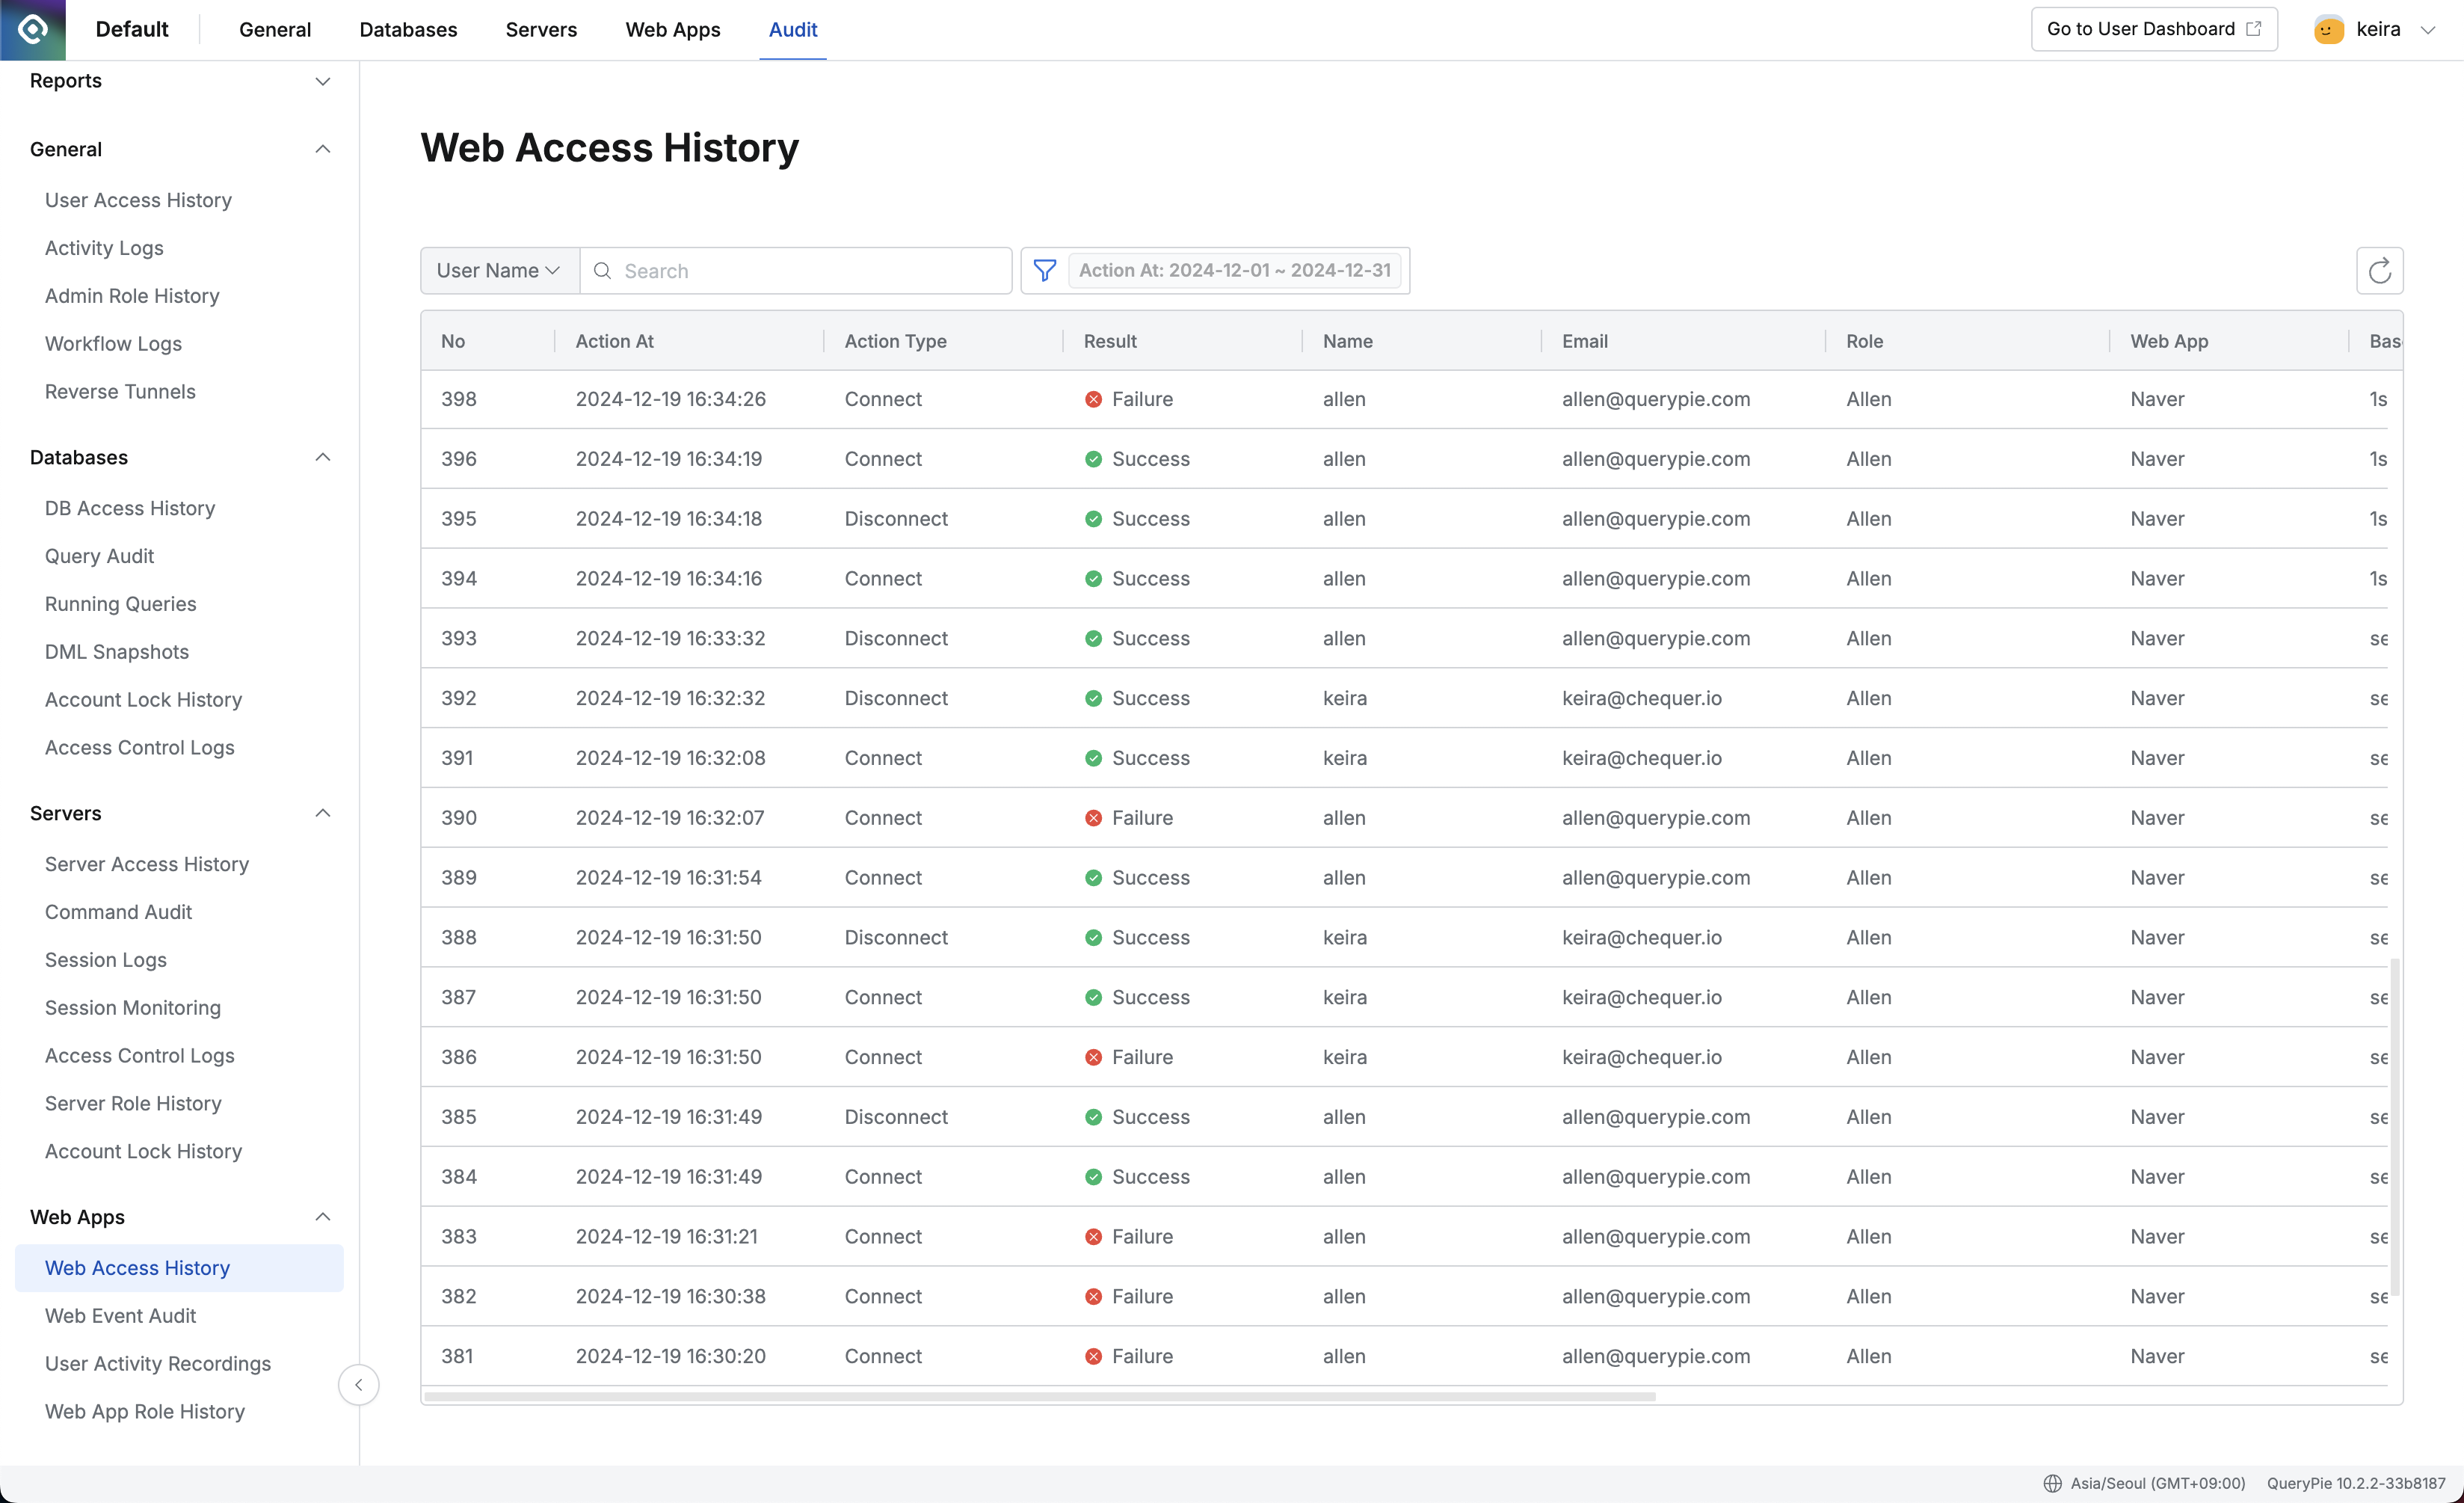
Admin > Audit > Web Apps > Web Access History
Navigate to the Admin > Audit > Web Apps > Web Access History.
You can view the access logs of the web app currently accessed by the user.
Action Type: Start and end of the web app access:
Connect: Access started.
This is shown when the web app is accessed, with all subpaths recorded separately.
Disconnect: Access ended.
This is shown when the tab is closed or the user navigates to another page.
Result: The result of the access attempt:
Success: Access successful.
Failure: Access failed.
This is shown when access is blocked by WAC policies.
2. Viewing the User’s Session Logs
The logs will display all records of the user accessing controlled web apps and navigating through subpages, based on the web app and role.
User activity logs are only recorded if User Activity Recording is enabled during Web App creation.

Admin > Audit > Web Apps > User Activity Recordings > Details
Navigate to the Admin > Audit > Web Apps > User Activity Recording.
Clicking the record left under the current user name will take you to the detail page.
In the Event Timeline, you can view the user's actions in chronological order.
By clicking the filter, you can view the actions by type.
The following values are searchable:
Content (Text or link clicked)
URL (URL of the page accessed)
Tab ID (Tab ID used)
A screenshot of the page the user was viewing is saved for each event.