Set Connection Details and Policies
Overview
You have the flexibility to configure specific details and security parameters for each connection, as well as define access restriction policies based on various factors such as time of day, day of the week, and maximum data access limits. These settings can be configured during the connection registration process for added control and security.
Set Connection Details and Policies

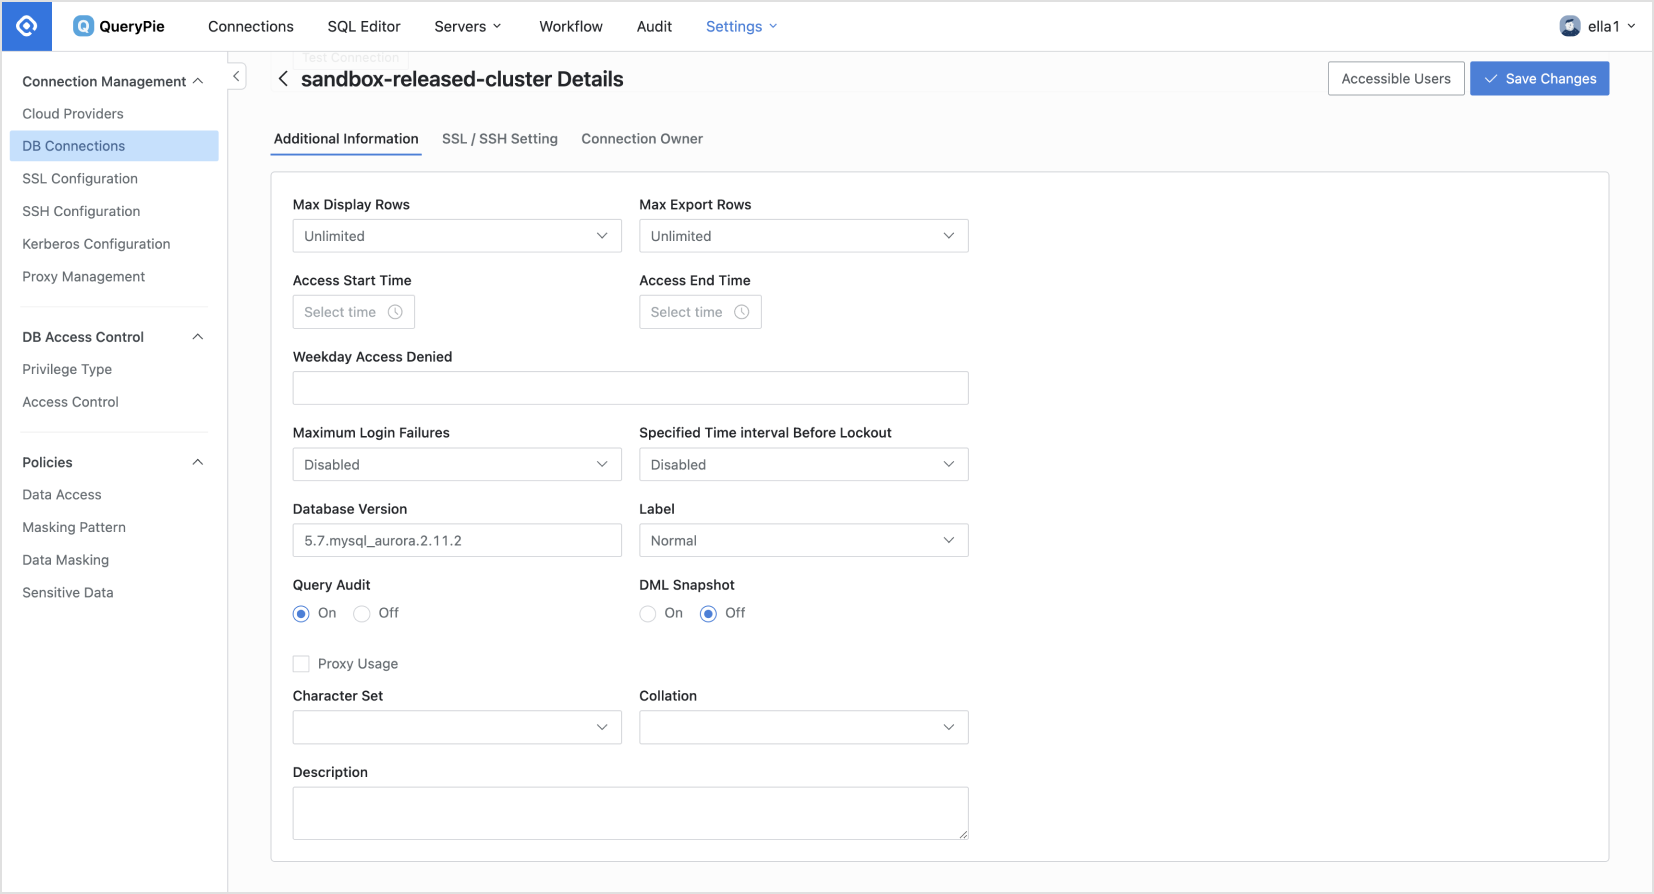
Database Settings > DB Connections > Connection Details > Additional Information
In the Database Settings menu, navigate to the DB Connections menu.
Select the connection you have previously registered.
Scroll down to the Additional Information section located at the bottom.
Here, you can input various details and configure policy settings:
Max Display Rows : Limit the maximum number of rows retrieved after a query execution.
Max Export Rows : Specify the maximum number of rows allowed for data export.
Access Start Time : Set the start time for connection accessibility based on the time zone.
Access End Time : Define the end time for connection accessibility within the specified time zone.
Weekday Access Denied : Choose the days of the week when the connection should be inaccessible.
Maximum Login Failures : Restrict the number of failed login attempts permitted for this connection.
Specified Time interval Before Lockout : Define the time interval used to determine the allowed number of failed login attempts.
Database Version : Enter the version of the database utilized by this connection.
Label : Indicate whether the connection is a ledger database or not (Default = Normal)
※ Setting Label to “Ledger” will enforce the DML Snapshot option.
Query Audit On/Off : Toggle to log queries executed on this connection (Default = On).
DML Snapshot On/Off : Toggle to record before and after data changes on this connection (Default = Off).
Proxy Usage : Specify whether to utilize a proxy for this connection. Refer to Proxy settings for more details.
Character Set : Choose the character set to be used for this connection.
Collation : Select the sorting method for the chosen character set.
Description : Optionally, provide a description for this connection.
Click the
Save Changesbutton in the upper right corner to confirm and save your settings.
Use SSL Connections in Connections
Registering an SSL certificate for each connection ensures secure communication, and QueryPie fully supports SSL connections.

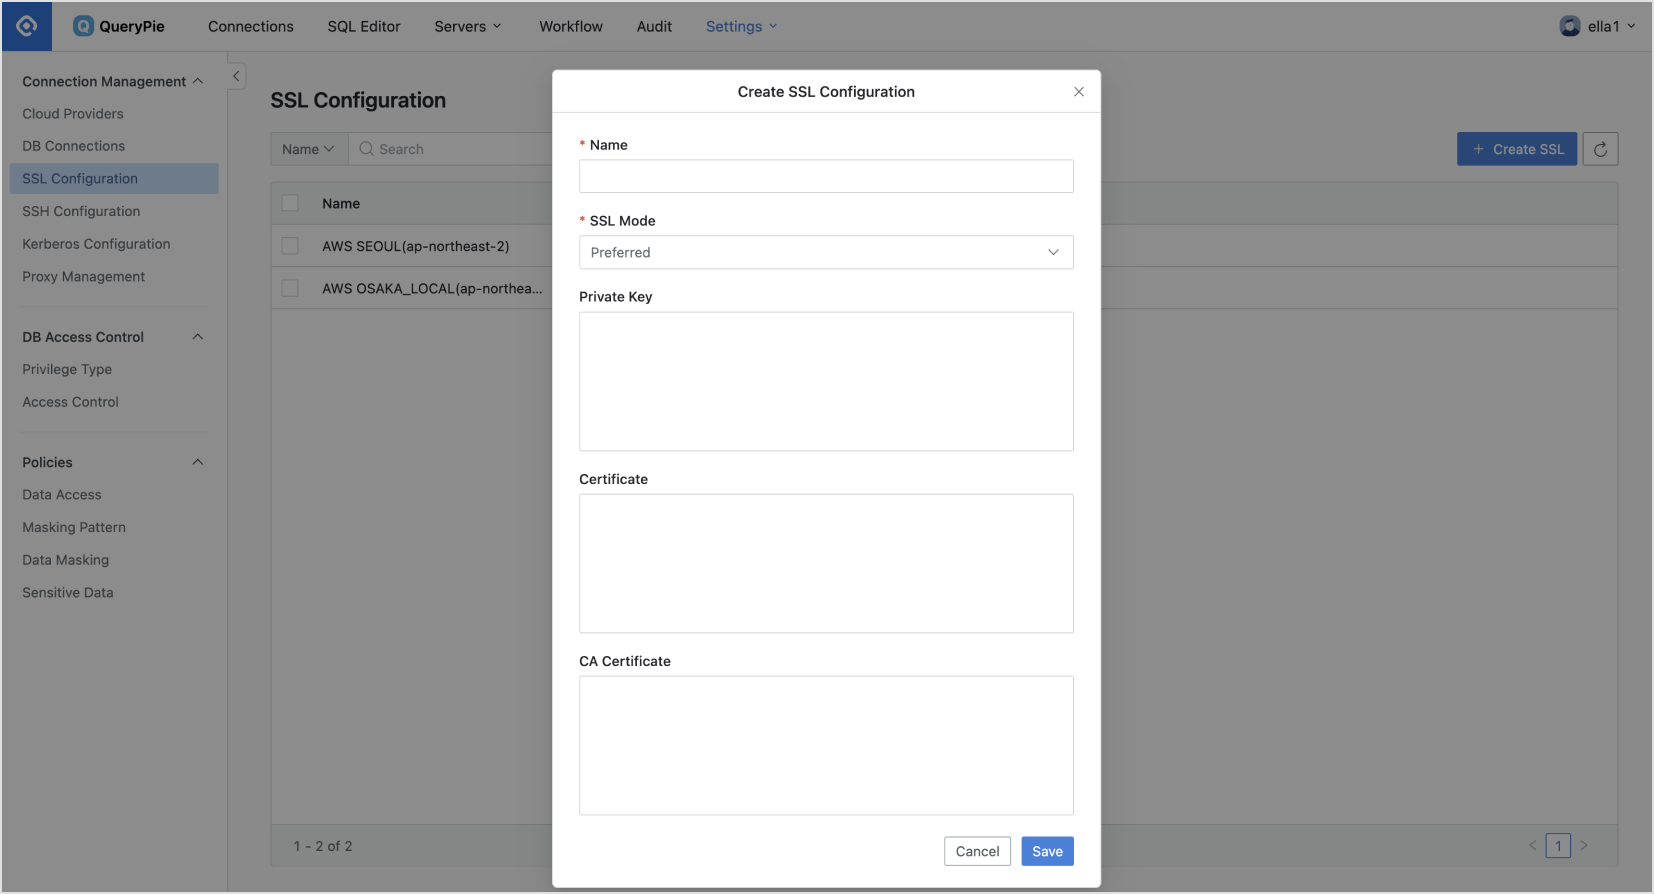
Database Settings > SSL Configuration > Create SSL
From the Settings menu, navigate to the Connection Settings > SSL Configuration menu.
Click on the
Create SSLbutton located in the upper-right corner.Provide the following details to register an SSL certificate:
Name : Assign a name to identify the SSL certificate.
SSL Mode : Choose the connection mode for SSL.
Private Key : Enter the key necessary for encryption/decryption.
Certificate : Input the certificate details to identify the client.
CA Certificate : Provide CA certificate information for certificate verification.
Click
Saveto confirm the SSL certificate enrollment.From the Settings menu, proceed to Connection Settings > Manage Connections menu.
Select the desired connection from the list and scroll down to the SSL / SSH Settings section.
Enable the option for Use SSL for SSL connections.
In the SSL Configuration section, select the SSL certificate you previously registered.
Save your changes by clicking the
Save Changesbutton.

Database Settings > DB Connections > Connection Details > SSL / SSH Setting
%201.png)