Create ProxyJump
Overview
With ProxyJump settings, you can connect to servers in different Network Zone or apply QueryPie's access control to servers with overlapping CIDRs. QueryPie must be able to connect to the Jump Host. ProxyJump for Windows Servers is also supported.
Creating a ProxyJump

Administrator > Servers > Connection Management > ProxyJump Configurations > Create ProxyJump
Navigate to the Administrator > Servers > Connection Management > ProxyJump Configurations menu.
Click the
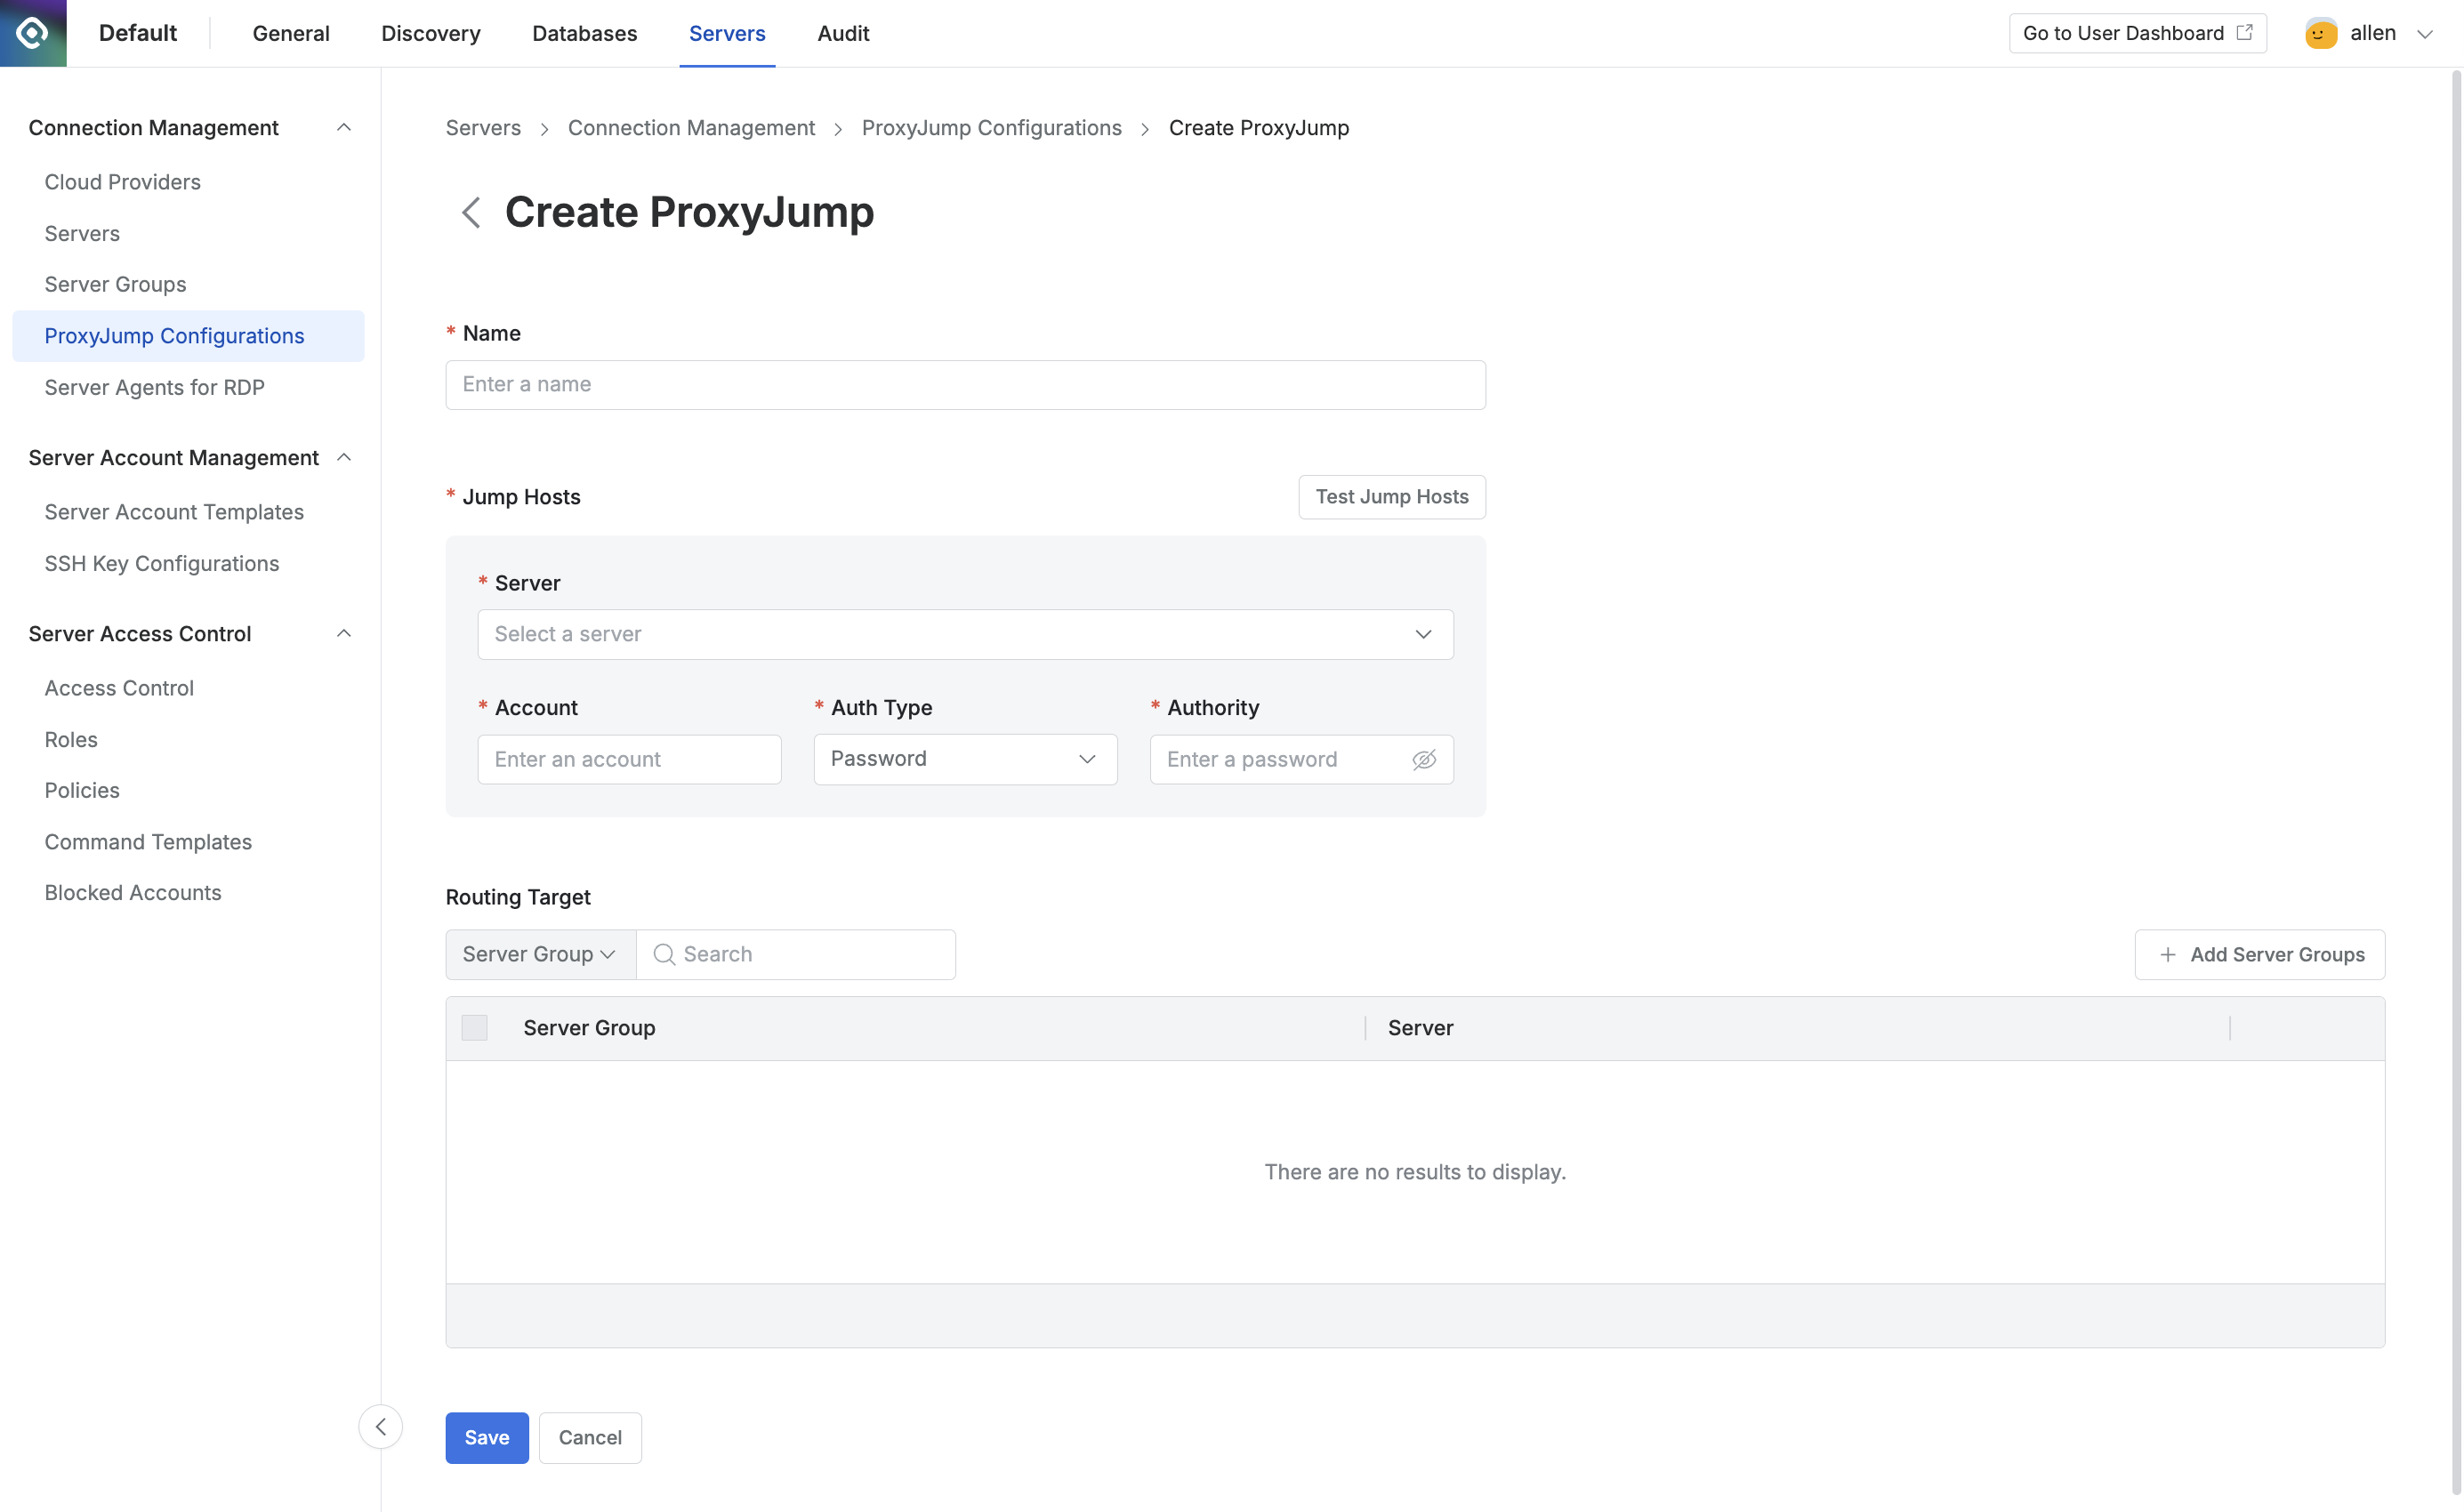
+ Create ProxyJumpbutton in the top right corner.Enter the following details to create a group:
Name : Enter the name of the ProxyJump configuration.
Jump Hosts : Set the Jump Hosts to be used as the hop.
Server : Select a Jump Host from the enrolled servers.
Account : Enter the account that can access the Jump Host.
Auth Types : Choose the authentication method for connecting to the Jump Host.
Password : Enter the password directly.
SSH Key : Select the SSH Key from the SSH Key Configurations.
Managed by Job : Choose credentials managed by QueryPie. This option appears only if “Password Provisioning” is configured in the Security menu.
Authority : Select either Password or SSH Key for authentication.
Test Jump Hosts : Check if the Jump Host can be accessed with the entered account.
Add Jump Host: When connecting to a server, the connection will sequentially pass through all added Jump Hosts to attempt access to the target server. You can configure up to 5 Jump Hosts.
Delete: Delete an added Jump Host. Jump Host 1 cannot be deleted.
Routing Target : Select the server group to connect via ProxyJump. Each server group can only have one ProxyJump configuration.
Click
Saveto save the configuration.
Setting up ProxyJump for Windows Server
Access the Windows Server and install the server agent.
Register the Windows Server manually via steps in Manually Enroll Servers.
Add the registered Windows Server to a server group.
Add the server group to the Routing Target.
Go to Administrator > Servers > Connection Management > Server Agents for RDP and verify that the server agent for the registered Windows Server has been added. It may take 1-2 minutes for the Server Agent to be added.