Email Integration
Overview
Email Integration provides the following key features:
Password Reset Email: Sends an email for user password reset.
Two-Factor Authentication Code: Provides an additional security step by sending a verification code via email during user login.
Event Notifications: Sends email alerts to administrators based on event triggers defined by alert rules.
To send emails, an SMTP server is required, and QueryPie provides integration options for configuring the SMTP server.
Email Integration Configuration
Navigate to the Administrator > General > System > Integrations menu.
Click the Email tile to go to the detailed page.
On the detailed page, click the
Configurebutton to open a popup where you can enter the SMTP information.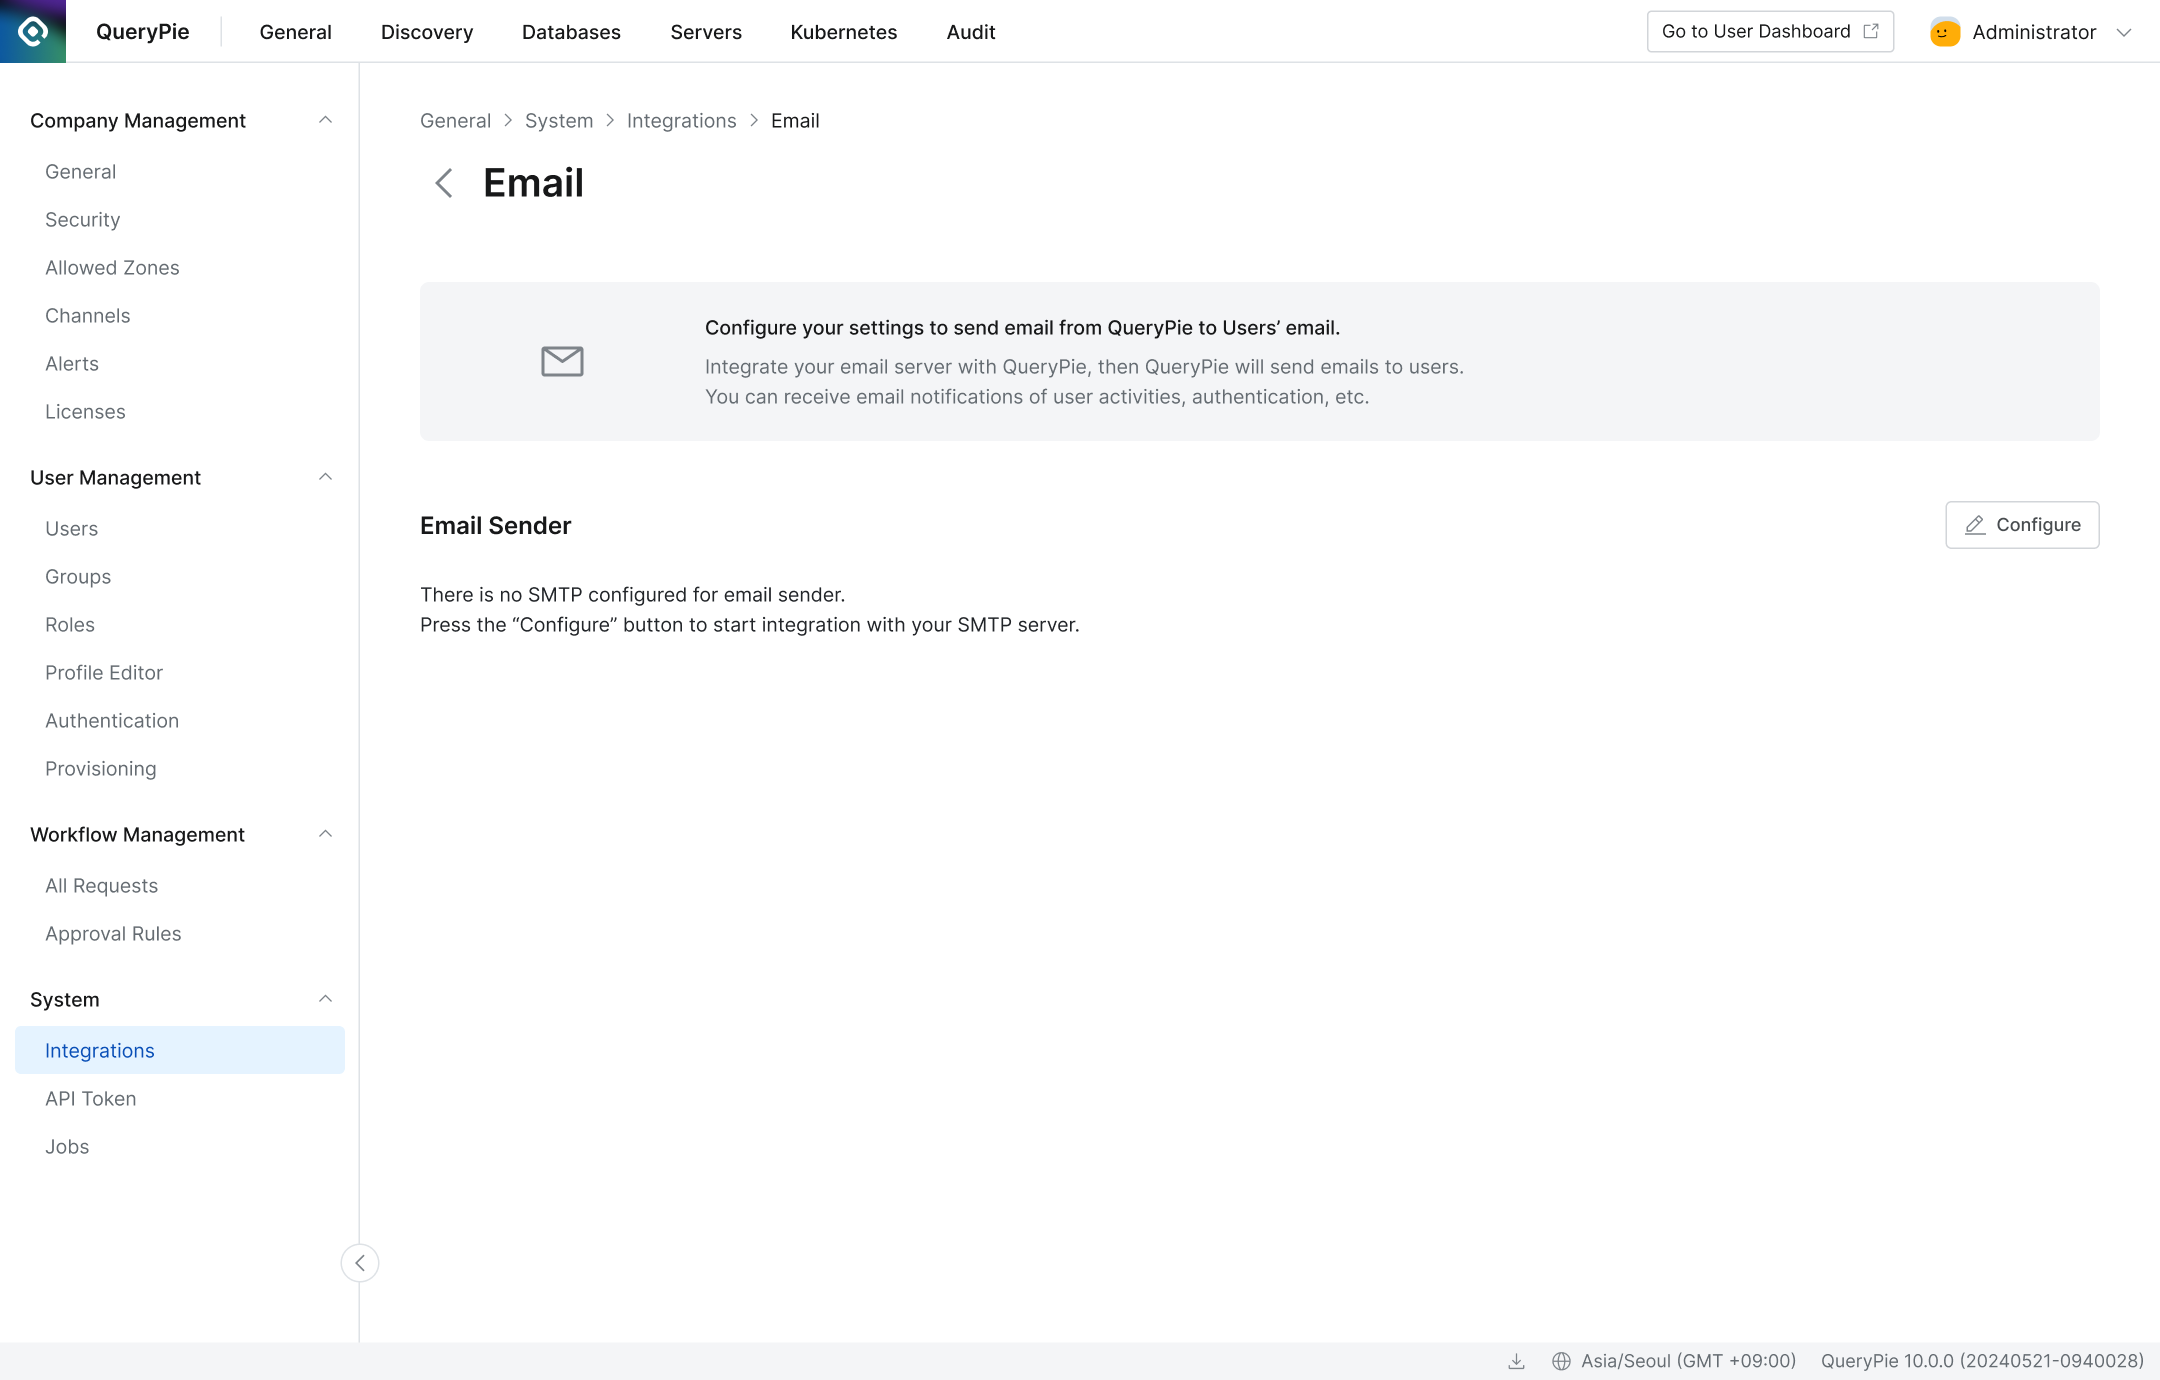
Email Integration Detailed Page
To create SMTP settings, enter the following information:
Email Server Name: Enter a custom name for easy identification.
Host: Enter the hostname (FQDN) of the SMTP server.
Secure: Choose the encryption method. You can select either TLS or STARTTLS. The default is TLS. STARTTLS will use plain text if the SMTP server cannot support TLS.
Port: Enter the port number used by the SMTP server.
Timeout (milliseconds): Enter the threshold for waiting for SMTP responses. The default value is 60,000. It's recommended not to modify this unless absolutely necessary.
Sender Email Address: Enter the email address of the sender.
Sender Name: Enter the name that will appear as the sender.
Support Email Address (Reply-to): All emails sent from QueryPie via SMTP will be sender-only emails. Since the sender email address does not receive replies, provide an email address for the recipient to contact for technical support when necessary. As of version 10.2.2, the support email address specified here will be used for the password reset email template and the two-factor authentication code email template.
SMTP Server Requires Authentication: Select On or Off based on whether authentication is required to connect to the SMTP server and send emails. If On, enter the User and Password.
User: Enter the user for authentication, typically in the form of an email address.
Password: Enter the password for the authentication account.
Test Button: Click the
Testbutton to check if the SMTP settings are correctly configured and can connect successfully.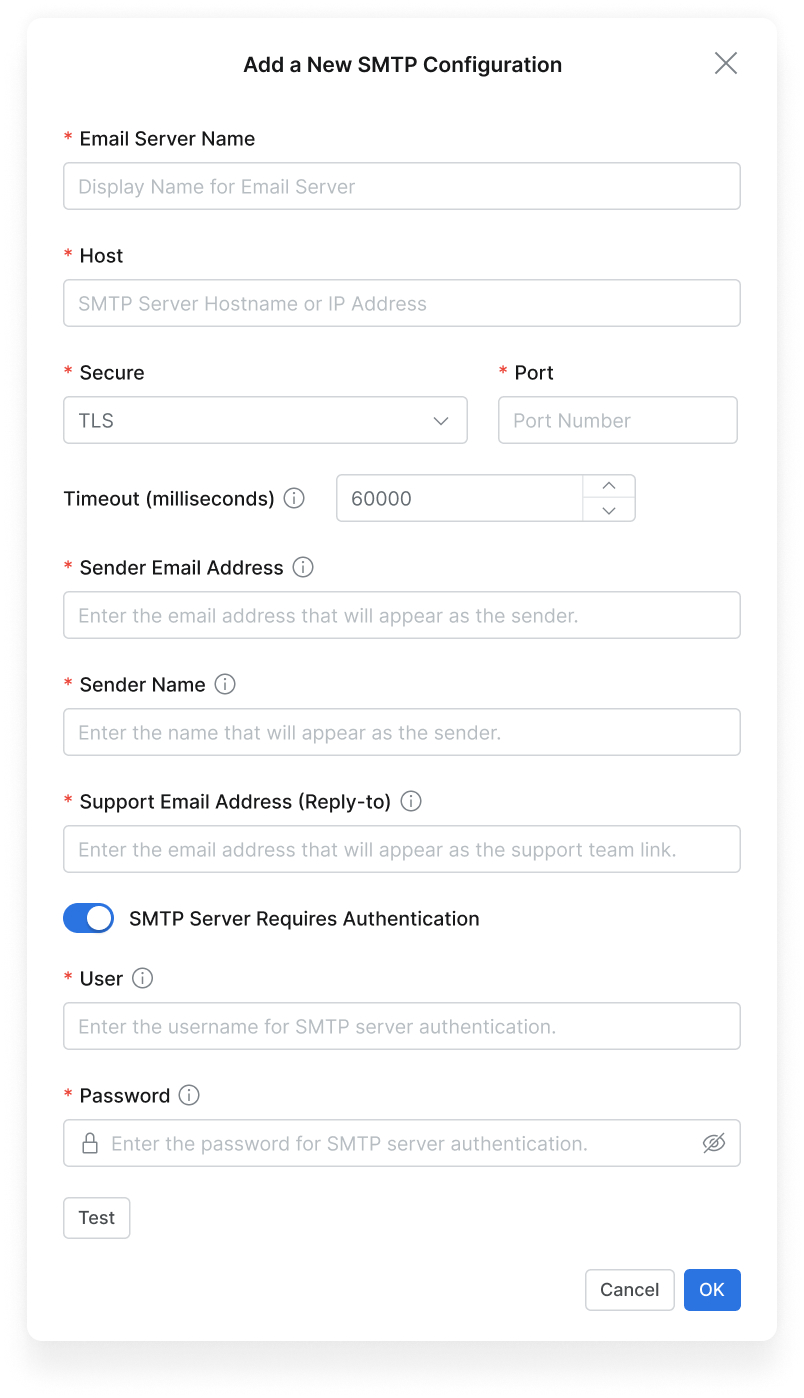
SMTP Settings Popup Dialog
Click the
OKbutton to save the settings.
Modifying Email Integration Settings
Navigate to the Administrator > General > System > Integrations menu.
Click the Email tile to navigate to the detail page.
On the detail page, click the
Editbutton for the SMTP settings displayed under Email sender.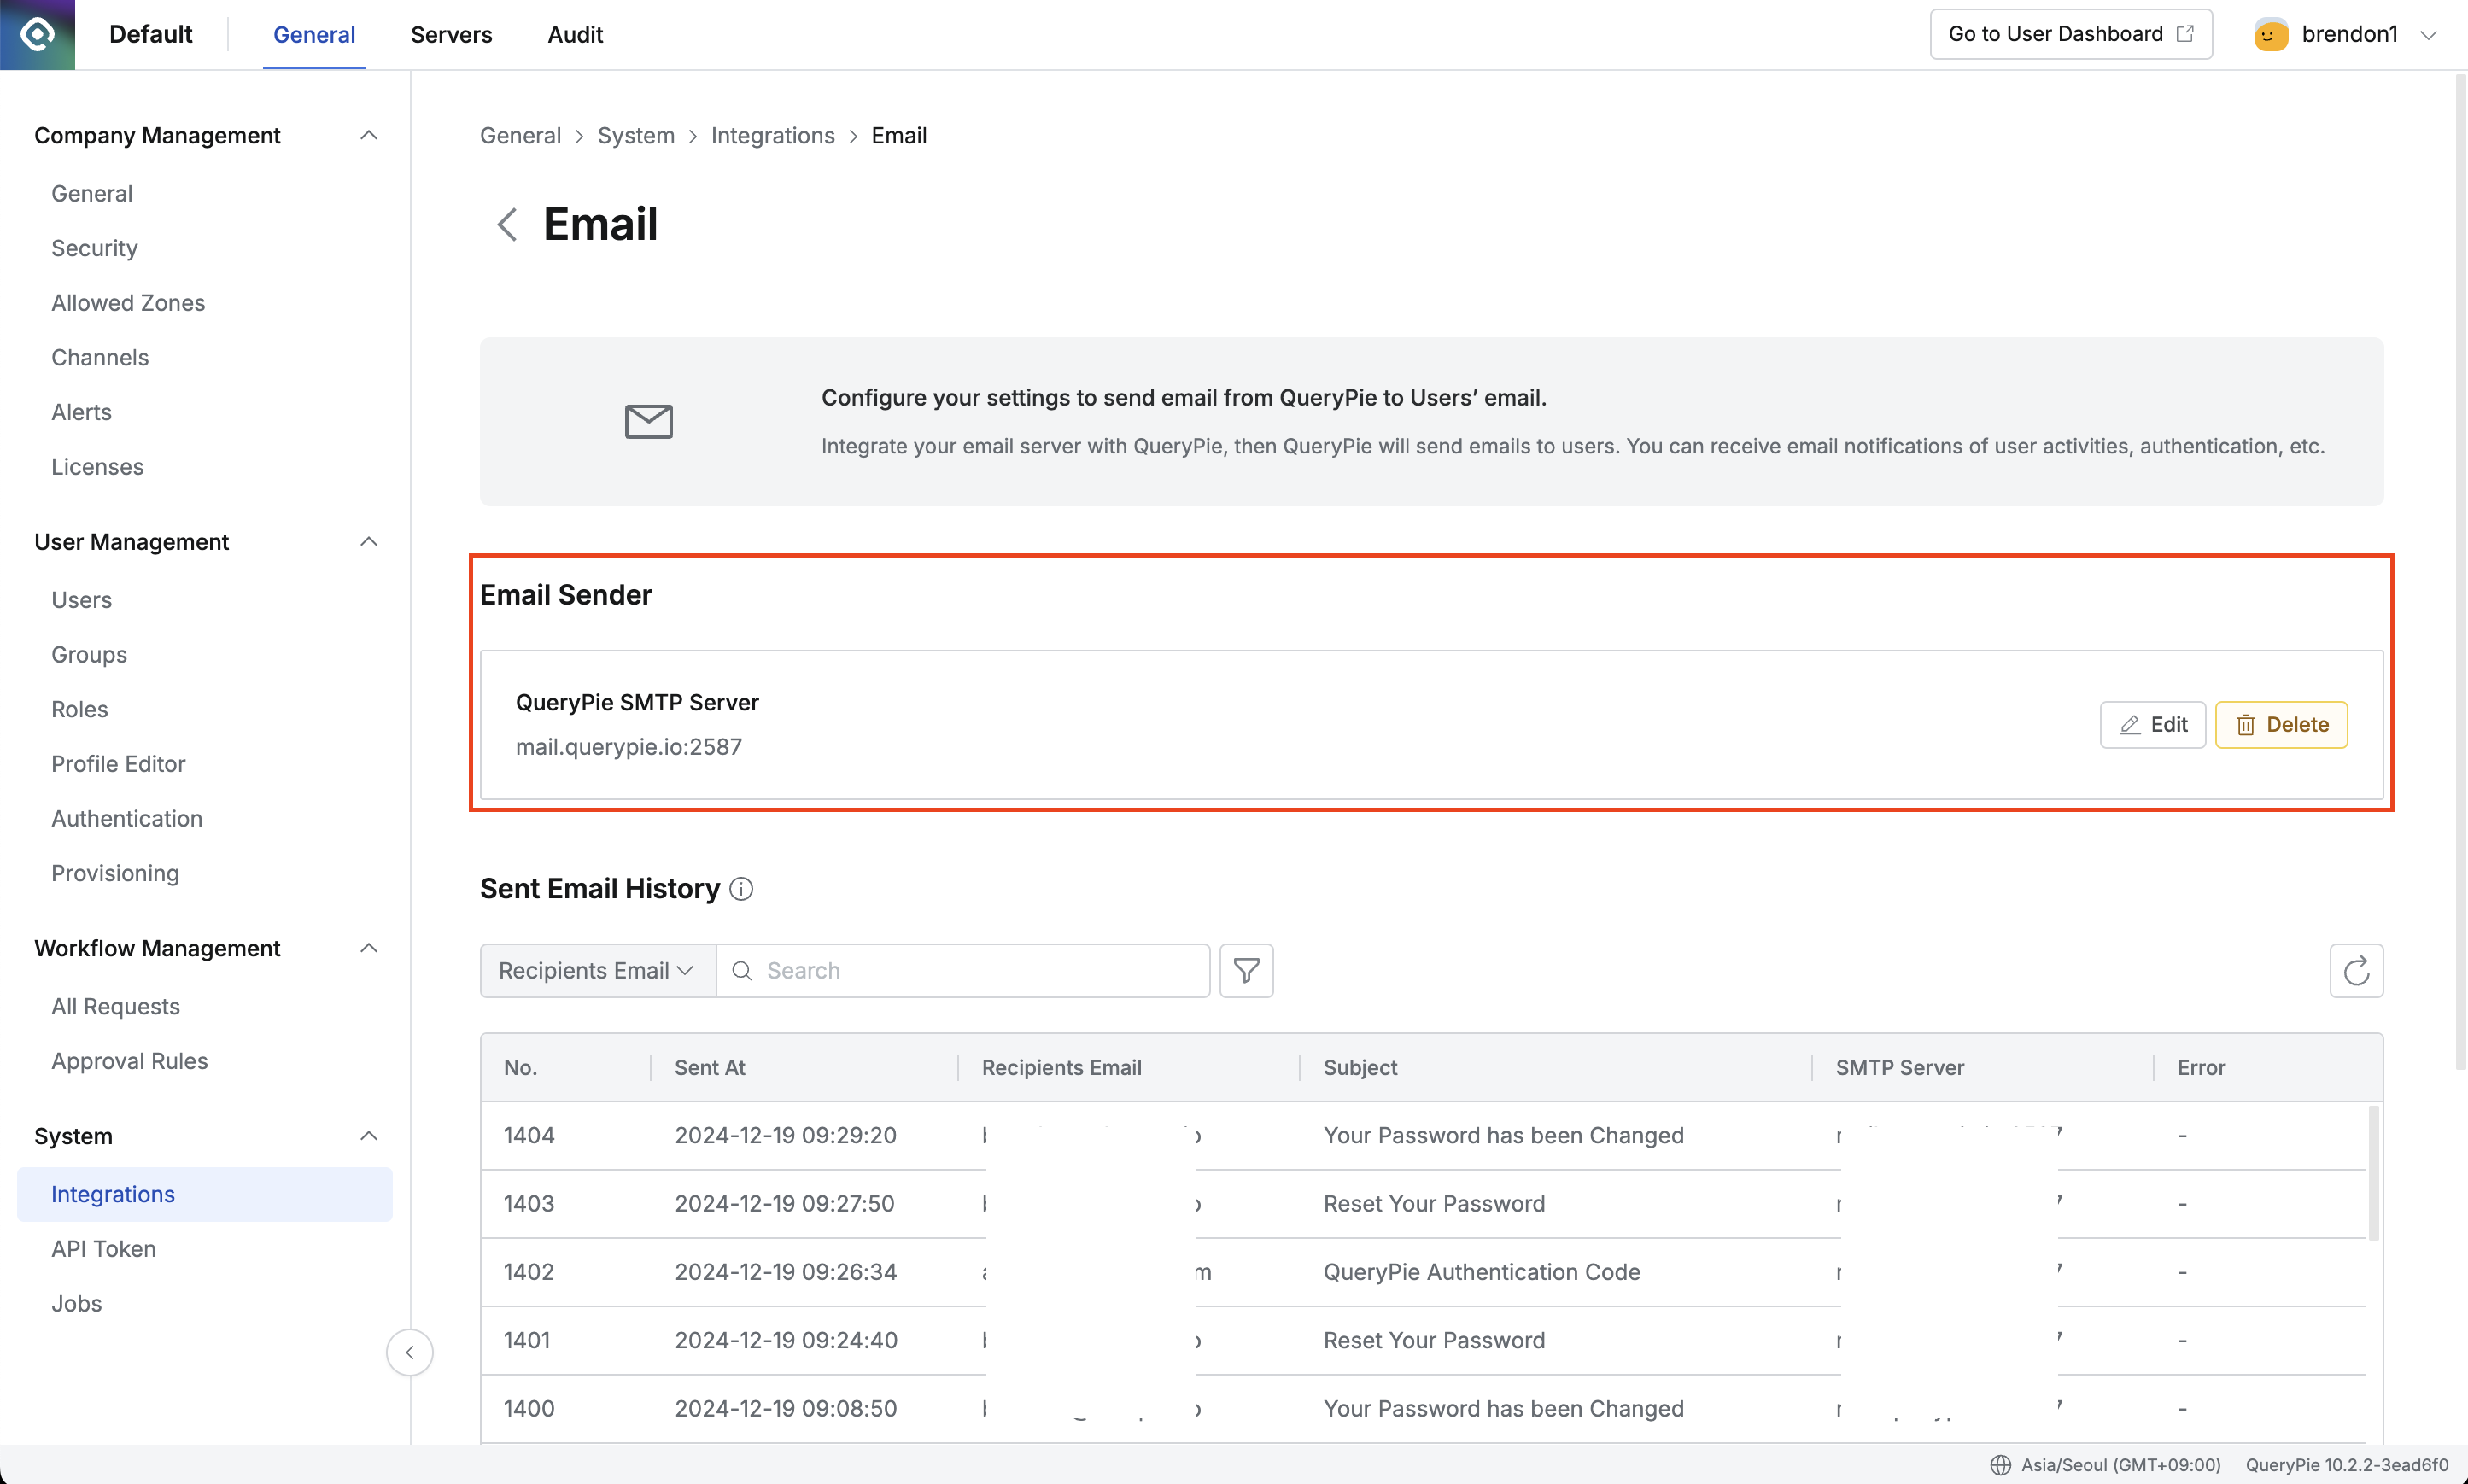
Email Sender
Make the necessary changes and save the settings.
Verifying Email Sending History
Navigate to the Administrator > General > System > Integrations menu.
Click the Email tile to navigate to the detailed page.
Review the Sent Email History list.
The email sending history stored in this list is retained for 30 days, and entries older than 30 days are deleted.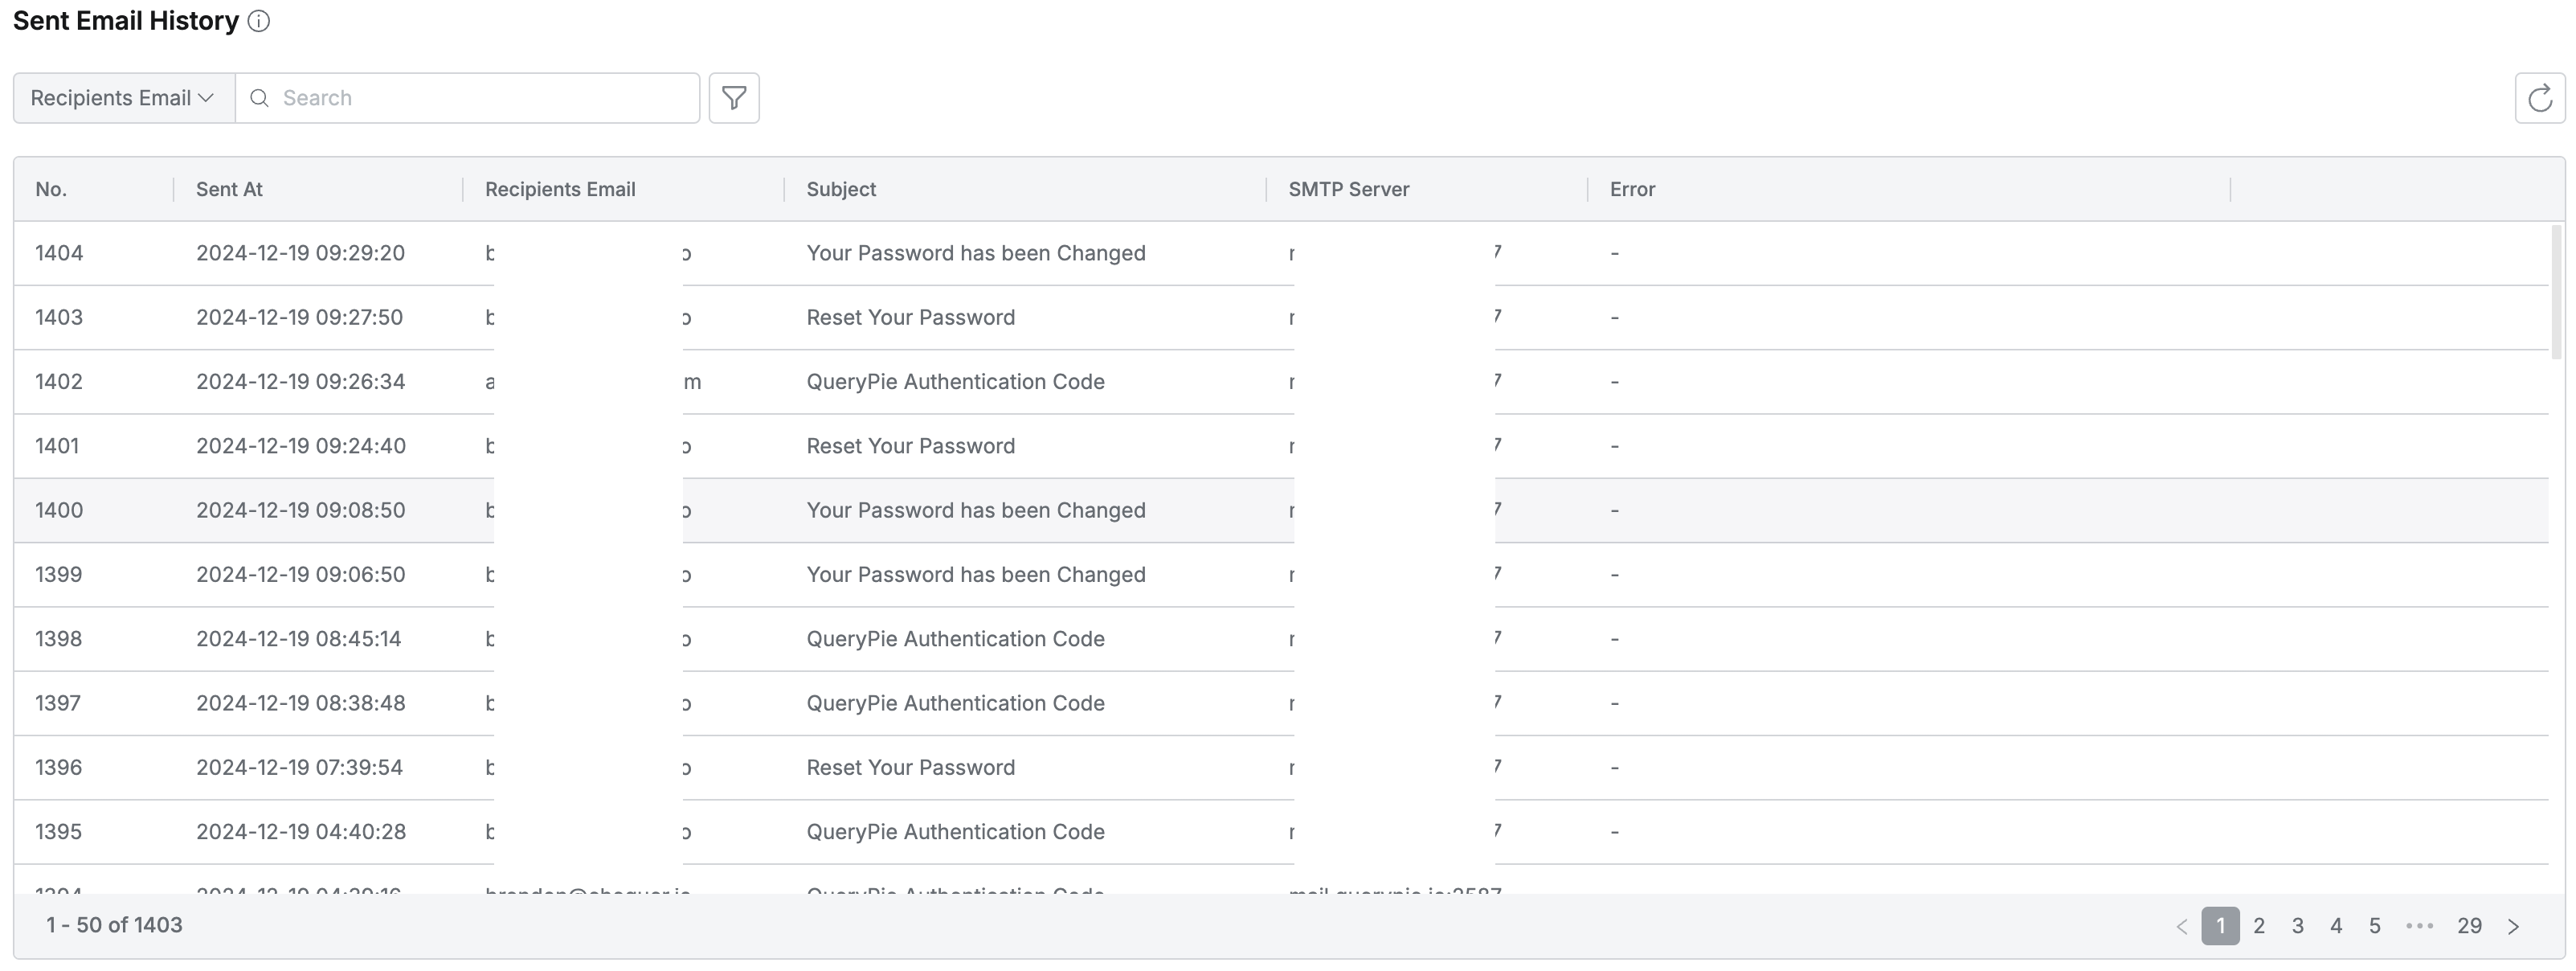
Sent Email History
Deleting Email Integration Settings
Navigate to the Administrator > General > System > Integrations menu.
Click the Email tile to go to the detailed page.
In the detailed page, click the
Deletebutton for the SMTP settings displayed under Email sender.
If there are any configurations, such as Alerts or MFA, using the SMTP settings, deletion will not be possible. You must first delete all related settings before the SMTP configuration can be deleted.Email Sender
Sending User Password Reset Email
To send a password reset email for users to reset their own password, Email Integration settings must be configured first.
Please refer to the following information on how to allow users to reset their own password via email.
Using Email as a Two-Factor Authentication Method
Starting from QueryPie 10.2.2, Email can be used as a two-factor authentication (2FA) method alongside Google OTP. Before enabling this feature, you must configure the Email Integration settings.
Refer to the instructions below to learn how to use Email as a two-factor authentication (2FA) method.