Synchronize DB Resources in Google Cloud
Overview
QueryPie supports integration with Google Cloud Platform (GCP) for database registration and management. By synchronizing resources from GCP, you can register them as managed databases in QueryPie, assign access permissions to users and groups, and configure policies for these synchronized databases.
Registering GCP Integration in QueryPie
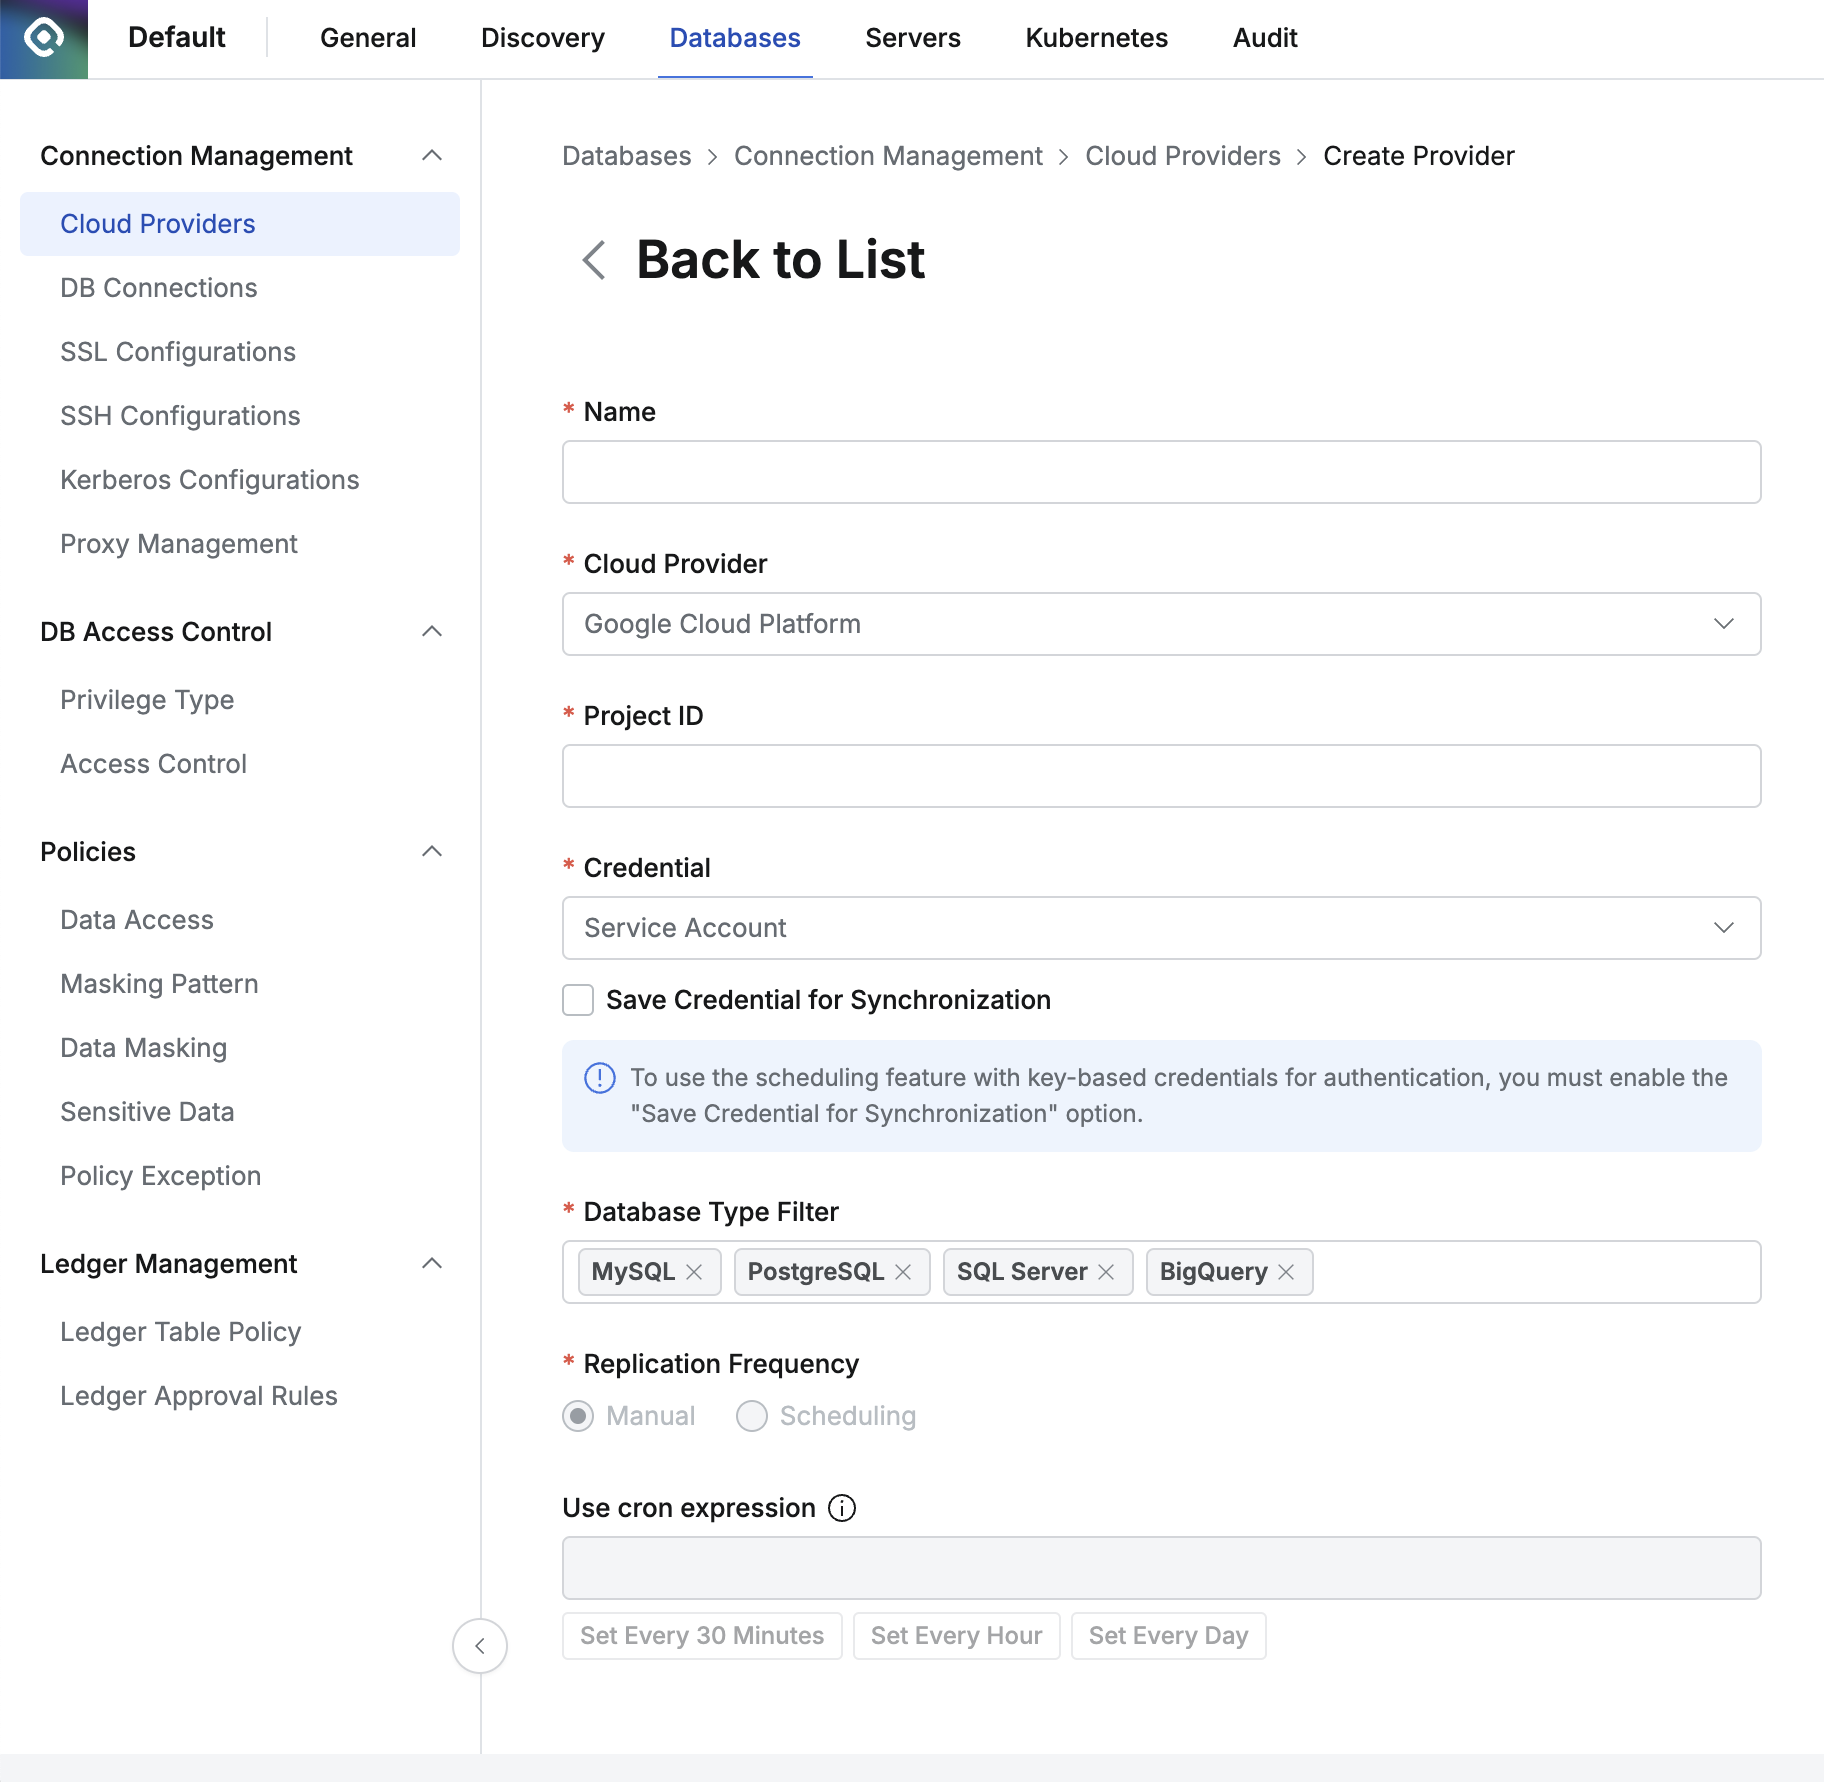
Administrator > Databases > Connection Management > Cloud Providers
Navigate to the Administrator > Databases > Connection Management > Cloud Providers menu.
Click the
Create Providerbutton in the upper right corner.Name: Enter a name to distinguish the provider.
Cloud Provider: Select Google Cloud Platform.
Project ID: Enter the Project ID for the resources to be synchronized.
Credential: Enter the required Credential information to synchronize the resources.
By clicking the
Synchronizebutton, a manual synchronization method is provided by default, where you input the GCP Service Account.Starting from QueryPie 10.2.2, the "Save Credential for Synchronization" option has been added, allowing synchronization through a schedule even when using the Service Account as the credential type.
Database Type Filter: Select the resources to be synchronized.
Replication Frequency: Choose the synchronization method:
Manual: Synchronize only when triggered manually.
Scheduling: Synchronize on a regular schedule using Cron Expressions.
Click
Saveto register the Cloud Provider.
Save Credential for Synchronization Option
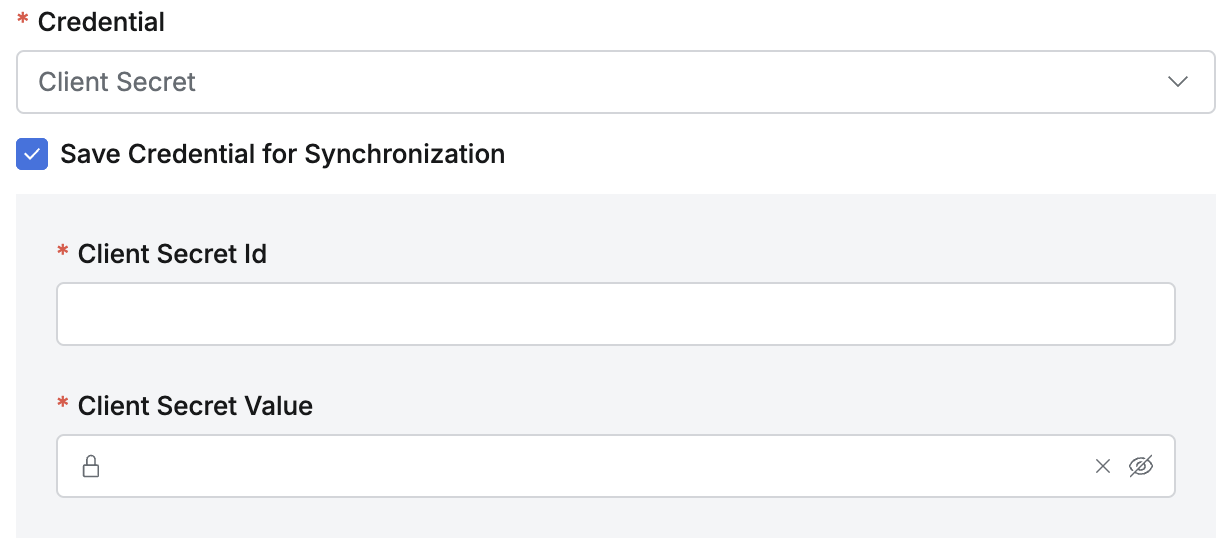
Save Credential for Synchronization
This option, once enabled and saved, cannot be disabled from the synchronization settings detail page, so it should be selected carefully. The saved credential cannot be replaced. If a different credential is needed, a new synchronization setting must be created. If a credential change is required, it is recommended to create a new credential with the same permissions, create a new synchronization setting, and then delete the existing synchronization setting.
Synchronization settings saved without this option enabled can have the option activated by checking the checkbox on the detail page.
When this option is enabled, synchronization can be done manually, or a schedule can be set.
Synchronizing and Managing GCP Cloud Providers
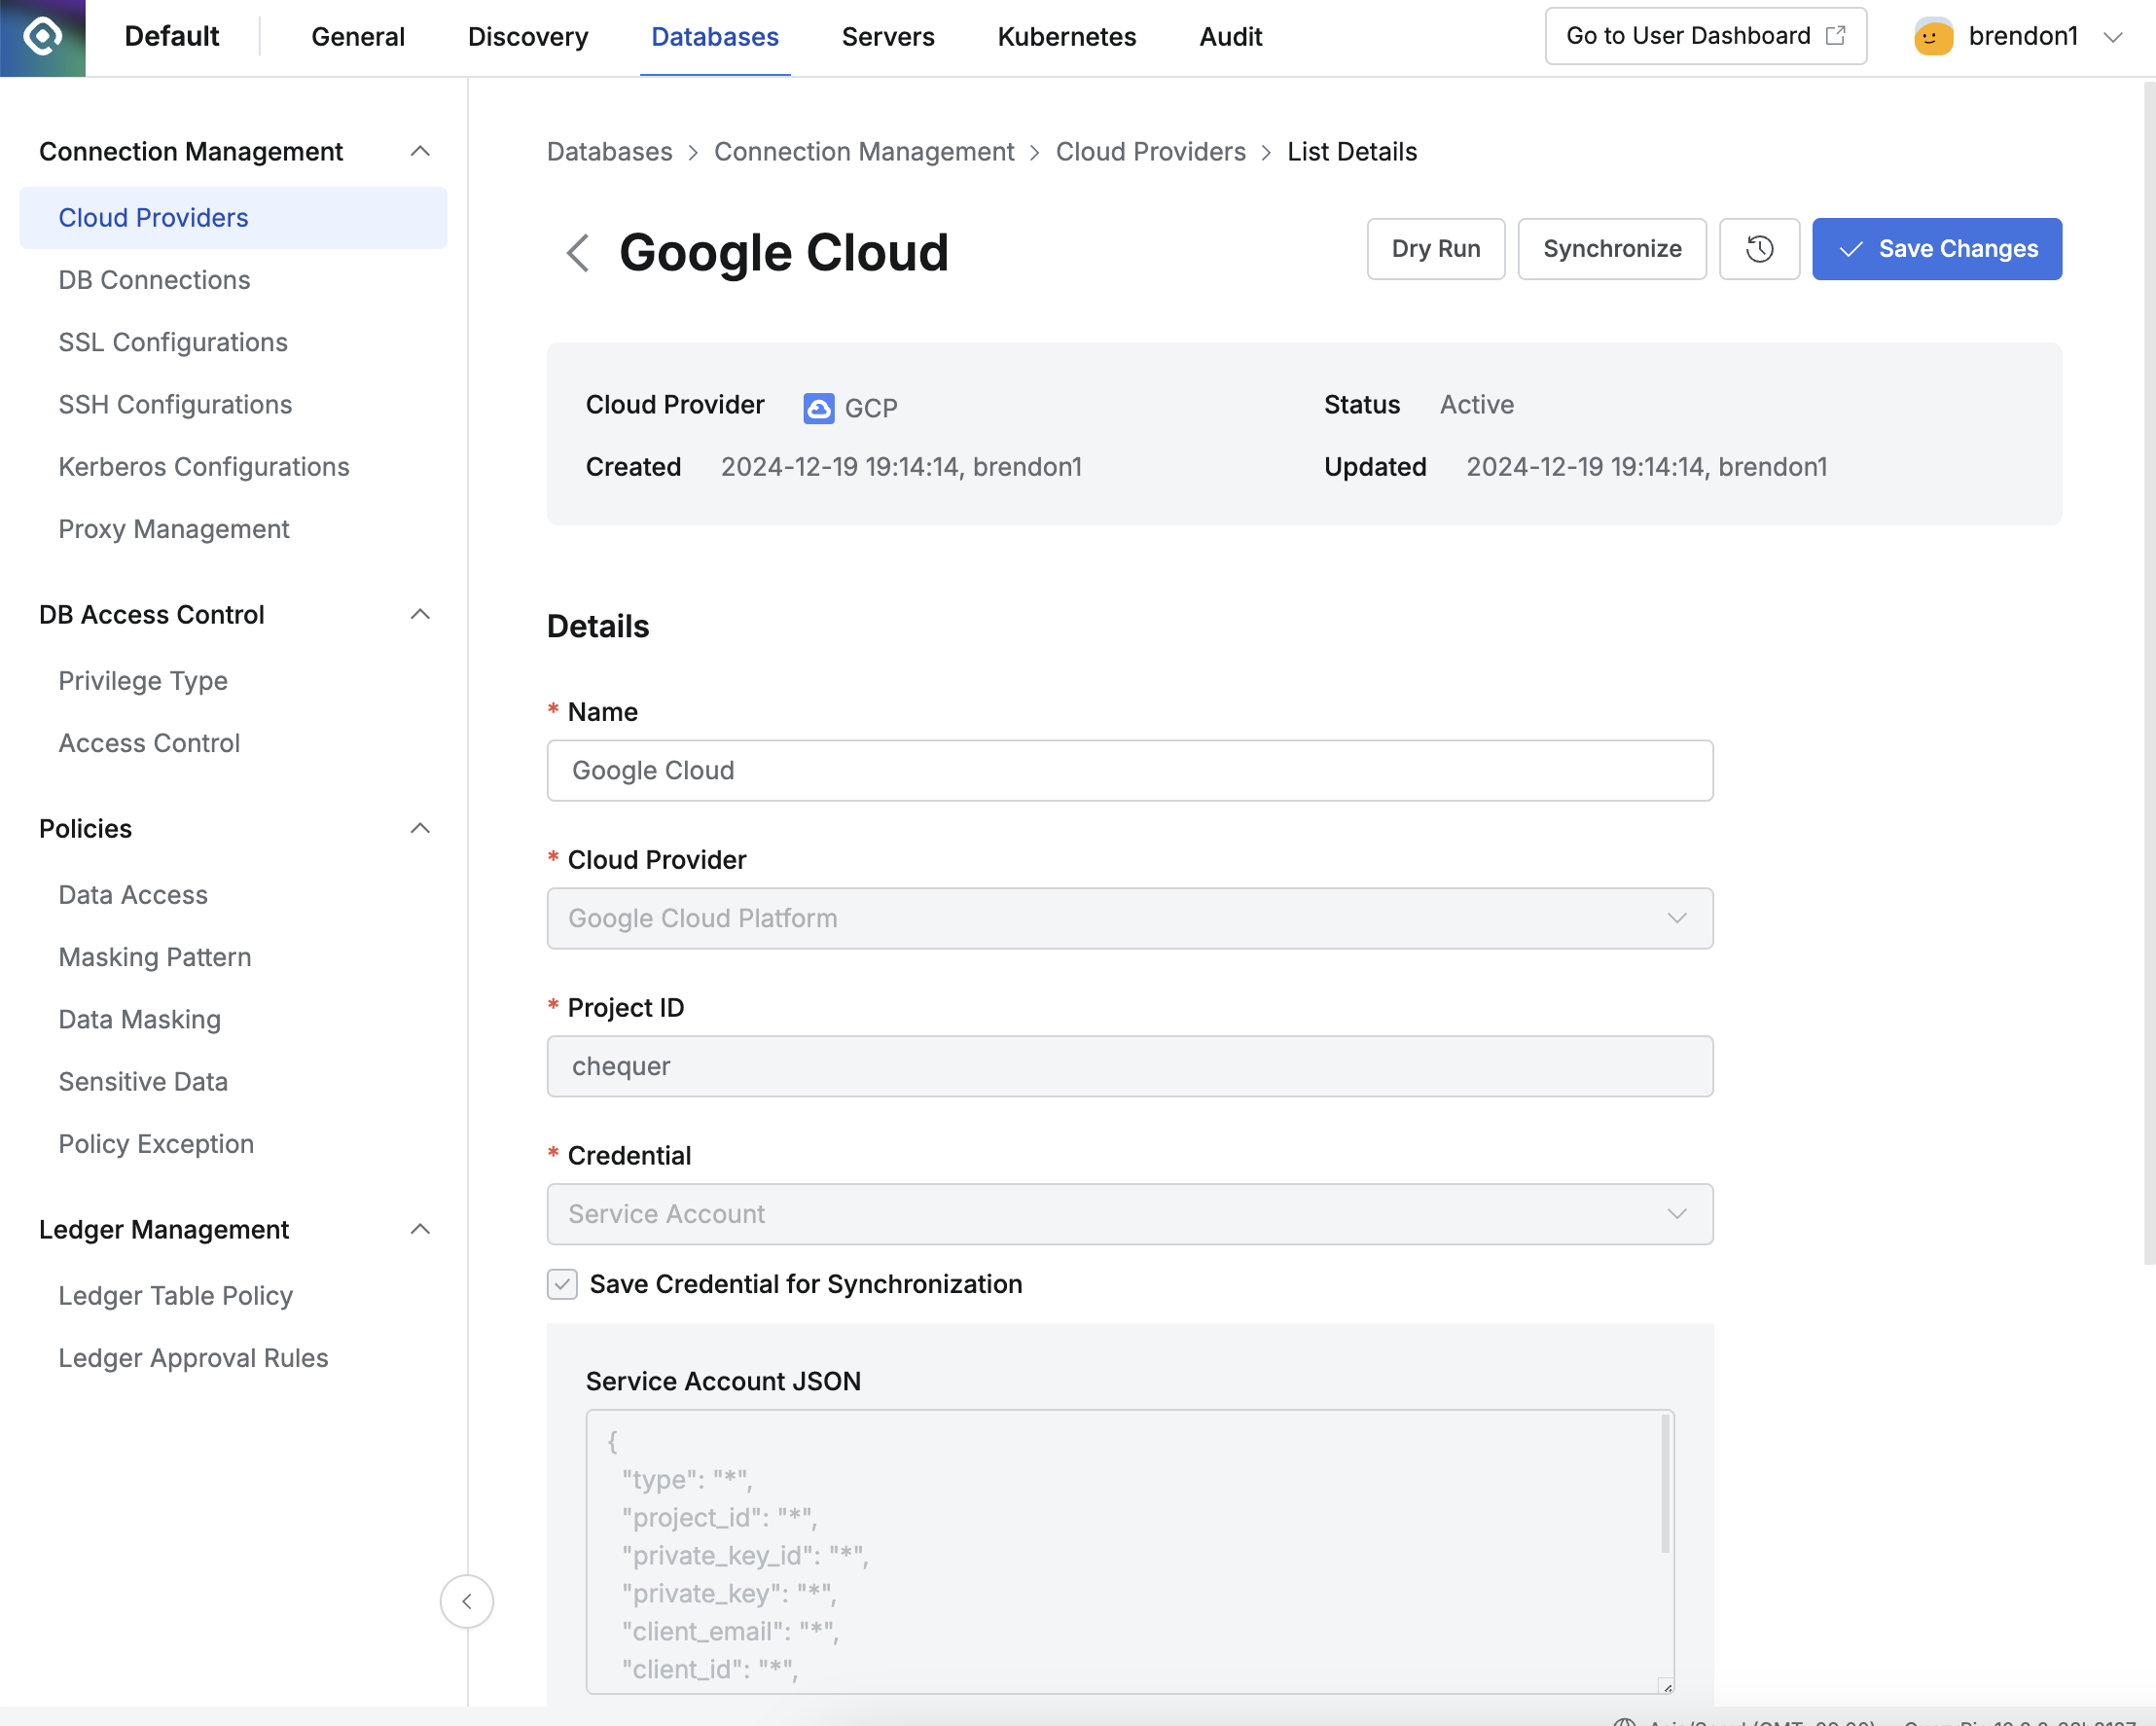
Administrator > Databases > Connection Management > Cloud Providers > Details
Navigate to the Administrator > Databases > Connection Management > Cloud Providers menu.
Click on the registered Cloud Provider to open the details screen.
Click the
Sychronizebutton in the upper right corner to sync resources from GCP.You can monitor synchronization progress in the Synchronization Log or view the history under Administrator > General > Systems > Jobs.
Once a Cloud Provider is registered, certain provider details cannot be modified:
Name: Changeable
Cloud Provider: Not changeable
Project ID: Not changeable
Credential: Not changeable
"Save Credential for Synchronization": The option can be changed from inactive to active, but it cannot be switched from active to inactive.
Database Type Filter: Changeable
Replication Frequency: Changeable
Synchronization settings saved without the "Save Credential for Synchronization" option enabled can have the option activated by checking the checkbox on the detail page. Just like when creating a new setting, once this option is activated, it cannot be deactivated again, so it should be selected carefully.
Synchronizing via Service Account
After registering the Cloud Provider for GCP, click the
Synchronizebutton in the details page.Enter the Service Account JSON key in the provided field and click
Ok.You can create a Service Account and obtain the JSON key from the Google Cloud Console under IAM & Admin > Service Accounts.
The resources synchronized with the provided JSON key can be viewed in the DB Connections menu.
Required Permissions for GCP Service Accounts
CloudSQL : CloudSQL Viewer
BigQuery : BigQuery Administrator