Ledger Table Control Policies
Overview
Within your organization, you can establish policies ensuring that any alterations to data within the ledger adhere to the SQL Request Workflow. This entails creating ledger-specific approval rules in the Ledger Approval Rules menu and associating these rules with ledger tables in the Ledger Table Policy. Upon configuration, SQL Requests necessitate approval from the designated rule before users can execute any modifications to the table, encompassing UPDATE statements.
Apply a Ledger Table Control License
A CHEQUER representative or partner representative must activate Ledger Management in your environment. Please reach out to CHEQUER or an authorized partner to initiate a license purchase.
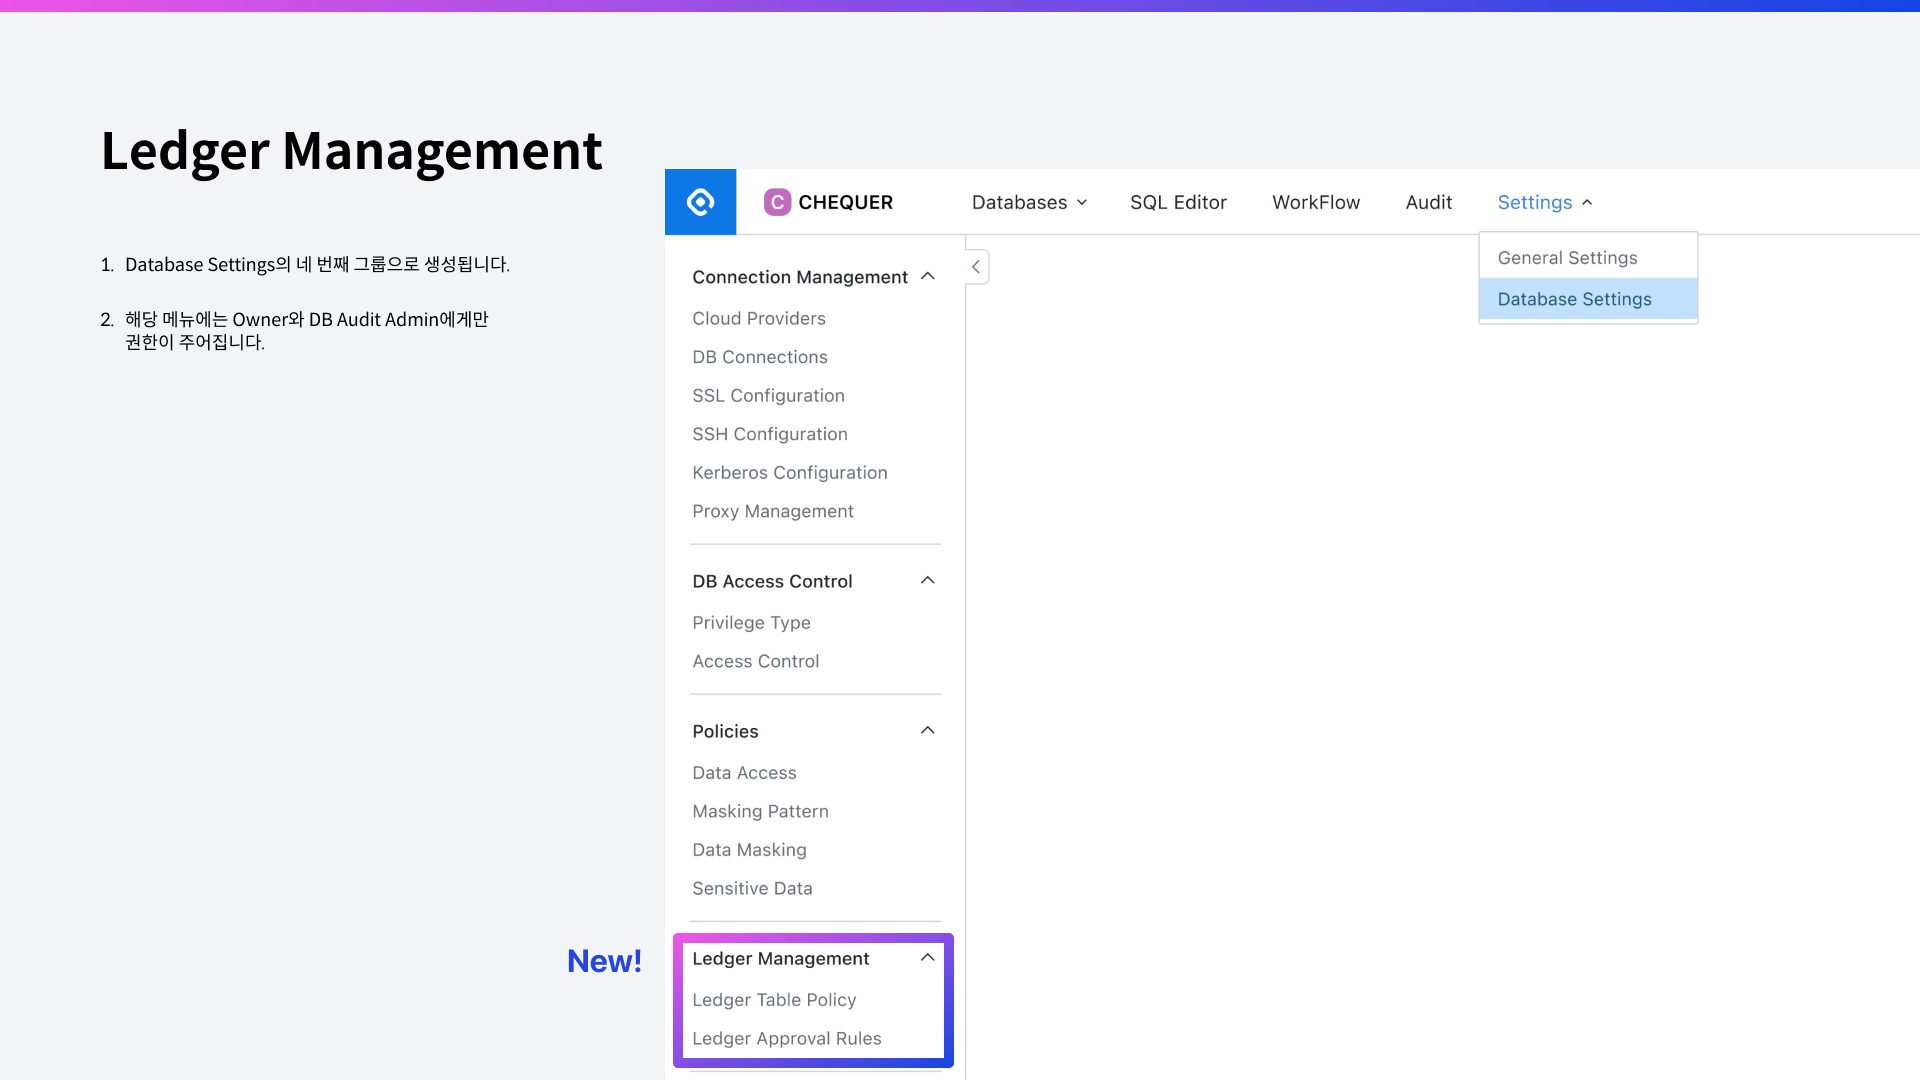
Once the feature has been activated and upgraded, you'll notice the creation of a group named Ledger Management and corresponding menu items named Ledger Table Policy and Ledger Approval Rules in the left-side menu under Settings -> Database Settings.
Access to this menu group is restricted to administrators with the Owner and DB Audit Admin roles only. Please refer to the role assignment for each administrator to ensure appropriate access.
Create a Ledger-Only Approval Rule
Create an approval rule to be enforced on the ledger table.
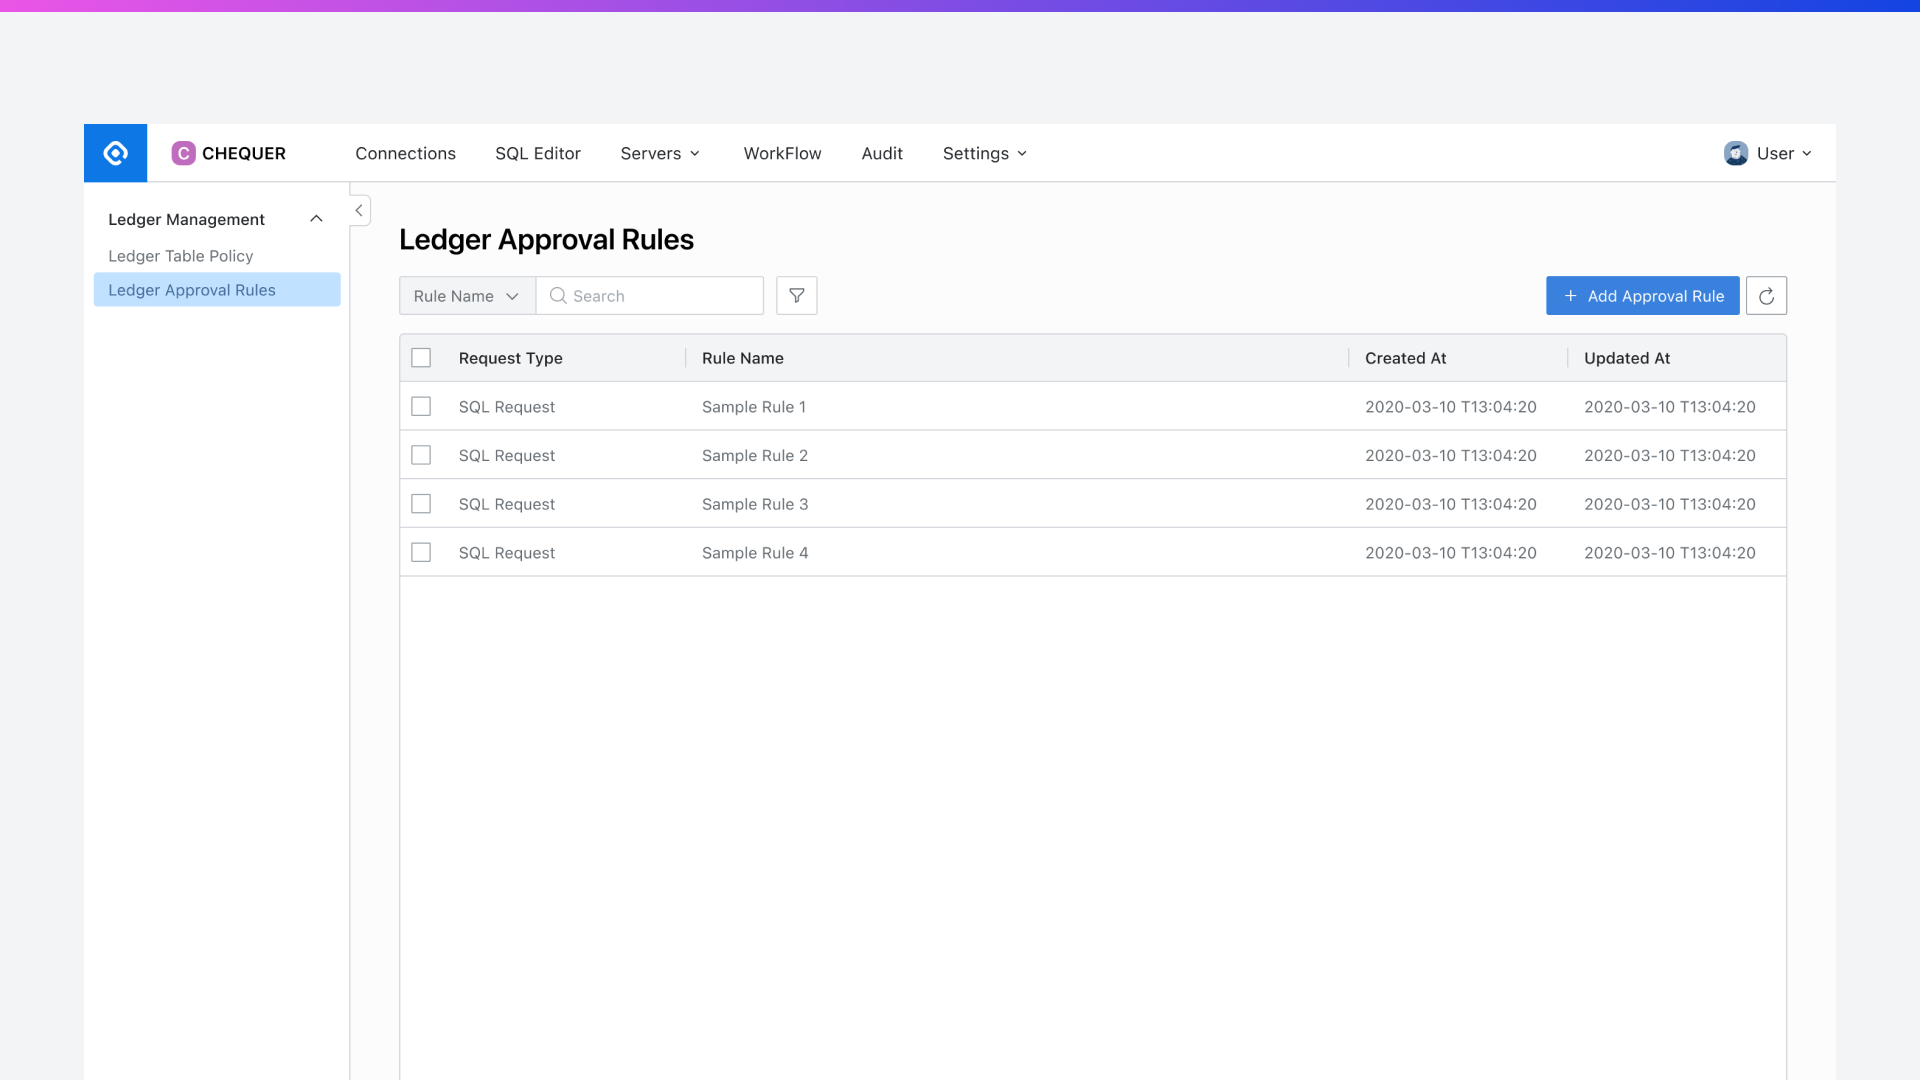
Database Settings > Ledger Management > Ledger Approval Rules
From the Database Settings menu, navigate to Ledger Management > Ledger Approval Rules menu.
Click on the
Add Approval Rulebutton located in the upper-right corner.Fill in the necessary details to create the policy:
Rule Name: Provide a descriptive name to identify the approval rule.
Request Type: Choose the type of request to which you want to add the approval rule. These rules are categorized by request type.
Approval Steps: Configure the approval rule to allow for staged approvals.
* You can add multiple approval steps by clicking the "Add Step" button. Note that up to three steps can be added.
* For detailed options for selecting approvers, please refer to the description of the approval rule details options below.Execution Steps: For the SQL / Export Request type, set rules for the executor.
* For detailed options for selecting an executor, please refer to the description of the approval rule details options below.
Urgent Mode : Optionally, enable urgent mode if post-approval functionality is required. By default, this is turned off.
Save your settings by clicking the
Savebutton.
For detailed options regarding approvers and executors, please refer to the documentation available at the following link: https://chequer.atlassian.net/wiki/spaces/QS1/pages/369361635.
Map Approval Rules to Tables
Map the approval rules you created earlier to the desired tables. Create a database-level policy, and within it, set a rule to link the approval rule to the desired table. Afterward, users attempting modification queries on that table, such as UPDATE, will be required to submit SQL requests through the corresponding approval rule.

Database Settings > Ledger Management > Ledger Table Policy
In the Database Settings menu, navigate to Ledger Management > Ledger Table Policy menu.
Click on the
Create Policybutton located in the upper-right corner.Enter the following details to create the policy:
Target Connection : Choose the connection containing the tables subject to policy enforcement.
Target Databases : Select the databases housing the tables under policy enforcement. You can select multiple databases simultaneously.
Save your settings by clicking the
Savebutton.
You will now see a policy listed under Ledger Table Policy, covering one database unit.
There is only one vendor that supports ledger table management: MySQL. Therefore, only MySQL is exposed in the connection list.
Next, select the desired policy to navigate to its detail page, which will list all the tables that the database holds. From here, map the Ledger Approval Rule to the table that should be managed as a ledger. After mapping, click on Save Changes, and you are done setting up the policy.
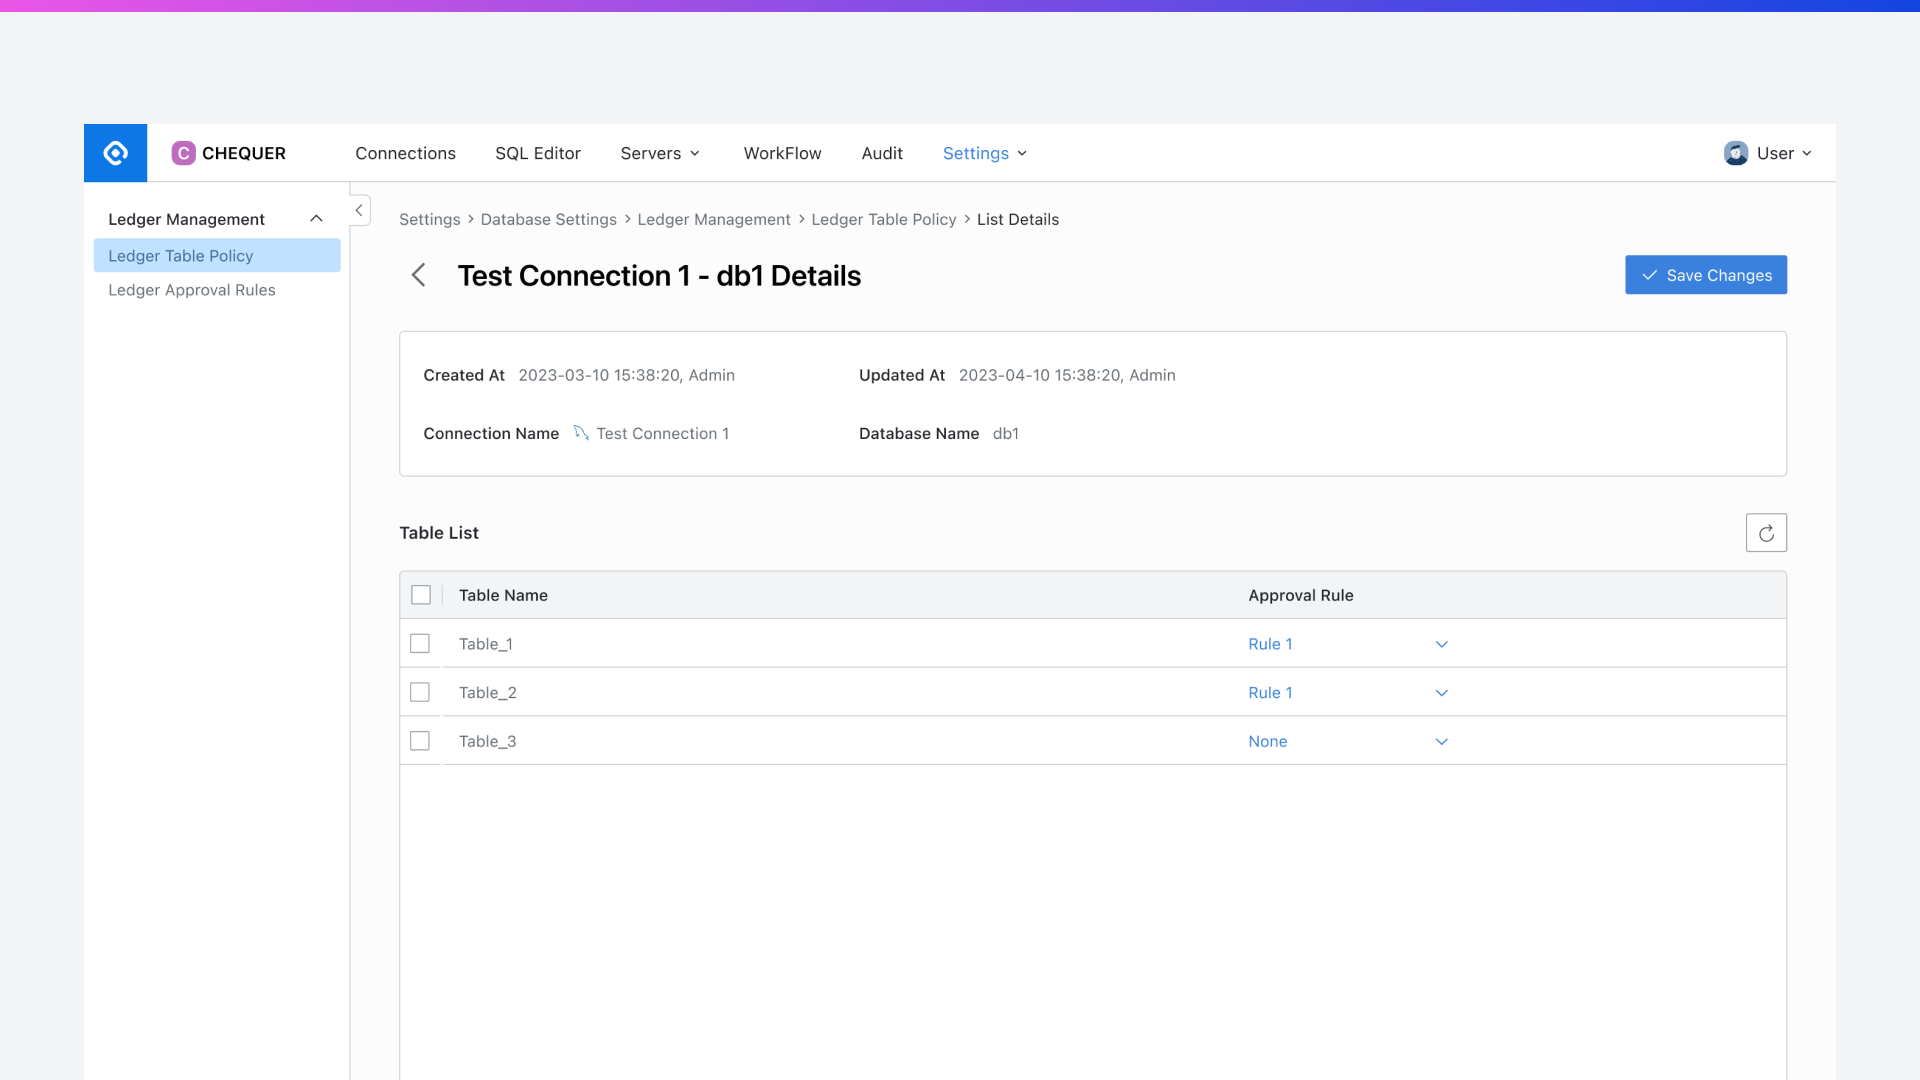
Database Settings > Ledger Management > Ledger Table Policy > Detail
Changes Applied to QueryPie When Setup Is Complete
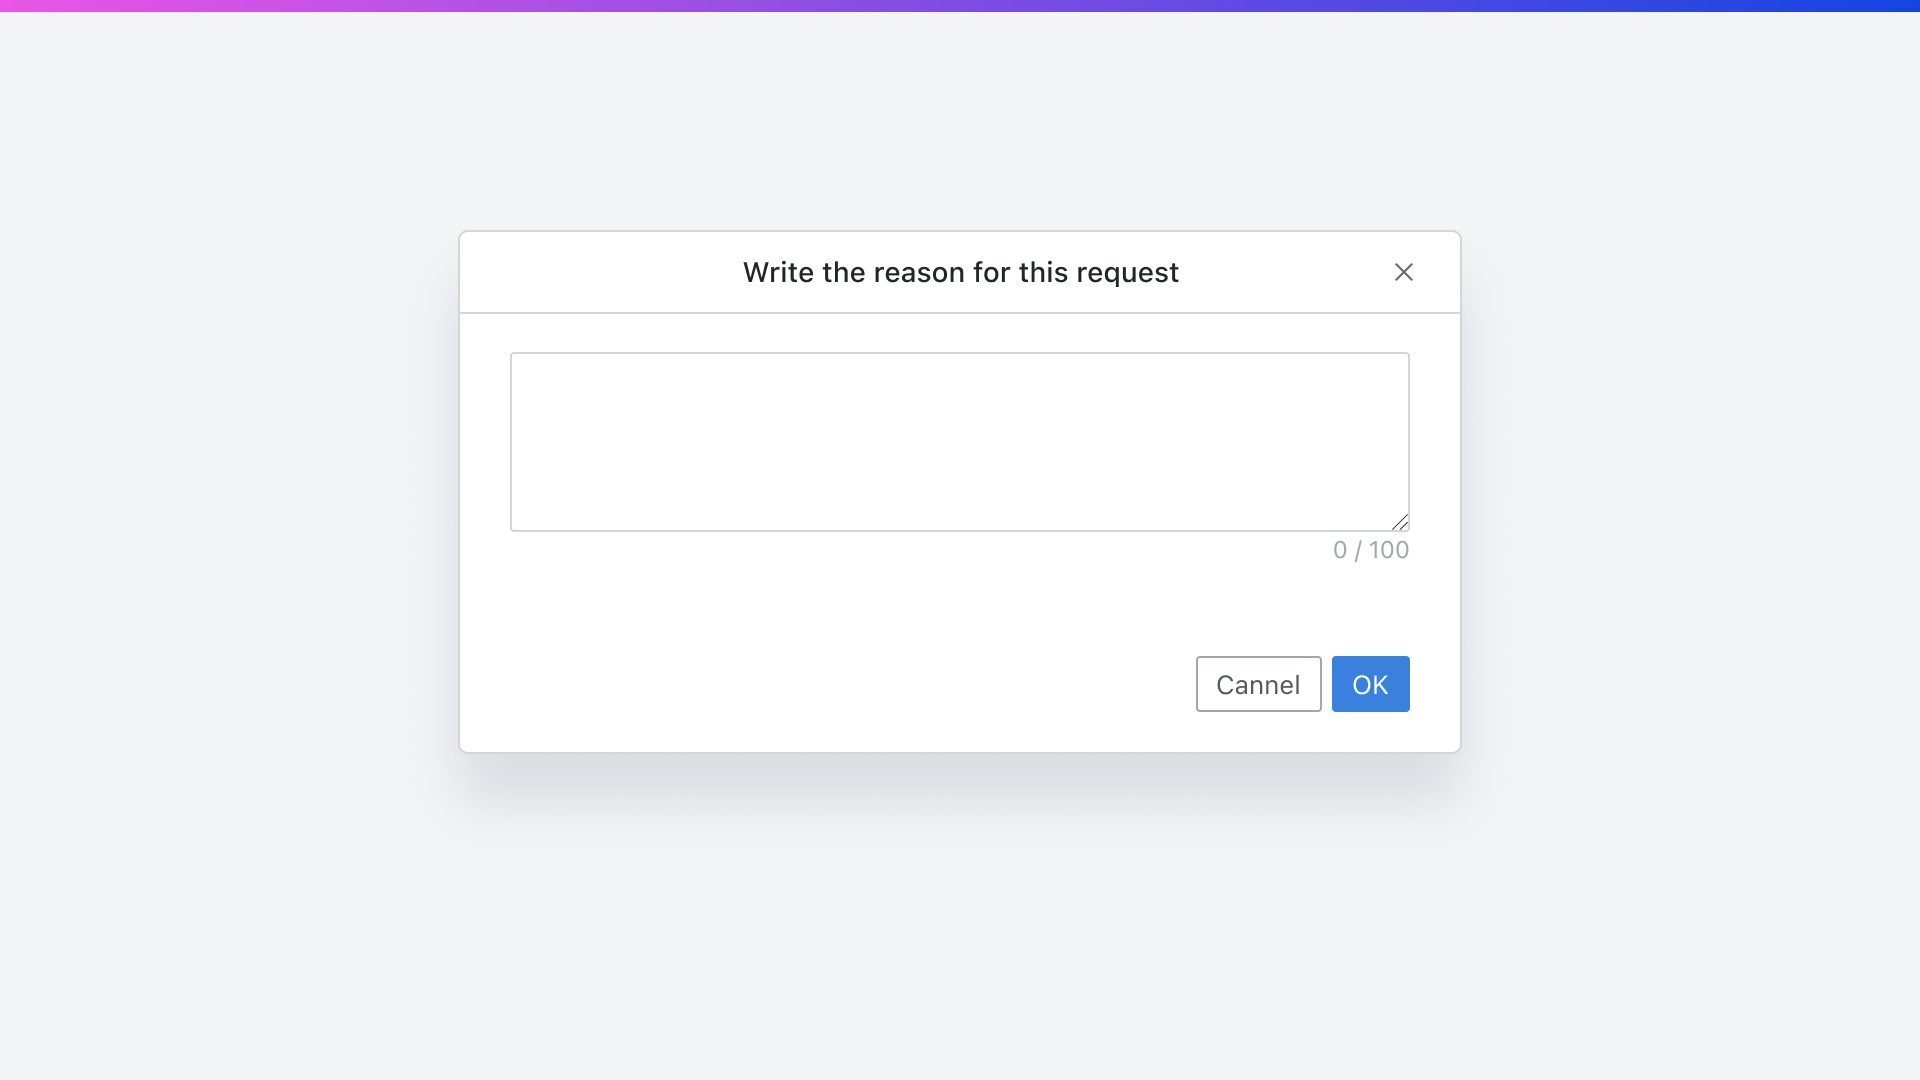
When attempting a SELECT operation on a table designated as a ledger, you must always provide a reason for the request.
If you attempt to execute a DML command that modifies data, such as UPDATE, an error message will appear along with a SEND SQL REQUEST button. Clicking this button will redirect you to the SQL Request screen. Once redirected to the SQL REQUEST screen, the user cannot change the Approval Rule.
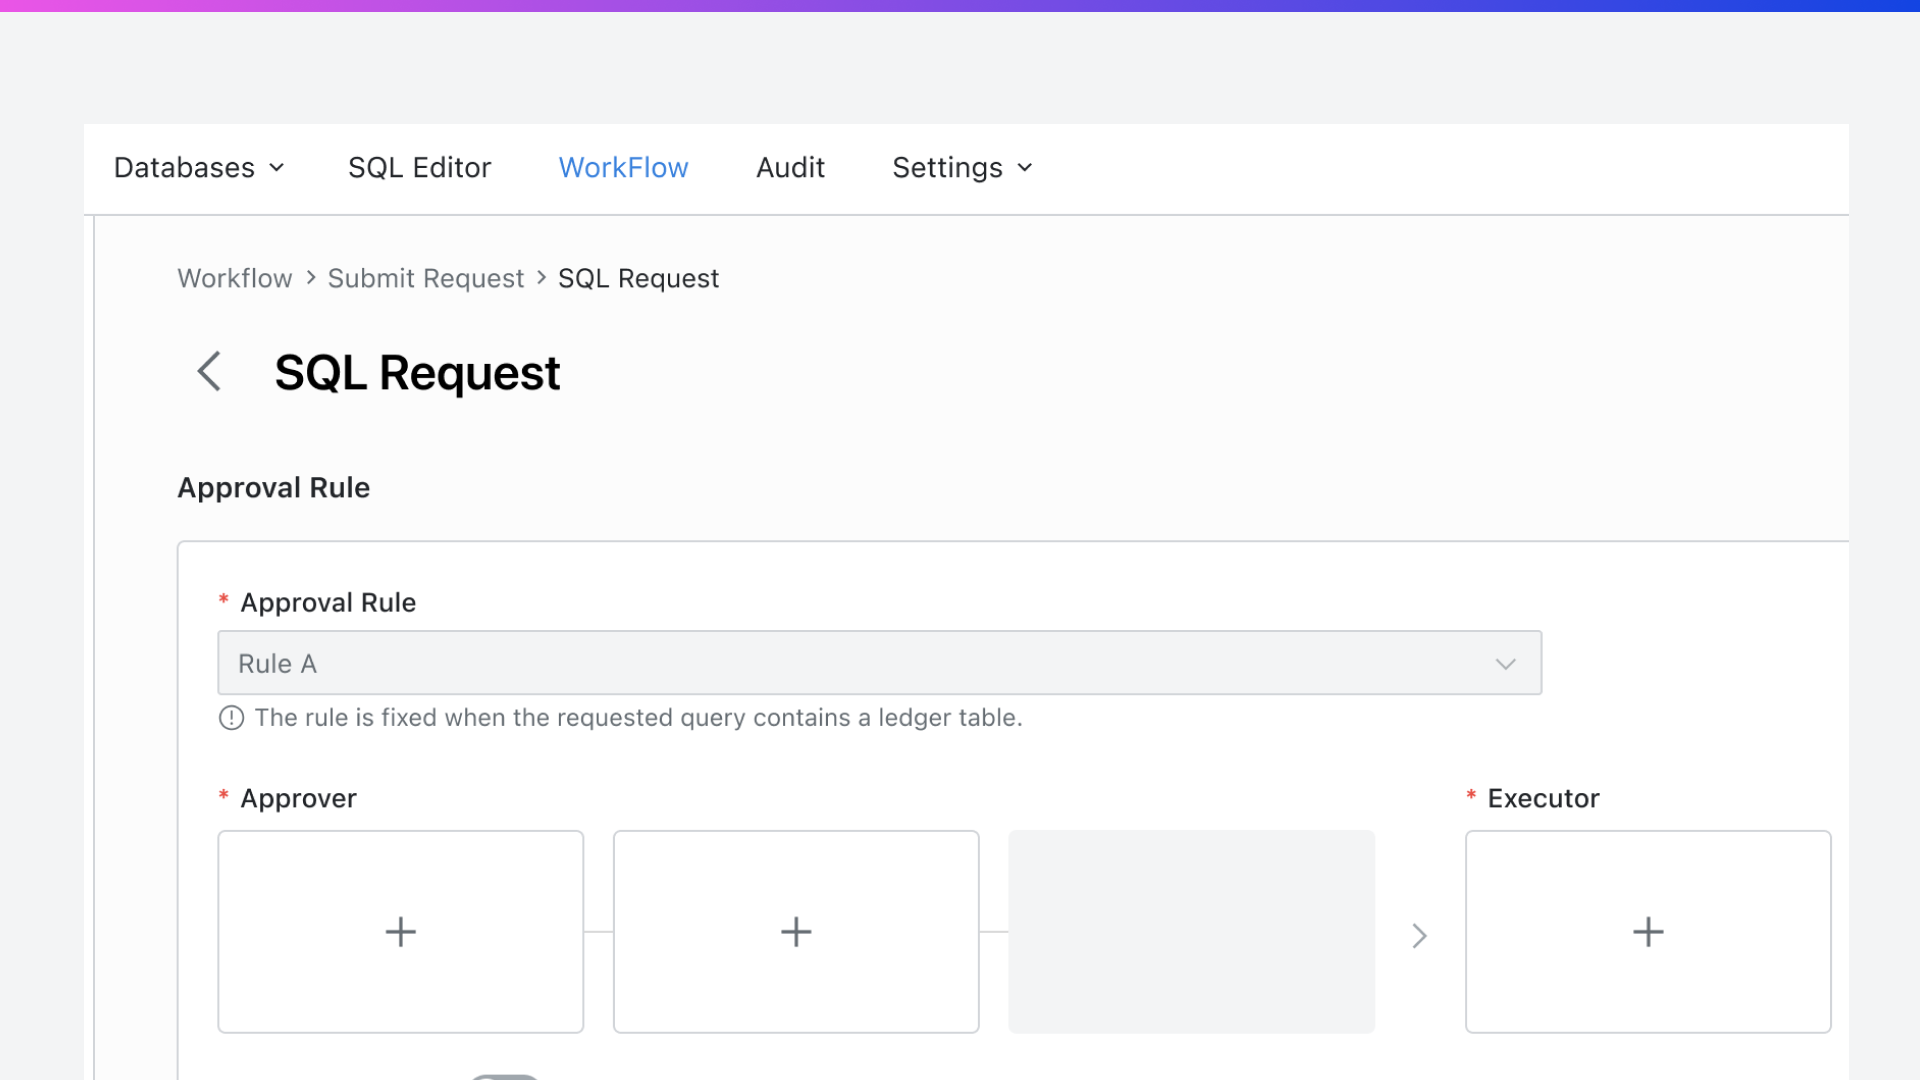
Approval requests that involve ledger tables, like this one, are marked with an "L" icon in the list, as shown below.

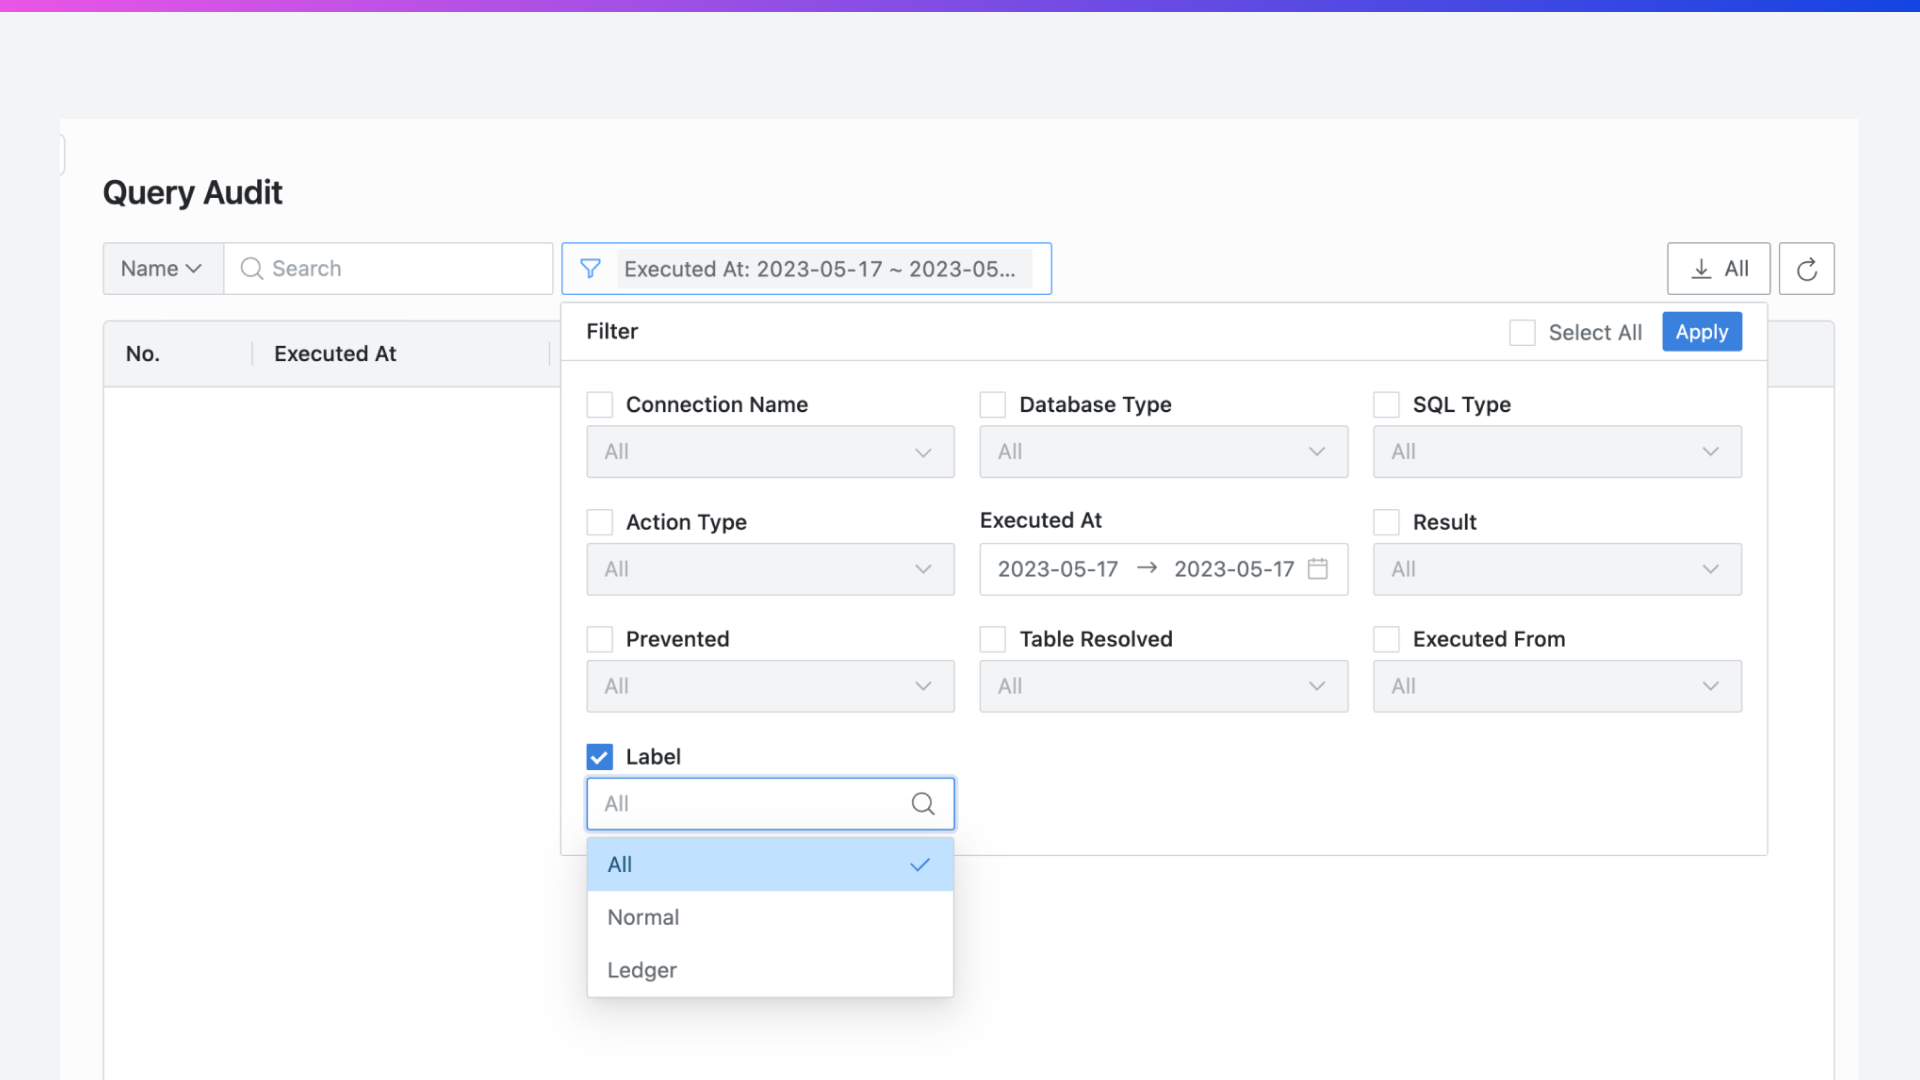
The syntax executed through this draft will include the label 'Ledger' in future Query Audits.
Related Topics