Sensitive Data Policies
Overview
You can learn how to establish sensitive data policies for managing data within your organization, such as personal or sensitive information. Navigate to the Sensitive Data menu, where you can create policies by selecting the connection you want to apply them to. From there, you can register and manage rules for sensitive data, specifying restrictions by table, column, or both. Once a policy is created, you can monitor access history through a dedicated log and receive notifications via the Alert feature. This allows you to stay informed about any unauthorized access or suspicious activity related to sensitive data, ensuring comprehensive data protection and compliance.
Create a Sensitive Data Policy
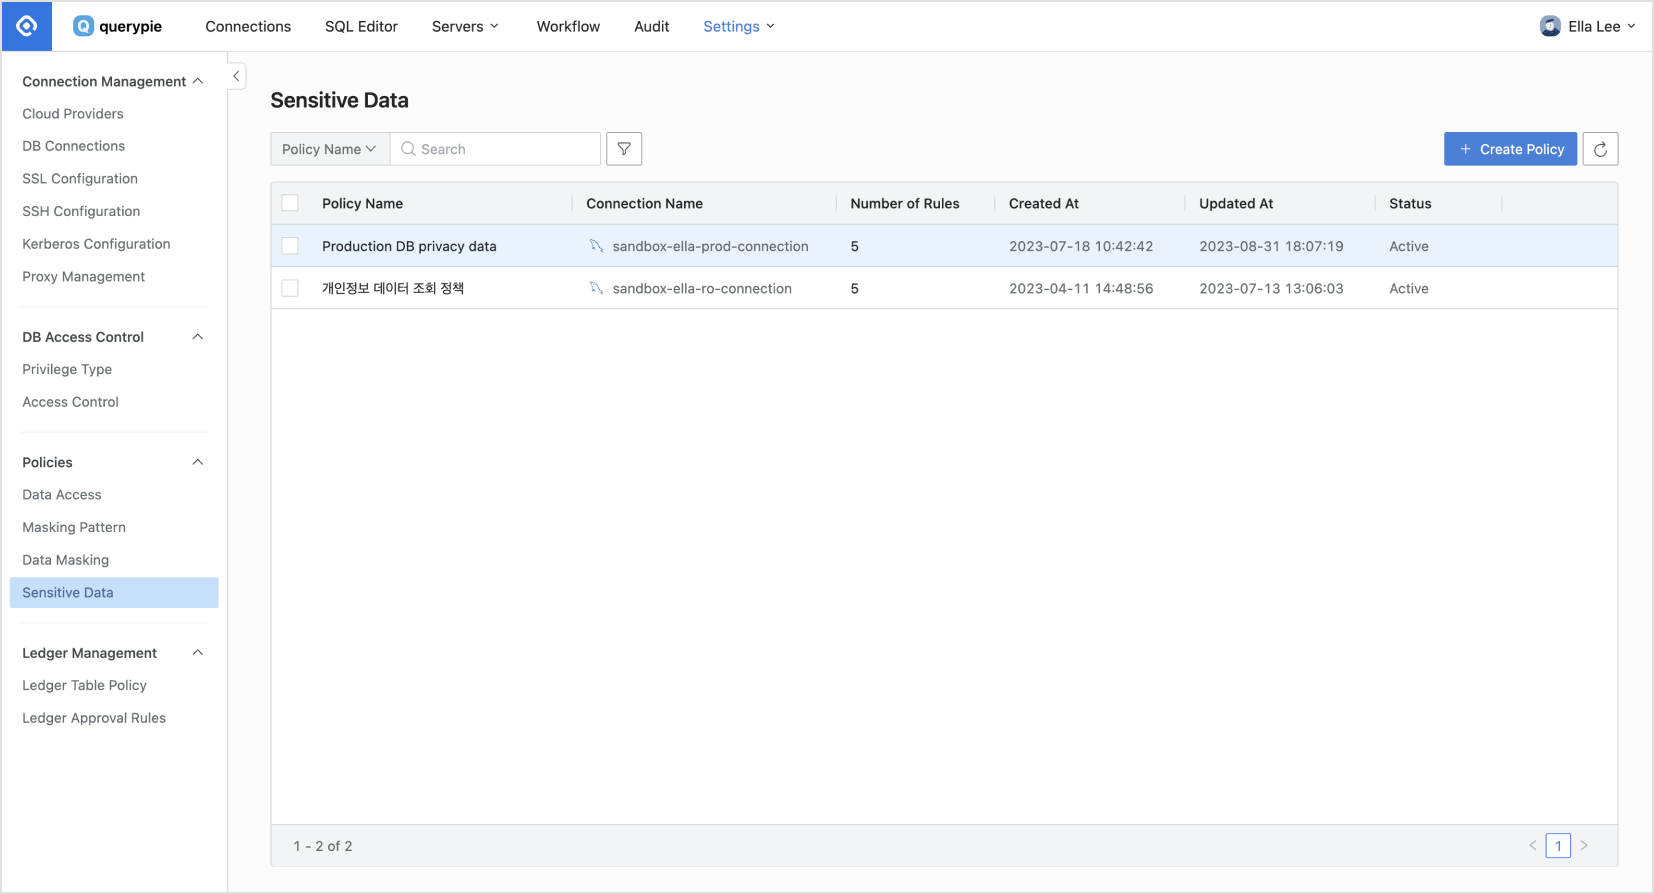
Register a sensitive data policy by connection.

Database Settings > Policies > Sensitive Data
From the Database Settings menu, navigate to Policies > Sensitive Data menu.
Click the
Create Policybutton located in the upper right corner.Enter the necessary details to create the policy:
Policy Name : Provide a descriptive name to distinguish the policy.
Target Connection : Select the connection to which the policy will apply. Each policy can be linked to one connection.
Save the policy by clicking the
Savebutton.
You will then view the newly created policy listed in the Sensitive Data policy list.
Register a Rule in a Sensitive Data Policy

Database Settings > Policies > Sensitive Data > Add Rule List
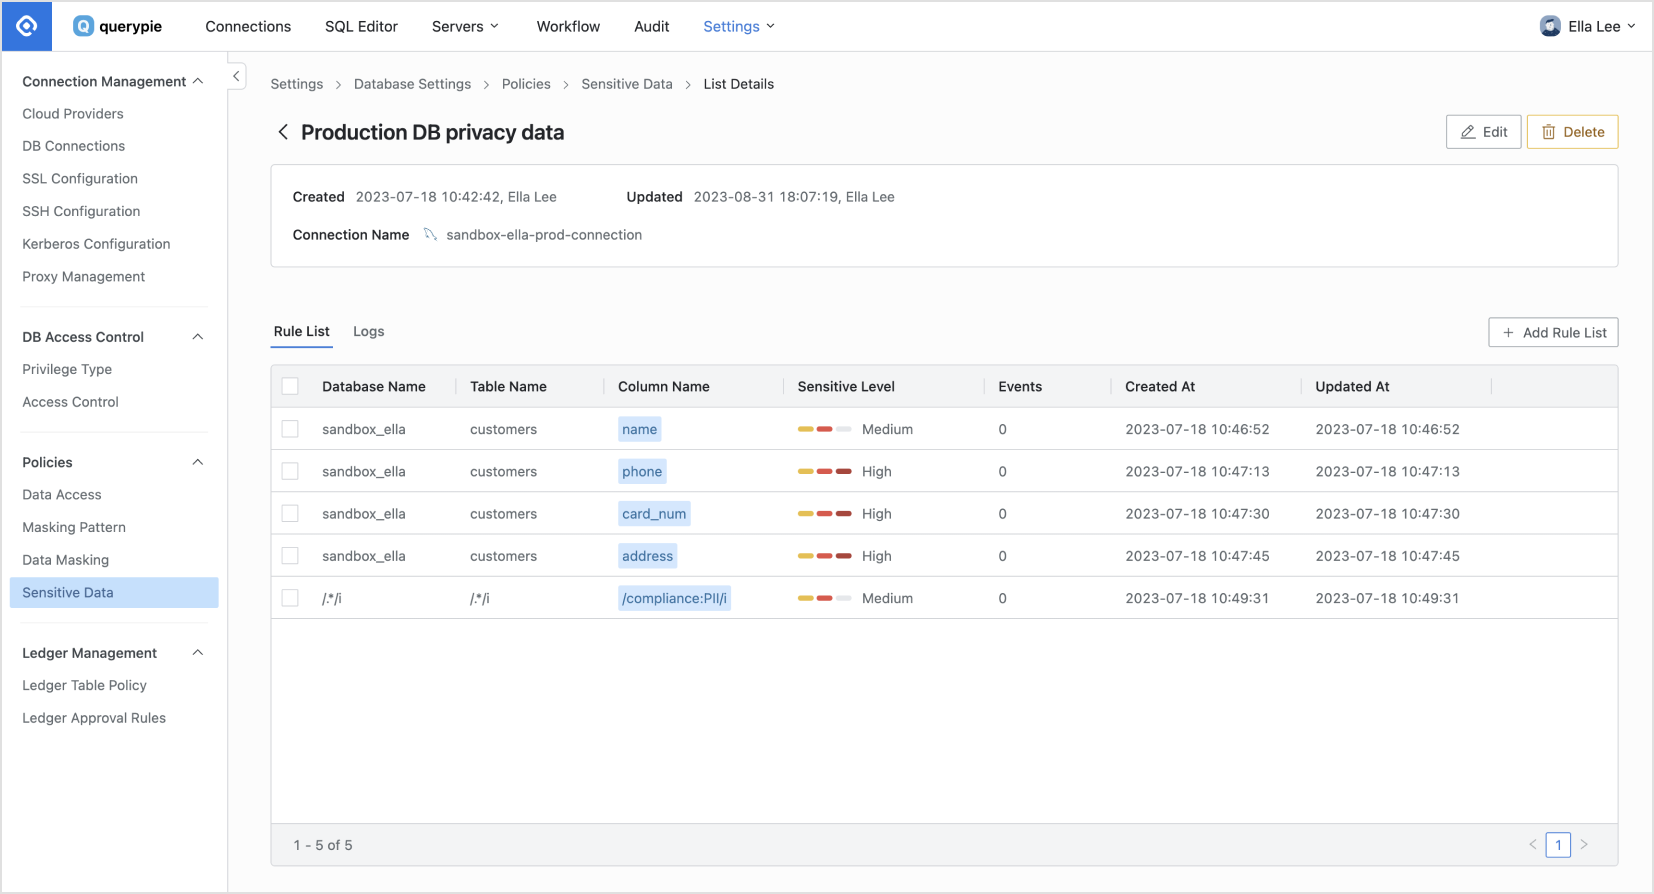
After creating a policy, proceed to register the data paths to which you want to apply the policy as rules.
In the Sensitive Data menu, locate and click on the policy you created.
The Policy Details and Rule Registration screen will appear. On the right side, click the
Add Rule Listbutton.Select the paths of data to which you want to apply the policy:
Database Name : This is a required value for rule registration.
Table Name : Required for registering the rule. Selecting the entire table data sets it as sensitive data.
Column Name : Choose a specific column if you want to apply the policy only to that column within the selected table.
Choose the sensitivity level for the data:
Select one of three levels: High, Medium, or Low.
The selected Sensitive Level information can be set as a trigger condition for future alerts.
Save your settings by clicking the
Okbutton.
On the Rule List tab, you can view the registered rule. When a user accesses that data, you can review the access history on the Logs tab.
If you want to set a sensitive data policy as an alert, refer to the documentation at https://chequer.atlassian.net/wiki/spaces/QS1/pages/370016610.
Q. When selecting Database Name, the error "[ENGINE] [30101] Please Check the user credential or IP ACL settings. Access denied for user 'username'@'host' (using password: YES)" occurs.
A. It is likely that the DB account information is either not set or set incorrectly. To address this:
Navigate to the Database Settings > DB Connections menu.
Click on the connection information associated with the database.
Enter the correct Database Username and Password information.
Save the changes.
Retry the operation.