MongoDB Data Policies and Rules
Overview
You can establish data access restrictions and masking policies for Collections and JSON Values to safeguard MongoDB data, ensuring that sensitive or personal information remains concealed during queries. MongoDB, among the DBMSs supported by QueryPie, necessitates distinct formatting logic due to its consistent storage of data in JSON format.
To create your initial policy, please refer to the following link:
Enroll a Rule in a Masking Policy
Settings > Policies > Data Masking > Add Rule List
After creating a policy, follow these steps to register the path to the data and apply the policy as a rule:
Navigate to the Data Masking menu and click on the policy you created.
The Policy Details and Rule Registration screen will appear. Click the
Add Rule Listbutton on the right.Select the paths of data to which you want to apply the policy:
Database Name : Provide the required value for rule registration.
Table Name : For MongoDB, enter a Collection name.
Column Name : For MongoDB, enter the JSON Attribute value to apply masking within the Document.
Apply a masking pattern:
Select one or more masking patterns to apply to the columns you selected in step 3.
By default, there are 20 different patterns available for masking personal and sensitive information.
You can also create custom detection and masking patterns through regular expressions in the Masking Pattern menu.
Make exceptions to masking rules for users or groups that need to see that data:
Allowed Users : Select the users or groups you want to exempt from this rule.
Save your changes by clicking the
Okbutton.
On the Rule List tab, you can view the registered rule. Now, when a user views a Document from that Collection in MongoDB, the Value of the specified Attribute will be masked based on the applied masking pattern. (e.g. "*****@gmail.com")
Register a Rule in a Collection / JSON Value Access Restriction Policy

Settings > Policies > Data Access > Add Rule List
After creating a policy, follow these steps to register the path to the data and apply the policy as a rule:
Navigate to the Data Masking menu and click on the policy you created.
The Policy Details and Rule Registration screen will appear. Click the
Add Rule Listbutton on the right.Select the paths of data to which you want to apply the policy:
Database Name : Provide the required value for rule registration.
Table Name : Also required. If only a table is selected, access to the entire table will be restricted. For MongoDB, enter a Collection name.
Column Name : For MongoDB, enter the JSON Attribute value to apply masking within the Document.
Make exceptions to masking rules for users or groups that need to see that data:
Allowed Users : Select the users or groups you want to exempt from this rule.
Save your changes by clicking the
Okbutton.
On the Rule List tab, you can see that the rule is successfully registered. From now on, when a user attempts to view the restricted data, they will not be able to access the table itself if the policy is applied at the table level. For columns, they will see {RESTRICTED} in place of the actual data.
JSON PATH Example
Here is an example of data in MongoDB to apply the policy to:
{
    _id: ObjectId("64b3f7ad344ac8c881a09dc6"),
    item: "journal",
    qty: 25,
    tags: ["blank", "red"],
    size: {
        h: 14,
        w: 21,
        uom: "cm"
    }
}
Case 1. Restrict Access to the Item Property

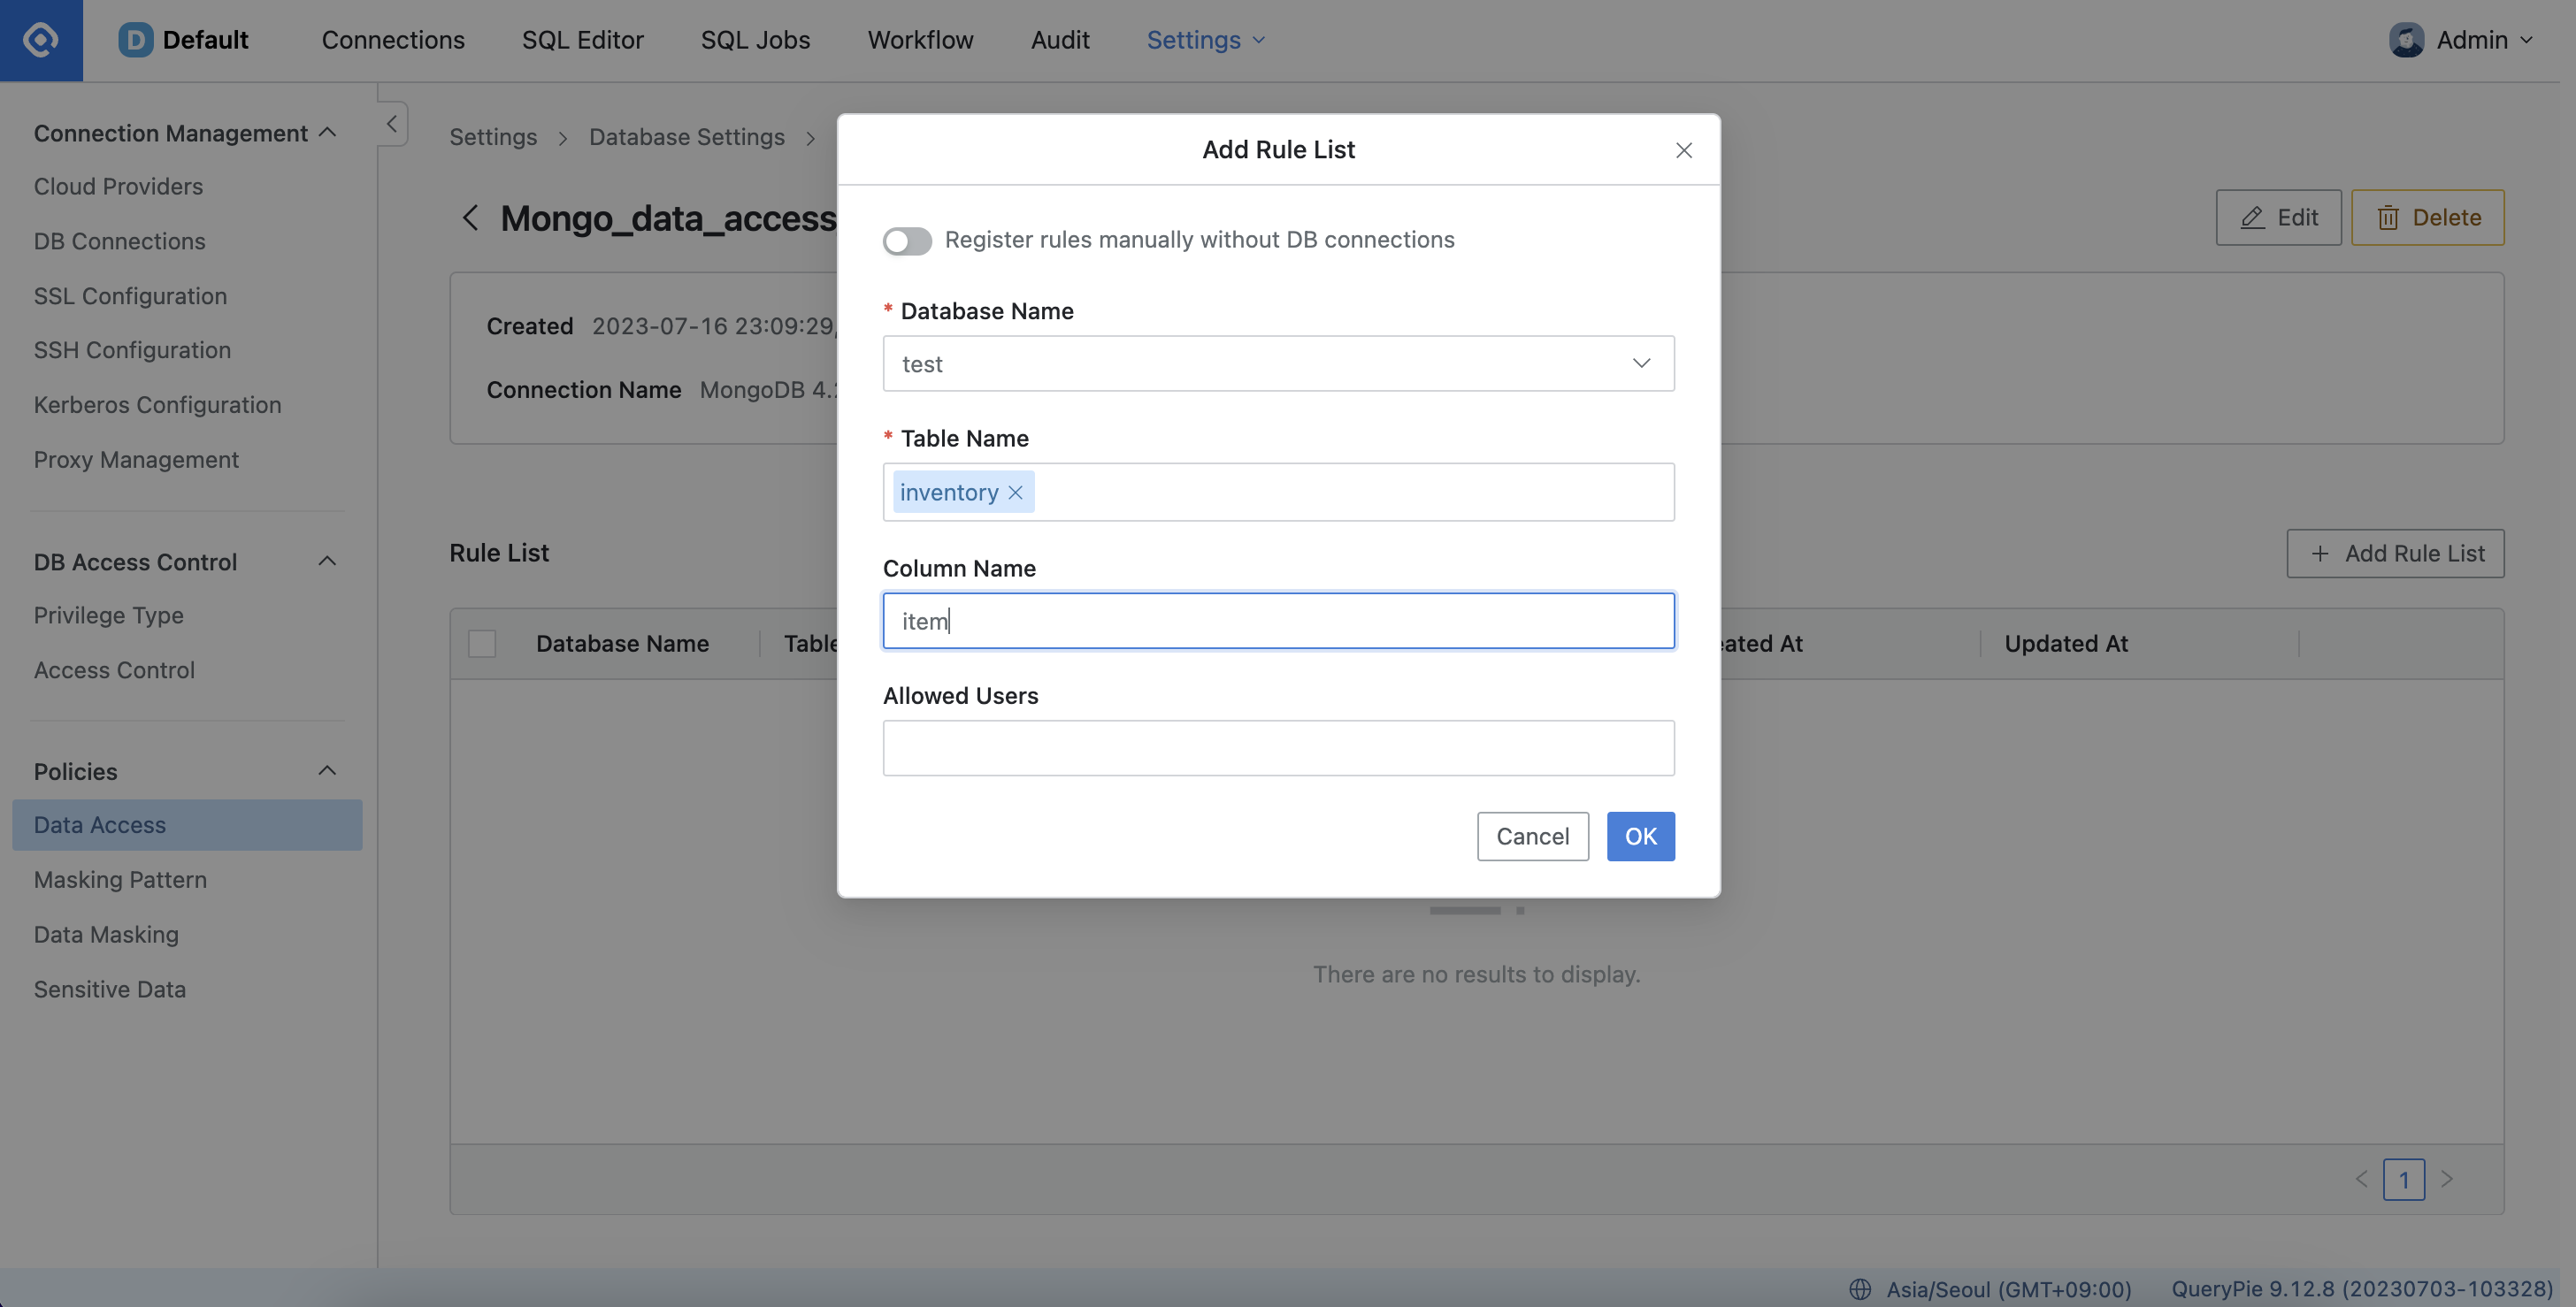
Settings > Database Settings > Policies > Data Access > Add Rule List
If you are configuring an access restriction policy for a single attribute, input an entry in the "Column Name" field, then proceed by clicking the OK button.
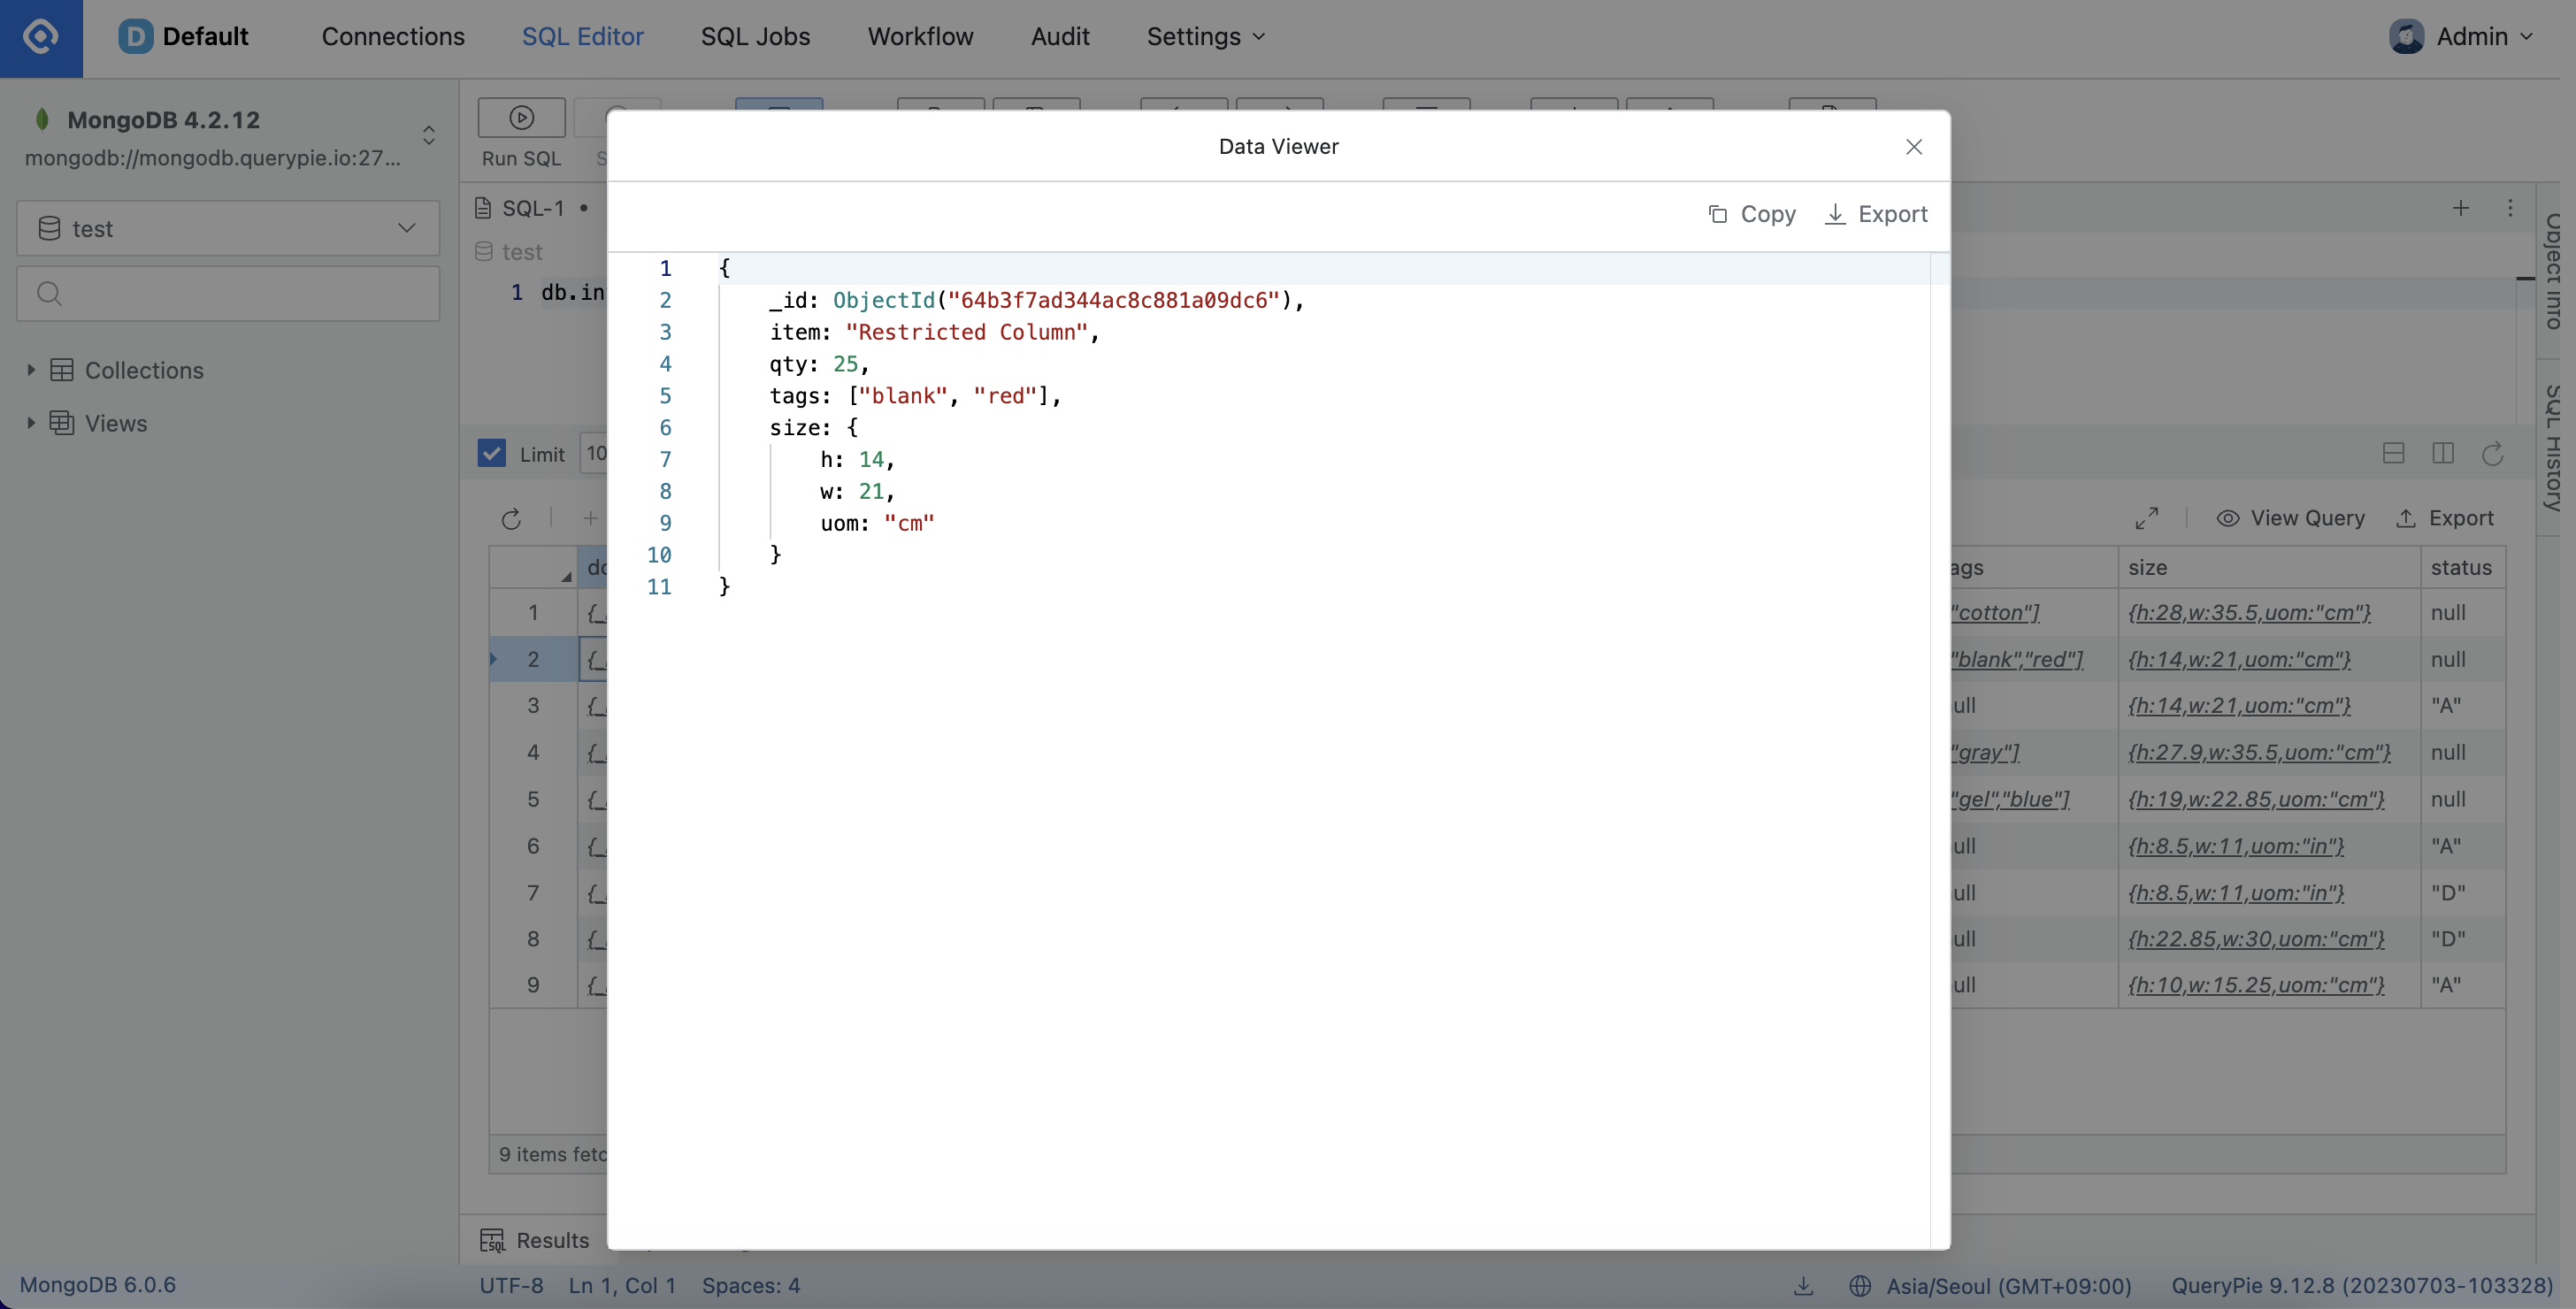
As depicted in the screenshot provided, you will notice that the value of the item property is indicated as "Restricted Column".
Case 2. Restrict Access to the size.h Property
If you wish to establish an access restriction policy for the "h" attribute under "size", kindly input $.size.h into the "Column Name" field, and proceed by clicking the OK button.
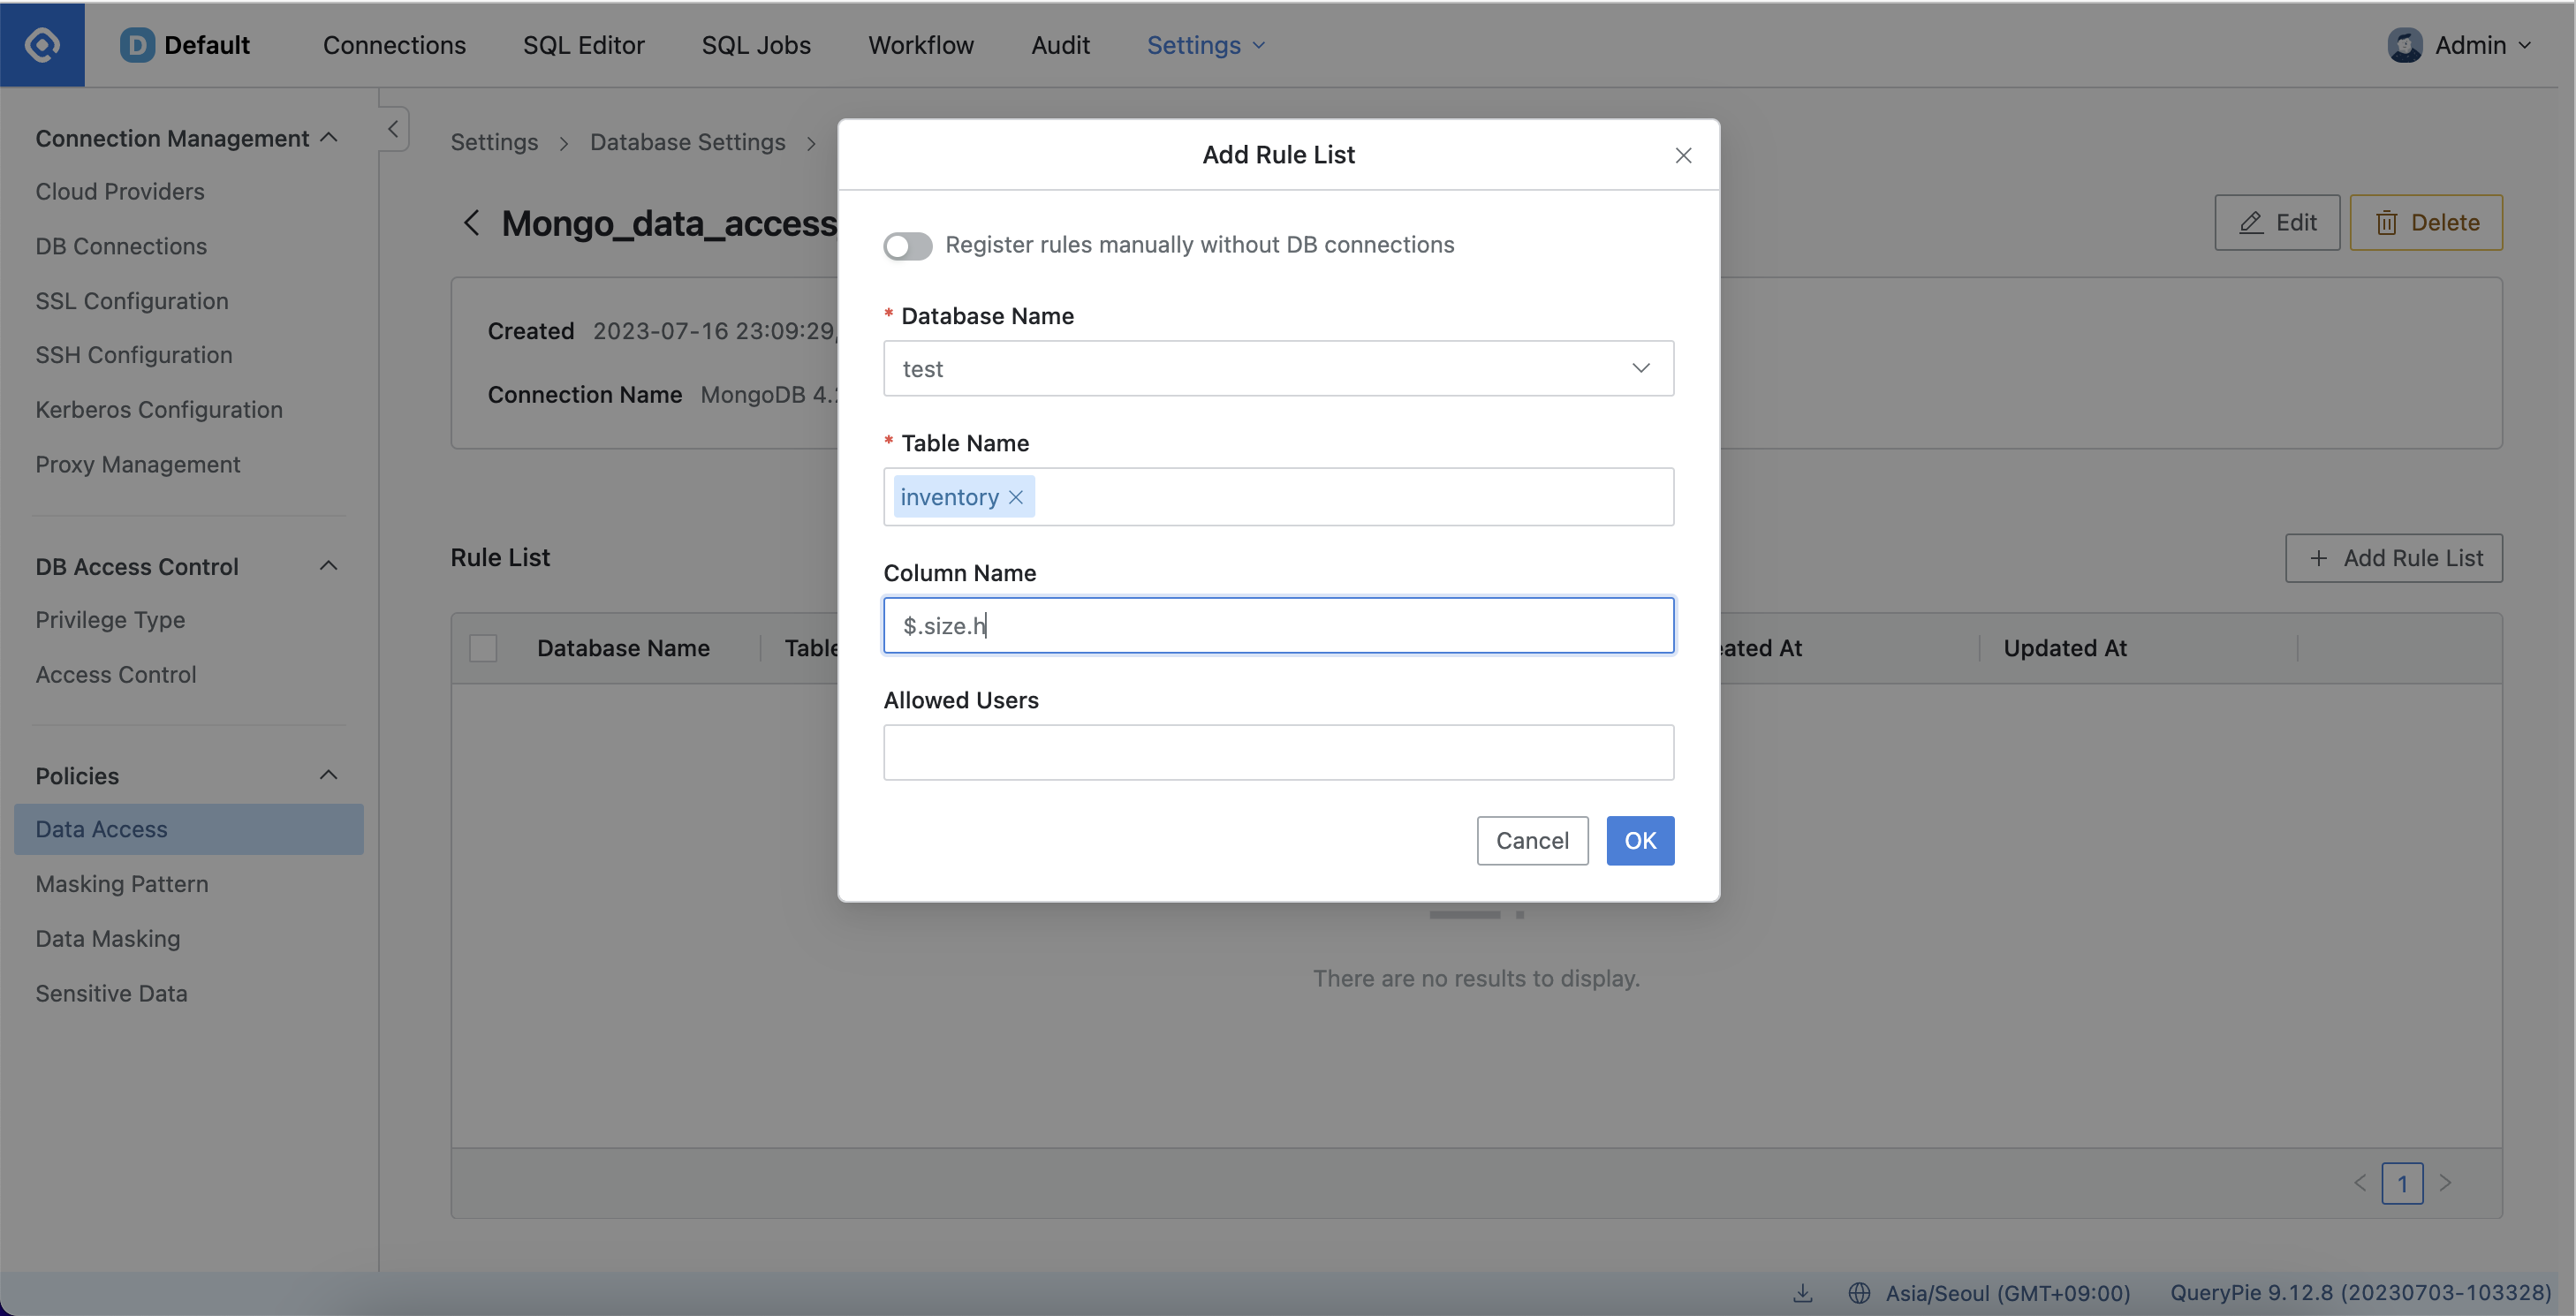
Settings > Database Settings > Policies > Data Access > Add Rule List
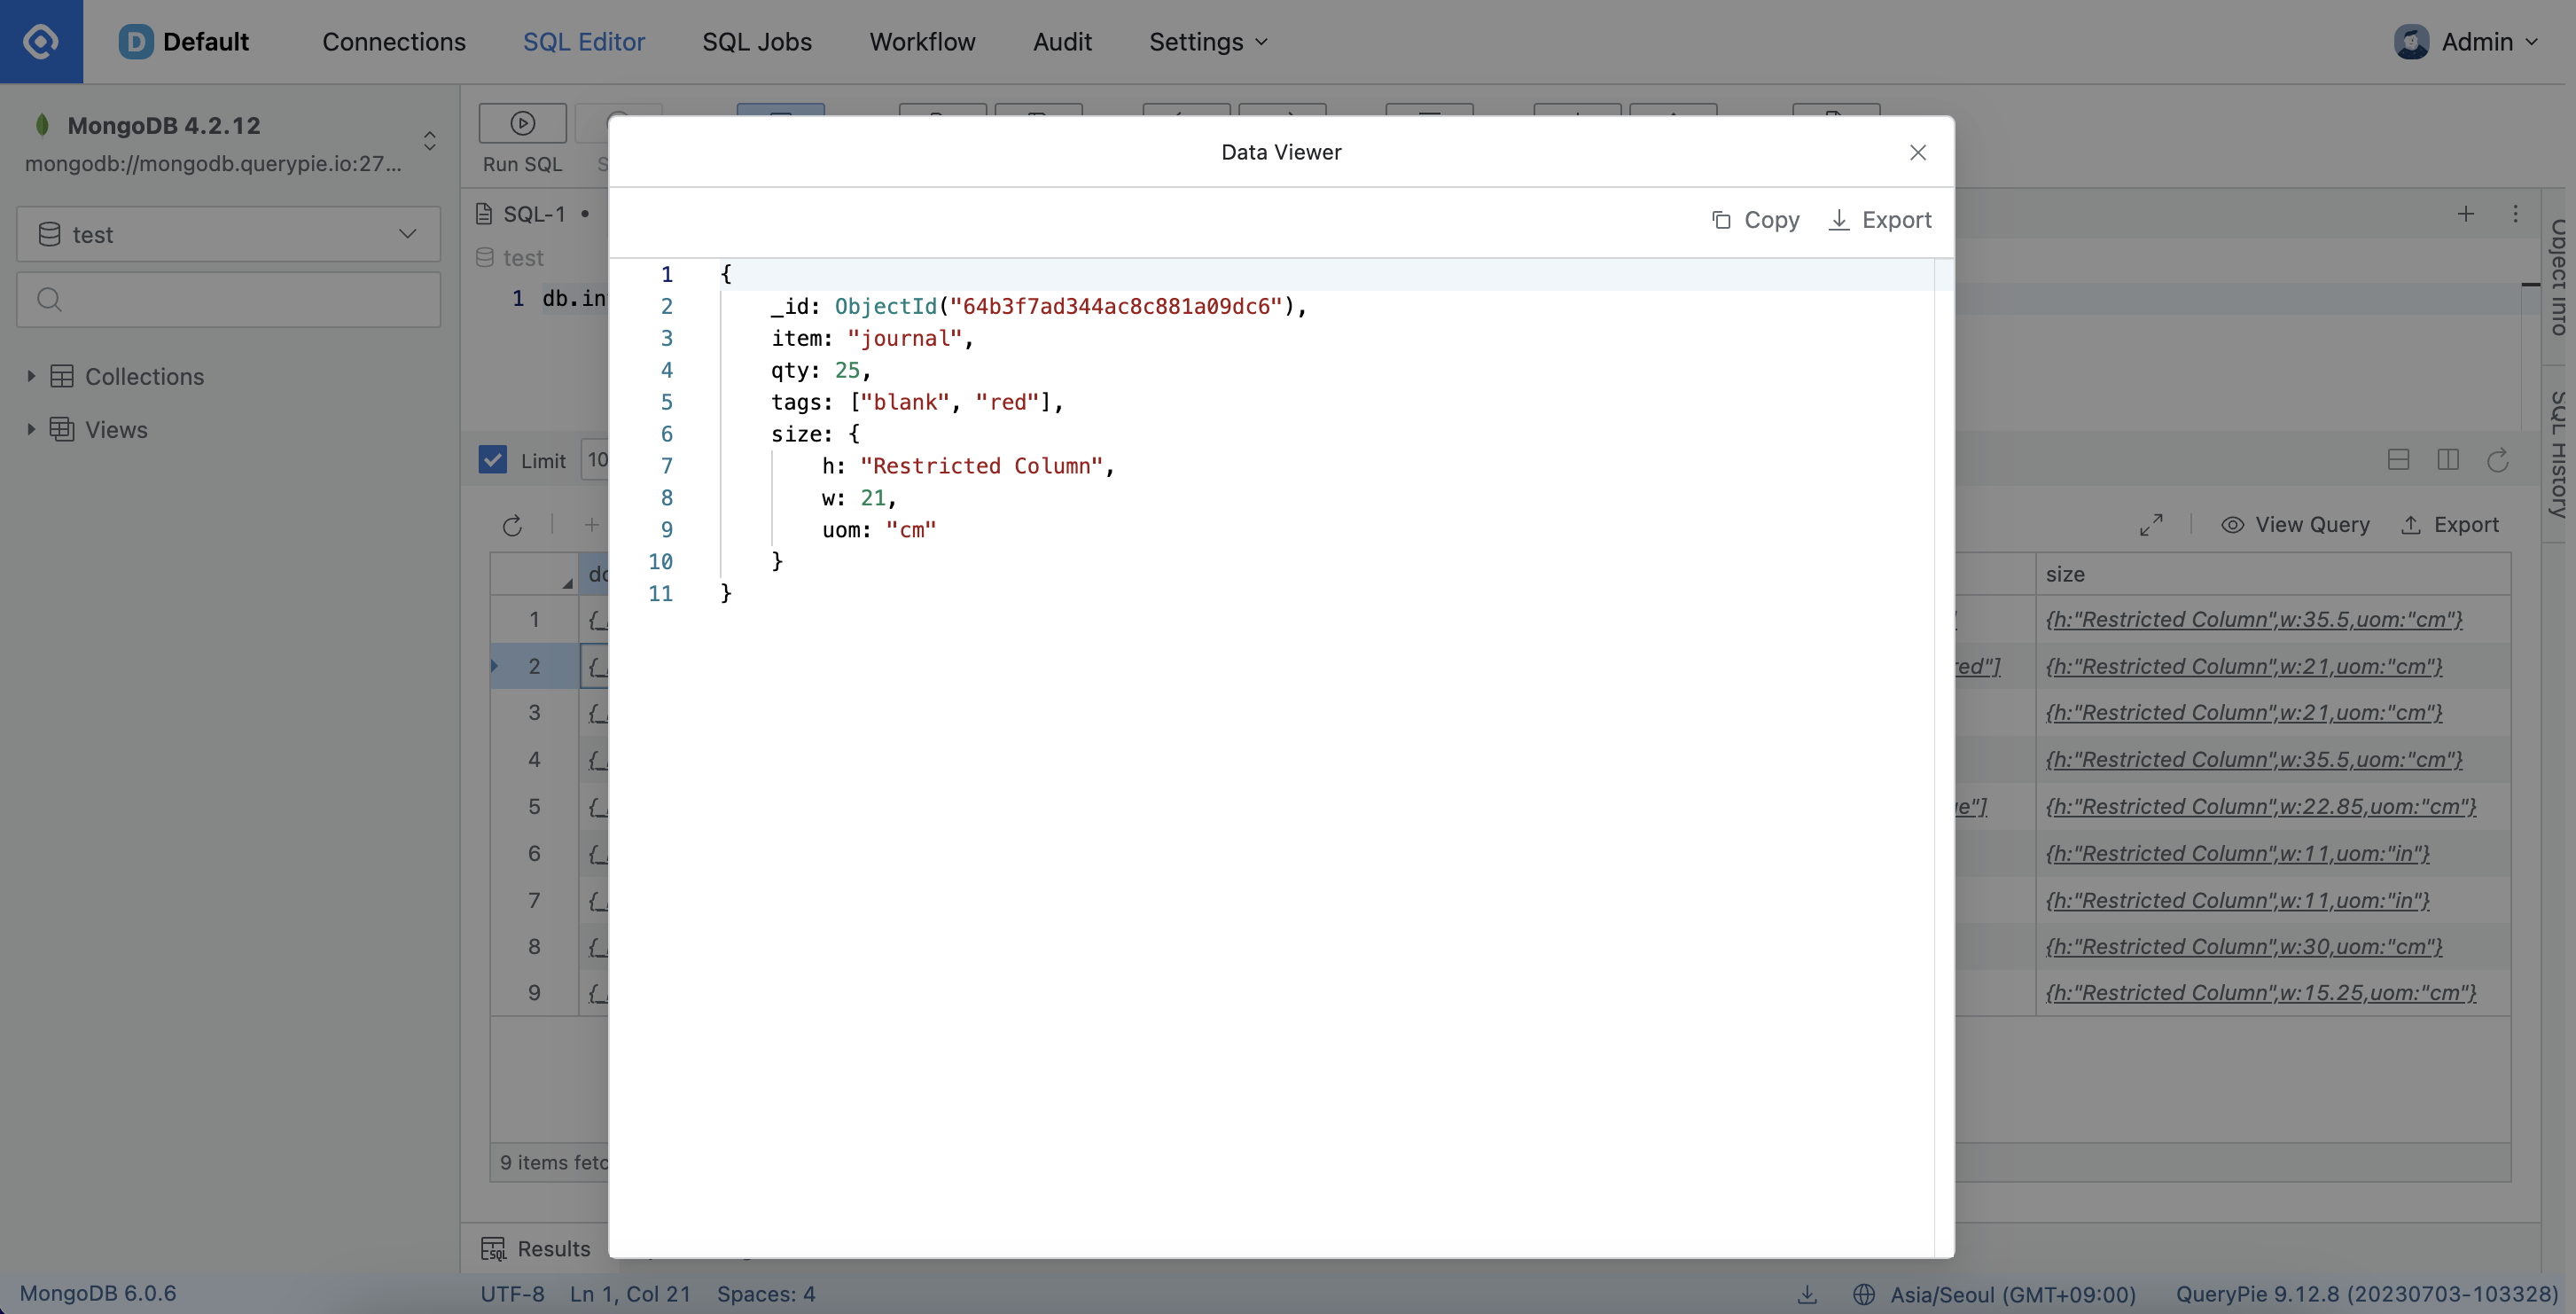
As depicted in the provided screenshot, you will notice that the value of the "h" property under "size" is exhibited as "Restricted Column".
Case 3. Restrict Access to All Properties Under Size
If you wish to establish an access restriction policy for all properties under "size", kindly input $.size into the "Column Name" field, and proceed by clicking the OK button.
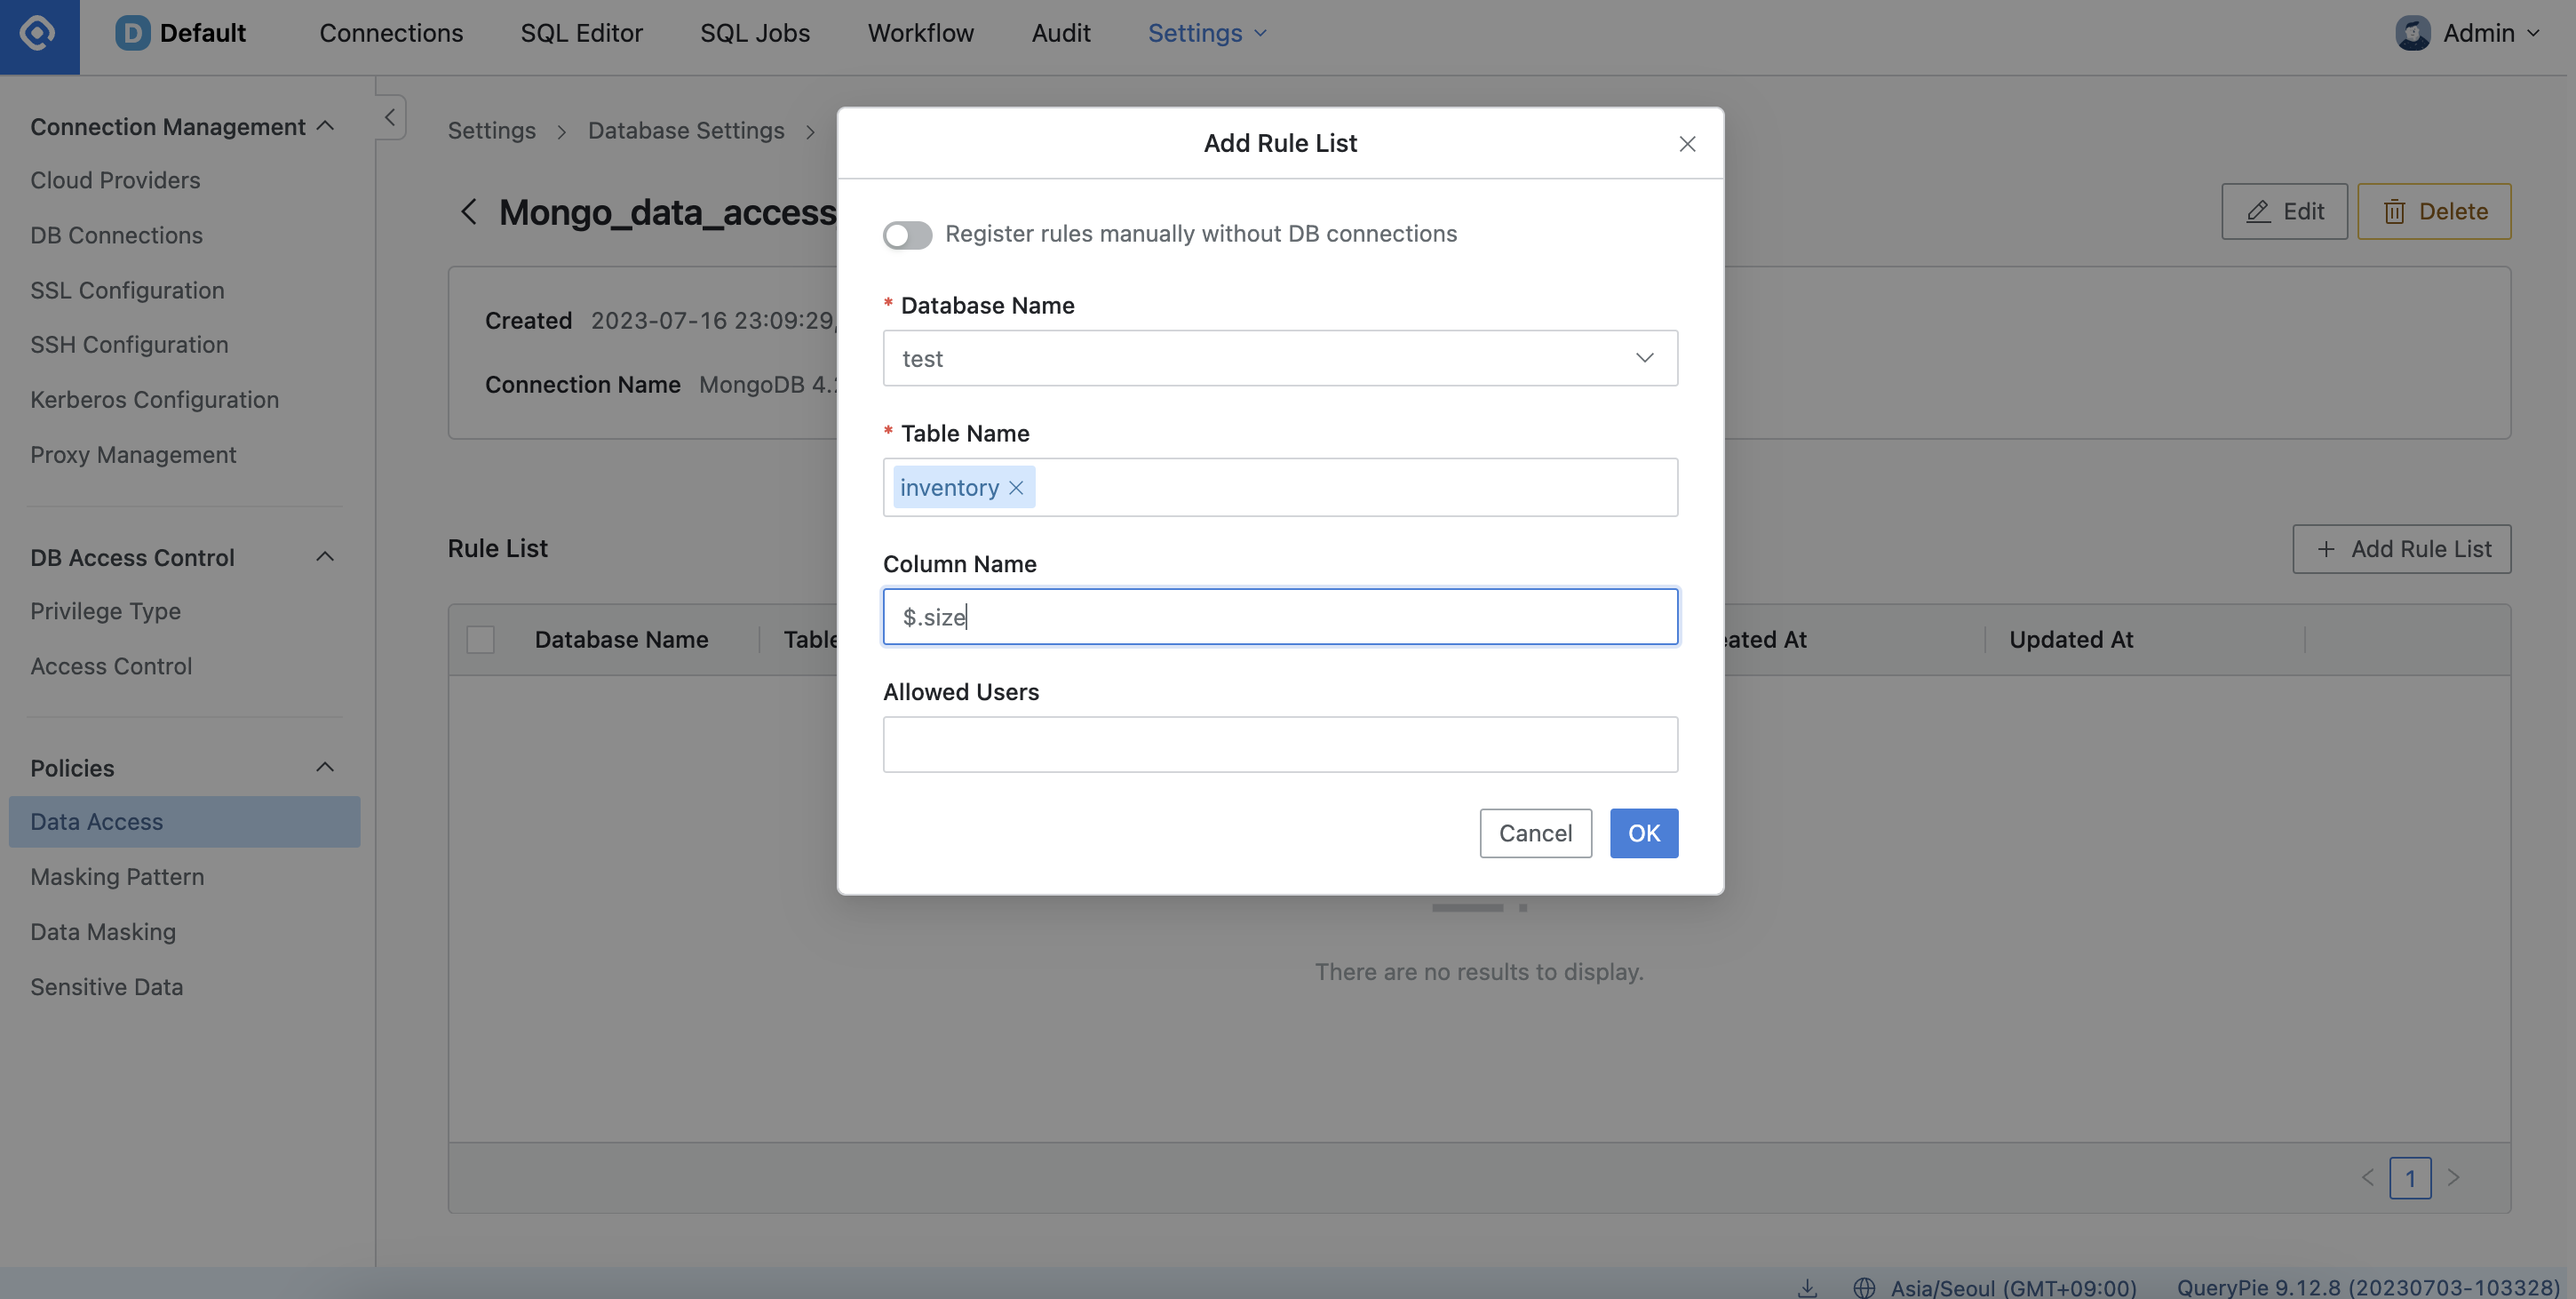
Settings > Database Settings > Policies > Data Access > Add Rule List
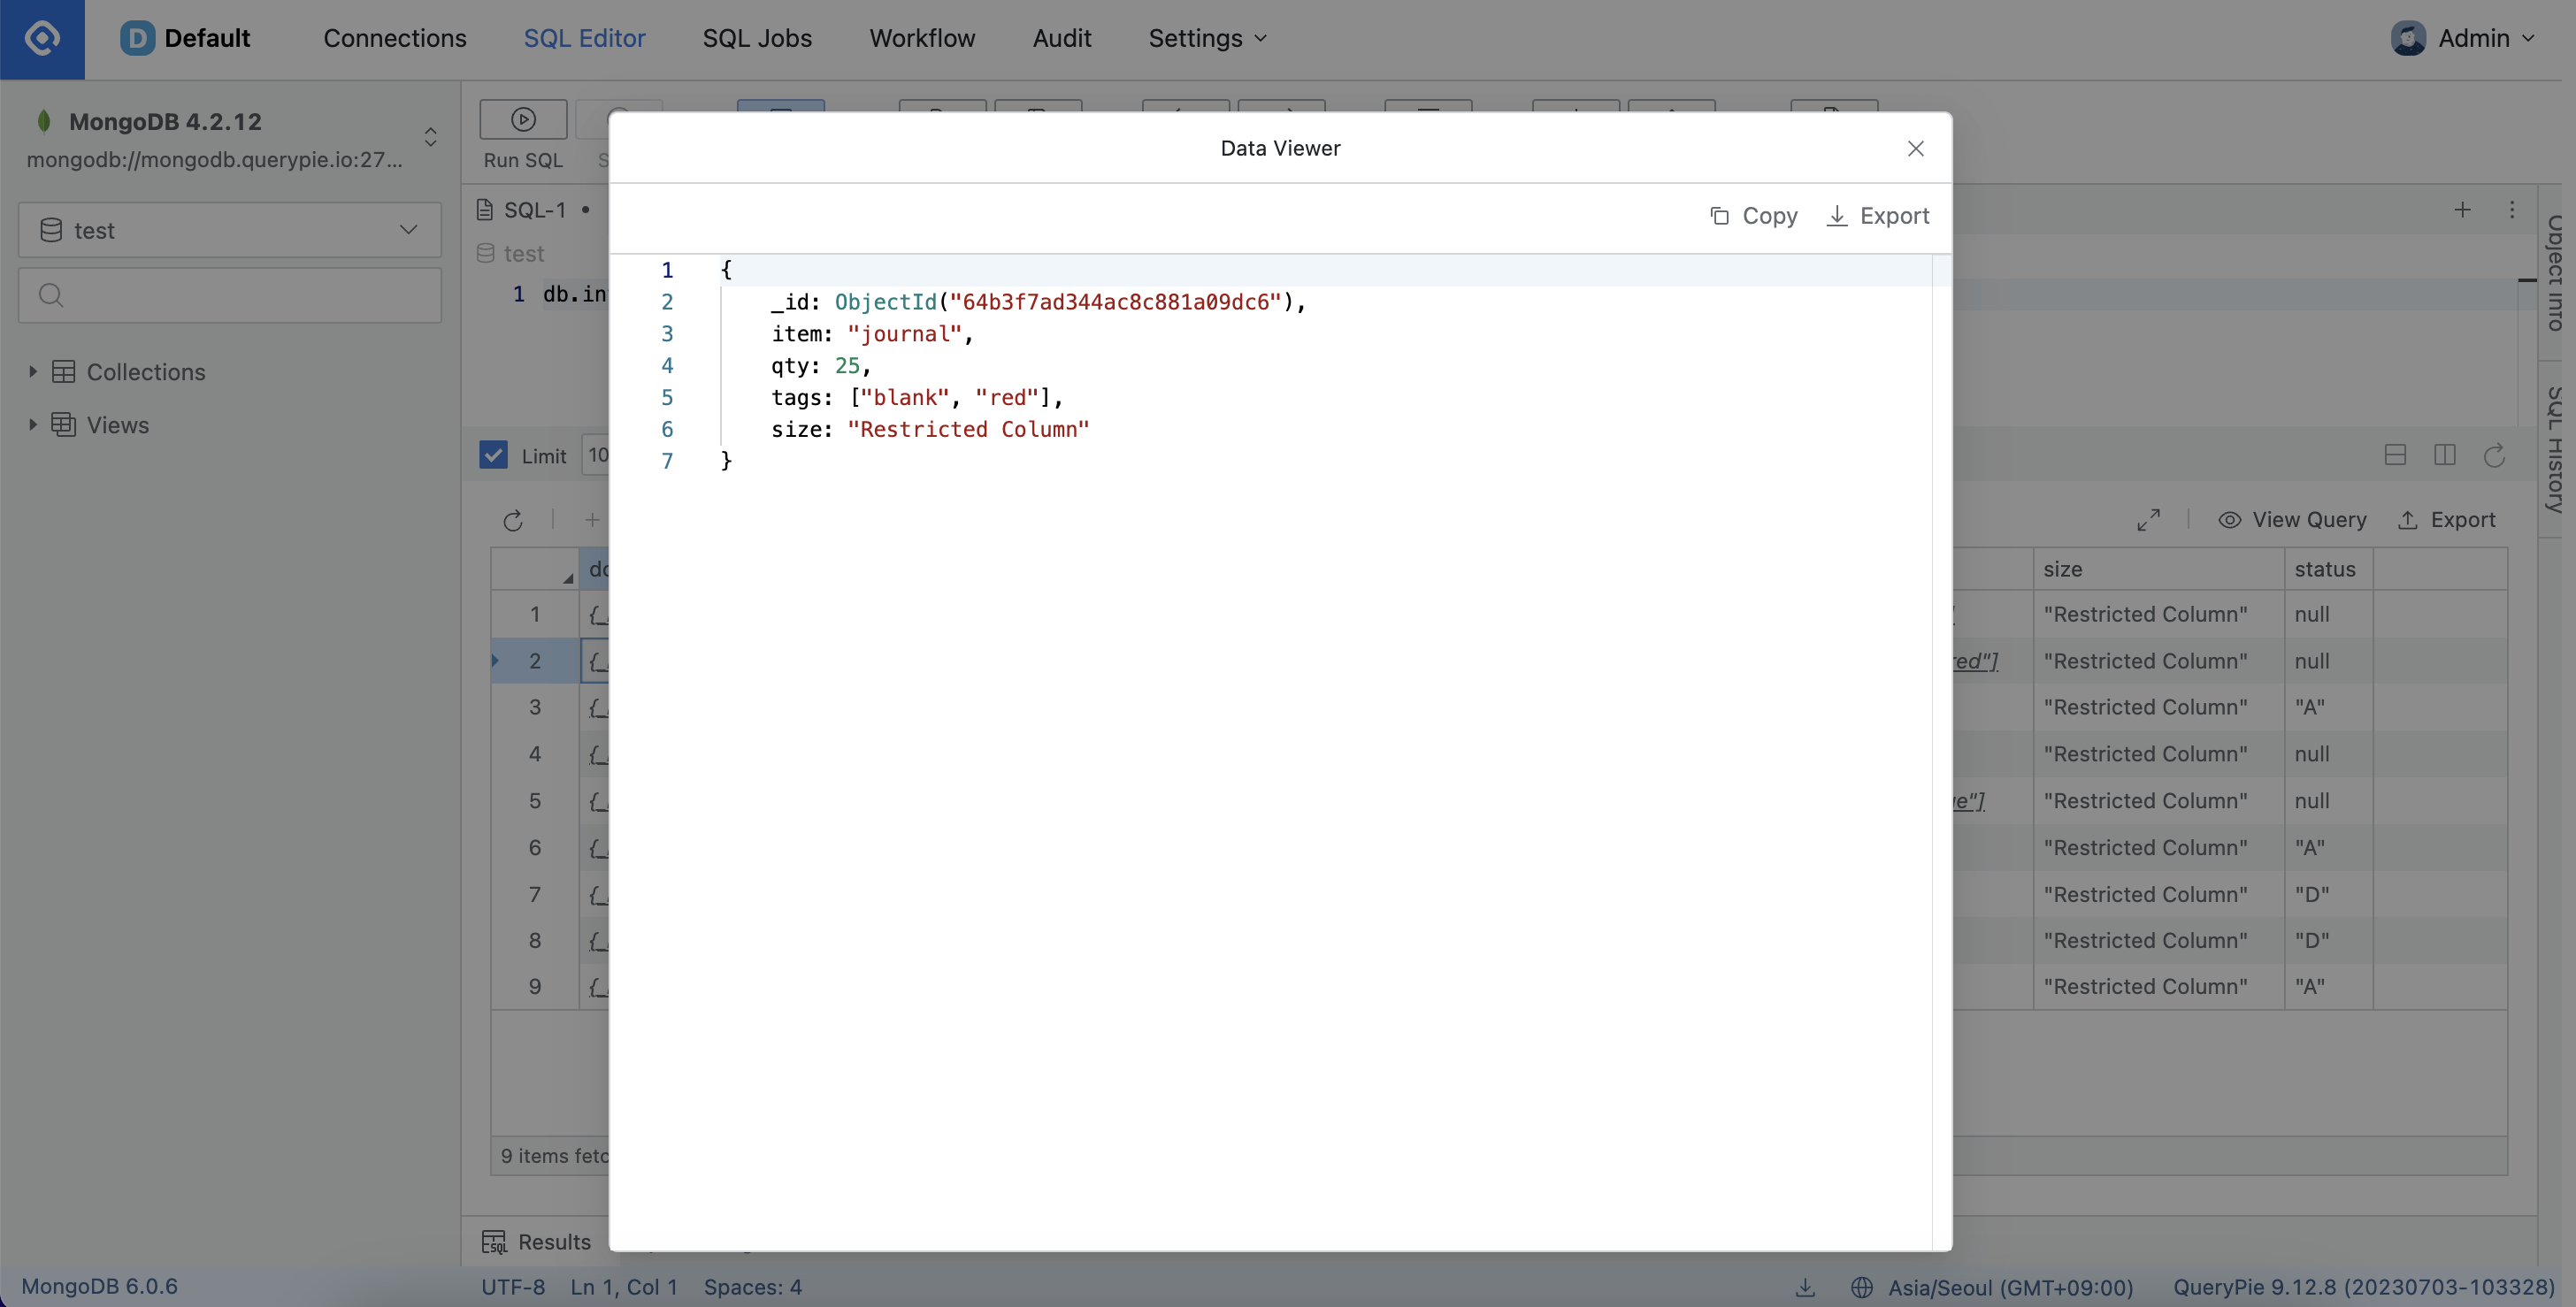
As illustrated in the screenshot above, it's evident that all properties under "size" are labeled as "Restricted Column".
Case 4. Restrict Access to the Second Value in the List for the Tags Property
If you wish to establish an access restriction policy for the second value in the list of values within the "tags" property, input $.tags[1] in the "Column Name" field, then click the OK button.
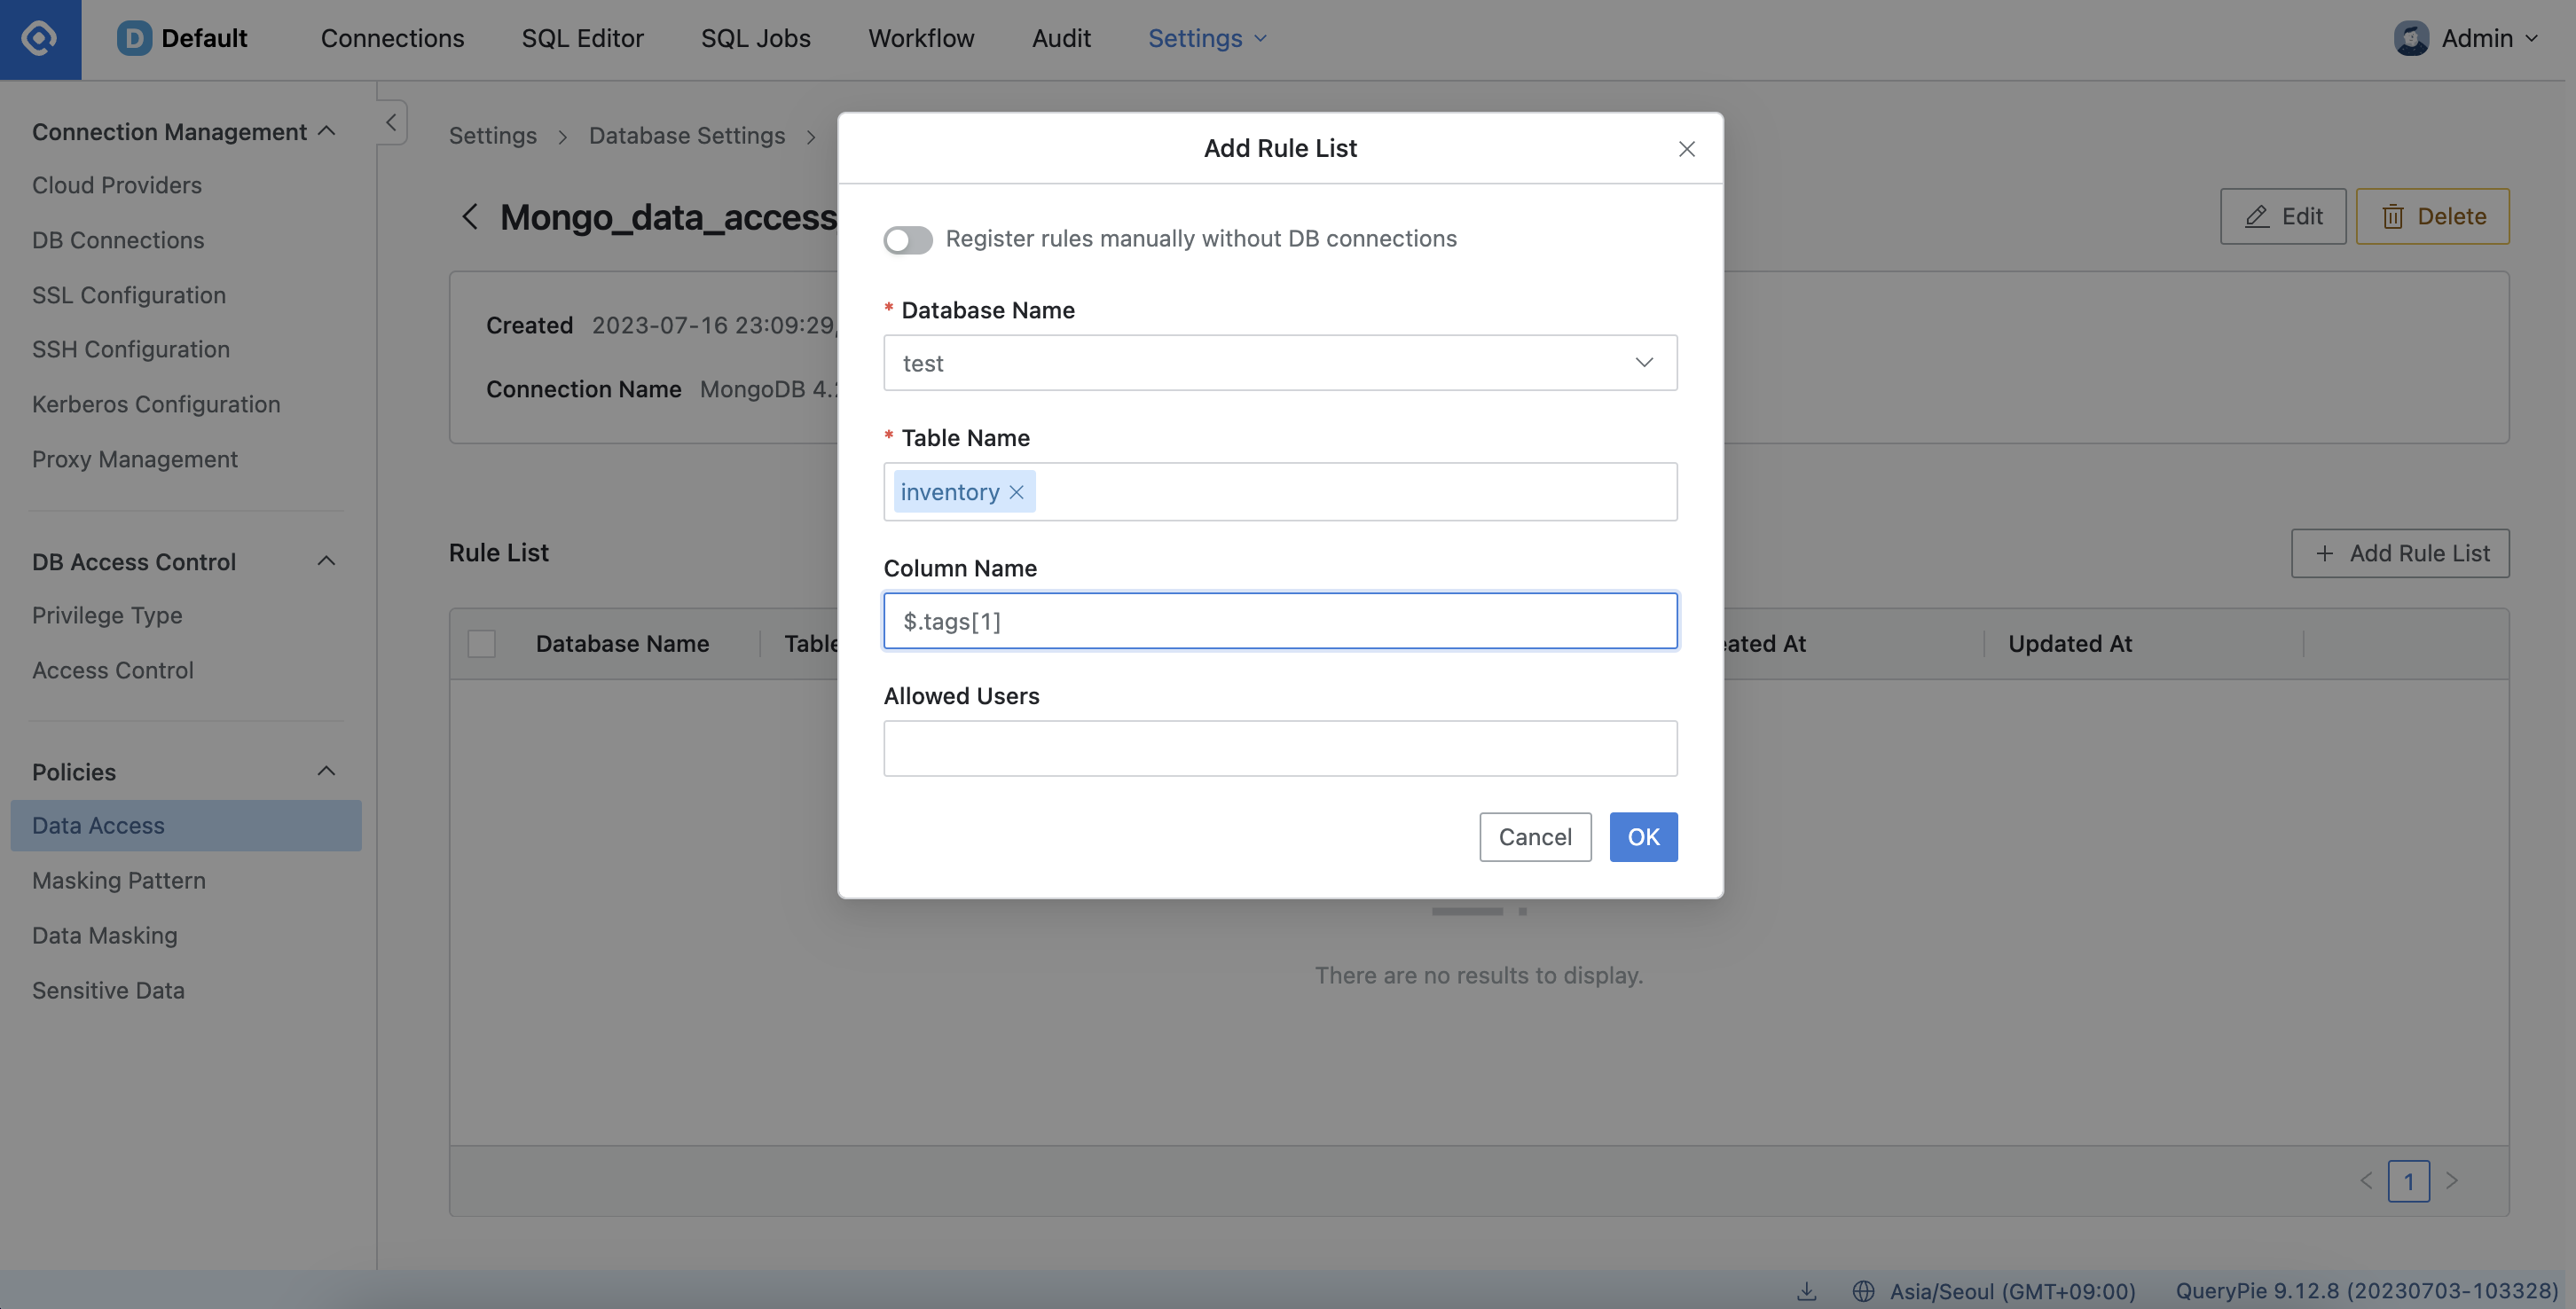
Settings > Database Settings > Policies > Data Access > Add Rule List
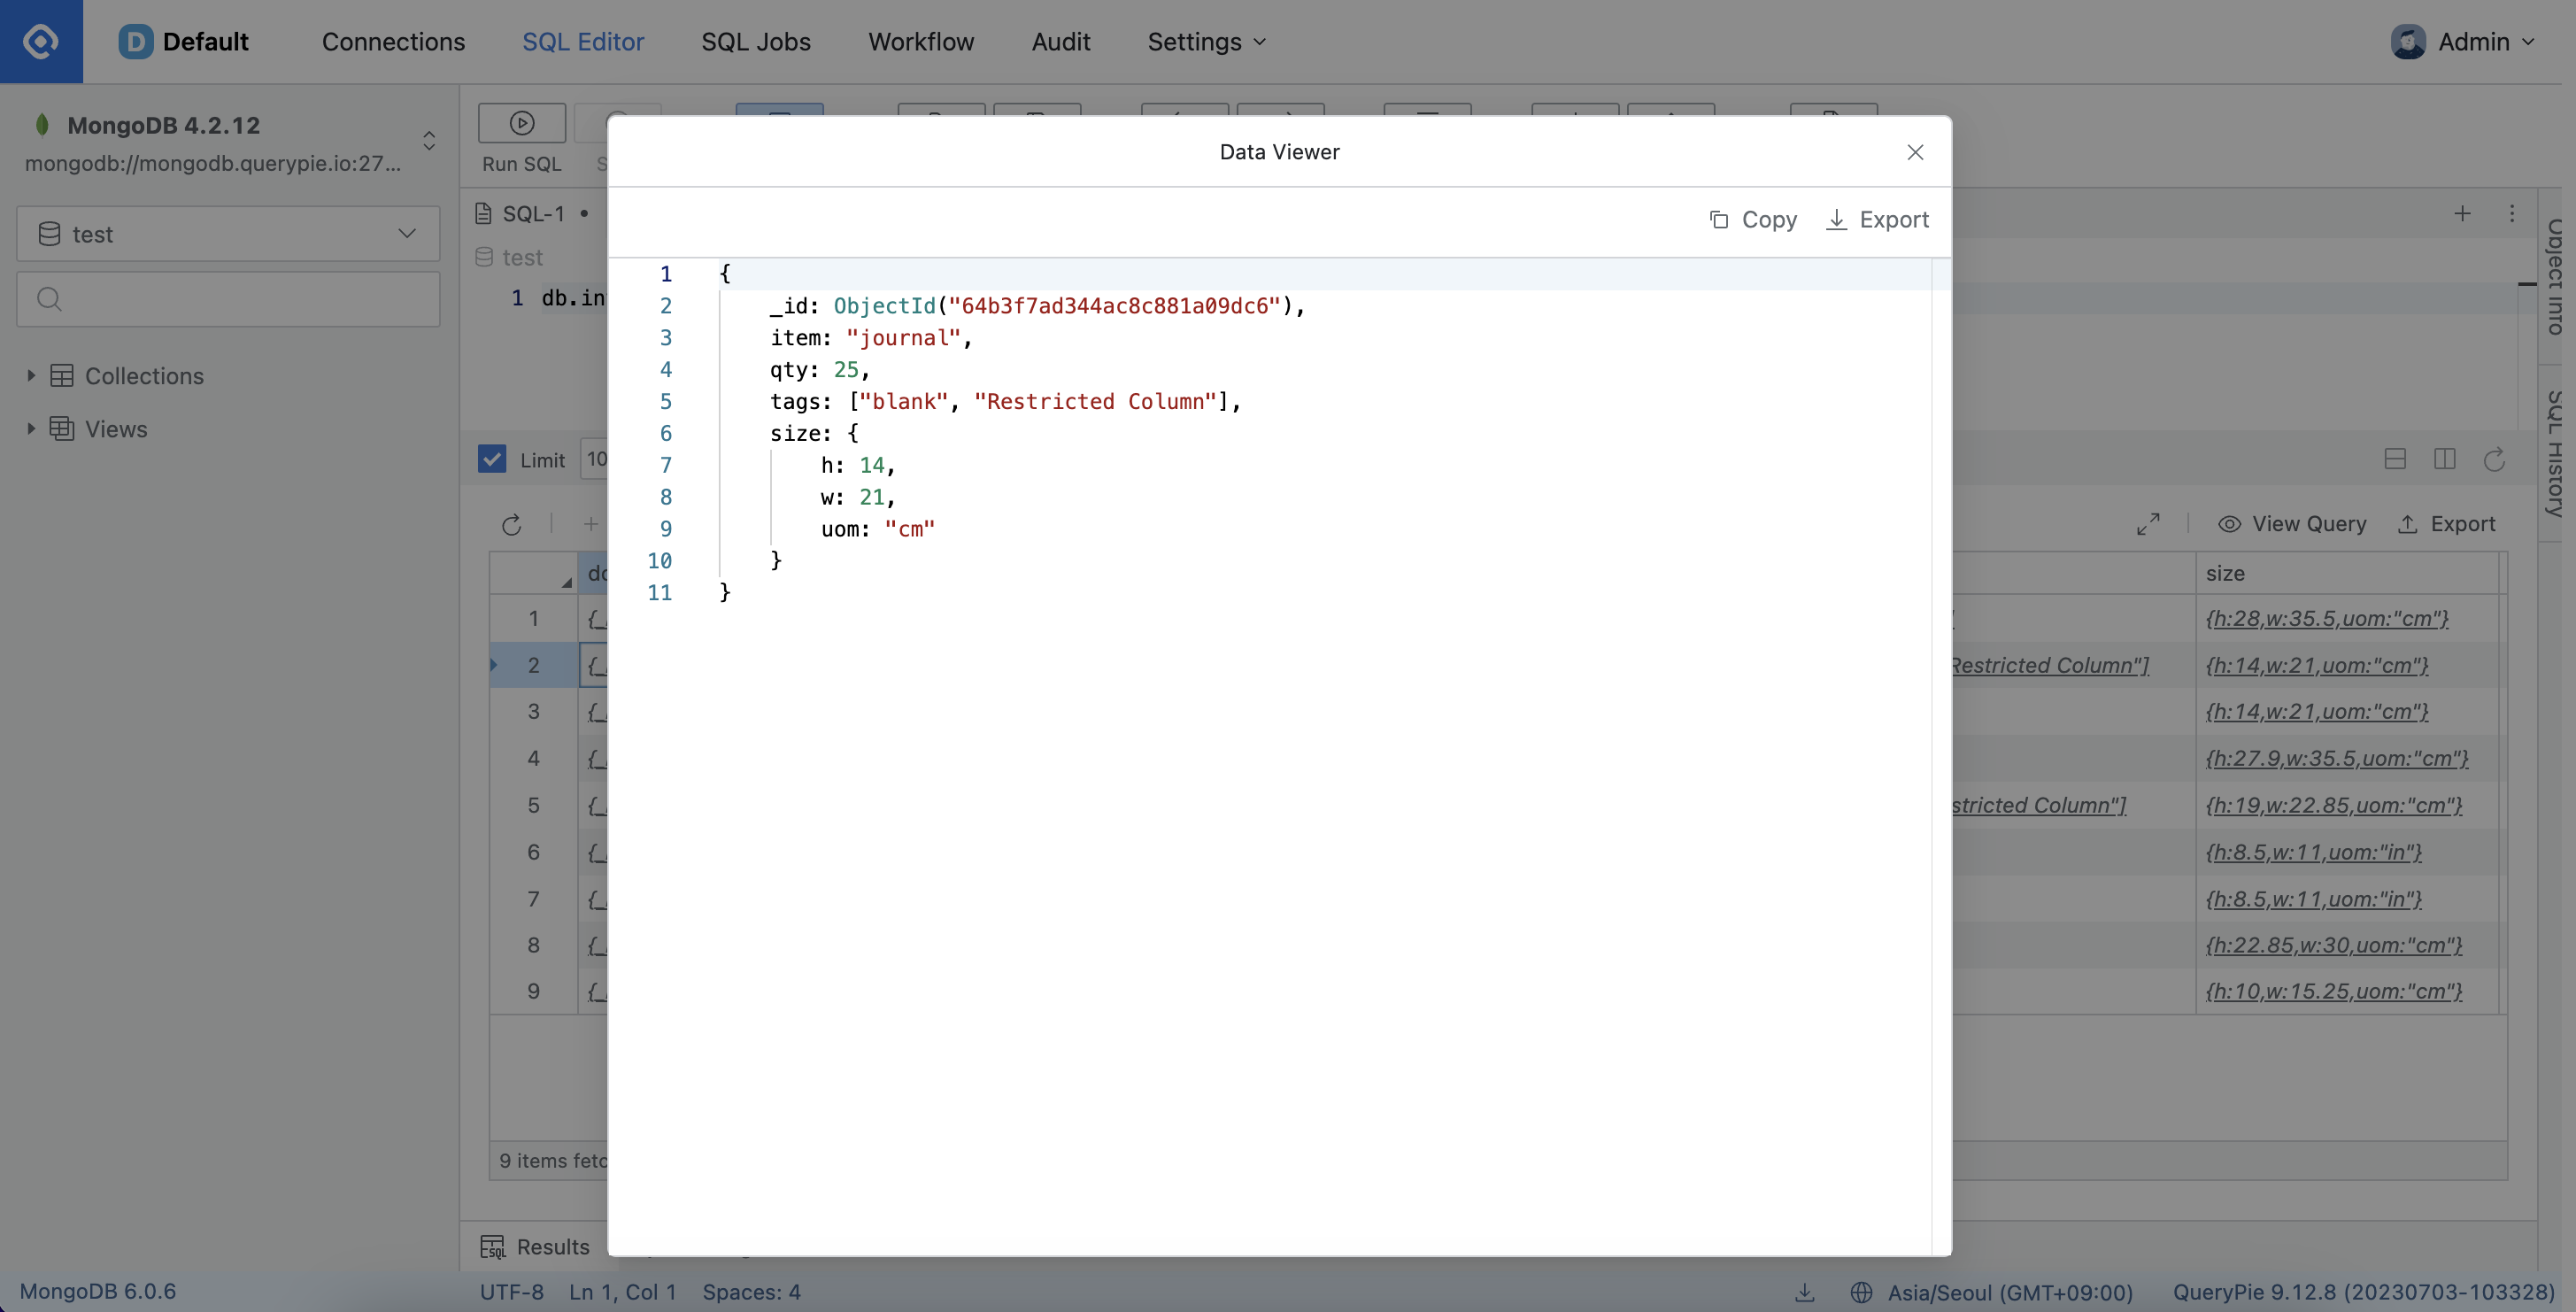
As depicted in the screenshot above, you can observe that the second value of the "tags" property is labeled as "Restricted Column".
Related Topics