Export Request
Overview
The Workflow feature simplifies the processing of requesting data exports, particularly when you lack export permissions or require approval. Upon approval by the designated approver, the executor can proceed to export the approved data once.
Export Request
Workflow > Submit Request > Export Request
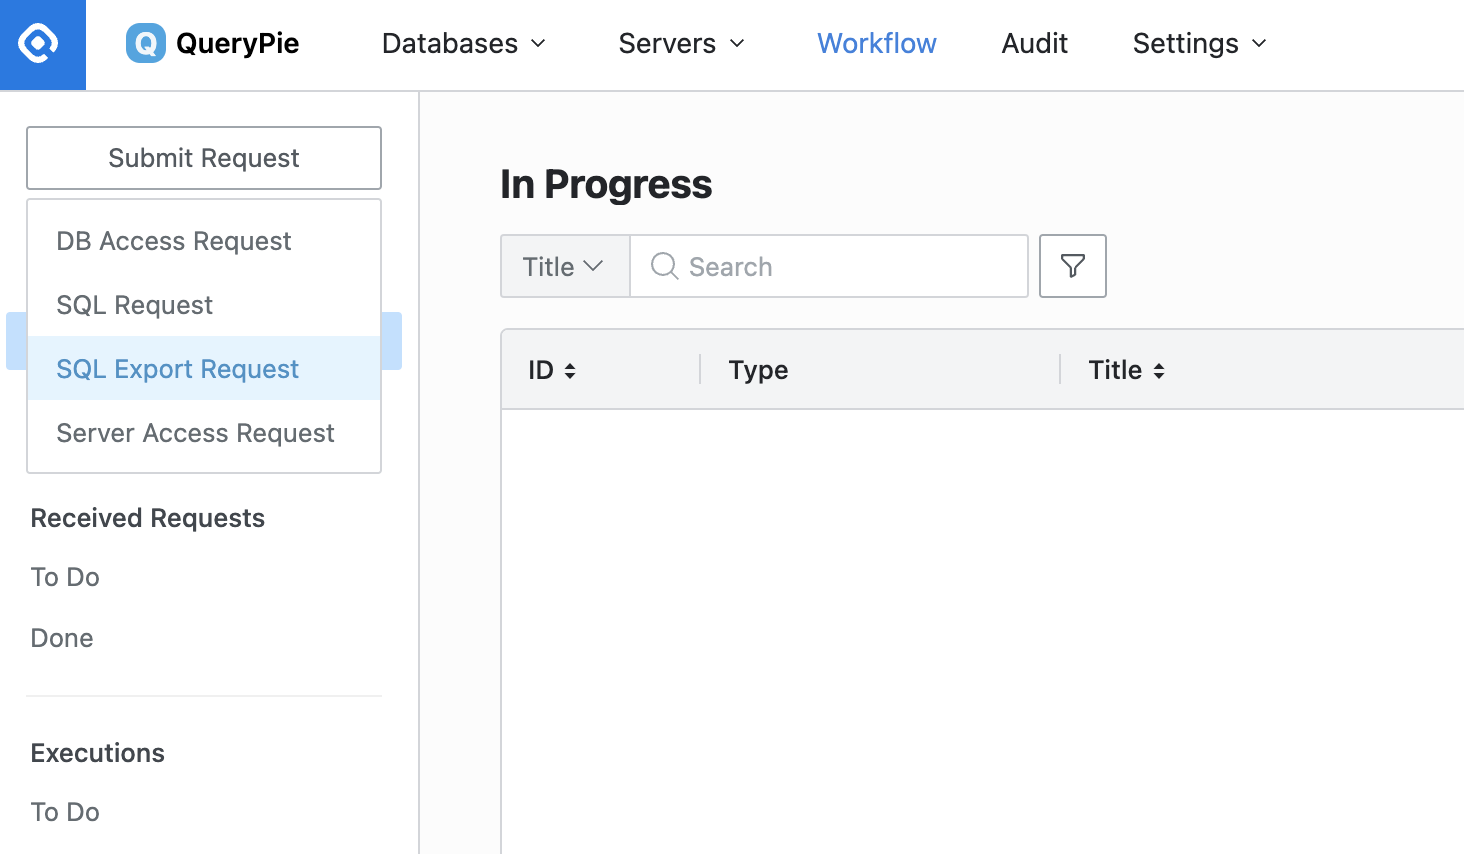
Navigate to the Workflow tab in the top menu of the webpage.
Click on the
Submit Requestbutton located in the top left corner, and then select theExport Requesttype.The Create export request page will be displayed.
Select Approval Rule
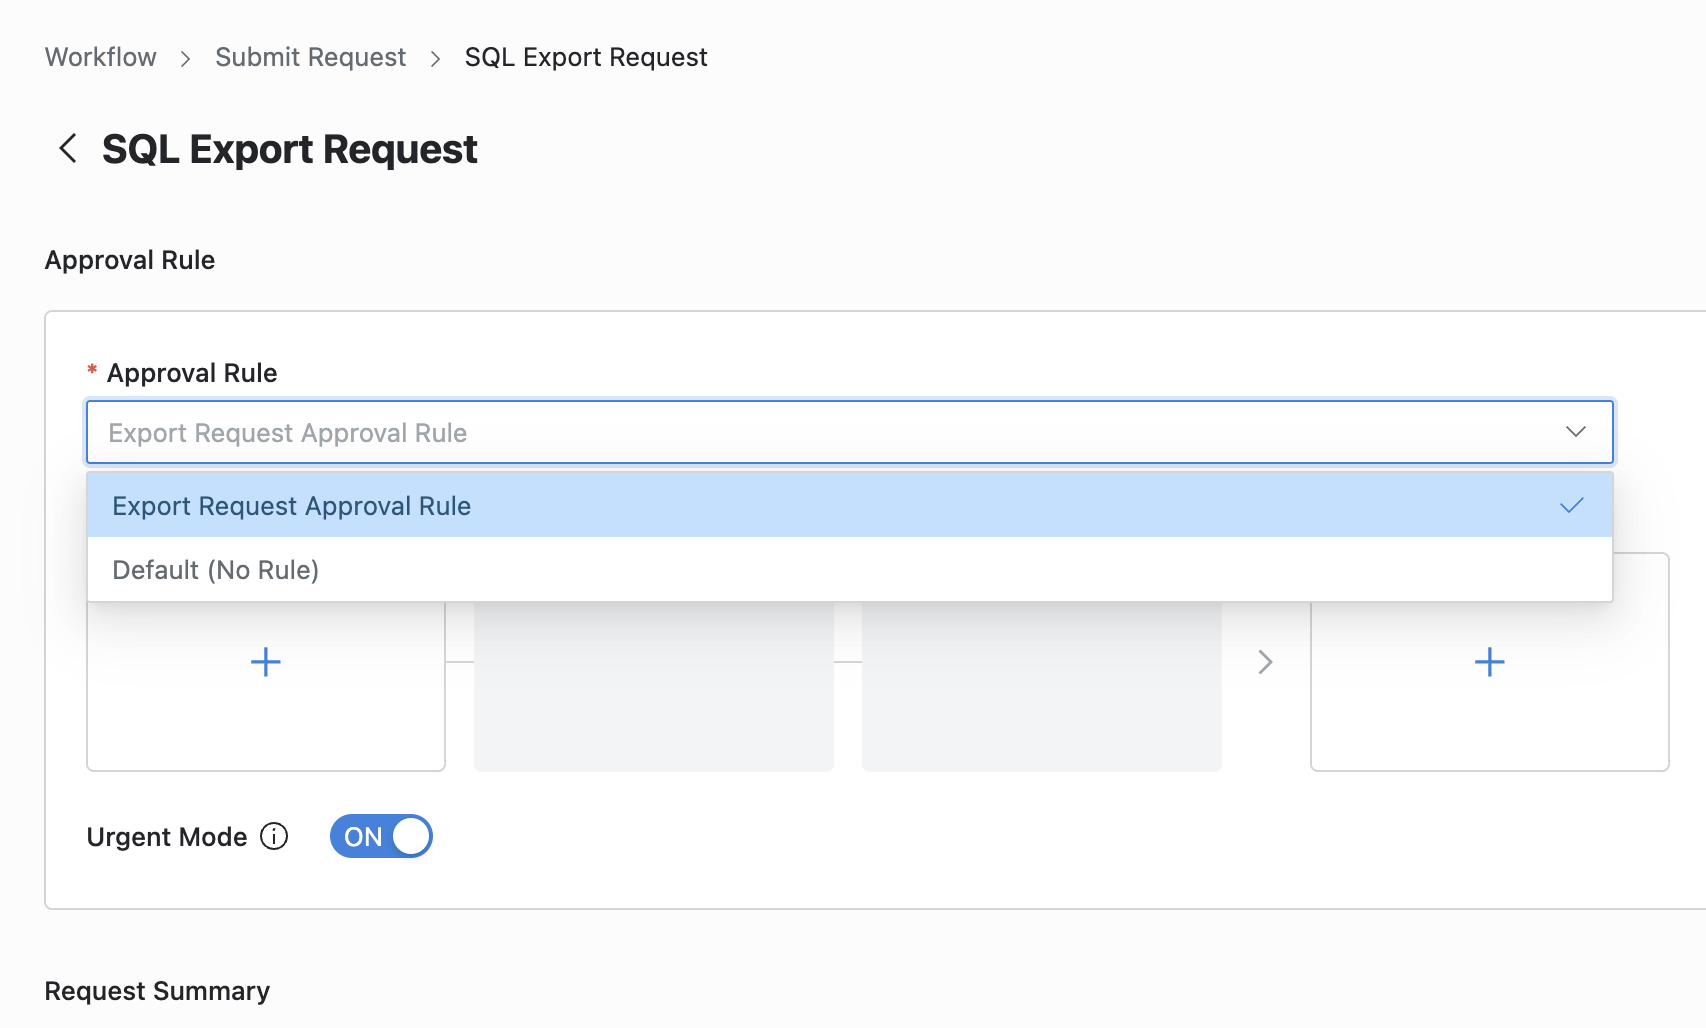
Workflow > Submit Request > Export Request > Approval Rule
At the top of the Export Request page, select an Approval Rule to govern the approval process.
If you select
Default (No Rule), users can choose their own approvers.Approvers can be automatically added to the Approvers field when an admin selects a preset approval rule.
Add Approvers
Approvers can be added directly by the requester based on the approval rules set up by the admin. Click the + button in the box, and a popup will appear allowing you to add an approver.
If you've selected a approval rule that doesn't allow the requester to select an approver themselves, then the + button won't appear, and the box will be grayed out, indicating it cannot be clicked. In this case, the name of the approver set by the admin is automatically displayed.
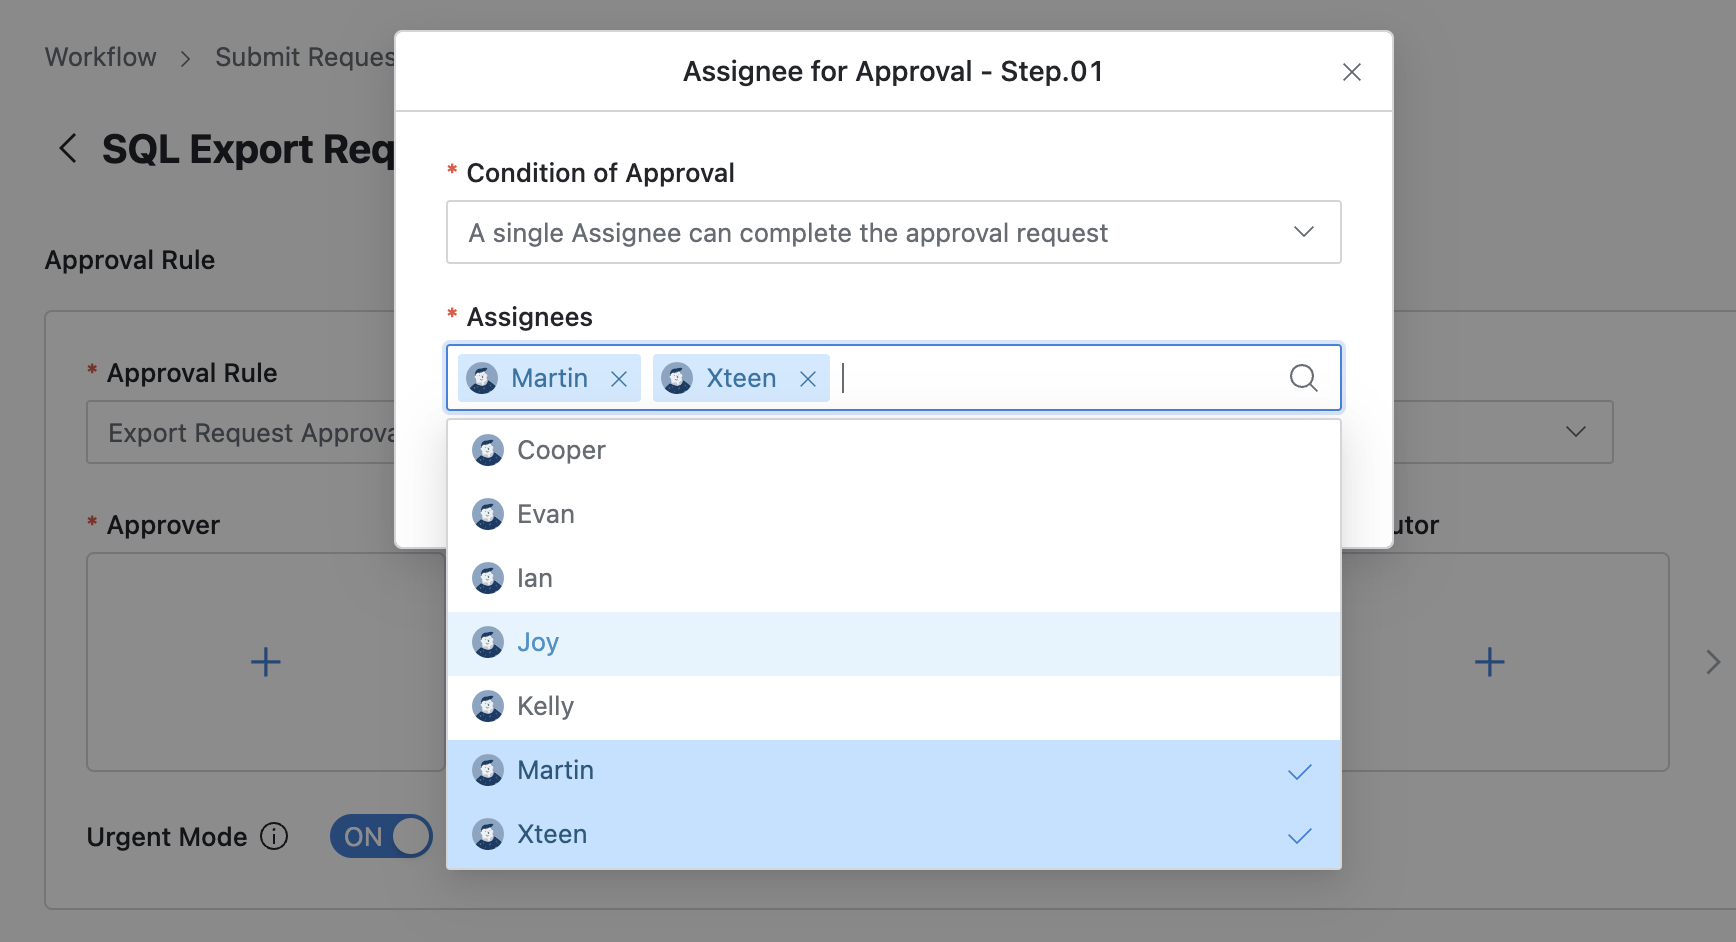
Workflow > Submit Request > Export Request > Assignee for Approval
Condition of Approval : Select an approval condition.
A single Assignee can complete the approval request : The workflow ends when one of the selected approvers approves.
All Assignees must approve this request : All selected approvers must approve the request to end the workflow. (All approvals are required regardless of the order of approval.)
Assignees : Select the approvers for the request.
Once all approvers are selected, click the
Savebutton in the bottom right corner of the popup to save the selections.Urgent Mode : If post-approval is allowed according to the approval rule, you can register requests with the post-approval option.
Fill Out a Data Export Request
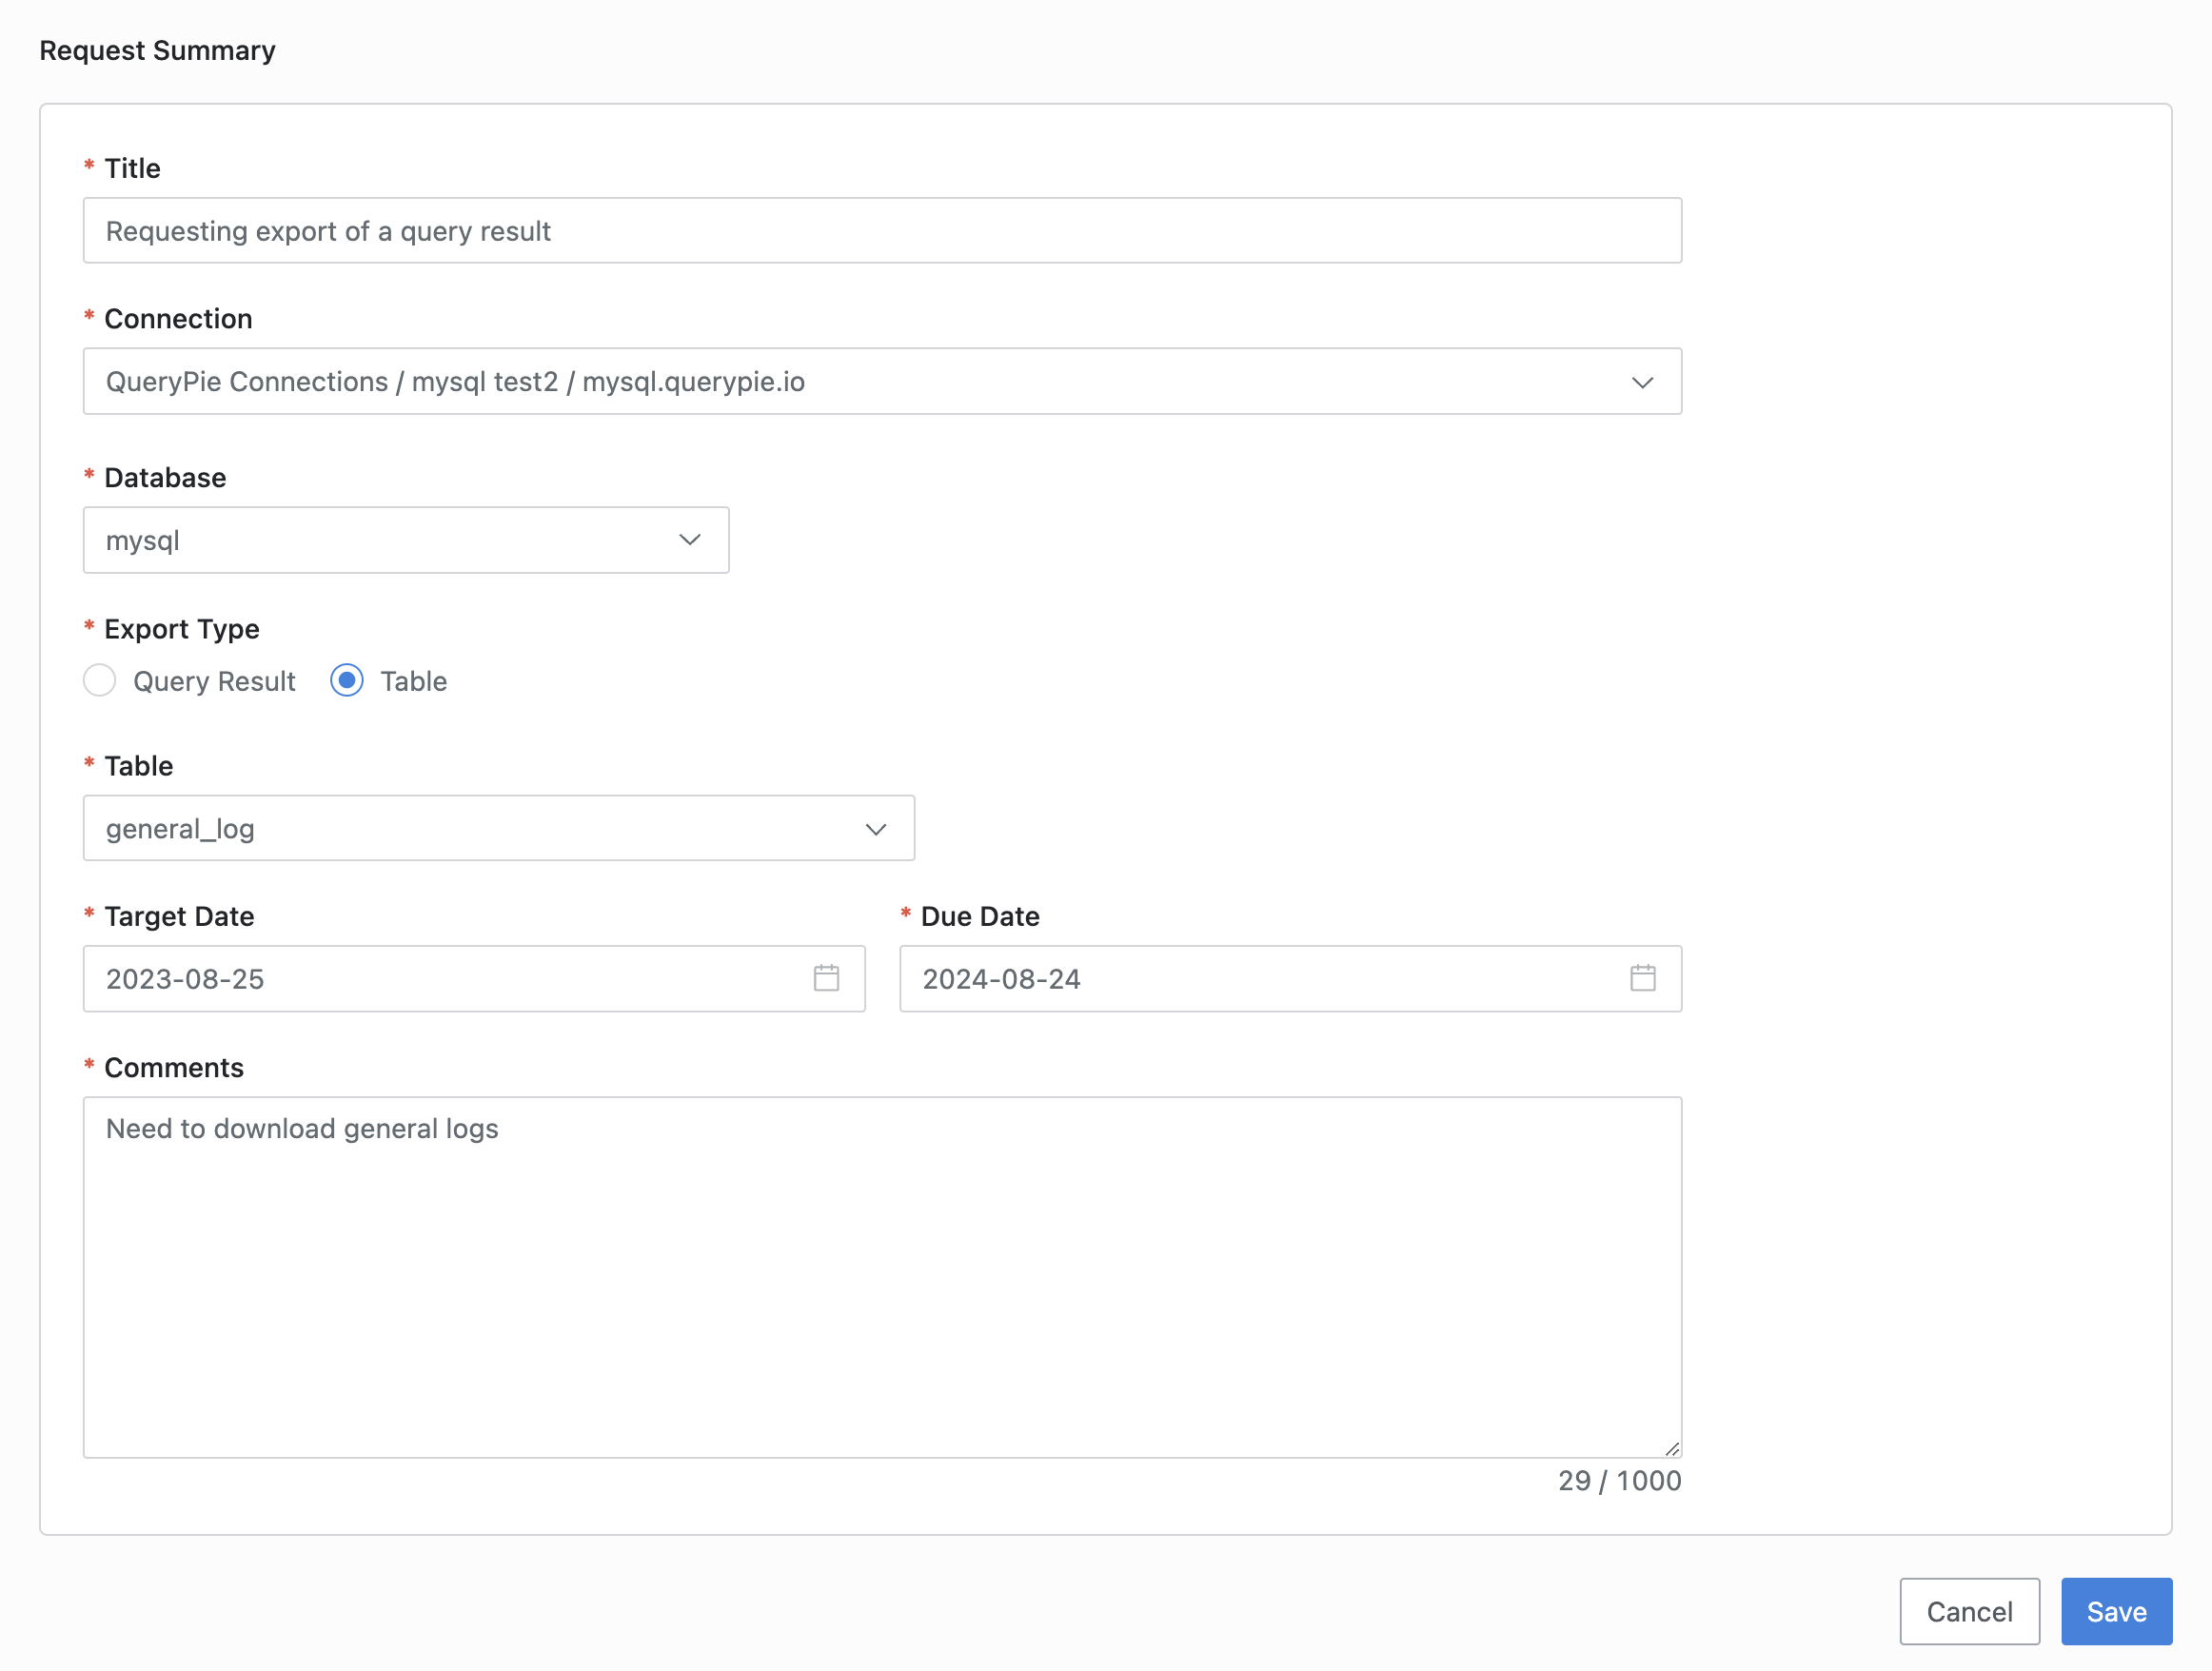
Workflow > Submit Request > Export Request > Request Summary
Title : Provide a subject for the request.
Connection : Select the target database to request data export.
Users can only select databases they have access to at the time of the request.
Database : Select the logical schema within the selected database where you want the SQL execution for data export to occur.
Content Type : Choose the preferred format for accessing the data you wish to download.
Query Result : Construct your own query within the Queries section of the Request page. Subsequently, you can download the results derived from that query.
Table : You can download the complete selected table.
Target Date : Set the date for when you want this query to run. The default selection is the day of the request.
Due Date : Set the date for when the approval or execution expires. The default selection is one year from now.
Comments : Provide a reason or justification for requesting data export.
Click
Saveto submit your SQL export request.
Once your request is successfully saved and submitted, you can track your request history and approval status in the Workflow > Sent Request > In Progress section.
Download Approved Data
Workflow > Executions > To Do > Request Details > Execute
Once an export request is approved, it becomes available for download.
Navigate to the Workflow > Executions > To Do menu.
Click on the pending export request to access its details page.
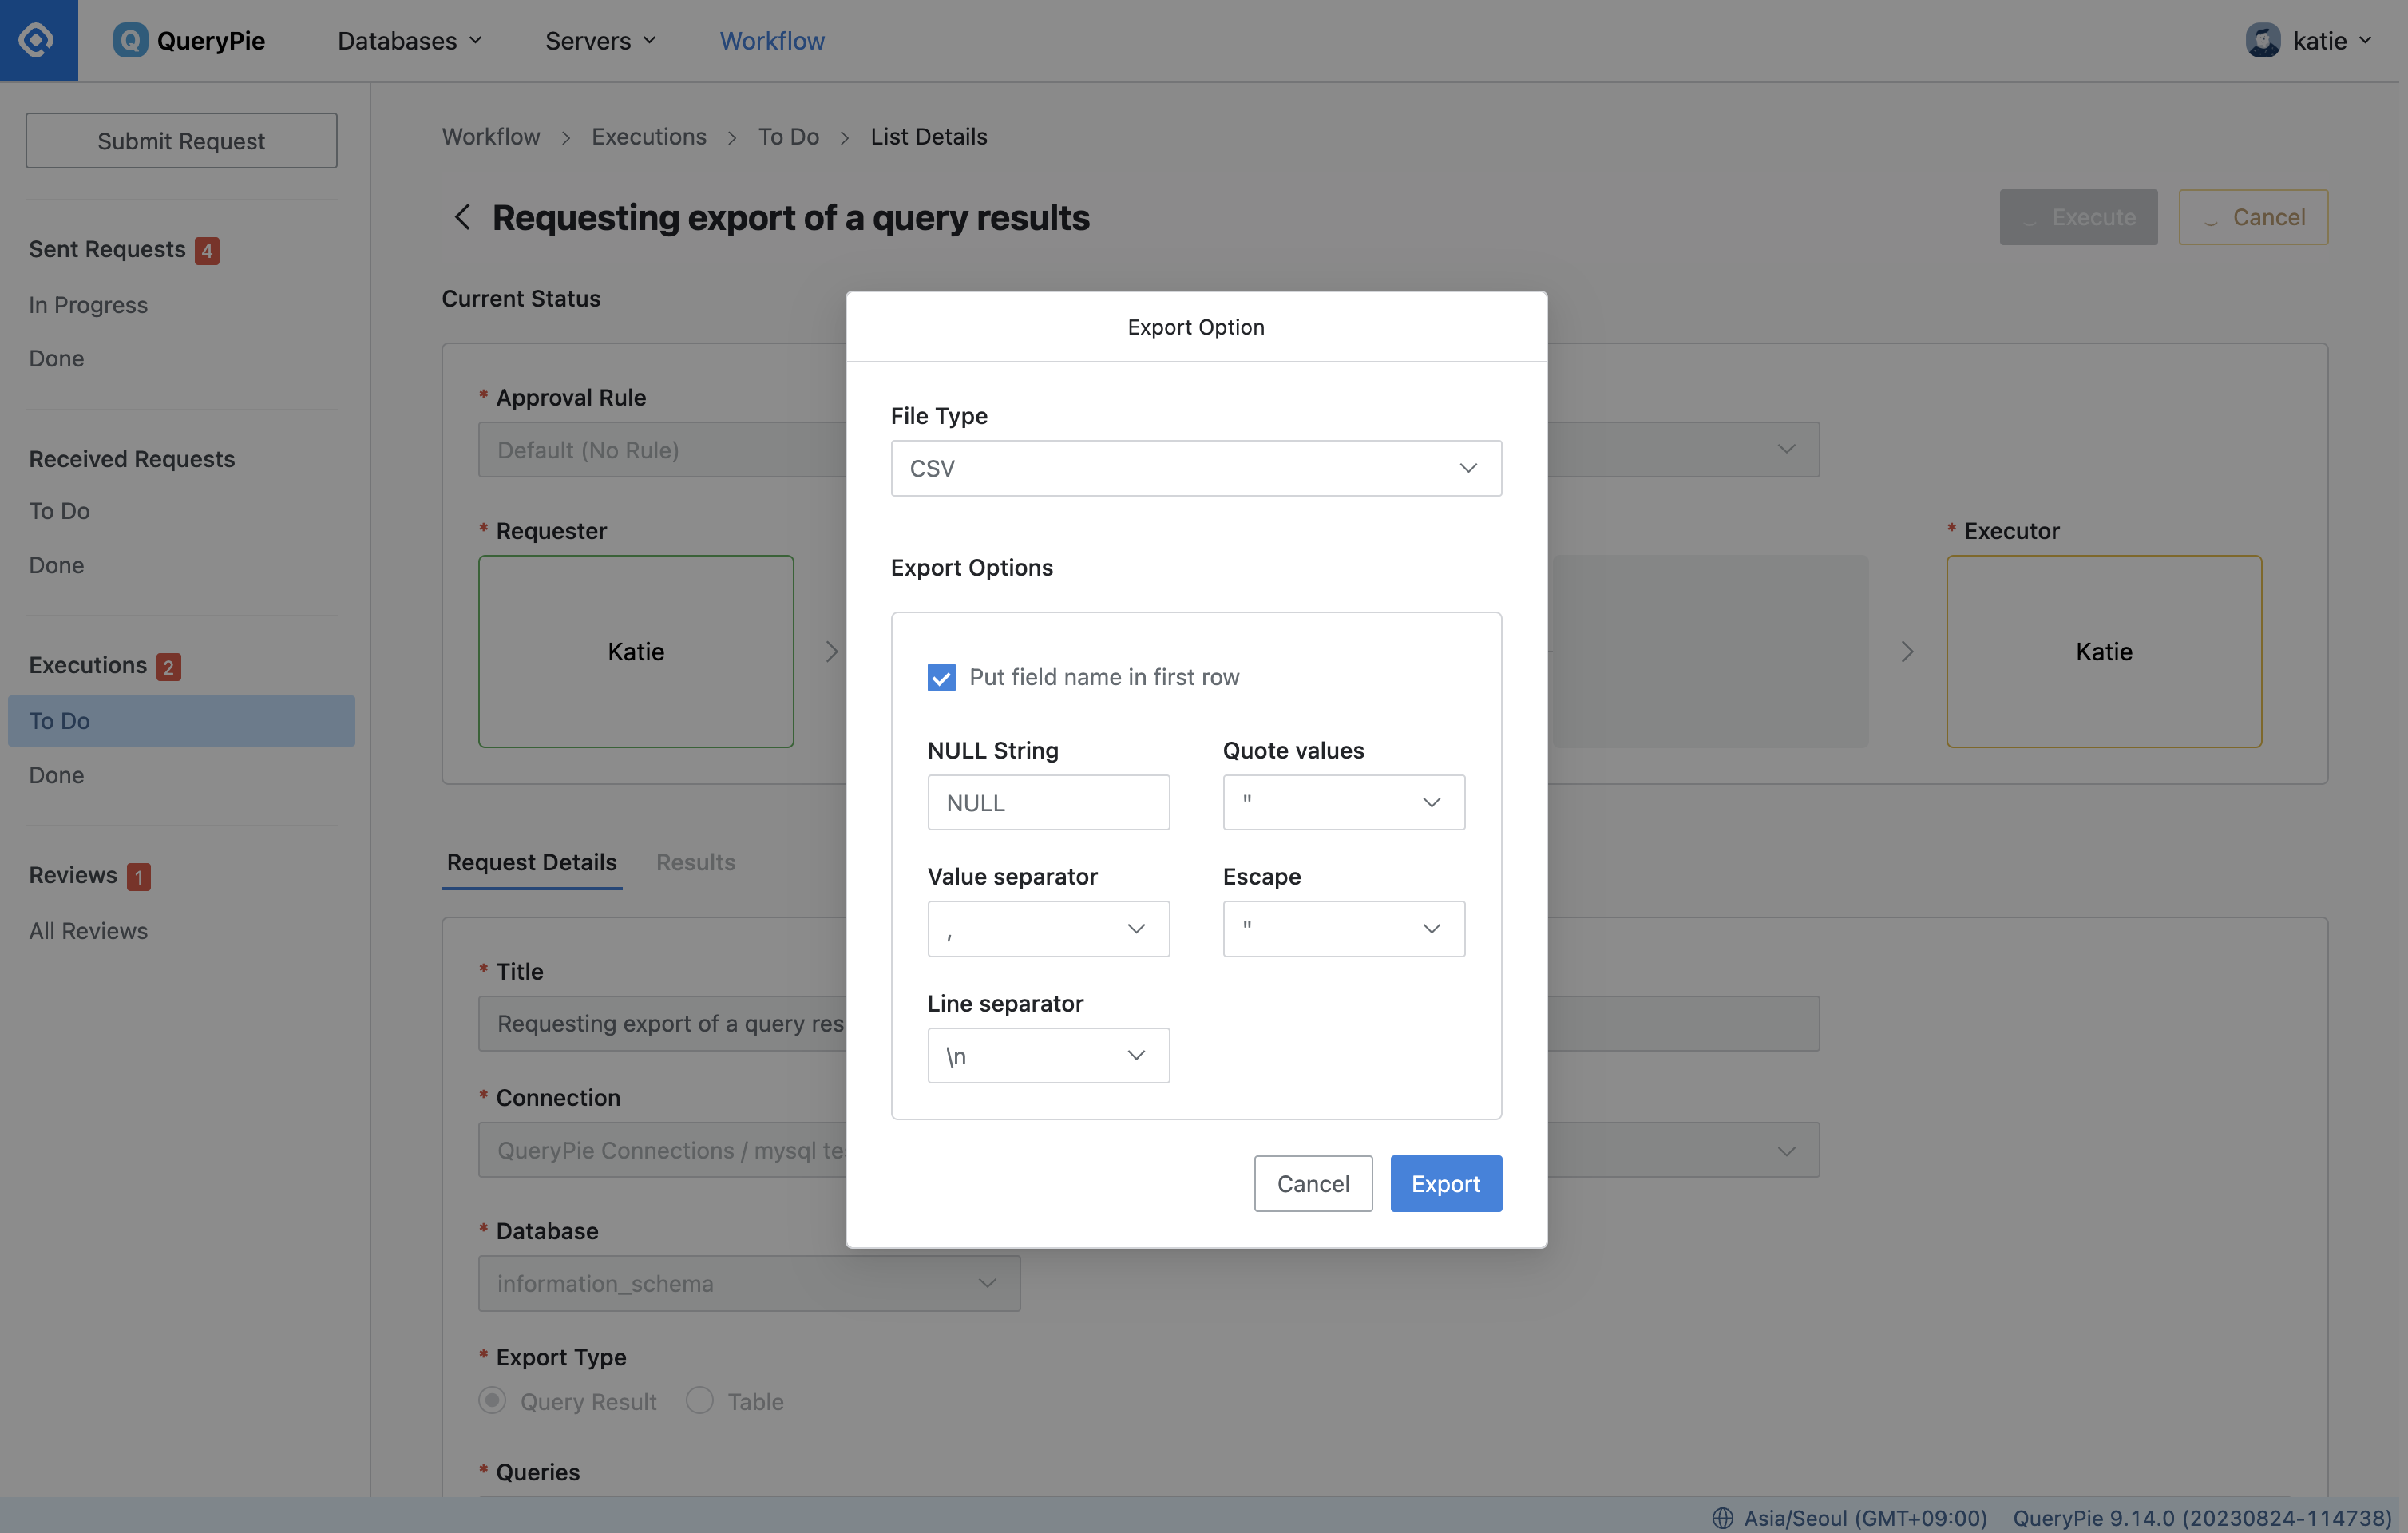
After reviewing the details of the export request, click the
Executebutton in the top right corner.In the Export Option modal, configure your export settings as needed. Then, click the
Exportbutton to initiate the download.If you decide not to proceed with the download, you can click the
Cancelbutton.
Once the download is complete, you can review the results on the Results tab within the details page.
To access the history of downloaded requests, navigate to Workflow > Executions > Done menu.
Related Topics