Data Masking
Overview
You can set policies to mask and display data that requires management within your organization, such as personal information or sensitive data, when viewing. In the Data Masking menu, you can select the connection for which to set policies, create policies, and register and manage rules for data that needs masking on a column basis.
Creating Data Masking Policies
Register new masking policies by connection.
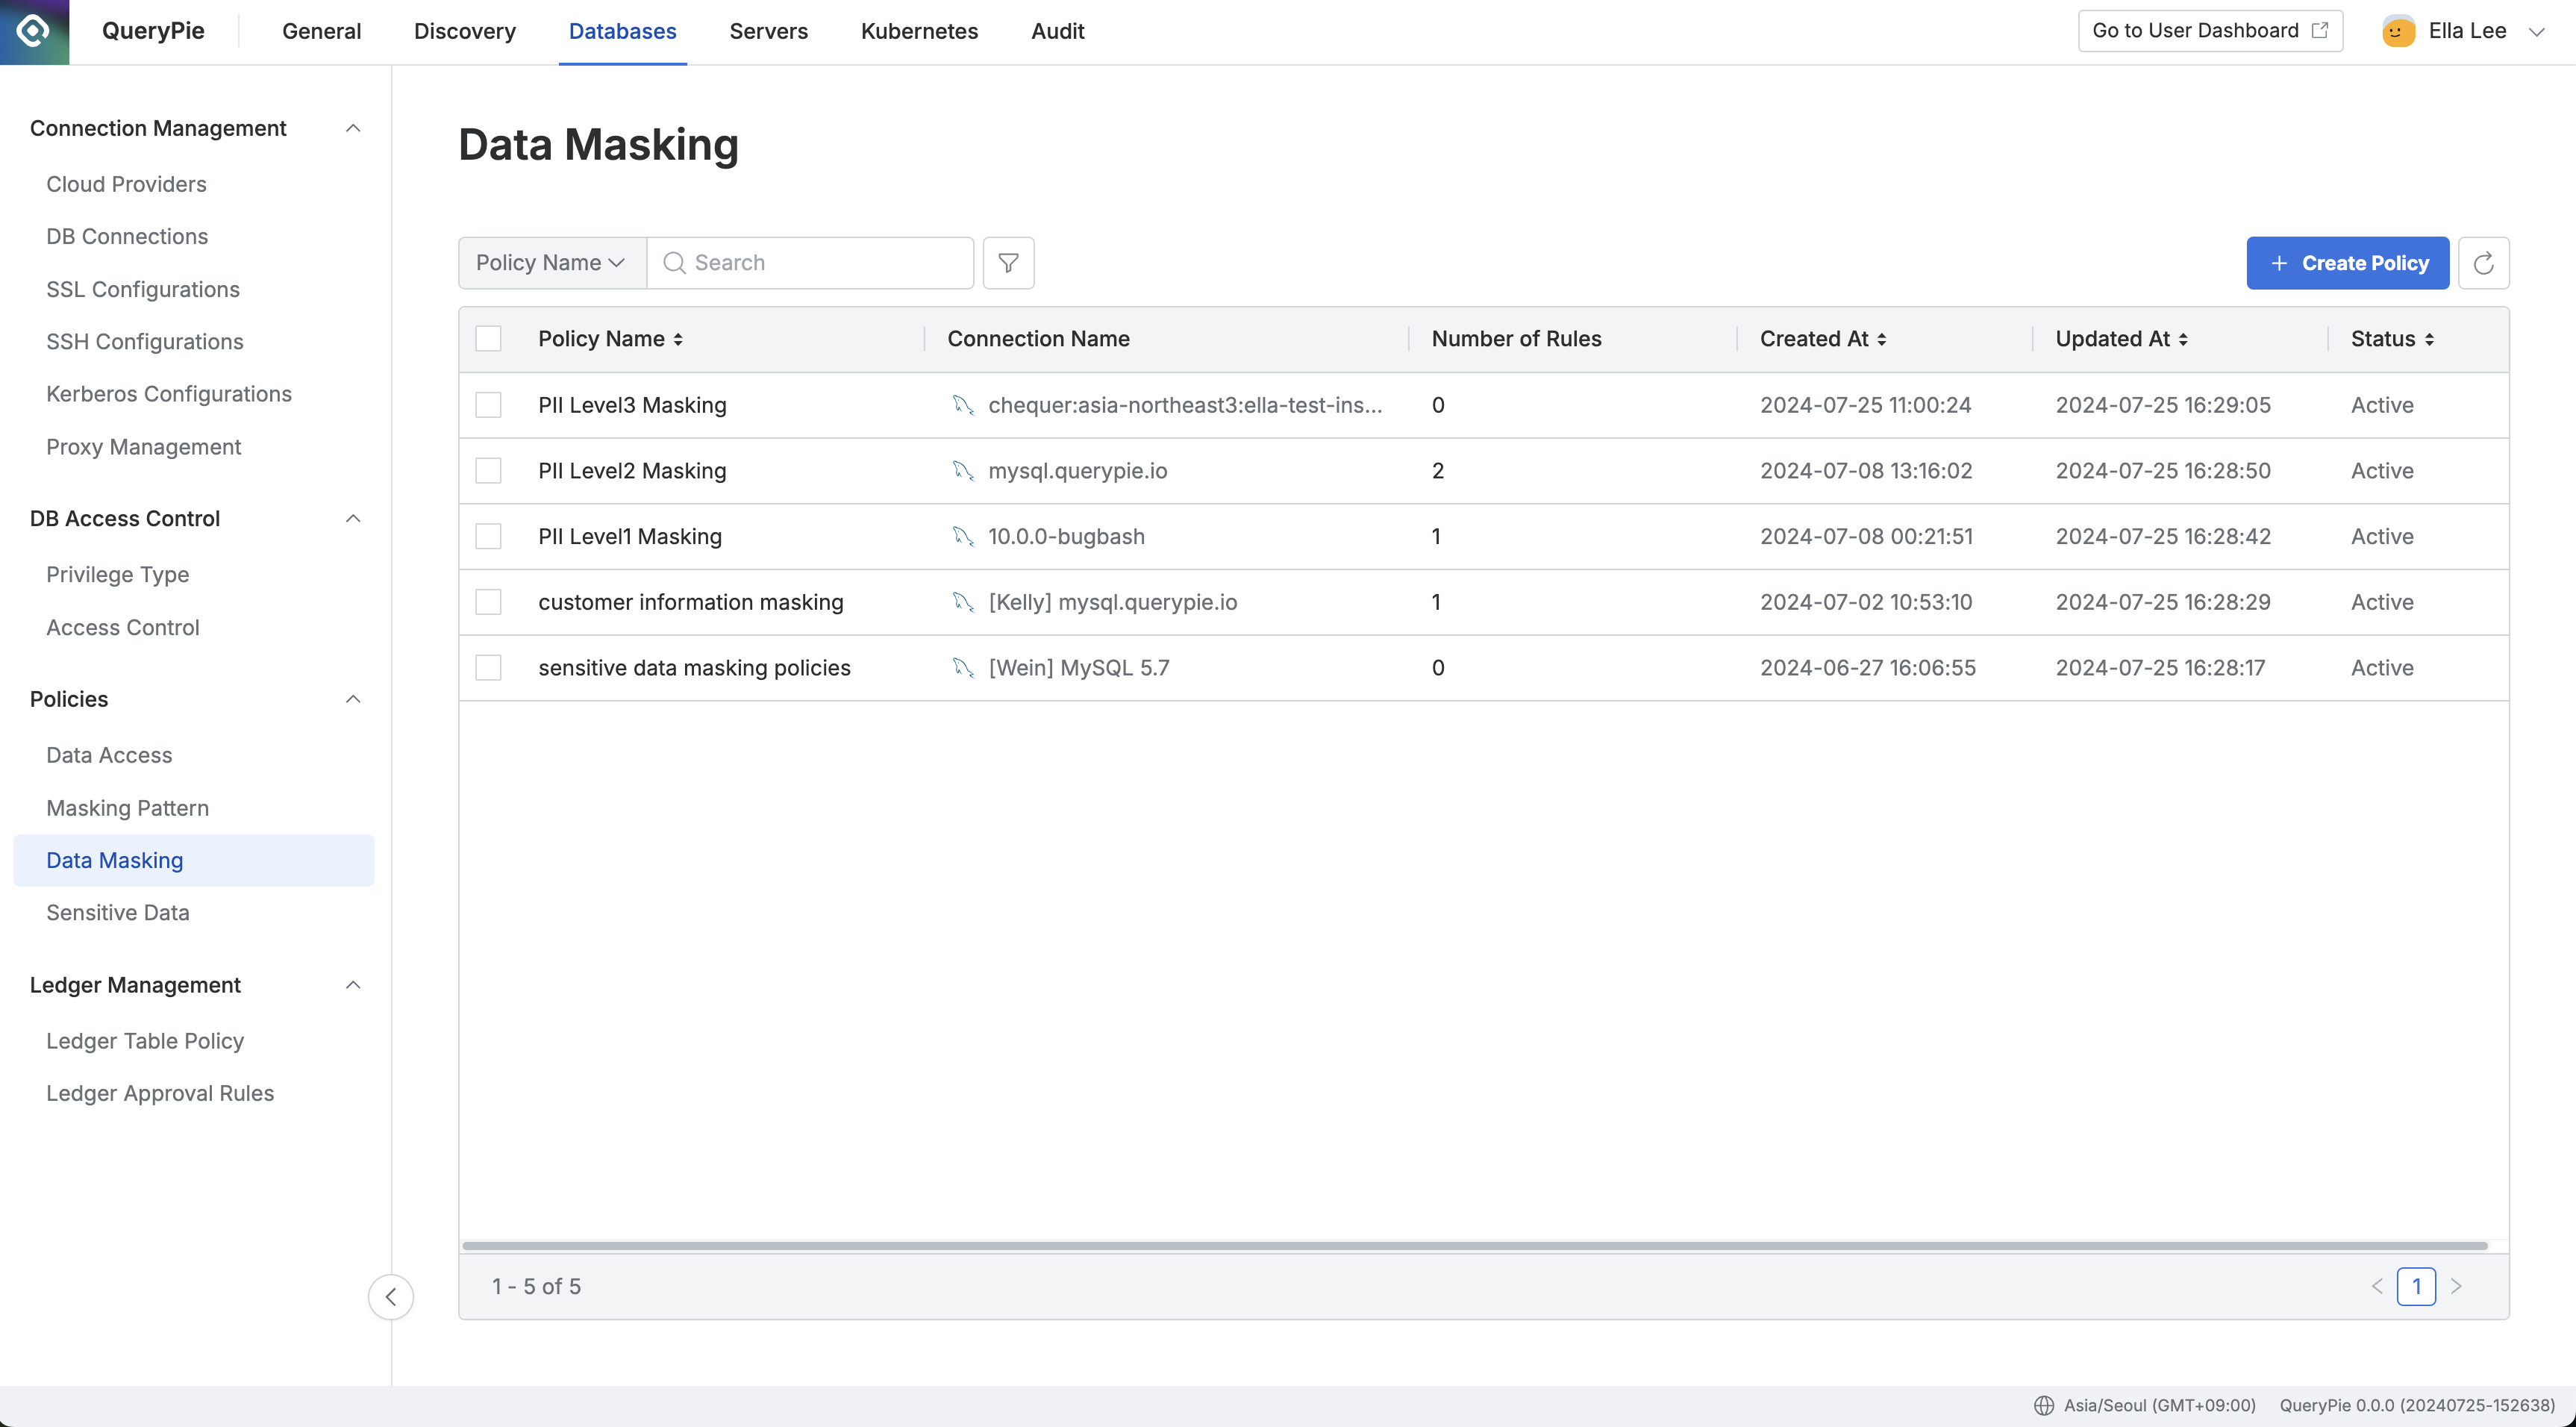
Administrator > Databases > Policies > Data Masking
- Navigate to Policies > Data Masking menu in Database settings.
Create PolicyClick the button in the top right corner.- Enter the following information for policy creation:
- Policy Name : A name to distinguish the policy on the screen.
- Target Connection : Select the connection to apply the policy to. One policy can be linked to one connection.
SaveSave through the button.
You can confirm that the policy has been created in the Data Masking policy list.
Registering Rules in Data Masking Policies
Administrator > Databases > Policies > Data Masking > Rule Details
After creating a policy, register the path of the data to which the policy will be applied as a rule.
- Click on the policy you created in the Data Masking menu.
- The policy details and rule registration screen will be displayed.
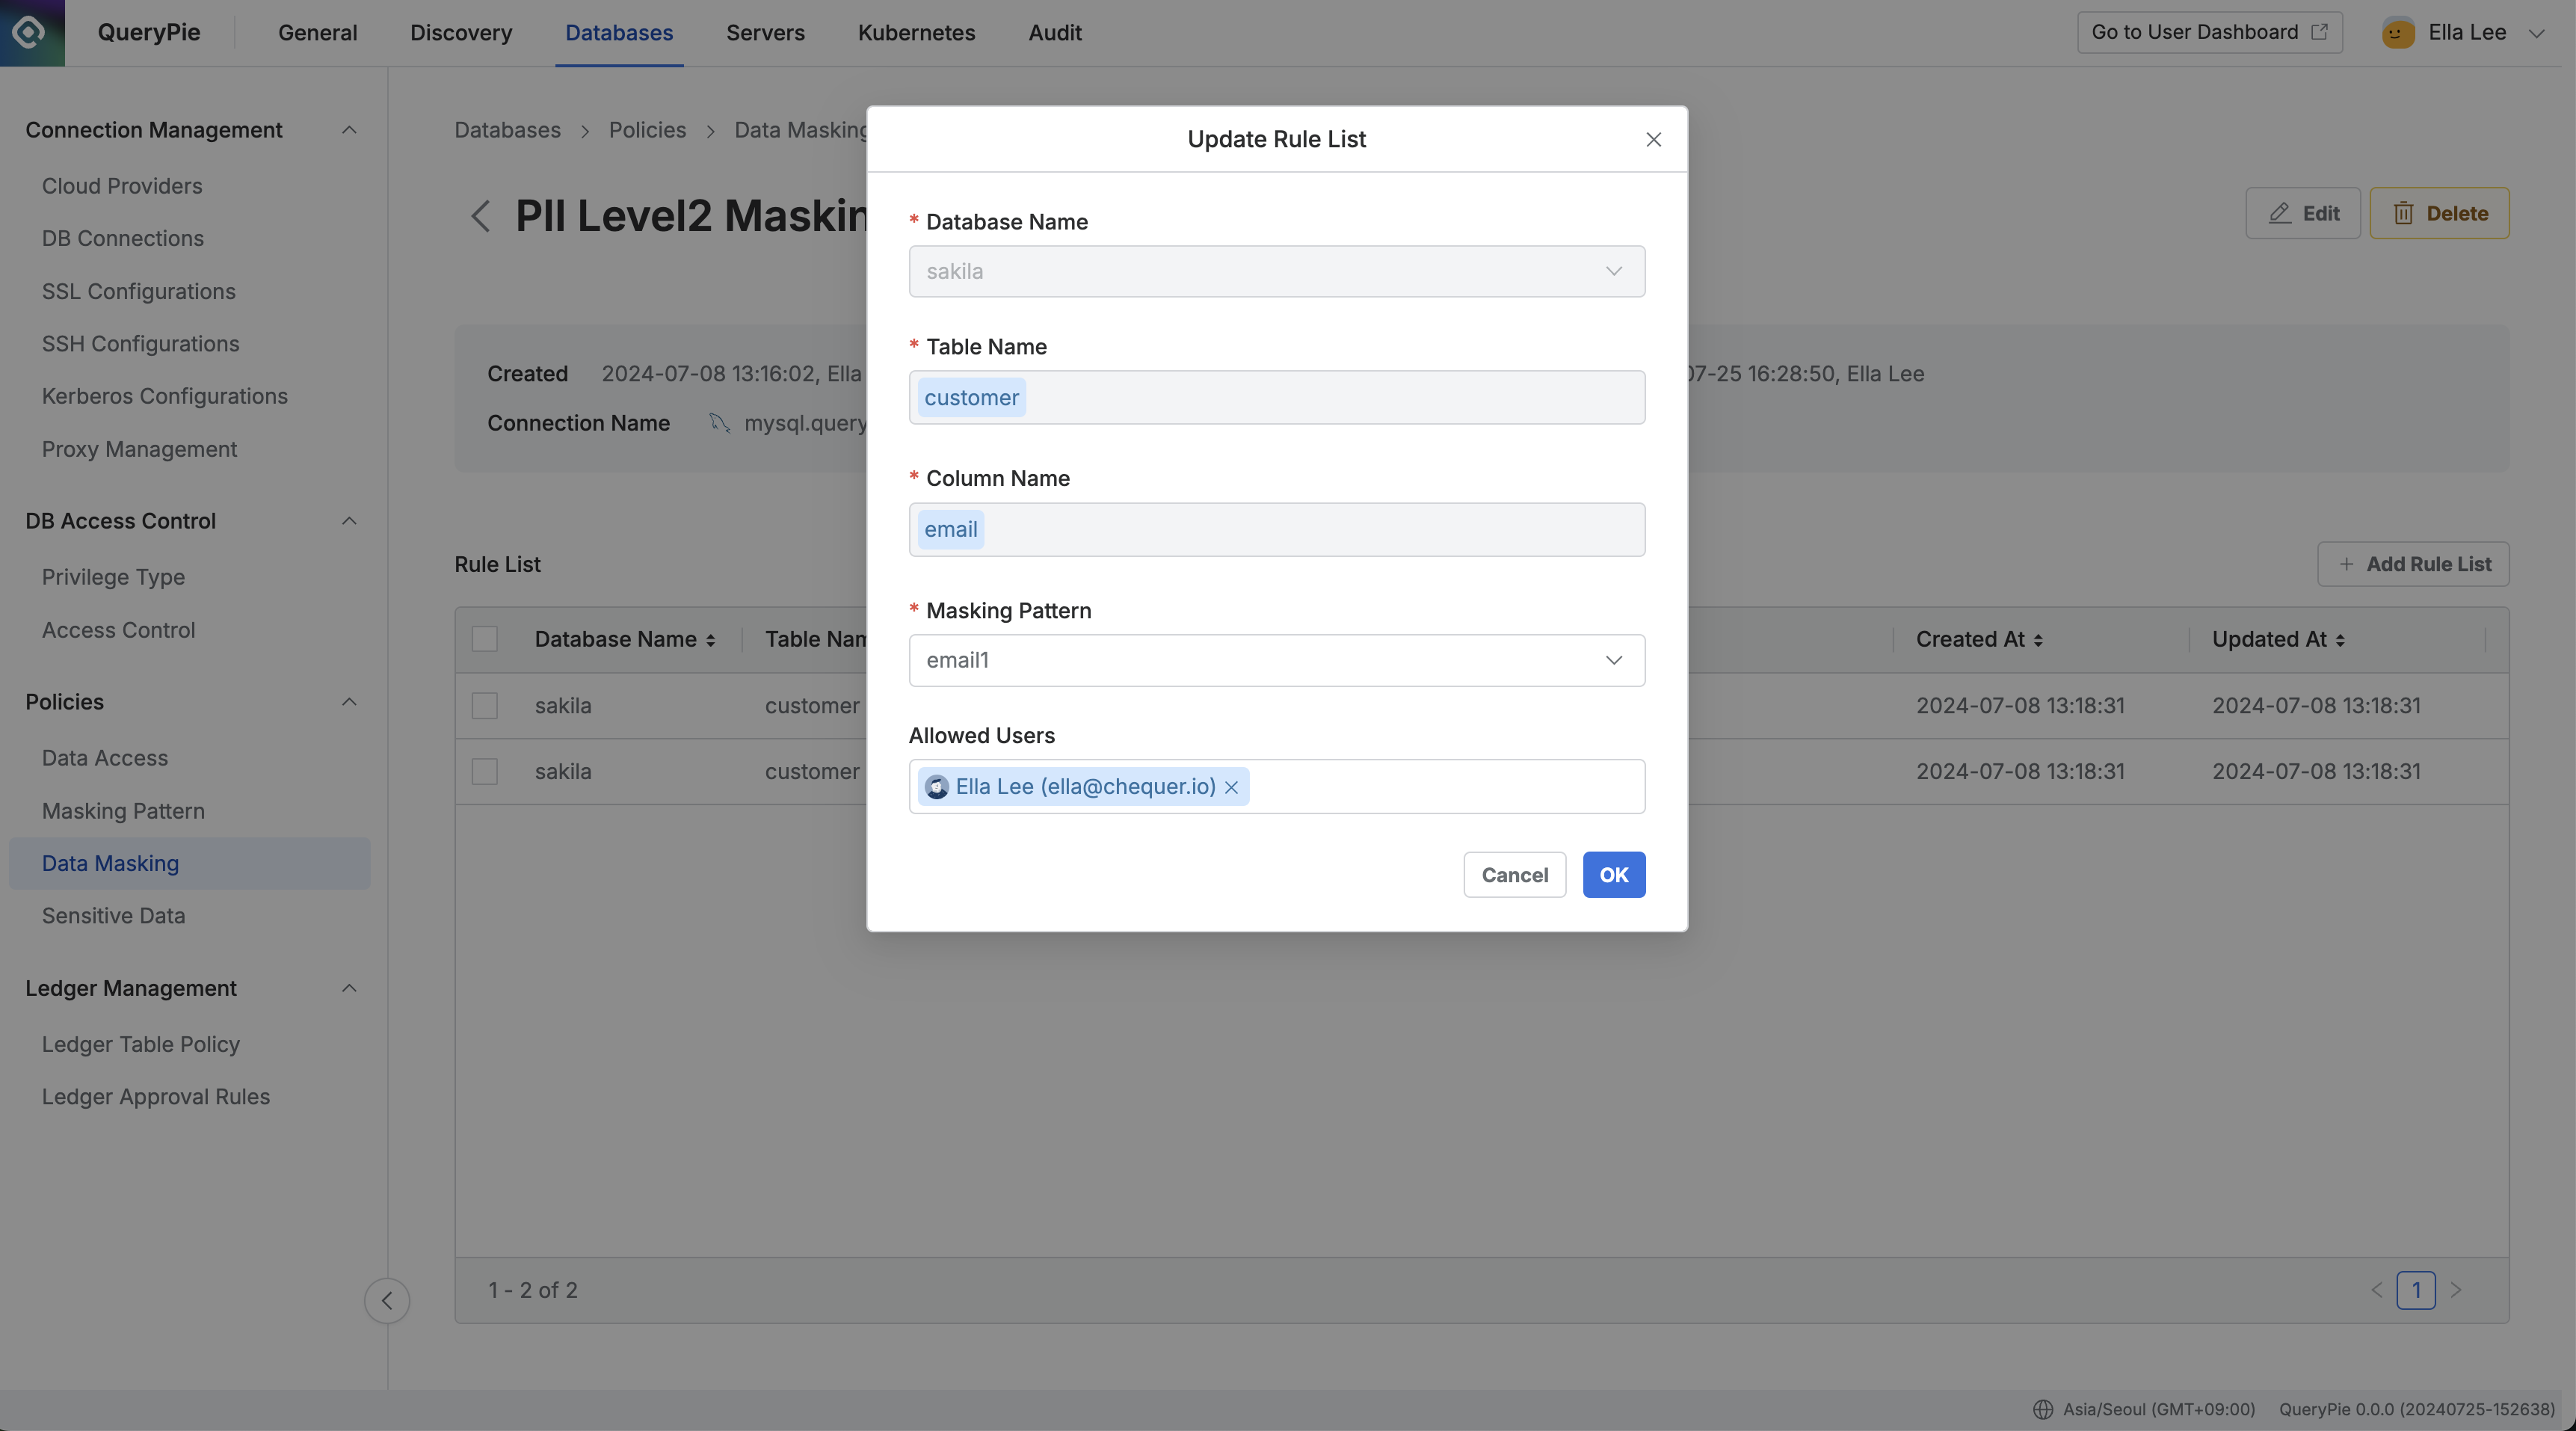
Add Rule ListClick the button on the right. - Select the path of the data to apply the policy to in order:
- Database Name : Required value for rule registration.
- Table Name : Required value for rule registration.
- Column Name : Required value for rule registration.
- Apply masking patterns:
- Select one or more masking patterns to apply to the column selected in step 3.
- By default, patterns for masking about 20 types of personal information and sensitive data are provided.
- You can create detection patterns and masking patterns directly through regular expressions in the Masking Pattern menu.
- You can make exceptions to masking rules for users or groups who need to view the data:
- Allowed Users : Select users or groups to make exceptions for this rule.
OkSave through the button.
You can confirm that the rule has been registered in the Rule List tab. Now when users view the data, it will be displayed masked according to the applied masking pattern, such as ’*****@gmail.com’.
When selecting Database Name, the error “[ENGINE] [30101] Please Check the user credential or IP ACL settings. Access denied for user ‘username’@‘host’ (using password: YES)” occurs. A. In this case, the DB account information may not be set up or may be set up with incorrect information. Click on the connection information in Database Settings > Connection Management > DB Connections menu, then enter and save the Database Username / Password information and try again.
Checking Access Logs for Columns with Applied Masking Policies
From version 10.3.0, you can check access logs for columns controlled by masking policies.
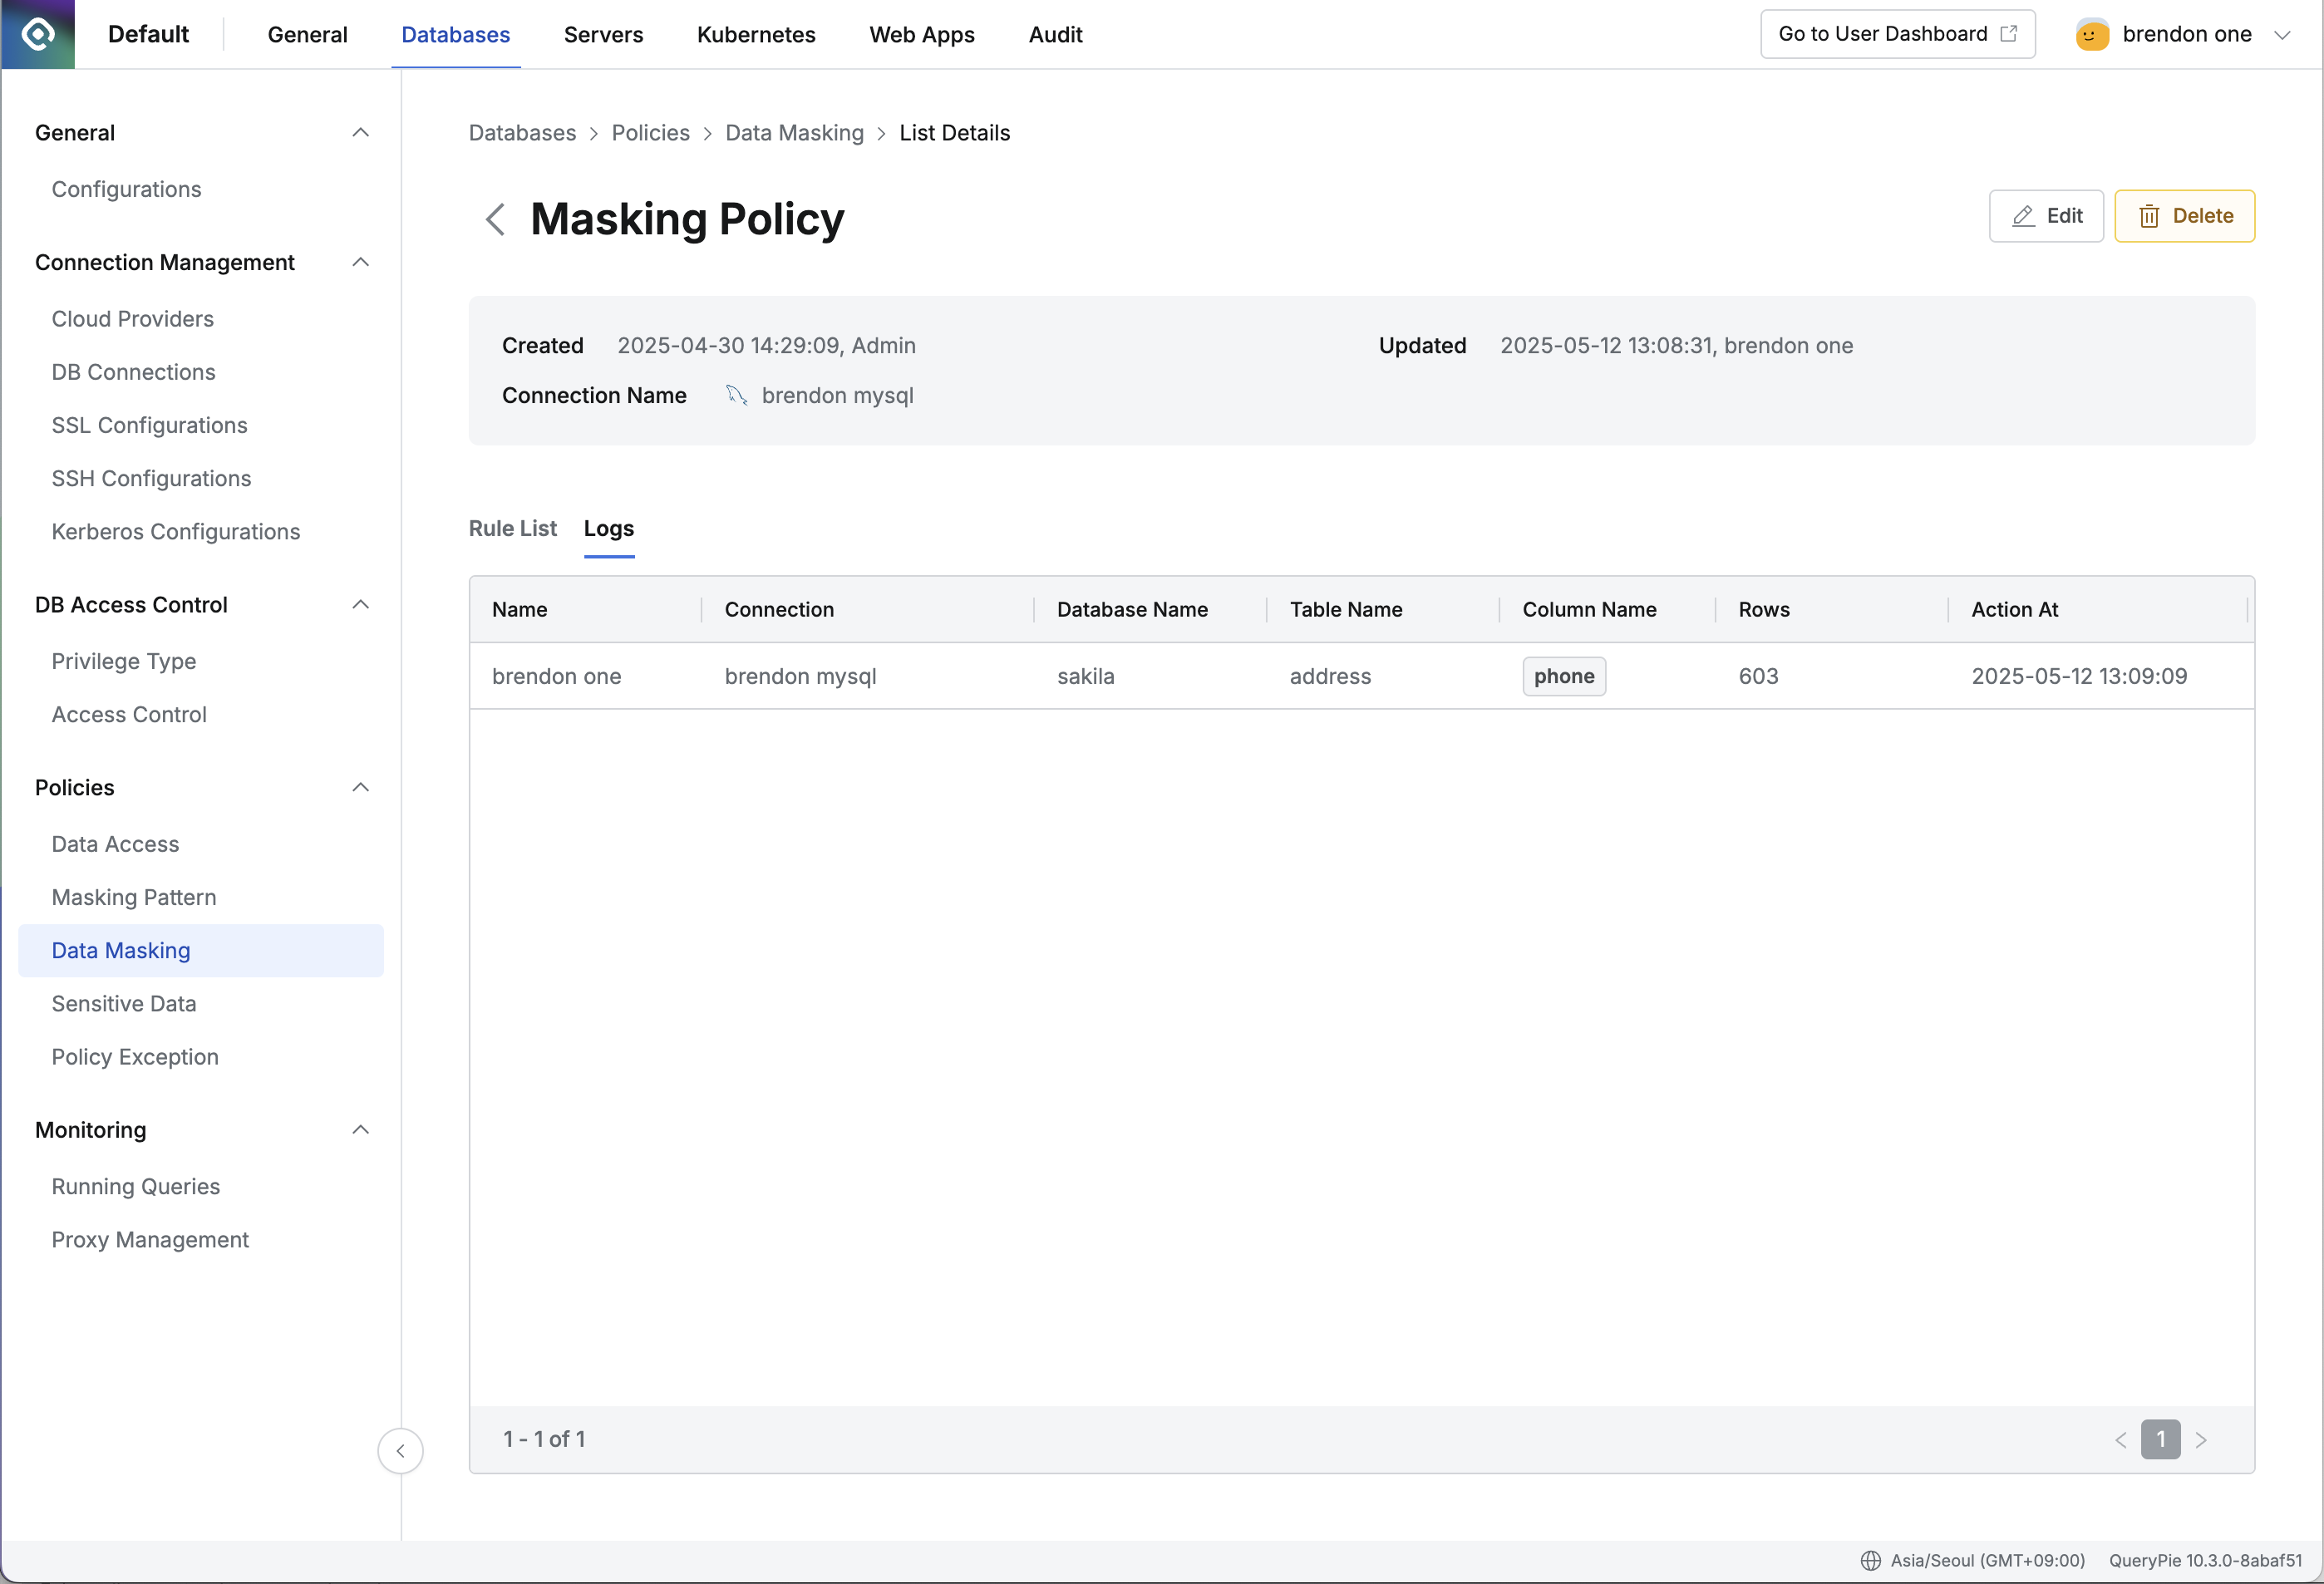
- Click on the individual item (row) of the policy you created in the policy list to navigate to the details page.
- Select the Logs tab.
- Check the log content:
- Name : Display Name of the QueryPie user.
- Connection : Target connection controlled by the policy.
- Database Name : Target logical database name controlled by the policy.
- Table Name : Target table name controlled by the policy.
- Column Name : Target single or multiple column names controlled by the policy.
- Rows : Number of rows returned by the query.
- Action At : Time when the query was executed.