Integrating with Okta
Overview
QueryPie supports integration with Okta. You can synchronize users and groups from Okta to grant access and apply policies, enabling a simplified user experience while operating with strict security controls. Integrating QueryPie with Okta enhances security, operational efficiency, and user experience across your database and system management ecosystem.
If you also plan to implement SCIM provisioning integration, please follow the steps in [Okta] Provisioning Integration Guide (../provisioning/okta-provisioning-integration-guide) instead. Using the outbound user synchronization via the Okta API at the same time may affect synchronization; proceed with caution.
Add QueryPie as an application in Okta
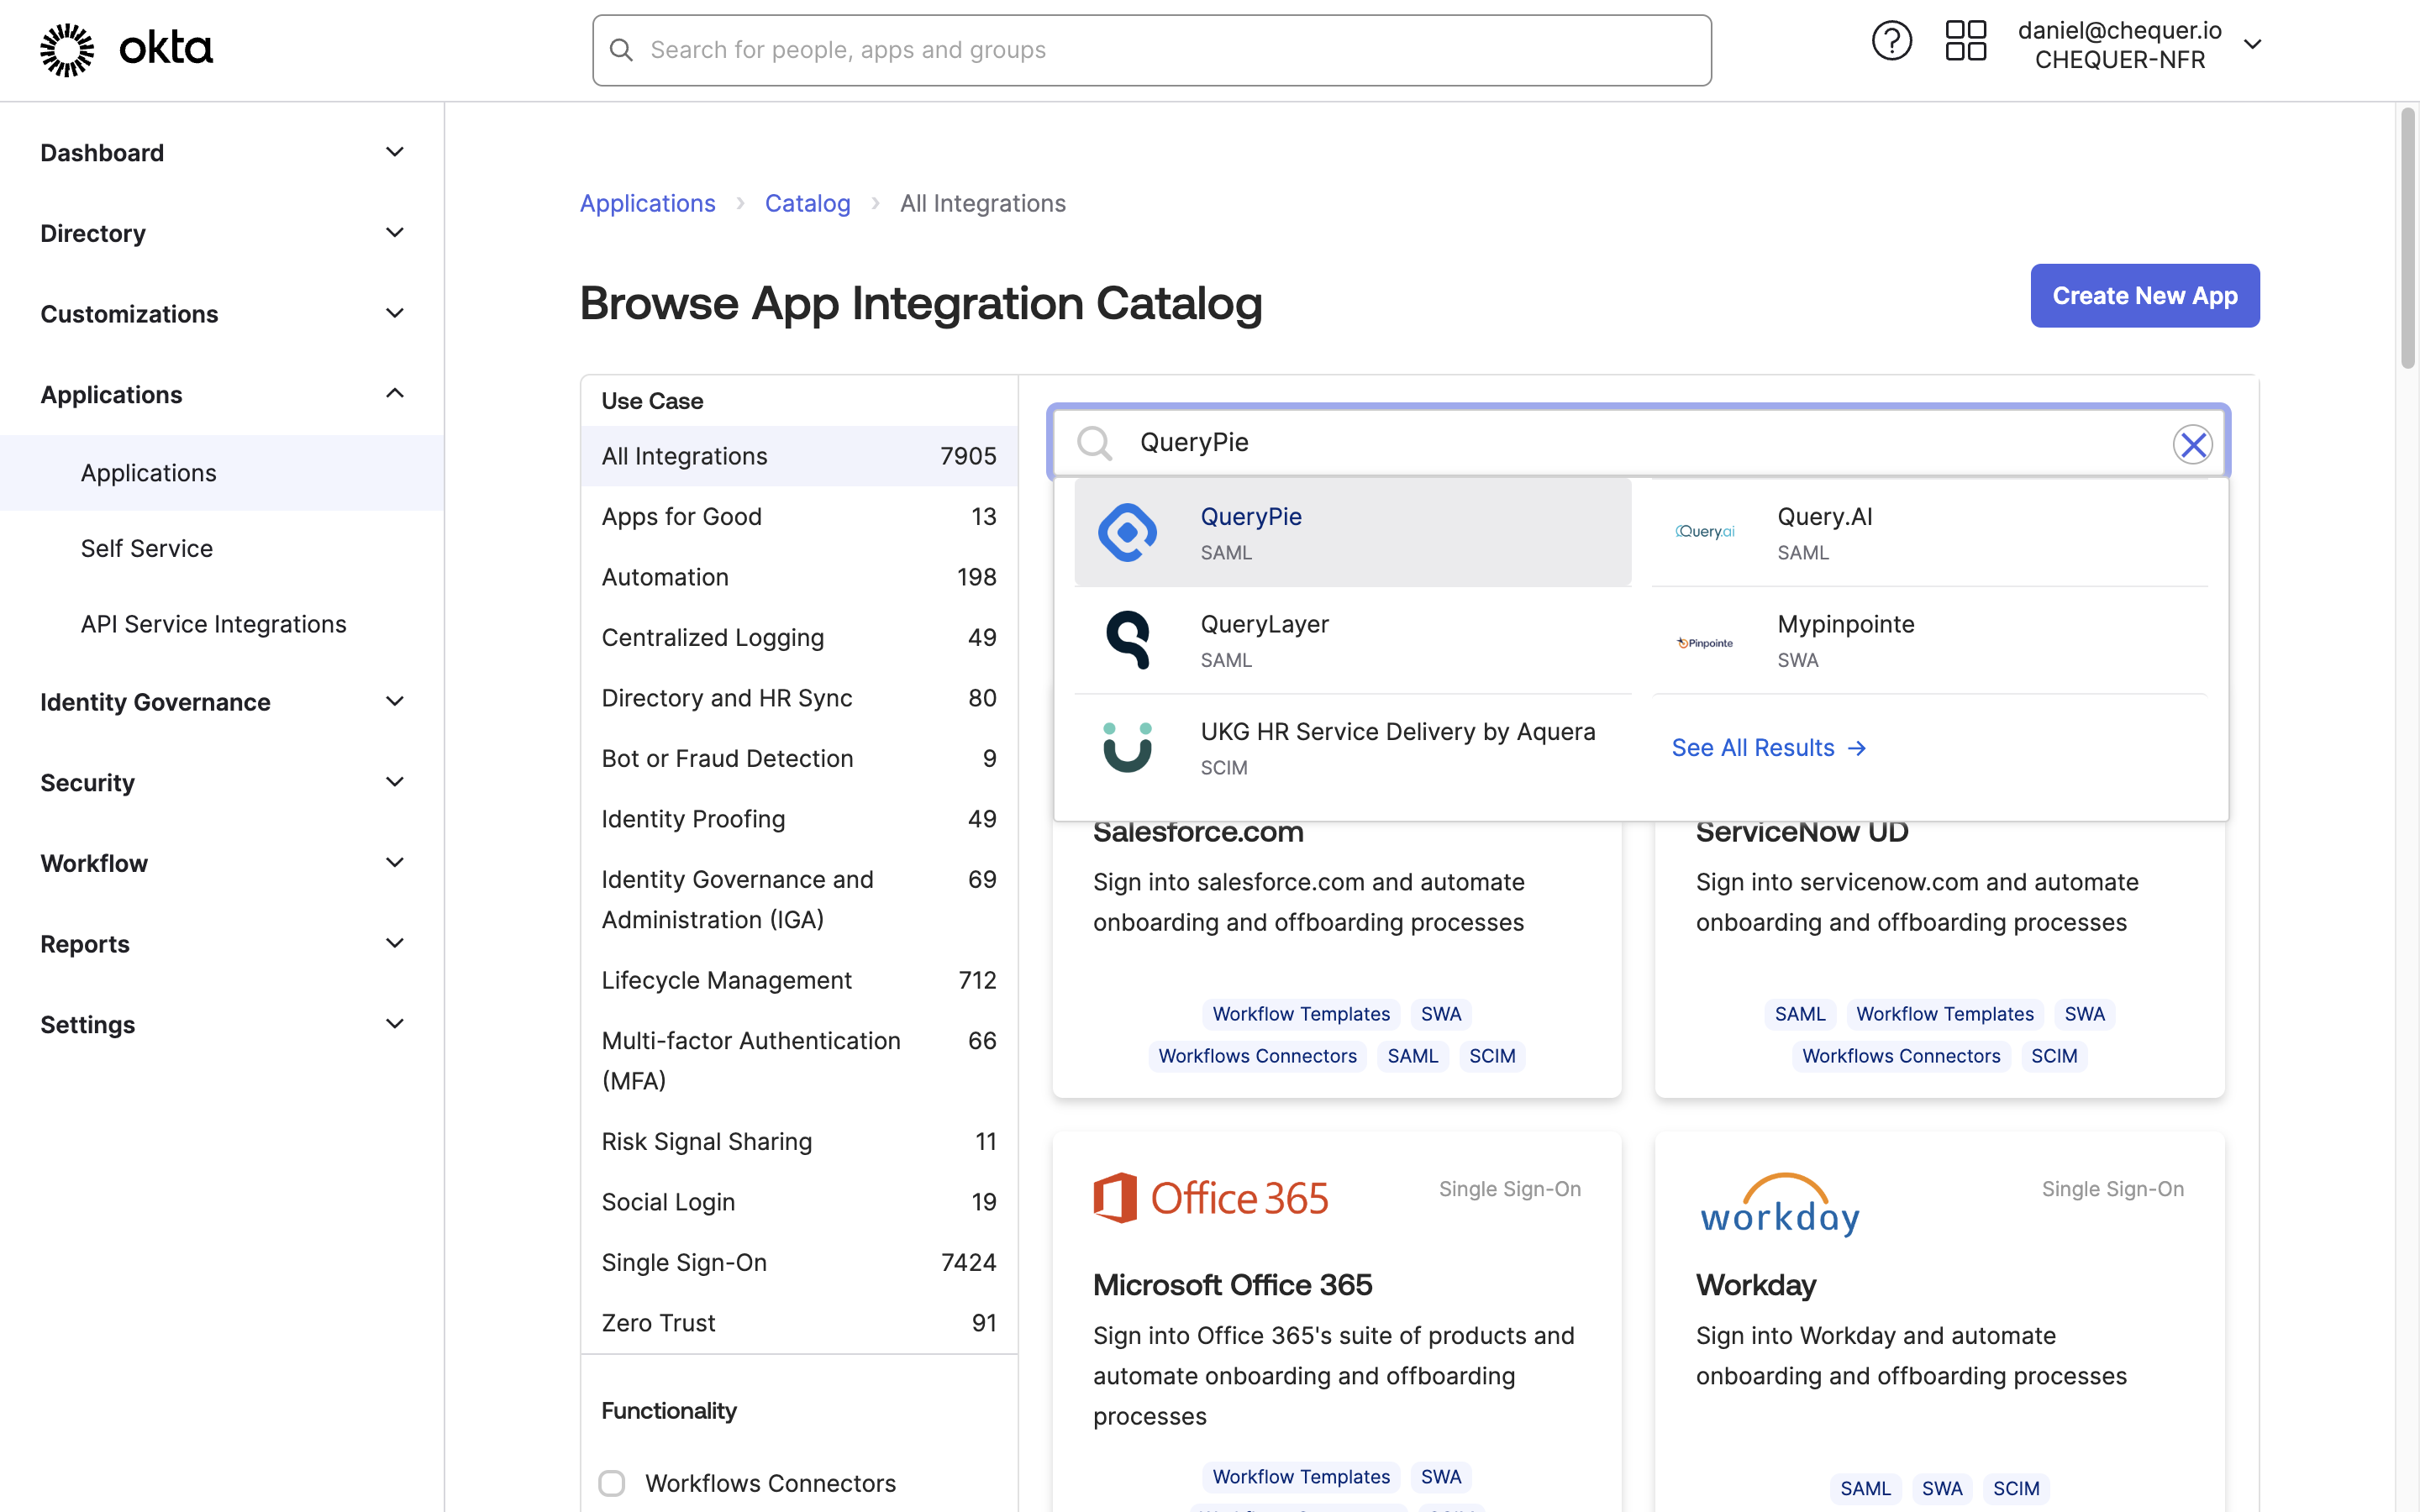
Okta Admin > Applications > Applications > Browse App Catalog > Search QueryPie
- Sign in to the Okta service with an admin account.
- Click your profile in the upper-right and go to Your Org.
- In the left panel of the Okta Admin Console, navigate to Applications > Applications.
- Click the
Browse App Catalogbutton and search for QueryPie. - On the QueryPie application page, click the
Add Integrationbutton. - Confirm that Application Label is set to QueryPie, then click the
Donebutton to add the application.
Profile settings for Okta account integration
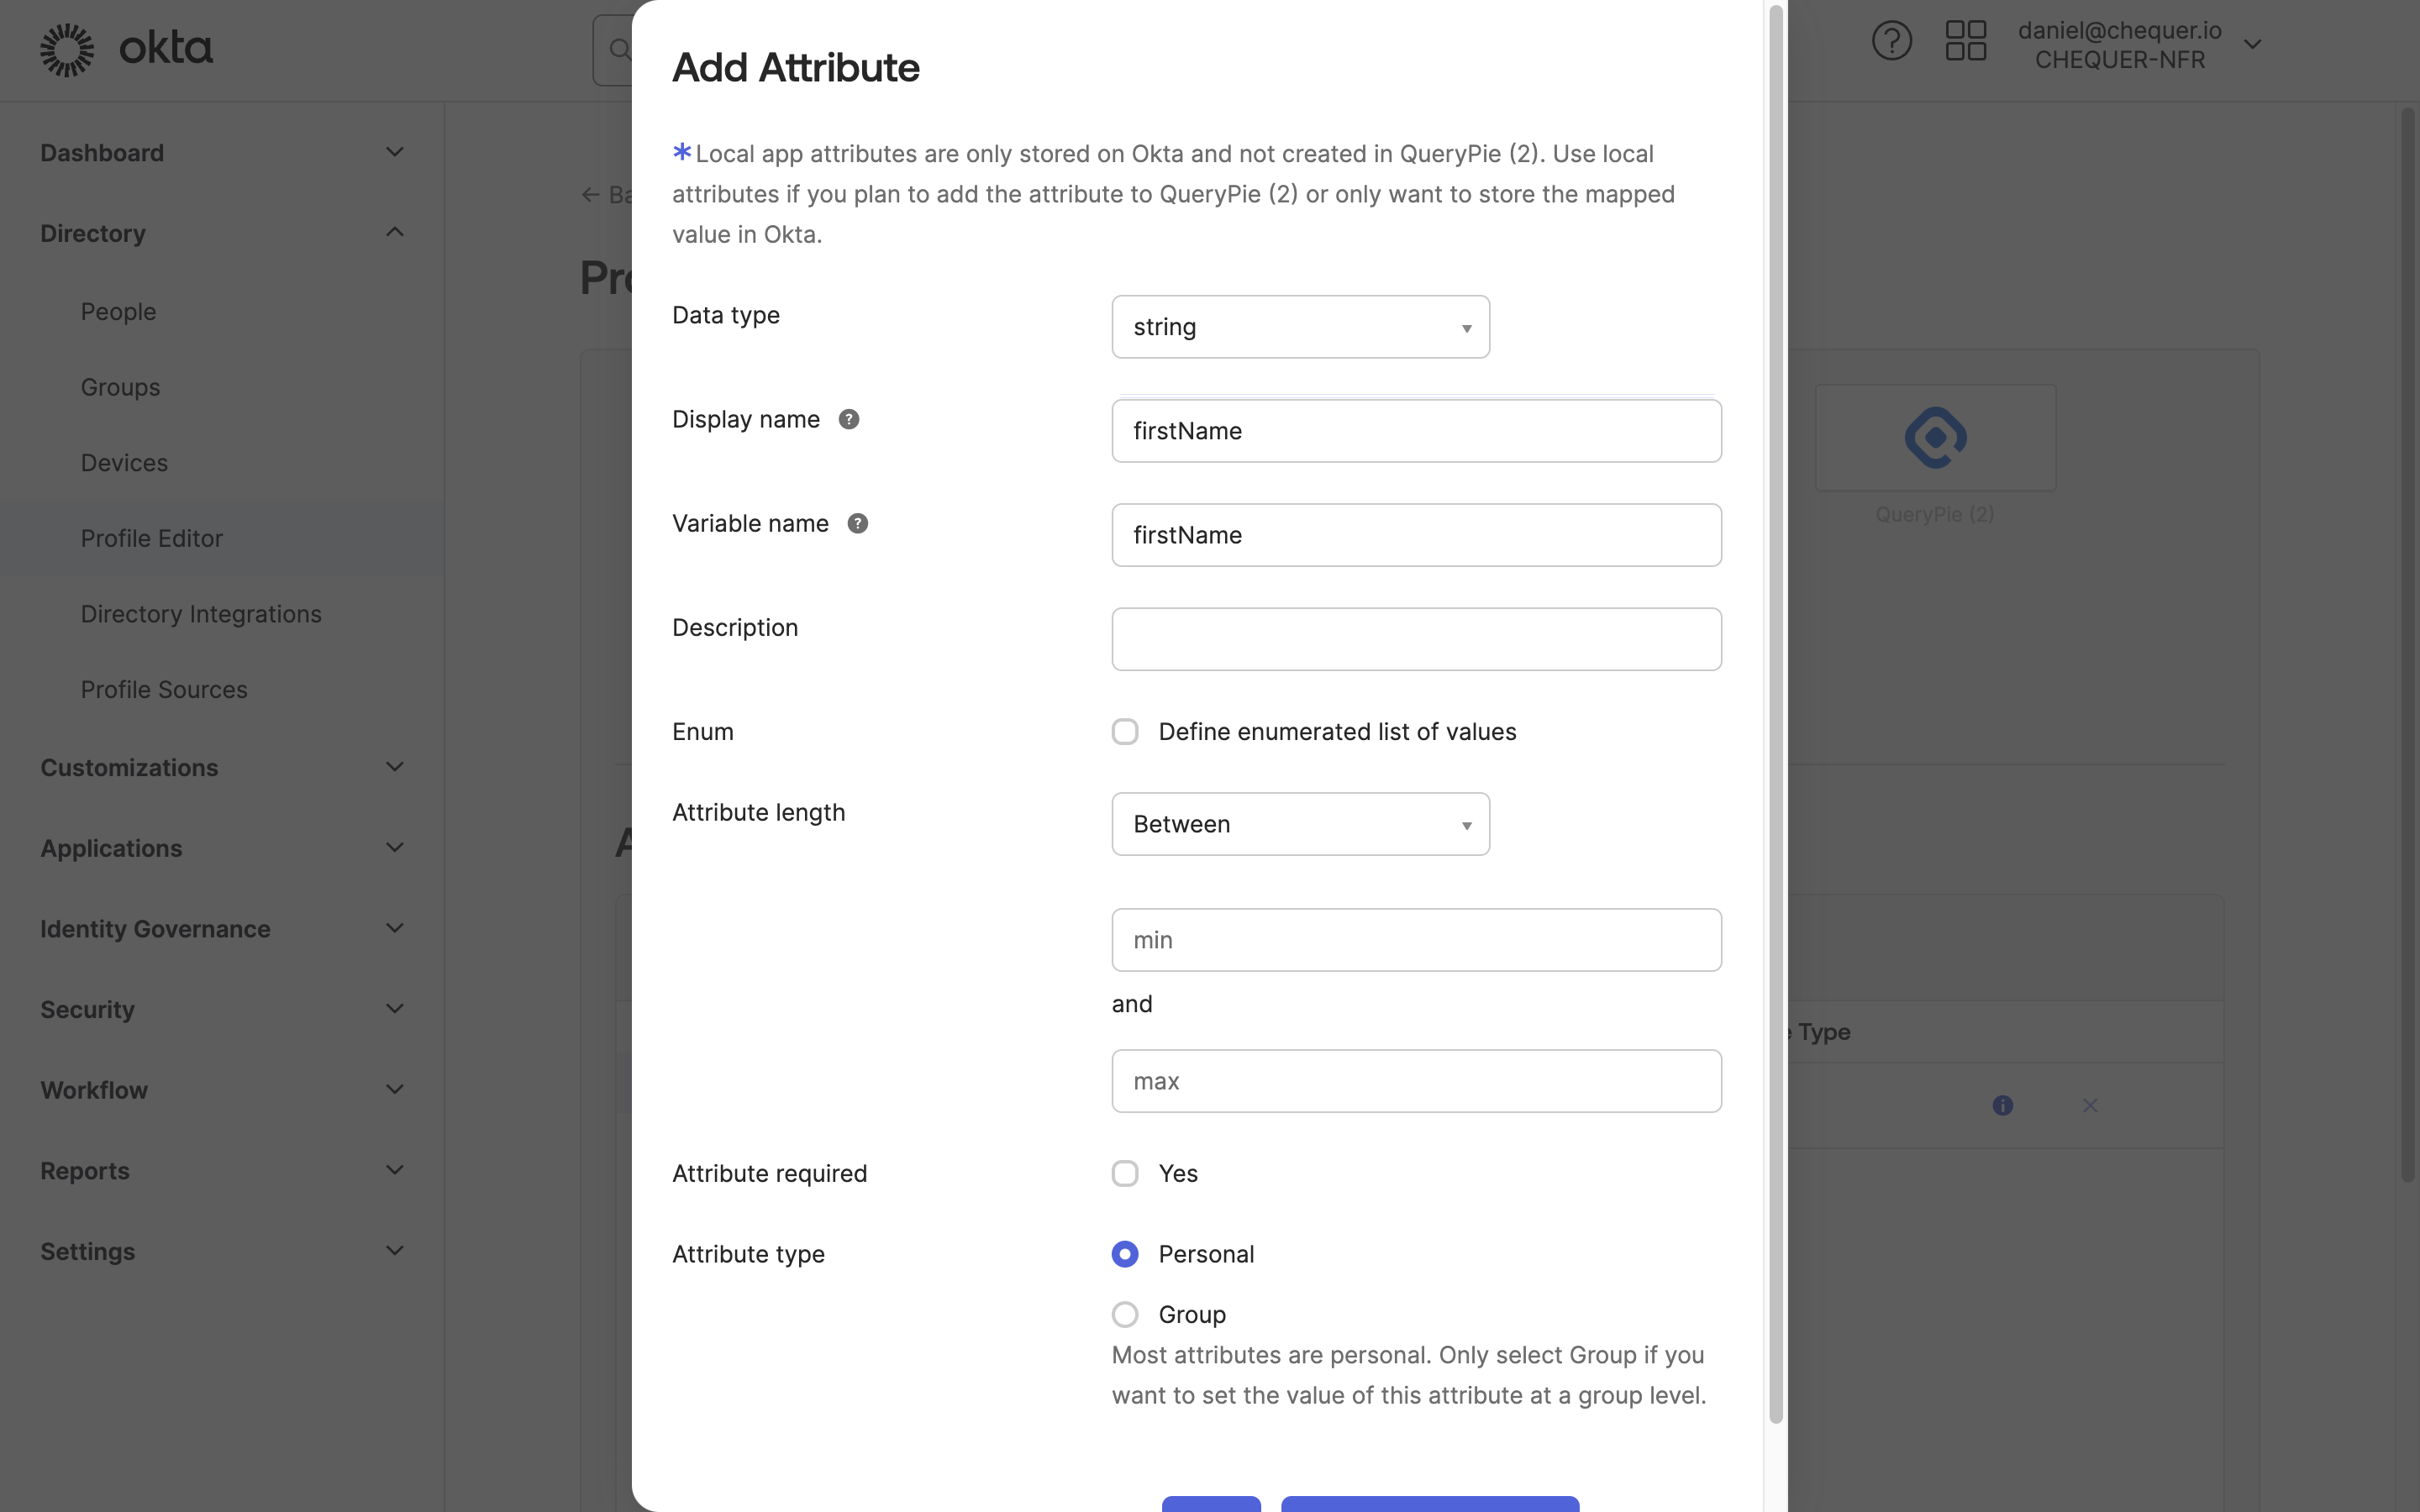
Okta Admin > Directory > Profile Editor > QueryPie User > Add Attribute
- In the left panel of the Okta Admin Console, go to Directory > Profile Editor.
- From the Profile list, click ‘QueryPie User’.
- In the Attributes section, click the
Add Attributebutton. - In the Add Attribute screen, enter the following four items in order and save:
- Display name: firstName / Variable name: firstName, then click
Save and Add Another - Display name: lastName / Variable name: lastName, then click
Save and Add Another - Display name: email / Variable name: email, then click
Save and Add Another - Display name: loginId / Variable name: loginId, then click
Save
- Display name: firstName / Variable name: firstName, then click
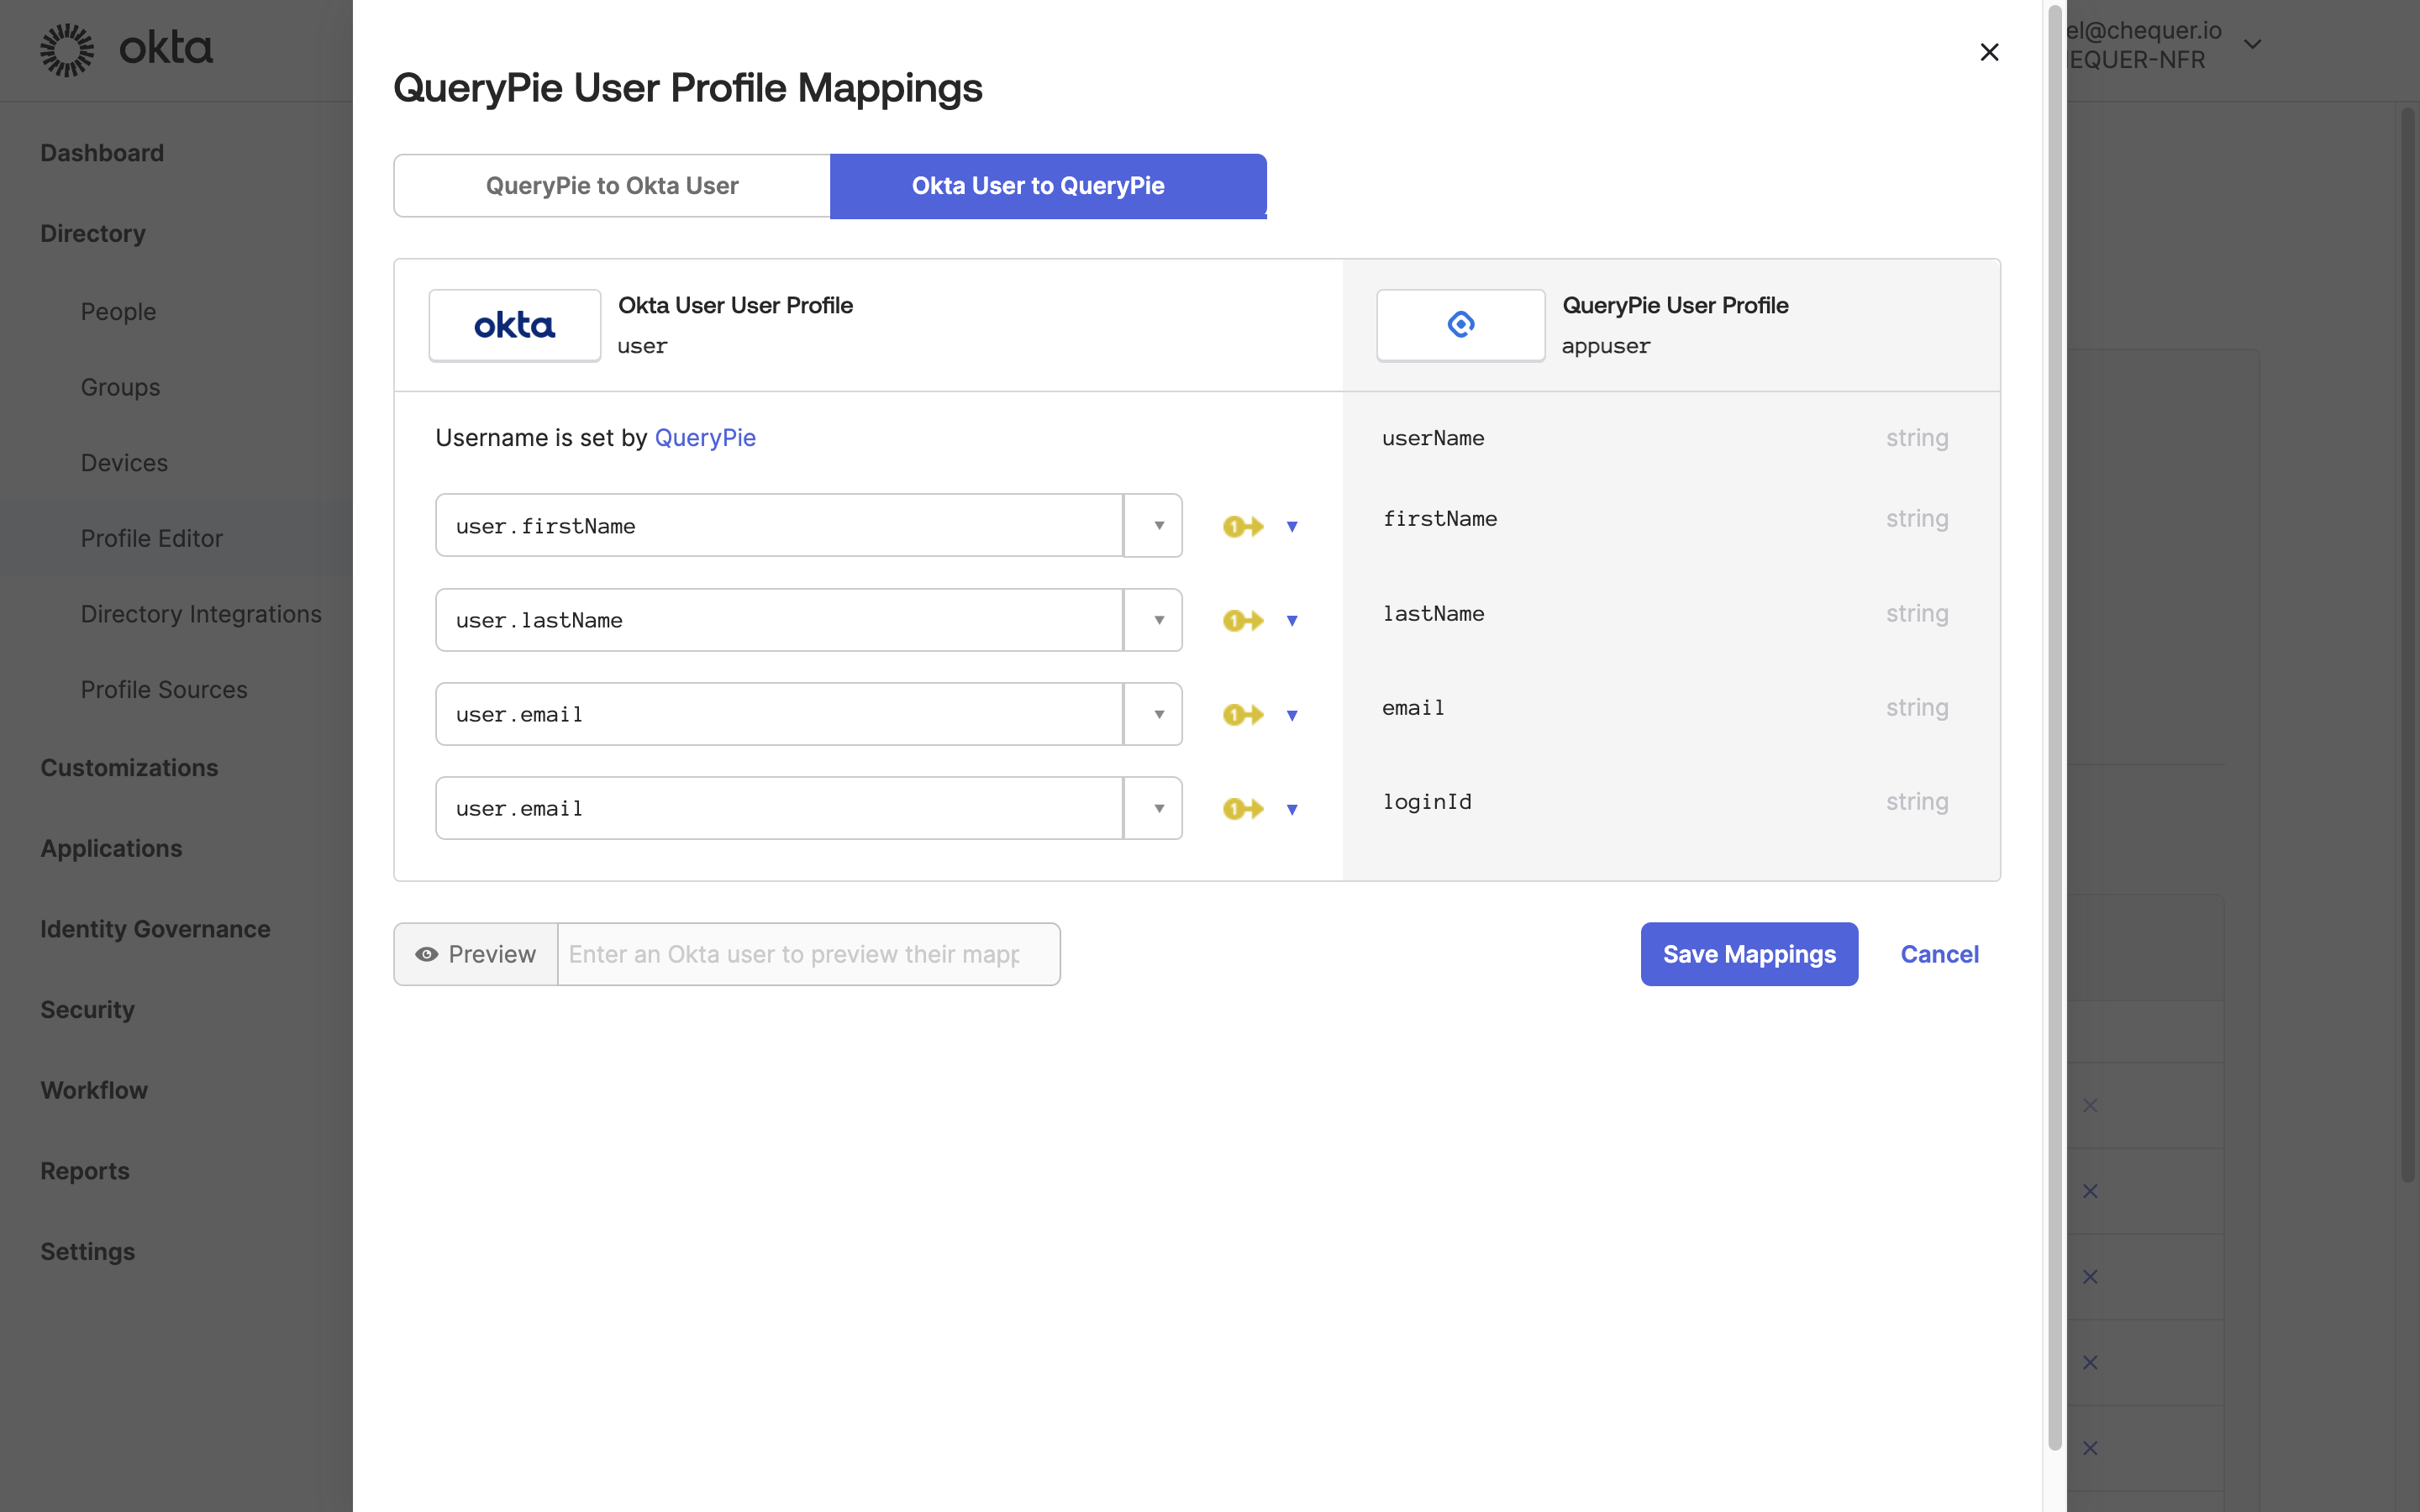
Okta Admin > Directory > Profile Editor > QueryPie User > Mappings
- After confirming the four attributes have been added, click the
Mappingsbutton. - Map Okta User Profile attributes to QueryPie User Profile attributes as follows:
- user.firstName ↔︎ firstName
- user.lastName ↔︎ lastName
- user.email ↔︎ email
- user.email ↔︎ loginId (Use Okta’s email as QueryPie’s login ID.)
- Click the
Save Mappingsbutton to save.
Assign users to the QueryPie application added in Okta
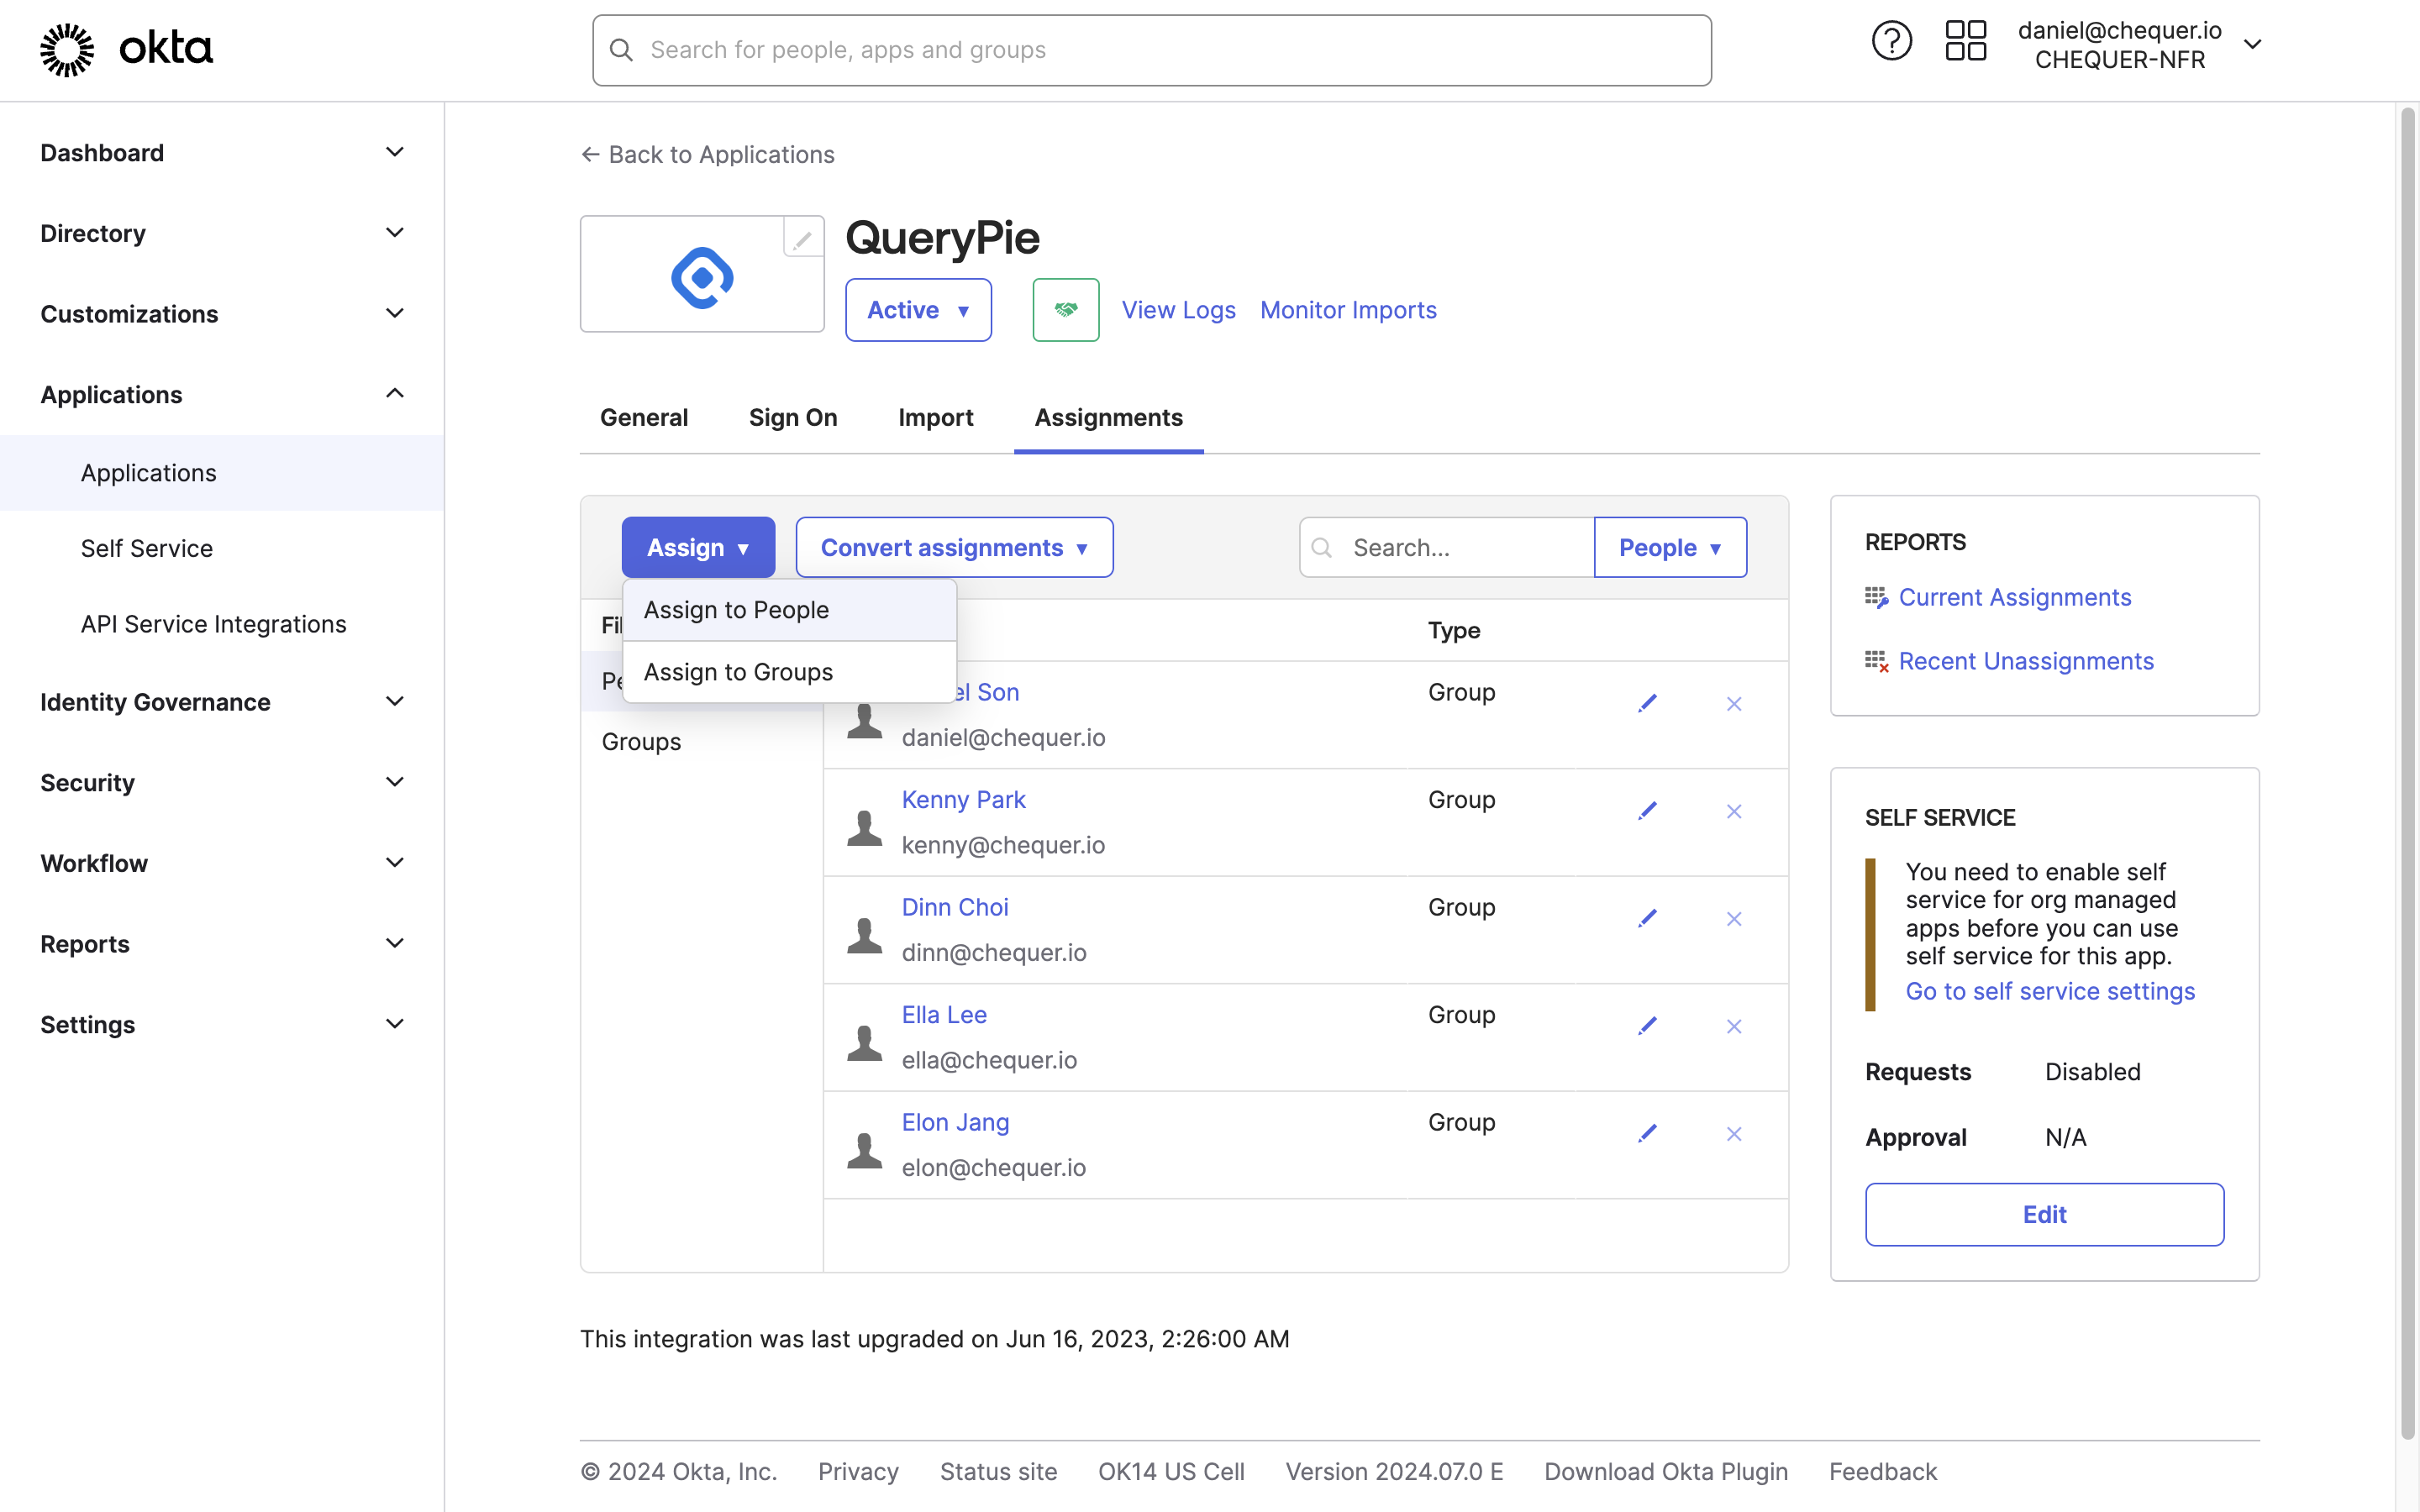
Okta Admin > Applications > Applications > QueryPie App
- In the left panel of the Okta Admin Console, navigate to Applications > Applications.
- From the list, click the QueryPie application.
- Go to the Assignments tab, click the
Assignbutton, and chooseAssign to PeopleorAssign to Group. - Assign users or groups who should have access to QueryPie via Okta accounts, then click the Done button.
- When assigning People: review user info and click
Save and Go Back. - When assigning Groups: leave the loginId field blank and click the
Save and Go Backbutton.
- When assigning People: review user info and click
- You can now confirm that the users or groups are assigned to the QueryPie application.
Configure integration information for the QueryPie application in Okta
Okta Admin > Applications > Applications > QueryPie App
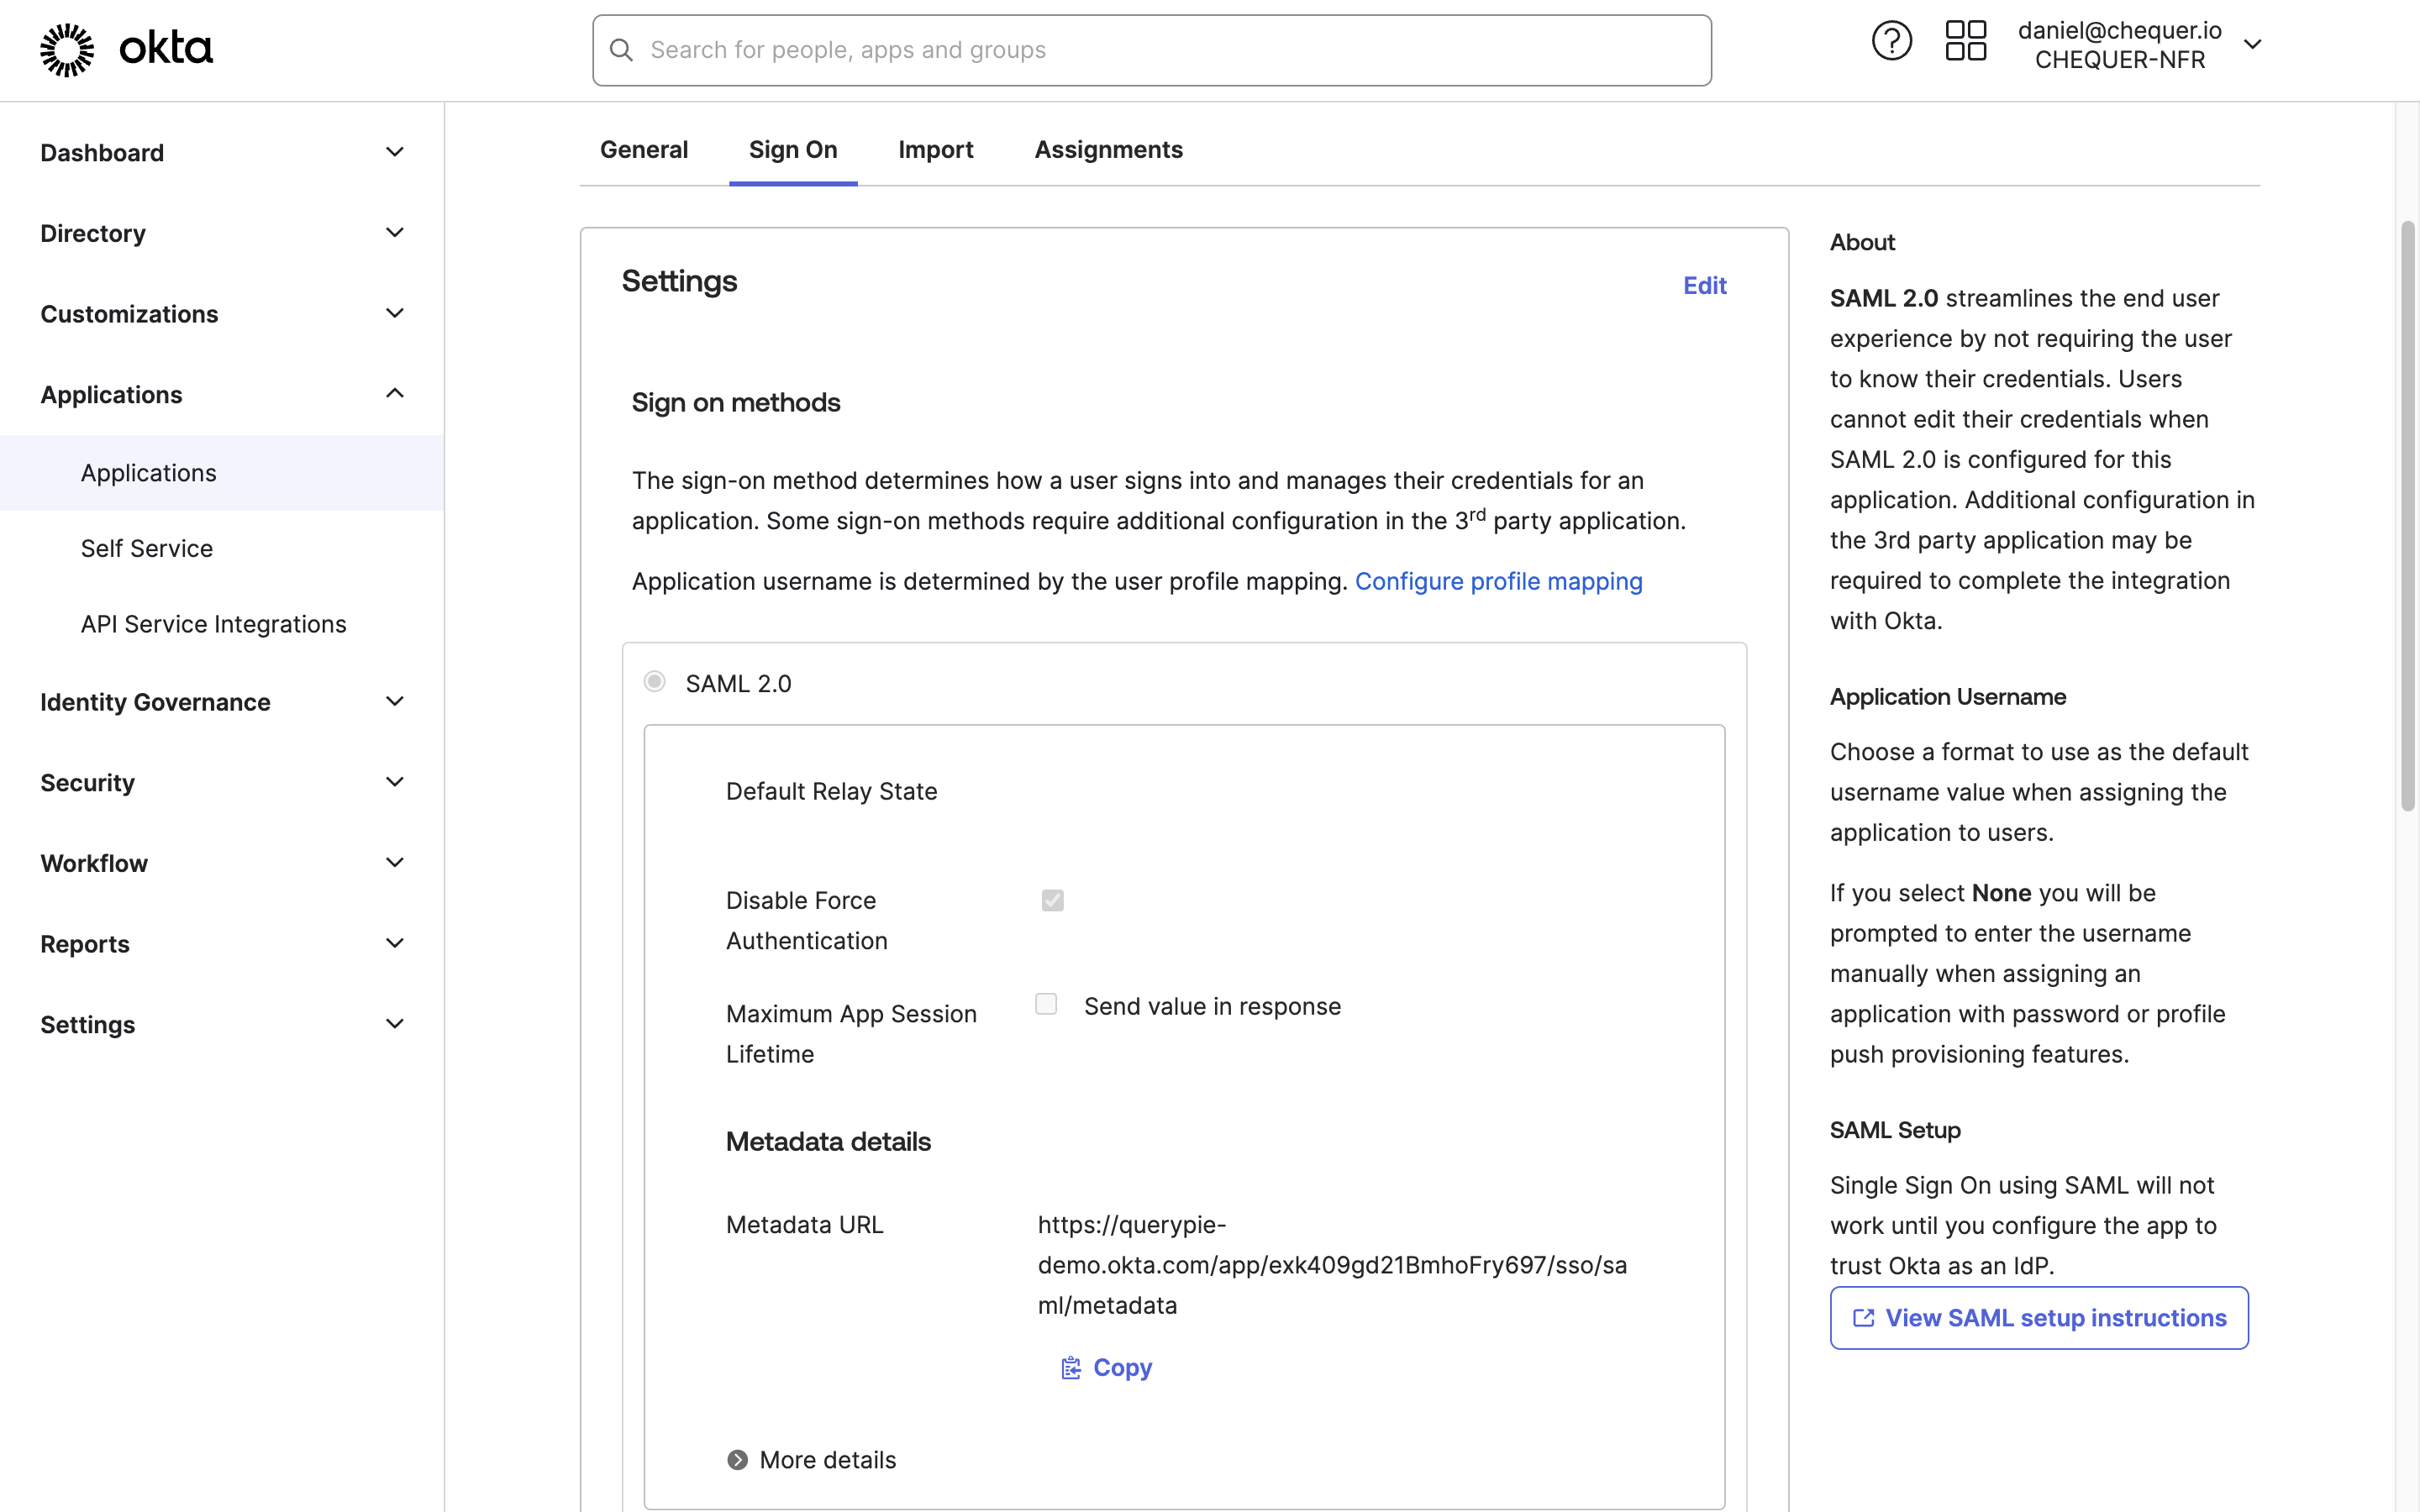
- On the QueryPie application page in Okta, navigate to the Sign On tab.
- Click the
Editbutton in the Settings area, enter the domain where QueryPie is installed into the Base URL field, and save. - Open the URL shown in Metadata URL in a separate tab and copy the XML displayed there.
Issue a minimal-privilege Okta API token
To synchronize users, groups, and group memberships between QueryPie and Okta, you need an Okta Admin API token. Typically, you can generate an API token using a Super Administrator or Read-Only Administrator account as follows:
- In the left panel of the Okta Admin Console, go to Security > API.
- In the API menu, go to the Tokens tab.
- Click the Create Token button to generate an authentication token.
However, to enhance security by minimizing permissions for the Okta API token, we recommend creating a token with the following roles and steps:
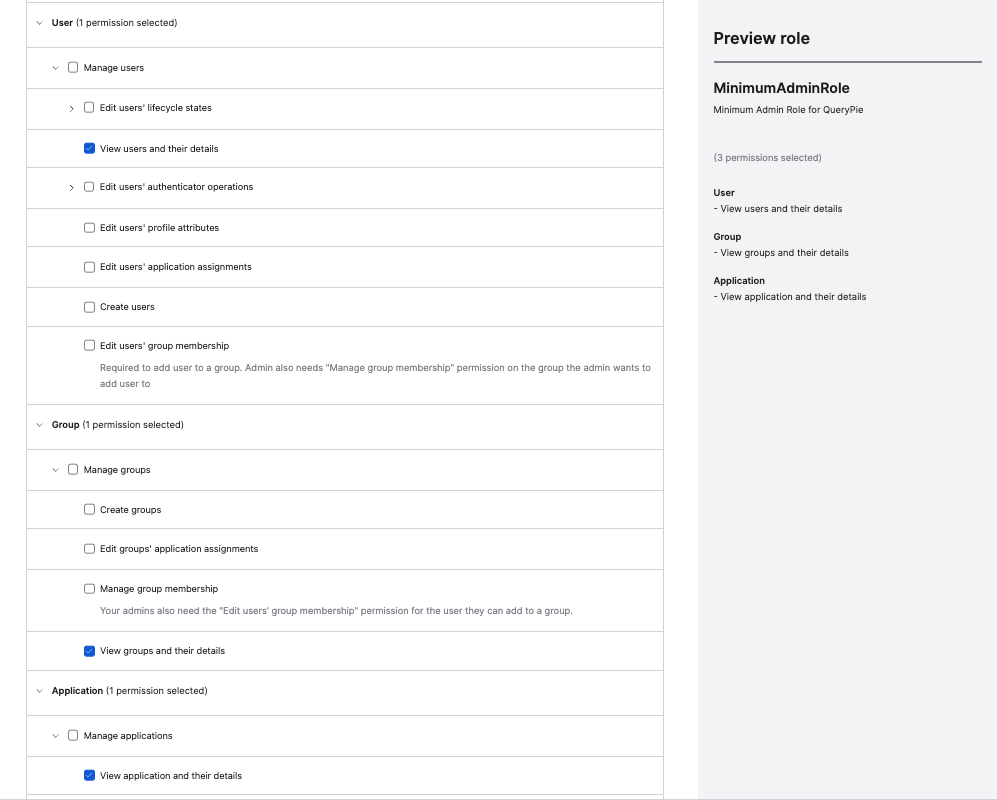
Okta Admin Console > Security > Administrators > Roles > Create new role
- In the left panel of the Okta Admin Console, go to Directory > People and click Add Person to create a dedicated system integration account.
- If you already have an account for QueryPie integration, skip this step.
- In the left panel of the Okta Admin Console, go to Security > Administrators and navigate to the Roles tab.
- Select Create new role.
- Define Role name (e.g., MinimumAdminRole) and Role description, and in Select Permissions, check only the following:
- User
- View users and their details
- Group
- View groups and their details
- Application
- View application and their details
- User
- Click Save role to save the custom role.
- Go to the Resources tab.
- Select Create new resource set.
- If you already have a resource set for scoping, skip to step 10.
- Define Name (e.g., MinimumResources) and Description, and specify the following scopes:
- User: All QueryPie users
- Group: All QueryPie user groups
- Application: Limit to the QueryPie app
- Click Create to finish.
- Go to the Admins tab and assign the following permissions to the integration account:
- Role: MinimumAdminRole | Resource: MinimumResources
- Role: Read-Only Administrator
- Temporary assignment to access the API token creation menu
- Sign in to the Okta Admin Console with the integration account.
- Go to Security > API menu and navigate to the Tokens tab.
- Click the Create Token button to generate an authentication token and store it.
- Then sign back in with the original admin account you were working with and edit the integration account under Security > Administrators > Admins tab to revoke the Read-Only Administrator permission.
Configure Okta integration and synchronization in QueryPie
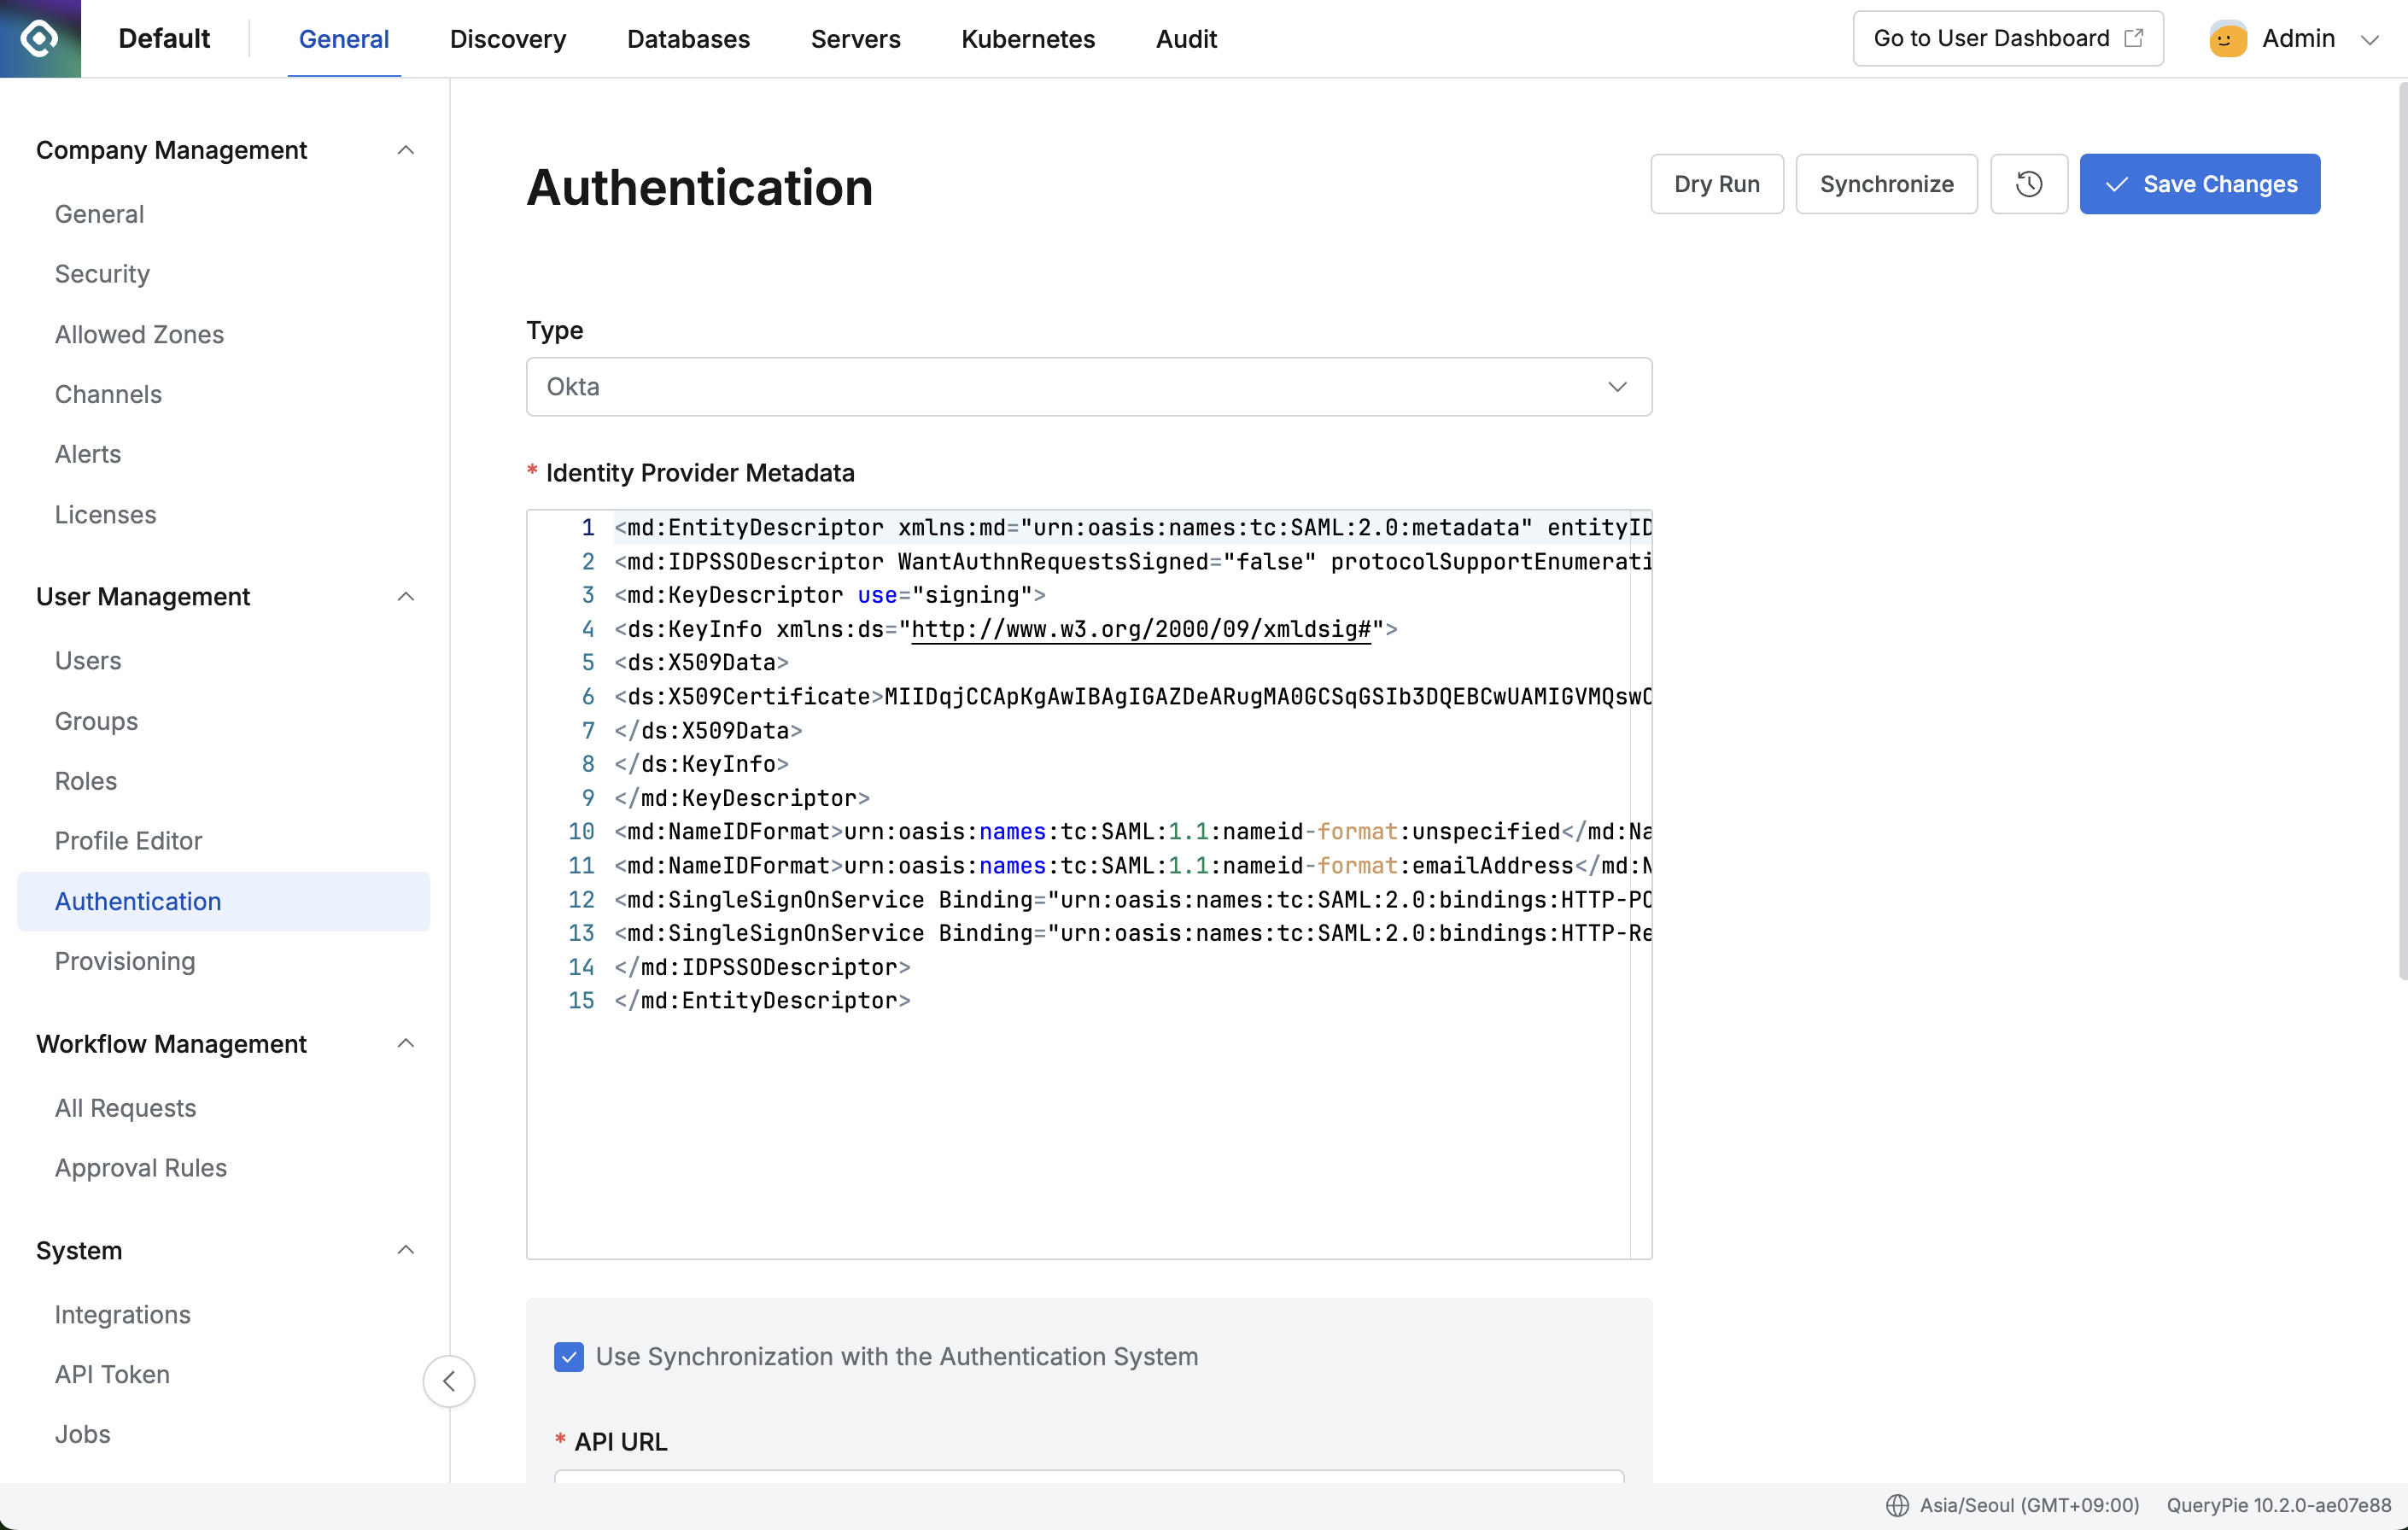
Administrator > General > User Management > Authentication
- In QueryPie, go to Administrator > General > User Management > Authentication.
- Select Okta as the Authentication Type.
- Paste the copied XML into Identity Provider Metadata.
- To enable automatic synchronization, check “Use Synchronization with the Authentication System”.
- API URL: Click your profile in the top-right of the Okta Admin Console to find the URL in the format
{domain}.okta.com. - API Token: Enter the Okta Admin API token.
- Application ID: Enter if you use two or more QueryPie apps in Okta.
- API URL: Click your profile in the top-right of the Okta Admin Console to find the URL in the format
- To use automatic synchronization, set Scheduling in Replication Frequency.
- Click the
Dry Runbutton to verify that the integration information has been entered correctly. - Save with
Save Changes. - Click the
Synchronizebutton to synchronize users from Okta.
How to find the Application ID If you use two or more QueryPie applications, go to Okta Admin > Applications and open the details page of the QueryPie app. You can find the Application ID in the URL at the top, as shown in the screenshot above.
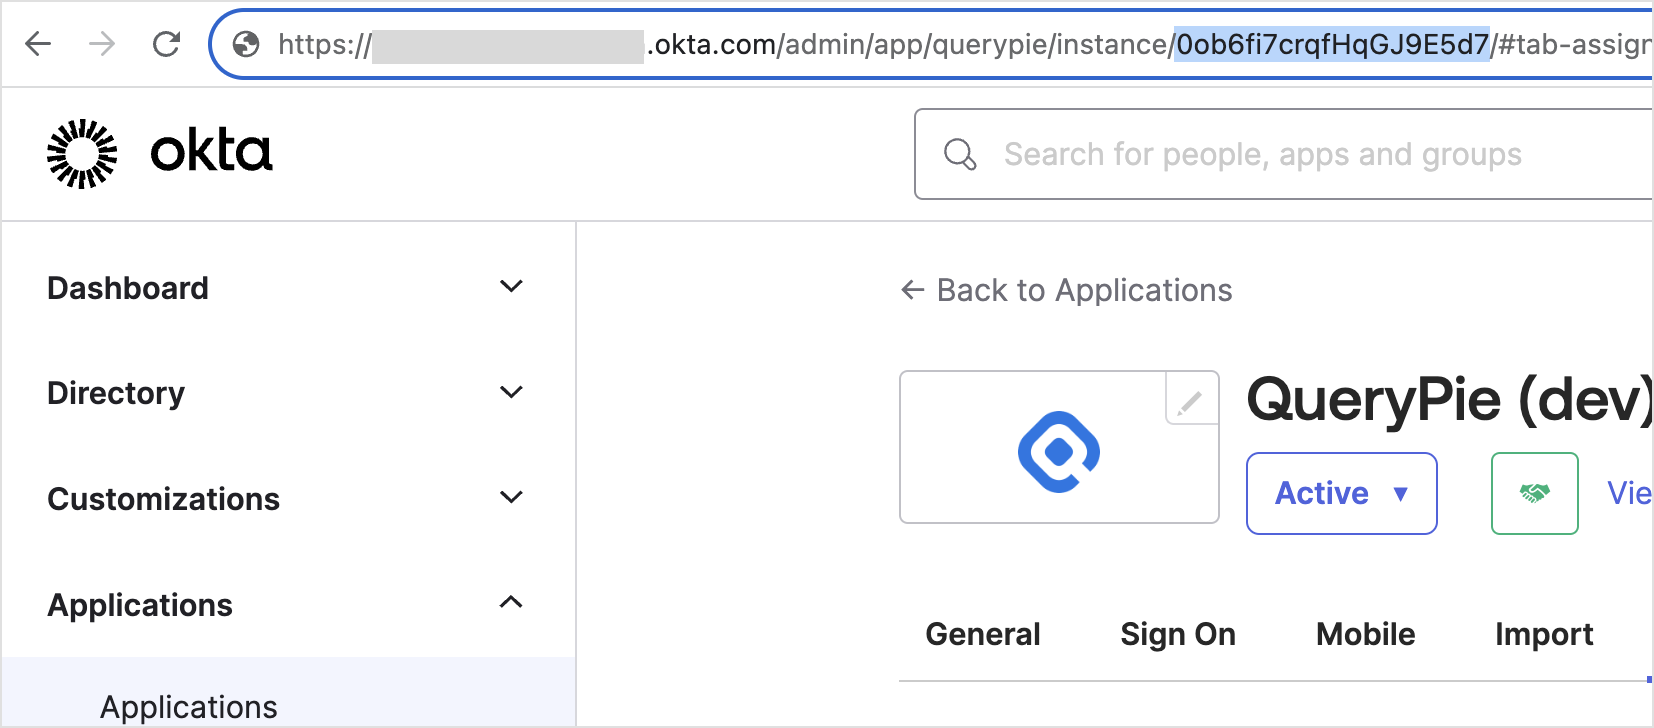
Okta Admin > Applications > QueryPie App URL at the top
Log in to QueryPie using Okta
- In General Settings > Users or Groups menu, you can verify the synchronized users and groups.
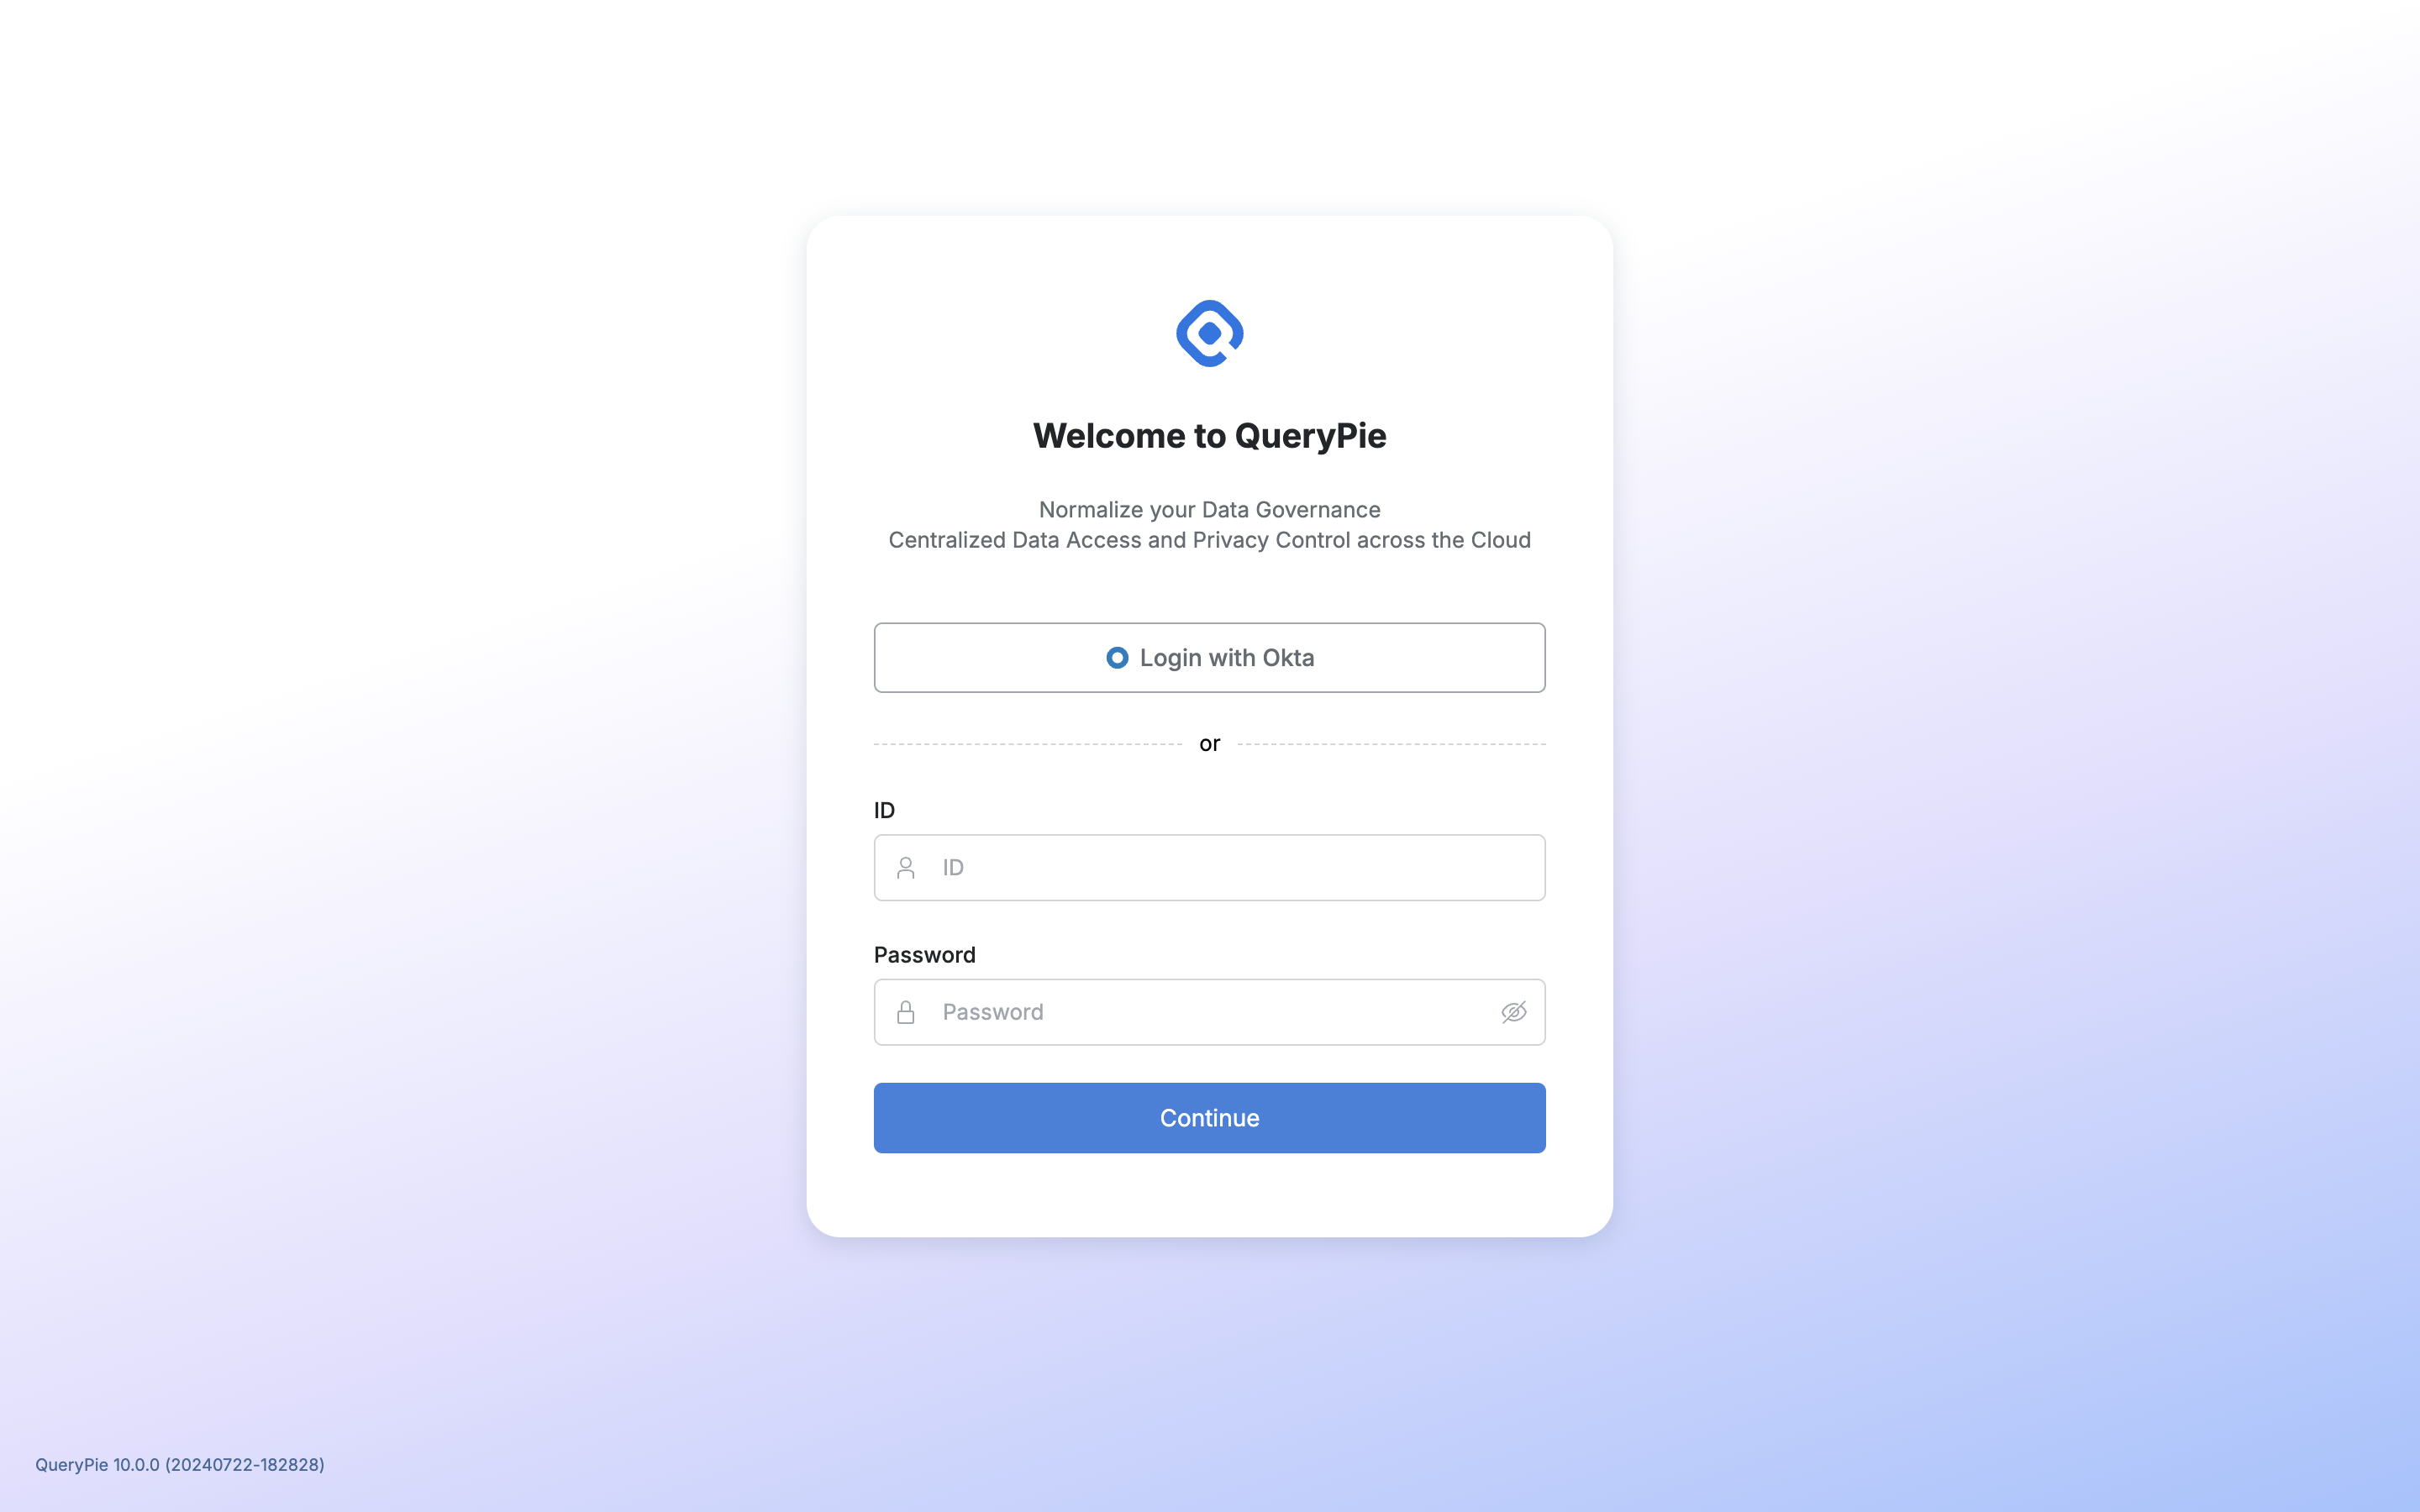
- You can now log in to QueryPie with your Okta account by clicking the
Login with Oktabutton on the sign-in page.
With this integration method, users and groups are synchronized one-way from Okta to QueryPie. If you also plan to implement SCIM provisioning integration, please follow the steps in [Okta] Provisioning Integration Guide (../provisioning/okta-provisioning-integration-guide).