Connecting to Authorized Servers
Overview
Users can view the list of authorized servers sorted by server, server group, or Cloud Provider at a glance. After selecting a server to connect to, users can execute commands and perform tasks through web terminal and web SFTP provided through web browsers regardless of operating system.
Selecting Role
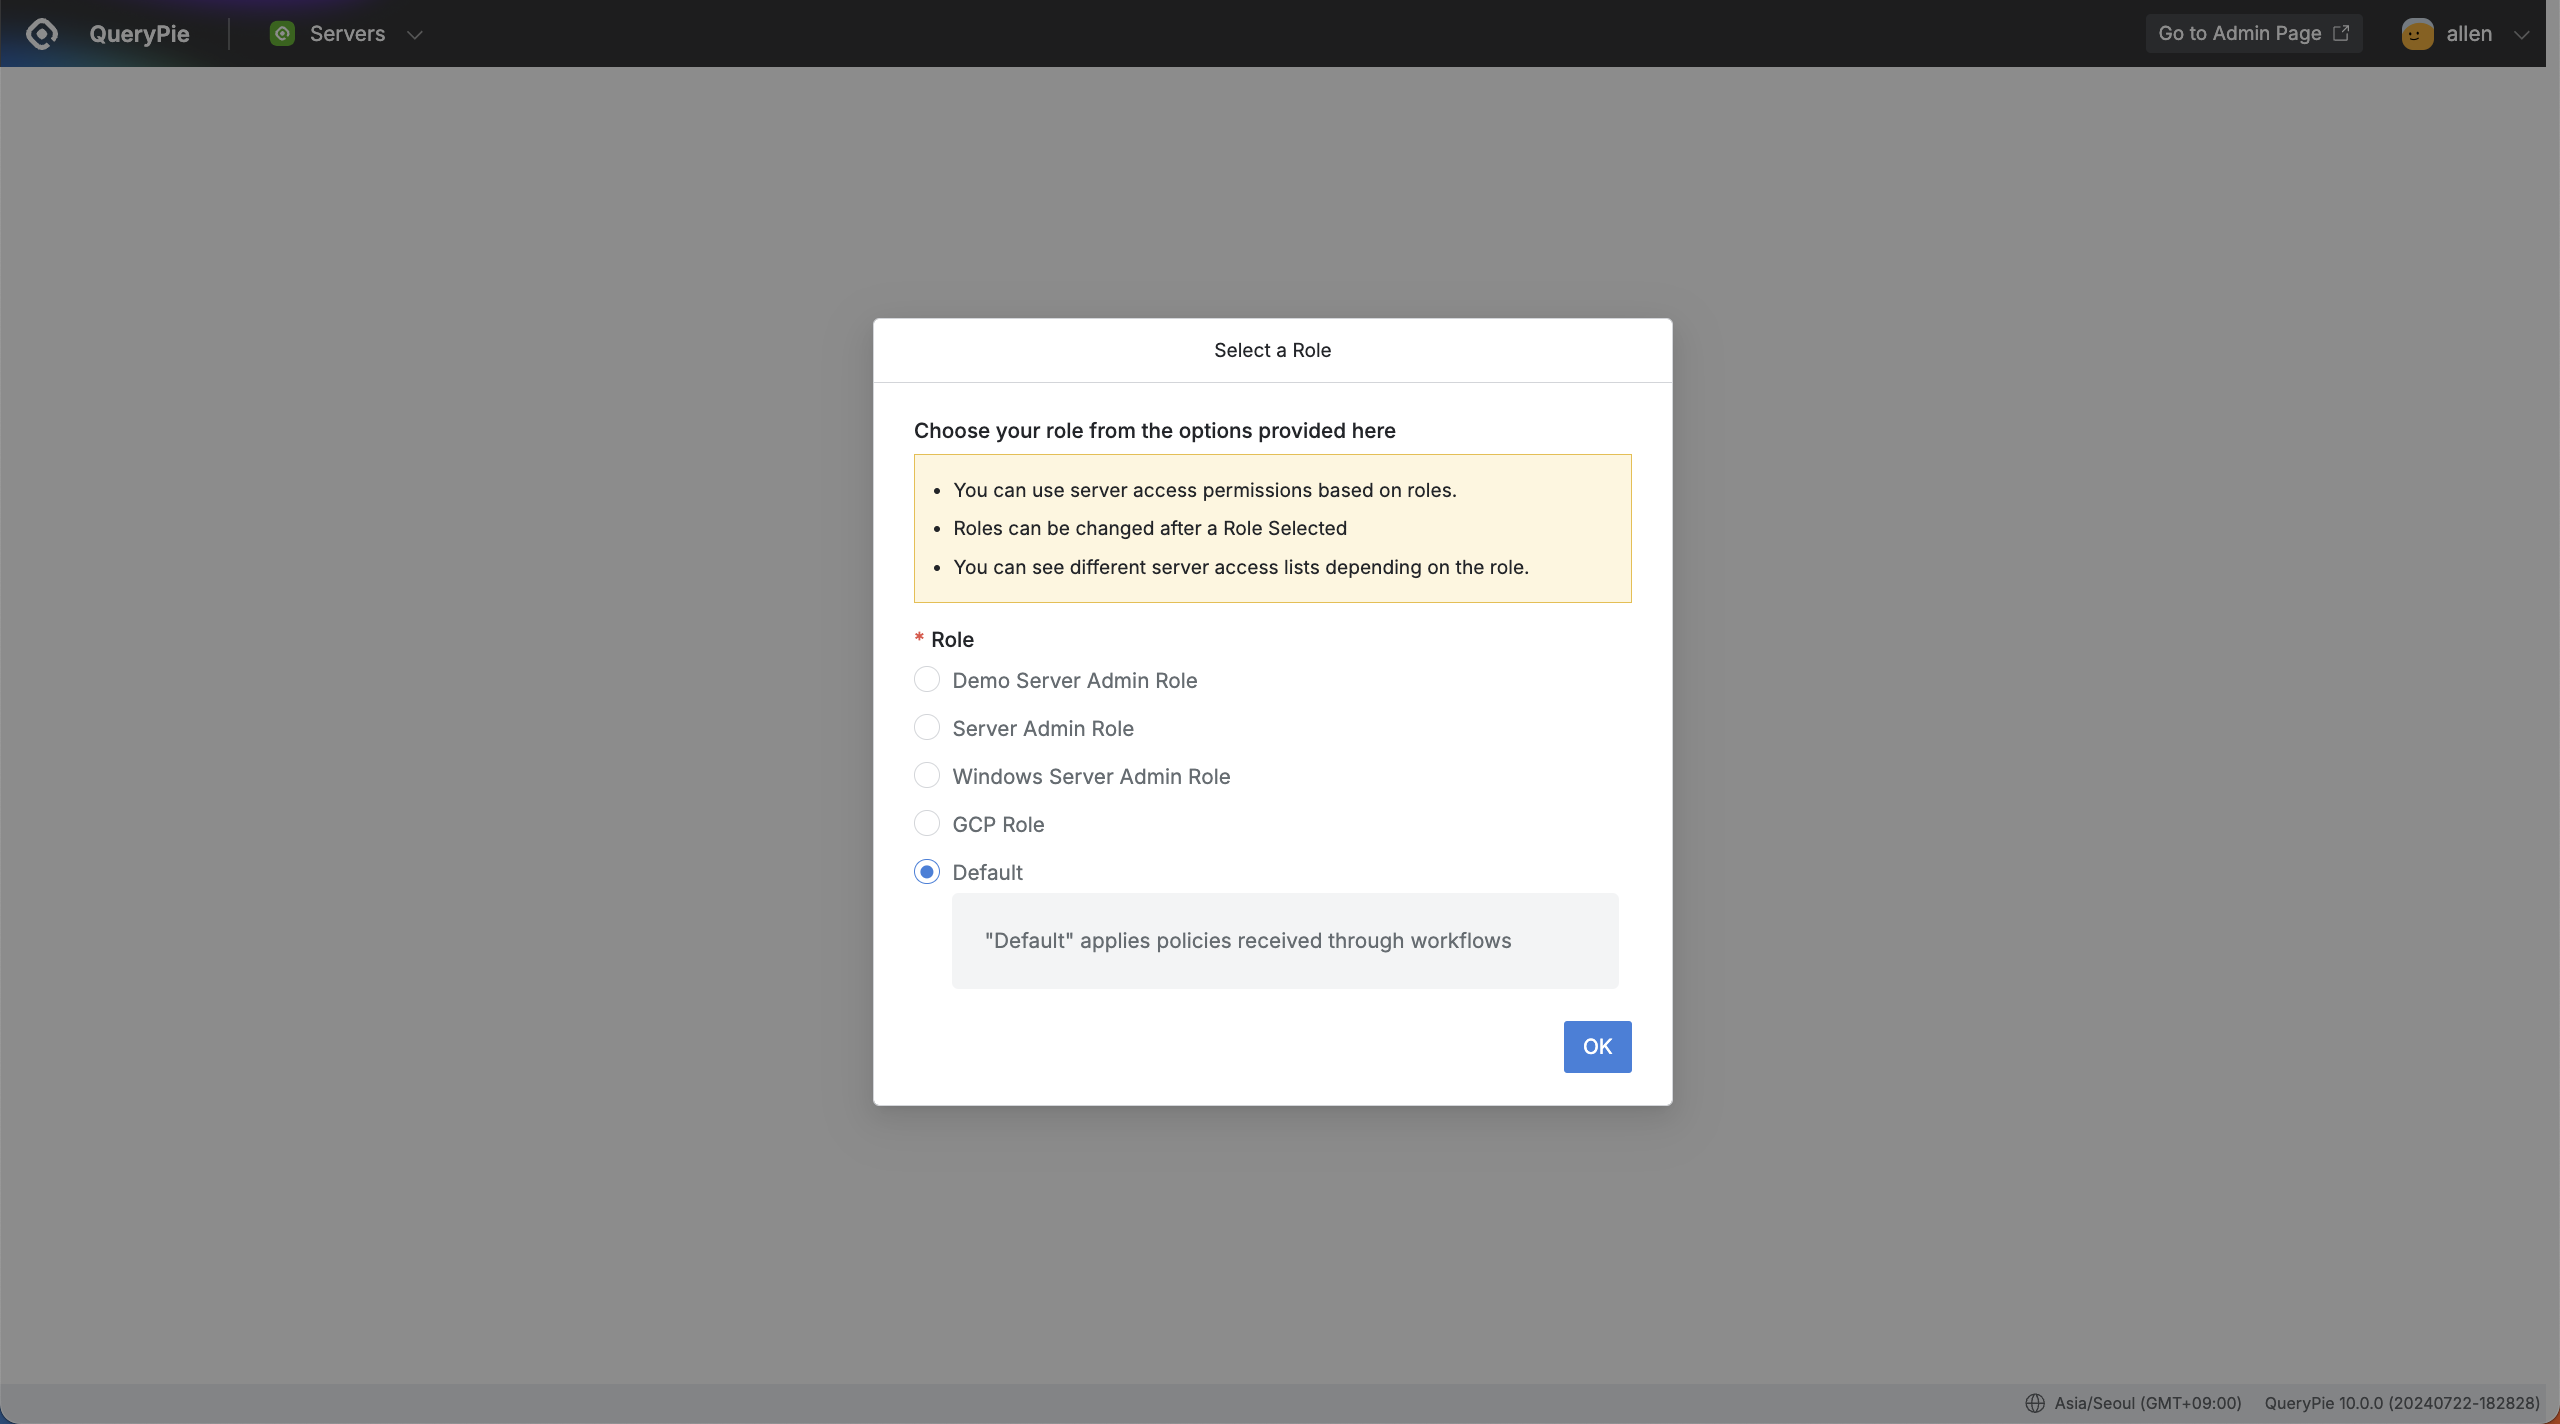
QueryPie Web > System Access Control > Servers > Select a Role
- On the Role selection screen displayed when first accessing the Servers menu, select the Role you want to use for access.
- Server access permissions vary by Role, and if you don’t have a granted Role, the Default Role is automatically selected.
- Default Role refers to permissions received through Workflow or access permissions directly granted by administrators without a Role.
Connecting to Server
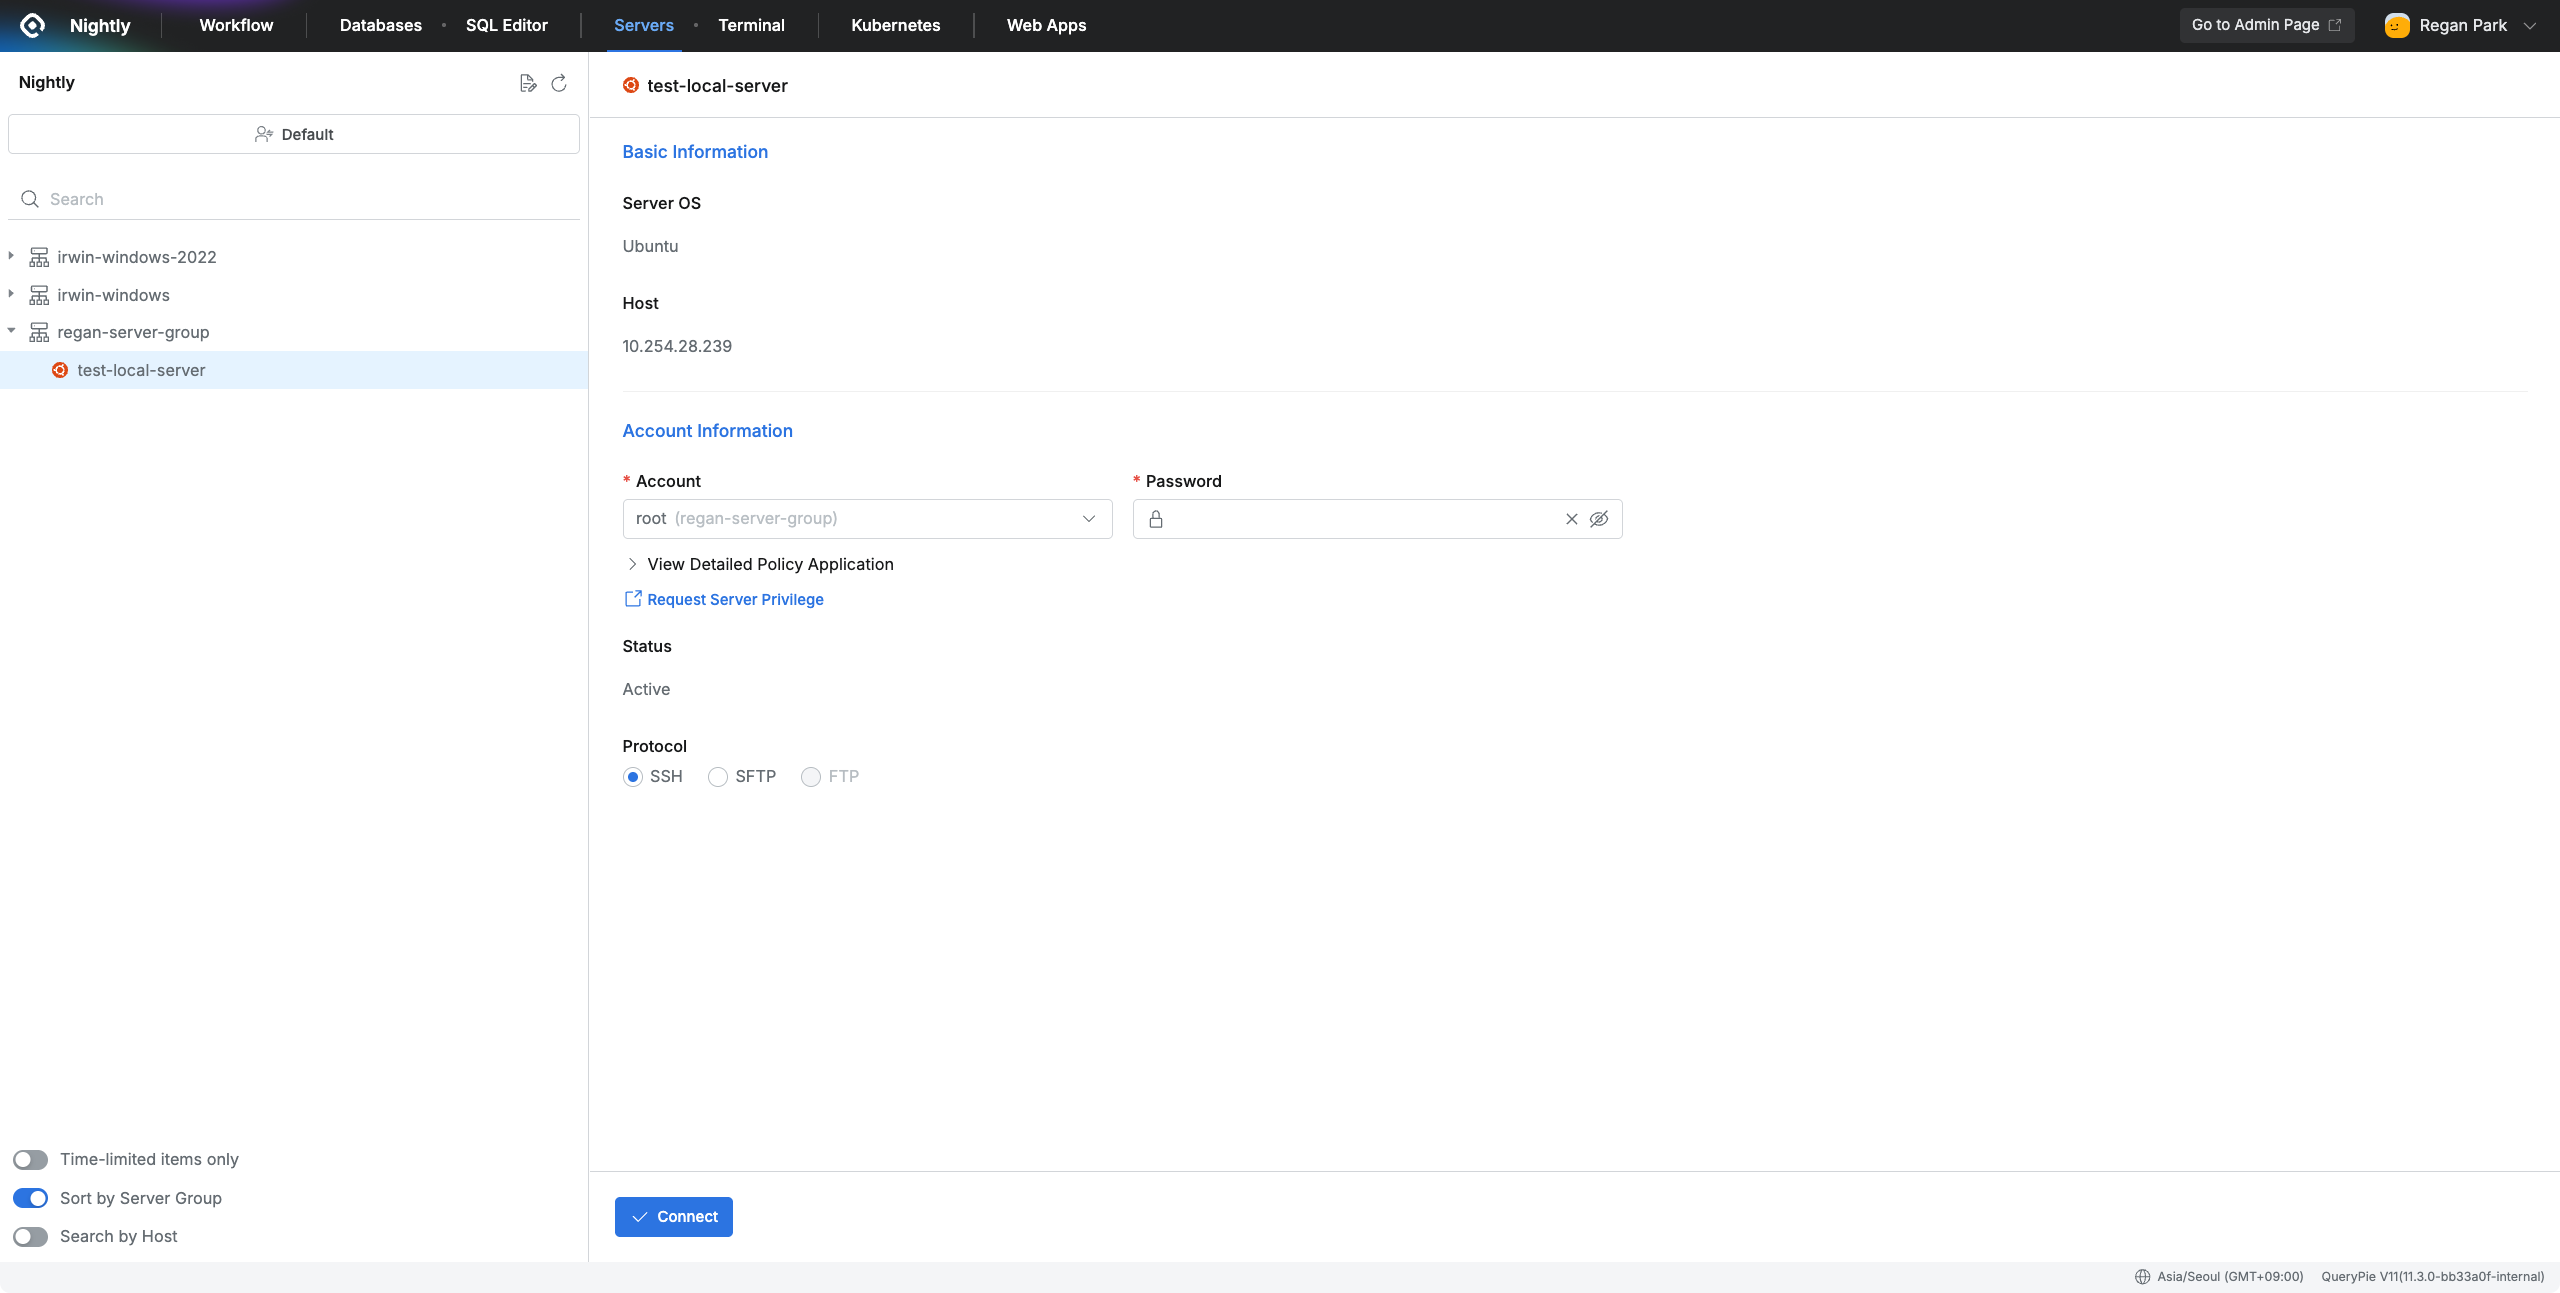
QueryPie Web > System Access Control > Servers
- After selecting a Role, you can check the list of servers accessible to the current user in the left panel
- Sort by Server Group : The server list is primarily sorted by server group, with individual servers sorted below. If you want to display only servers without server groups, you can change the
Sort by Server Groupbutton in the top left to Off status. - Time-limited items only : Only displays servers with time-based permissions in the list.
- Search by Host : Changes the search criteria for the server list from the existing server name to Host (IP address). At the same time, the display method of the server list also switches to Host. When the toggle is disabled, you can only search by server name.
- Sort by Server Group : The server list is primarily sorted by server group, with individual servers sorted below. If you want to display only servers without server groups, you can change the
- When you select a server from the server list, you can check the server and account information on the right page.
- Server OS : Displays the OS of that server
- Host : Displays the host of that server.
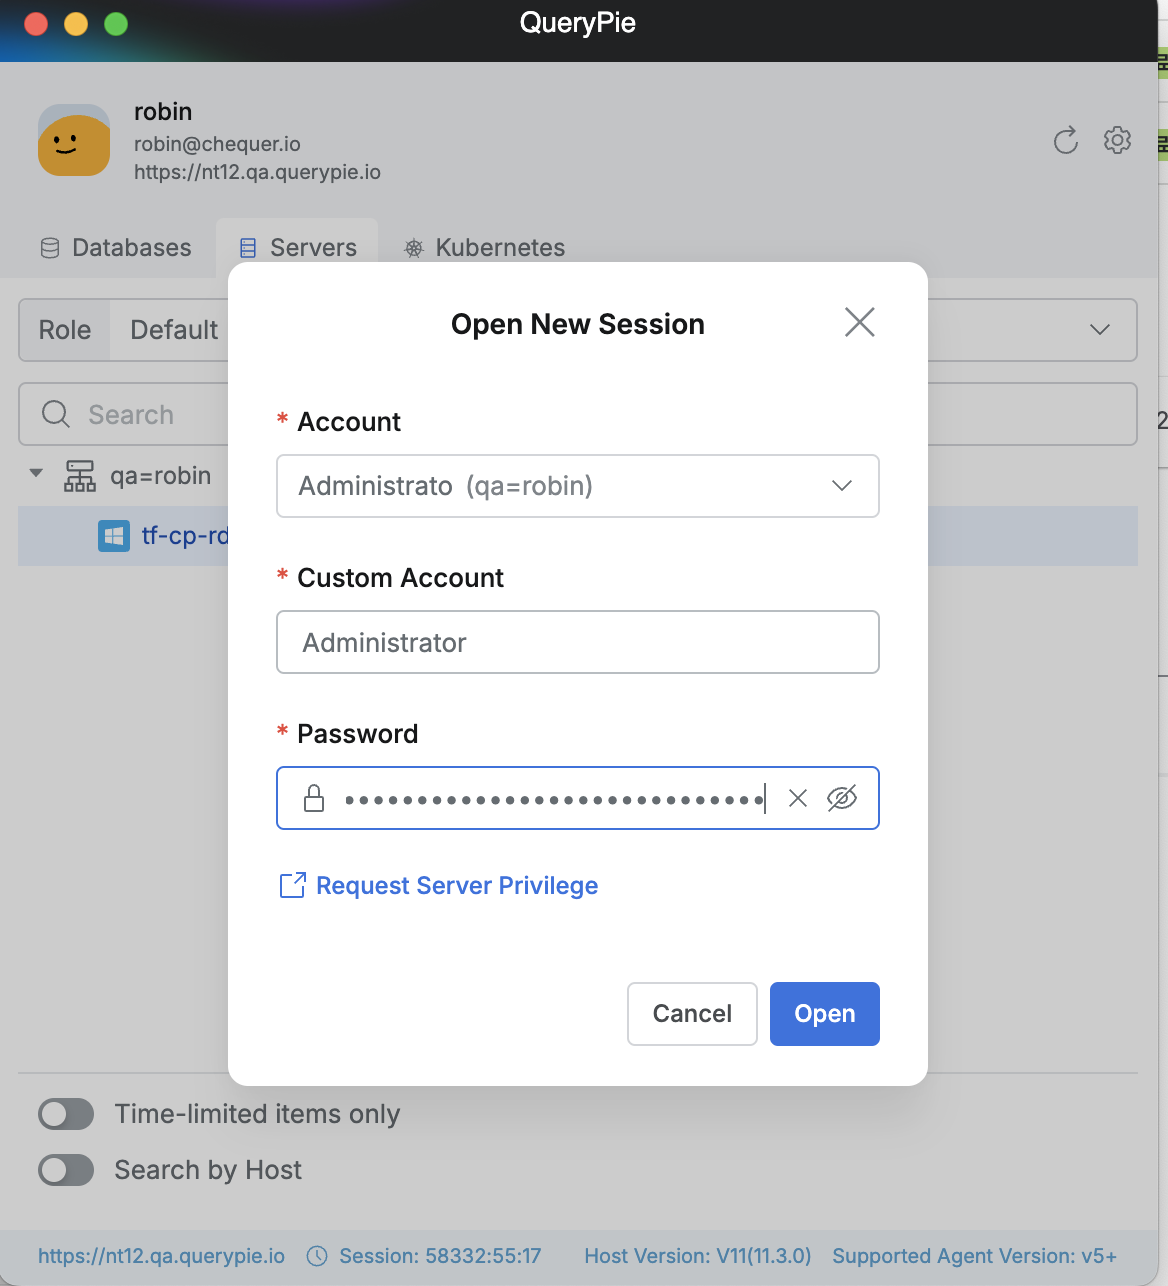
- Account : List of accounts with permissions. The server group to which the server and account belong is displayed in parentheses after the account.
- Custom Account : Displayed when you select an account with category QueryPie - Custom Account in Account. Enter the account of the server you want to connect to in addition to the pre-registered accounts. Enter the password for that account in the Password field.
- View Detailed Policy Application : Displays the policies applied to the selected account.
- Access Time : Displays the accessible time.
- Weekday Access Allowed : Displays the accessible days of the week.
- Restrict Commands (SSH) : Displays blocked commands for SSH access.
- Restrict Functions (SFTP) : Displays blocked functions for SFTP access.
- Password (or SSH Key) : If the authentication method for the selected account is Password, a field where you can enter the Password is displayed. If automatic login is set up, the Password item is not displayed, and login is performed with the password or SSH Key set by the administrator.
- Status : Displays the status of the selected account.
- Protocol : You can select SSH, SFTP, or RDP to connect.
- Click the
Connectbutton at the bottom to connect to the server.
Q. I’m getting an error that the connection failed. Why is this happening? A. Connection may fail if the permission status has changed or if you attempt to connect during a time or day when access is not allowed. Also, connection may not be possible due to the administrator’s server information settings, so please contact the administrator for detailed information.
Q. How do I connect to Windows Server through RDP?
A. In QueryPie, you can connect to Windows Server through the QueryPie Agent (User Agent / Multi-Agent) only. The connection method is as follows.
After installing the QueryPie Agent (User Agent / Multi-Agent), right-click the authorized Windows Server, click the Open Connection with menu, and then click the RDP Client installed on your PC to connect.
- Windows PC supports the MSTSC program installed by default on the PC.
- macOS needs to download Windows App for RDP access.
From version 11.3.0, in Multi-Agent, you can select a Custom Account and manually enter the account password to connect.
Q. How do I connect to macOS through VNC?
A. When the user’s PC is macOS, you can connect to macOS through QueryPie User Agent. The connection method is as follows.
After installing QueryPie User Agent, right-click on the authorized macOS, click the Open Connection with menu, then click the Screen Sharing.app installed on macOS to connect.
When connecting, you must directly enter the macOS account information.
- Windows PC does not support macOS access.
- VNC can only connect to macOS servers.