Requesting SQL Export Request
Overview
You can submit SQL Export Request by following the steps below. This requests data export for which you do not have permission on specific DB connections, and after approval, the executor can execute the approved data export once.
Requesting SQL Export Request
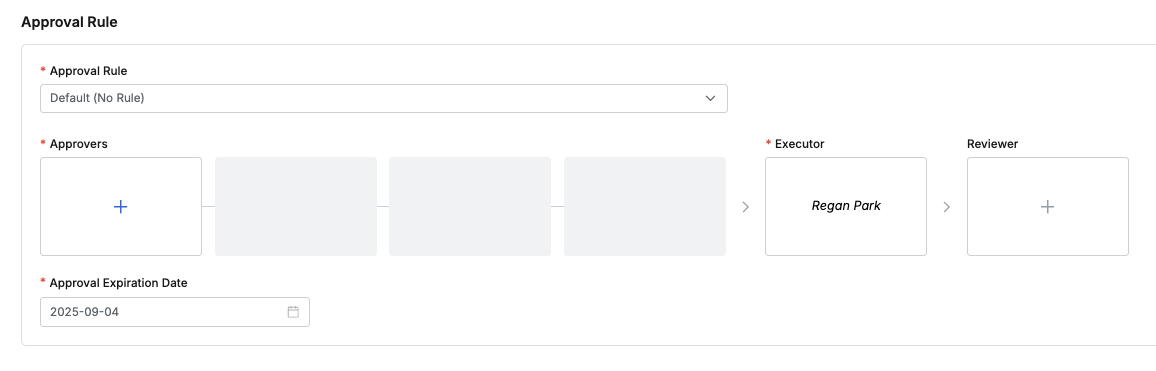
1. Selecting Approval Rules
- Select an Approval Rule to choose the appropriate approval rule for your purpose. The approval target varies depending on the selected rule.
- If a pre-configured approval rule is selected, the approver is automatically assigned and cannot be added or modified.
- Approval Expiration Date: Enter the approval expiration date. The maximum value can be set through Maximum Approval Duration. The Approval Expiration Date cannot exceed the Execution Expiration Date. If exceeded, the request cannot be submitted.
- However, when submitting in Urgent Mode, the above condition is ignored.
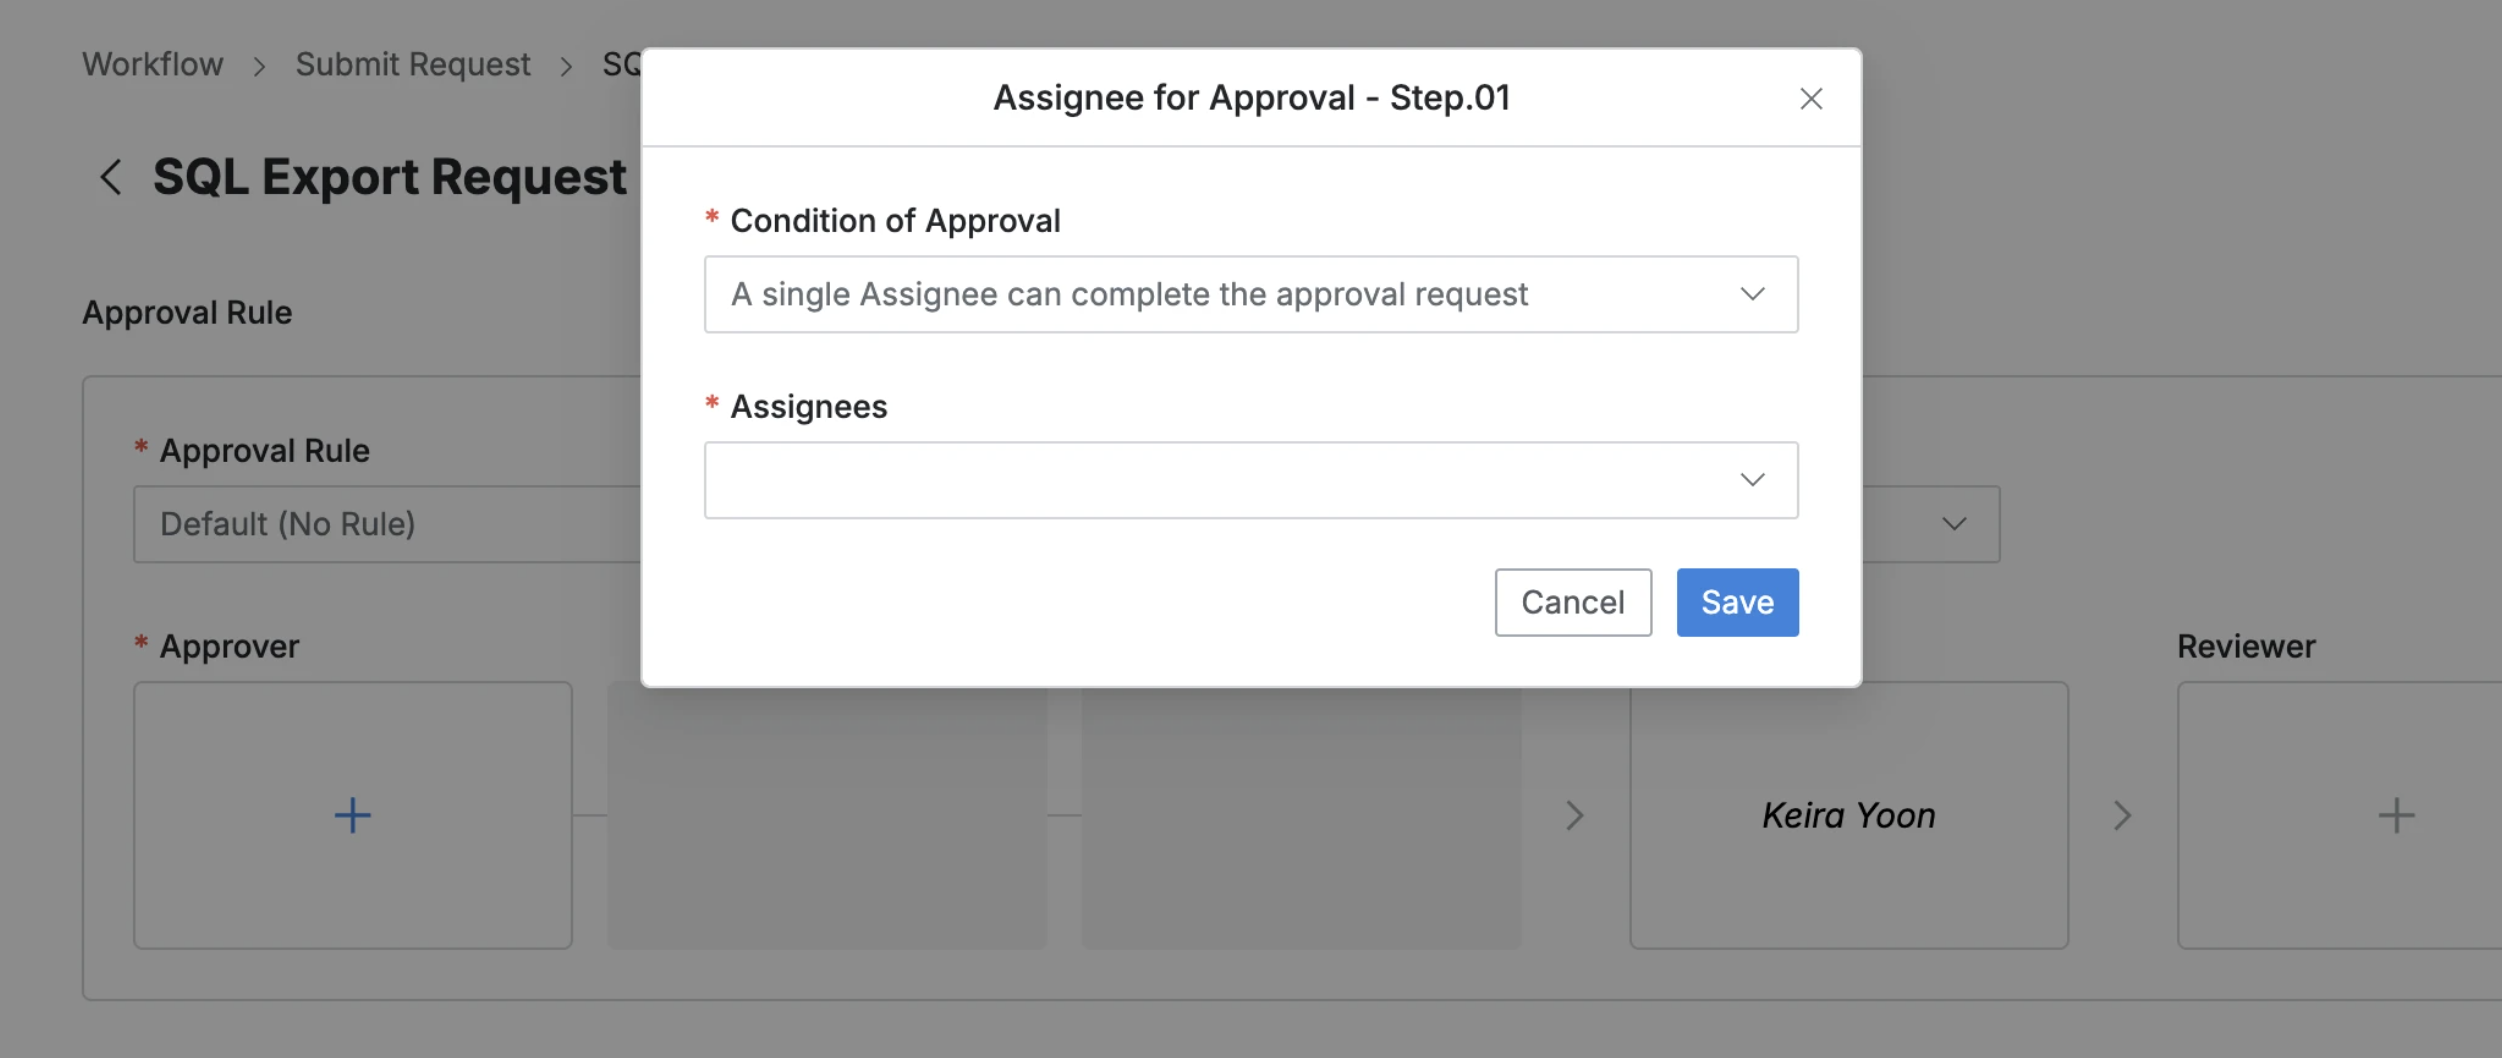
2. Assigning Approvers
- Click the
+button in the approval line to display a popup window where you can assign step-by-step approvers. - In this popup window, add approval conditions and approvers, then click the
Savebutton to save the approval line. - Available approval conditions are as follows:
- A single Assignee can complete the approval request: The approval request is approved with just one approval from multiple people.
- All Assignees must approve this request: All approvers must approve for the approval request to be approved.
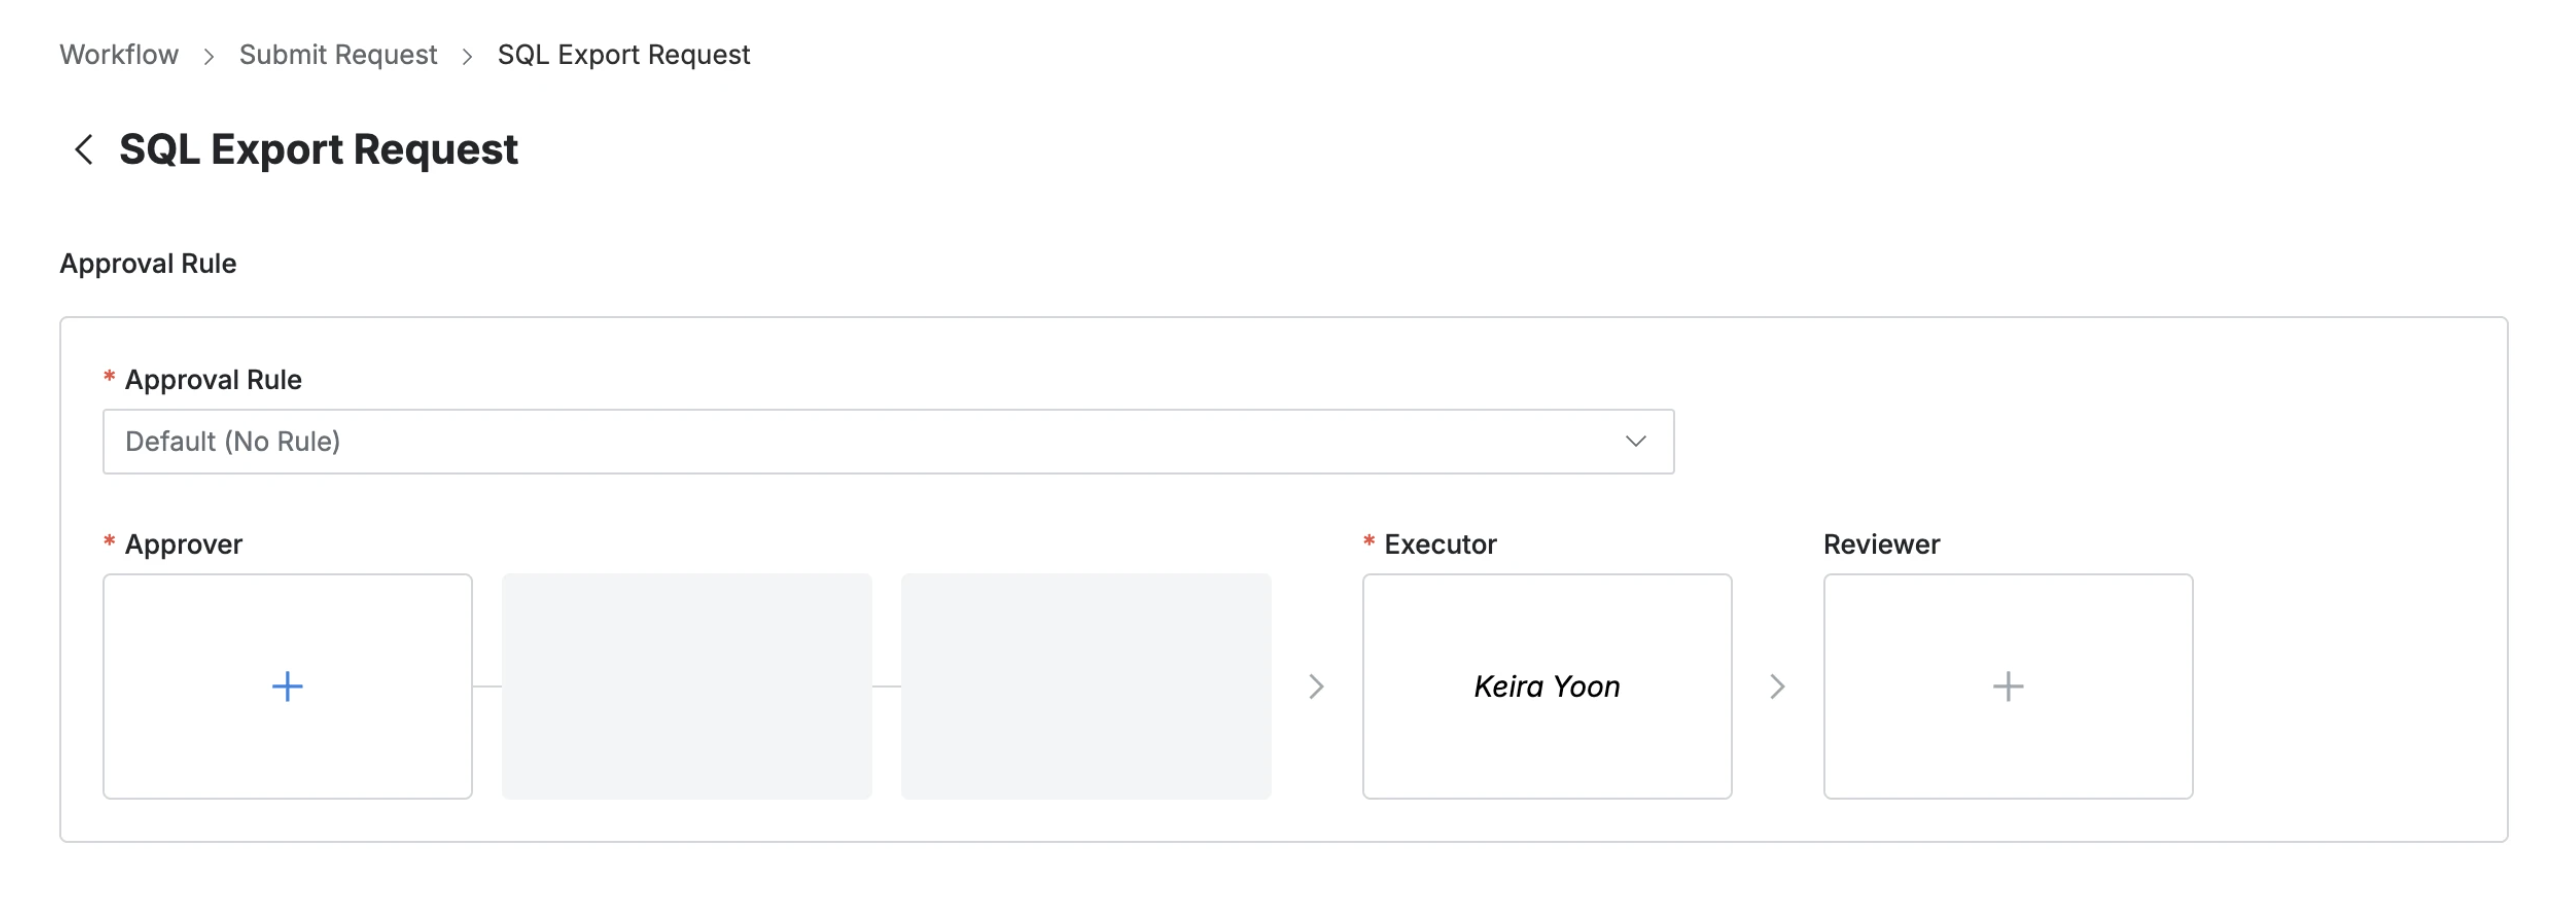
3. Assigning Executors and Reviewers
- Click the
+button in the approval line to display a popup window where you can assign executors and reviewers.- If the administrator has not allowed reviewer assignment, the Reviewer box will not be displayed.
- In this popup window, add approval conditions and approvers.
- Click the
Savebutton to close the modal and complete reviewer assignment.
4. Sending Request with Post-Approval
- If you select an approval rule that allows post-approval functionality, the Urgent Mode switch will be displayed.
- After setting Urgent mode = On and registering the approval request, you can immediately receive permissions or perform tasks.
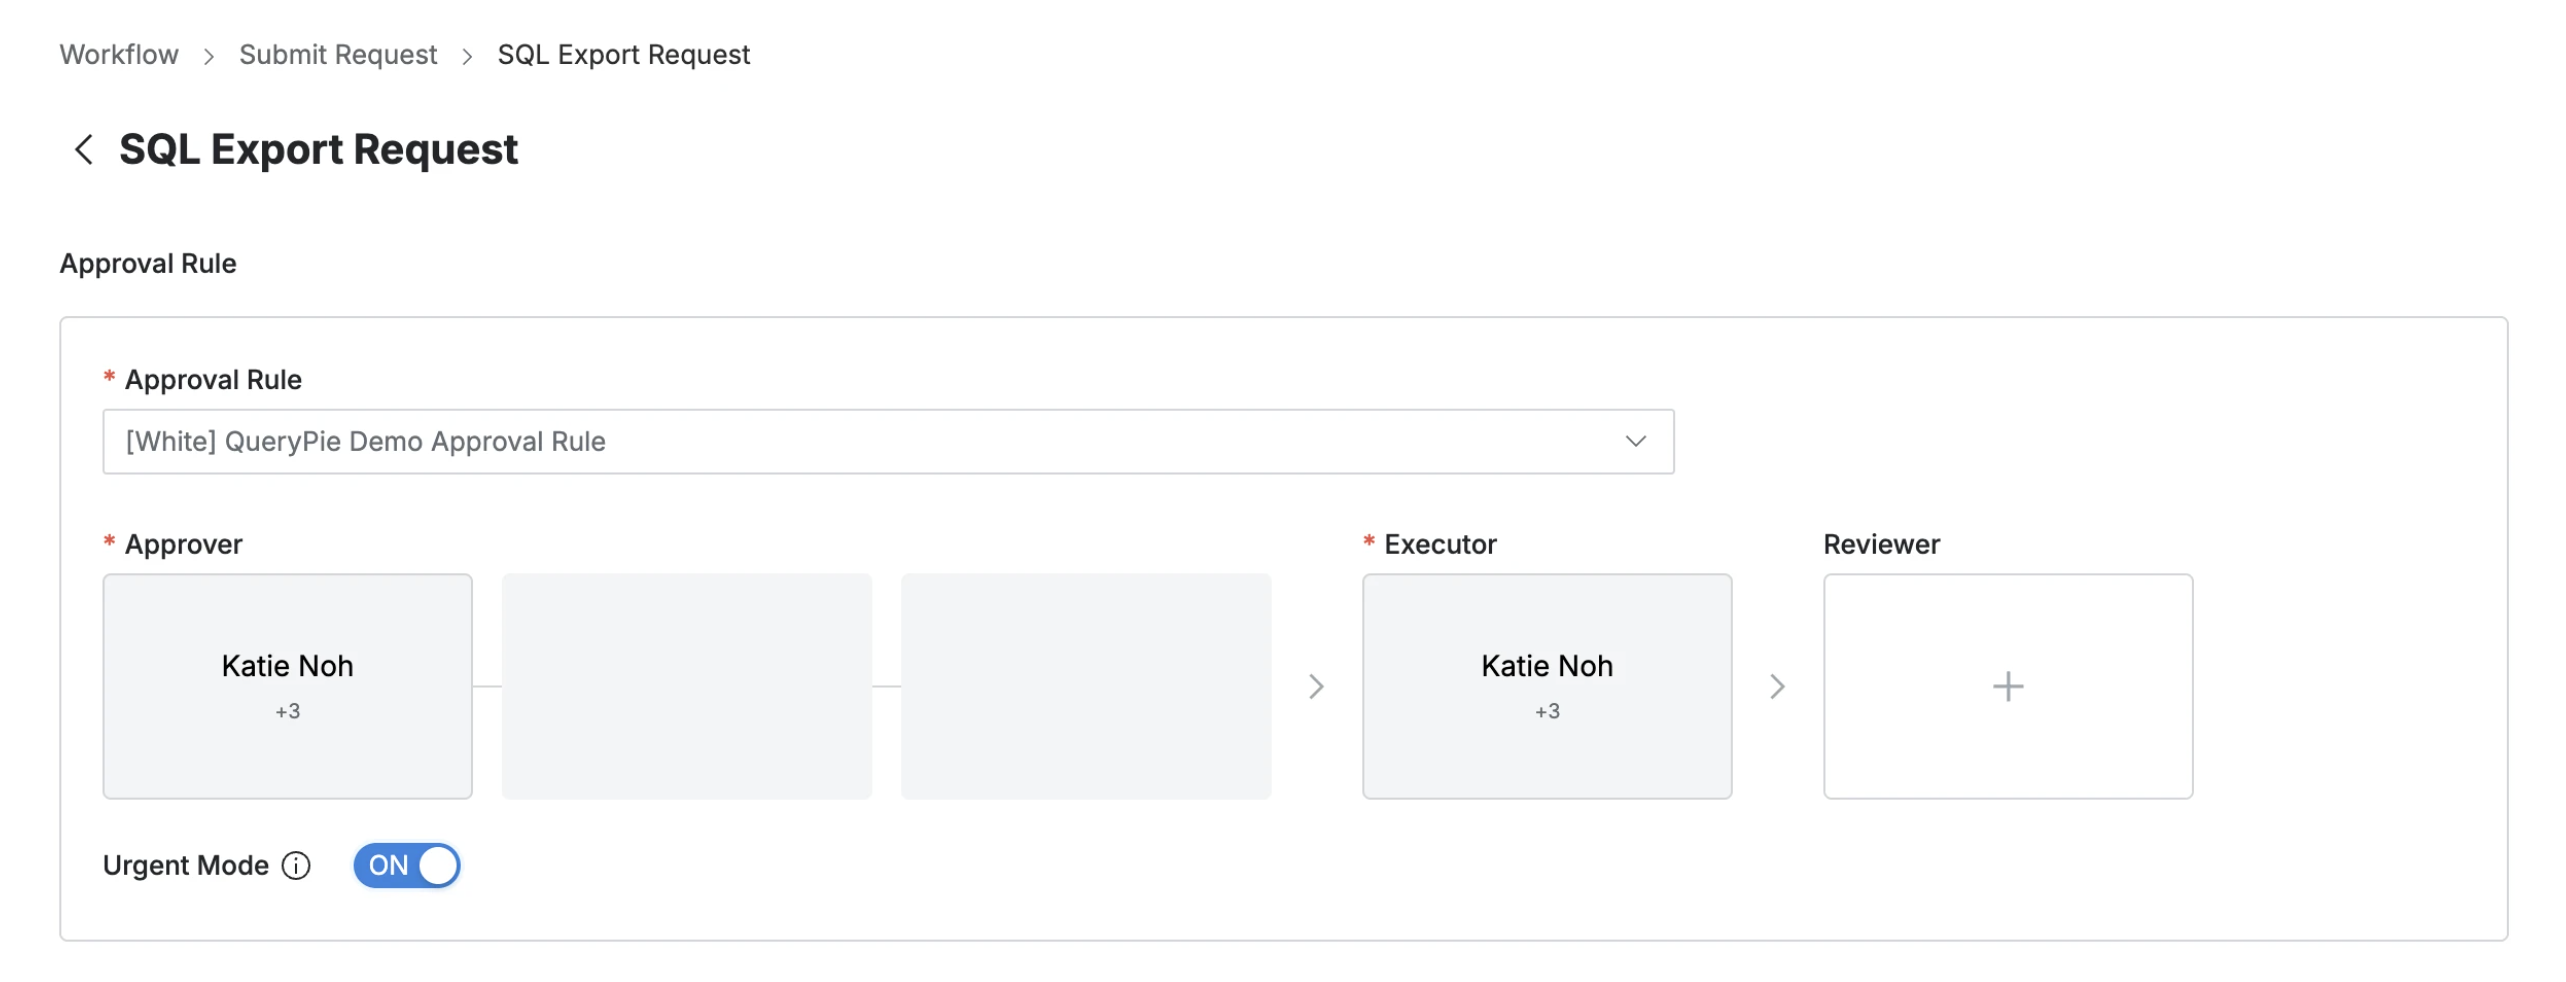
Q. I can’t see the Urgent Mode switch. A. If you select an approval rule where the administrator has not allowed Urgent Mode, this feature will not be displayed as such.
5. Entering Request Information
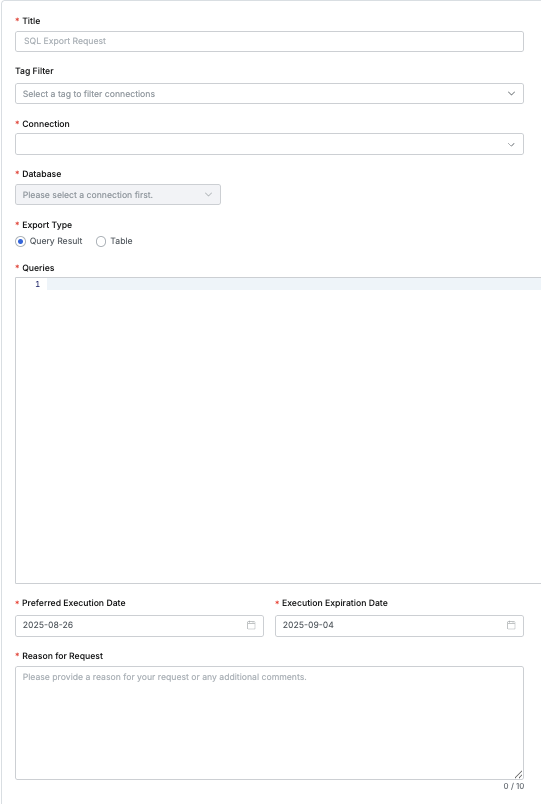
User > Workflow > Submit Request > SQL Export Request > Request Summary
- Title: Enter the request title.
- Connection: Select the target connection for which you want to request SQL execution. Only connections for which you have permission can be selected.
- Database: Select the database within the selected connection for which you want to request data export.
- Content Type: Select the method for querying the data you want to download.
- Query Result: Write queries directly in the Queries section on the request page. You can download the results of that query. You can write up to 10 queries and export them.
- Table: You can export the entire selected table.
- Preferred Execution Date: Select the date when you want the query to be executed. The default selection date is the day of the request.
- Execution Expiration Date: Select the last date when the Executor can execute. The default selection date is one week later.
- Reason for Request: Enter the reason for requesting SQL Export permission.
- Submit: After completing the draft, click the
Submitbutton to complete the submission.
Downloading Approved Data
Approved Export Request items become immediately downloadable upon approval completion.
- Navigate to Workflow > Executions > To Do menu.
- Click on the Export Request item waiting for execution to go to the detail page.
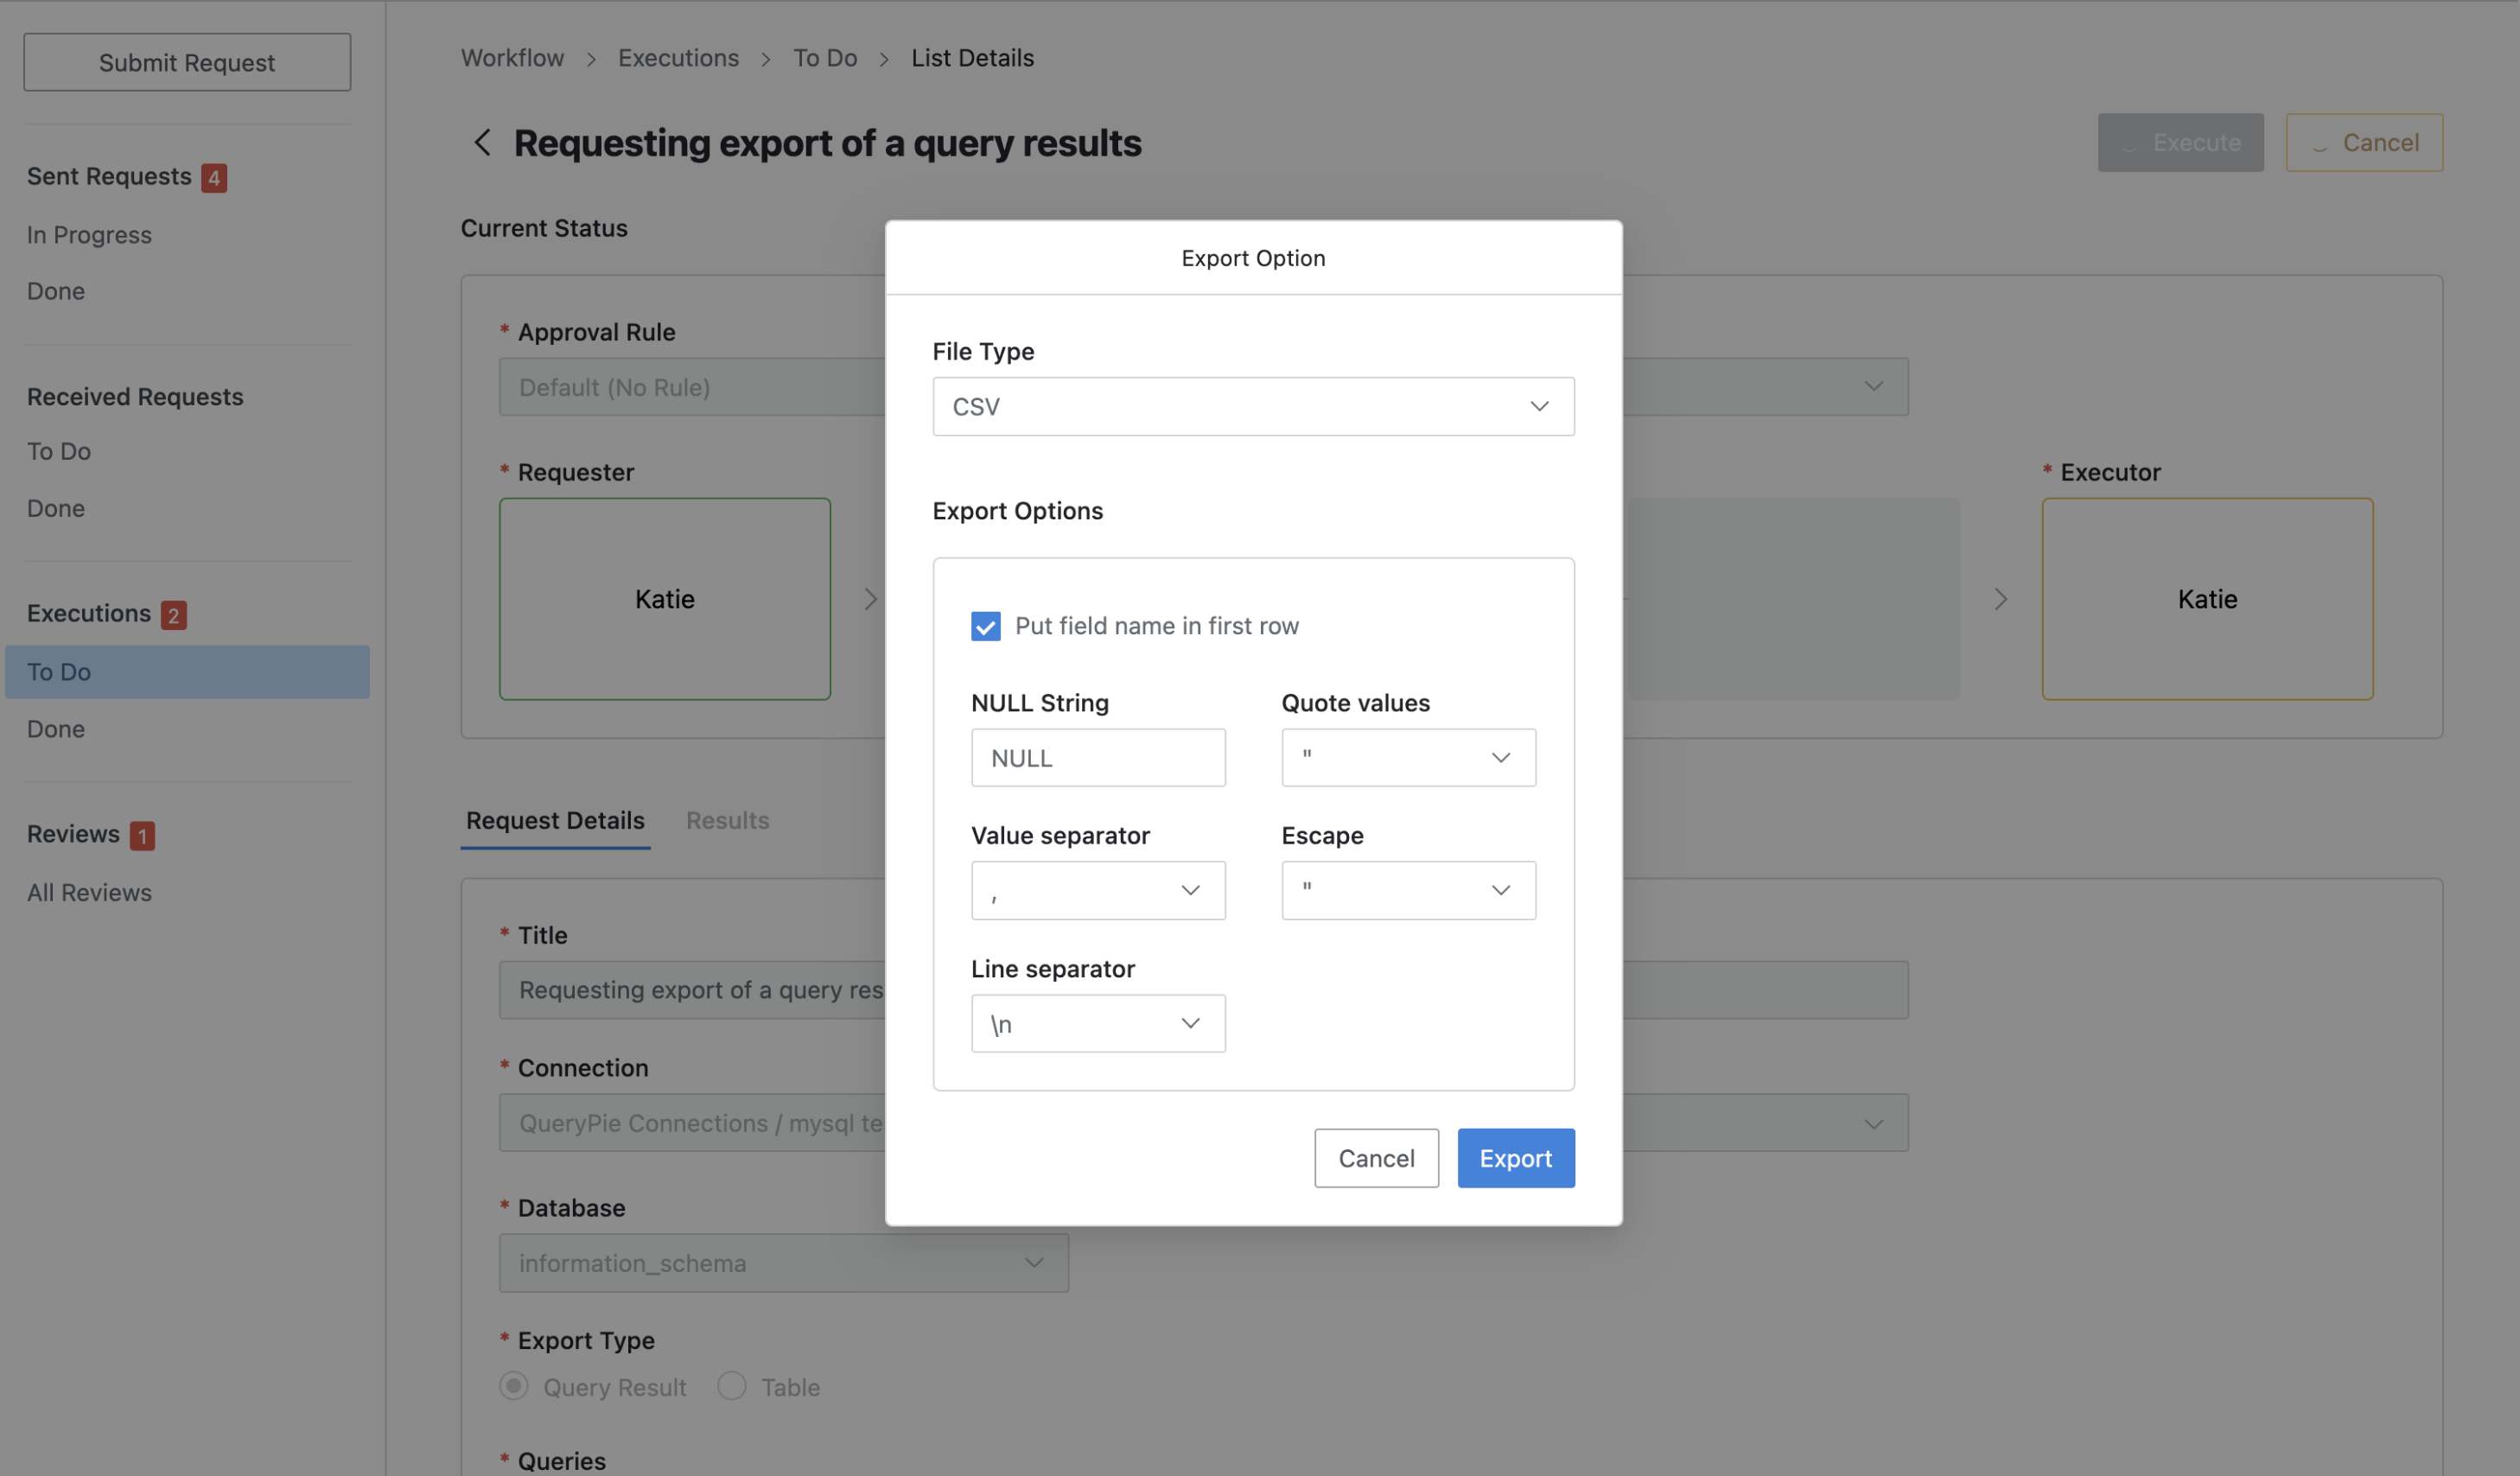
- After checking the Export Request details, click the
Executebutton in the top right. - Set the export options in the Export Option modal, then click the
Exportbutton.- After checking the details, if you don’t want to download, you can cancel by clicking the
Cancelbutton.
- After checking the details, if you don’t want to download, you can cancel by clicking the
- The download results can be checked in the Results tab within the detail page.
- You can check the request history where you downloaded in Workflow > Executions > Done menu.
Last updated on