Integrating with Event Callback
Overview
Event Callback integration delivers system events occurring in QueryPie to your applications in real time via webhooks. This allows you to integrate and manage critical system event notifications with external services.
Configure Event Callback
- Go to Administrator > General > System > Integrations.
- Click the Event Callback tile to open the details page.
- Click
+ Createon the details page to open the popup for creating an Event Callback.
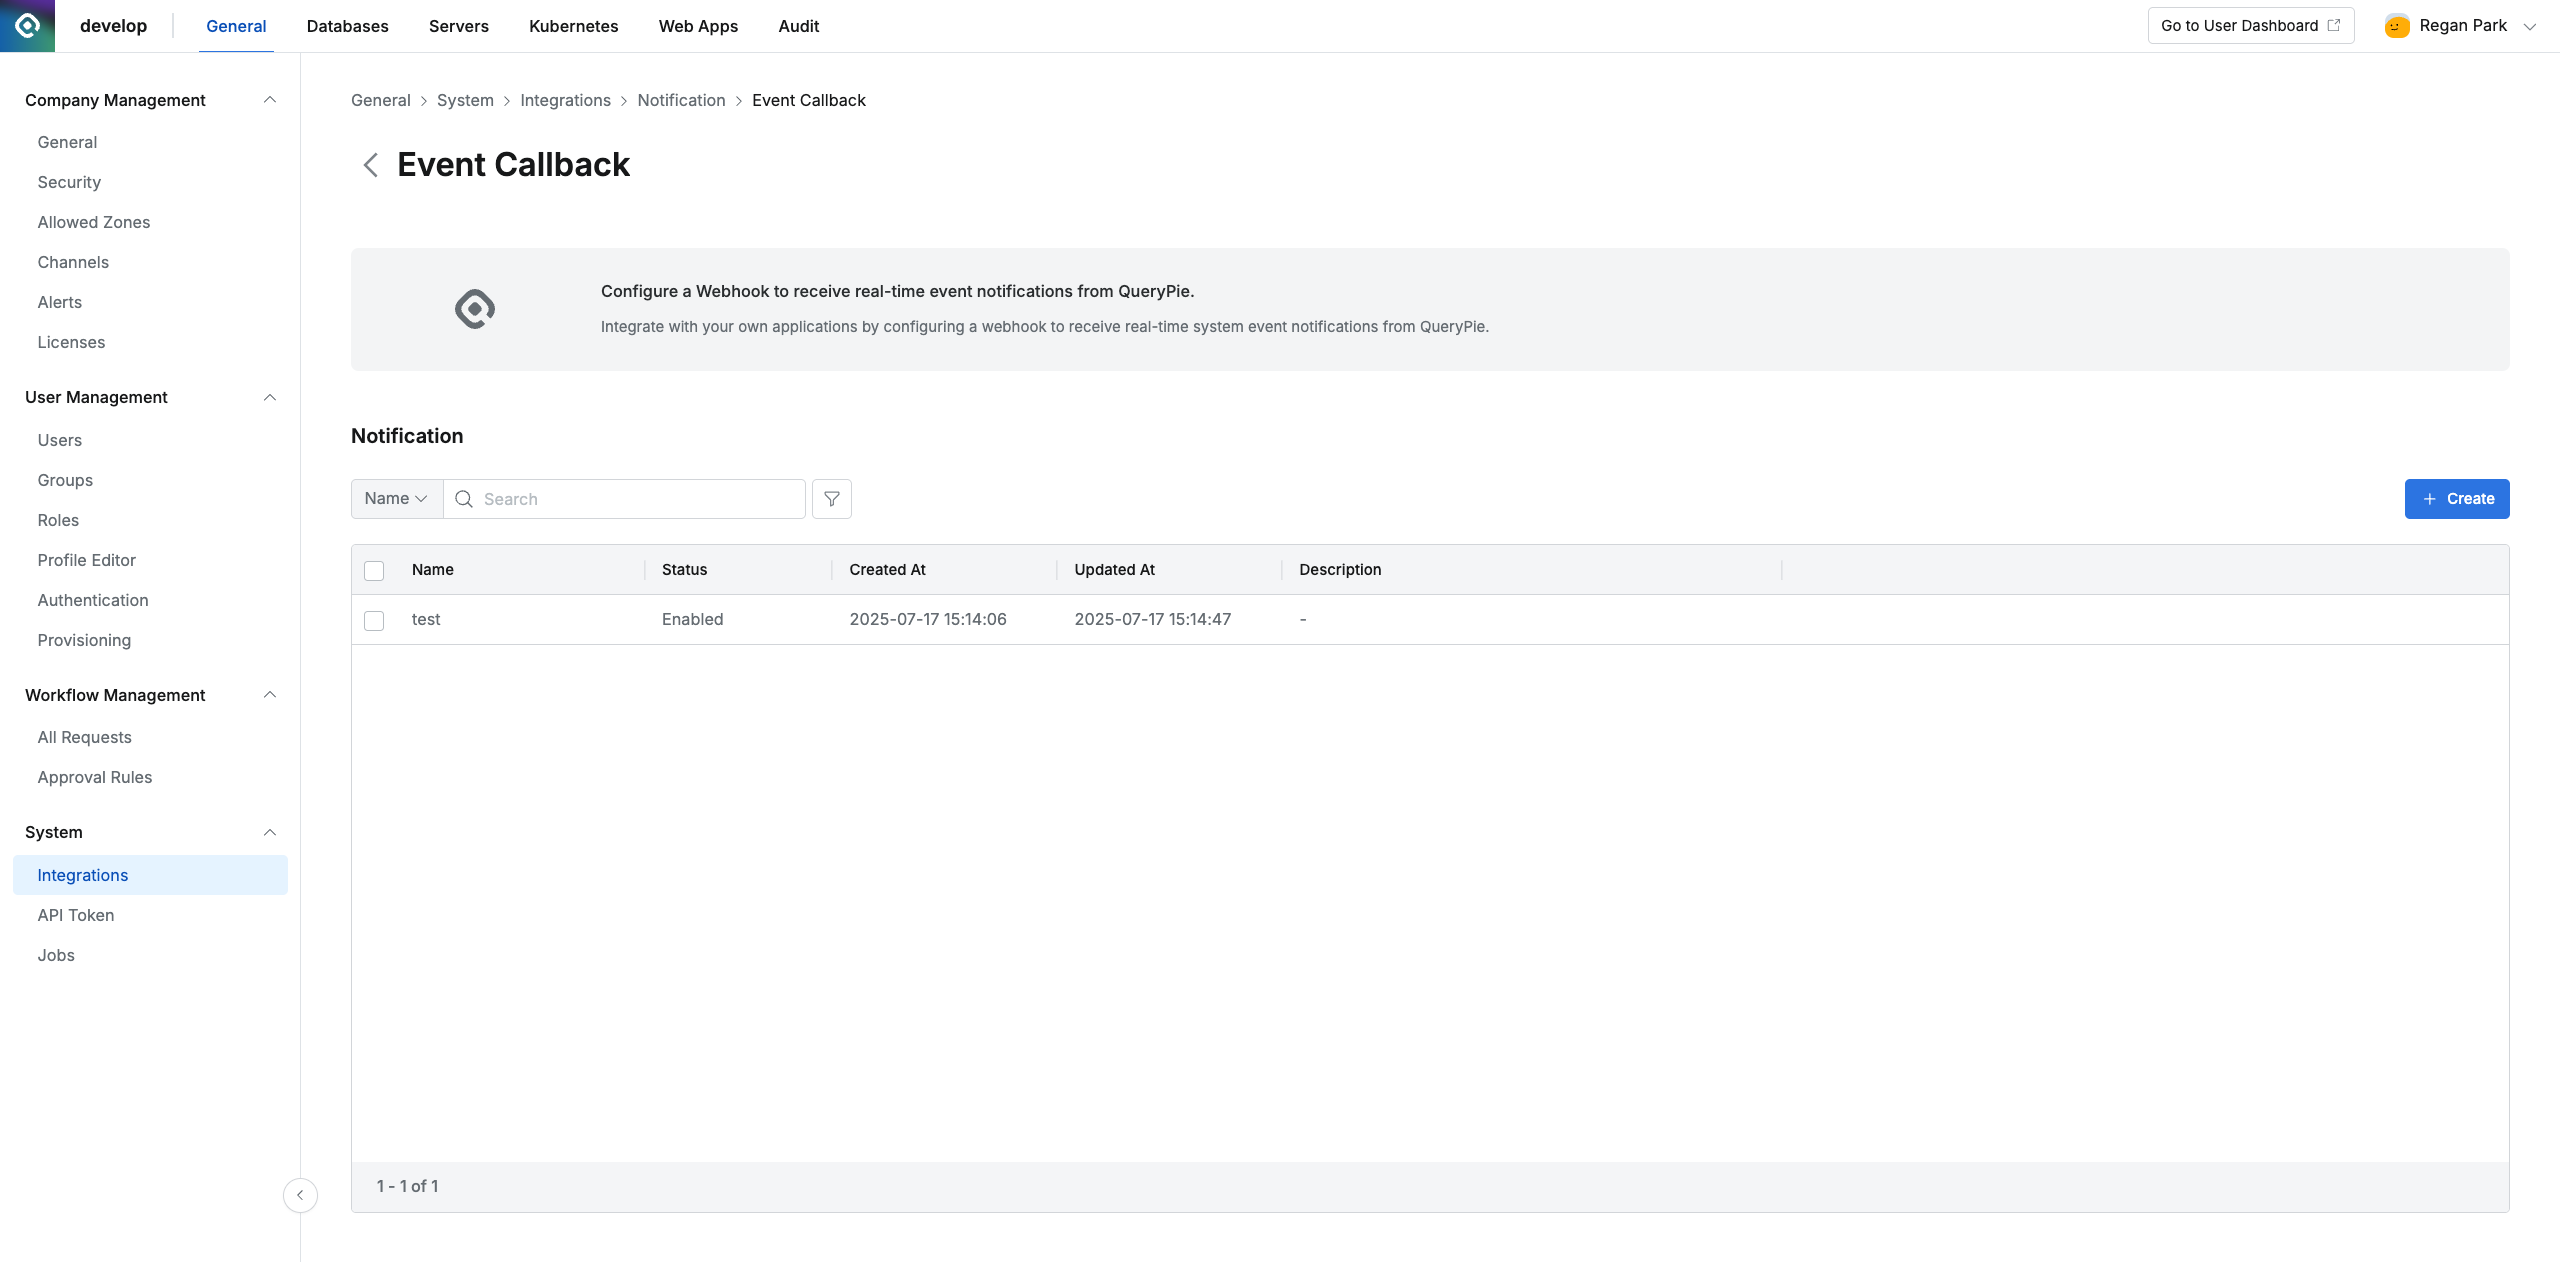
Event Callback Integration detail page
-
Enter the following information to configure the Event Callback.
- Name : Enter an identifiable name.
- Callback URL : Enter the webhook URL of the external application that will receive event notifications.
- Status : Select the operational status of the webhook.
- Enabled : The webhook is active and events are sent in real time.
- Paused : Temporarily pause the webhook. Events that occur in this state are accumulated and will all be sent once you switch back to Enabled.
- Disabled : Fully deactivate the webhook. Events are neither sent nor accumulated in this state.
- Subscribed Events : Select the event types to subscribe to. Currently supported events:
USER_LOCKED: User account lockedUSER_LOGIN_SUCCEEDED: User login succeededUSER_CREATED: User createdUSER_DELETED: User deleted
- Authorization Header : Enter the authorization header used for securing webhook requests. (e.g., Authorization: Bearer <token>)
- Description : Enter a description for this configuration (optional).
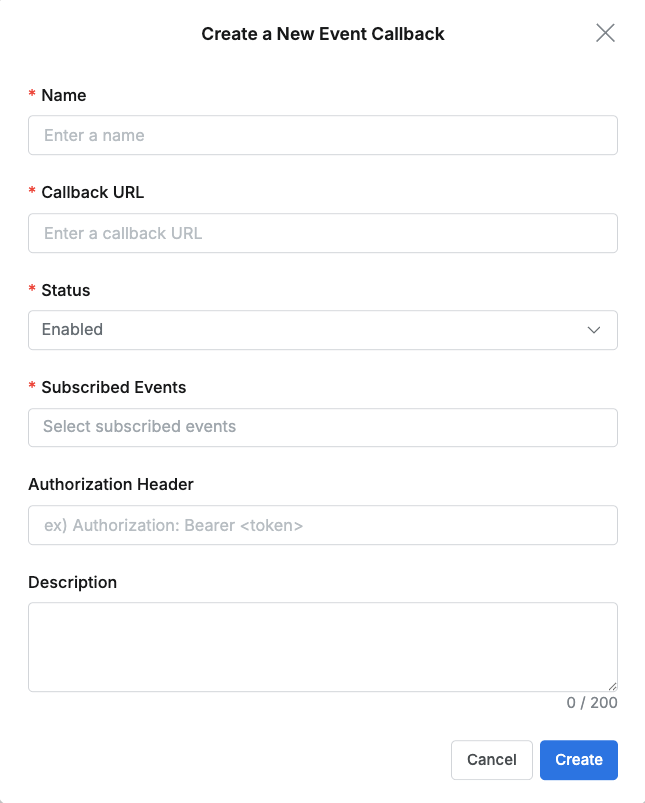
Event Callback settings popup dialog
-
Click
Createto save the configuration.
Edit Event Callback settings
- Go to Administrator > General > System > Integrations.
- Click the Event Callback tile to open the details page.
- In the list of created Event Callbacks, click the item you want to edit.
- Modify the necessary information and save.
Delete Event Callback settings
- Go to Administrator > General > System > Integrations.
- Click the Event Callback tile to open the details page.
- In the list of created Event Callbacks, check the box to the left of the item you want to delete.
- Click
Deleteat the top-left of the list.
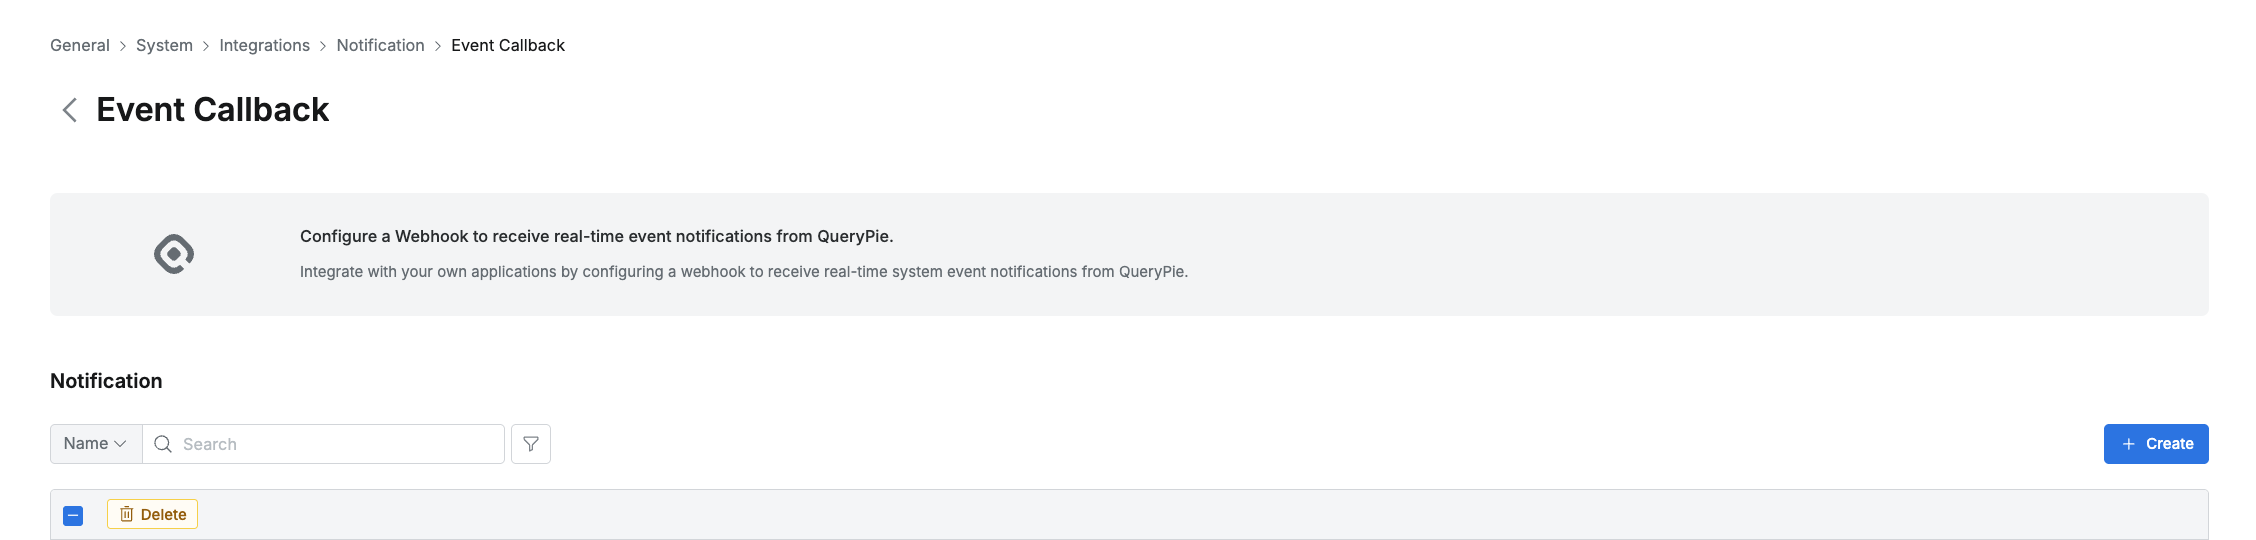
- When the confirmation window appears, proceed to delete to remove the configuration.
Last updated on