Initial WAC Setup in Web App Configurations
The Web App Configurations page is available in version 10.2.6 or higher.
You can perform initial WAC-related settings through the GUI on the Web App Configurations page.
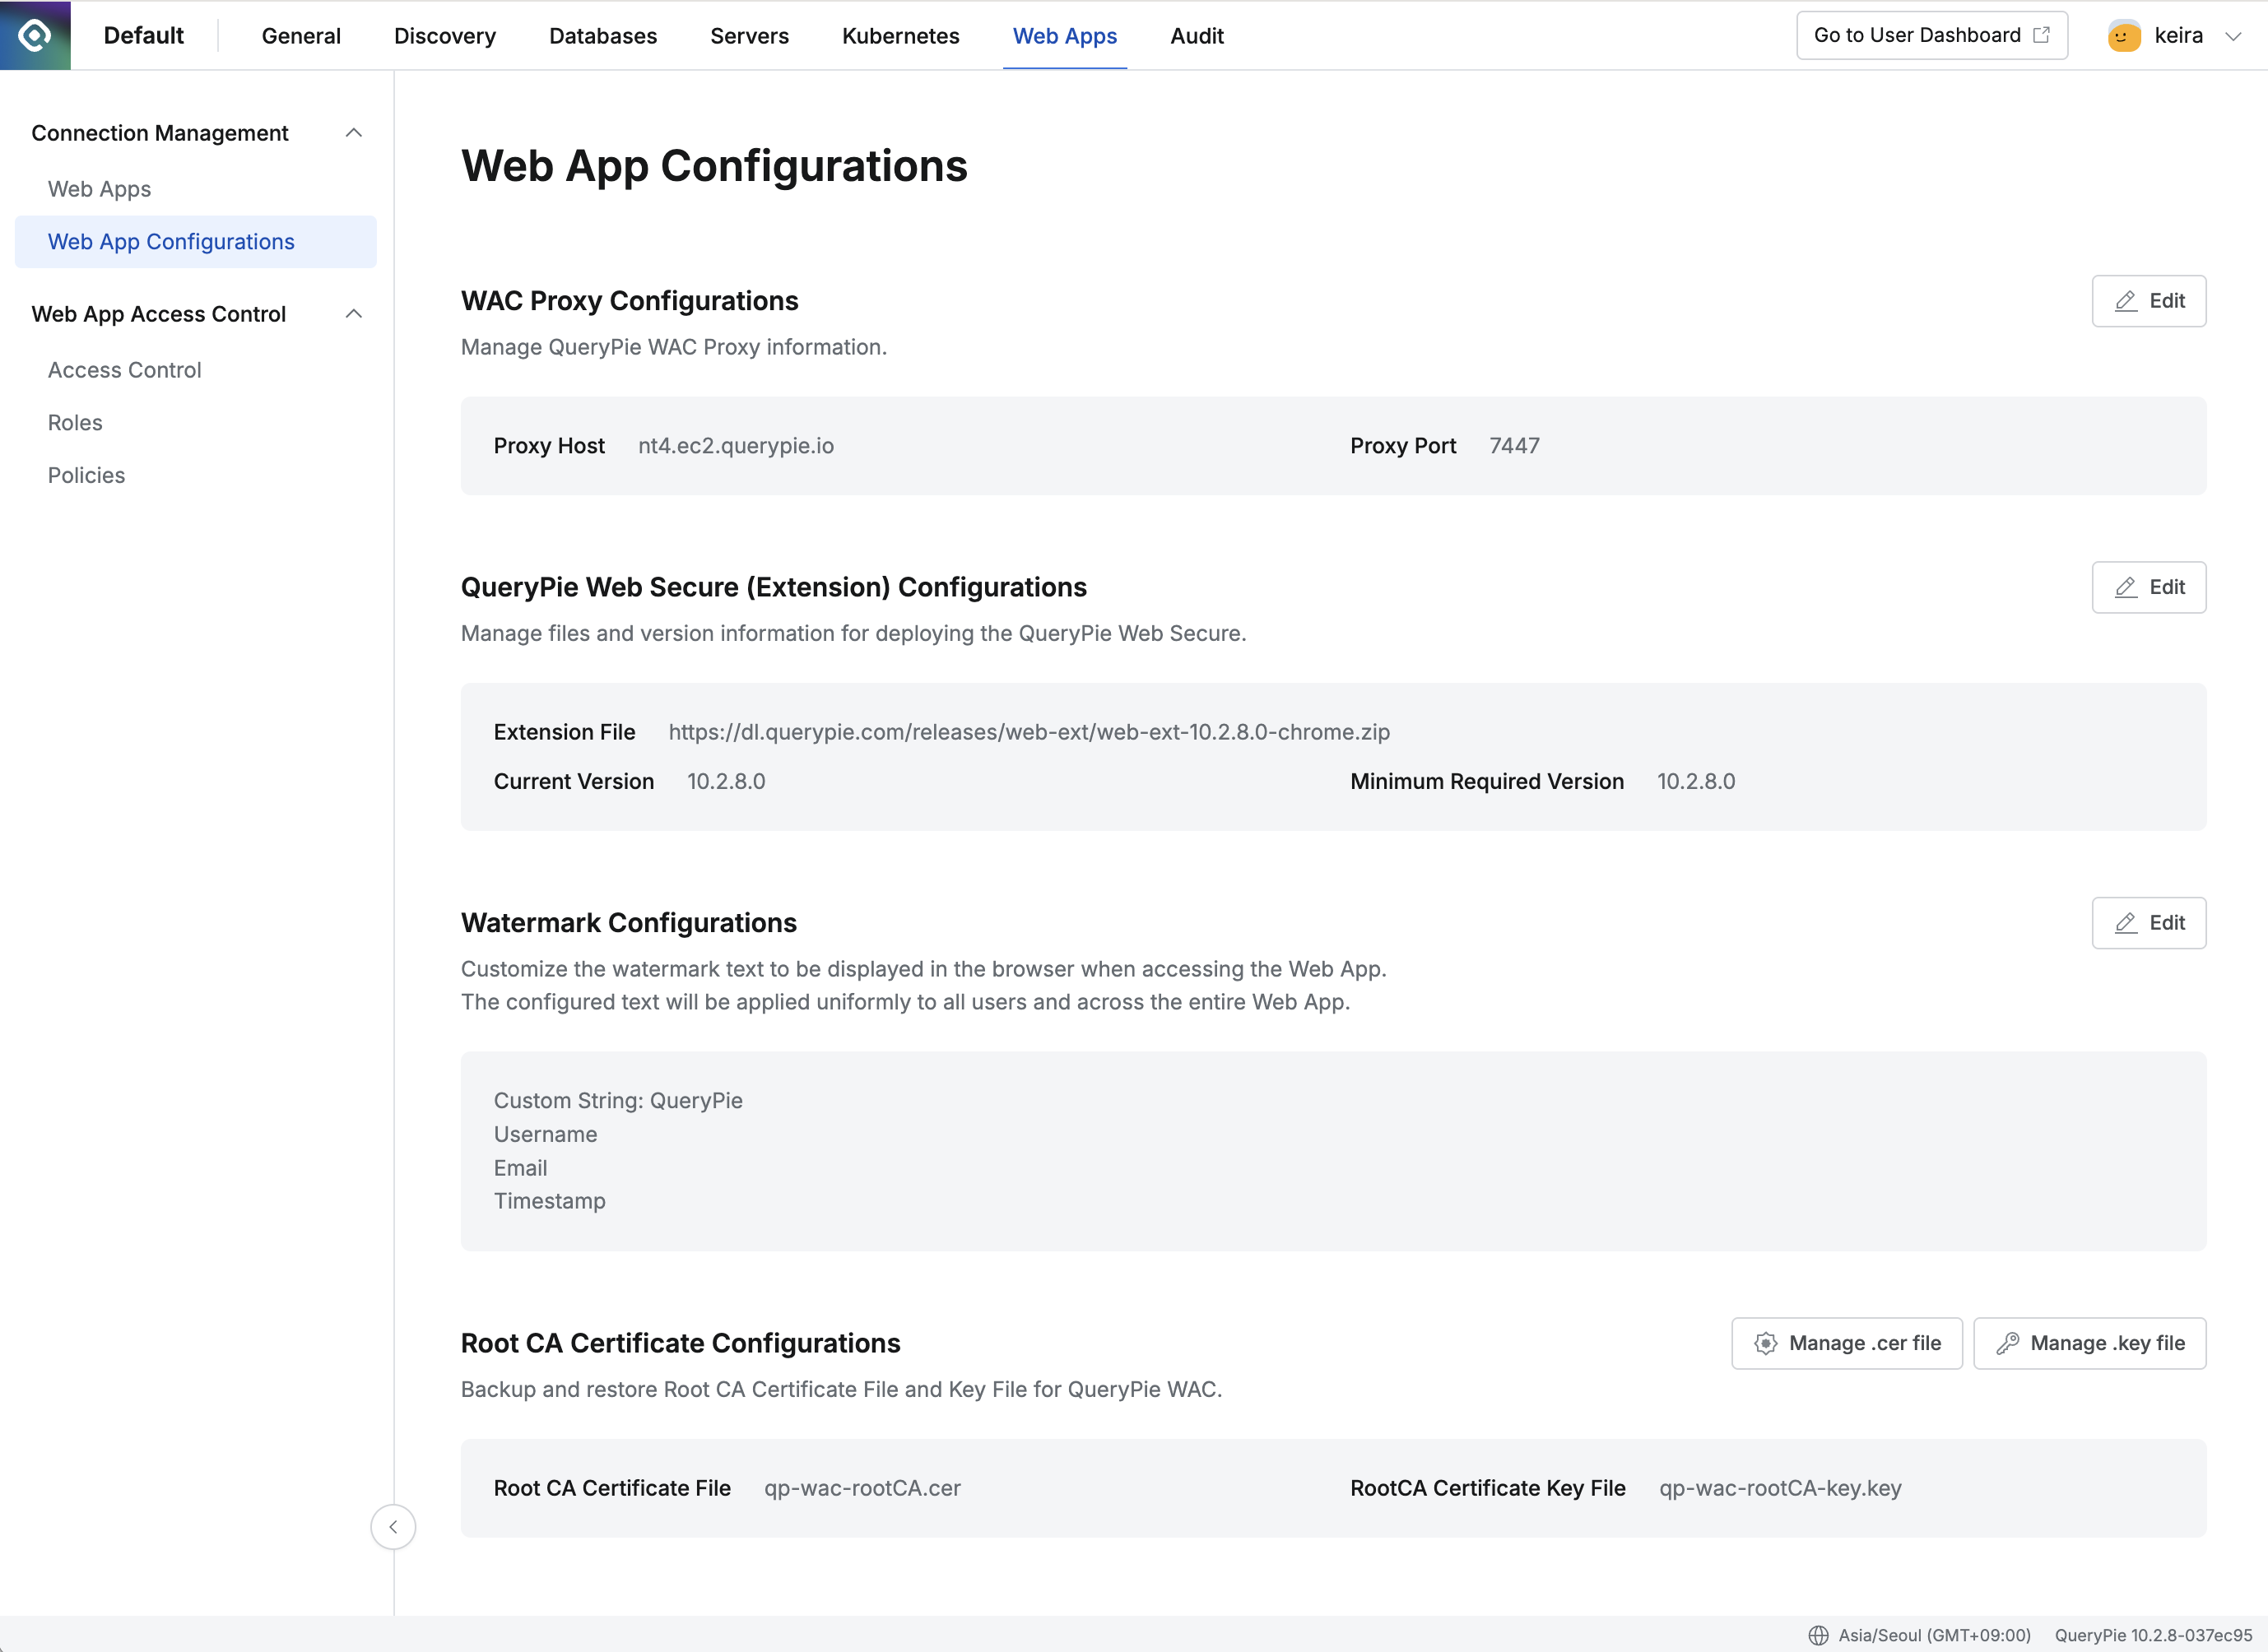
Admin > Web Apps > Connection Management > Web App Configurations
WAC Proxy Configurations 10.2.6~
After configuring the WAC proxy server, enter the server configuration information. The description of each field is as follows.
- Proxy Host : This is a field to set the FQDN (Fully Qualified Domain Name) of the WAC proxy host.
- You can enter FQDN or IP address in the Proxy Host field.
- The default value
wac-proxy.querypie.iois an arbitrarily set value, and must be changed to match the actual proxy host you are using to use WAC correctly. - If you change the Proxy Host, you must restart the QueryPie application.
- Proxy Port : This is the port number of the WAC proxy server. The default value is
7447.
How to restart the QueryPie application is as follows.
- Access the EC2 server where QueryPie is installed.
- Run the following command to stop the container:
docker compose down - Use the following command to restart the container:
docker compose up -d
QueryPie Web Secure (Extension) Configurations 10.2.6~
Administrators can directly manage WAC Extension related settings.
- By default, it includes a public link to download the latest extension at the time of product release and compatibility information.
- For users in closed network environments who need WAC Extension deployment, download the WAC Extension file from a PC with internet access, then upload the file to the internal repository in Configurations.
- When WAC Extension patches are released separately from regular releases, apply the changed configuration values. This allows you to deploy the changed extension to users as well.
The description of each field is as follows.
- Extension File : This is the path where you can download the extension file.
- Current Version : This is the version information of the currently registered extension.
- Minimum Required Version : This is the value of the minimum extension version required by the currently installed QueryPie version.
- The WAC server checks the extension version information installed on the user’s browser, and if a version lower than the value entered in this field is being used, it forces extension updates.
Current Version and Minimum Required Version information must be entered according to the compatibility information provided by QueryPie.
Deploying WAC Extension in Closed Network Environment
- Download the WAC Extension from a PC with internet access and keep it ready.
- In a closed network environment, access QueryPie > Web App Configurations page, then click the
Editbutton in the QueryPie Web Secure (Extension) Configurations section. - In the Extension File option, select
Add by File Uploadand upload the extension file you downloaded.
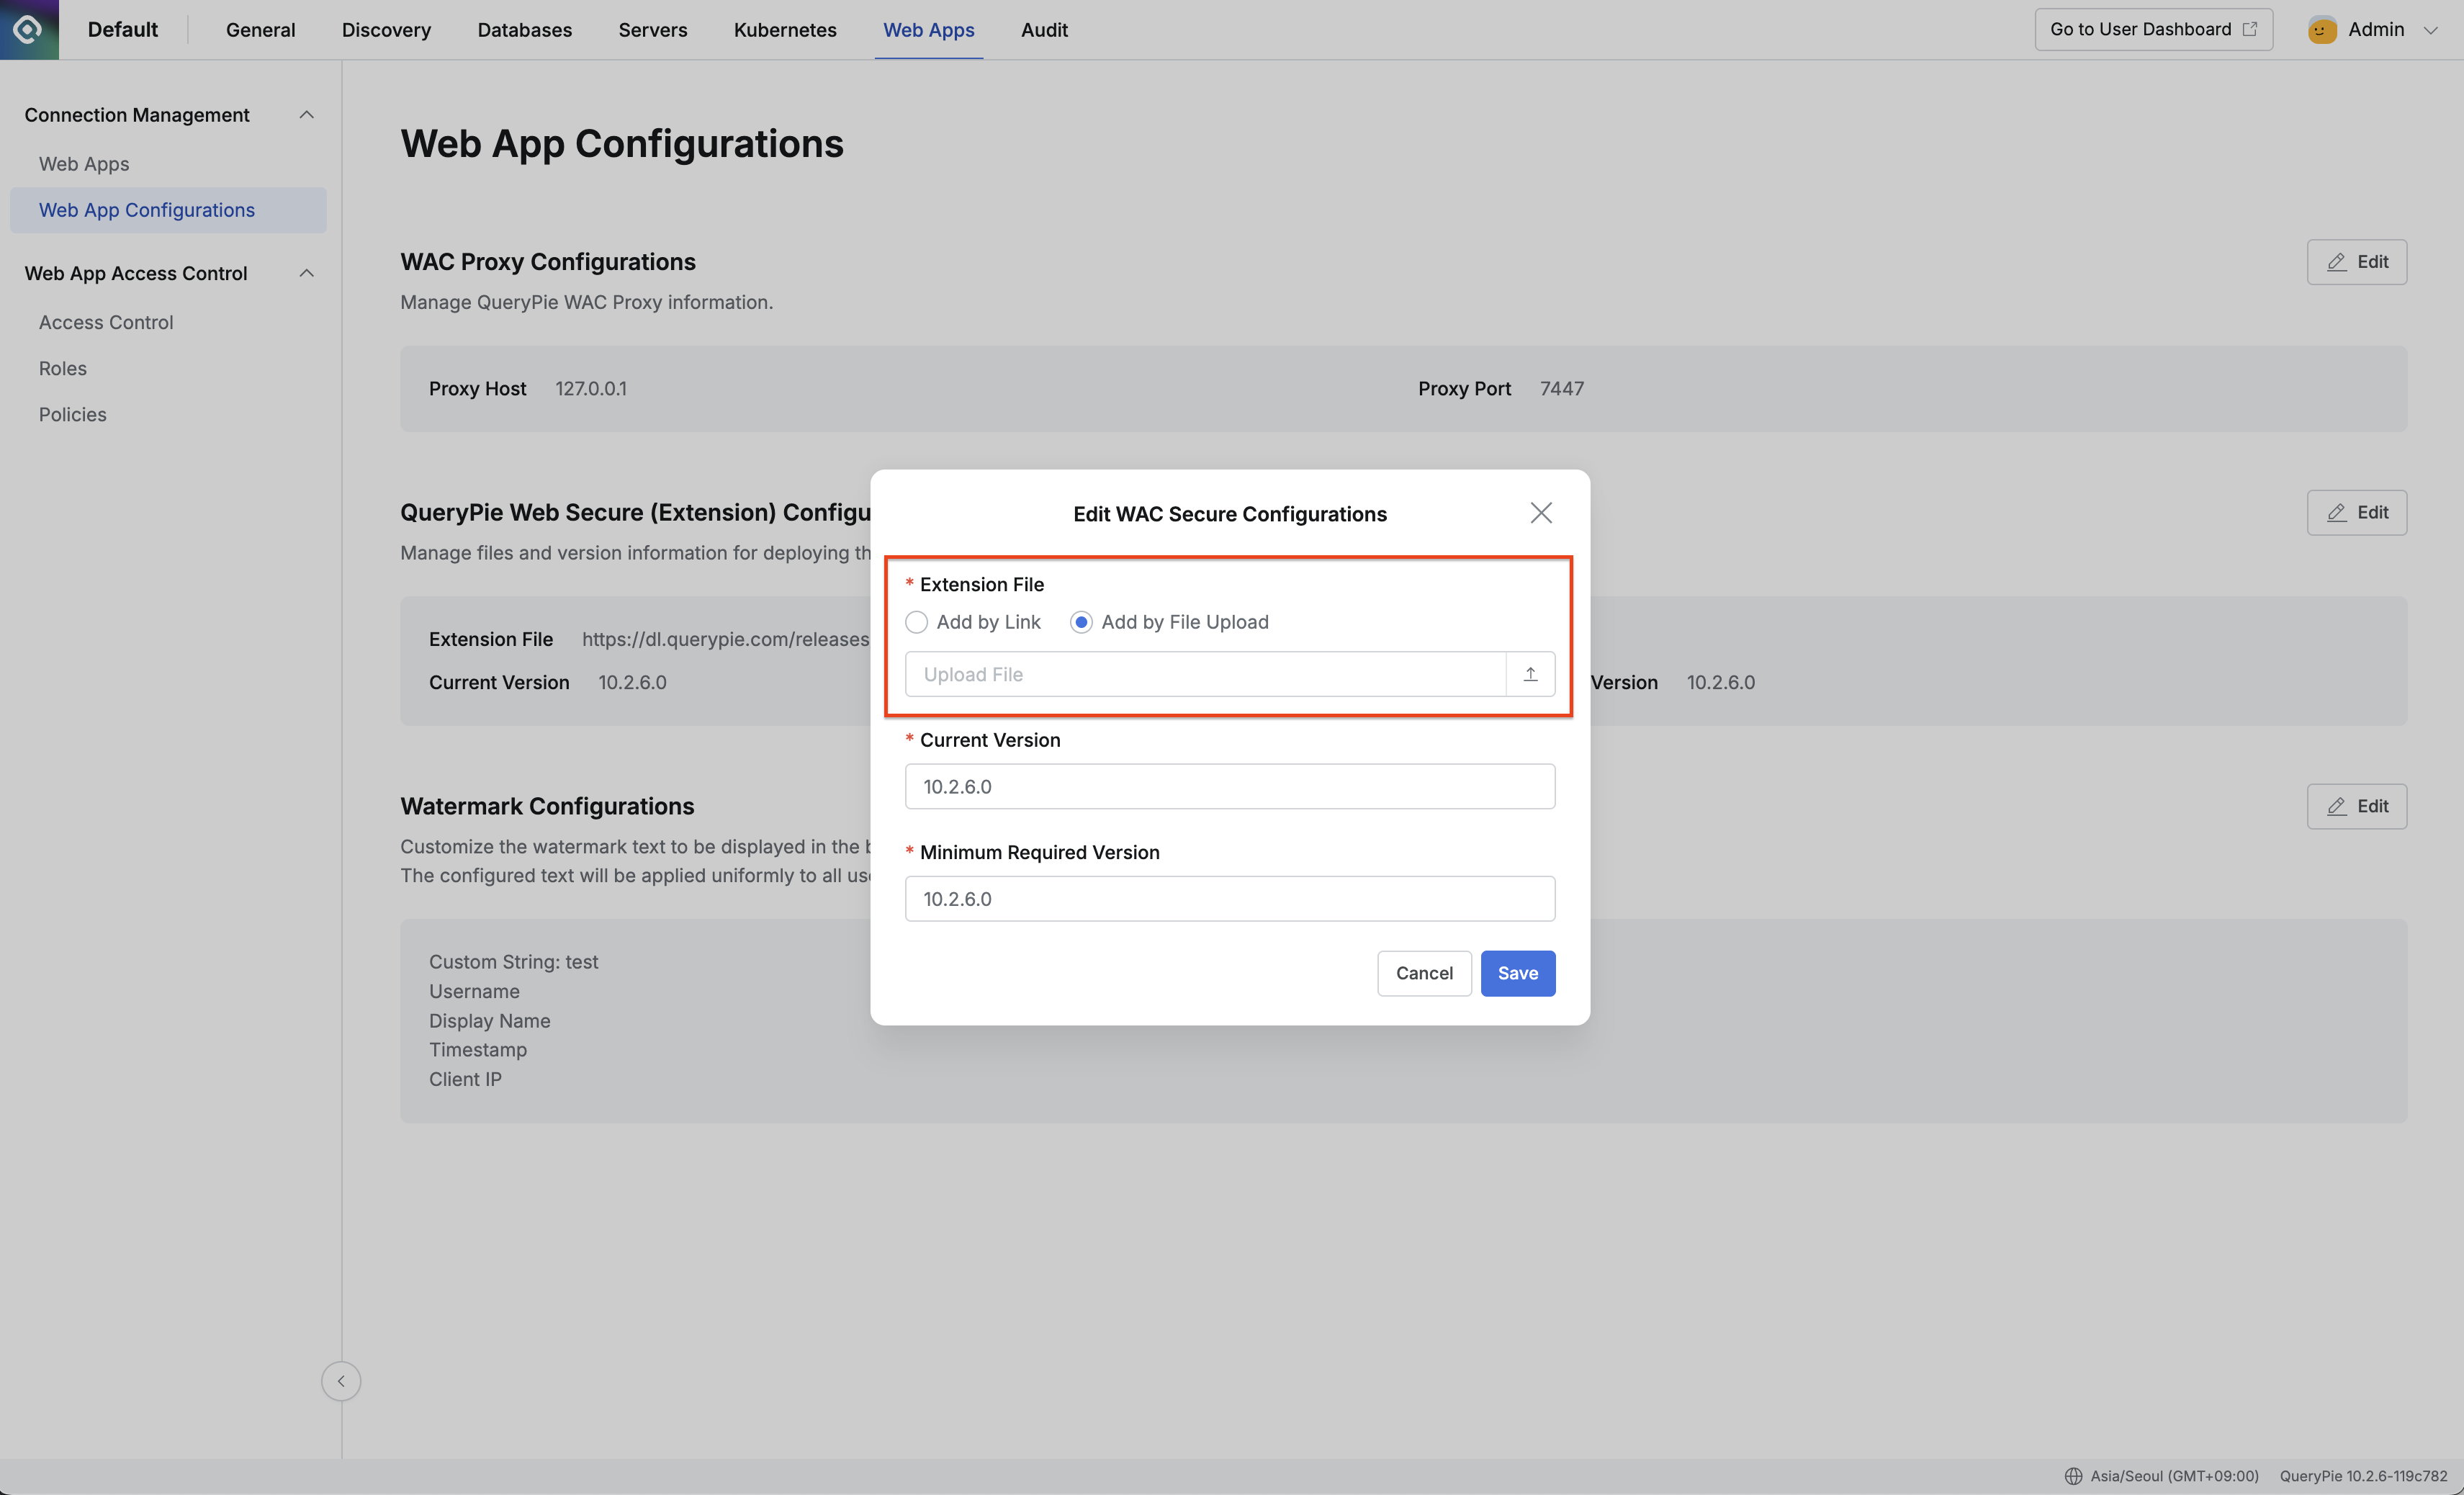
Admin > Web Apps > Connection Management > Web App Configurations > WAC Secure settings modal
- If there are no separate compatibility information changes received, maintain the existing values for Current Version and Minimum Required Version information.
- Click the
Savebutton to save. - You can see that the Extension File link has changed from a link starting with
https://dl.querypie.com/…to a link starting with the QueryPie Domain you are currently using.
Deploying Emergency Patch Extension Link
- Click the
Editbutton in the QueryPie Web Secure (Extension) Configurations section. - In the Extension File option, select
Add by Linkand paste the new download link you received. - Update compatibility information changes according to the guide received from QueryPie manufacturer.
- Click the
Savebutton to save.
Watermark Configurations 10.2.6~
In the Watermark Configurations section, you can check the currently applied watermark text settings and set the text you want when applying watermarks.
- Click the
Editbutton to change the text settings. - When the settings modal is open, you can preview the watermark application results based on the currently logged-in user.
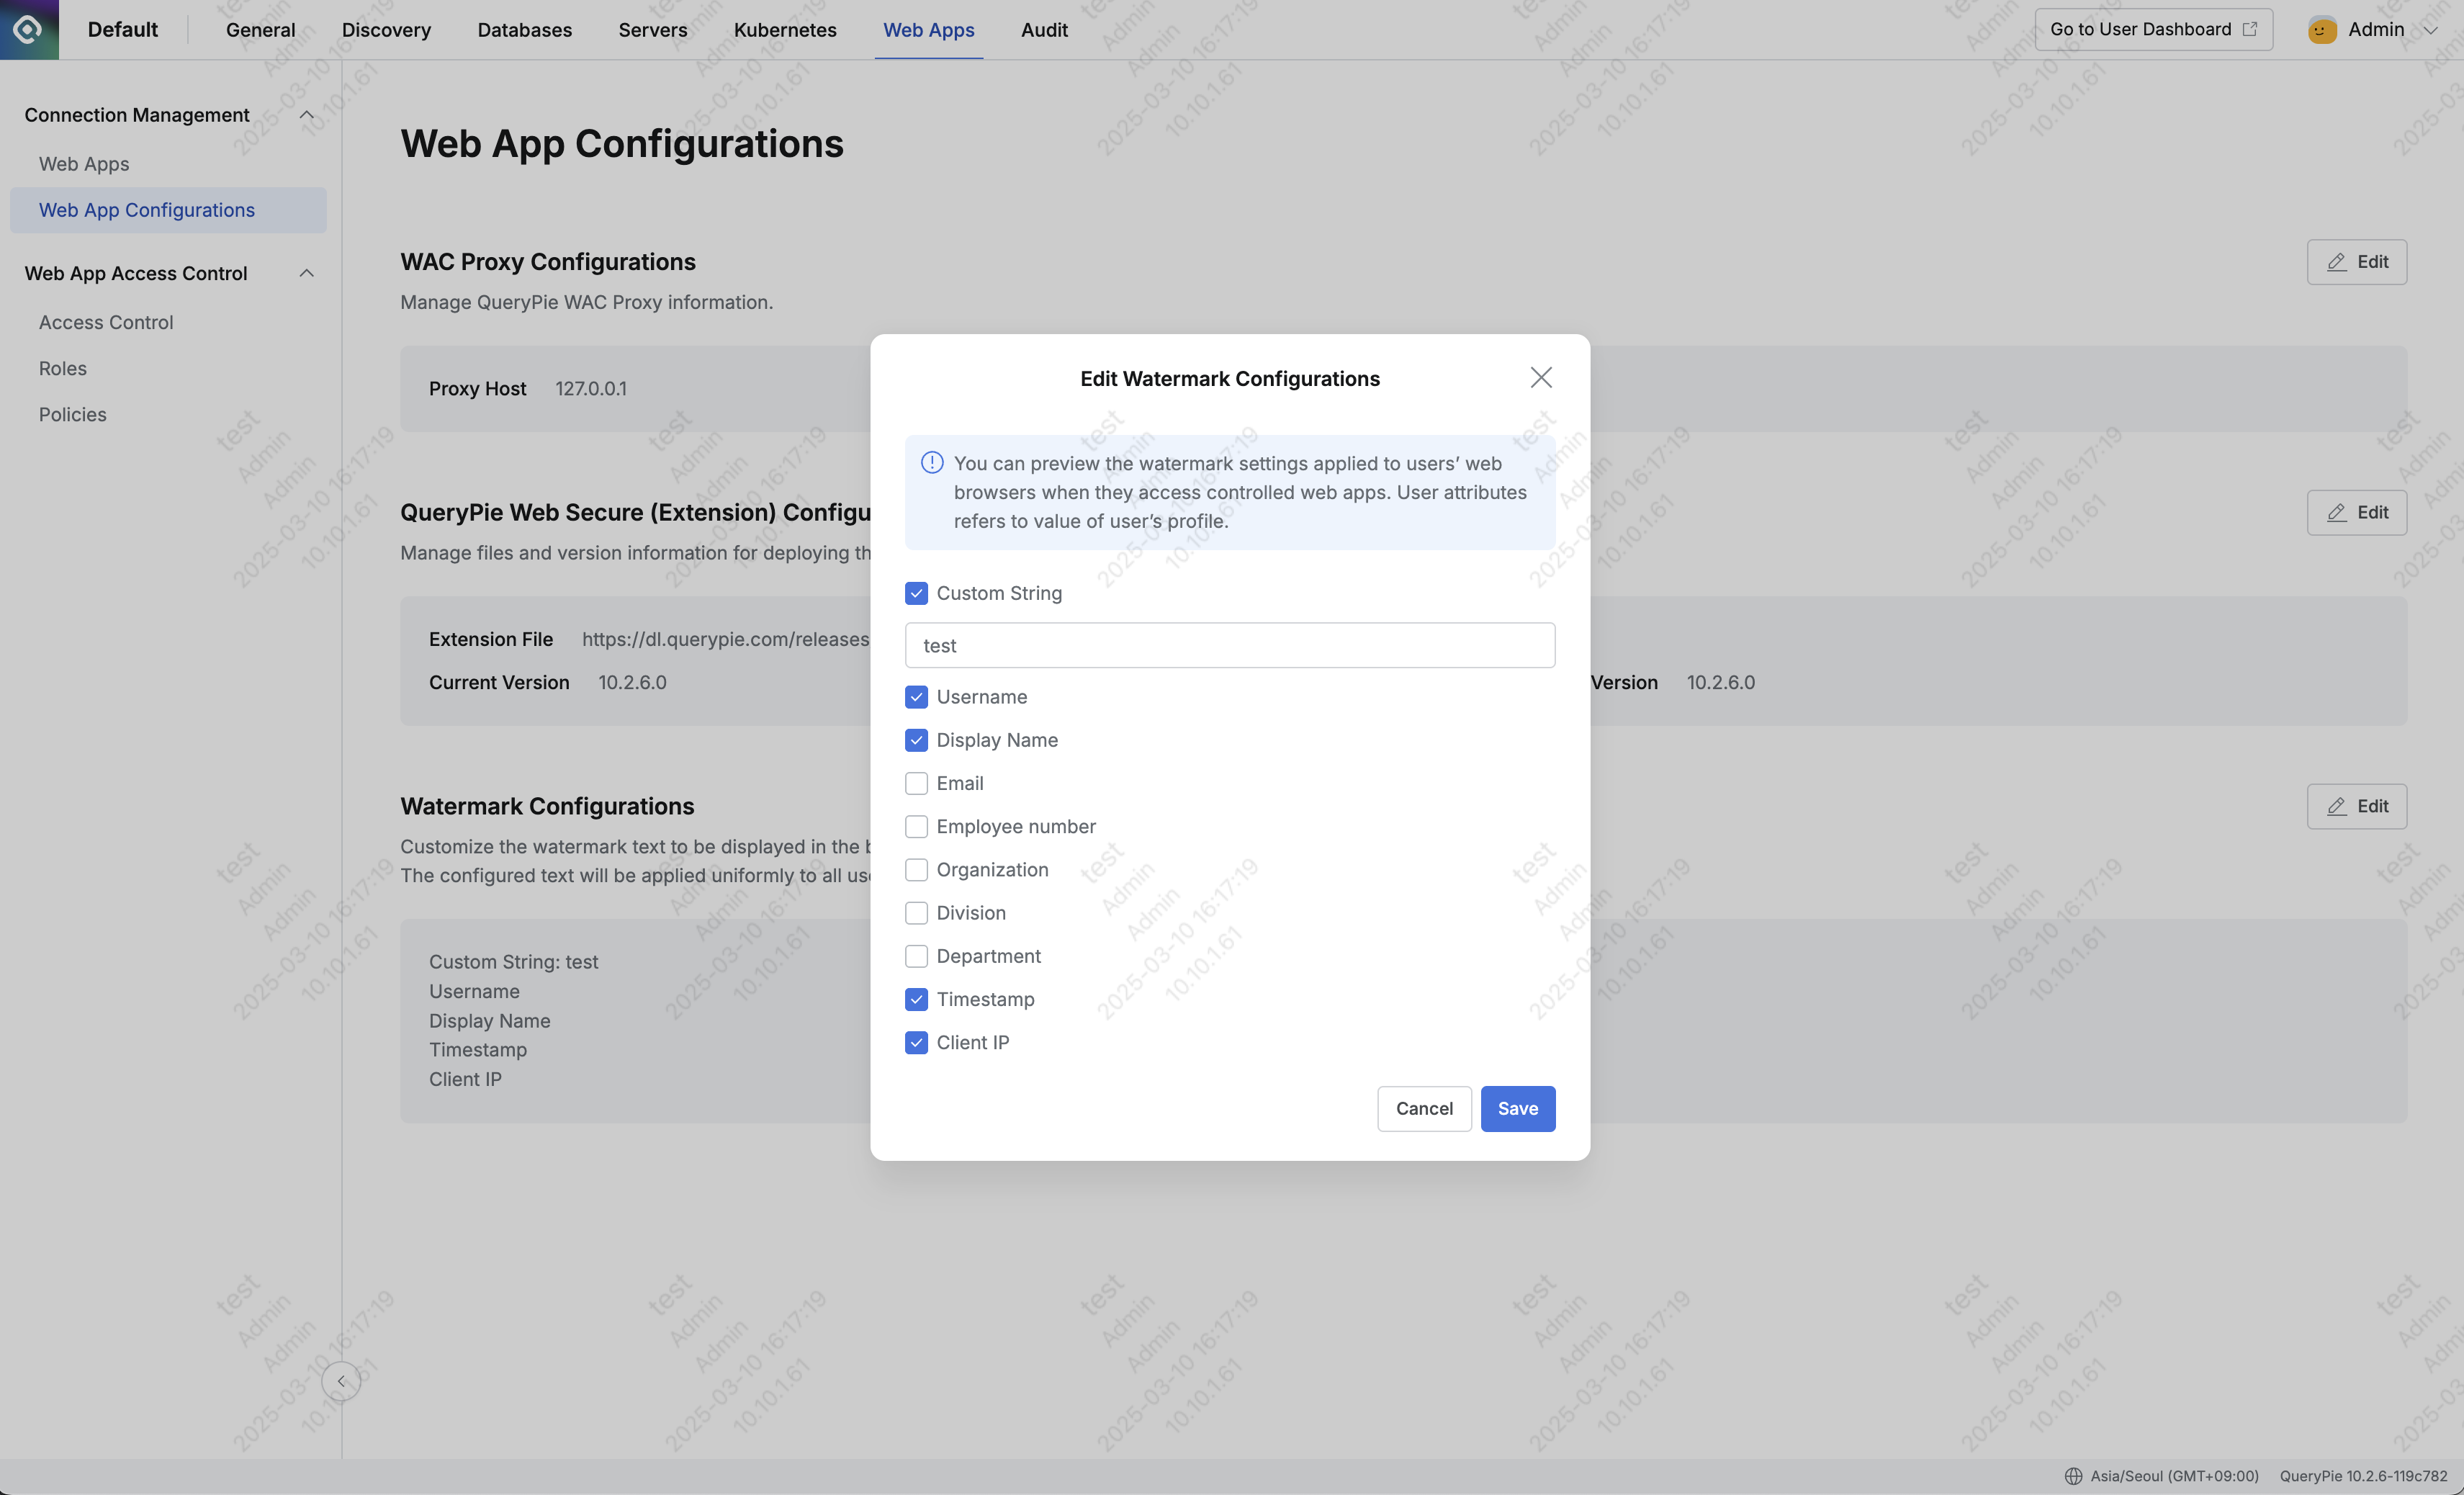
Admin > Web Apps > Connection Management > Web App Configurations > Watermark settings modal
- Custom String : You can enter the text you want to display in the watermark. Up to 40 characters can be entered.
- User Information : You can display Username, Display Name, Email, Employee number, Organization, Division, and Department information.
- Timestamp : The time when the page was first accessed is displayed.
- Client IP : The client IP that accessed the page is displayed.
Root CA Certificate Configurations 10.2.8~
In the Root CA Certificate Configurations section, you can backup and restore the Root CA certificate currently used by QueryPie.

Admin > Web Apps > Connection Management > Web App Configurations > Manage .cer file modal
- Manage .cer file
- Backup Root CA Certificate File : You can download the currently used certificate file. (Same as the certificate file you can get from User Profile > Web Secure)
- Restore Root CA Certificate File : You can upload the certificate file you downloaded.
- Manage .key file
- Backup Root CA Certificate Key File : You can download the currently used certificate key file.
- Restore Root CA Certificate Key File : You can upload the certificate file you downloaded.
After uploading the certificate, QueryPie application restart is required to apply the changes.
How to restart the QueryPie application is as follows.
- Access the EC2 server where QueryPie is installed.
- Run the following command to stop the container:
docker compose down - Use the following command to restart the container:
docker compose up -d