Requesting Unmasking (Mask Removal Request)
Overview
When you need to verify original data for items masked by masking policies in DAC, you can request temporary mask removal from administrators through Workflow. Mask removal can be requested through Workflow, or through the Unmasking Request menu that appears when you right-click on masked data in the web SQL editor.
Requesting Unmasking
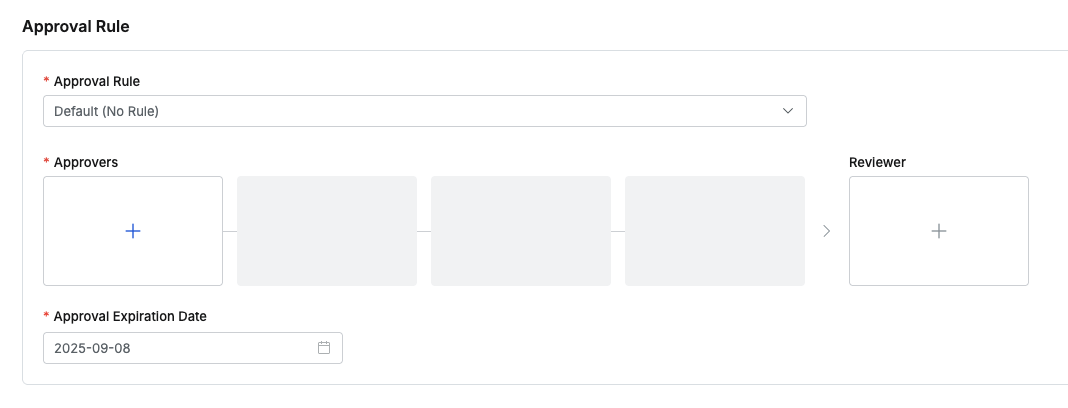
1. Selecting Approval Rules
- Select an Approval Rule to choose the appropriate approval rule for your purpose. The approval target varies depending on the selected rule.
- If a pre-configured approval rule is selected, the approver is automatically assigned and cannot be added or modified.
- Approval Expiration Date: Enter the approval expiration date. The maximum value can be set through Maximum Approval Duration. The Approval Expiration Date cannot exceed the Unmasking Expiration End Date. If exceeded, the request cannot be submitted.
- However, when submitting in Urgent Mode, the above condition is ignored.
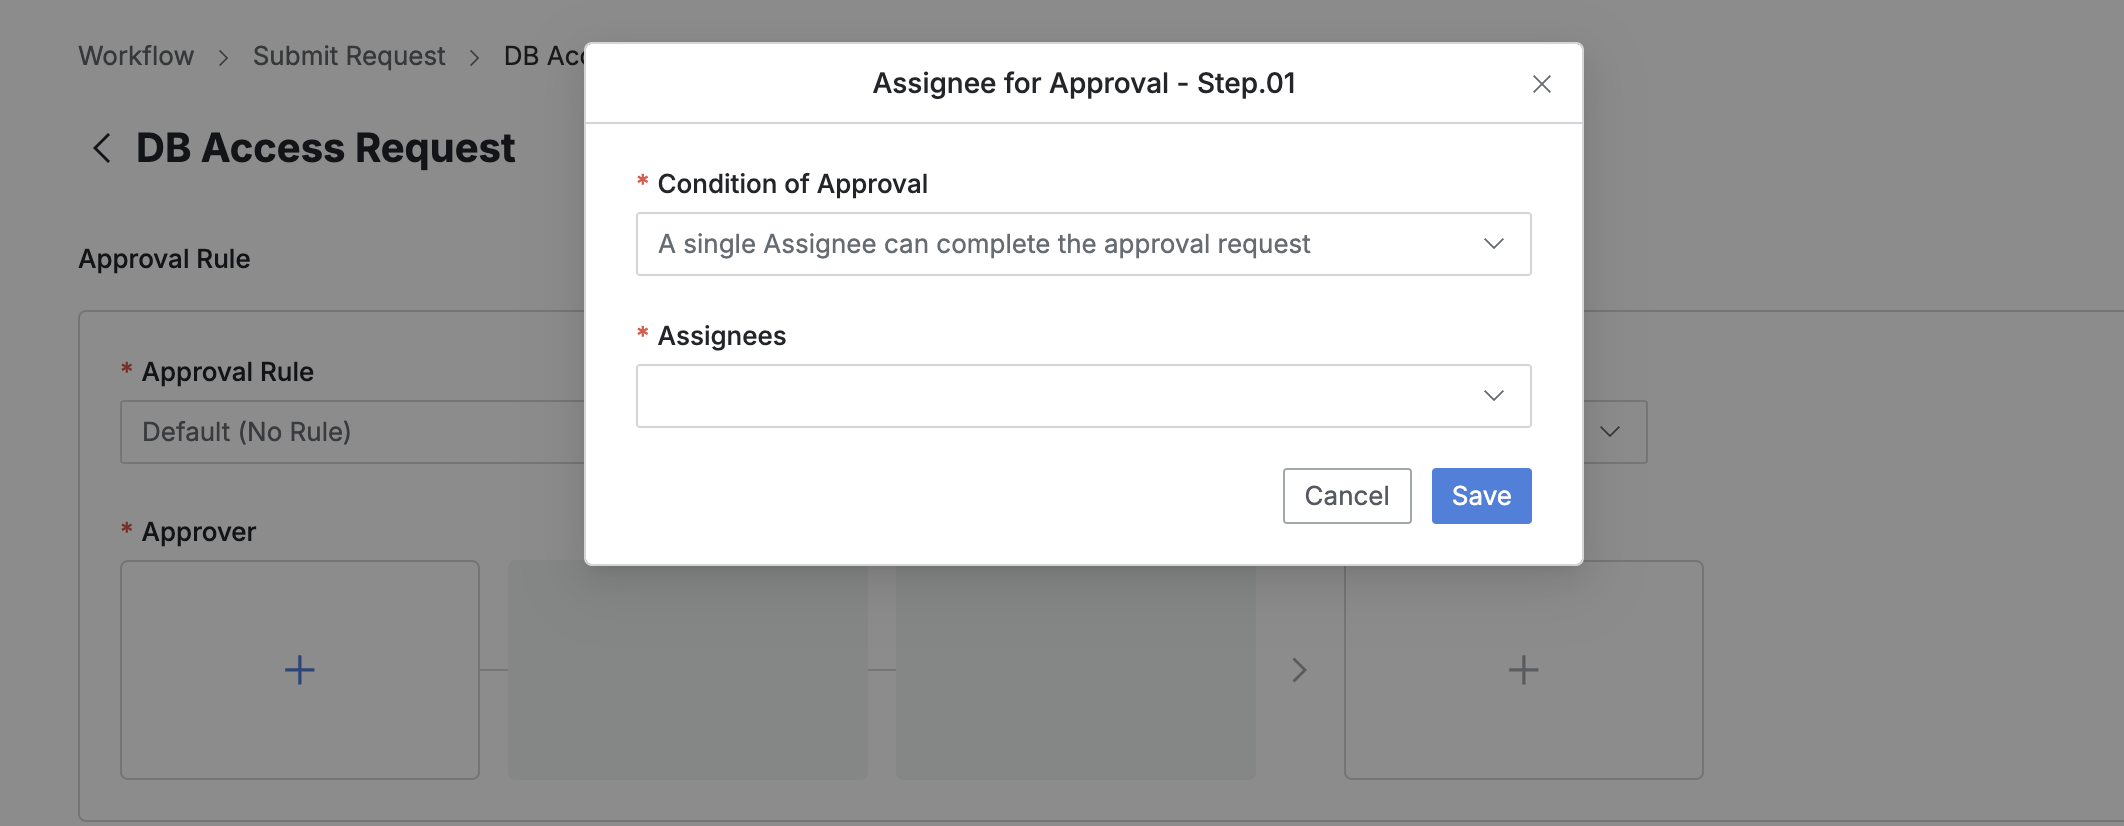
2. Assigning Approvers
- Click the
+button in the approval line to display a popup window where you can assign step-by-step approvers. - In this popup window, add approval conditions and approvers, then click the
Savebutton to save the approval line. - Available approval conditions are as follows:
- A single Assignee can complete the approval request: The approval request is approved with just one approval from multiple people.
- All Assignees must approve this request: All approvers must approve for the approval request to be approved.
3. Assigning Reviewers
- Click the
+button in the approval line to display a popup window where you can assign reviewers.- If the administrator has not allowed reviewer assignment, the Reviewer box will not be displayed.
- In this popup window, add approval conditions and approvers.
- Click the
Savebutton to close the modal and complete reviewer assignment.

4. Sending Request with Post-Approval
- If you select an approval rule that allows post-approval functionality, the Urgent Mode switch will be displayed.
- After setting Urgent mode = On and registering the approval request, you can immediately receive permissions or perform tasks.
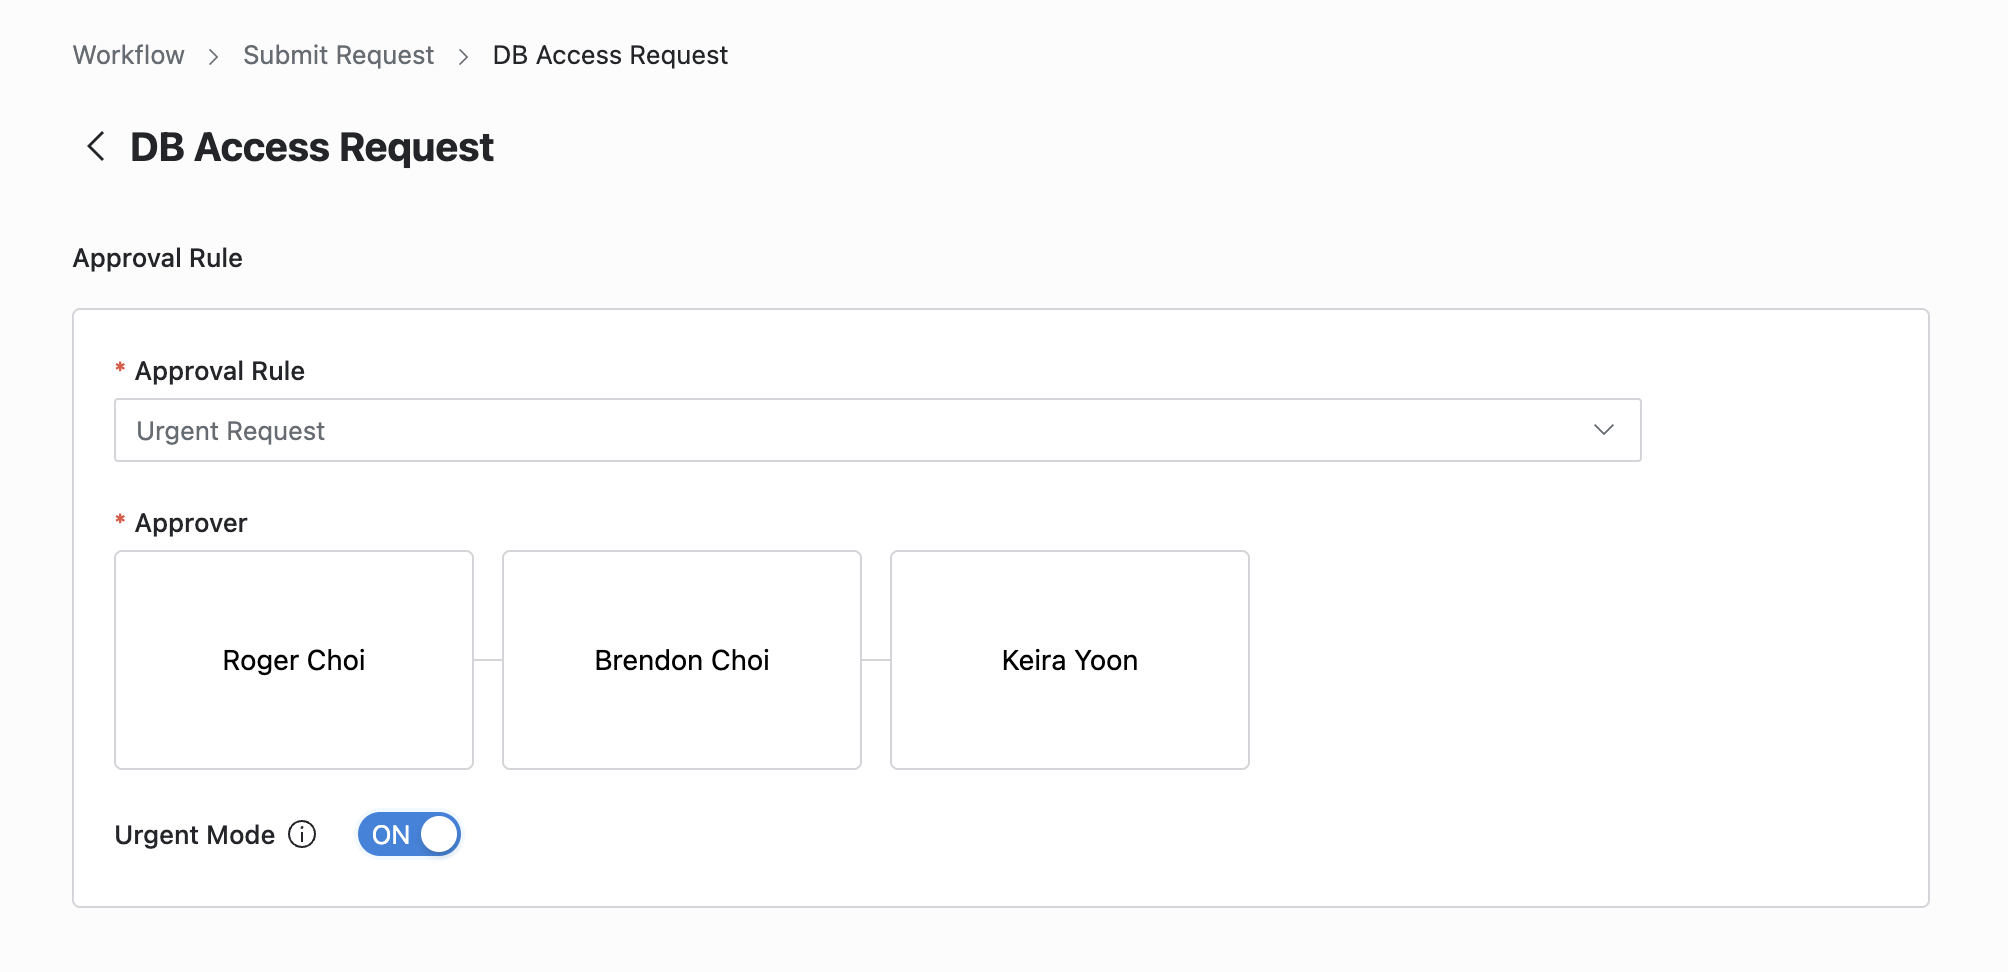
Q. I can’t see the Urgent Mode switch. A. If you select an approval rule where the administrator has not allowed Urgent Mode, this feature will not be displayed as such.
5. Entering Request Details
From version 11.3.0, the way to specify the expiration has changed.
For policy exception requests, the field name is unified as ” Policy Exception Schedule ”, and you can explicitly specify the start and end times of validity.
- Title: Enter the request title.
- Connection: Select the connection that contains the column for which you want to request mask removal.
- Column: You can select one or more columns, up to a maximum of 30 columns.
- Policy Exception Schedule: You can set the period during which the mask removal (unmasking) exception will be applied. The maximum validity period of the policy exception cannot exceed the Maximum Policy Exception Period set by the administrator.
- Specific Period: Specify the start and end times. You can specify in hours.
- Time Duration: Specify so that it is valid for the set time from the start time.
- Start On Approval option: For both Specific Period and Time Duration, if you enable (check) Start On Approval, the effect begins at the time of approval. In general, since the requester cannot know the approver’s approval time, using this option is not recommended (it may require resubmitting if expiration constraints arise). When using Urgent Mode, approval is post-approval and it’s unknown when approval will occur; therefore, except for special situations where it must be used, Start On Approval is not recommended.
- Reason for Request: Enter the reason for requesting mask removal.
- Click the
Submitbutton at the bottom of the page to submit the request.
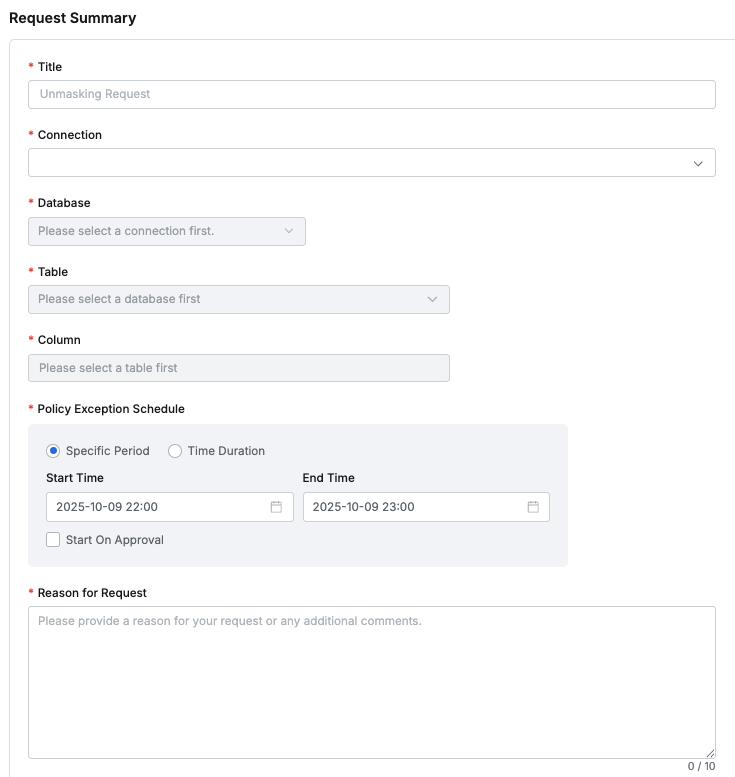
User > Workflow > Submit Request > Unmasking Request > Request Summary