Users
Overview
The User page allows you to view the list of users currently registered in QueryPie and perform various management tasks.
Viewing User List
You can view the user list in the User page, and search and filter functions are provided.

Administrator > General > User Management > Users
Information that can be checked in the Users list is as follows.
- Auth Provider : User authentication provider
- Displays the IdP Type configured in QueryPie or User Management > Authentication.
- For manually registered users, it is displayed as QueryPie.
- For users integrated from IdP, it is displayed with each ID Provider name.
- For detailed information about Authentication, please refer to the Authentication documentation.
- Name : User name (Display Name)
- Username : User login ID
- Email : User email
- Admin Role : Administrator privileges granted to the user
- Last Login At : Last login date and time
- Last Access At : Last resource access date and time
- Created At : User account creation date and time
- Description : Account status related information
- Account Locked Manually : Deactivated by administrator or API
- Account Expired : Account expiration due to long-term inactivity
- Account Locked : Account locked due to multiple login failures

Description Display by Type
- Status : Account activation status (Active or Inactive)
Adding Users Manually
Add new users to your organization manually. After adding users, you can assign them to groups and policies and grant permissions.
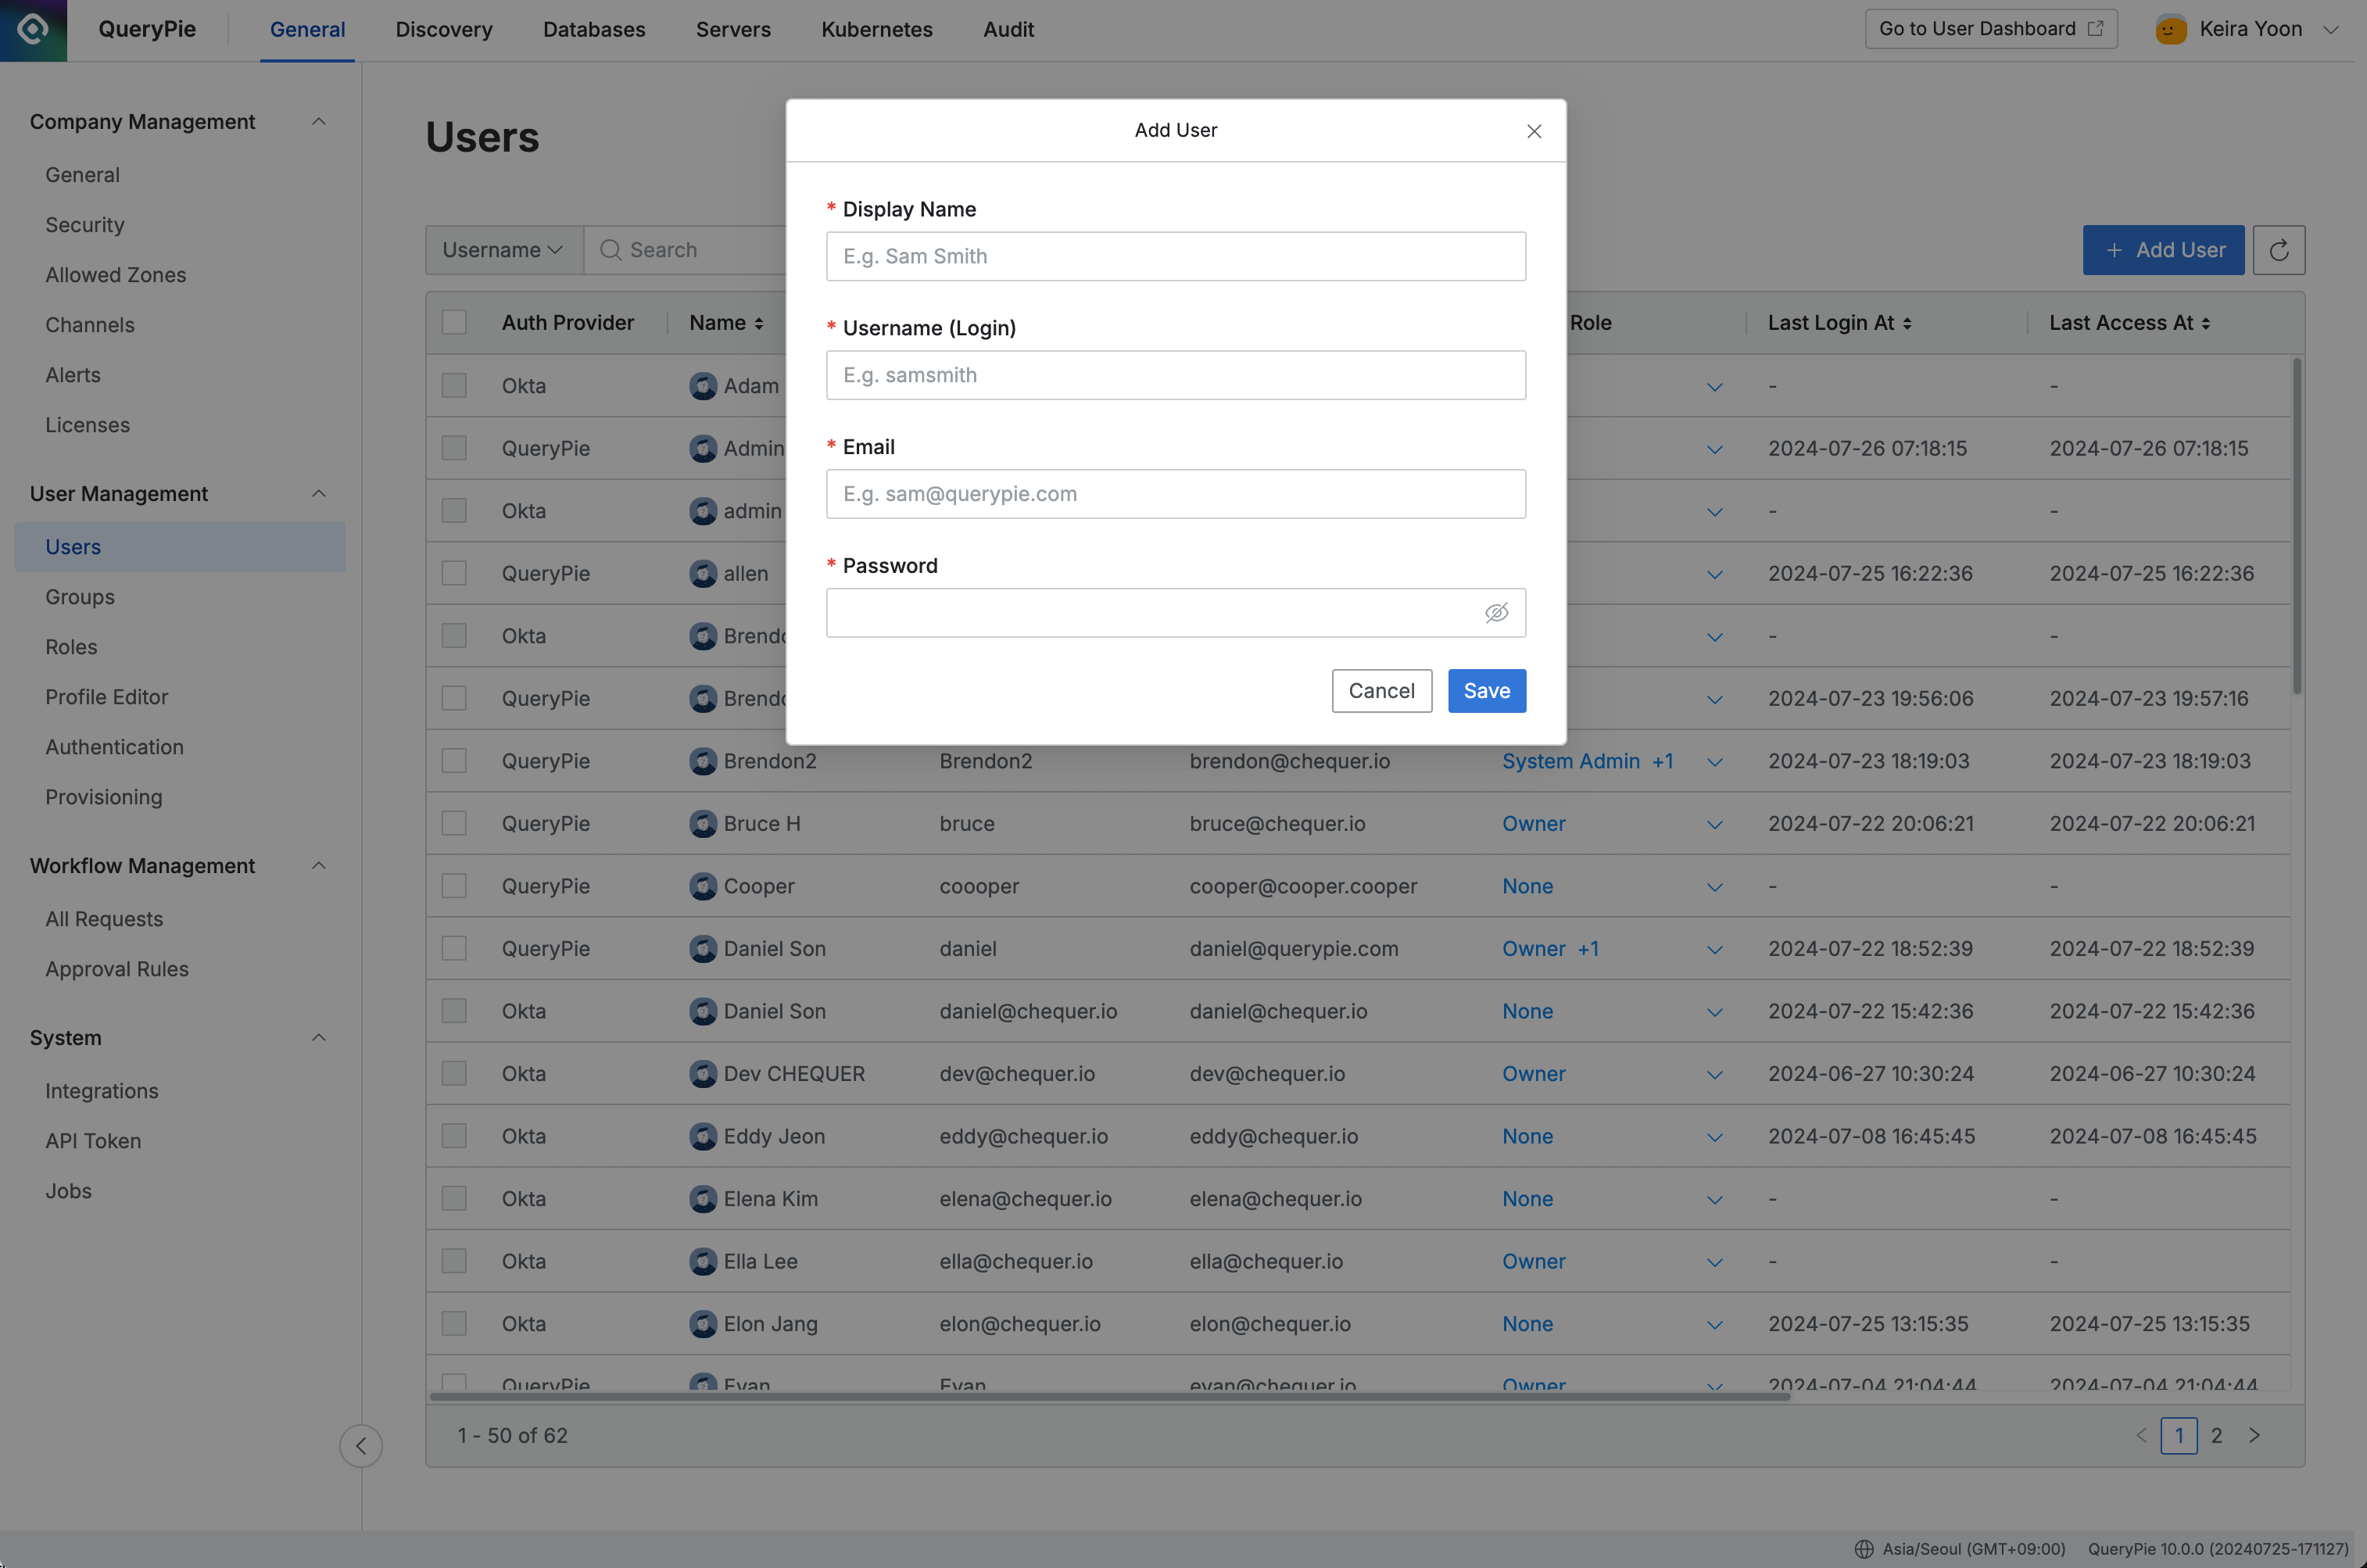
Administrator > General > User Management > Users > Add User
- Navigate to Administrator > General > User Management > Users menu.
- Click the
Add Userbutton in the top right corner. - Enter the following information for user addition.
- Display Name : Enter the display name for the user to be shown in QueryPie.
- Username : Enter a unique Login ID for the user to use when logging in, typically in the form of a name or email address.
- Email : A unique key value to identify the user within QueryPie.
- Password : The initial password set by the administrator. Please guide users to change it after login.
- Save by clicking the
Savebutton.
The user’s Username field is a unique value and cannot be modified after initial addition.
You can confirm that the user has been added to the Users list as QueryPie Provider. By default, they are registered as a basic User without Admin privileges.
Granting or Revoking Administrator Roles to Users
Only users with Owner role can grant Admin Role to administrators.
You can grant or revoke predefined administrator roles (Admin Role) to users.
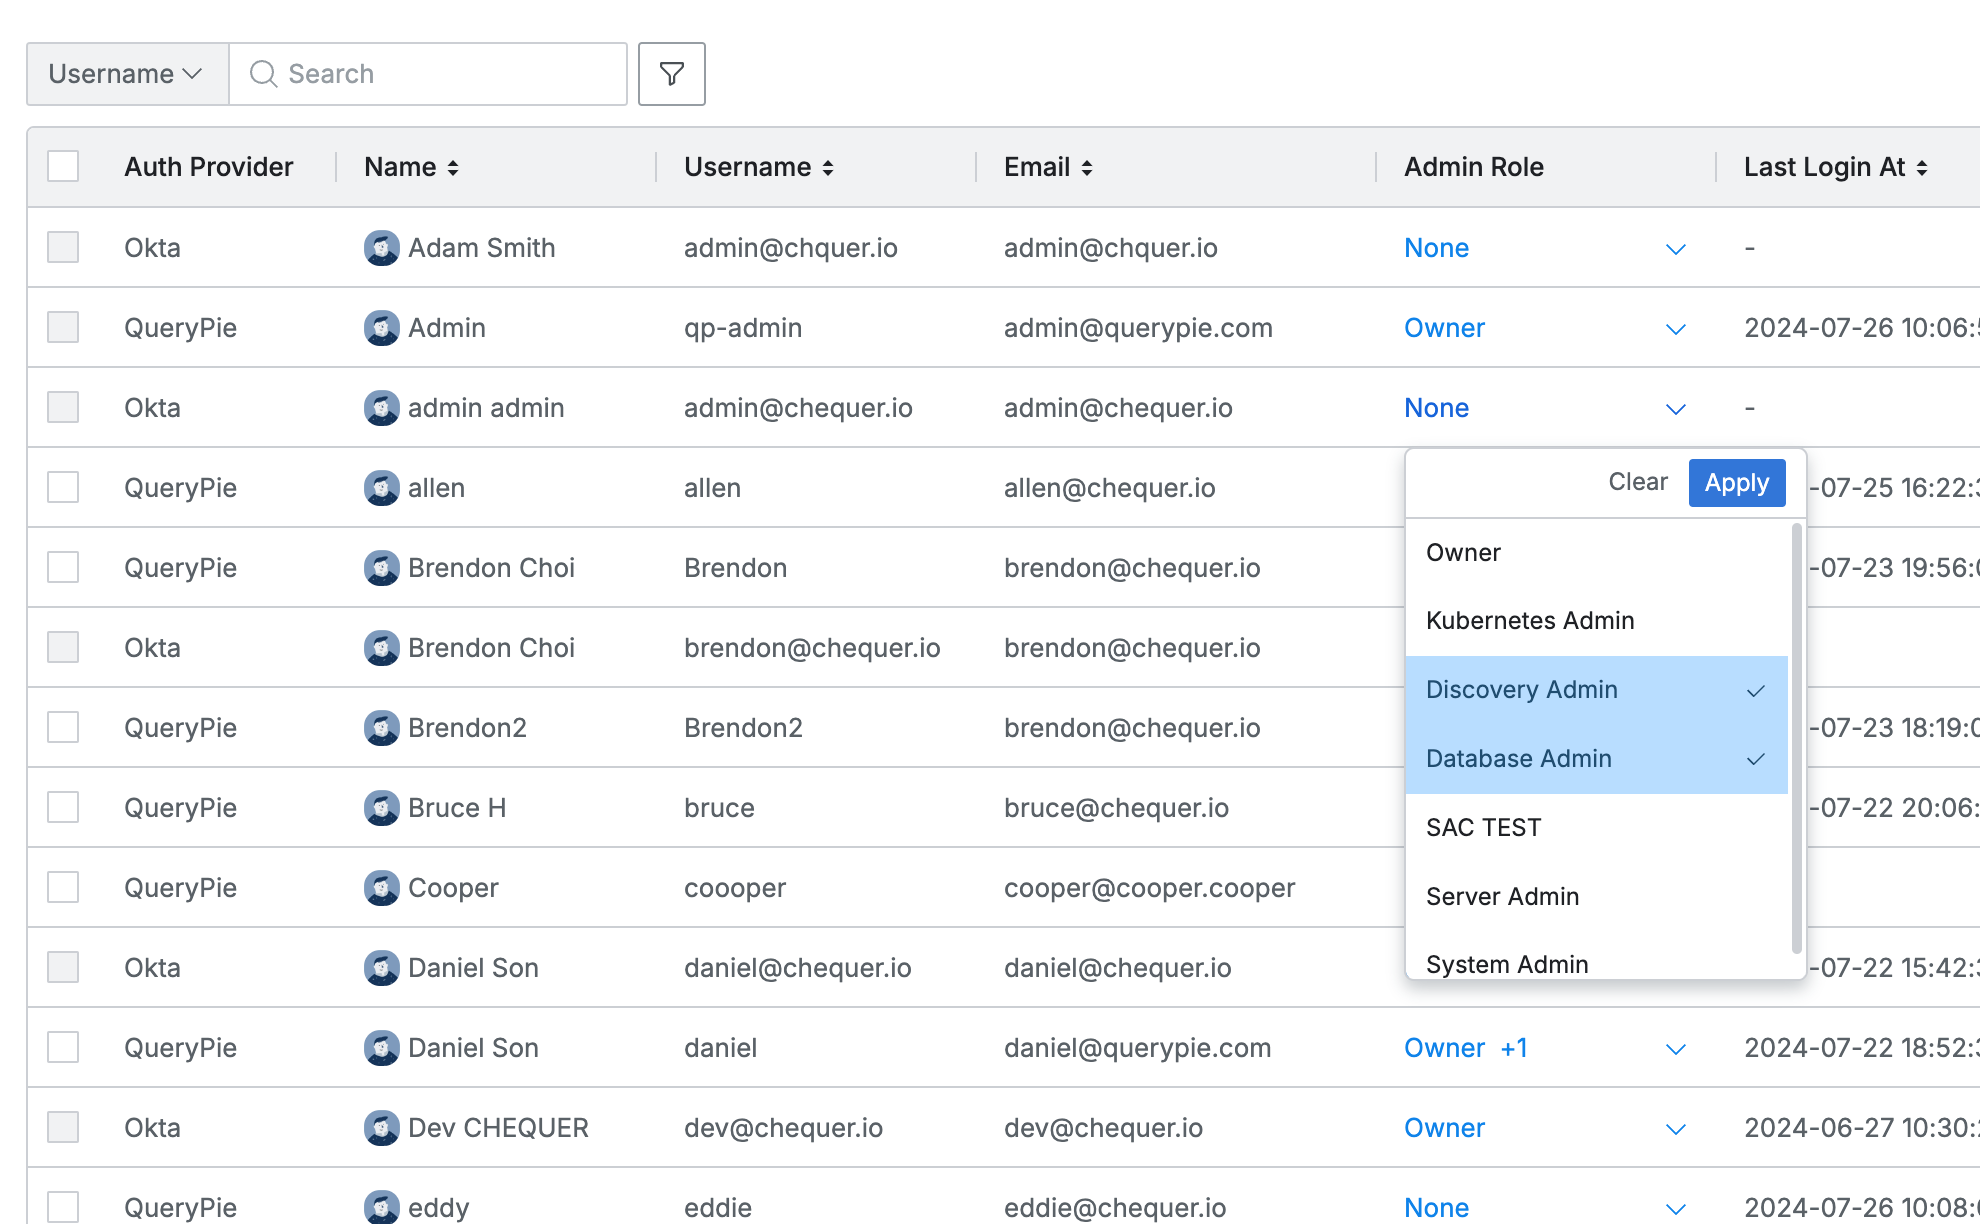
Administrator > General > User Management > Users
- Admin Role The dropdown items in the column display the current administrator role status.
- If no privileges are granted, it is displayed as None.
- If privileges are already granted, the privilege name is displayed. (If multiple, displayed in +N format)
- Click the dropdown to add or remove privileges. (Multiple selection possible)
- Click the
Clearbutton to reset all privilege selection history. - Click the
Applybutton to save the changes.
For methods to manage administrator roles themselves, please refer to the Roles documentation.
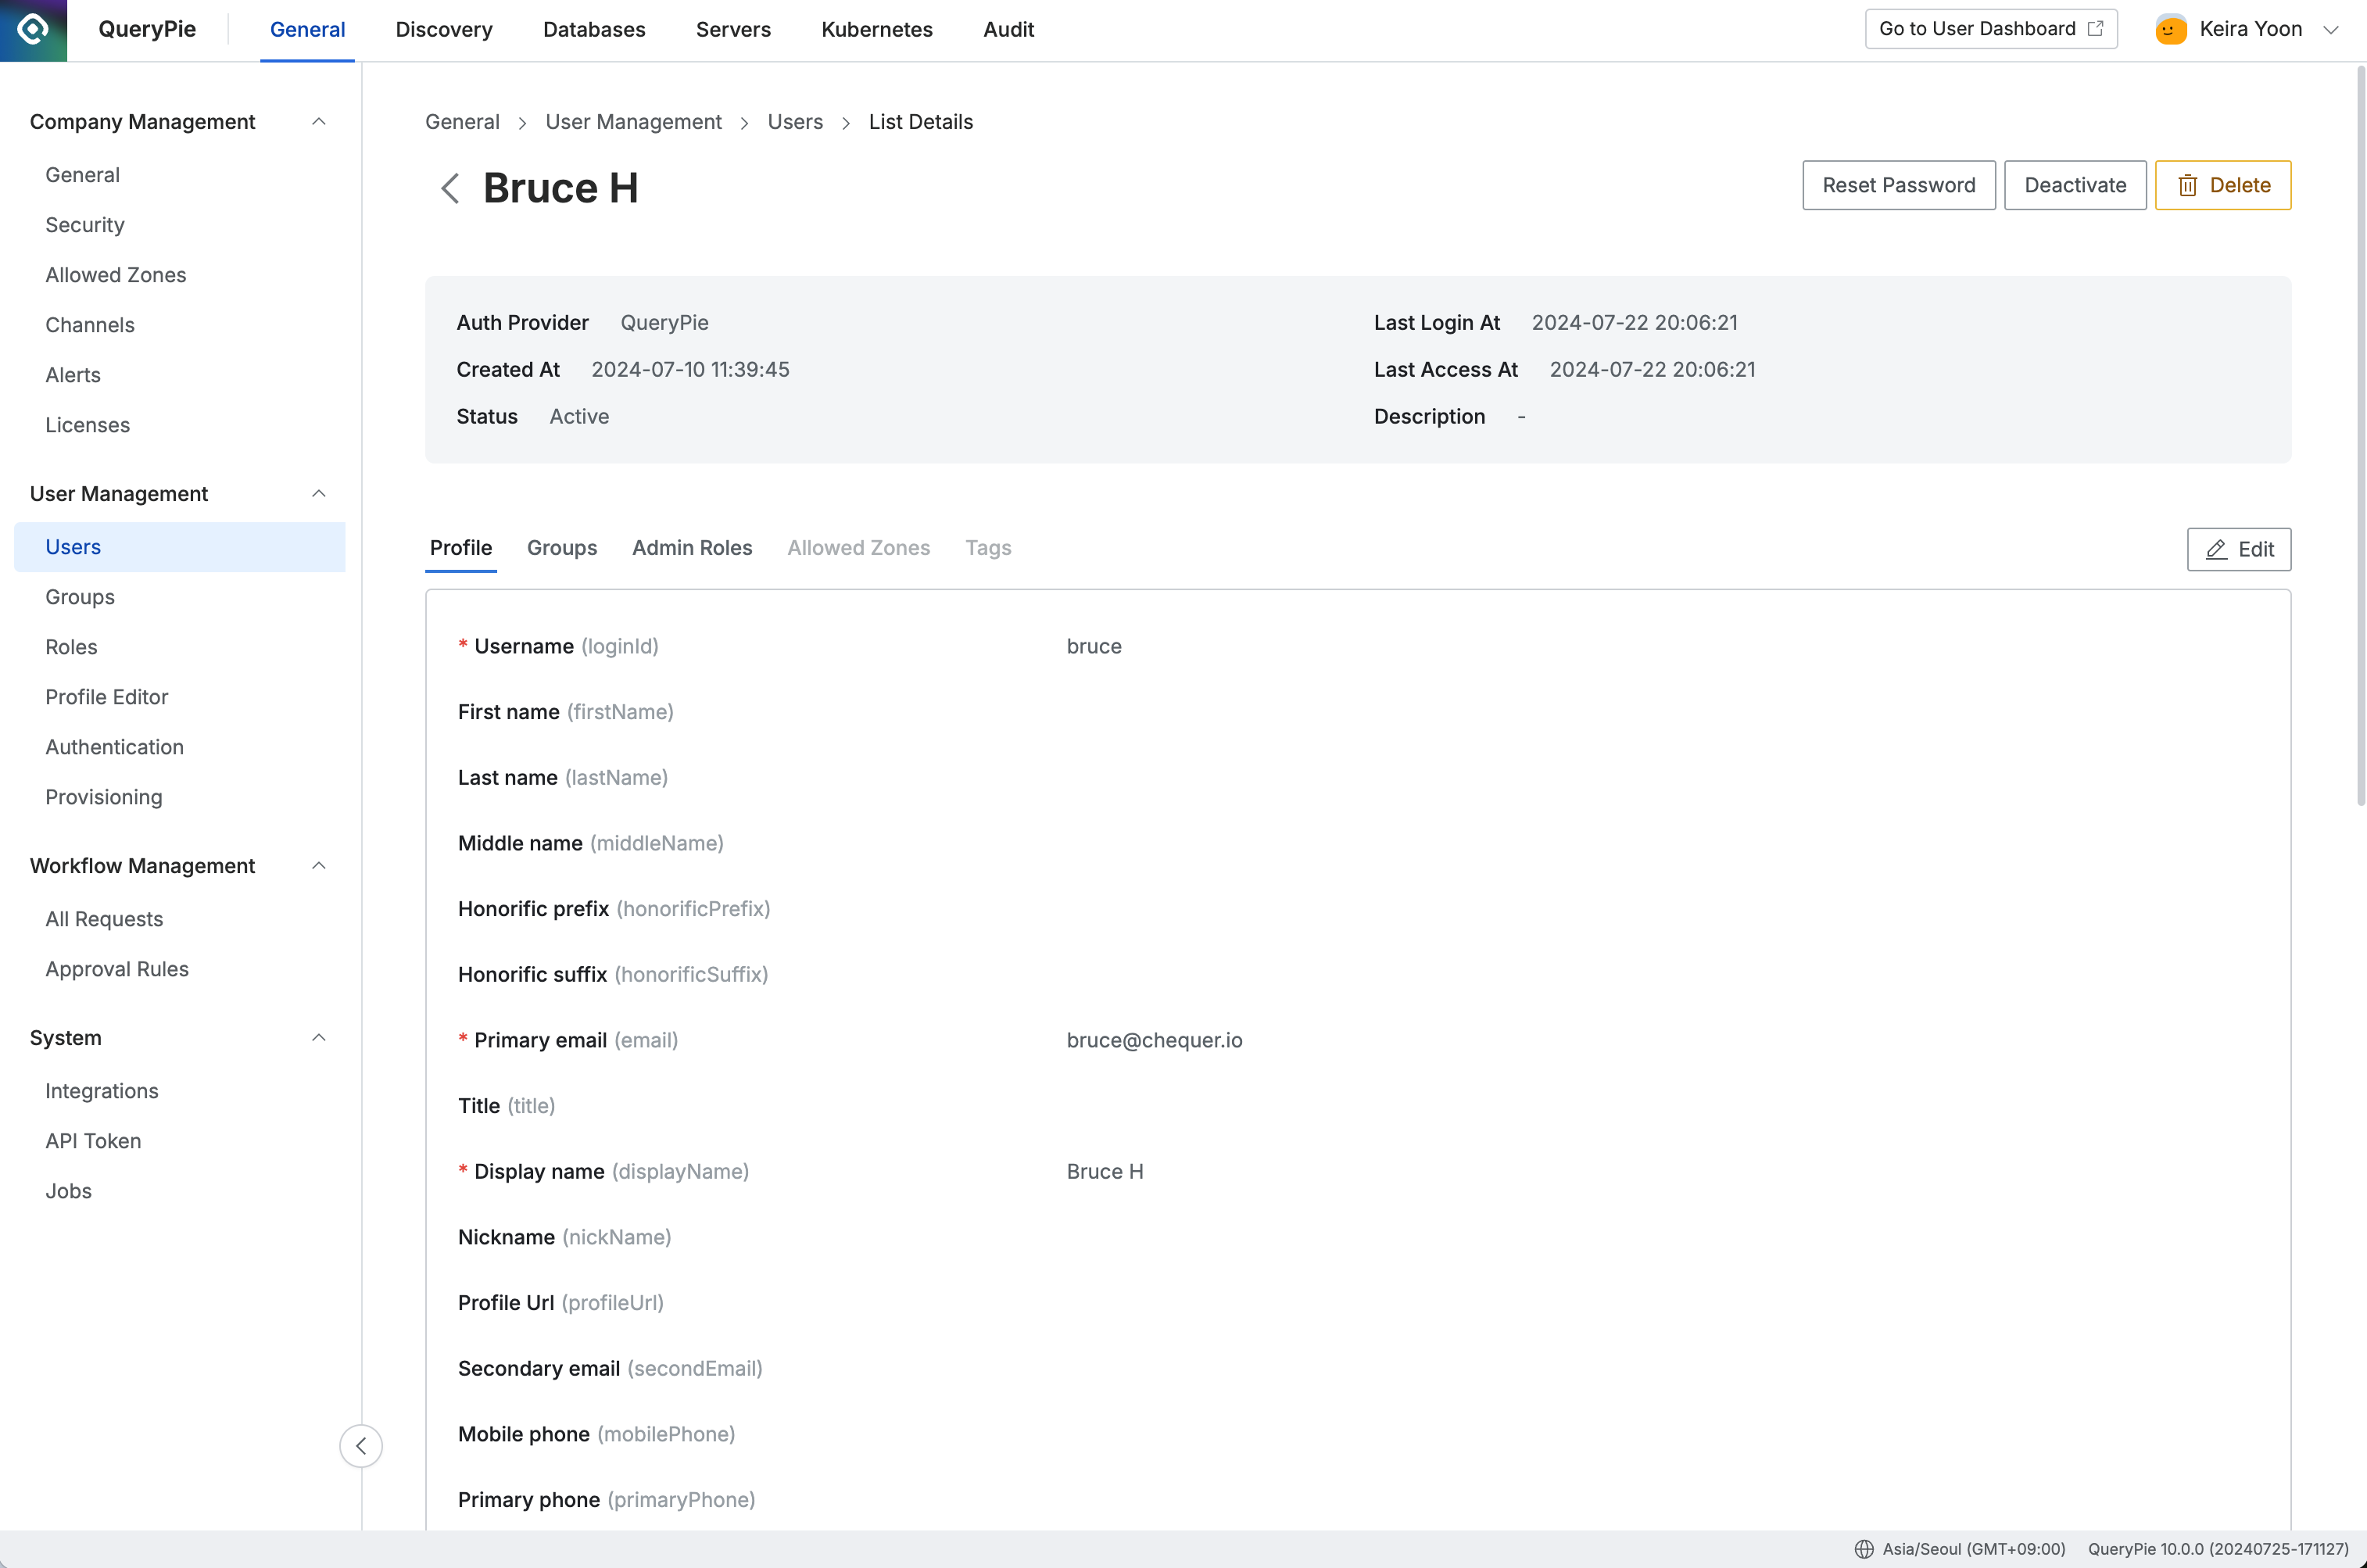
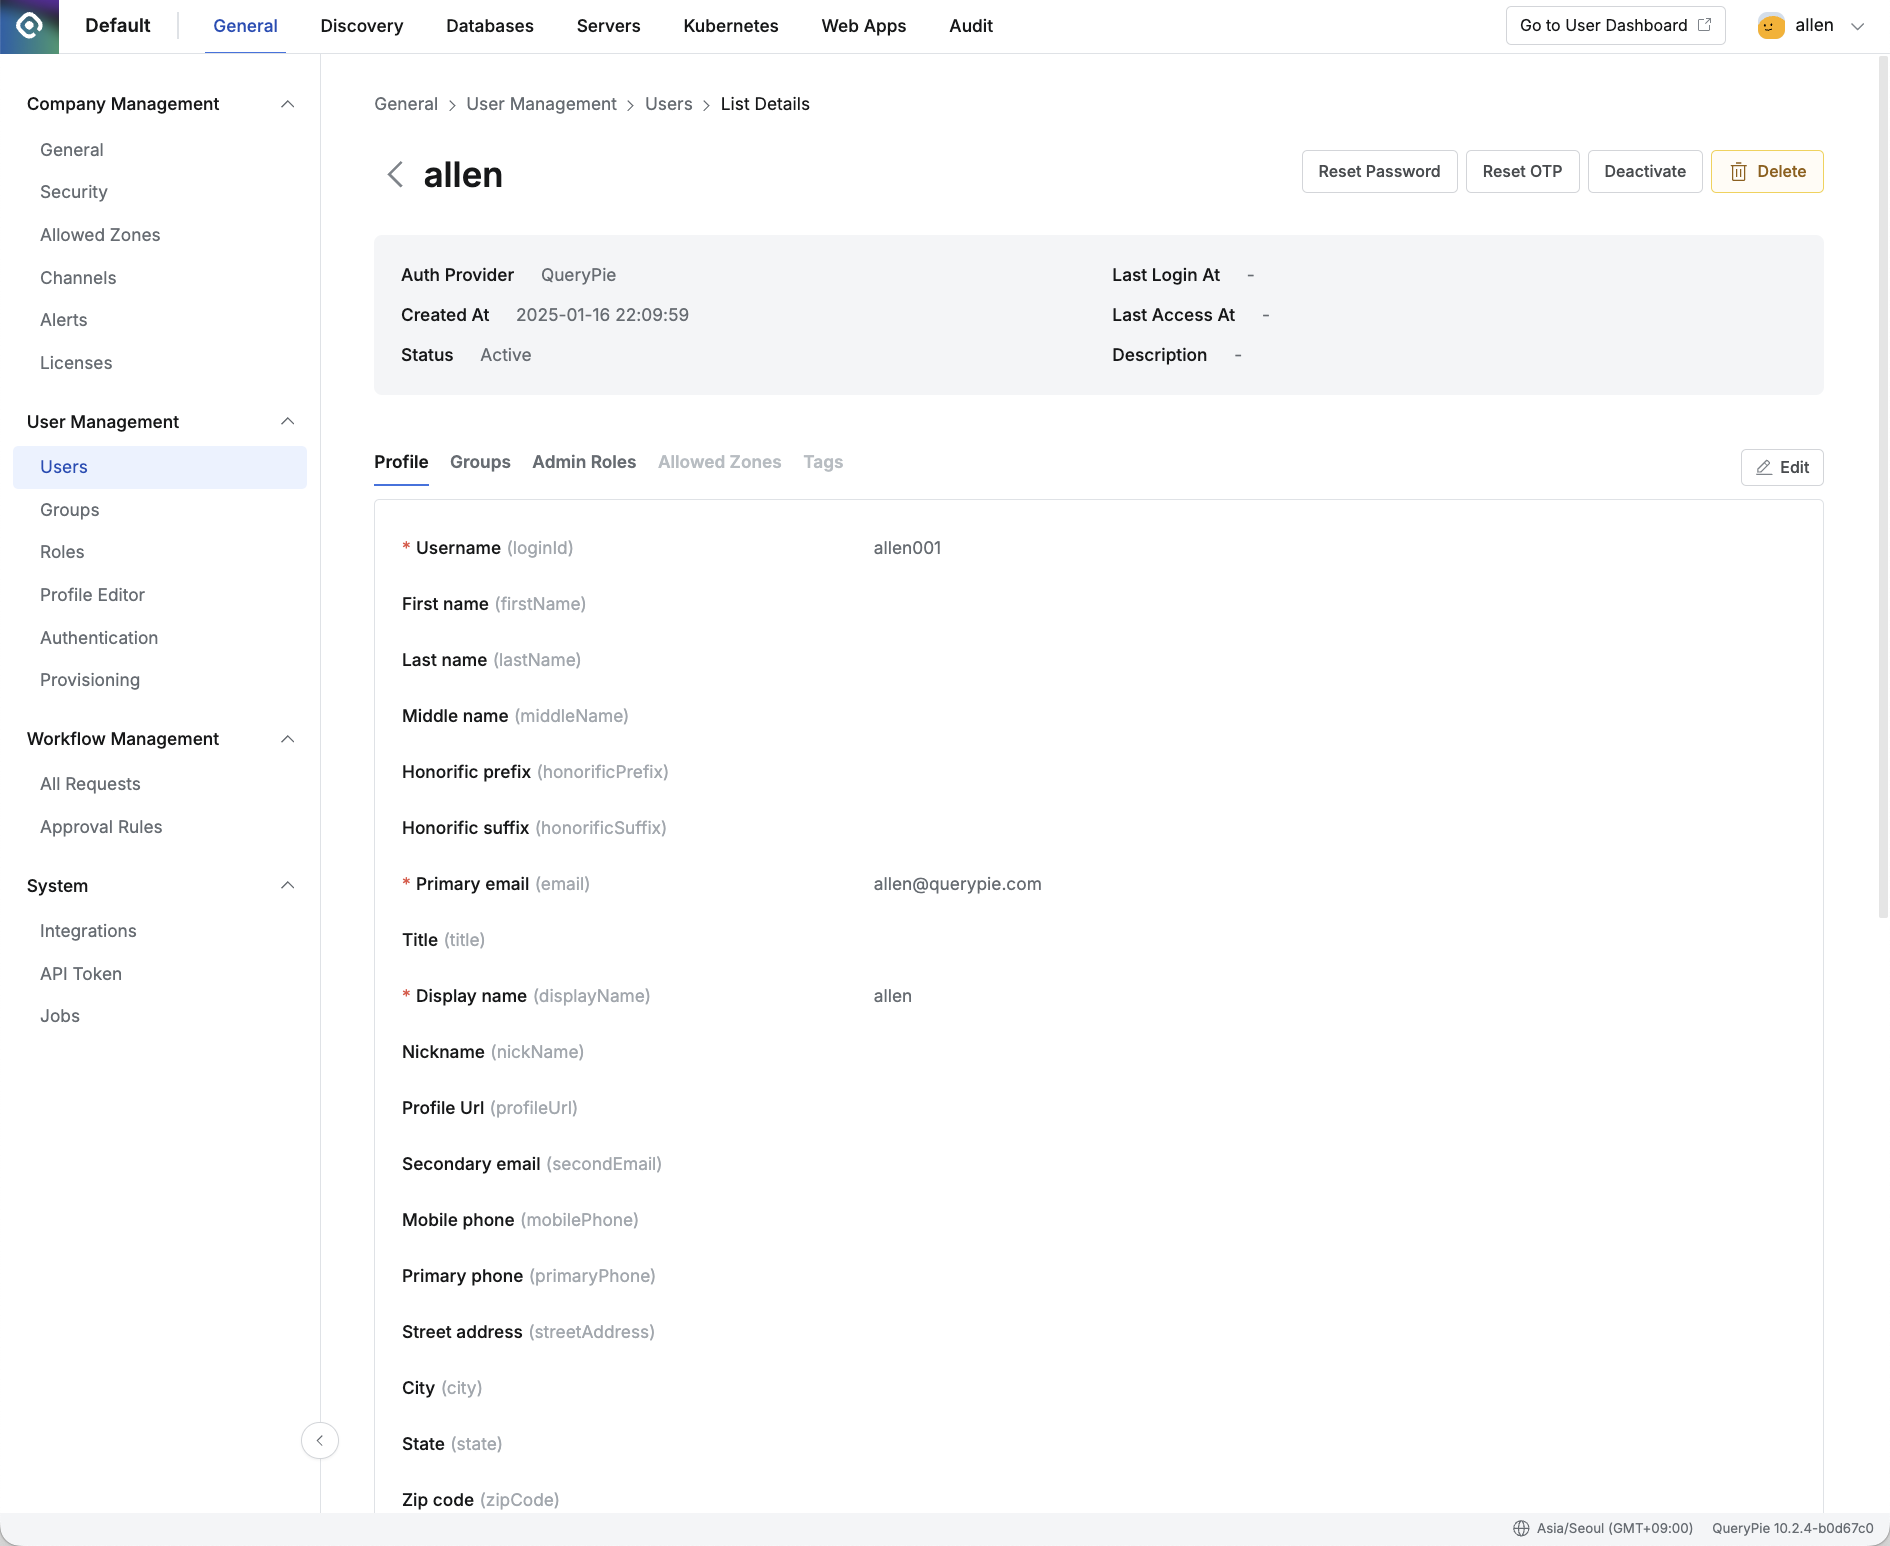
Viewing User Details
Click on a user in the Users page to enter the detail information page. You can view registered information and perform user management tasks. Attribute-based Access Control (ABAC) can be implemented with attributes registered in the user profile. User detail information is divided into Profile, Groups, Admin Roles, Allowed Zones, and Tags tabs. For descriptions of each item, please refer to the User Profile documentation.
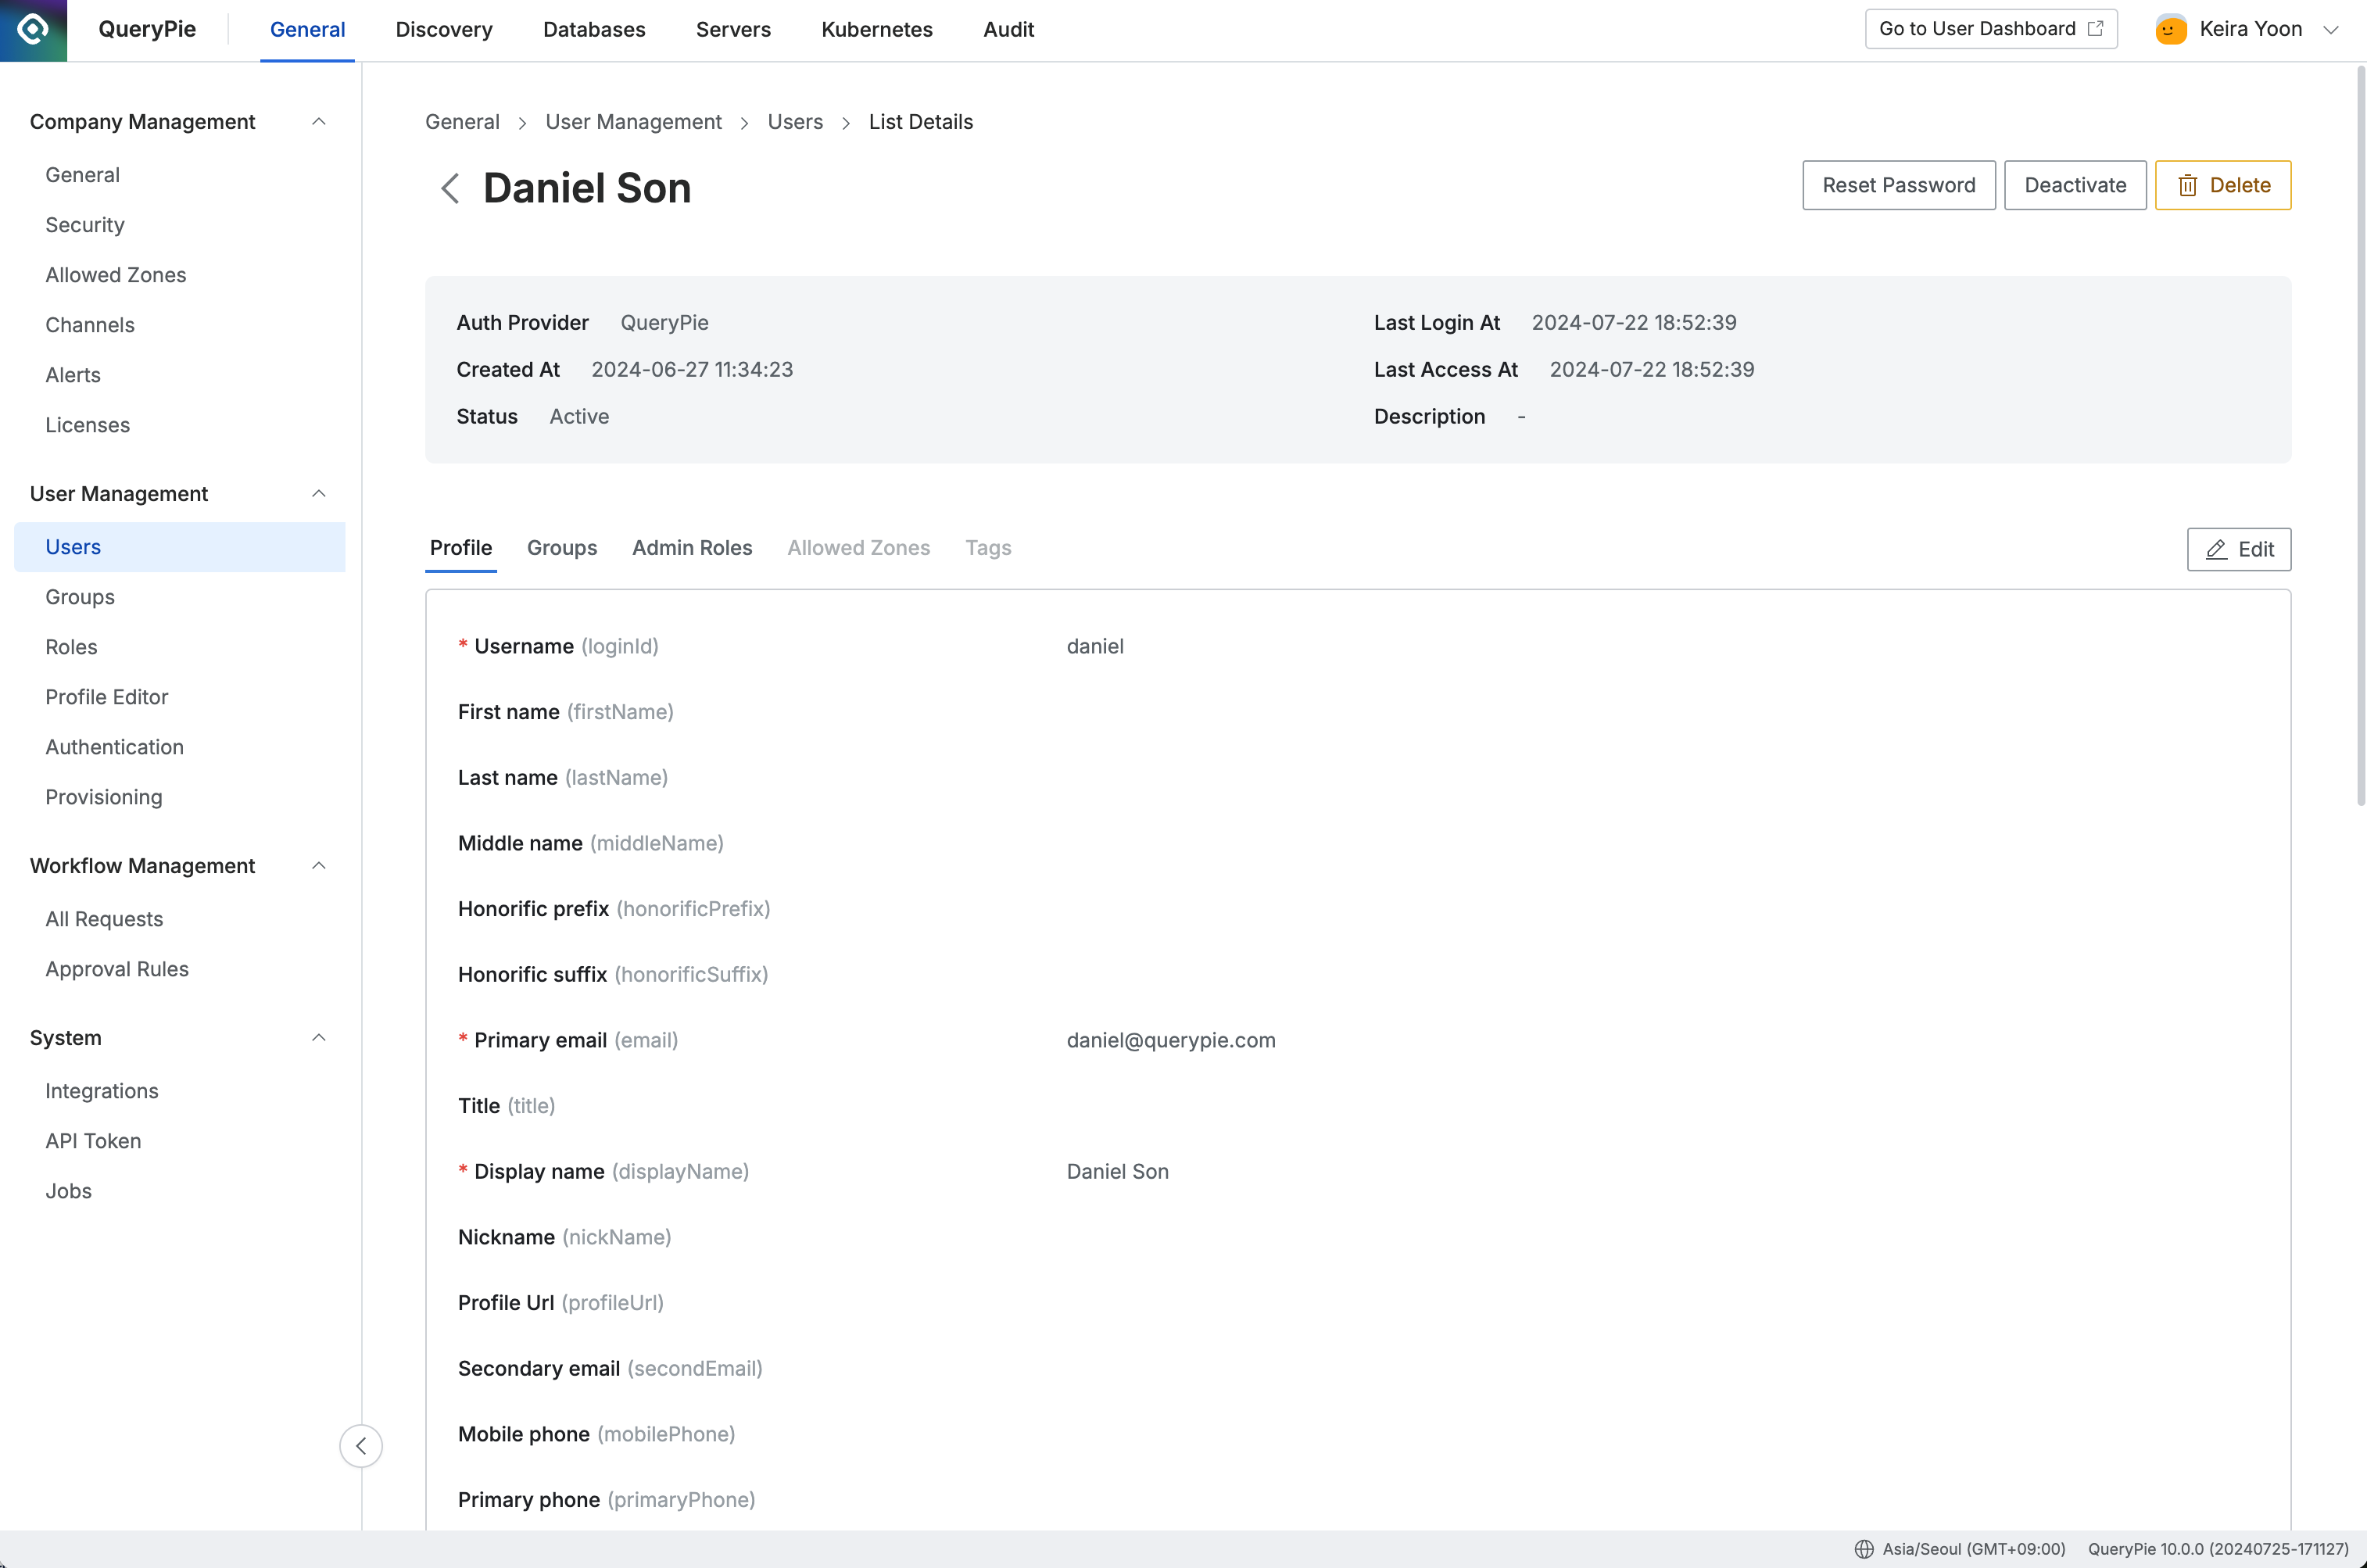
Administrator > General > User Management > Users > List Details
Only users registered through QueryPie can modify Profile information and delete users, and users integrated through SCIM must reflect modifications through ledger data updates.
Deactivating Users
When user accounts need to be deactivated for various reasons, they can be processed through two methods.
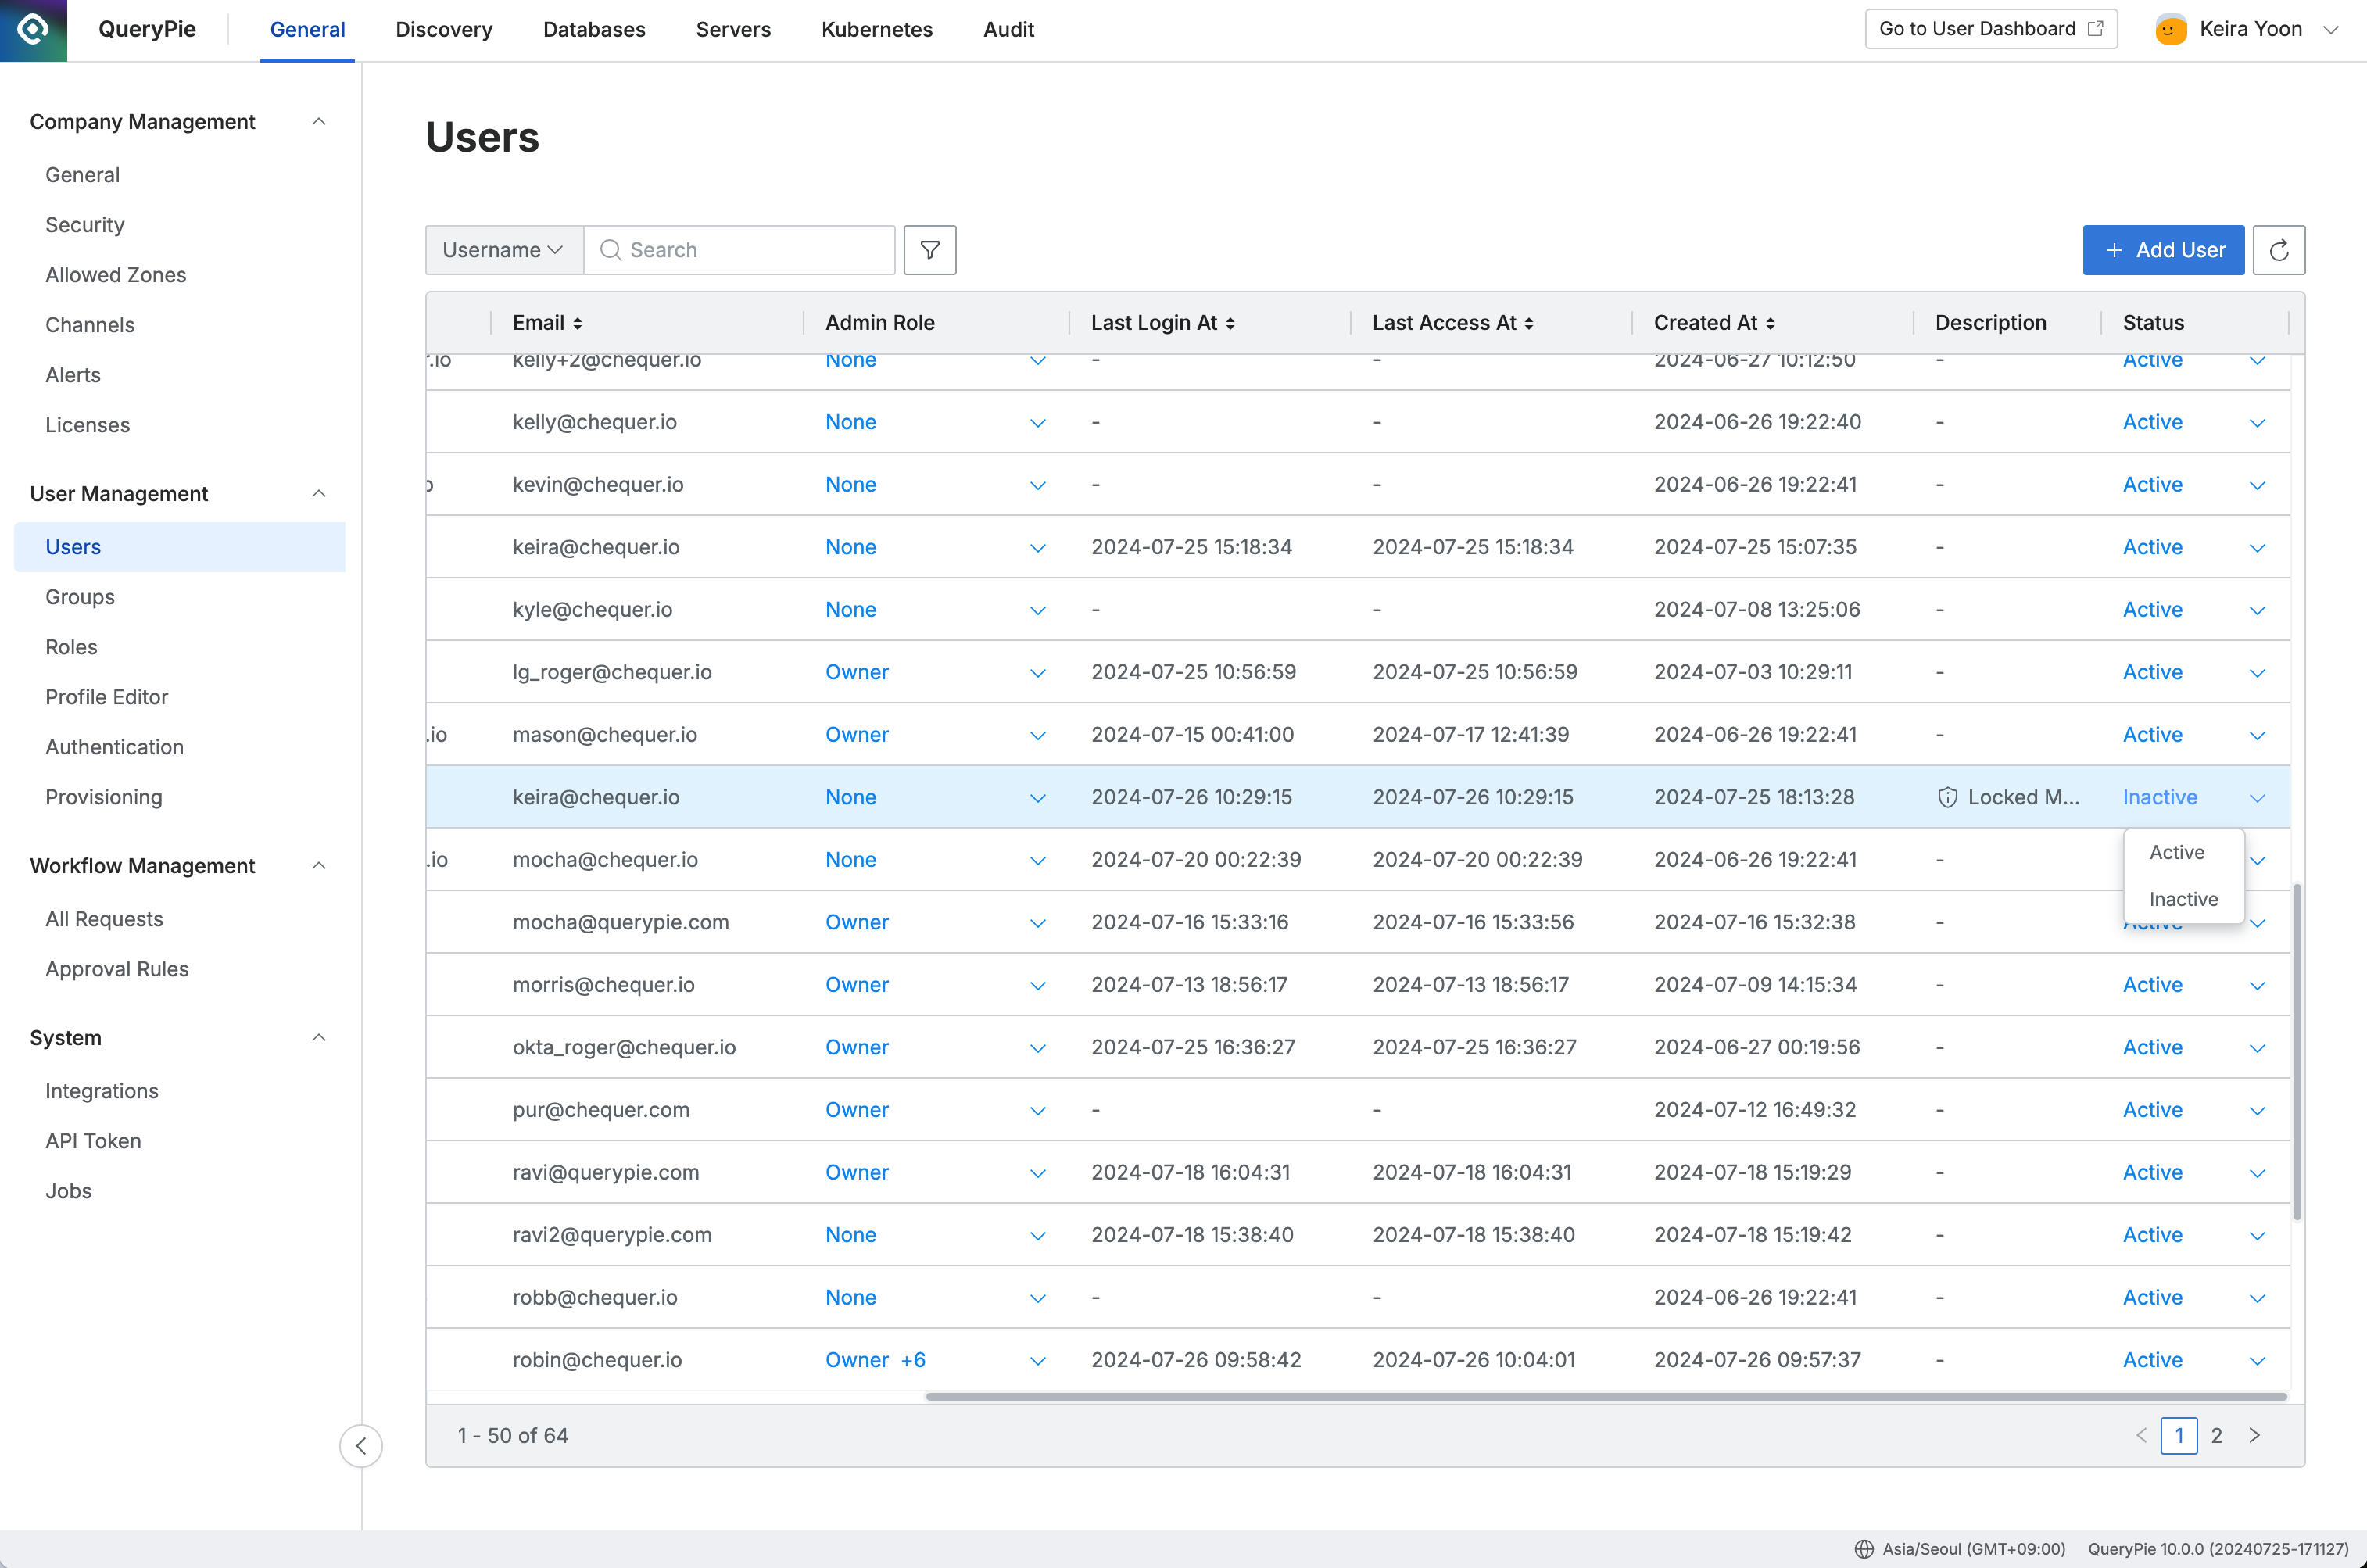
Deactivating from Users Page
In the Status dropdown within the user page, change the Status value of the user you want to deactivate to Inactive.
When a reason input modal is displayed, enter the reason for change and click the OK button to complete the change.
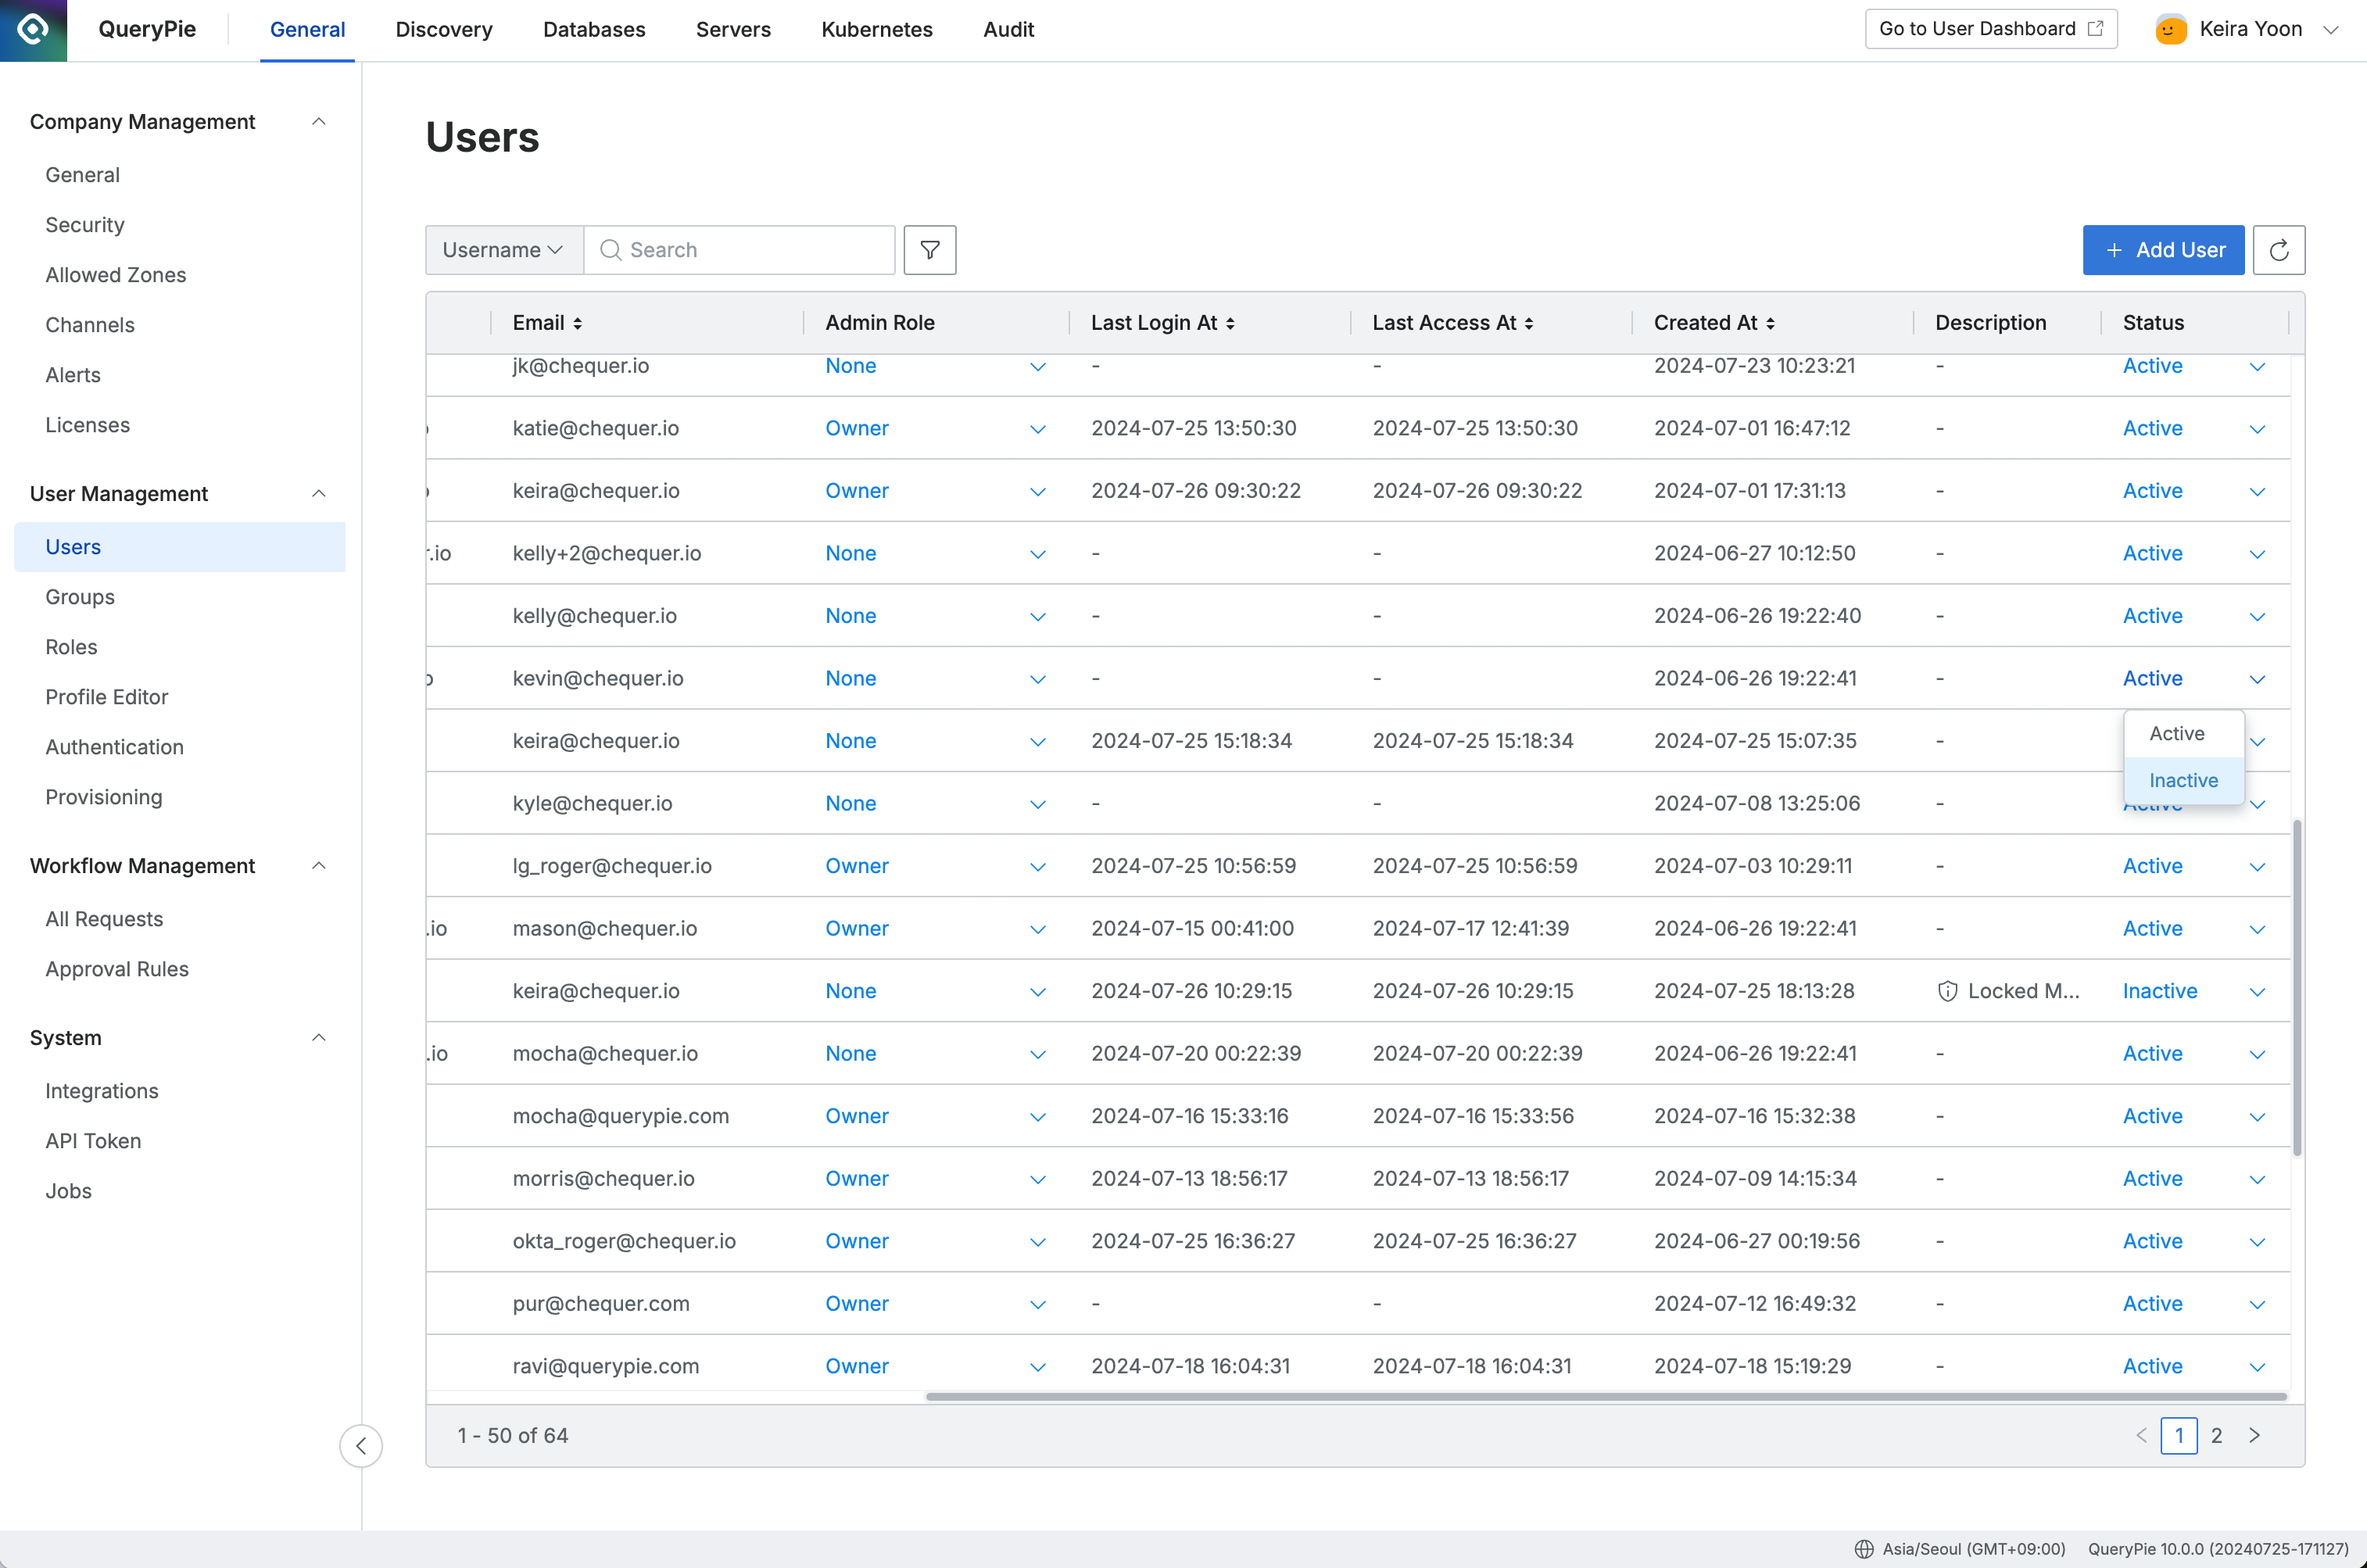
Administrator > General > User Management > Users
Deactivating from Detail Page
Click the Deactivate button in the user detail page to display a reason input modal.
After entering the reason and clicking the OK button, user deactivation is completed.
Administrator > General > User Management > Users > List Details
The account status of deactivated users is displayed as Inactive, and Description shows Locked Manually.
Reactivating Users
User accounts that have been manually deactivated by administrators or deactivated due to long-term inactivity are displayed with Inactive status. There are two main methods to reactivate these user accounts.
Reactivating from Users Page
In the Status dropdown within the user page, change the Status value of the user you want to reactivate to Active.
When a reason input modal is displayed, enter the reason for change and click the OK button to complete the change.
Administrator > General > User Management > Users
Reactivating from User Detail Page
Click the Reactivate button in the detail page of the deactivated user.
When a reason input modal is displayed, enter the reason for change and click the OK button to complete the change.

Administrator > General > User Management > Users > List Details
Modifying User Information
Only information of users manually registered in QueryPie can be modified. Modifying user information integrated through SCIM is possible after ledger data updates and synchronization.
Click the Edit button in the user detail page to enter edit mode.
Modifiable fields are activated.
After completing input, click the Save button to complete the modification.
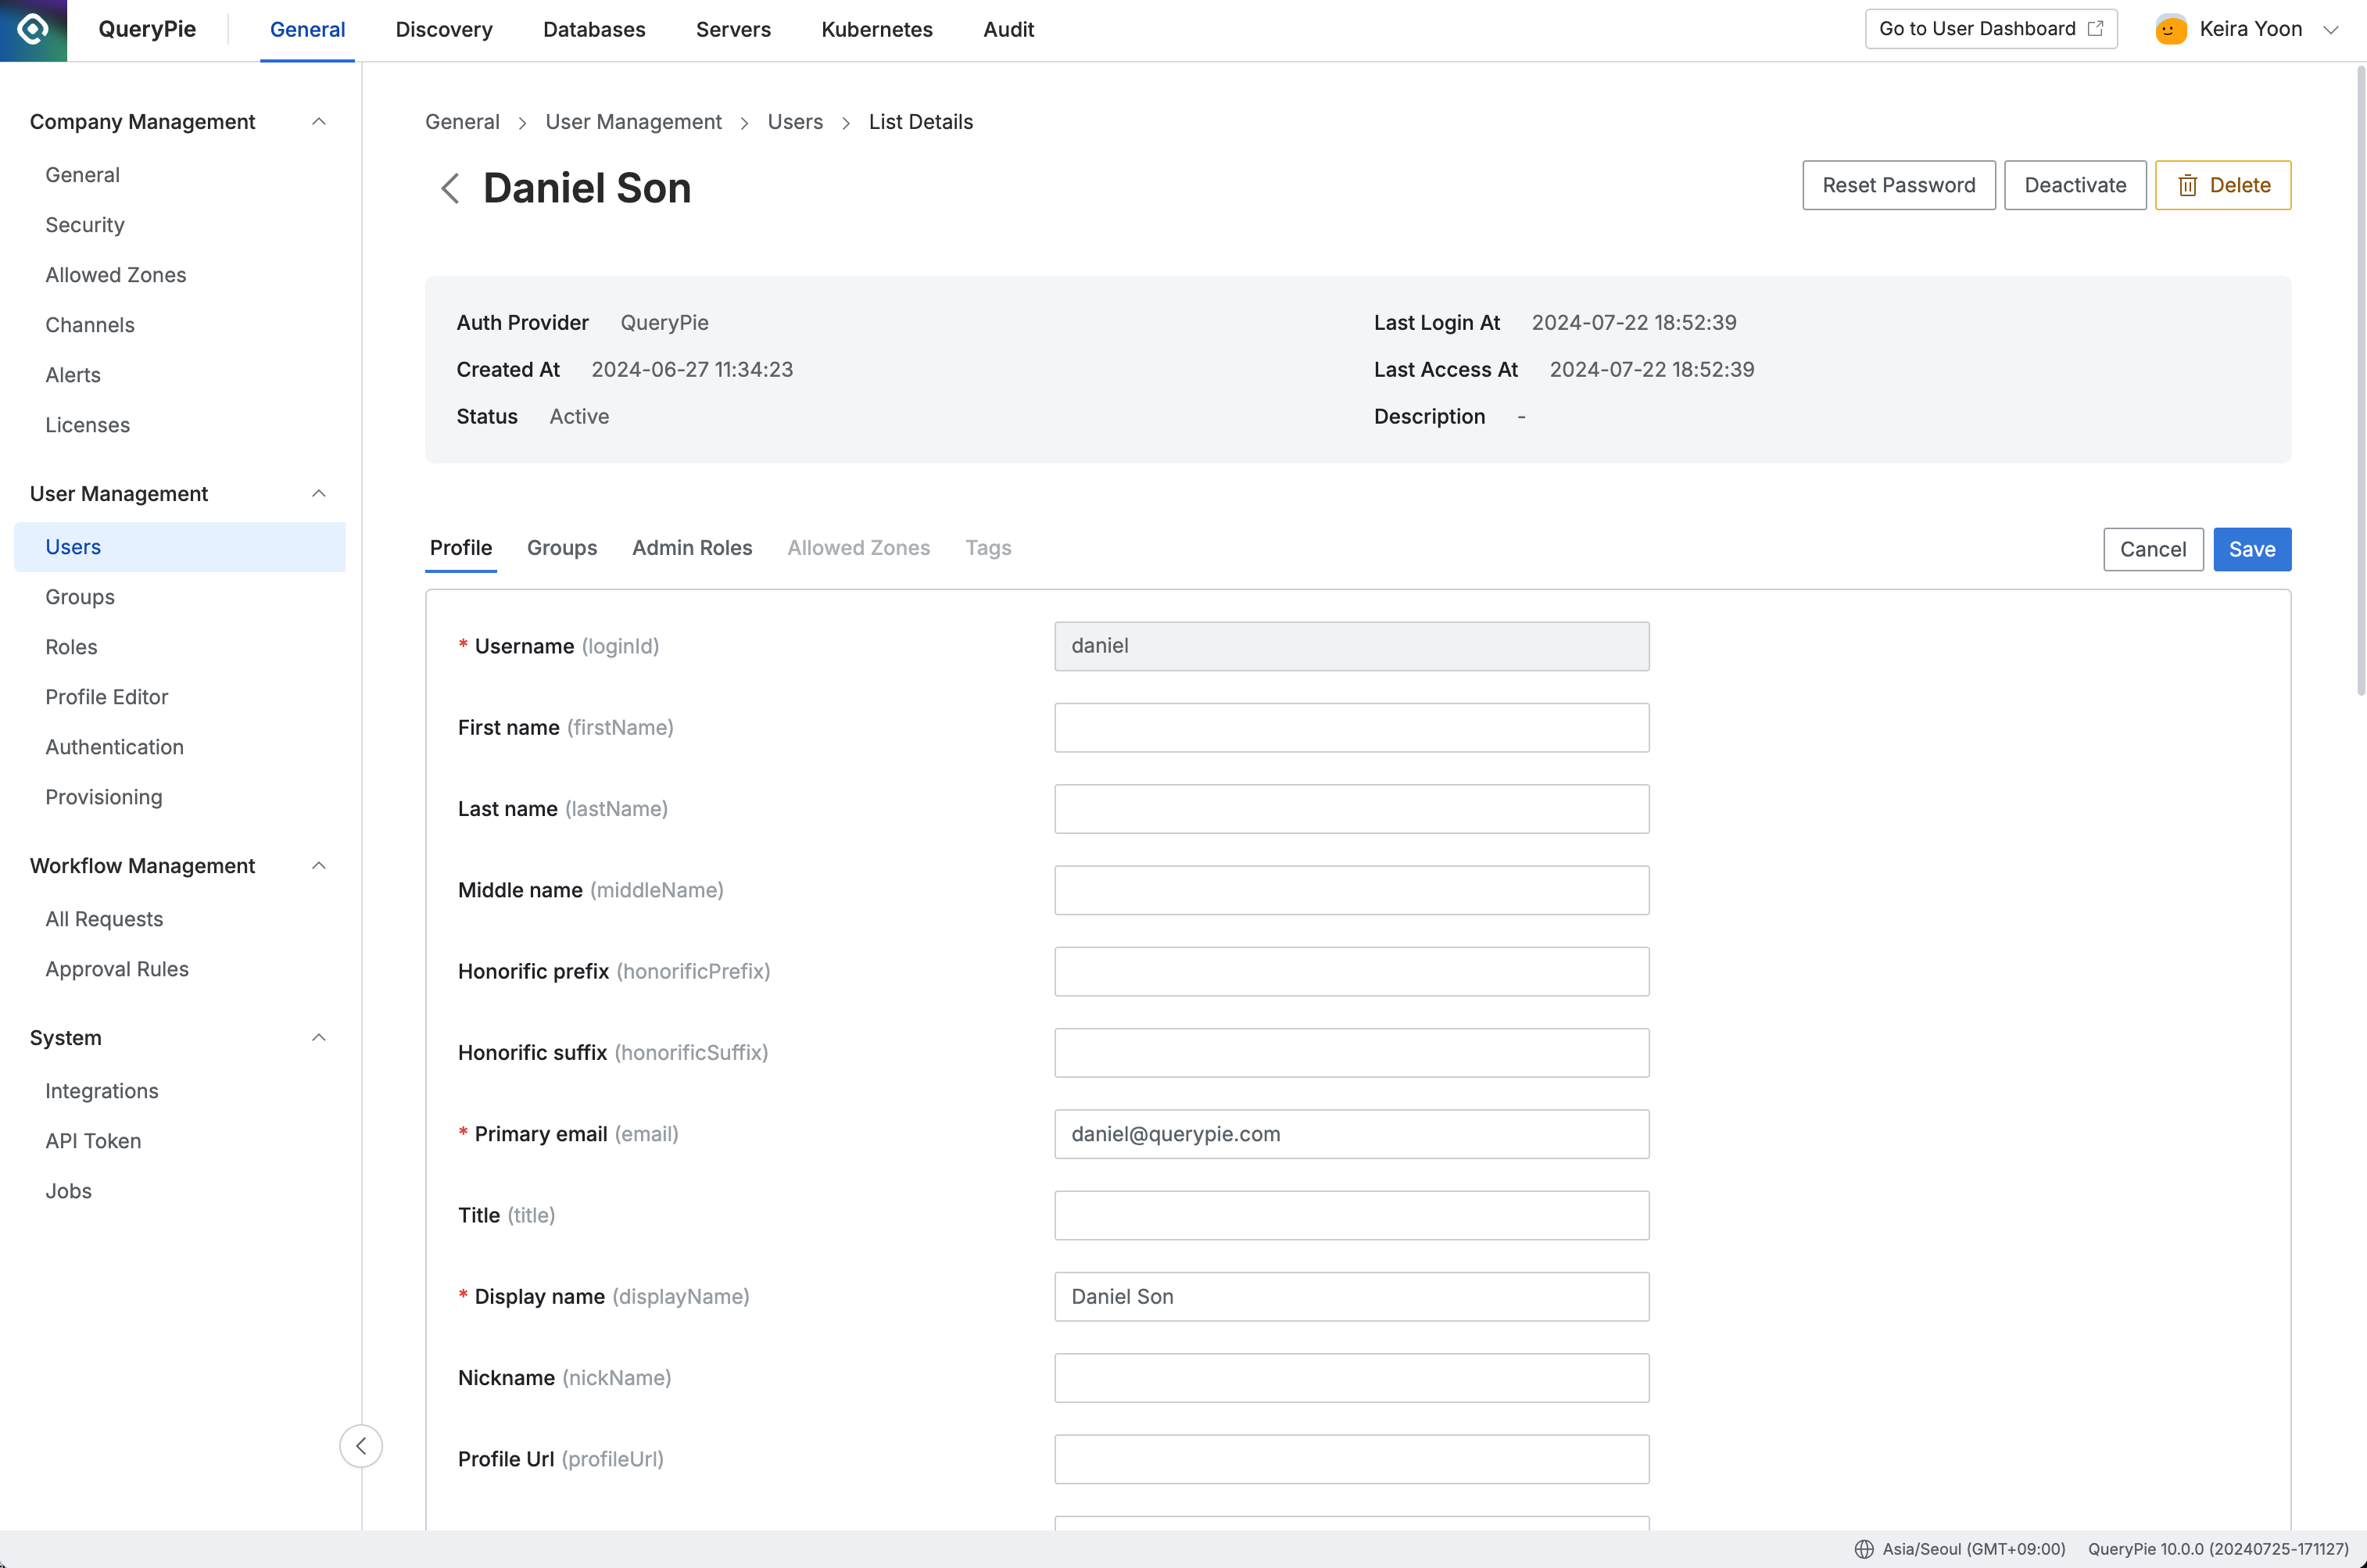
Administrator > General > User Management > Users > List Details > Edit
Deleting Users
Only users manually registered in QueryPie can be directly deleted. Deleting users integrated through SCIM is possible after ledger data updates and synchronization.
Click the Delete button in the user detail page to display the Delete User confirmation modal.
Enter “DELETE” as the confirmation phrase and click the Delete button to complete the deletion.
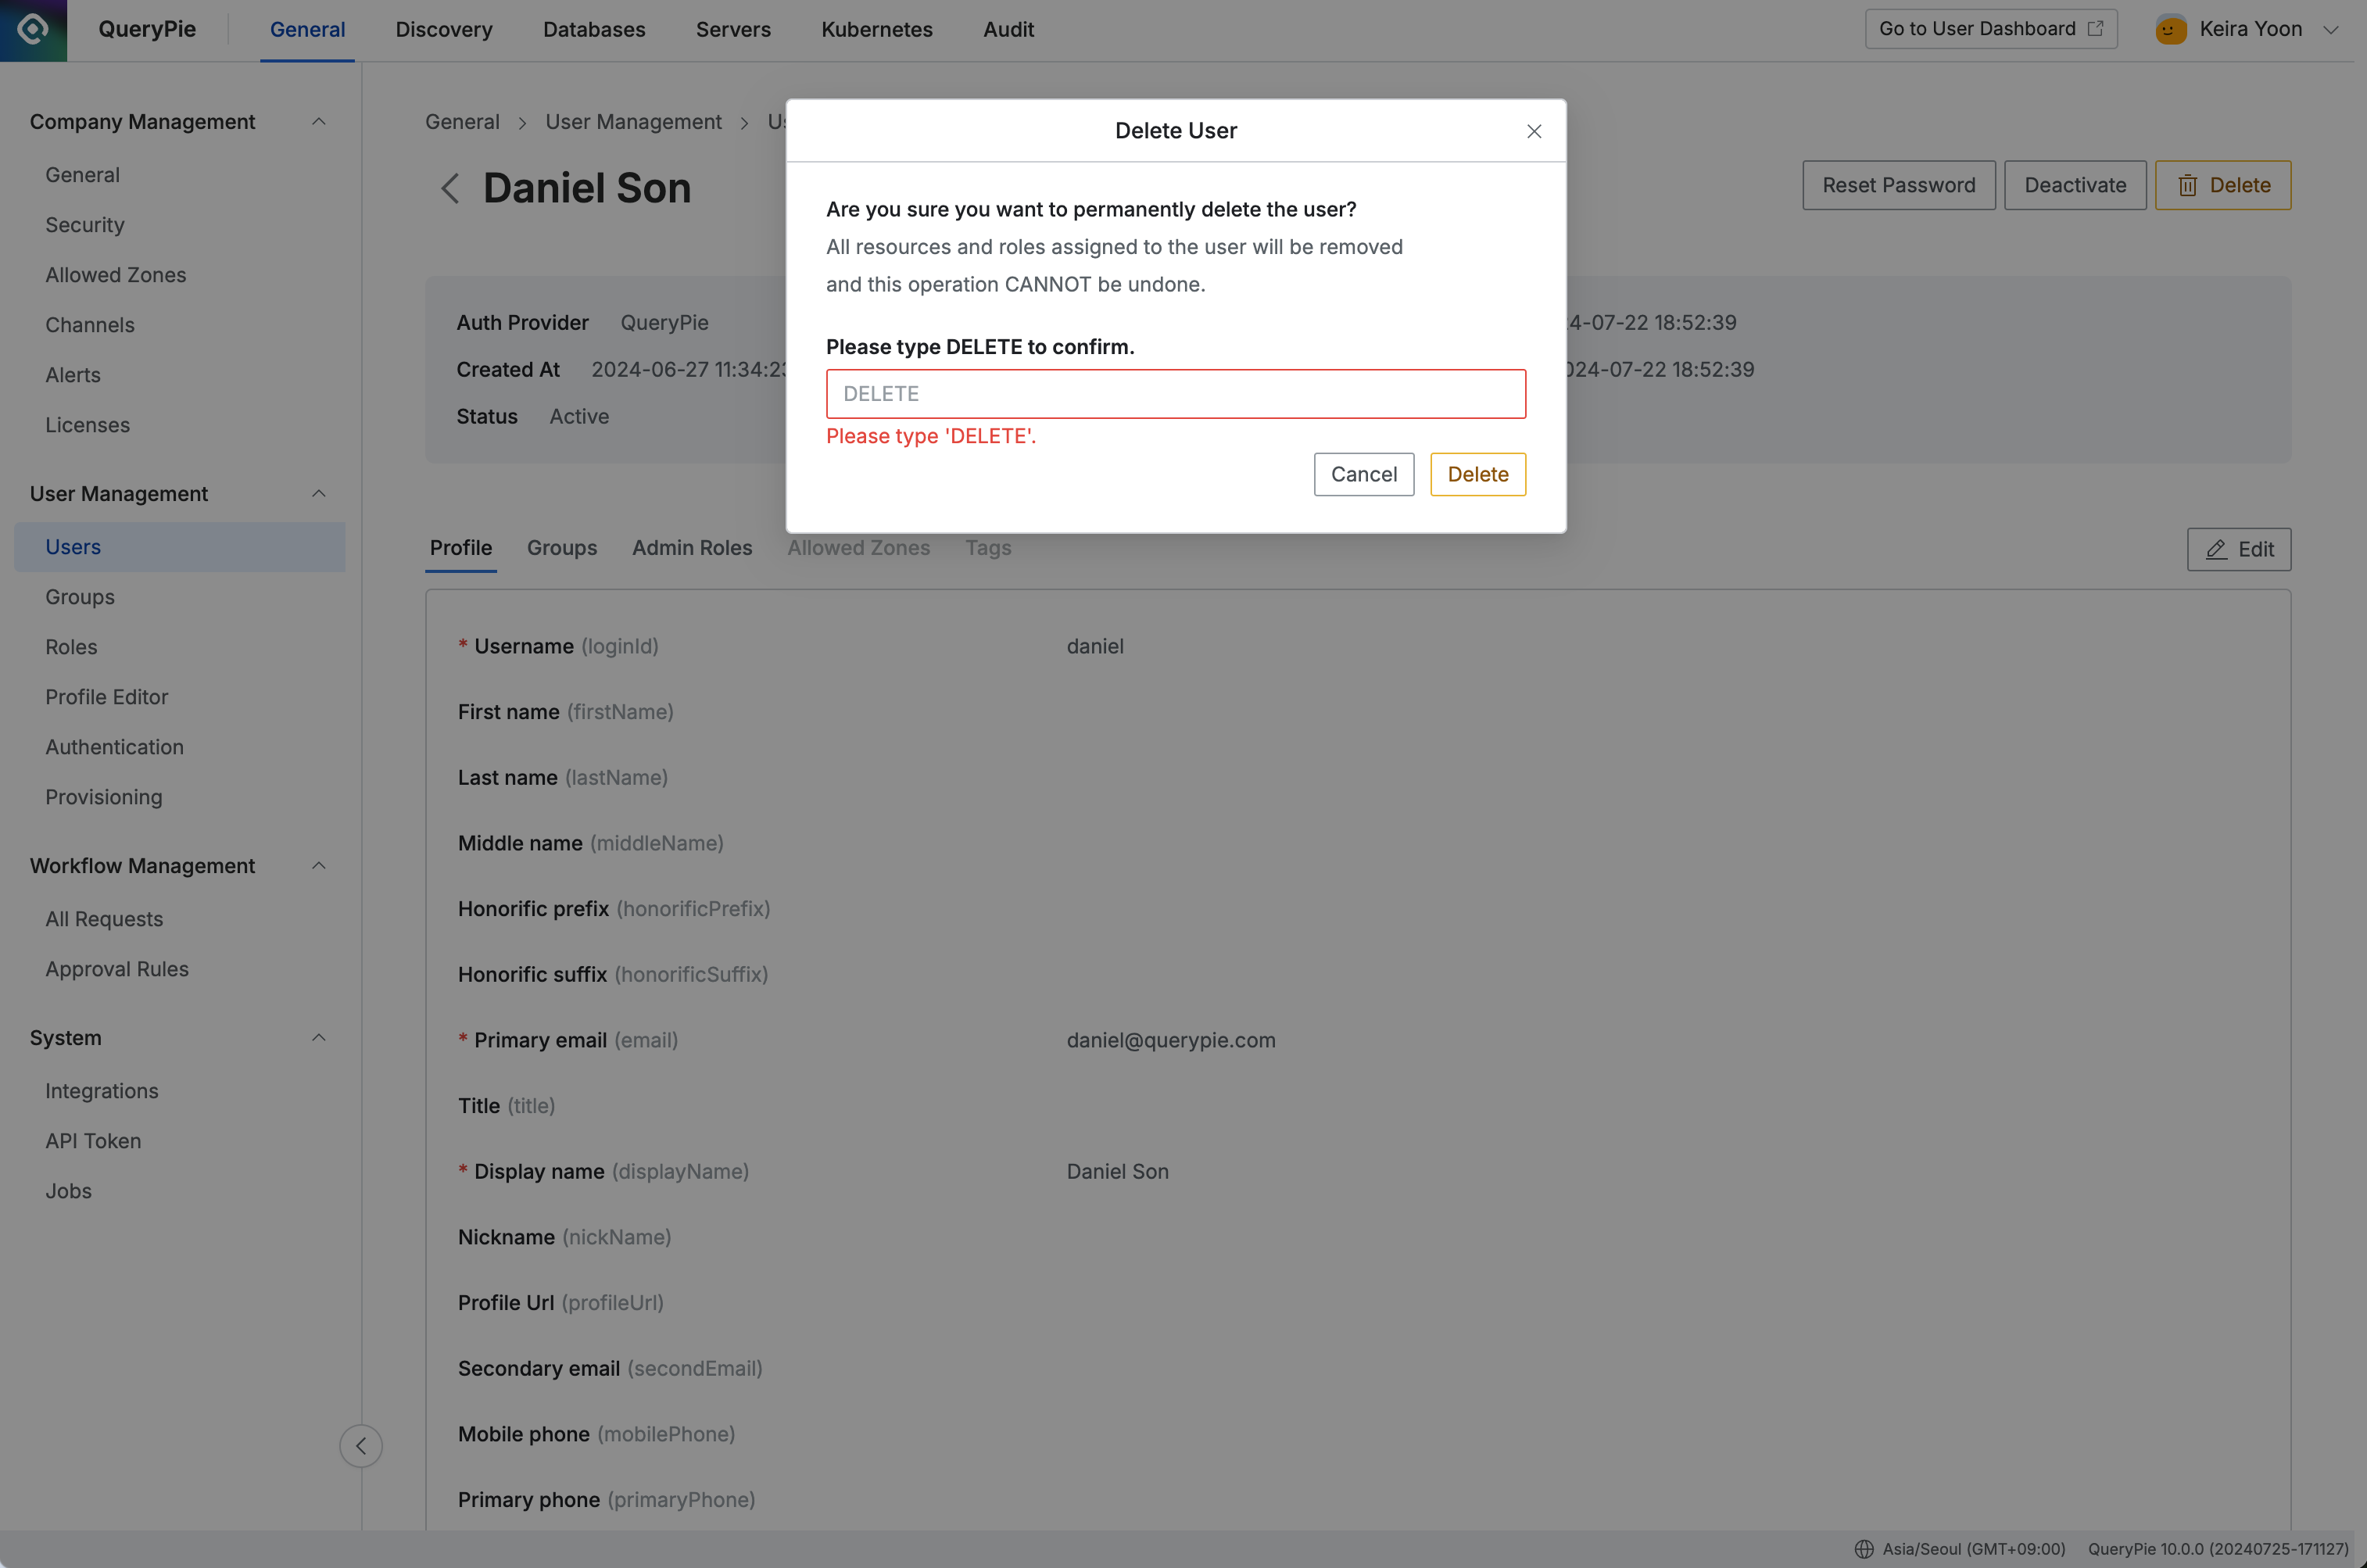
Administrator > General > User Management > Users > List Details > Delete User
Resetting User Passwords
Only users manually registered in QueryPie can have their passwords reset. Authentication methods for users integrated through SCIM are managed in SCIM.
Password reset is performed through temporary password issuance. Administrators must issue temporary passwords in the user detail page and guide users to the temporary passwords.
Issuing Temporary Passwords
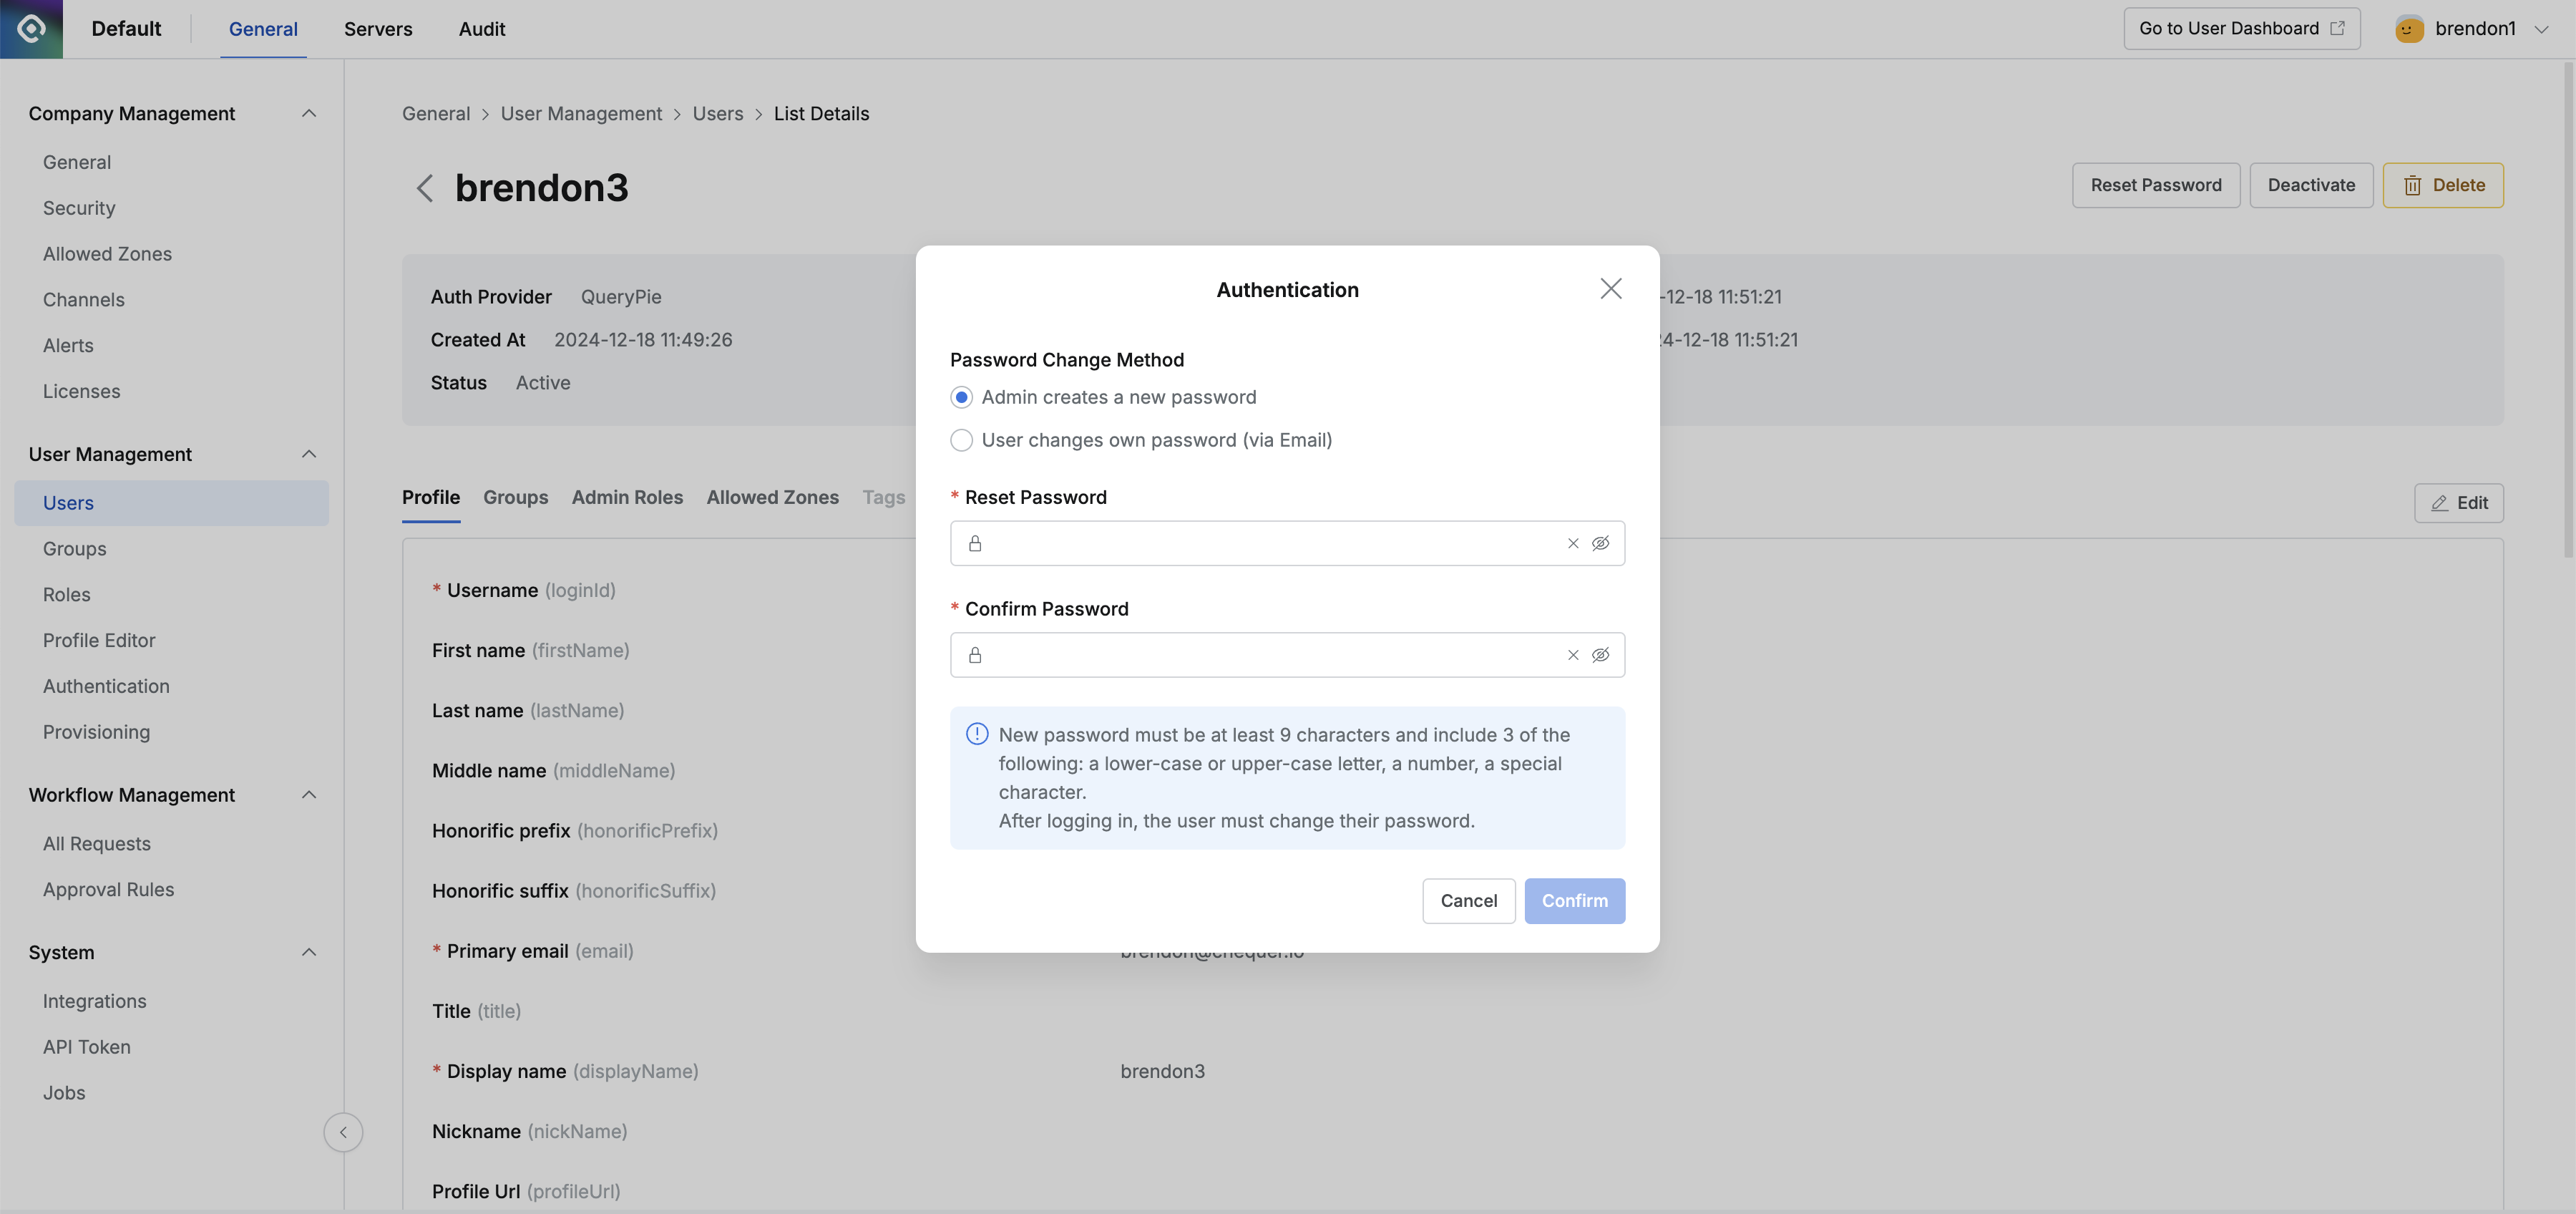
Administrator > General > User Management > Users > List Details > Authentication
- Click the
Reset Passwordbutton in the detail page of the user whose password you want to reset to display the authentication confirmation modal. - After entering the temporary password, click the
Confirmbutton to complete temporary password issuance.
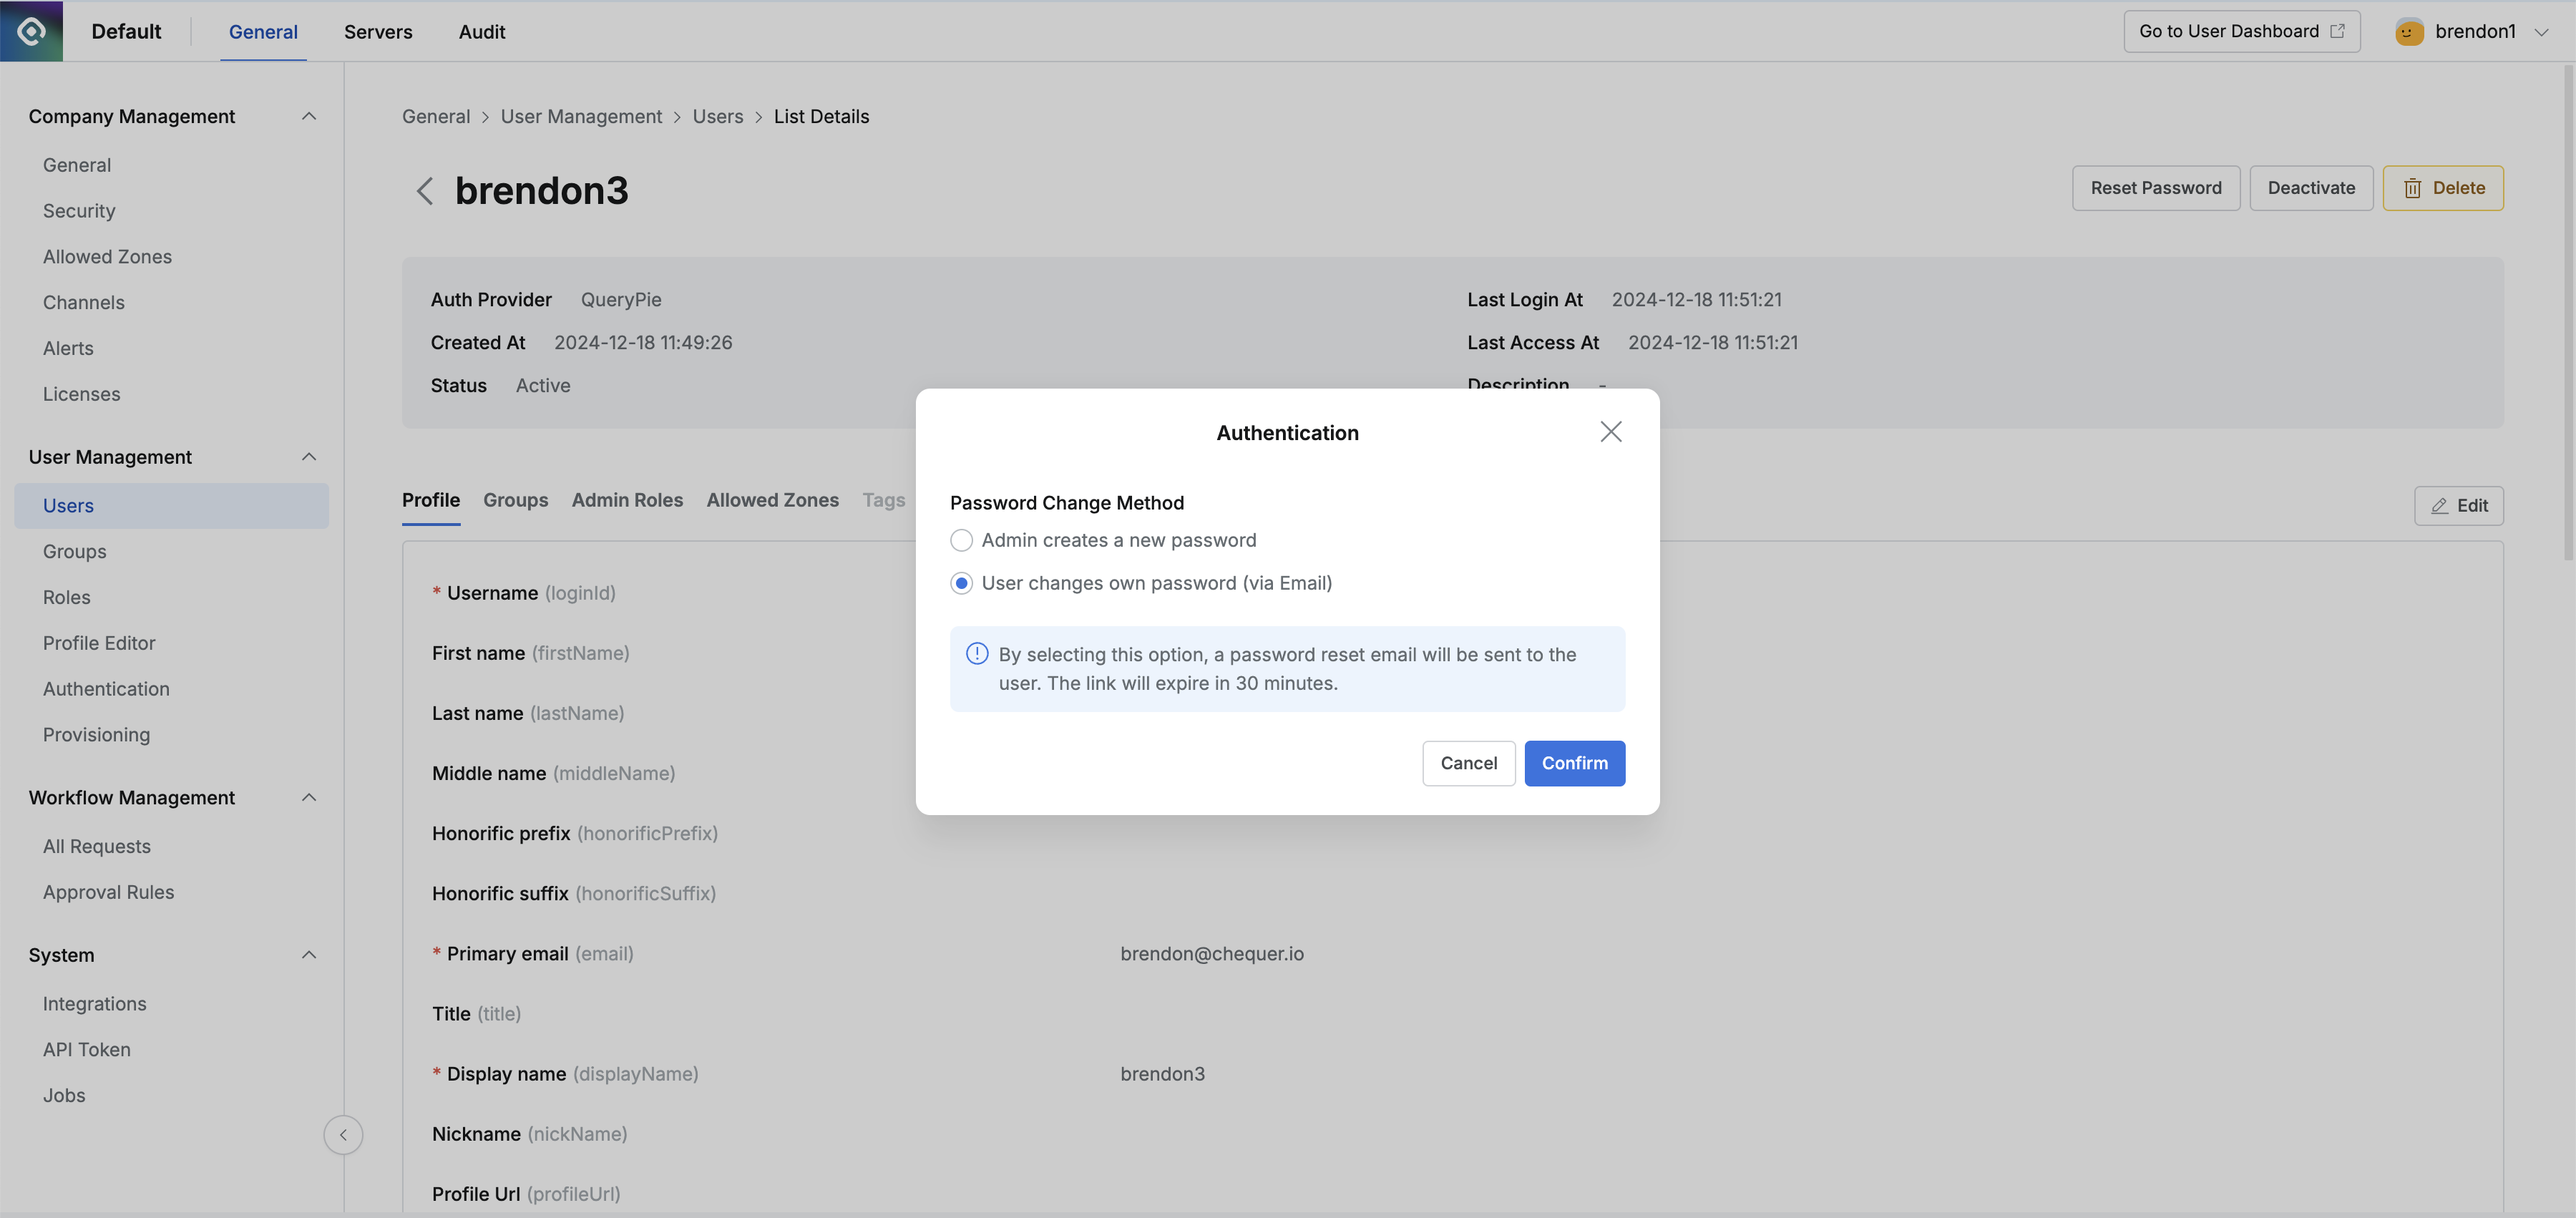
From QueryPie 10.2.2, when Email integration is configured, administrators can send reset emails to allow users to reset their own passwords instead of specifying temporary passwords.
- The administrator clicks the
Reset Passwordbutton in the user detail page. - In the “Password change method” of the popup window, select “User changes own password (via email)” and click the
Confirmbutton to send a password reset email to the user’s email address.
Selecting for User to Reset Own Password via Email
The content of the email that users will receive is similar to the following. The password reset link is valid for 30 minutes. If the user does not access this link for more than 30 minutes, they cannot reset their password through this link, so the administrator must perform the above procedure (User changes own password (via email)) again to send a password reset email.
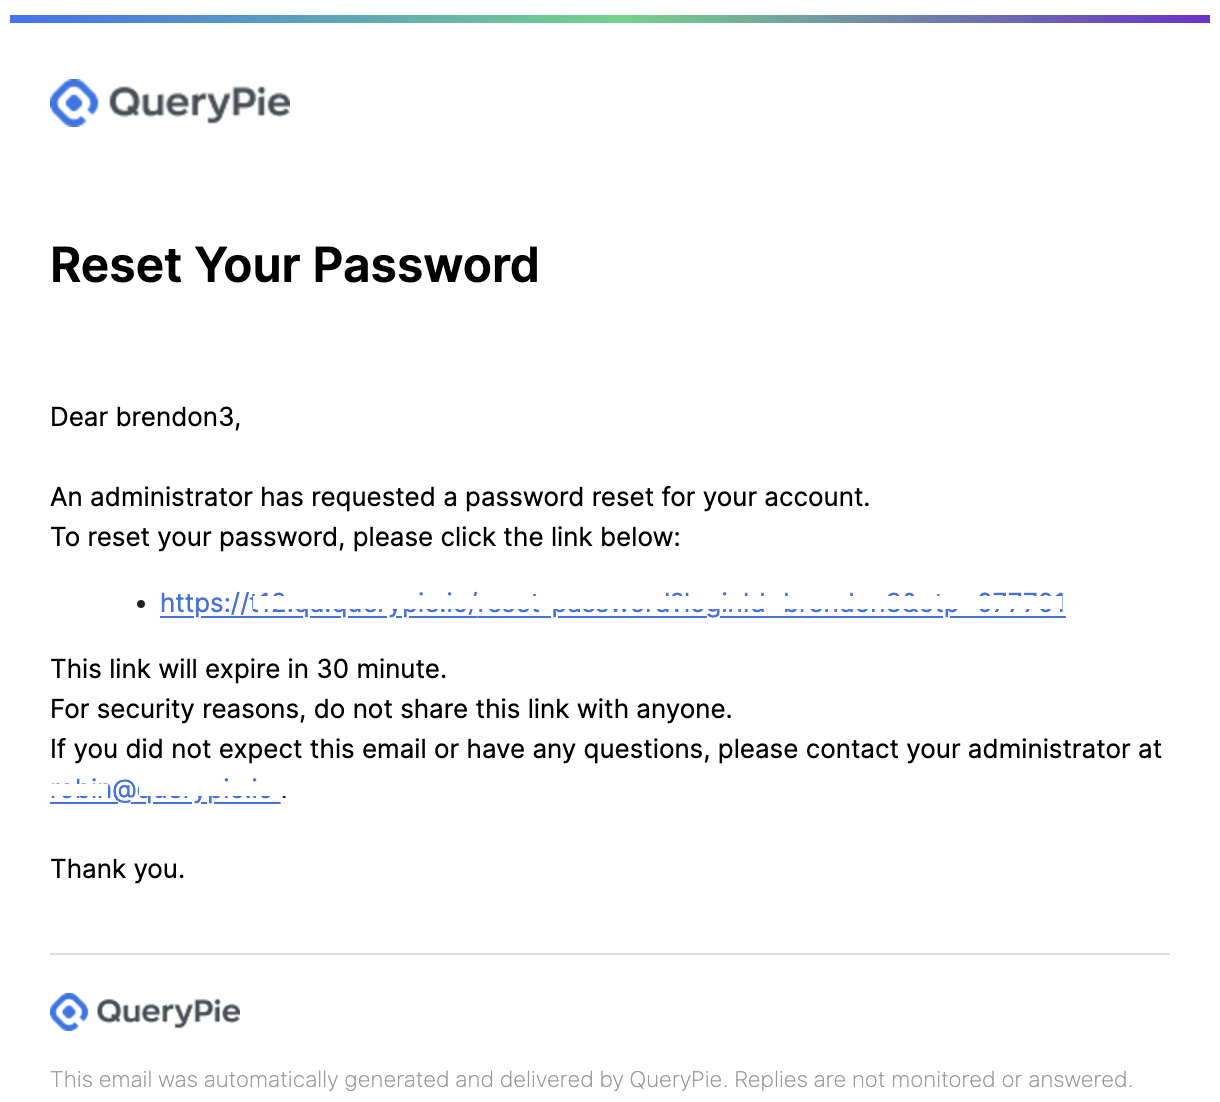
Password Reset Email
Password Reset (User)
When users log in with the temporary password set earlier, they immediately enter the password reset screen.
After changing the password, click the Change Password button to complete the password change, and they can log in with the new password.
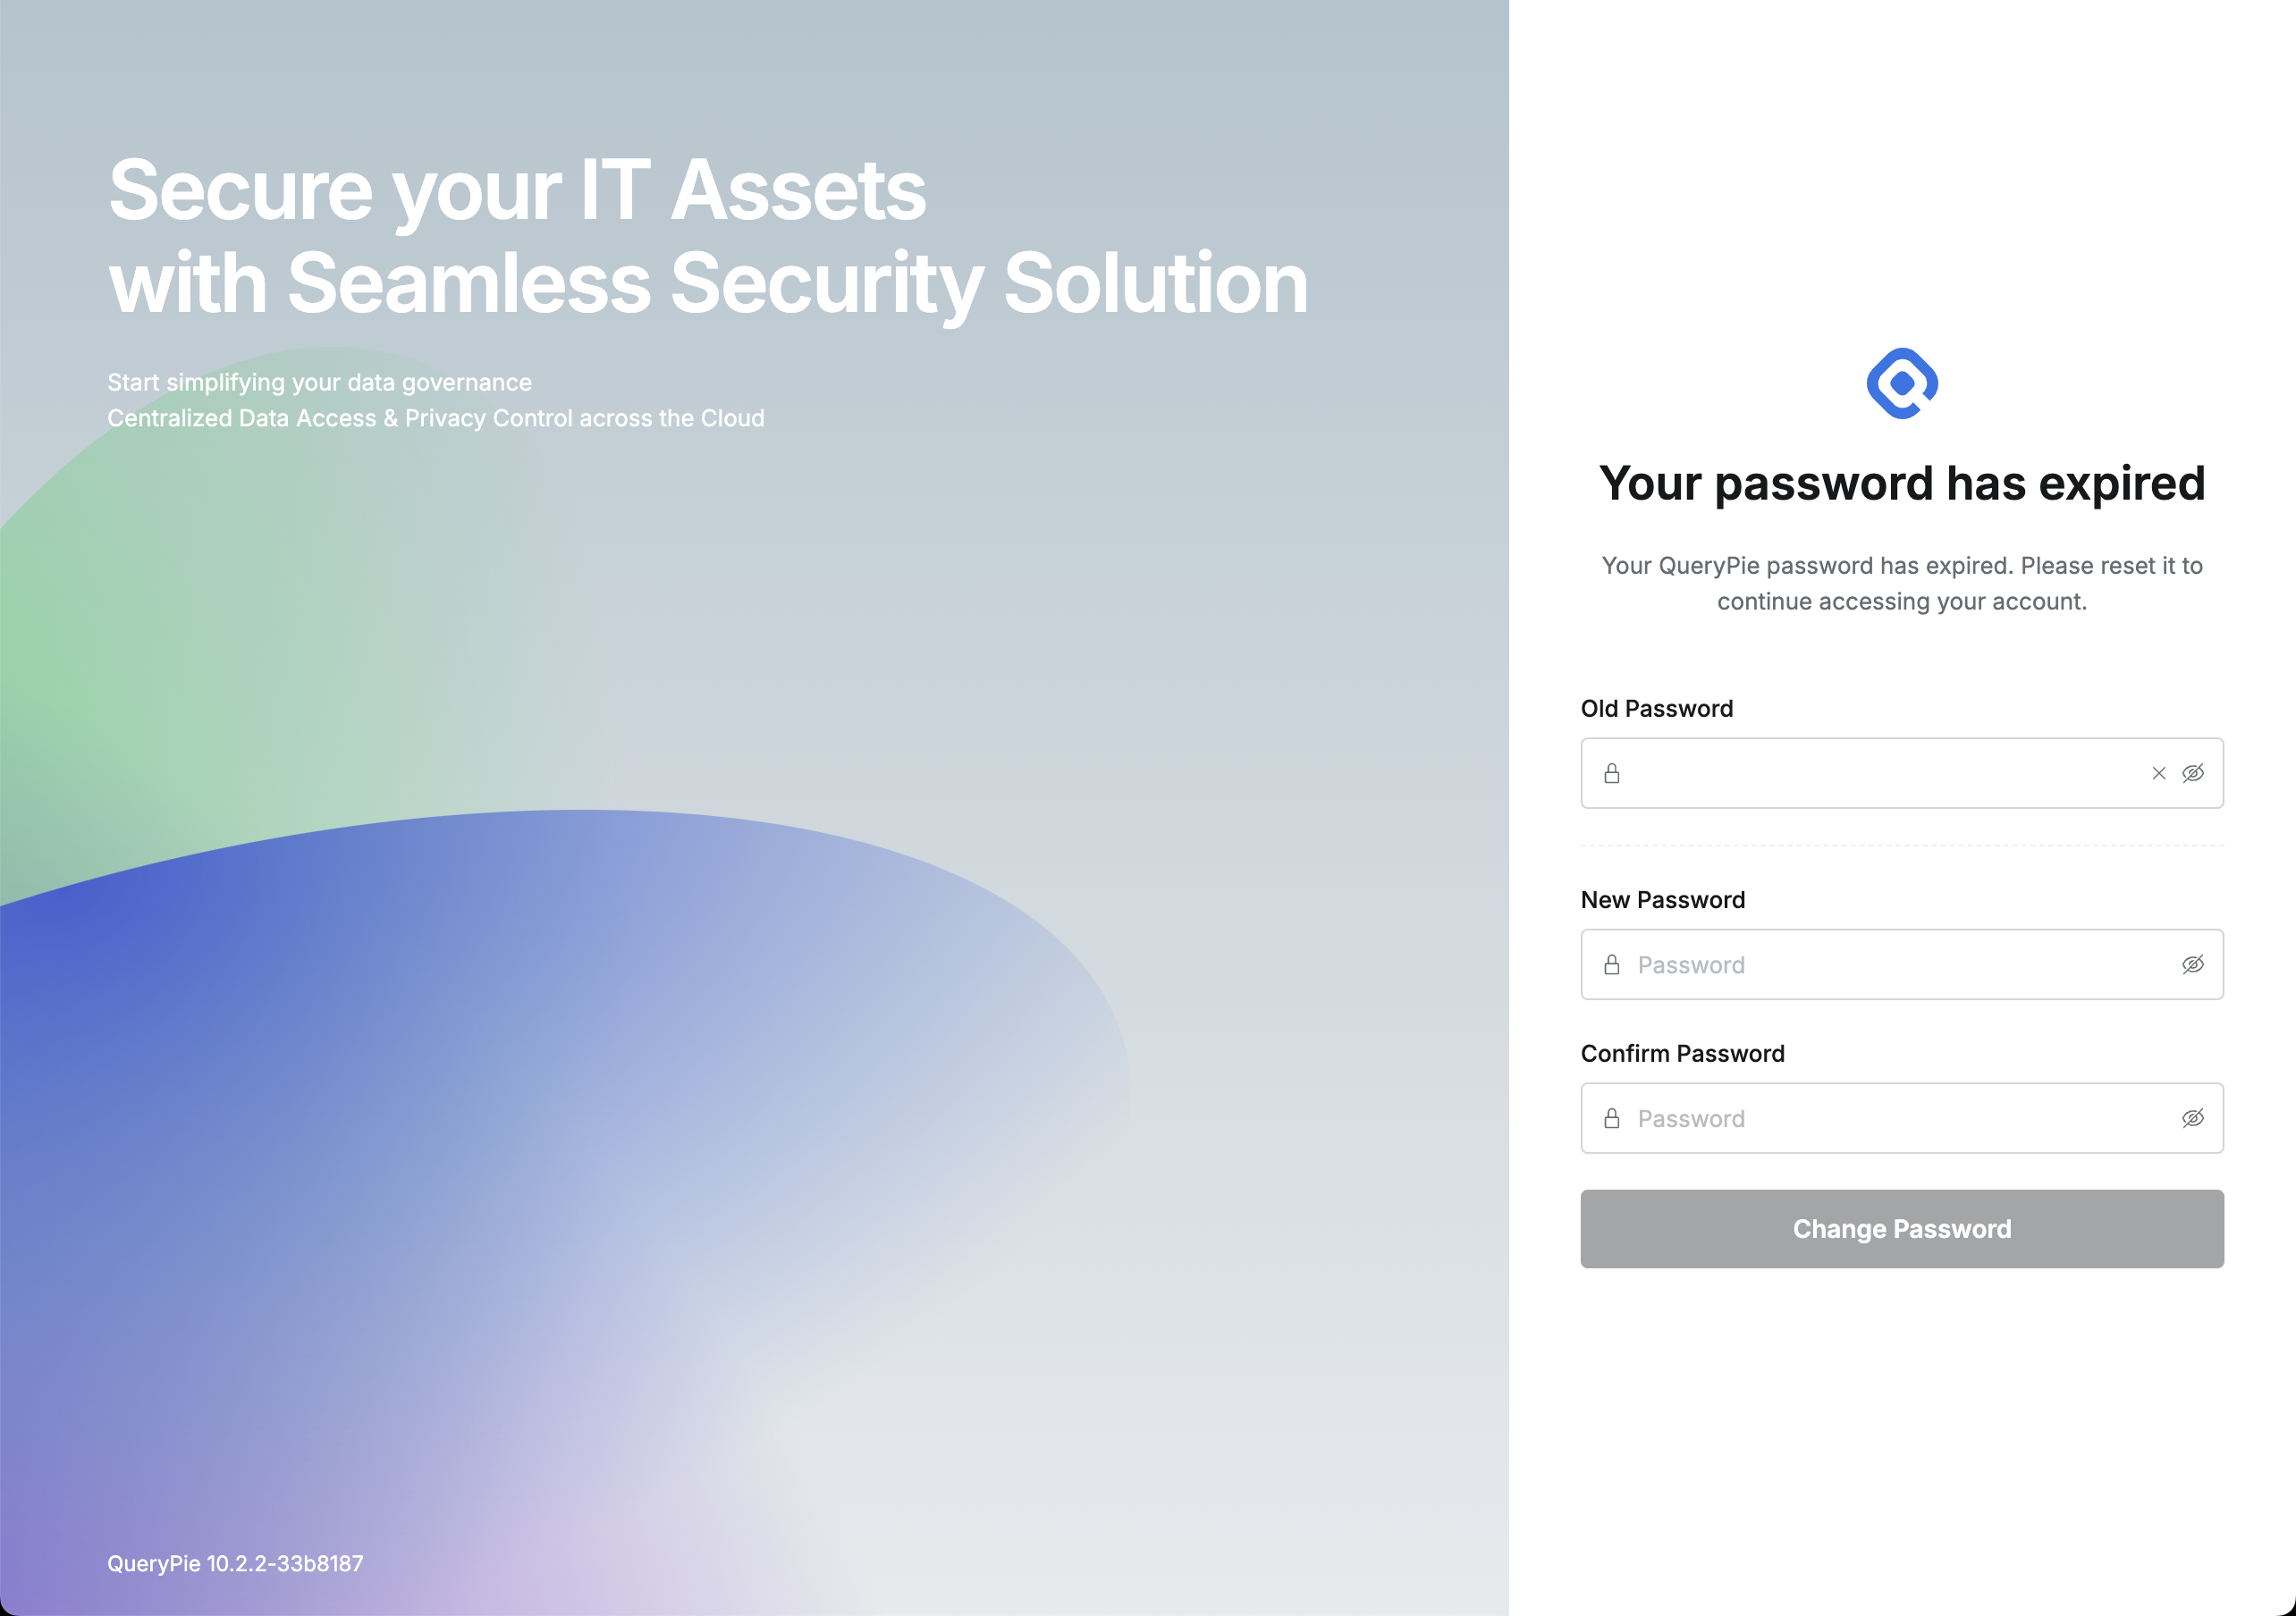
Password Reset Screen
Resetting User OTP
Click on a user in the Users page to enter the detail information page. If 2FA is configured through OTP, OTP reset functionality is provided. After OTP reset, users must reconfigure their OTP. For methods to reconfigure OTP, please refer to the My Dashboard documentation.
User OTP Reset
Click the Reset OTP button in the user’s detail page.
When a warning modal is displayed, click the Reset button to complete the reset.
Administrator > General > User Management > Users > List Details