My Dashboard
Overview
When you successfully log into QueryPie Web, you are redirected to the user dashboard screen. The dashboard allows you to view at a glance basic information such as role permissions granted to the currently logged-in user, groups you belong to, approval status, and recently accessed connection lists.
Logging into QueryPie Web
When you access QueryPie through a web browser, you first encounter the login screen.
If you access from an IP not allowed by the administrator, the login screen may not be visible.
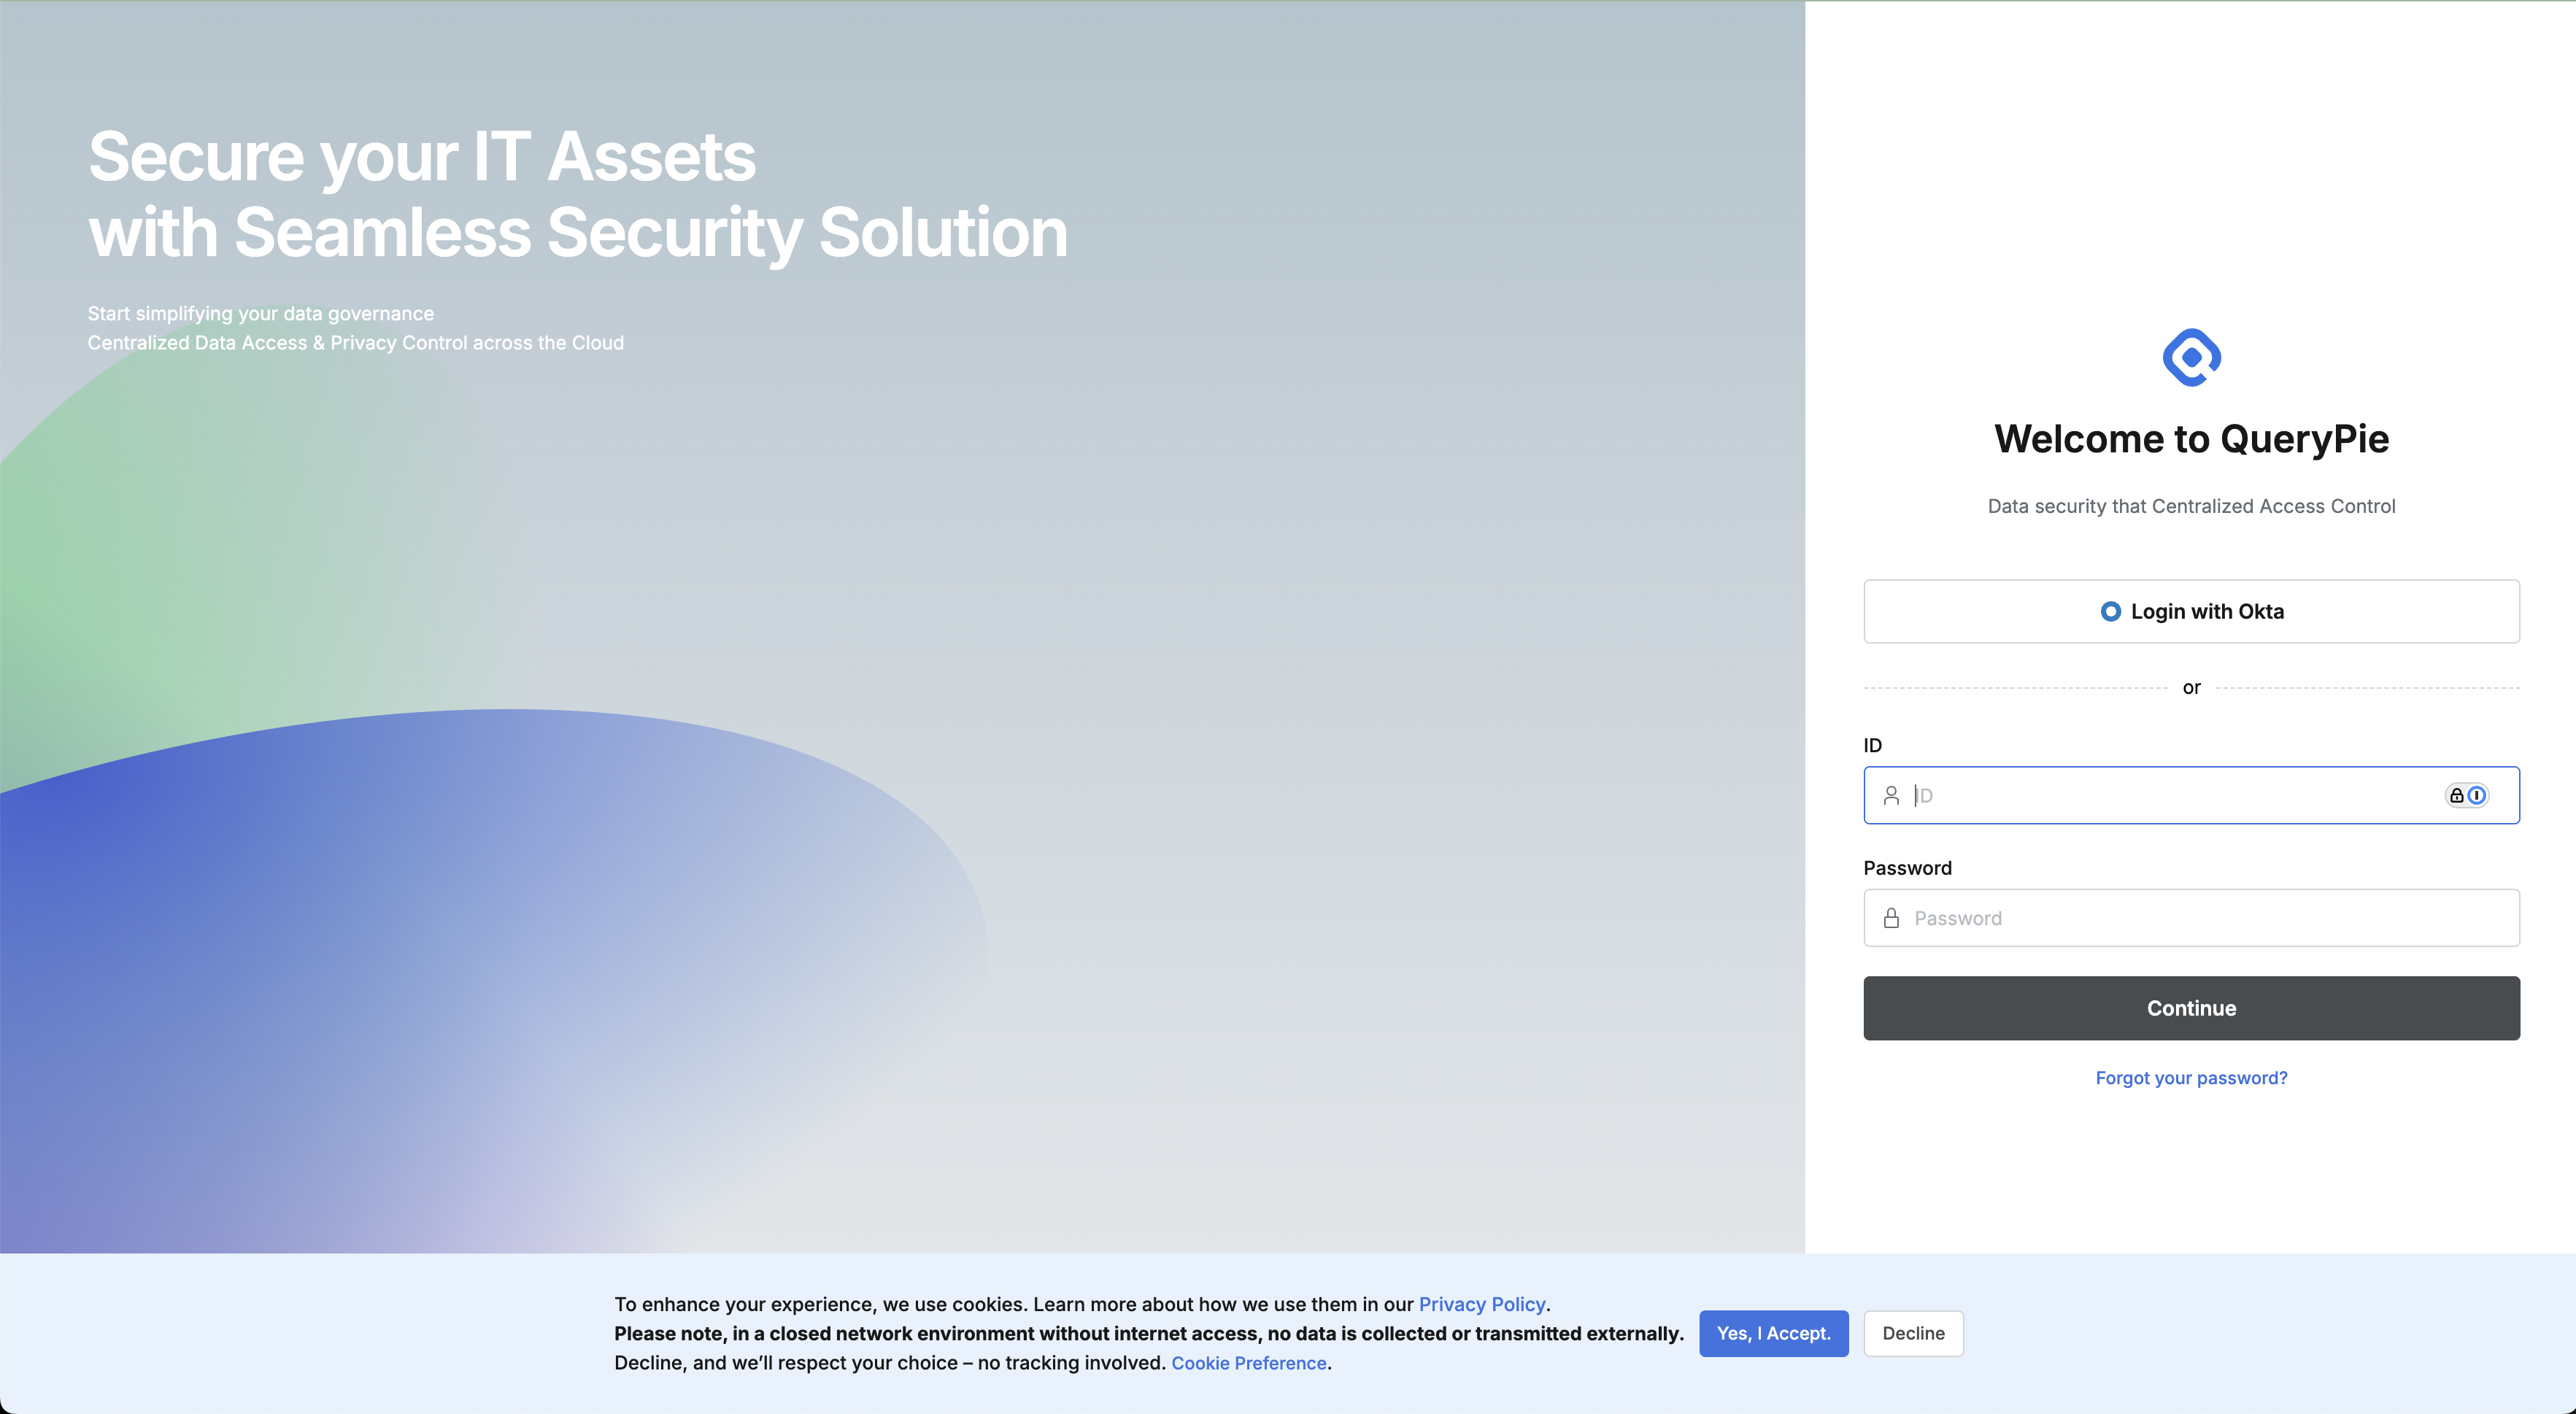
QueryPie Login Screen
Google Analytics Cookie Usage Notice and Cookie Settings
QueryPie uses cookies to collect information to improve user experience.
When you first access the login page, you can agree to or refuse the use of optional analytical cookies, and you can modify your consent or refusal at any time.
Individual consent or refusal for optional analytical cookies is possible on the Cookie Settings (Cookie Preferences) screen.
Essential cookies cannot be refused as basic functionality may not work if not used.
You can also set this on the Cookie & Privacy screen in the user environment settings screen of preferences after logging in.
In closed networks where internet communication is not possible, information is not transmitted externally even if you agree.
You can check QueryPie’s user privacy handling policy through the Privacy Policy link.
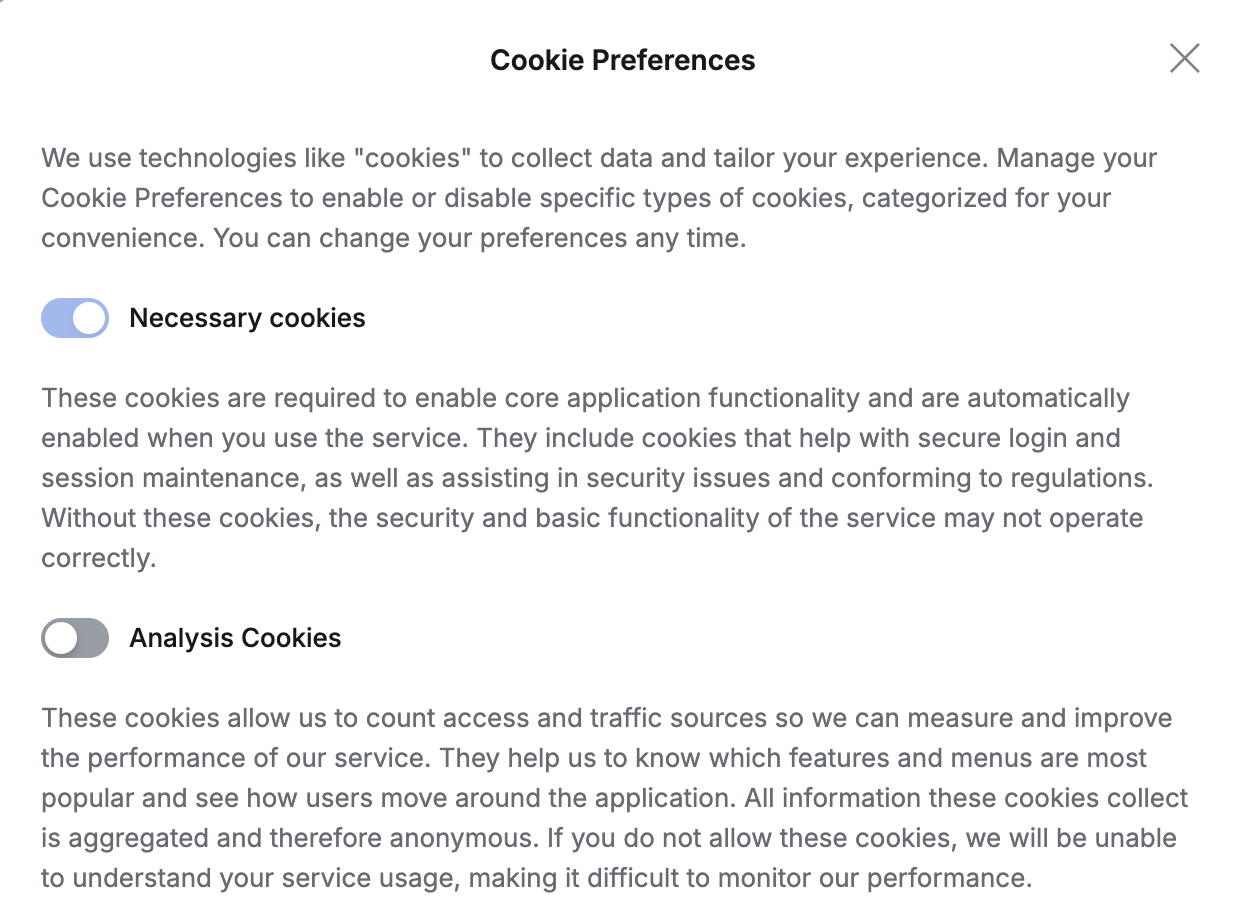
Cookie Settings Screen
Reference: Preferences | Cookie-&-Privacy
Entering Account Information
- SSO Login Button : Appears when administrators have configured SSO (Single Sign-On), and clicking it connects to the IdP authentication page.
- ID/PW Input Fields : Enter the ID and password registered in QueryPie, then click the
Continuebutton to log in.
When administrators have configured Multi-Factor Authentication, users must proceed with secondary authentication using the means specified by the administrator after entering their password during login. As of QueryPie 10.2.2, the provided secondary authentication means are Google OTP and Email.
- When administrators specify Google OTP as the secondary authentication means
- Enter the login password on the login page.
- Register with the Authenticator app using the QR Code displayed in the popup window during first login. The screen displays guidance text ‘Download an authentication app such as Google Authenticator, Microsoft Authenticator, Okta Verify, etc.’ to easily select and install a compatible authentication app from the App Store or Google Play Store.
.png)
QR Code for Authenticator App Registration
- Enter the one-time authentication code output by the Authenticator app.
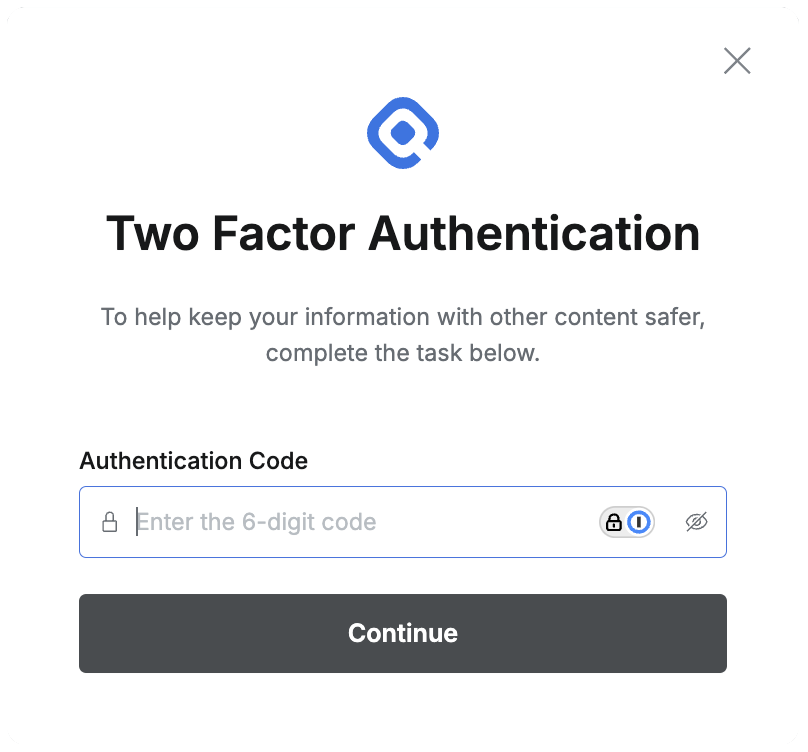
Enter One-Time Authentication Code
- When Email is specified as the secondary authentication means
- Enter the login password on the login page.
- Check the authentication code in the authentication email received in your inbox.
The authentication code is valid for 30 minutes. - You can request resending of the authentication email through “Resend authentication code”. The second resend request is possible after 5 minutes.
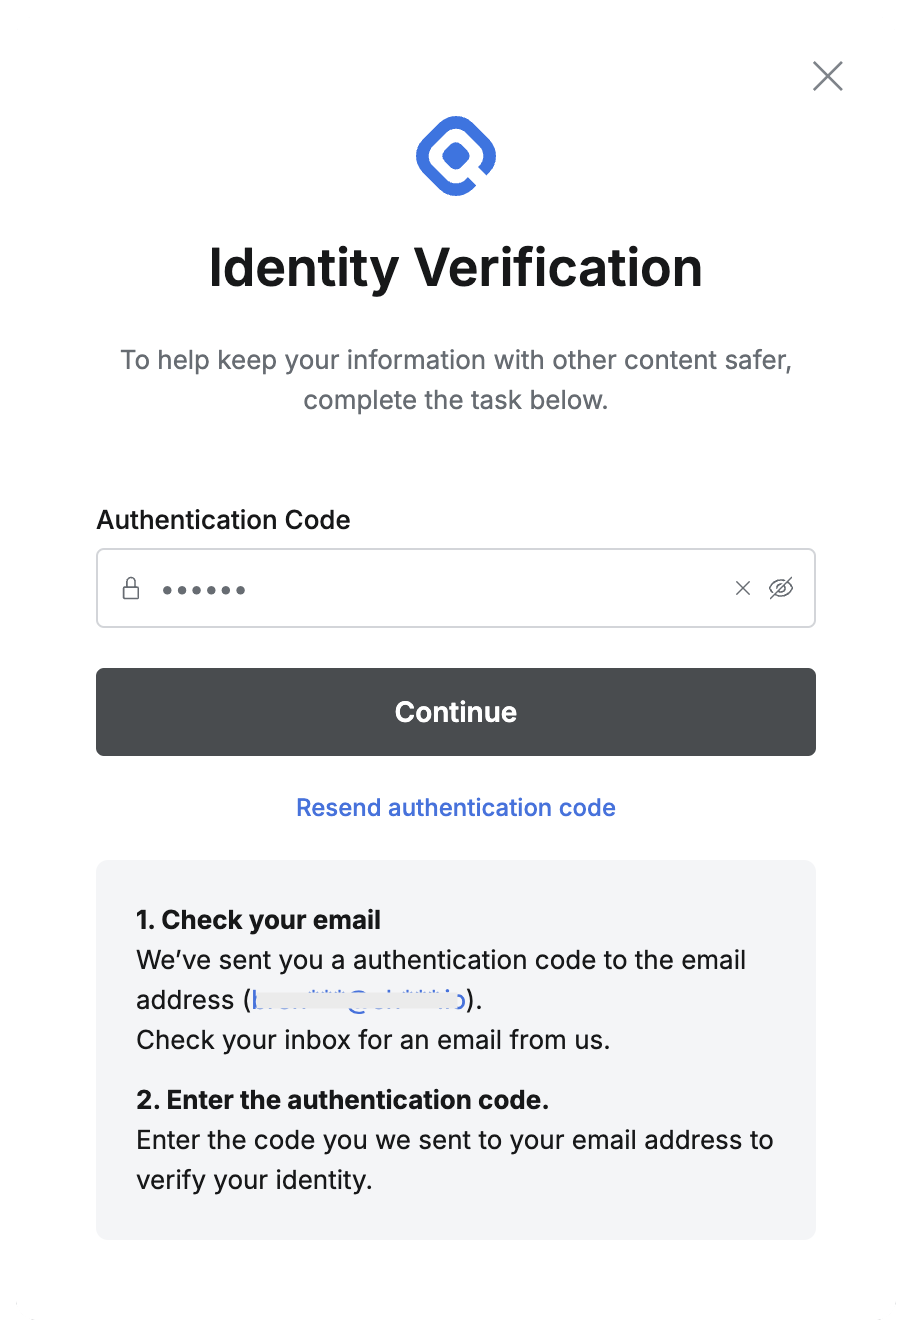
Enter One-Time Authentication Code (Email)
User Dashboard
When login is completed normally, you are redirected to the user dashboard screen. The dashboard allows you to view at a glance basic information such as role permissions granted to the currently logged-in user, groups you belong to, approval status, and recently accessed connection lists.
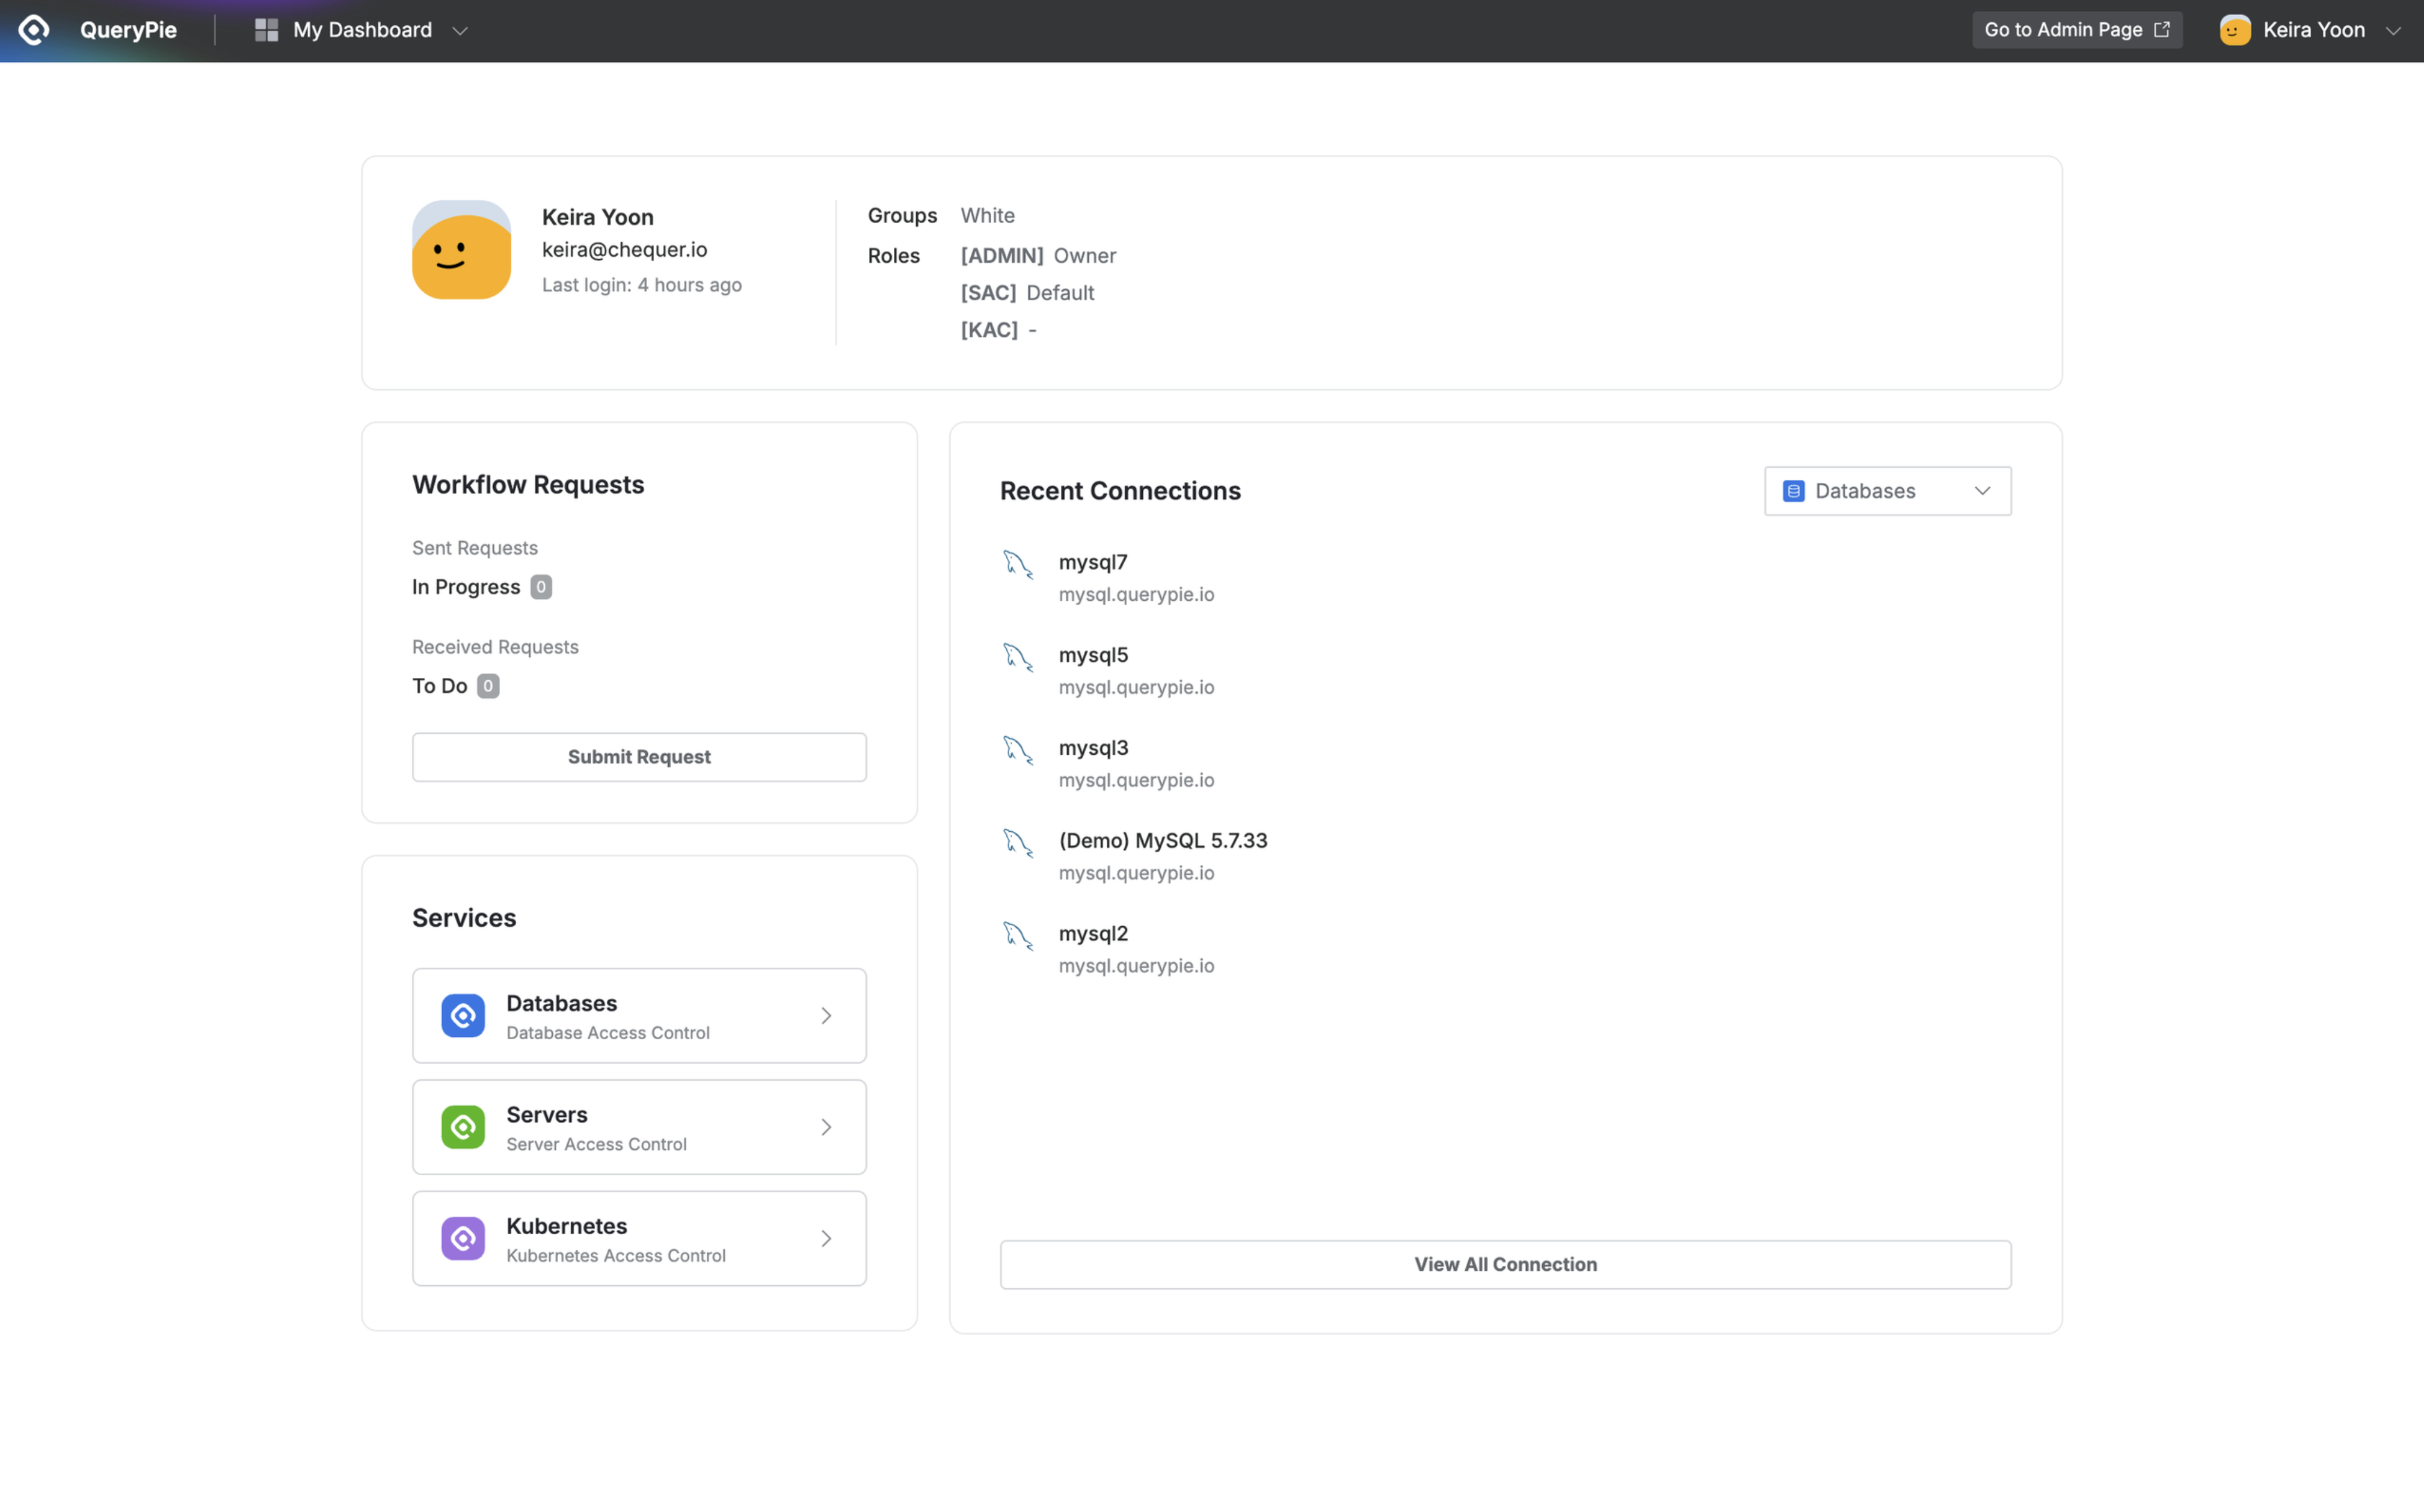
My Dashboard
User Information
- Basic Information : Displays user name (Display Name), email, and last login time.
- Groups : Displays the user groups the user belongs to.
- Roles : Displays the list of roles assigned to the user, separated by product area. For users with administrator (Admin) roles, the assigned Admin Role is also displayed.
Workflow Requests
- Sent Requests : Displays the number of in-progress requests among the approval requests I sent.
- Received Requests : Displays the number of requests requiring my approval among the requests I received.
- Submit Request : Click this button to immediately enter the approval request creation page from the dashboard.
Services
- Services available according to your current license are displayed, and clicking them navigates to the main screen of each service.
Recent Connections
- You can check the list of connections with recent access history for each QueryPie service.
Navigating to Administrator Page
Only users assigned the QueryPie administrator role can see the Go to Admin Page button in the top menu bar that provides access to the administrator page.
Clicking this button opens the administrator page in a separate tab.

My Dashboard > Top Right Menu