Requesting DB Access Request
Overview
You can request Privilege for DB connections that need access by following the steps below. After approval is completed, permissions are immediately granted, and you can access the granted connections through the SQL Editor in QueryPie Web or through Agent.
Requesting DB Access Request
1. Selecting Approval Rules
- Select an Approval Rule to choose the appropriate approval rule for your purpose. The approval target varies depending on the selected rule.
- If a pre-configured approval rule is selected, the approver is automatically assigned and cannot be added or modified.
- Approval Expiration Date : Enter the approval expiration date. The maximum value can be set through Maximum Approval Duration. The Approval Expiration Date cannot exceed the Access Expiration Date. If exceeded, the request cannot be submitted. If Maximum Approval Duration > Maximum Access Duration, the value of Maximum Approval Duration is applied the same as the value of Maximum Access Duration. Example) If Maximum Approval Duration is 14 days and Maximum Access Duration is 5 days, the value of Maximum Approval Duration is also applied as 5 days.
- However, when submitting in Urgent Mode, the above condition is ignored.
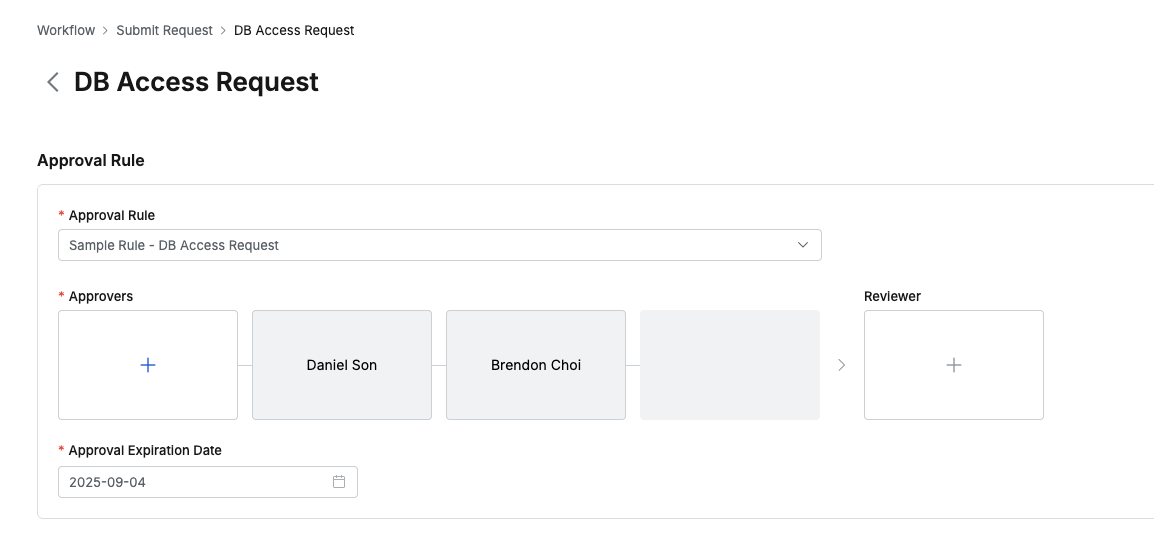
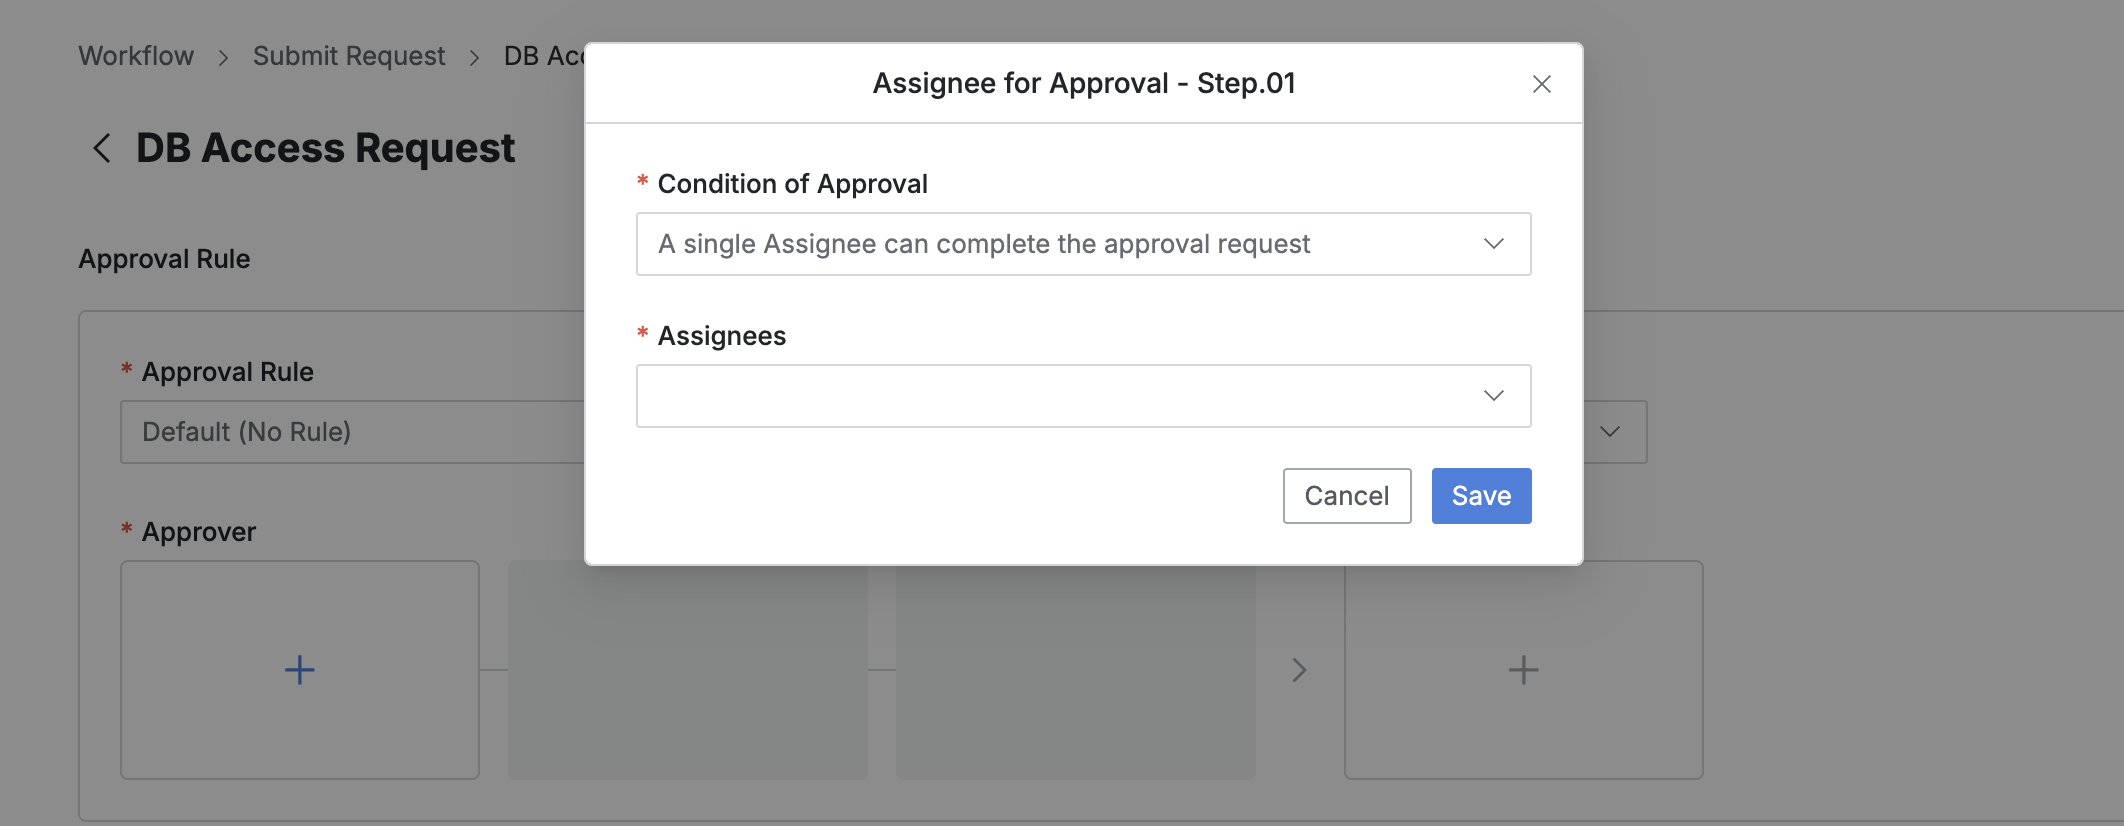
2. Assigning Approvers
- Click the
+button in the approval line to display a popup window where you can assign step-by-step approvers. - In this popup window, add approval conditions and approvers, then click the
Savebutton to save the approval line. - Available approval conditions are as follows.
- A single Assignee can complete the approval request: The approval request is approved with just one approval from multiple people.
- All Assignees must approve this request: All approvers must approve for the approval request to be approved.
3. Assigning Reviewers
- Click the
+button in the approval line to display a popup window where you can assign reviewers.- If the administrator has not allowed reviewer assignment, the Reviewer box will not be displayed.
- In this popup window, add approval conditions and approvers.
- Close the modal by clicking the
Savebutton to complete reviewer assignment.
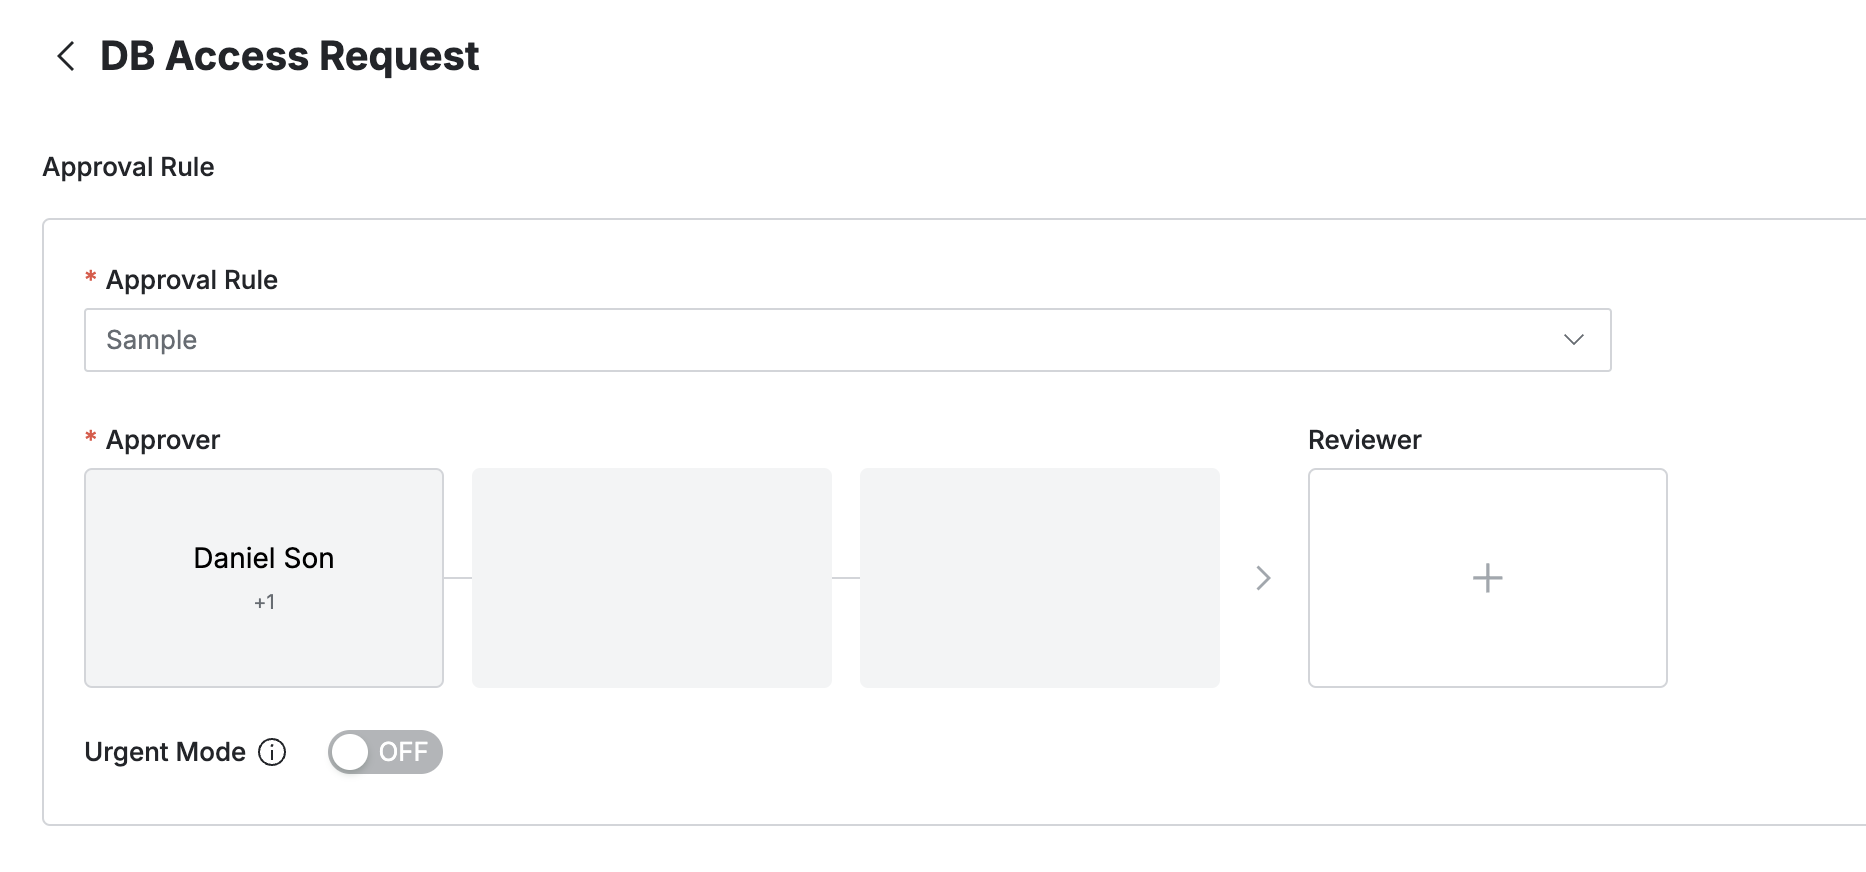
4. Sending Request with Post-Approval
From version 11.3.0, when sending a request in post-approval mode, you can no longer specify the Approval Expiration Date.
- If you select an approval rule that allows post-approval functionality, the Urgent Mode switch will be displayed.
- After setting Urgent mode = On and registering the approval request, you can immediately receive permissions or perform tasks.
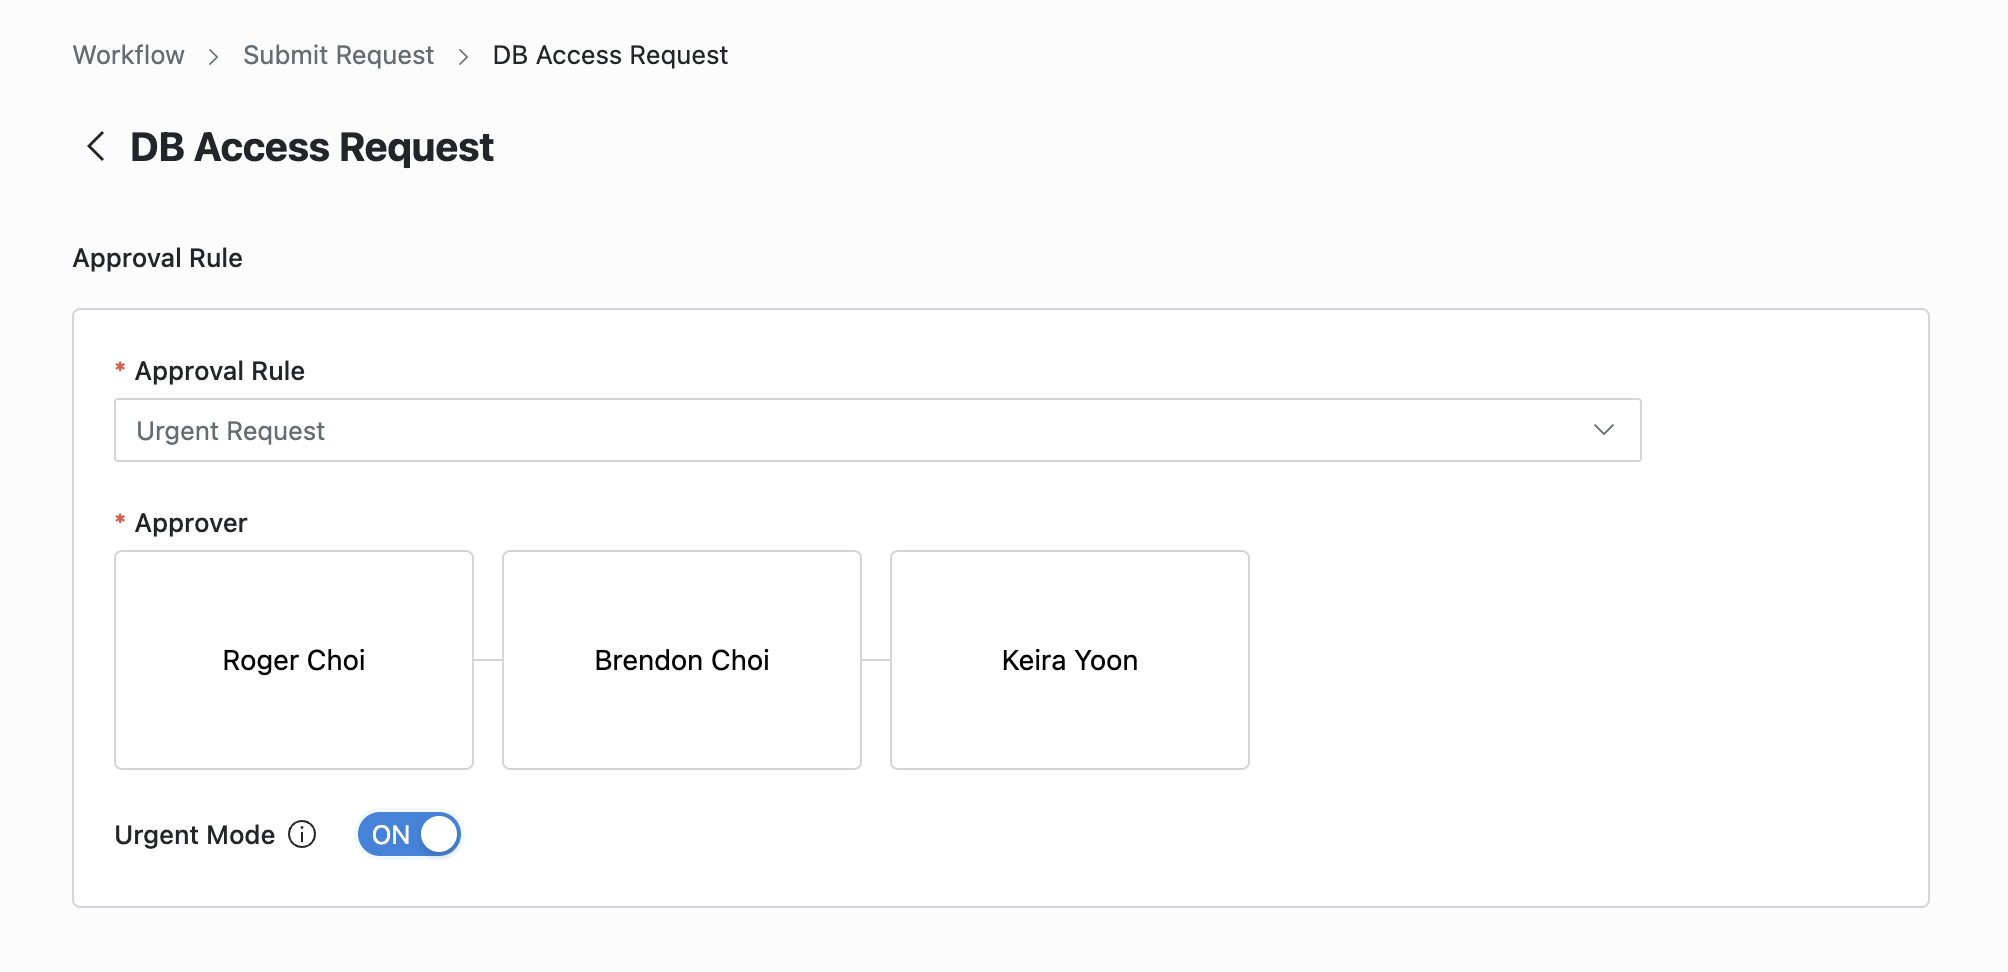
Q. I can’t see the Urgent Mode switch. A. If you select an approval rule where the administrator has not allowed Urgent Mode, this feature will not be displayed.
5. Entering Request Information
- Title : Enter the request title.
- Access Expiration Date : Enter the expiration date of the requested permission. The default value follows the Maximum Access Duration value in DAC configurations in the administrator page.
- Reason for Request : Enter the reason for requesting access permission.
User > Workflow > Submit Request > DB Access Request > Request Summary
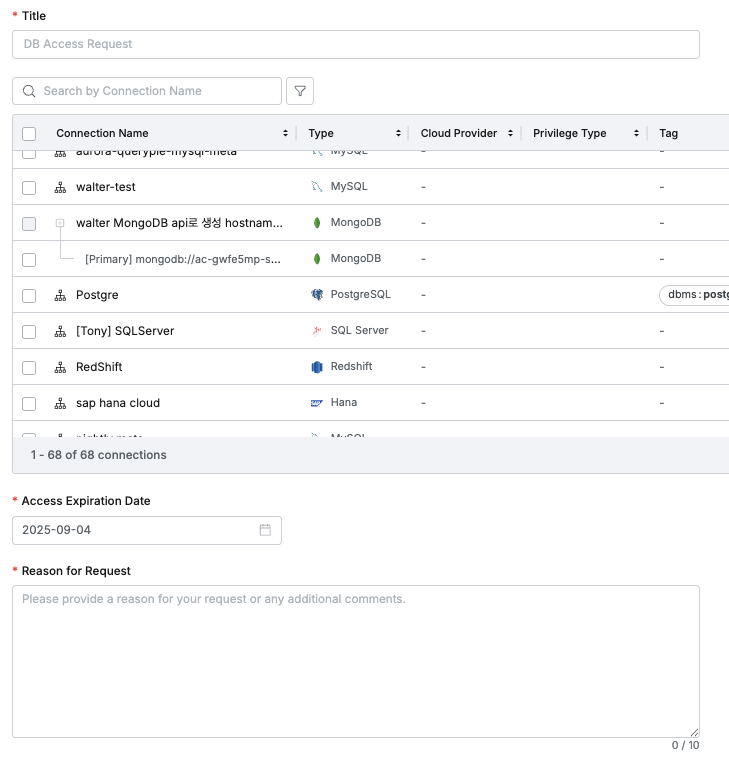
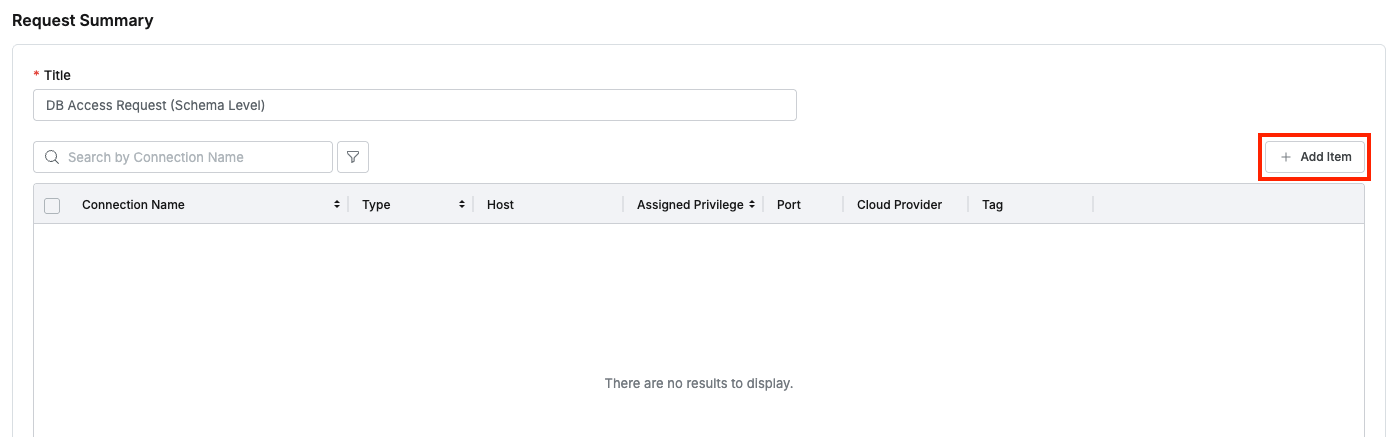
6. Selecting DB Connections to Request and Specifying Permissions
- The table within the Request Summary area displays the list of DB connections currently registered in QueryPie.
- Privilege Type : If you specify the Privilege Type to request for a specific DB connection, that value is displayed.
- Current Privilege : Displays the current permissions for that connection. If there is no current access permission, it is empty.
- Expiration Date : Displays the expiration date of the permissions currently granted for that connection.
- Select the DB connections for which you want to request access permissions using checkboxes, then you can select the Privilege Type using the following two methods:
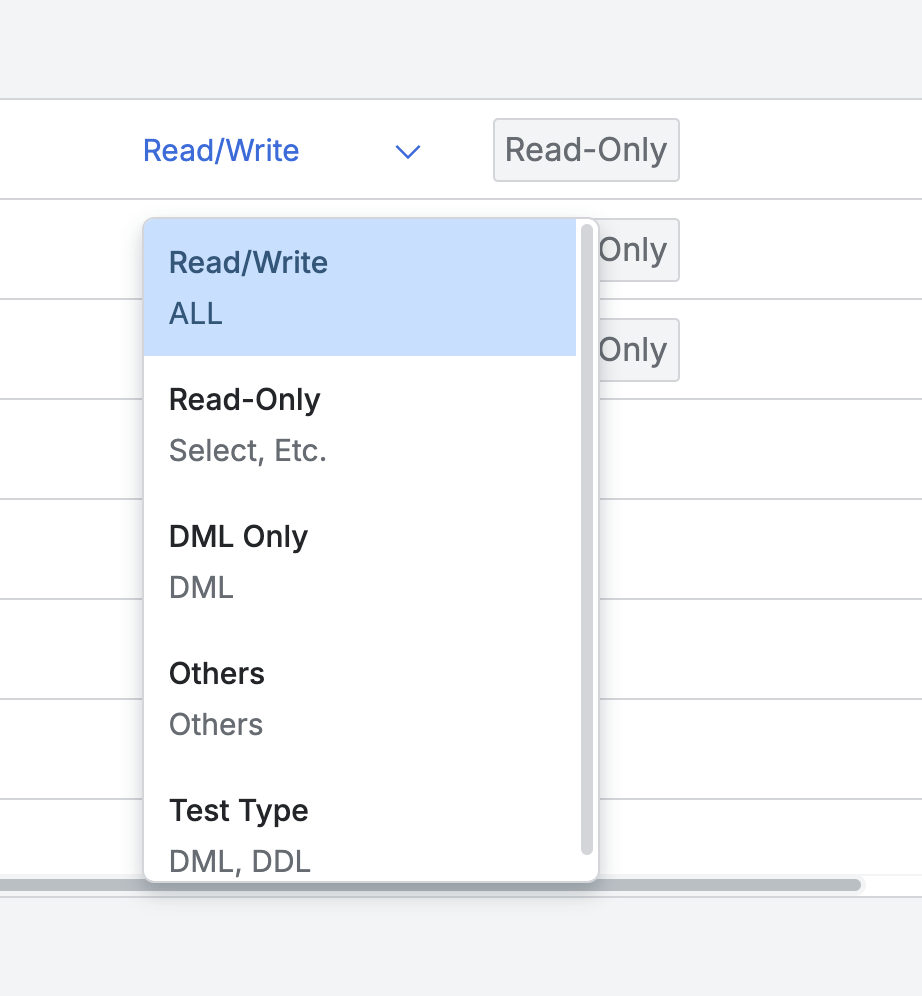
Specifying per connection through dropdown
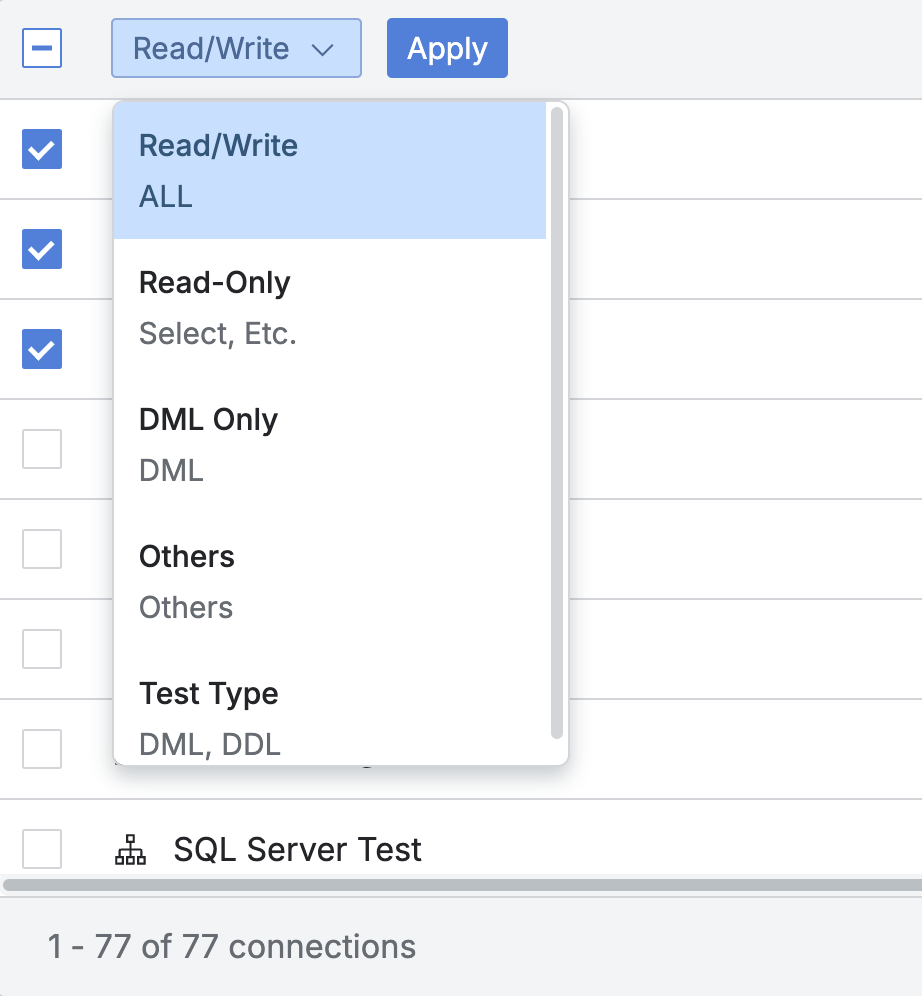
Bulk application through checkboxes and Apply button
- Available Privilege Types are as follows.
- Read/Write Permission : Full permissions.
- Read-Only Permission : Permission to only SELECT.
- Other Permissions : Permissions additionally created by administrators, and if no permissions are created, only the above two permissions are displayed.
- If you have completed specifying the approval rules and entering the request body, click the
Submitbutton at the bottom of the page to submit the request.
Requesting DB Access Request (Schema Level)
From 11.5.0, schema (Logical DB) level access requests are possible. The following content omits common parts and focuses on the different parts.
- Click the Submit Request button and select “DB Access Request (Schema Level)” from the menu.
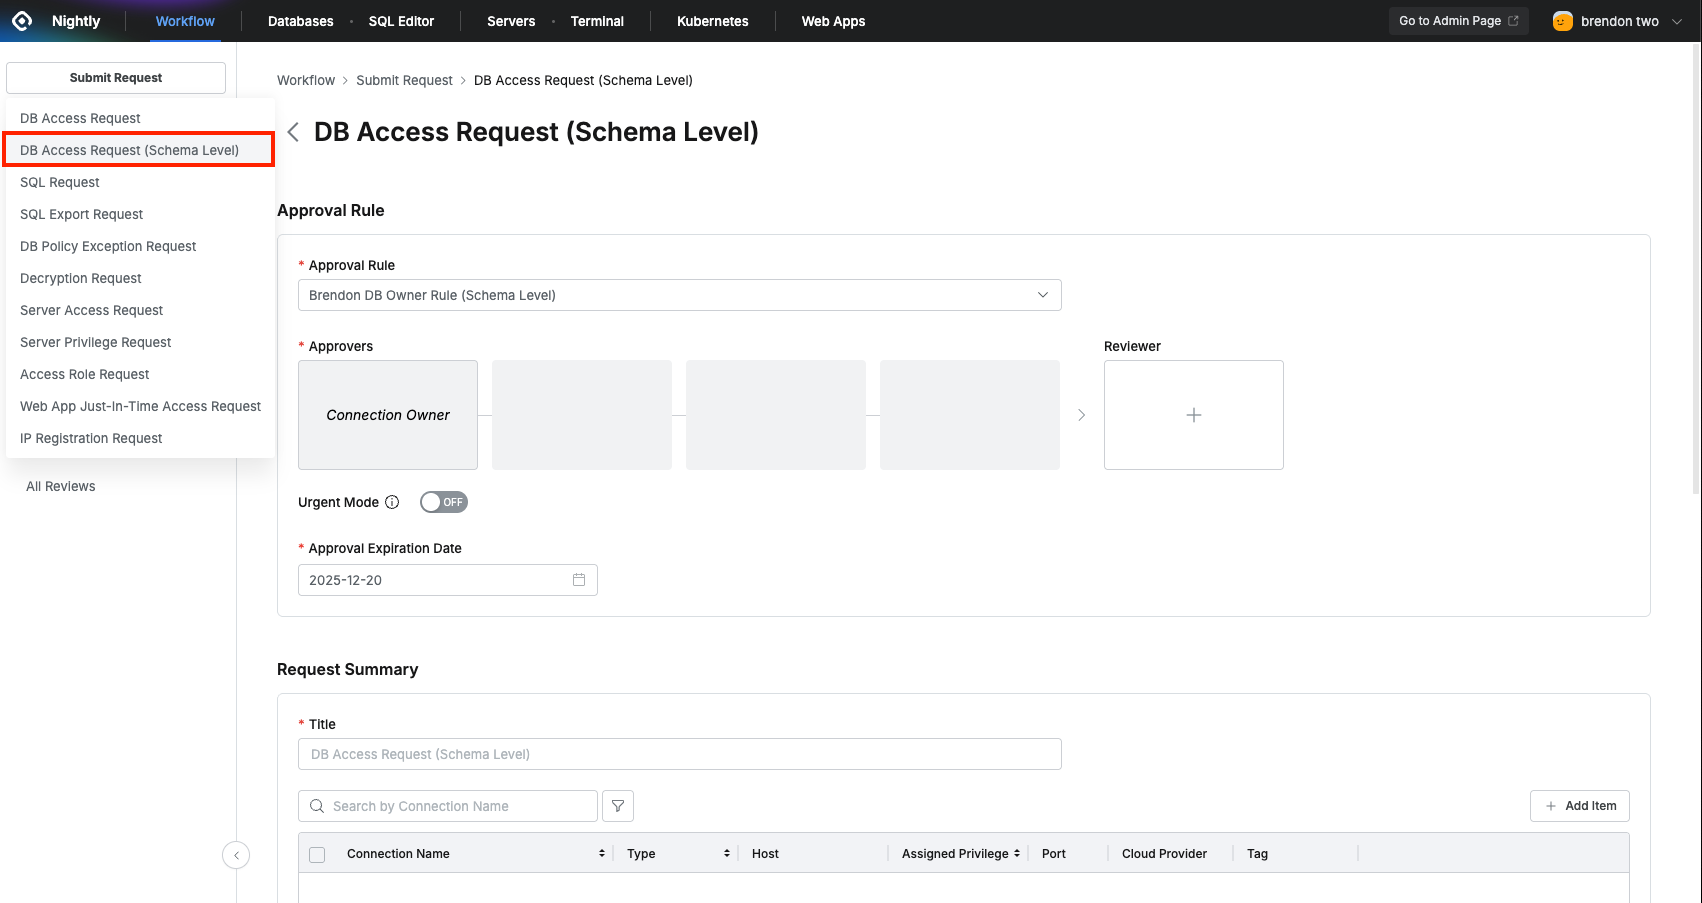
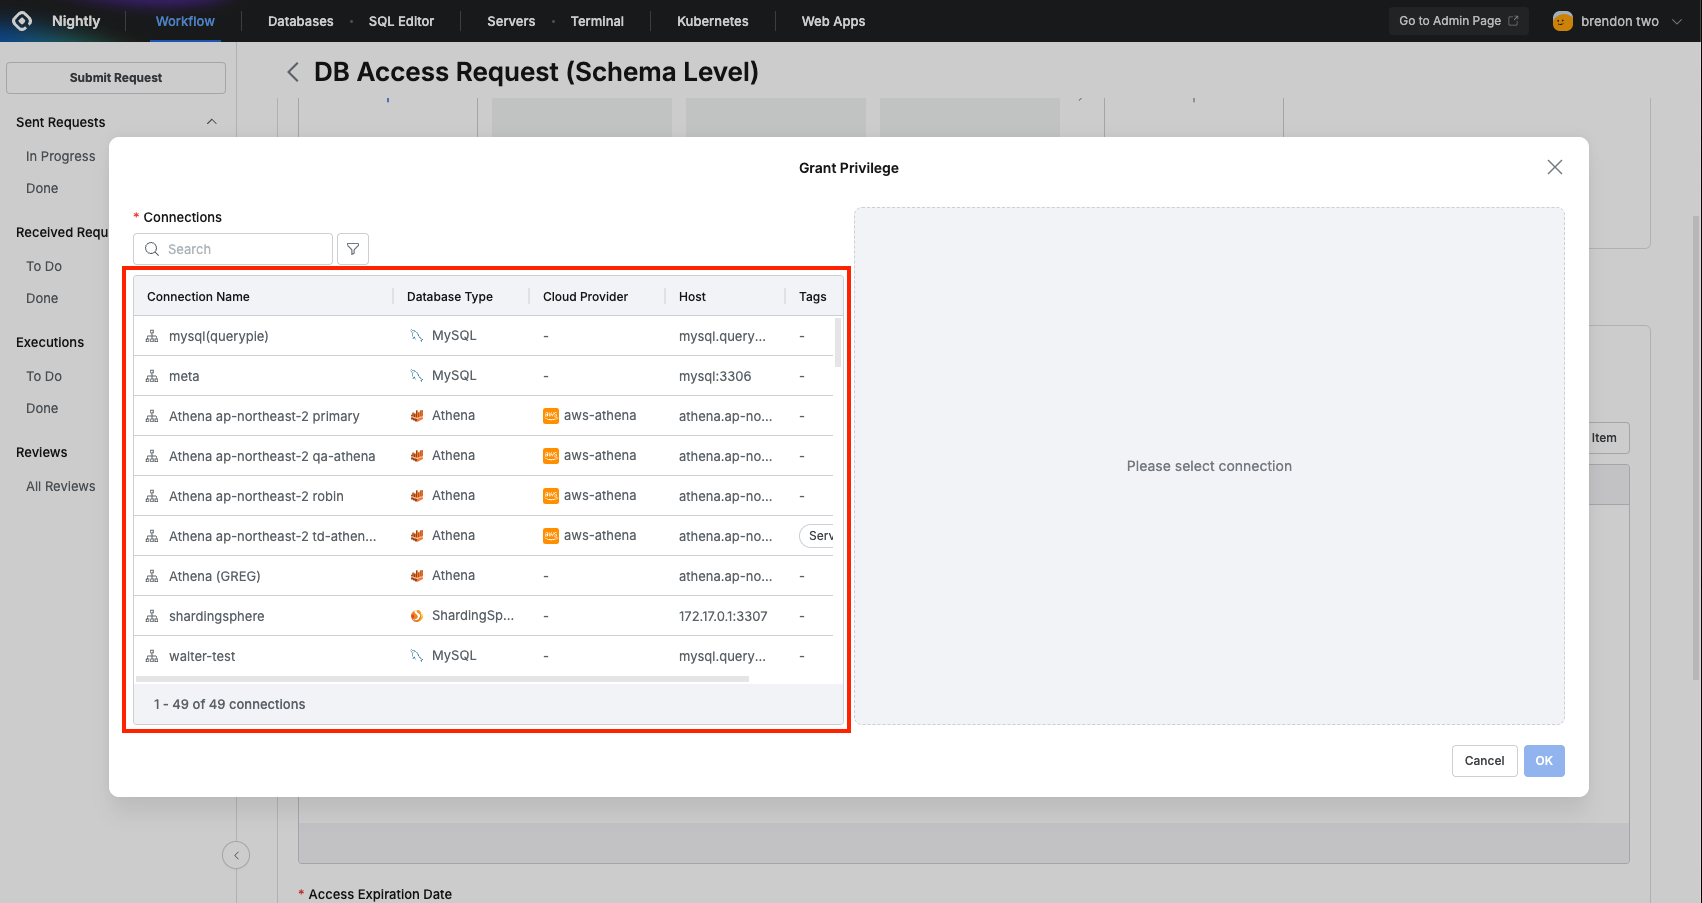
- Click the
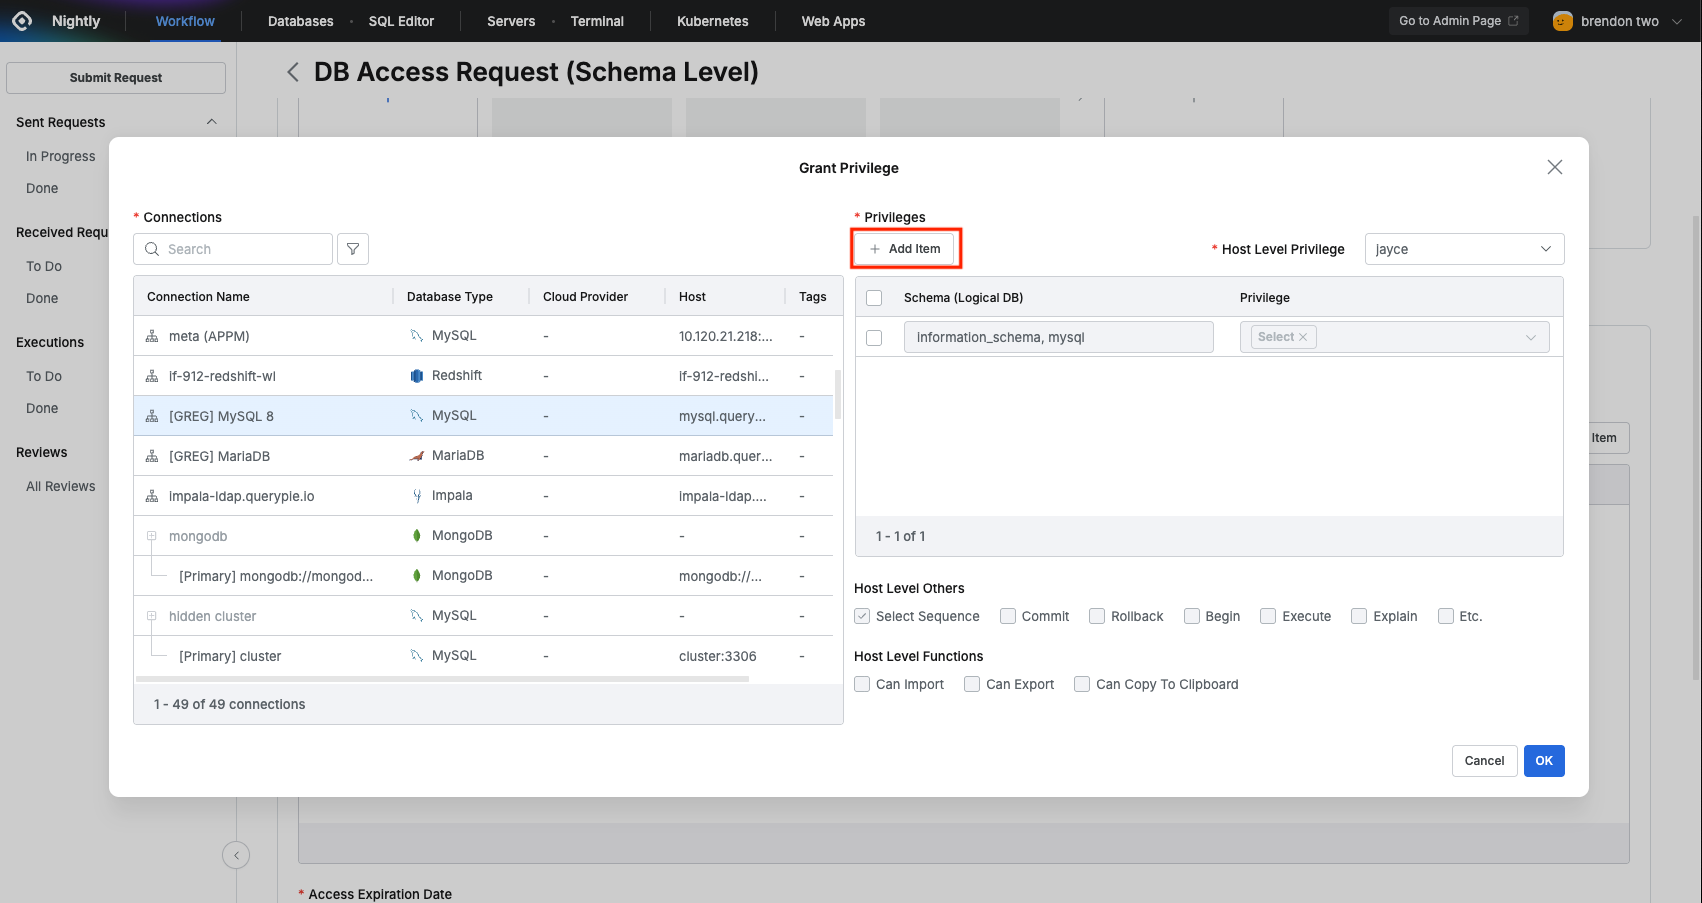
Add Itembutton.
- Select the connection to connect to from the left panel.
- When you select a connection, you can see that SELECT privilege is automatically granted to schemas that require select privilege in the privilege item on the right. You can remove this item, but if you do, errors may occur when querying schema structure in Web editor or proxy, so do not remove this item unless necessary.
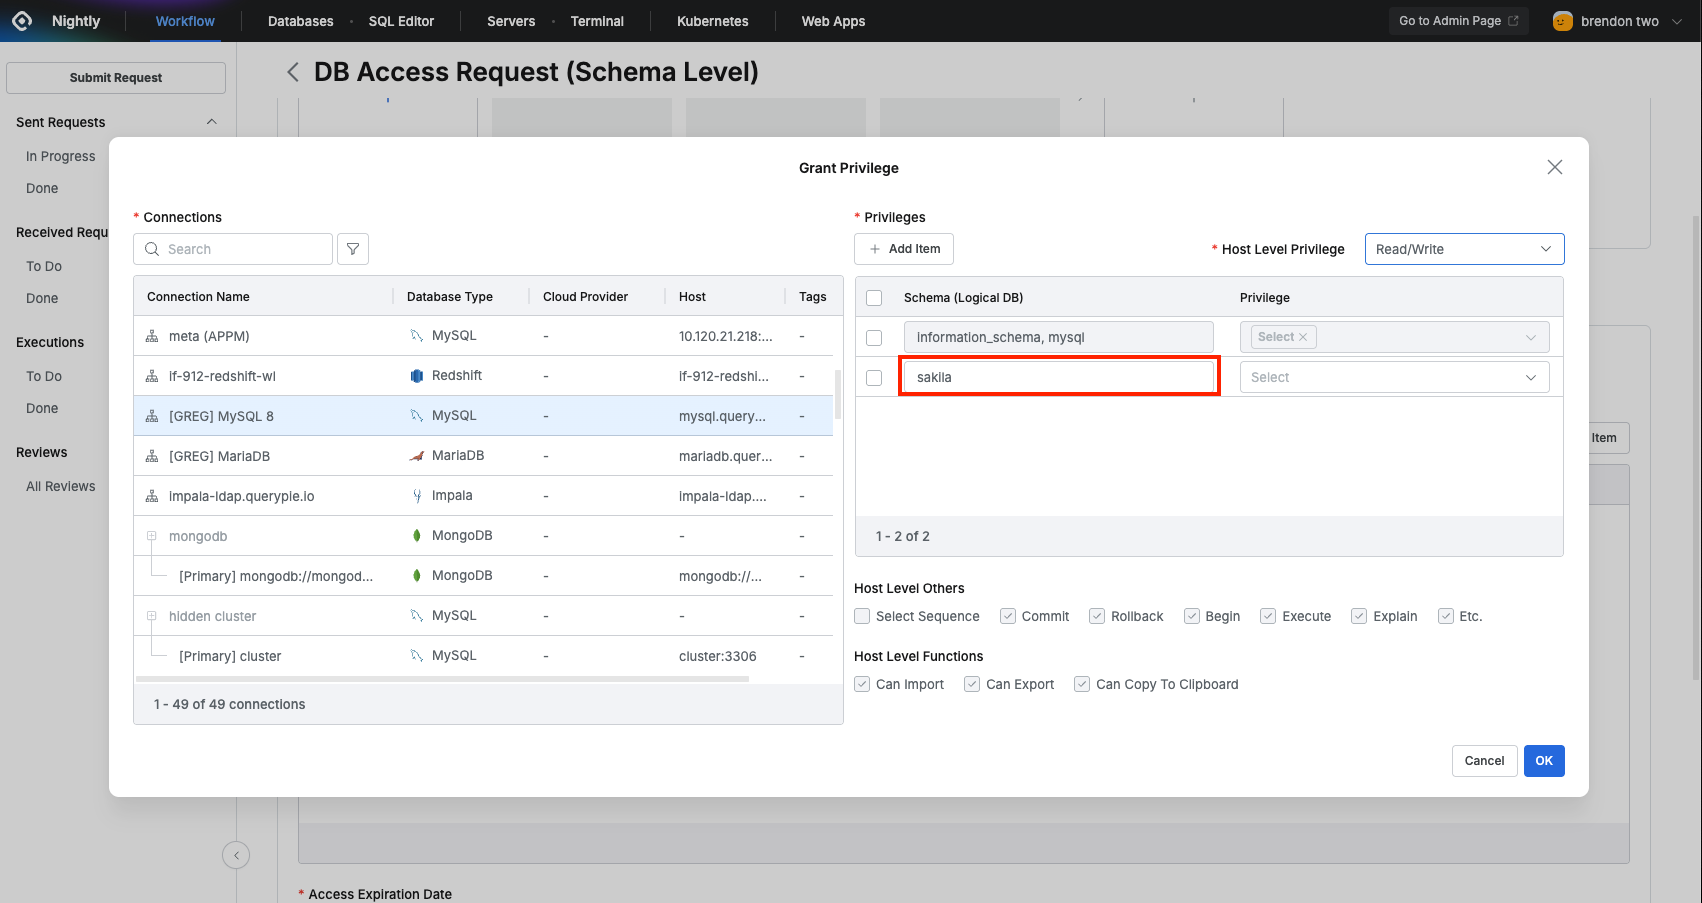
Click theAdd Itembutton.
- A row is added below where you can add targets. For DBMS with schema structure (Oracle, Postgres, etc.), you must enter the target name in the format
{database name}.{schema name}. For DBMS without schema structure like MySQL, enter only the logical DB name.
- Oracle example: ORCLDB.TESTUSER
- PostgreSQL example: testdb.test_schema
- MySQL example: sakila
- To assign privileges, first select the desired privilege type from the Host Level Privilege item at the top right of the popup window. (Schema level privileges can only be granted within the scope of host level privileges. For example, if you select Read/Write as Host Level Privilege, you can grant SELECT, INSERT, etc. within that scope, but if you select Read-Only as Host Level Privilege, you can only specify SELECT.) If there are no privileges needed for Host Level privilege assignment, you must request the administrator to create a privilege type with specific privileges for that connection.
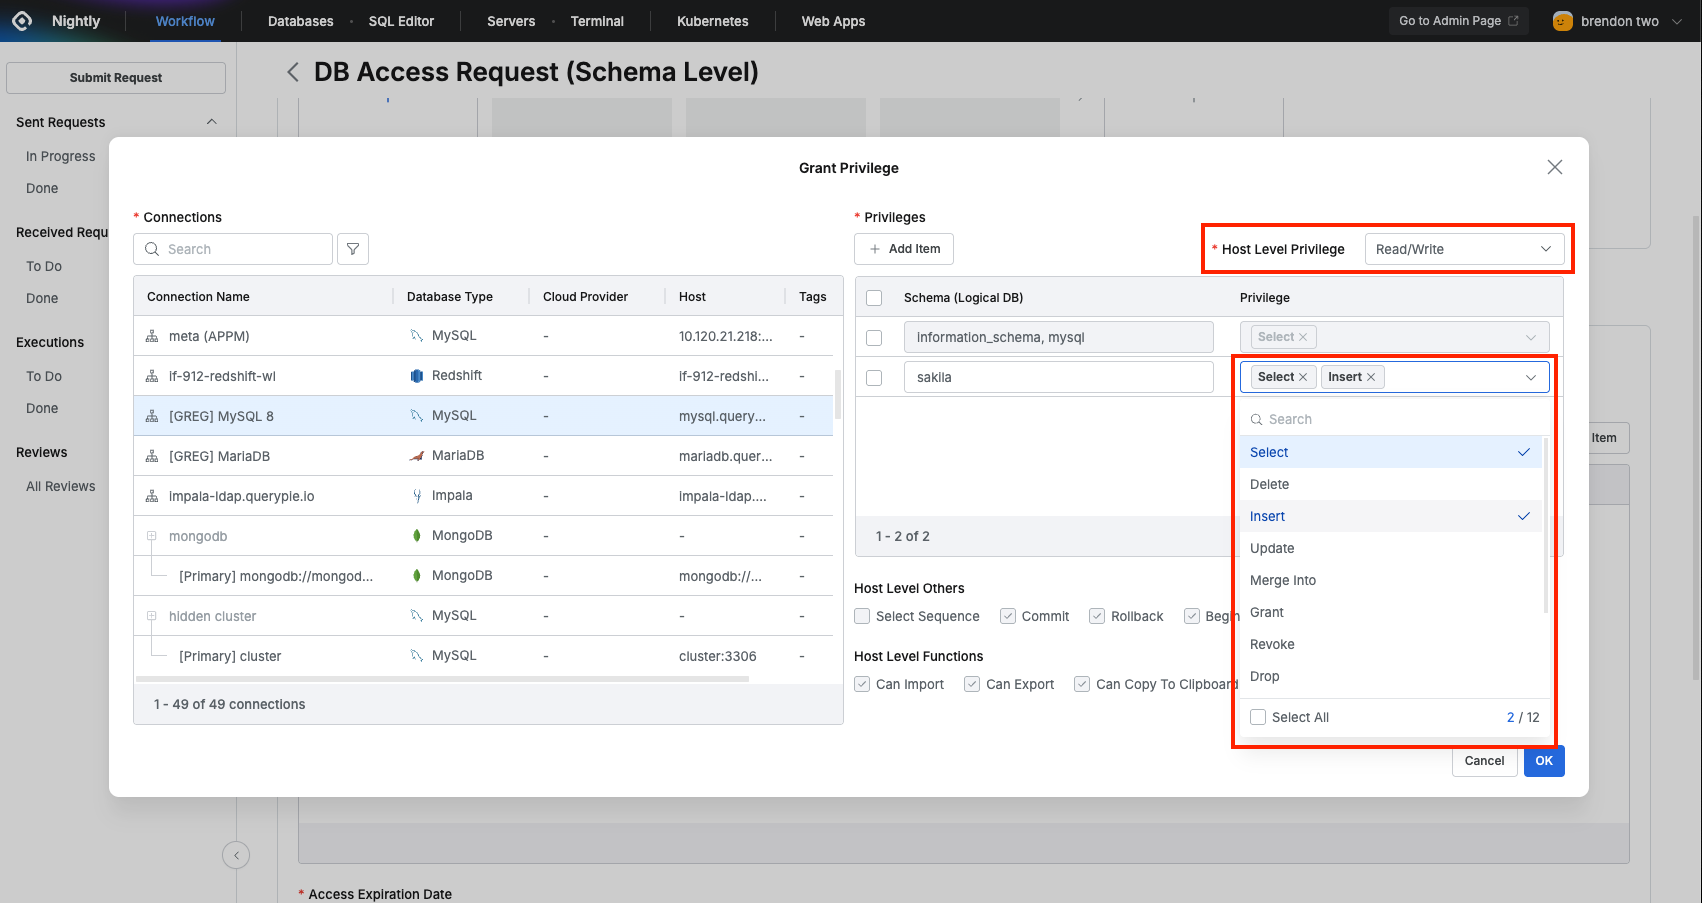
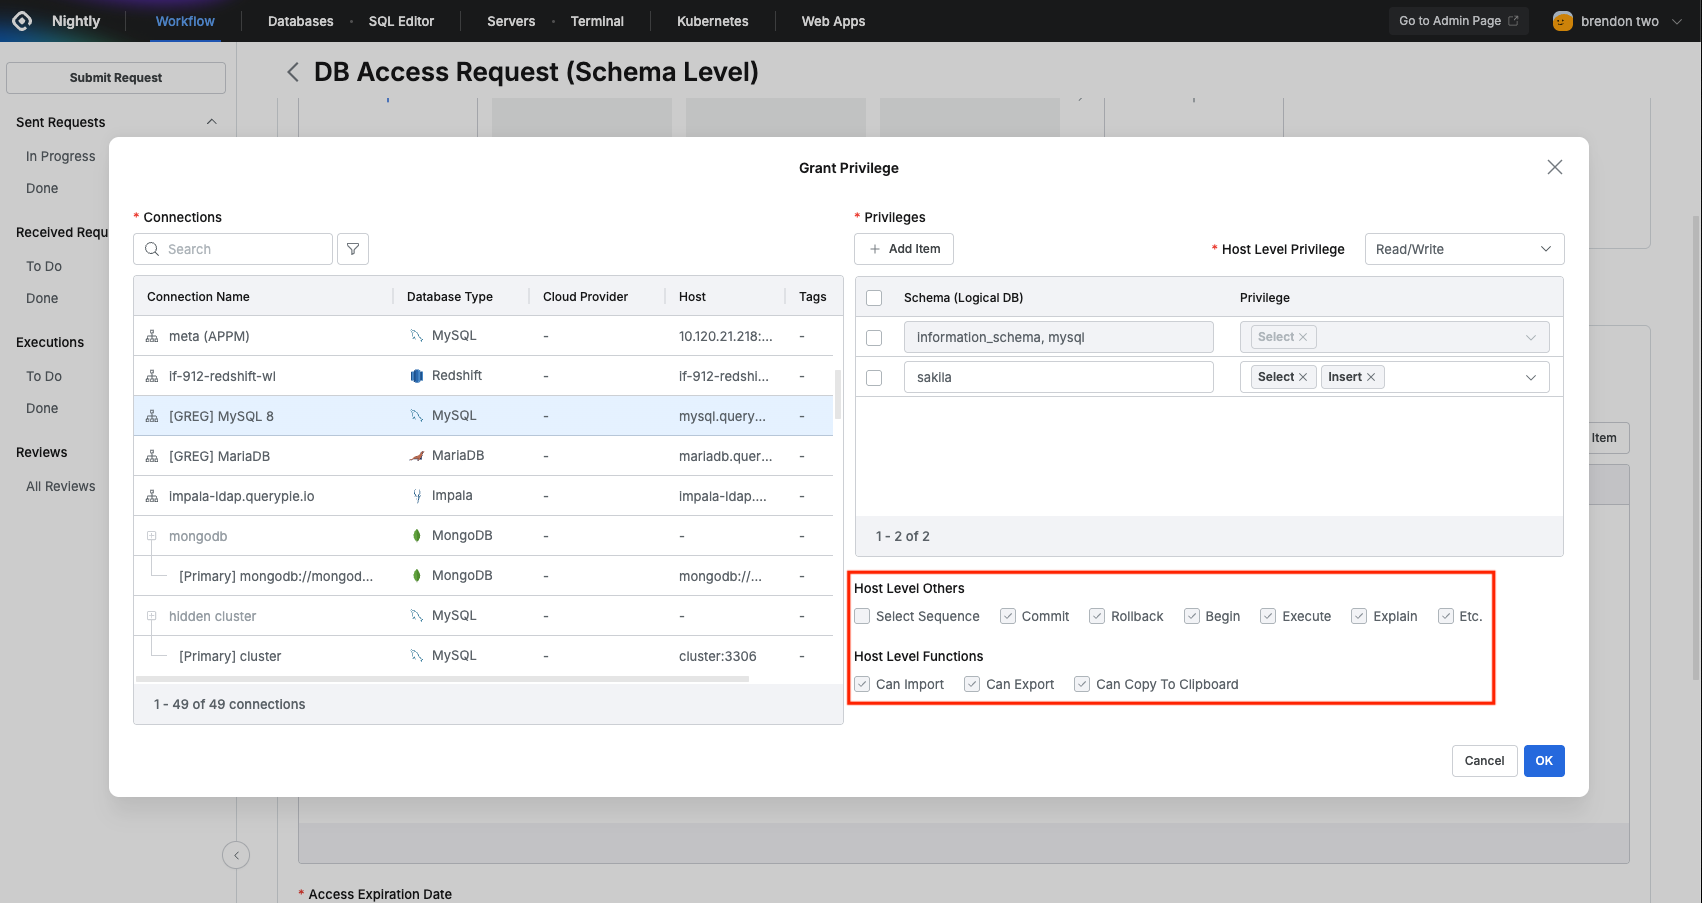
- Host Level Others and Host Level Functions displayed below are read-only. They are used to check upper-level information because Schema Level privileges are dependent on the properties of Host Level Privileges.
- Click the
OKbutton, enter the remaining parts of the form, and click theSubmitbutton to complete the request.