Synchronizing DB Resources from MS Azure
Overview
QueryPie supports MS Azure integration for database registration and management. You can synchronize resources within Azure to register them as databases managed by QueryPie, and grant access permissions and set policies for users and groups for the synchronized databases.
Registering Azure Integration Information in QueryPie
Search Filter functionality has been added in 11.3.0 to synchronize only resources with specific tags.
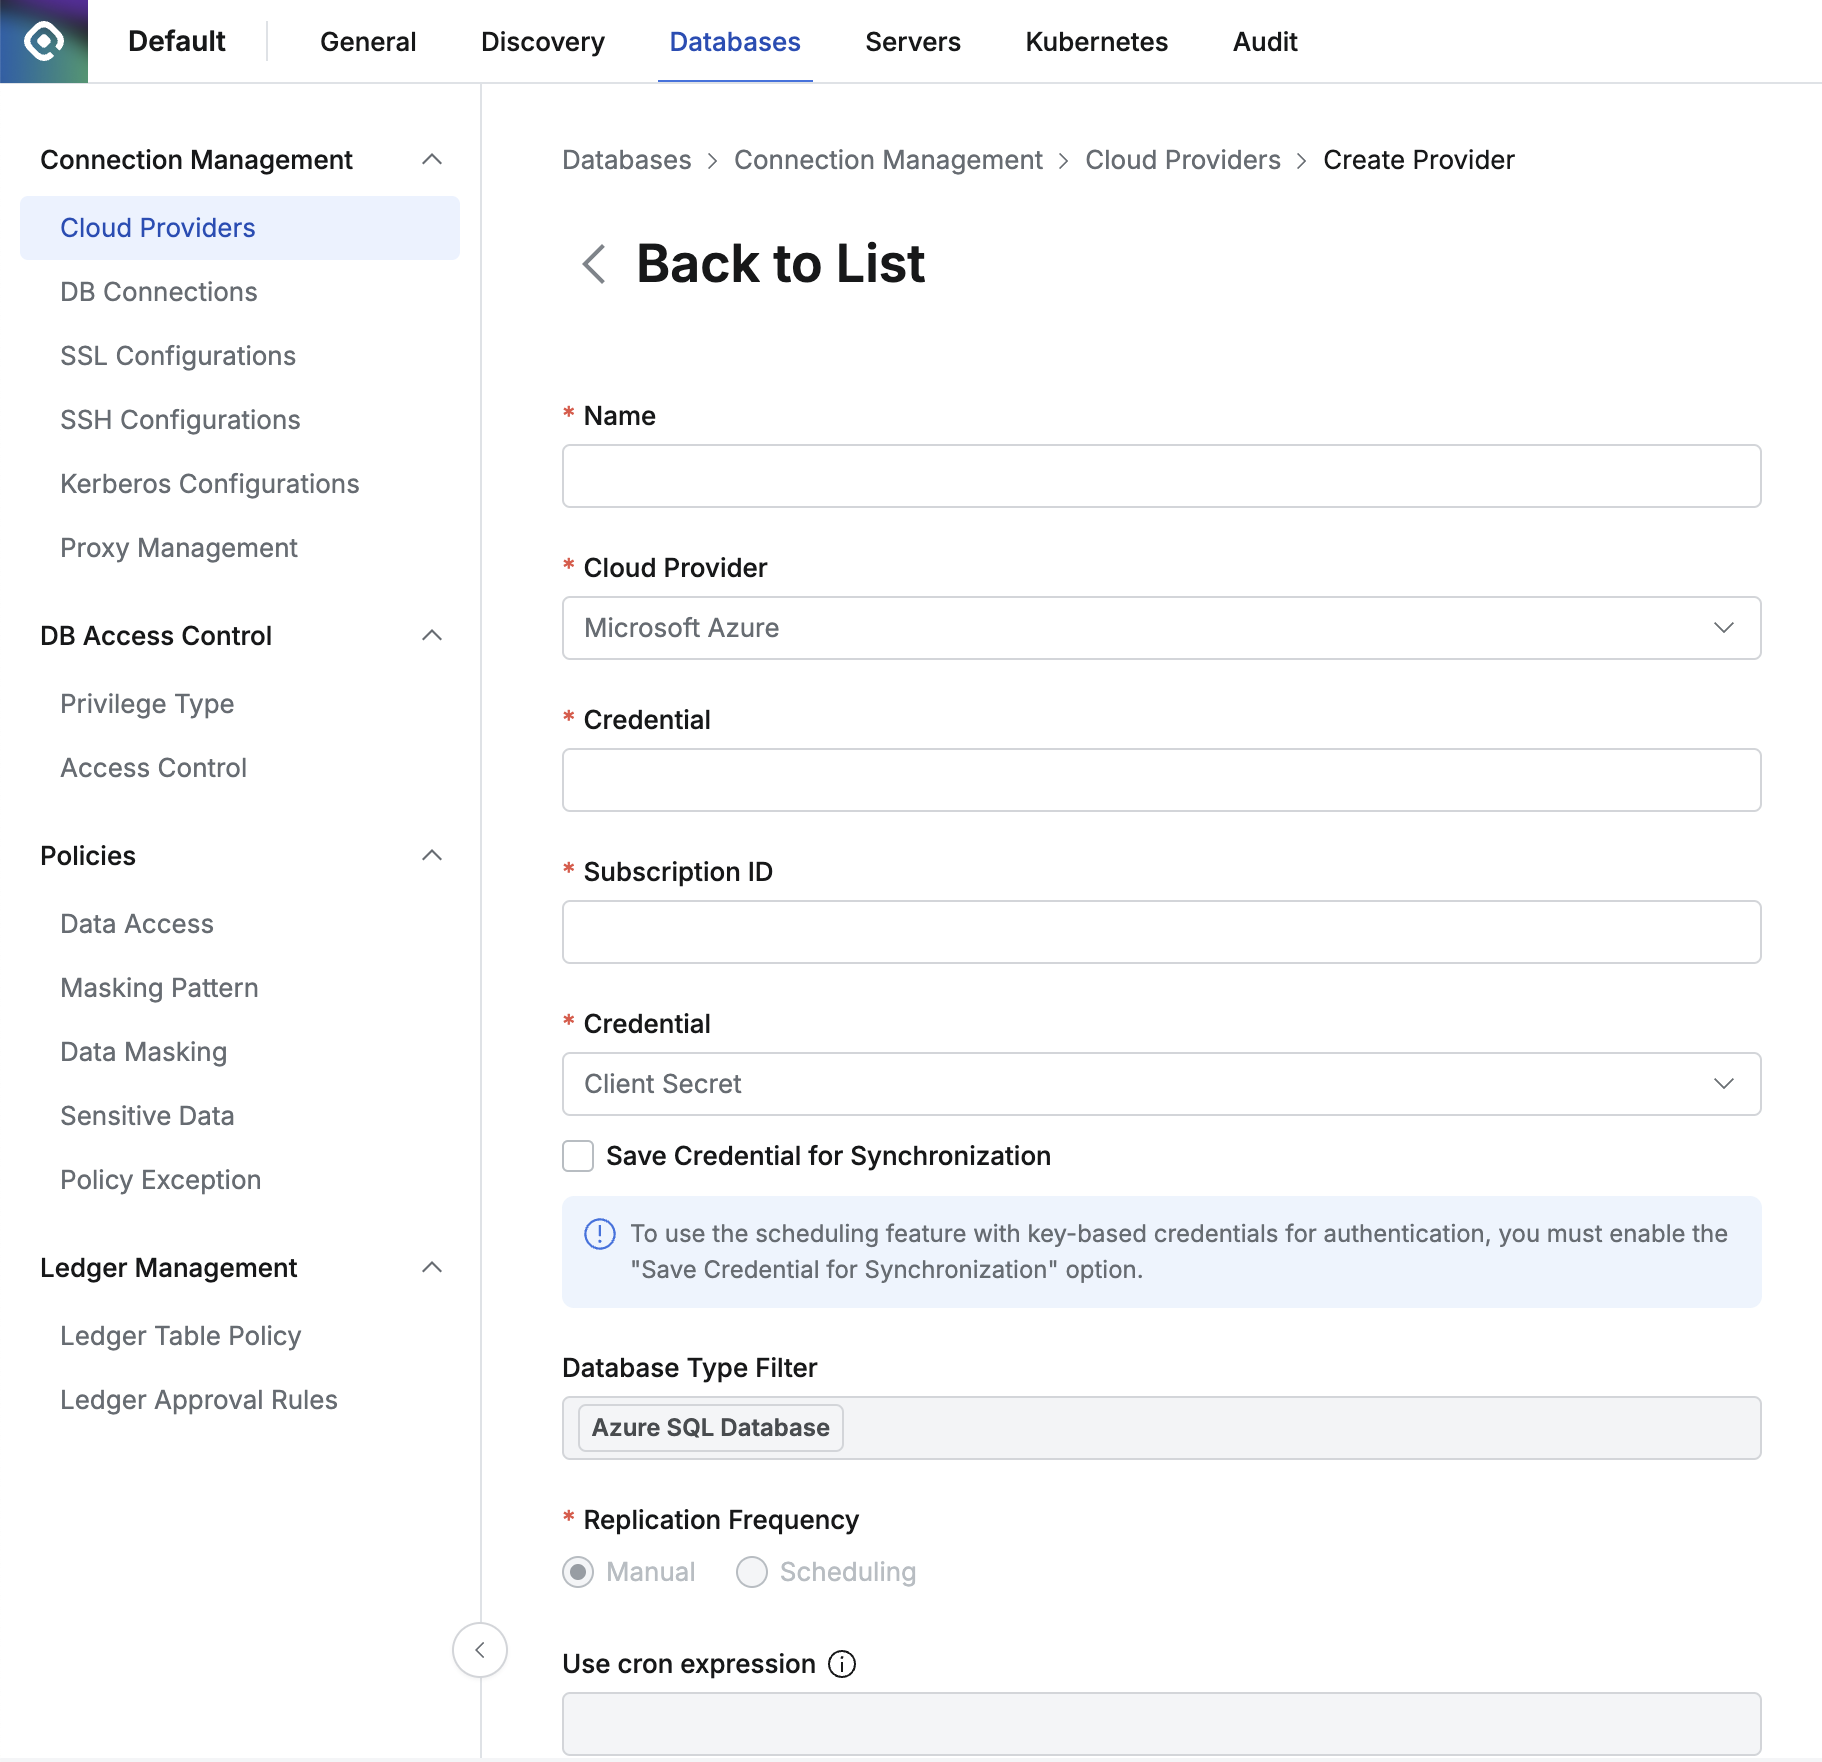
Administrator > Databases > Connection Management > Cloud Providers > Create Provider
- Navigate to the Cloud Provider menu from the Database settings menu.
- Click the
Create Providerbutton in the top right. - Enter a name that can distinguish the provider in the Name field.
- Cloud Provider Select Microsoft Azure.
- Enter the Tenant ID of the resources you want to synchronize.
- Subscription ID Enter the Subscription ID.
- Enter the Credential information required to synchronize resources. Currently, only Client Secret method is supported.
- Provides a manual synchronization method that enters Azure’s Client Secret when clicking the
Synchronizebutton.
Starting from QueryPie 10.2.2, the “Save Credential for Synchronization” option is provided to enable scheduled synchronization even when using Client Secret as the Credential type.
- Provides a manual synchronization method that enters Azure’s Client Secret when clicking the
- Database Type Filter Select the resources you want to synchronize.
- Currently, only Azure SQL Database can be synchronized.
- Search Filter You can get a list of specific types of resources you want to synchronize.
- Search Filter works the same way as AWS search. You can use values such as name, host, OS, tags, etc. as filters, and you can conveniently enter search conditions and filters using the Enter key in the following order.
- Enter Key value and press Enter → Select search condition and press Enter → Enter Value and press Enter
- Search Filter works the same way as AWS search. You can use values such as name, host, OS, tags, etc. as filters, and you can conveniently enter search conditions and filters using the Enter key in the following order.
- Replication Frequency Select the synchronization method.
- Manual : A method that synchronizes manually only when you want to synchronize.
- Scheduling : A method that synchronizes resources through periodic scheduling. Provides Cron Expressions.
- Auto Configuration Upon Initial Synchronization You can specify some values for DBs that are first synchronized from the Cloud Provider. Initial value settings cannot be modified after saving the Cloud Provider. If changes to this setting are needed, you must delete the Cloud Provider and register it again.
- Tag : You can automatically add tags to synchronized DBs.
- If you enter
{vpcid}in the tag value, the VPC ID of the Cloud that the DB belongs to will be automatically filled. - Example: If you set the tag Key to “Network” and enter Value as
{vpcid}, when the DB is in “vpc-1a2b3c4d” VPC, the “Network: vpc-1a2b3c4d” tag will be automatically created.
- If you enter
- Tag : You can automatically add tags to synchronized DBs.
- Click the
Savebutton to save the Cloud Provider.
Save Credential for Synchronization Option
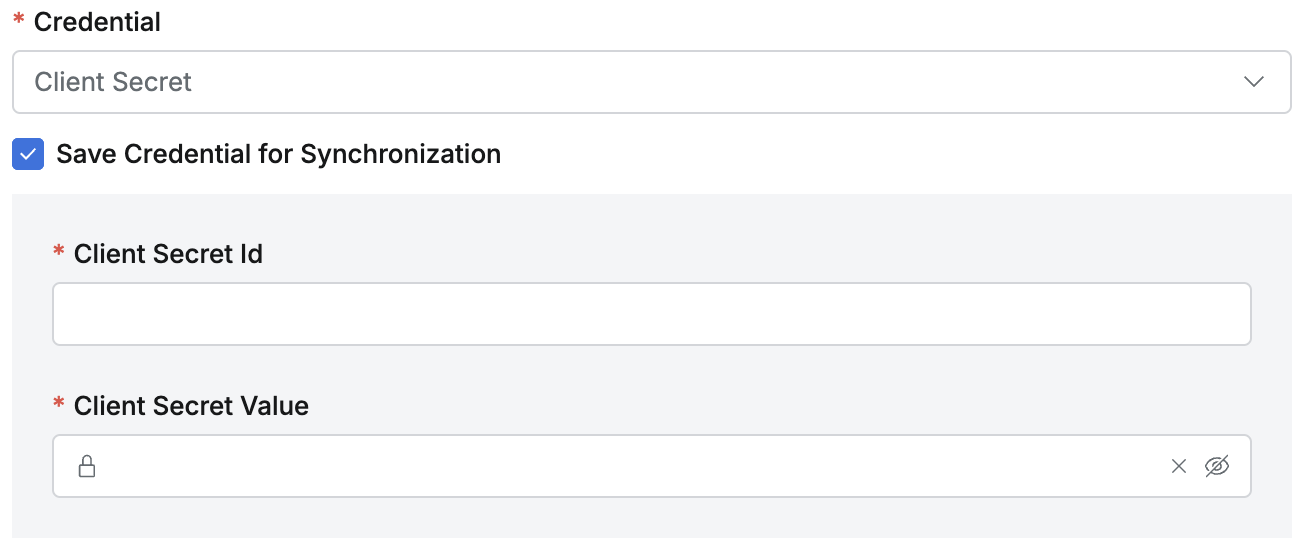
Save Credential for Synchronization
- Synchronization settings saved with this option enabled cannot be disabled on the synchronization settings detail page, so you must choose carefully. Saved credentials cannot be replaced. If you need to use different credentials, you must create new synchronization settings. If credential changes are needed, we recommend creating credentials with the same permissions as the existing ones, creating new synchronization settings, and then deleting the existing synchronization settings.
- Synchronization settings saved without this option enabled can be enabled by checking the checkbox on the detail page.
- When this option is enabled, you can synchronize manually or set a schedule.
Synchronizing and Managing Registered Azure Cloud Provider

Administrator > Databases > Connection Management > Cloud Providers > Details
- Navigate to the Cloud Provider menu from the Database settings menu.
- Click on the registered Cloud Provider to enter the detailed information screen.
- Click the
Synchronizebutton in the top right to synchronize resources from Azure. - You can check the synchronization progress in the displayed Synchronization Log, and also check the synchronization history in the Administrator > General > Systems > Jobs menu.
- Once a Cloud Provider is registered, the Provider basic information and authentication information cannot be changed.
- Name : Changeable
- Cloud Provider : Not changeable
- Tenant ID : Not changeable
- Subscription ID : Not changeable
- Credential : Not changeable
- “Save Credential for Synchronization” : Can be changed from disabled to enabled, but cannot be changed from enabled to disabled
- Database Type Filter : Not changeable
- Replication Frequency : Cloud synchronization settings with the “Save Credential for Synchronization” option enabled can change this value. “Save Credential for Synchronization” is disabled by default.
Synchronization settings saved without the “Save Credential for Synchronization” option enabled can be enabled by checking the checkbox on the detail page. Like when creating new ones, this setting cannot be disabled again after being enabled so you must choose carefully.
Registering Applications and Obtaining Client Secret Information in Microsoft Azure
- Access the Microsoft Entra ID menu in the Azure console.
- Register a new application in the ‘App registrations’ menu on the left menu.
- Enter the ID value of the application as the Client Secret ID.
- Move to the ‘Certificates & secrets’ menu on the detail page of the registered application.
- Click the ‘New client secret’ button at the top to generate a new client secret.
- Access the ‘IAM’ menu of ‘Subscriptions’.
- Assign the previously registered application to the ‘Reader’ role through ‘Add role assignment’.