Secret Store Integration
Overview
In the Integrations menu, you can enter and manage Secret Store information.
Through Secret Store, you can securely manage DB and server authentication information, and safely connect to DB and servers without directly exposing authentication information to users. When storing connection information, you can configure it to authenticate by retrieving authentication information from Secret Store rather than storing it within QueryPie.
The actual use of Secret Store can be configured in the Security menu. The following is a list of Secret Store services currently supported by QueryPie.
- HashiCorp Vault
- Microsoft Active Directory
- AWS Secrets Manager (Available from QueryPie ACP version 11.6.0)
Entering HashiCorp Vault Integration Information
Prerequisites for Vault Integration:
- Vault Server for QueryPie Integration:
- To integrate with Vault, the Vault server must be running. The Vault service must be running, able to process API requests, and perform authentication in Vault.
- Authentication Information for Resources Stored in Vault:
- To integrate with Vault, authentication information for services (e.g., DB, Server, etc.) that will connect to Vault must be pre-stored. This means having access permissions and authentication information (e.g., Username, Password, API keys, etc.) for the services to be integrated stored in Vault.
- Correct Path for Retrieving Authentication Information:
- The path used to identify credentials stored in Vault must be accurate. This refers to the path that specifies which credentials to retrieve from Vault. This path is connected to resources and credentials stored in Vault.
- For more detailed Vault configuration, please refer to the Hashicorp Vault Documentation official documentation .
Administrator > General > System > Integrations > HashiCorp Vault > Connect
- Click the
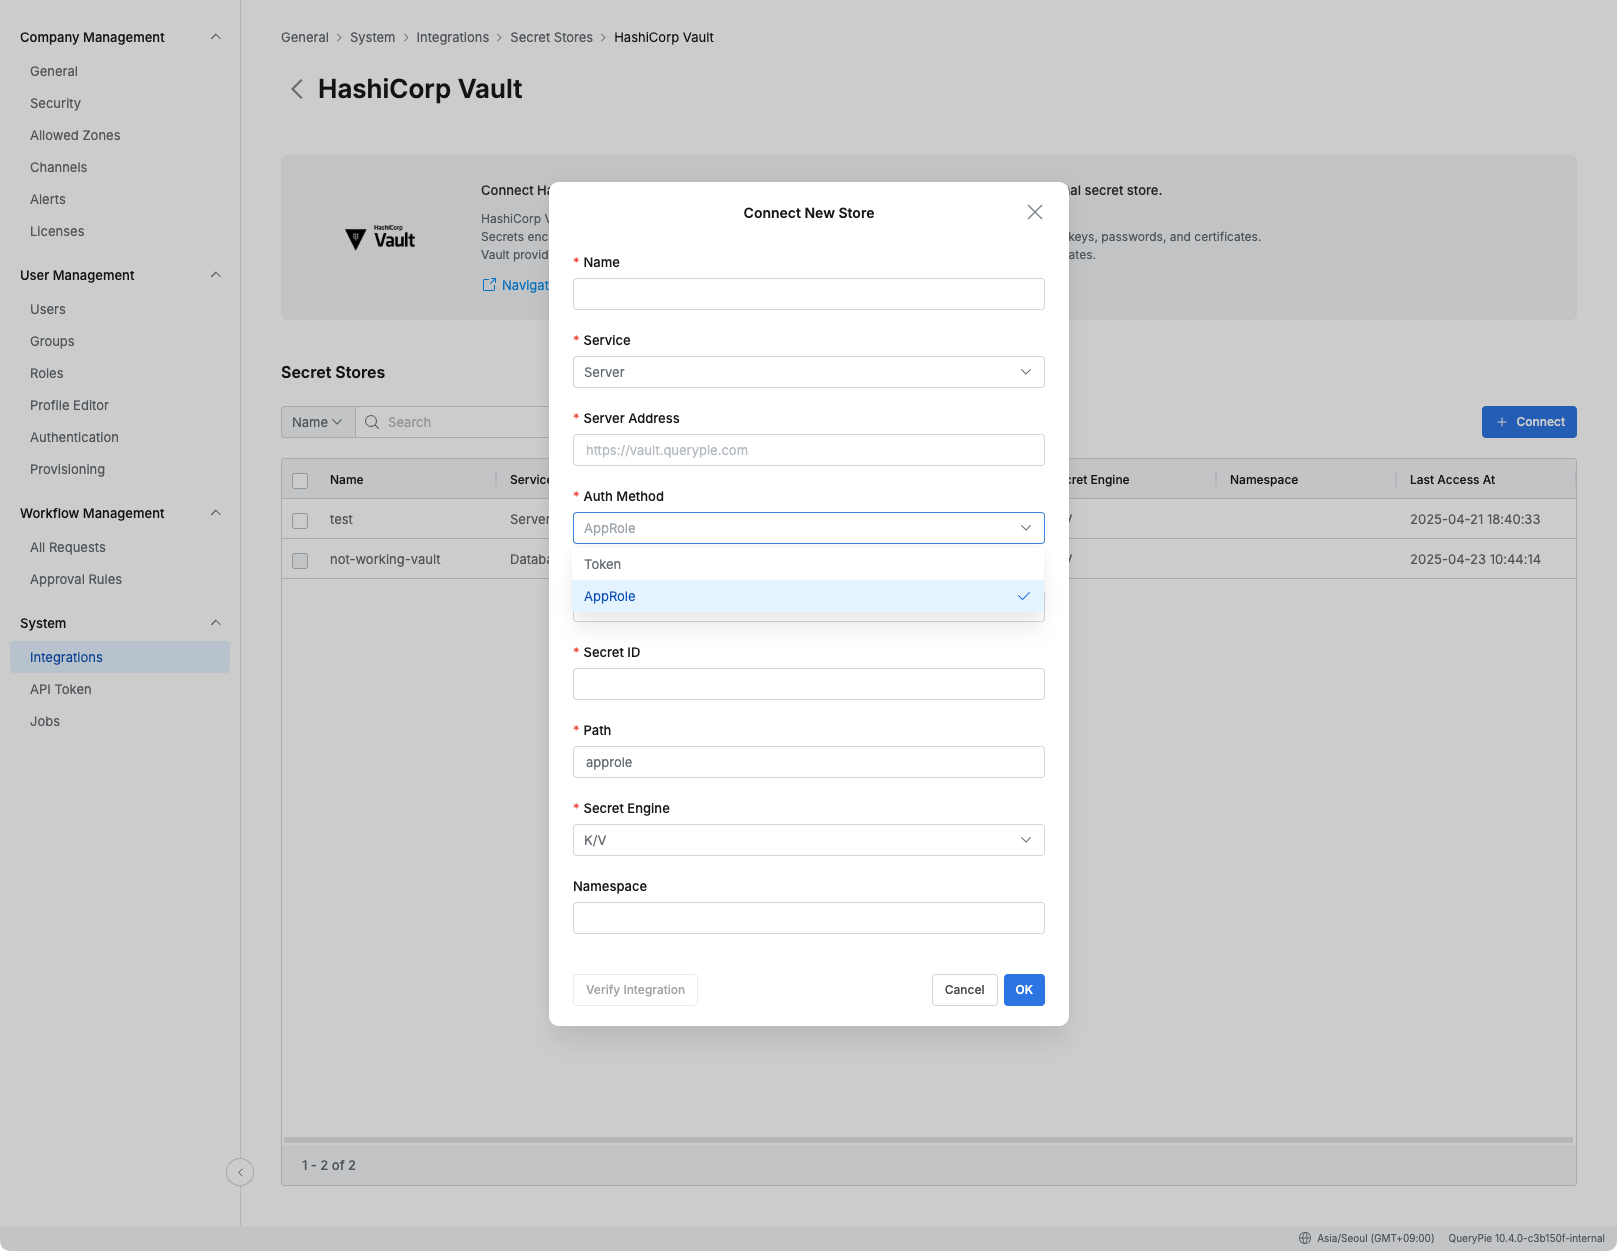
Connectbutton on the HashiCorp Vault page. - Name : Enter the name of the Secret Store.
- Service: Select the service that will use this Secret Store connection (choose one of Database / Server / Kubernetes). (Kubernetes is supported starting from version 11.5.4.)
- Service items cannot be changed after saving.
- The available Secret engines by service are as follows.
- Database : K/V, Database, Google Cloud
- Server : K/V, SSH OTP, SSH CA
- Kubernetes : Google Cloud
- Enter authentication information for integration according to the selected Secret Store type.
- Server Address : Enter the address of the Secret Store server.
- Auth Method : Select the authentication method between QueryPie and Vault. It cannot be changed after configuration.
- Token : Authentication method using a Token issued by Vault.
- AppRole : Authentication method using a combination of Role ID and Secret ID.
- Role ID : Unique identifier required for AppRole authentication.
- Secret ID : Secret credentials required for login.
- Secret Engine : Select the Secret Engine type of Hashicorp Vault.
- Supports Database, K/V, SSH OTP, SSH CA, and Google Cloud.
(Google Cloud secret engine is supported starting from 11.5.6.) - Secret Engine cannot be changed after configuration.
- To change, you need to disable Secret Store settings for all connections and reconfigure.
- Supports Database, K/V, SSH OTP, SSH CA, and Google Cloud.
- Namespace : Enter the Vault Namespace.
- Namespace items cannot be changed after configuration.
- After entering all necessary information, click the Verify integration button.
- If all information is entered correctly, a ✔️ Success message will be displayed.
- Click the
OKbutton to save.
To actually store authentication information in Secret Store from QueryPie, you must enable Secret Store usage after completing Vault integration. For detailed information, please refer to the Secret Store configuration documentation.
Viewing HashiCorp Vault Integration Information
Administrator > General > System > Integrations > HashiCorp Vault
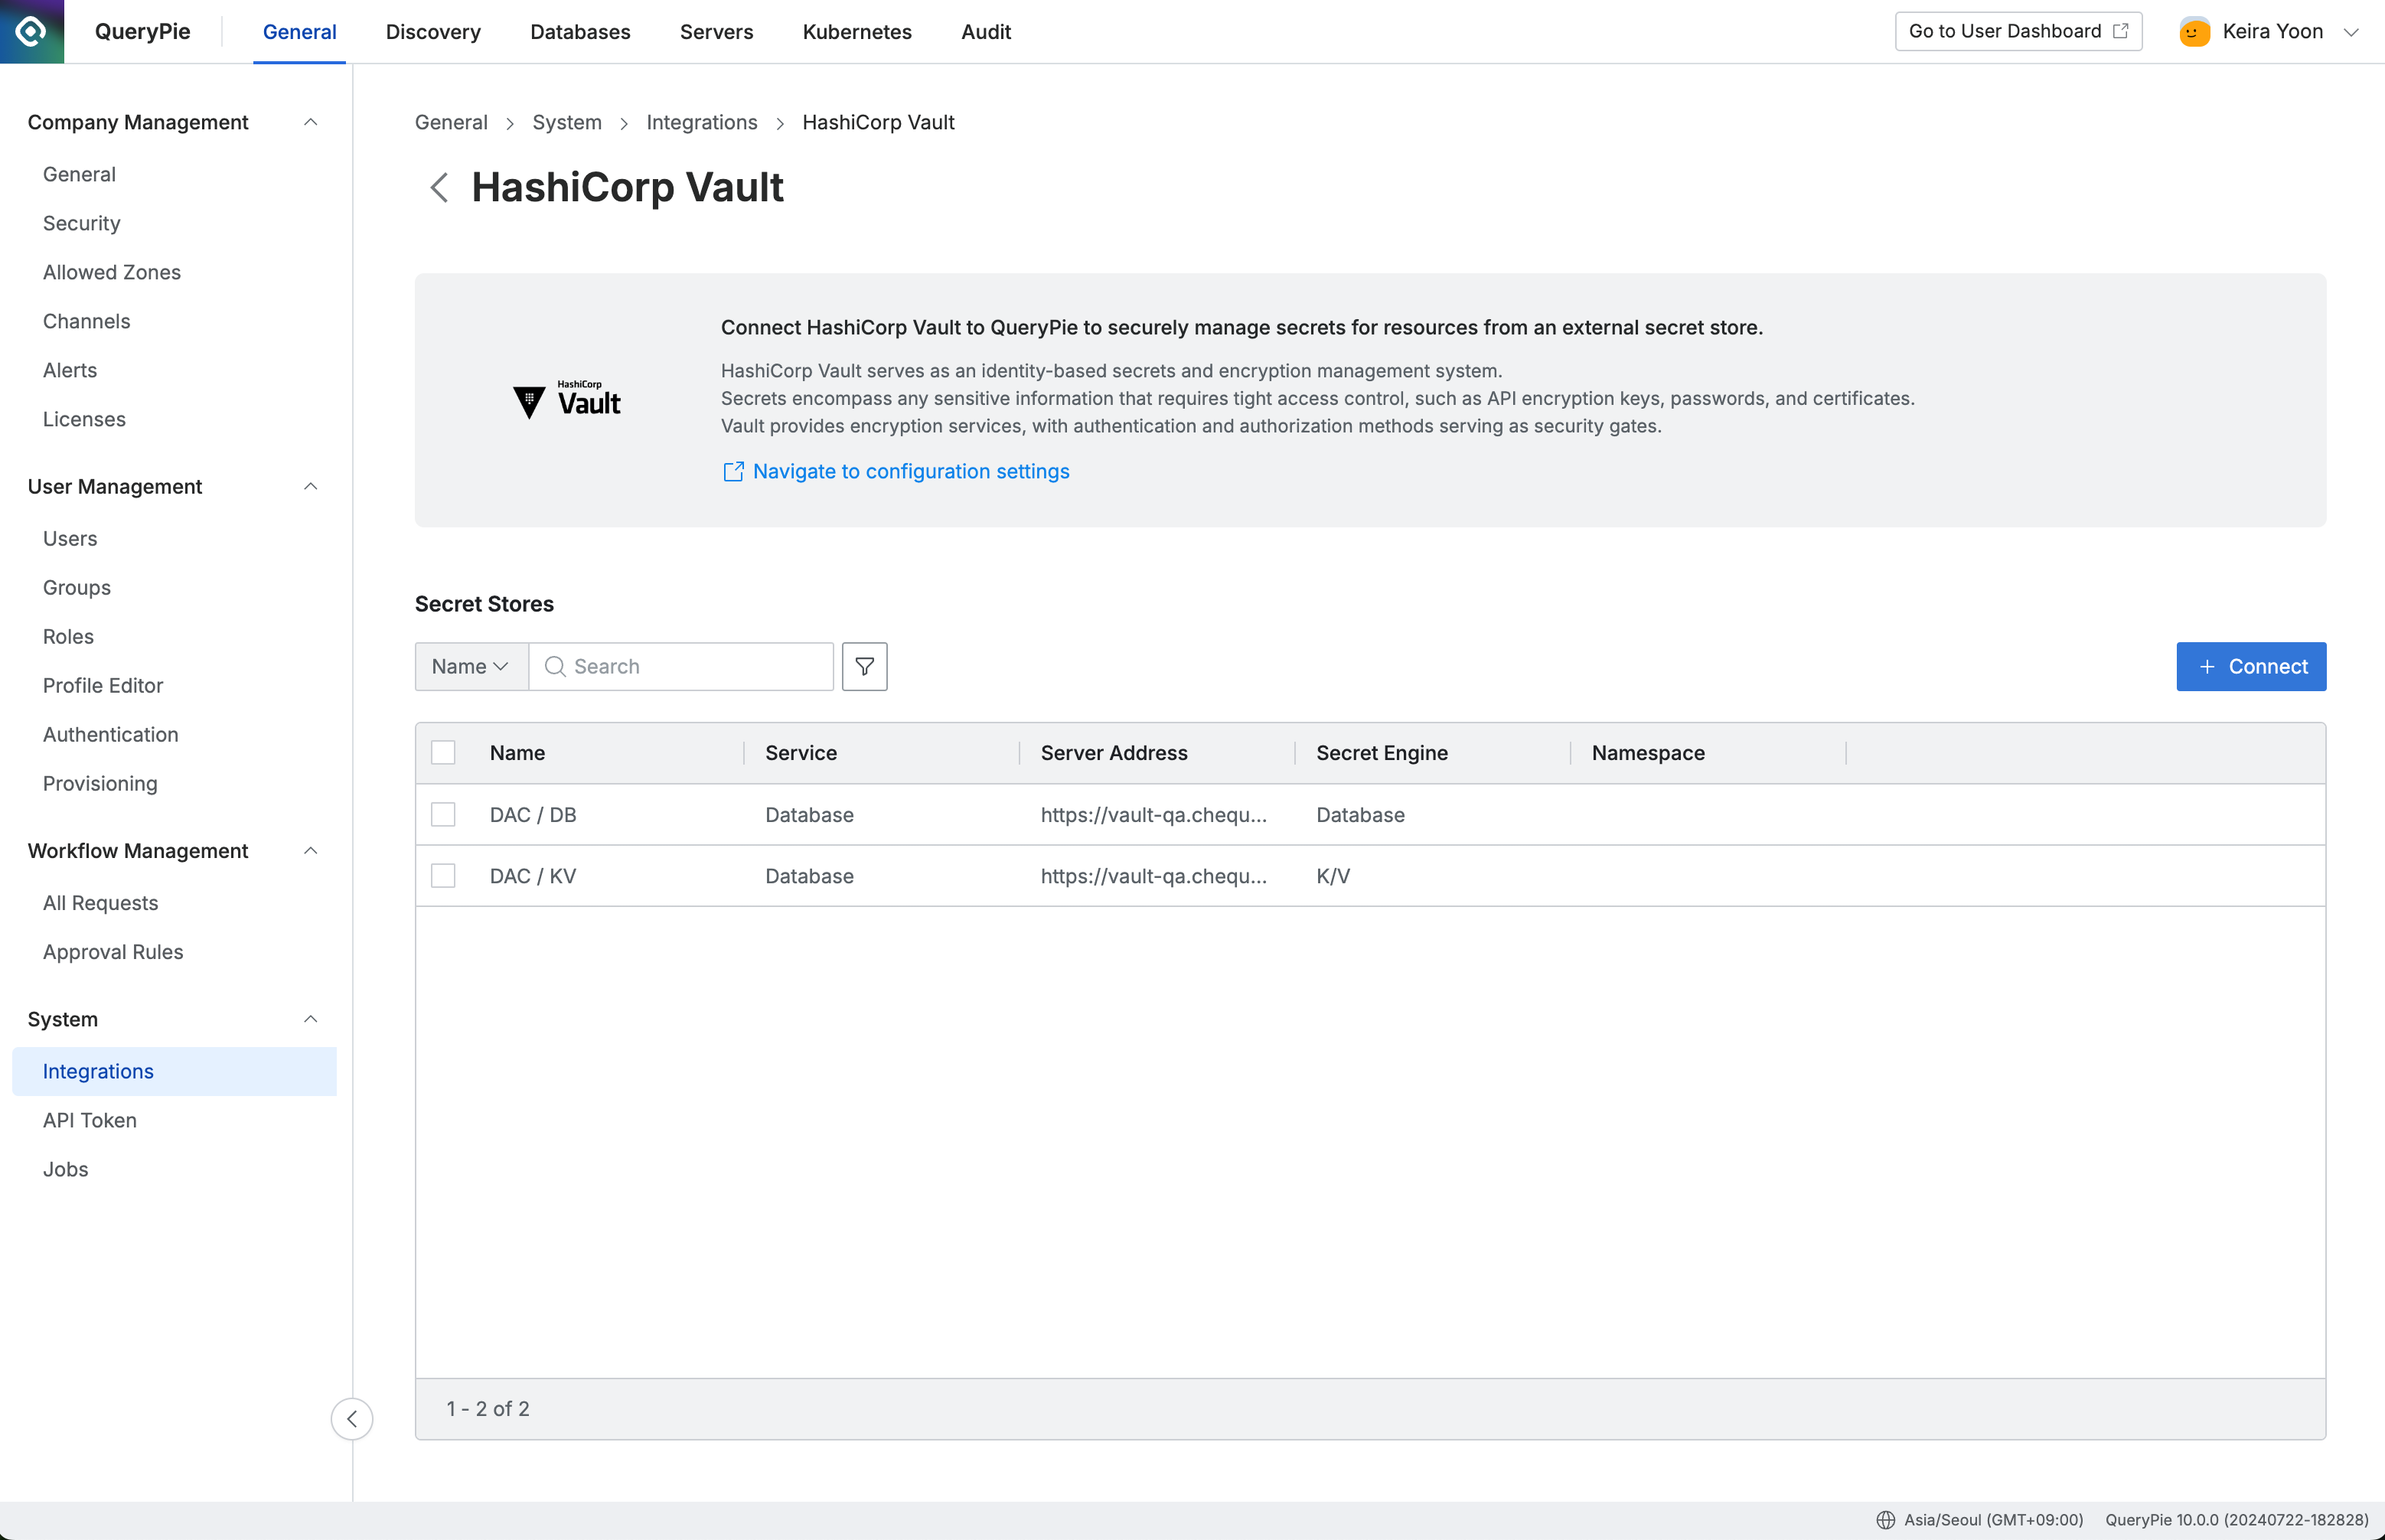
- Navigate to Administrator > General > System > Integrations > menu.
- Click on the HashiCorp Vault tile under Secret Store.
- You can view the list of currently integrated Vault instances.
Deleting HashiCorp Vault Integration Information
To disable Secret Store activation in the Administrator > General > Security page, you must first delete all integrated Vault information. The following is how to delete integration information.
Administrator > General > System > Integrations > HashiCorp Vault > Delete
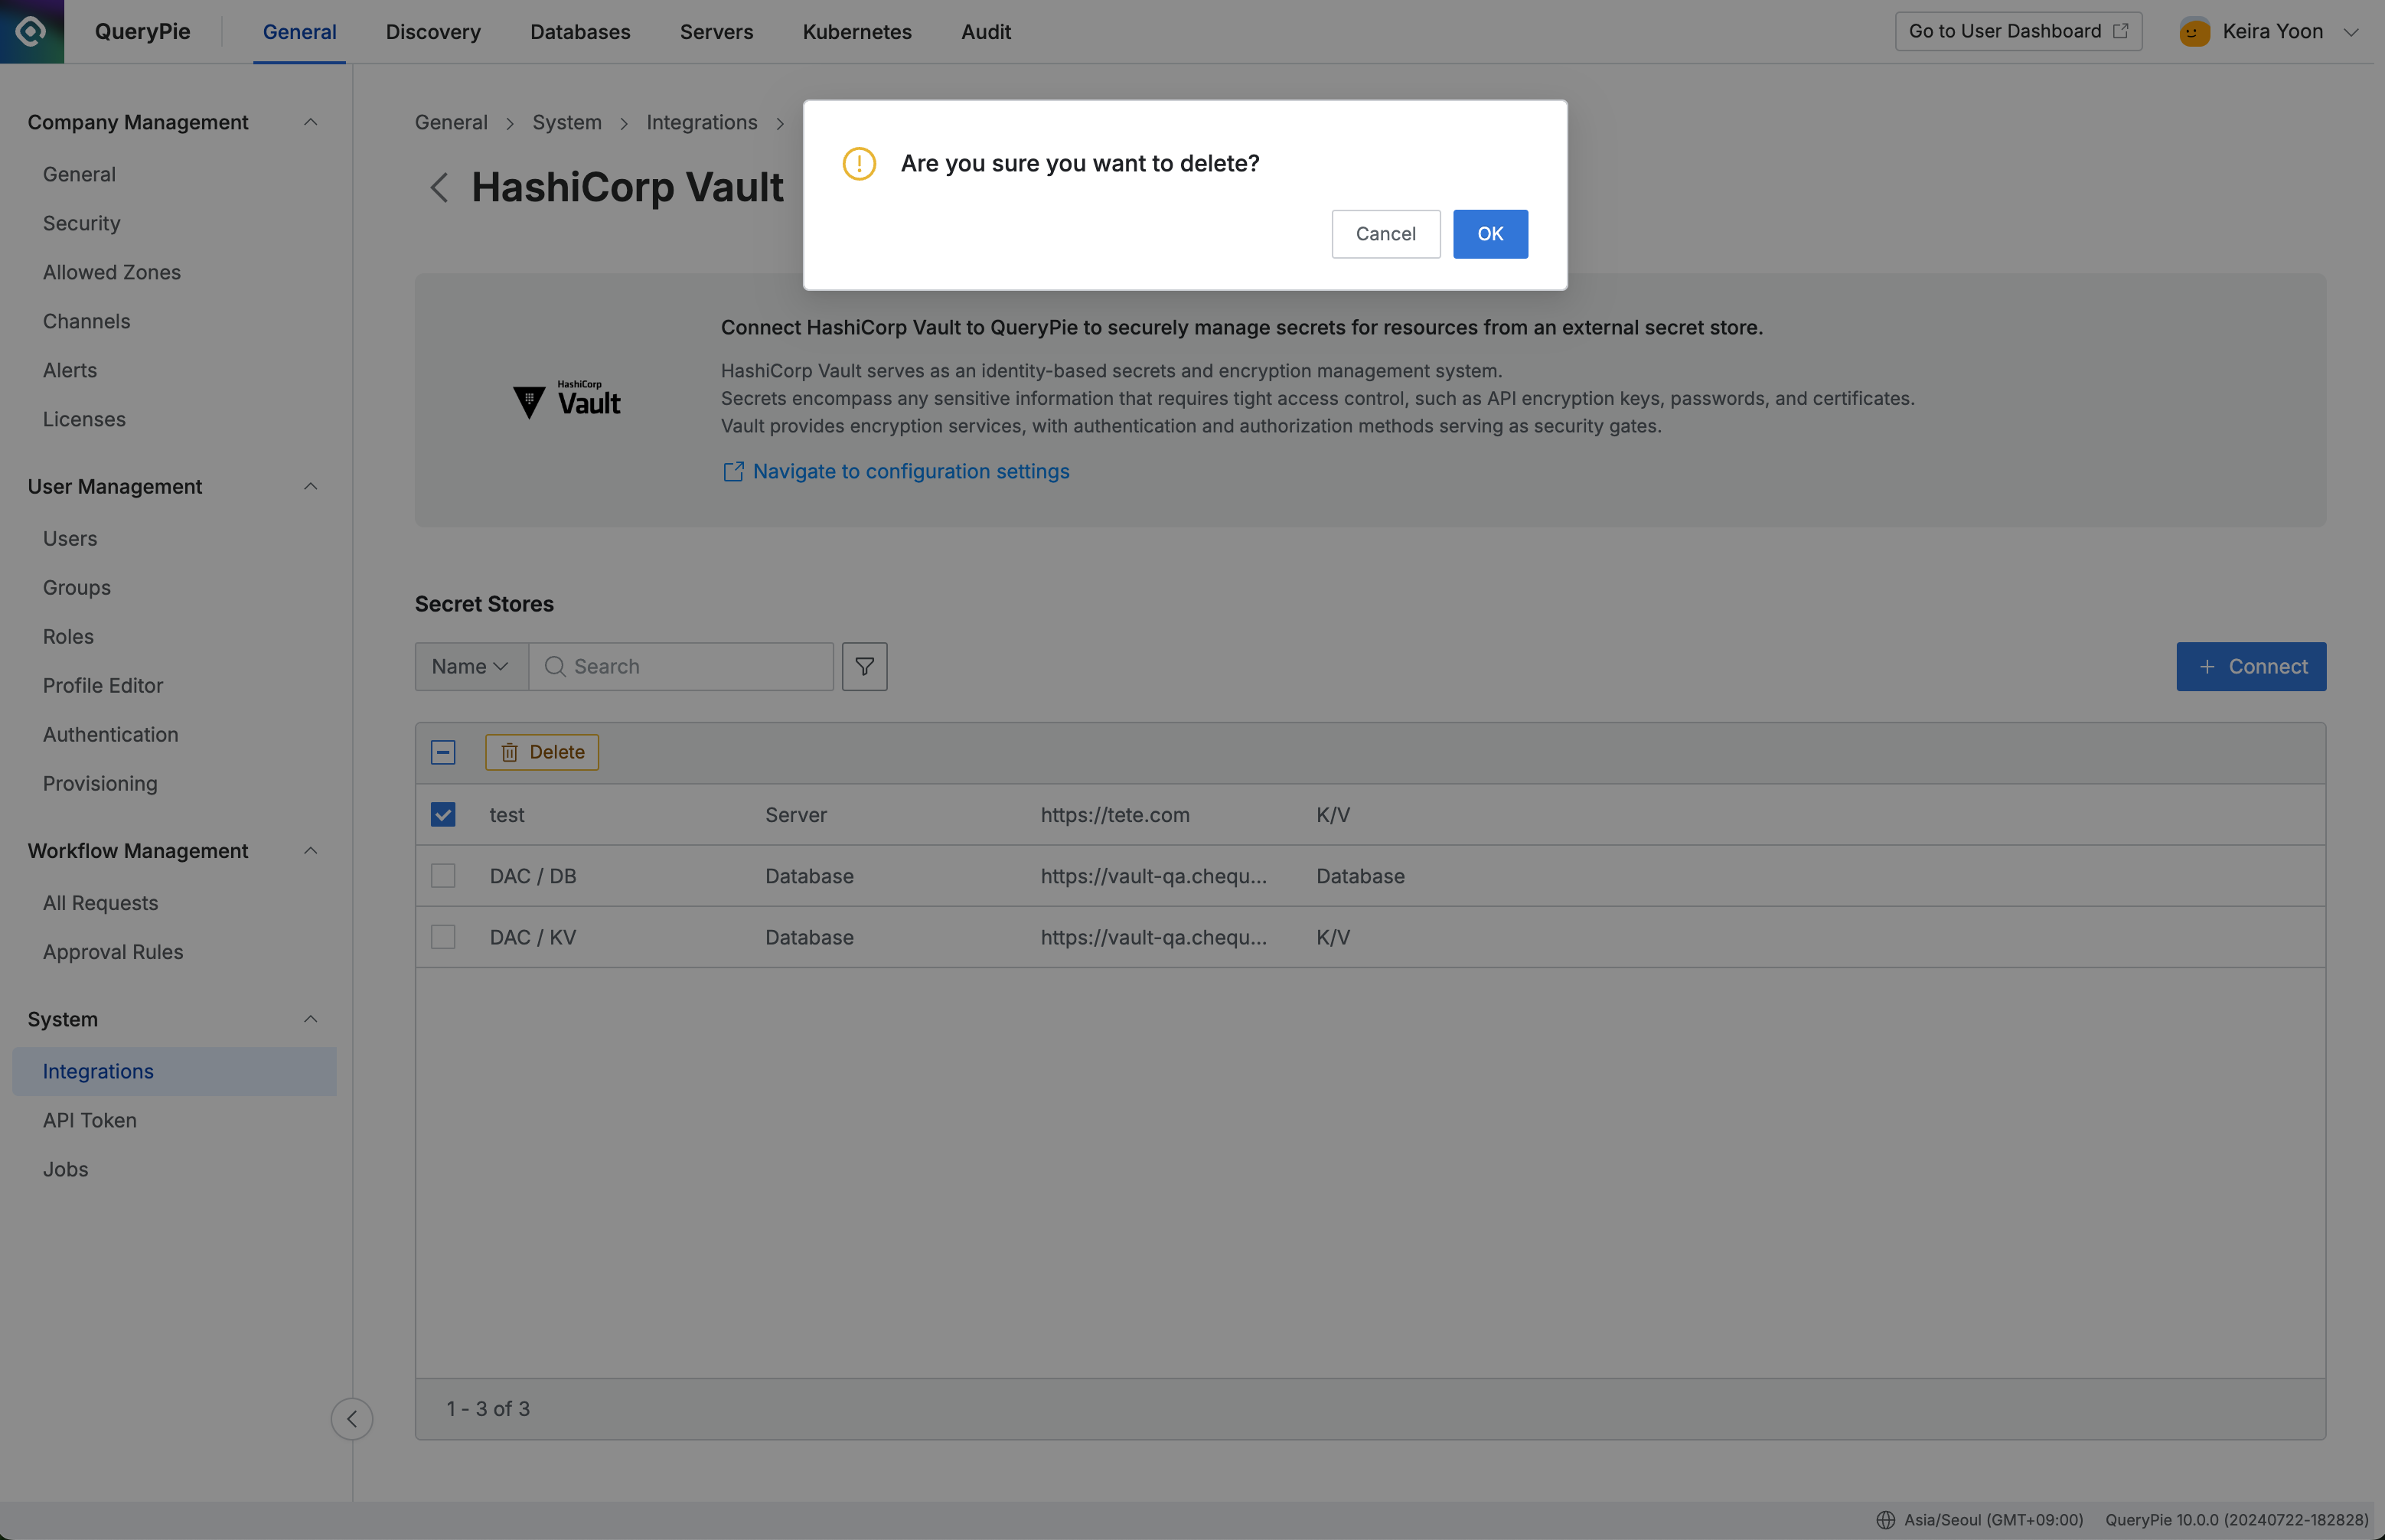
- When you select a checkbox in the table, a
Deletebutton appears in the header area. Click the button. - Click the
OKbutton in the deletion confirmation modal. - Confirm that the selected list item has been deleted from the list.
Entering Active Directory Integration Information
Prerequisites for Active Directory Integration:
- Active Directory Server: The AD server to be integrated with QueryPie must be running normally and support LDAPS (LDAP over SSL) connections.
- Administrator Account Information: Information (username, password) of an account with permissions to connect to AD and change passwords of other user accounts is required.
- Network Settings: QueryPie server must be able to access the LDAPS port (default: 636) of the AD server.
- Click the
+ Connectbutton on the Active Directory page. - Enter the information required for integration.
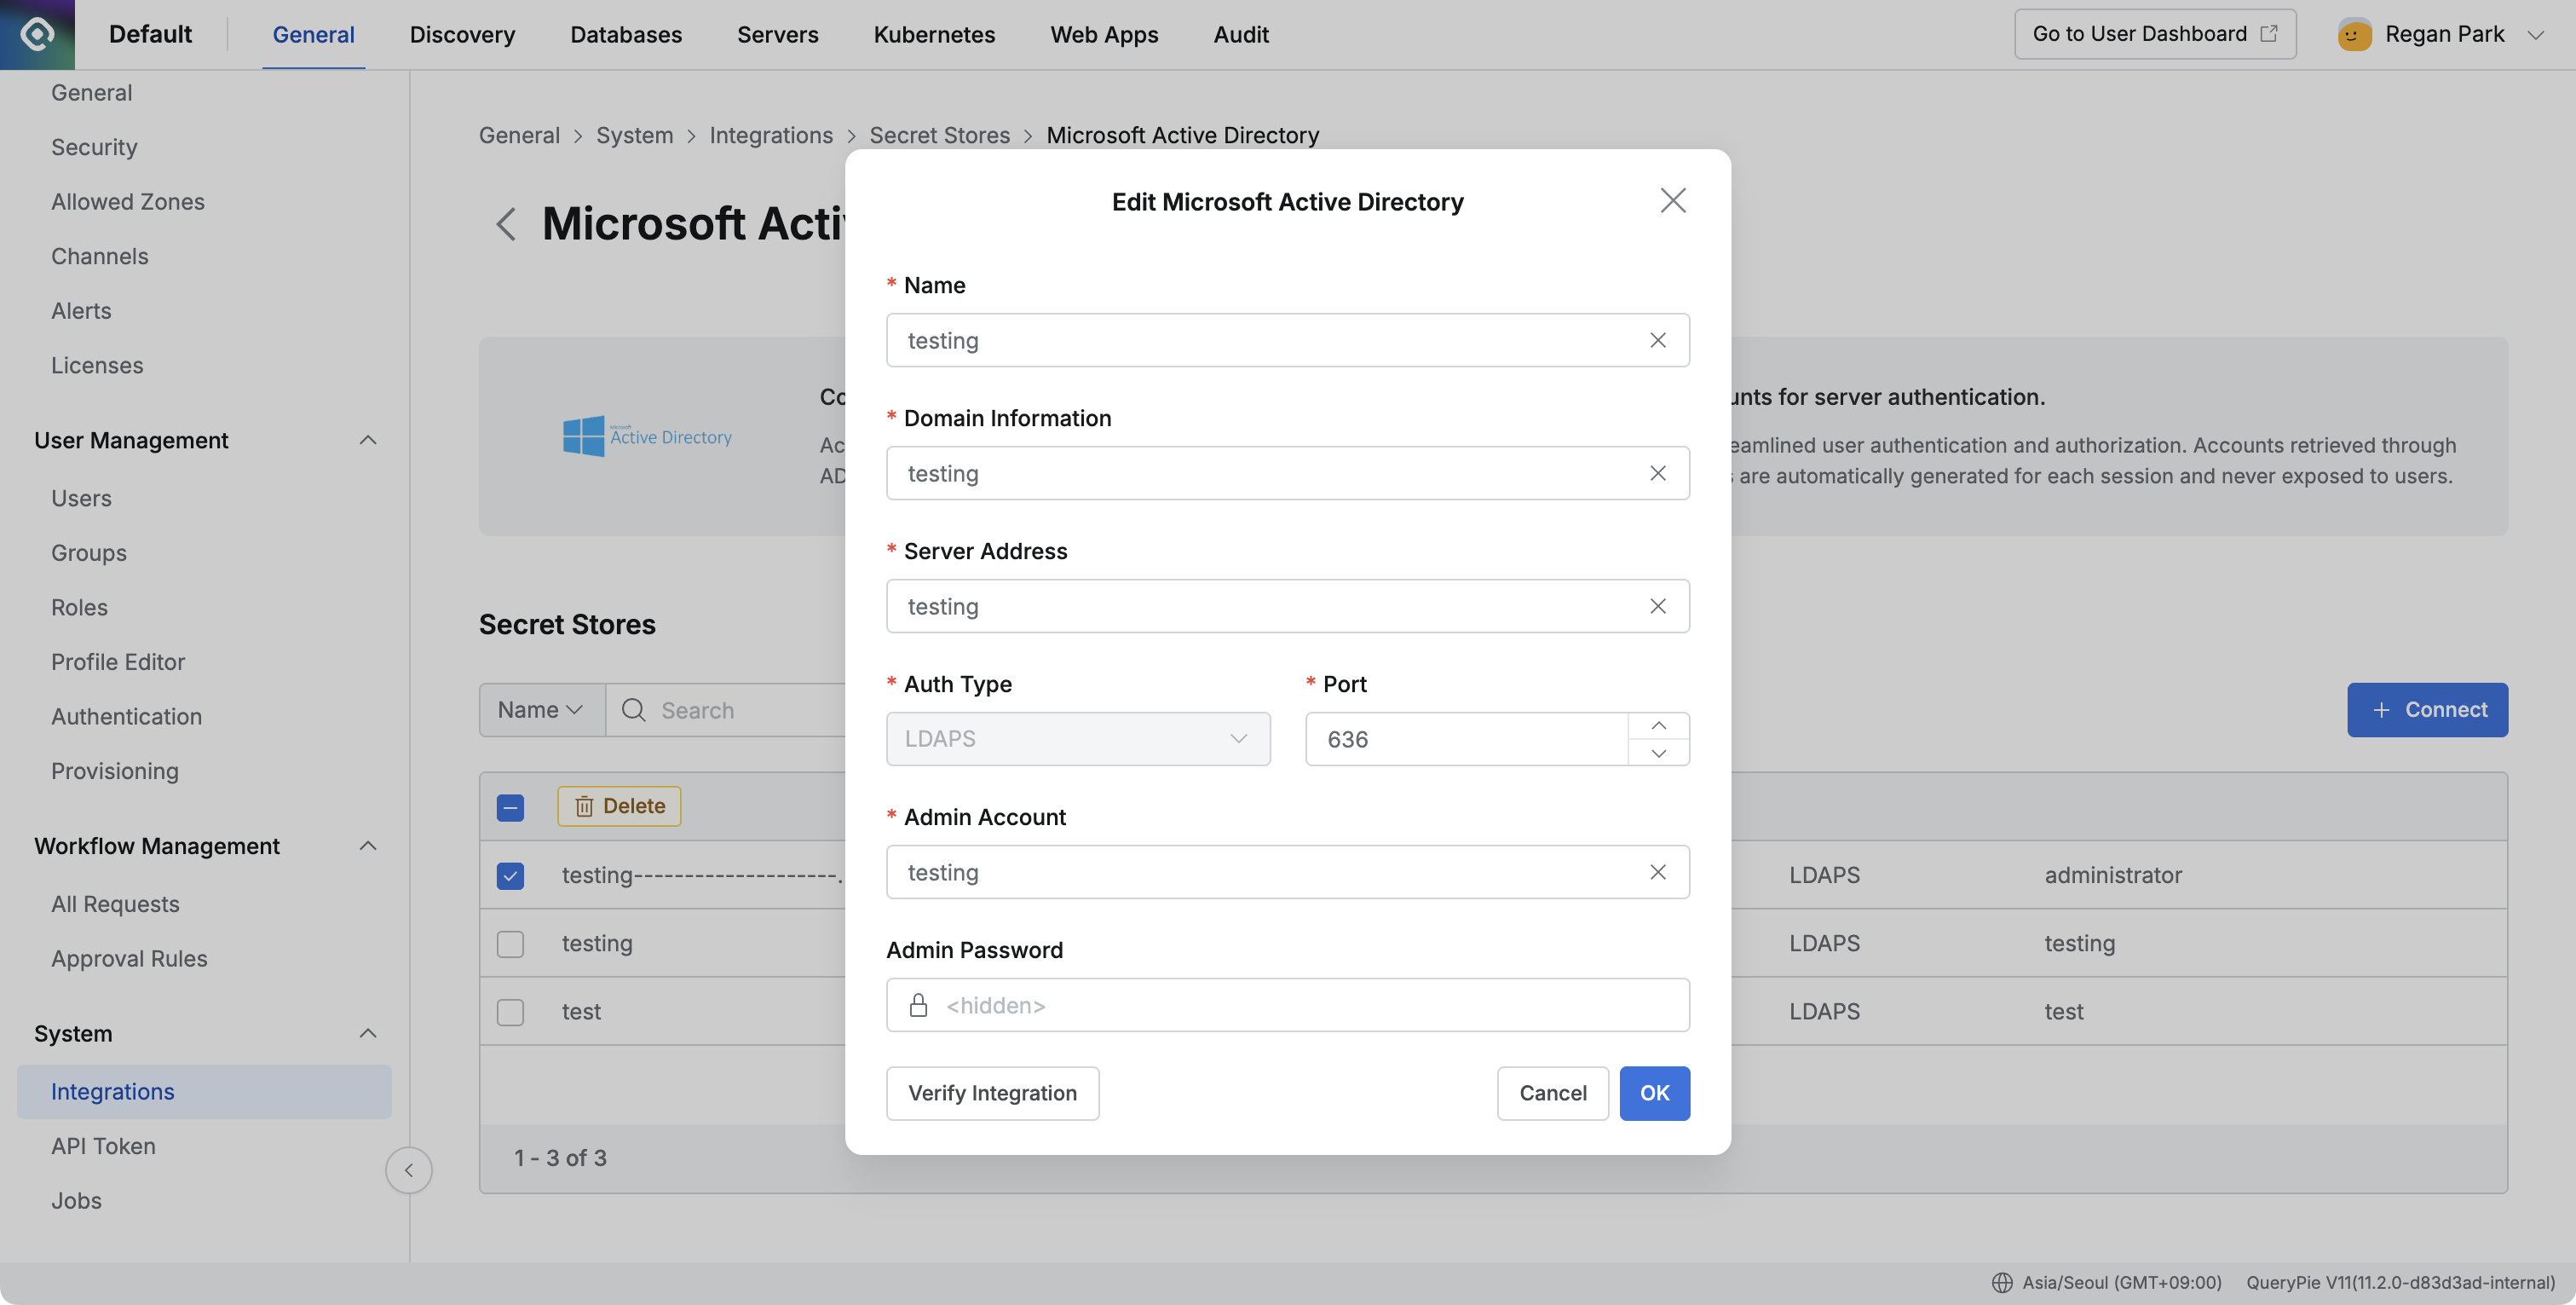
- Name: Enter the name of the integration information.
- Domain Information: Enter the domain name of the Active Directory that will manage passwords.
- Server Address: Enter the address of the Active Directory server.
- Auth Type: Authentication method is fixed to LDAPS.
- Port: Enter the LDAPS port number. (Default: 636)
- Admin Account: Enter the username of the administrator account that will connect to AD. This account needs permissions to change passwords of other users.
- Admin Password: Enter the password of the administrator account.
- After entering all information, click the
Verify Integrationbutton to verify integration with the AD server. - When the integration verification success message is displayed, click the
Savebutton to complete the setup.
Viewing Active Directory Integration Information
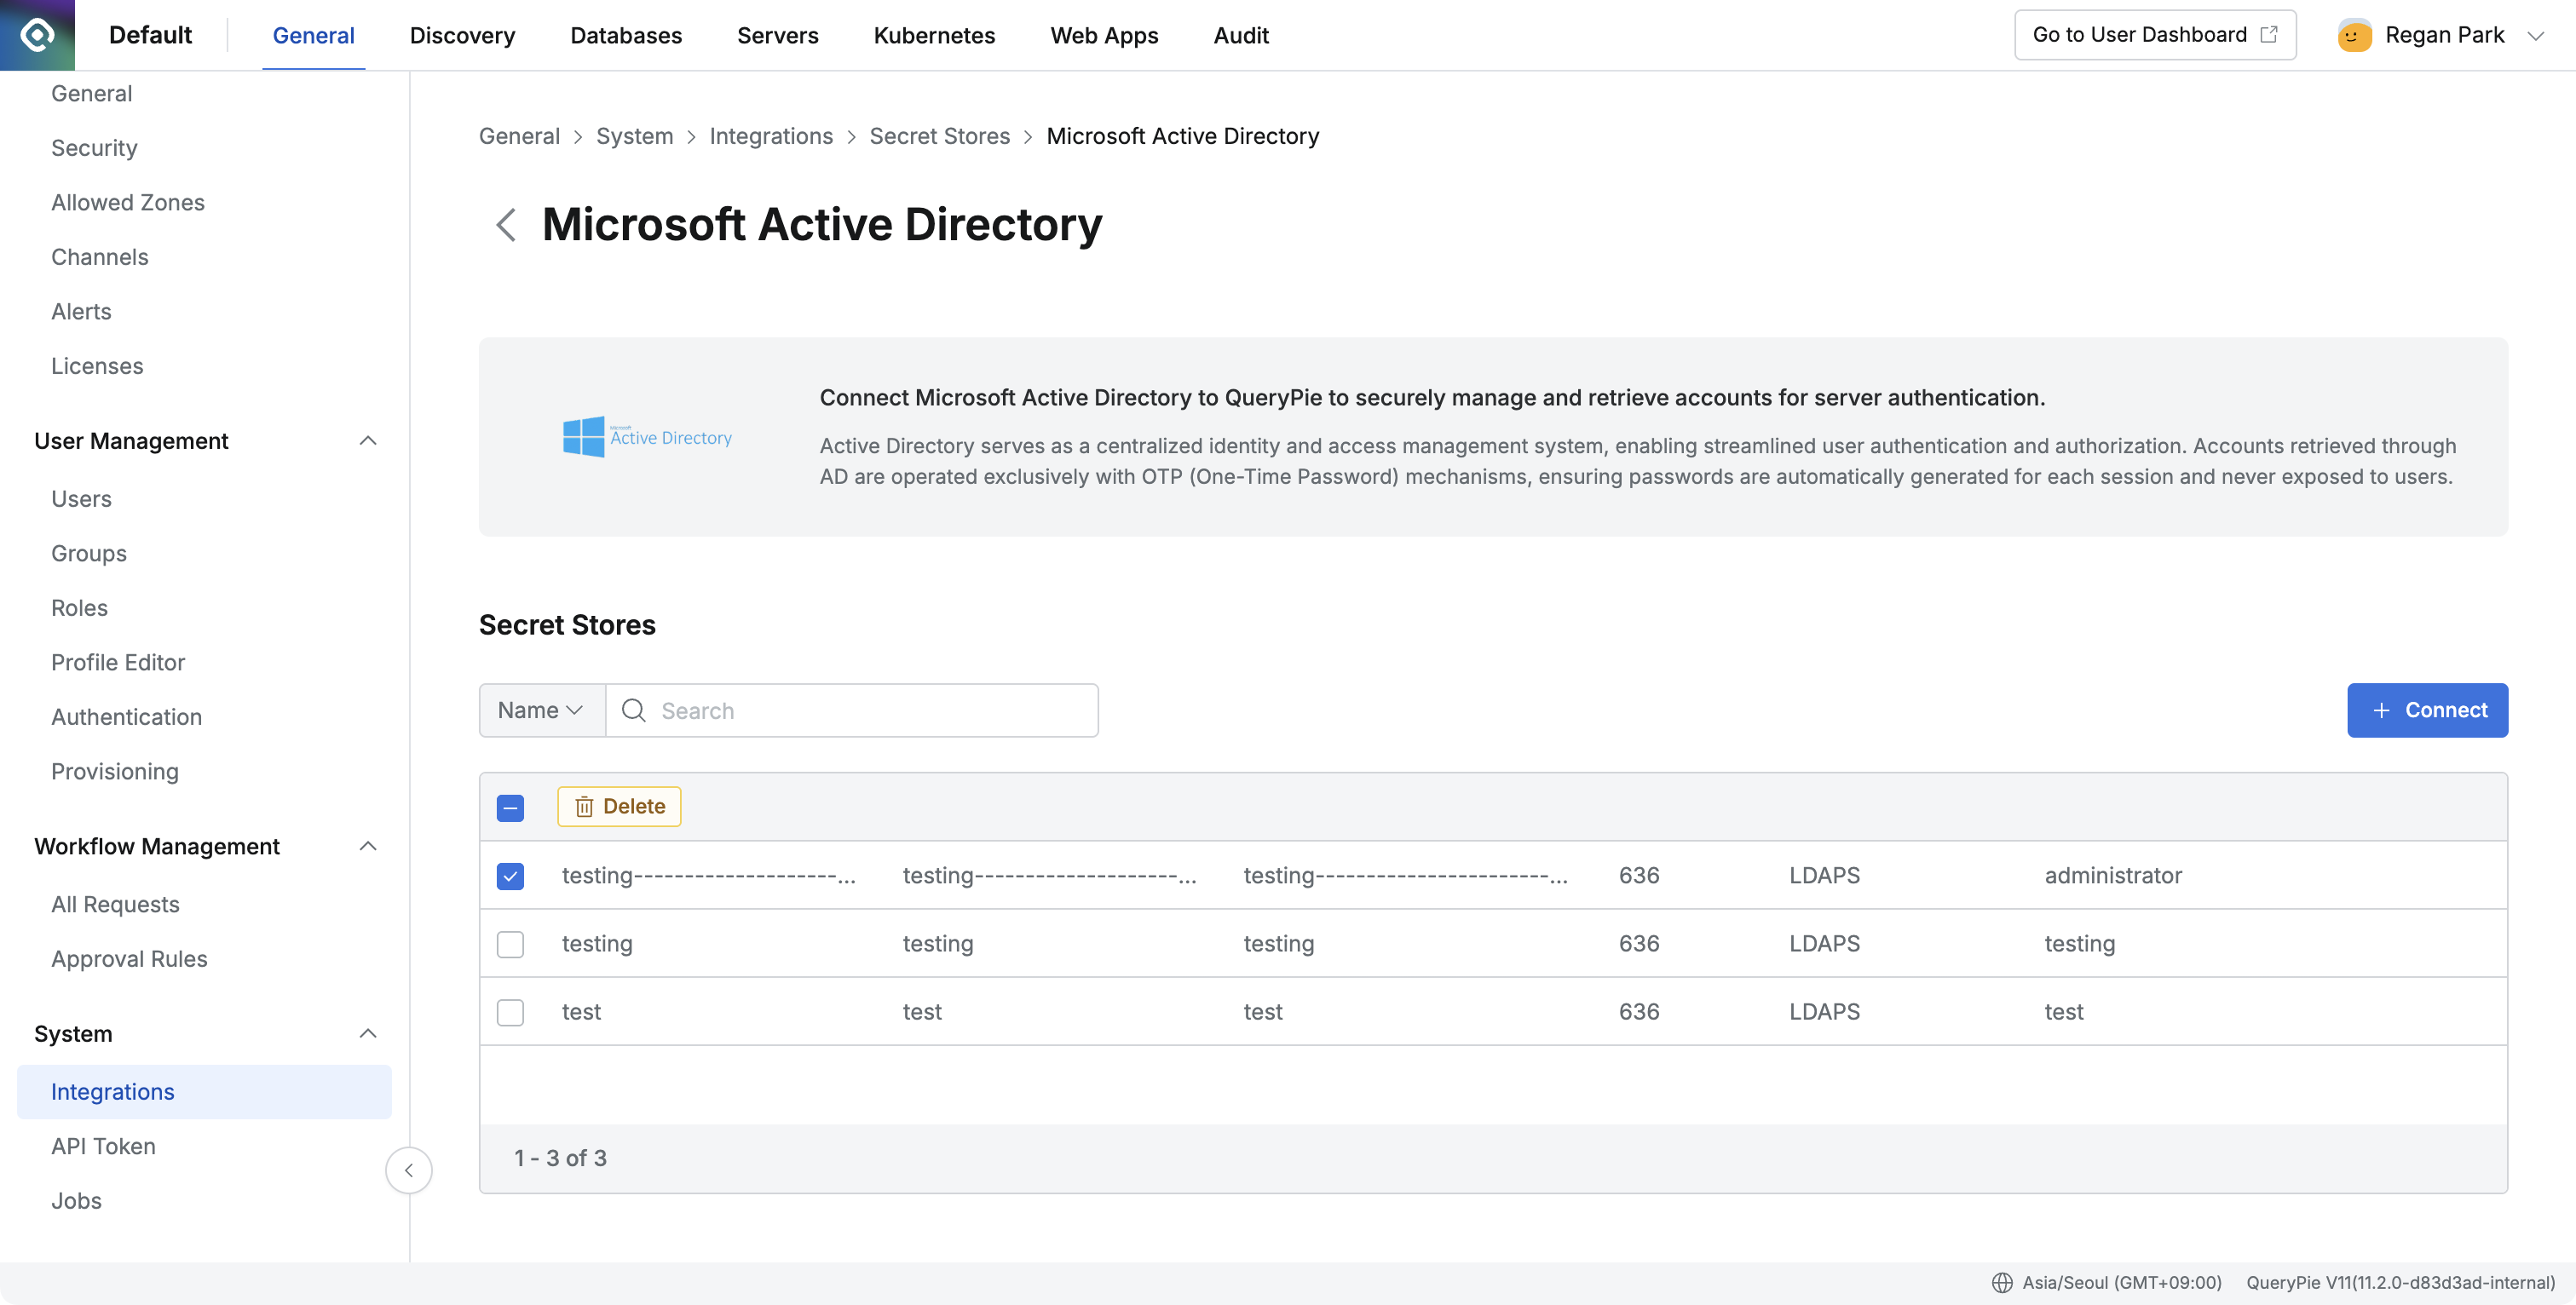
Administrator > General > System > Integrations > Microsoft Active Directory
- Navigate to
Admin > General > System > Integrations > Secret Storesmenu. - Click on the Microsoft Active Directory (AD) tile.
- You can view the list of currently integrated AD information.
Deleting Active Directory Integration Information
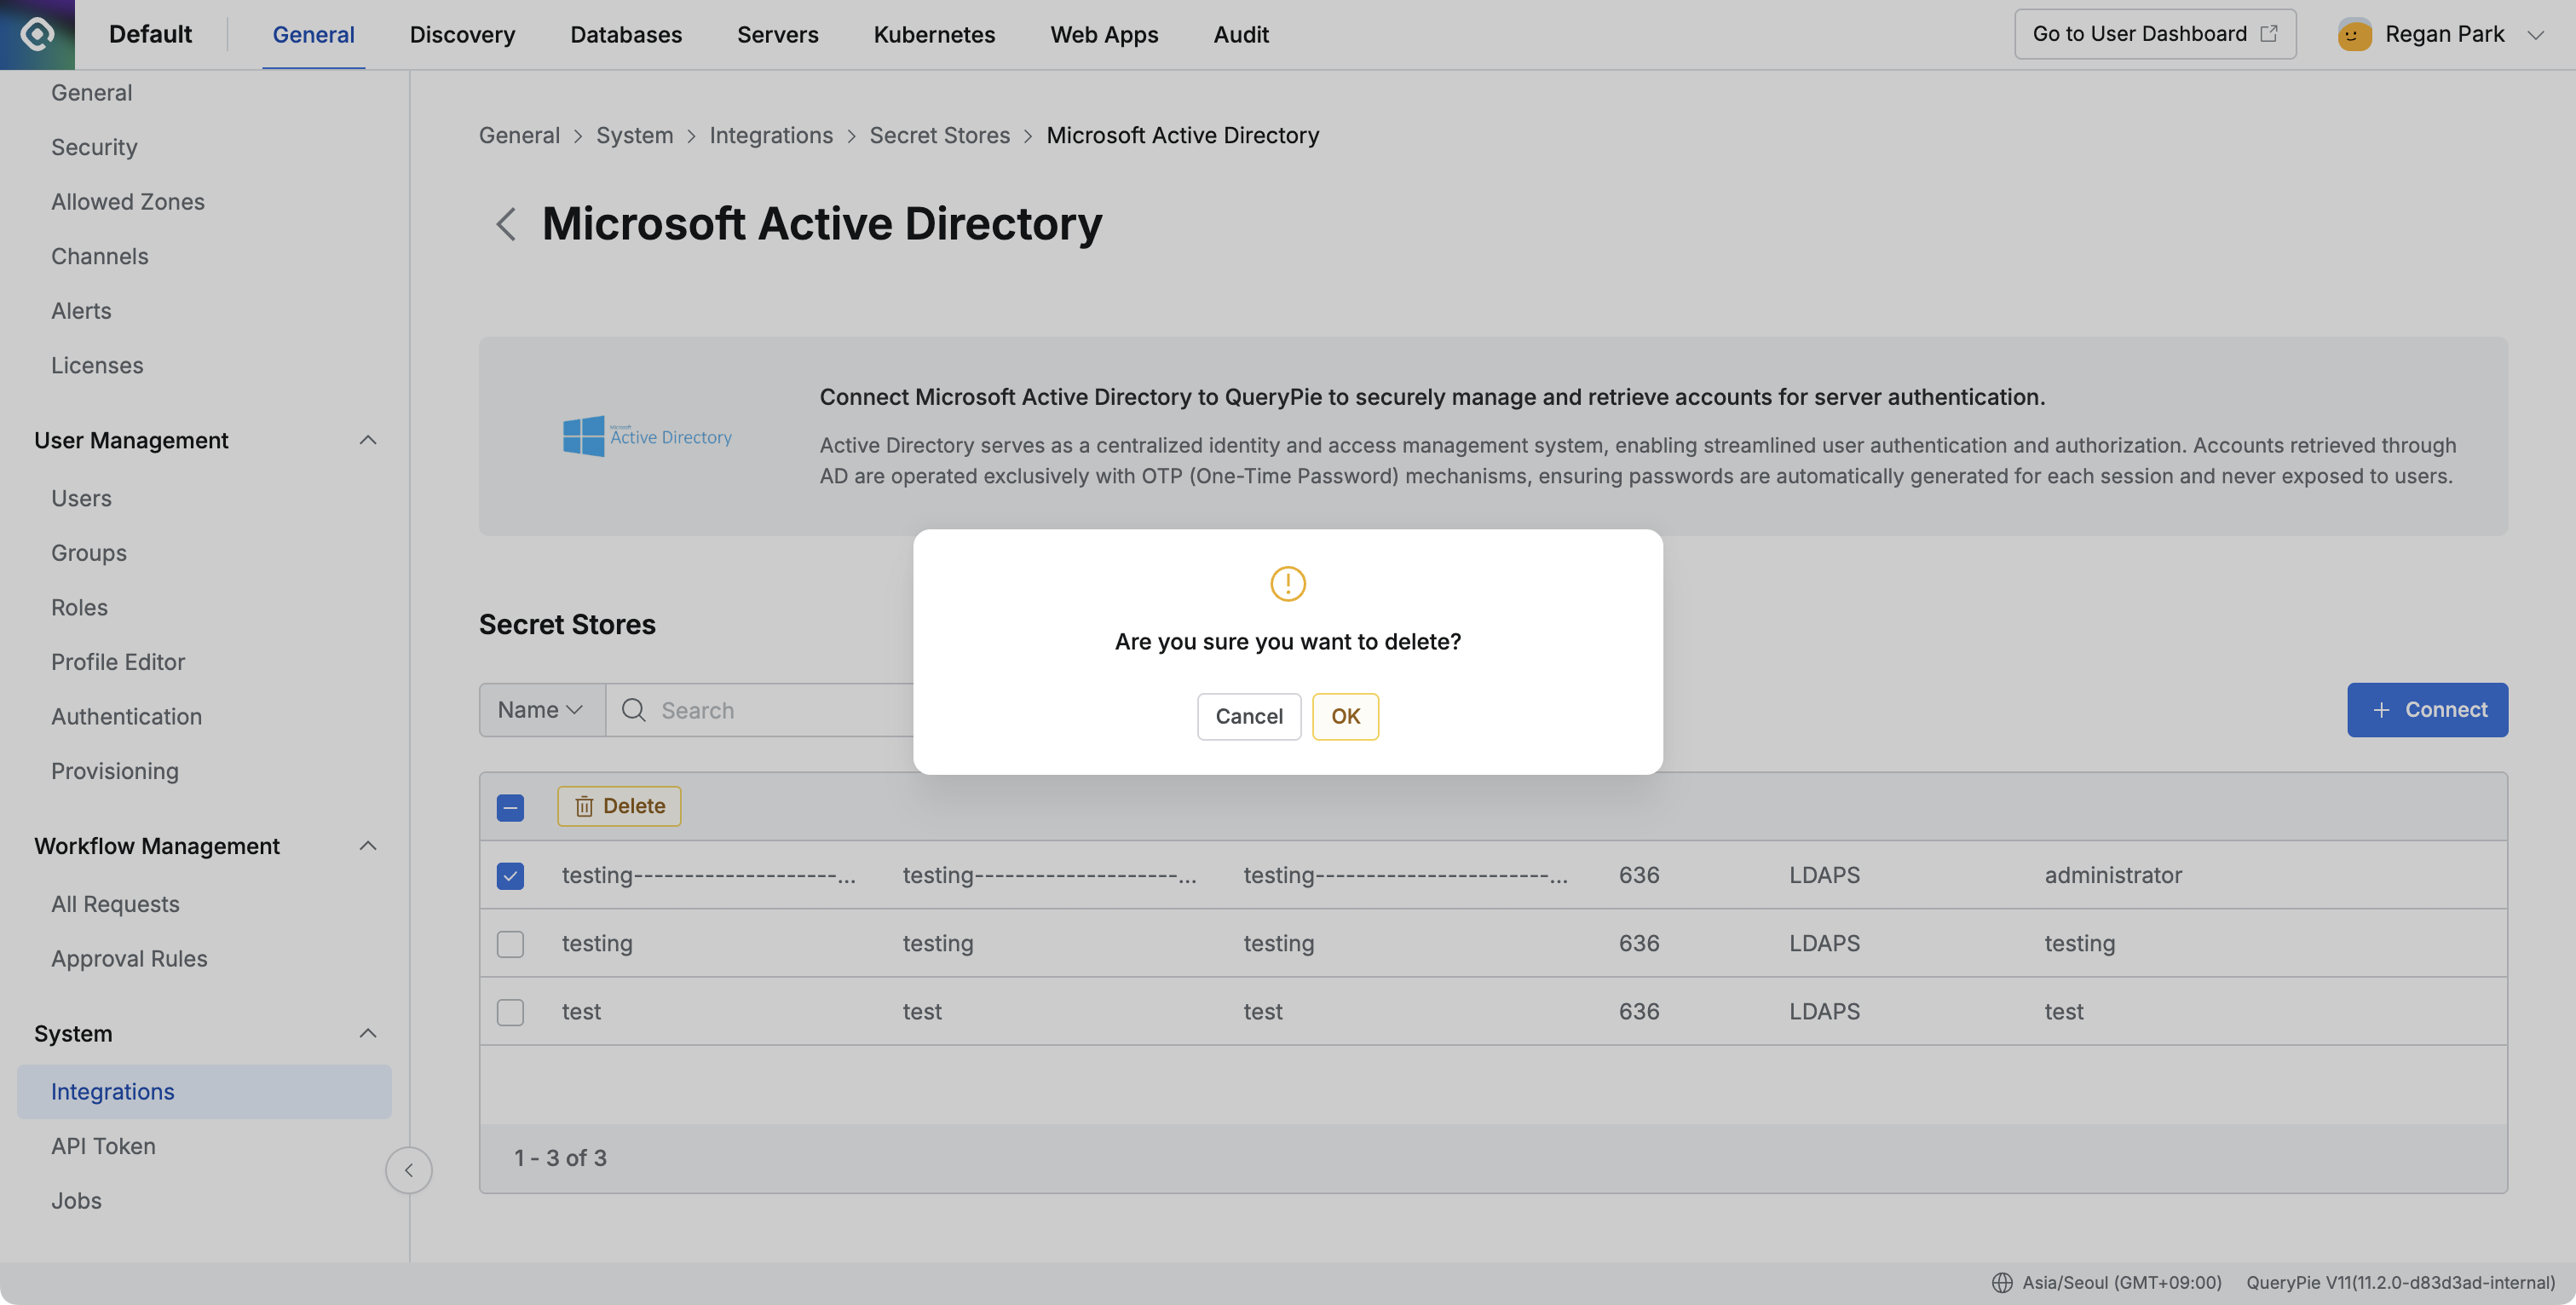
- Select the checkbox for the AD information item you want to delete in the table, and a
Deletebutton will appear in the header area. Click that button. - Click the
OKbutton in the deletion confirmation modal. - Confirm that the selected item has been deleted from the list.
Important Notes When Deleting Active Directory Before deleting Active Directory integration information, you must first delete all individual accounts (UPN) connected to that AD domain. Please proceed with the following procedure after deleting all related accounts in Admin > Servers> Account Management > Active Directory tab.
Entering AWS Secrets Manager Integration Information
For more details about AWS Secrets Manager, please refer to the AWS official documentation .
- Navigate to
Admin > General > System > Integrations > Secret Storesmenu. - Select the AWS Secrets Manager tile.
- Click the
+ Connectbutton. - Enter the information for creating a Secret Store.
- Name : Enter the name of the Secret Store.
- Region : Select an AWS Region (e.g., ap-northeast-2).
- Auth Method : Select the authentication method.
- IAM Role : Uses the default AWS credentials configured in the QueryPie ACP runtime environment. No additional authentication information is required.
- Access Key : Authenticates using an AWS IAM Access Key. Enter the following additional items.
- Access Key ID : Enter the AWS IAM Access Key ID.
- Secret Access Key : Enter the AWS IAM Secret Access Key.
- Assume Role : Authenticates using the Assume Role method with a Role ARN. This can also be used for cross-account access as needed. Enter the following additional items.
- Role ARN : Enter the IAM Role ARN (e.g.,
arn:aws:iam::123456789012:role/MyRole). - External ID : (Optional) Enter the External ID related to cross-account access.
- Role ARN : Enter the IAM Role ARN (e.g.,
- Click the
Verify Integrationbutton to verify the AWS connection status. - Click the
OKbutton to save.
The IAM principal (user or Role) accessing AWS Secrets Manager requires secretsmanager:DescribeSecret and secretsmanager:GetSecretValue permissions.
When using Assume Role, the target Role must also have these permissions granted.
For more details about AWS IAM, please refer to the AWS official documentation .
Viewing AWS Secrets Manager Integration Information
- Navigate to
Admin > General > System > Integrations > Secret Storesmenu. - Select the AWS Secrets Manager tile.
- The list of registered Secret Stores is displayed. The fields in the list are described below.
- Name : The name of the Secret Store.
- Region : The AWS region.
- Auth Method : The authentication method for AWS Secrets Manager (IAM Role / Access Key / Assume Role).
- Last Access At : The date and time when the Secret was last accessed.
Deleting AWS Secrets Manager Integration Information
- Navigate to
Admin > General > System > Integrations > Secret Storesmenu. - Select the AWS Secrets Manager tile.
- Select the items to delete by checking the checkboxes, then click the
Deletebutton. - Click
OKin the confirmation popup.
If there are DB connections using the Secret Store you are trying to delete, it may affect the password retrieval for those connections.