DB Connections
Overview
In the DB Connections page, you can view the list of DB connections registered in QueryPie and configure detailed settings.
The detailed features described in this document are as follows:
Manually Registering DB Connections
Click the Create Connection button in the top right of the DB Connections page to enter the manual registration page.
Administrator> Databases> Connection Management> DB Connections> Create Connection> Click here
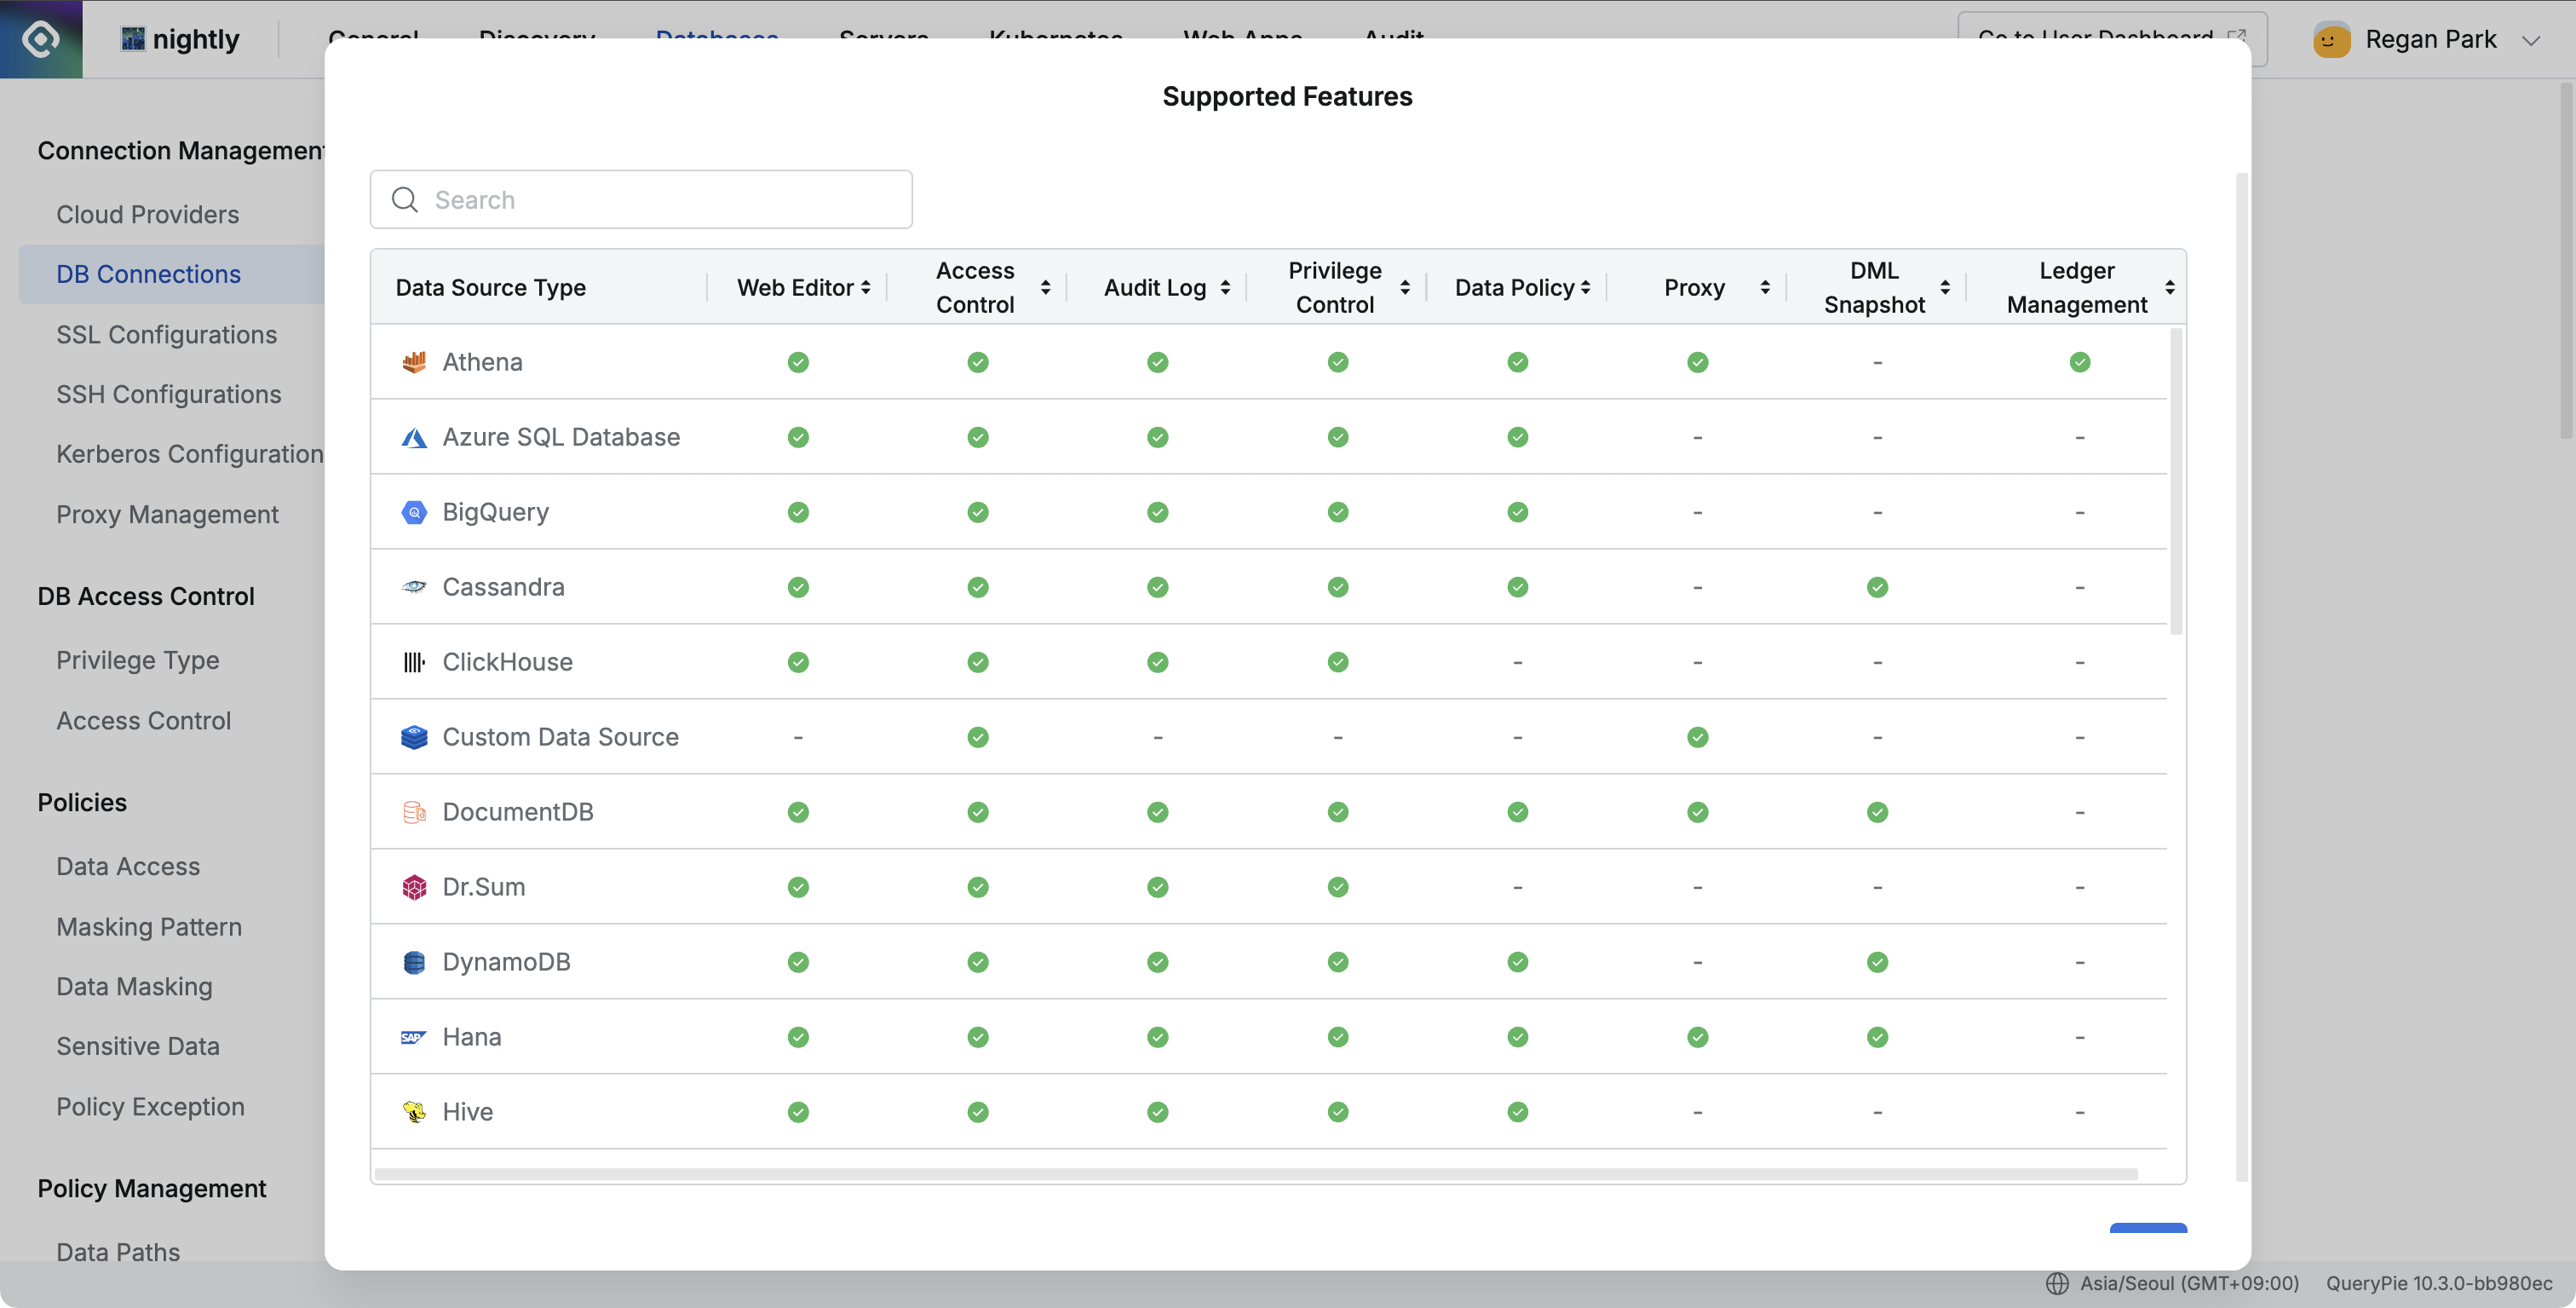
From version 10.2.8, administrators can use the “Supported Features” modal through the Click here link on the connection selection screen for connection creation, which allows you to see all vendor features supported by QueryPie at a glance.
This modal is composed of major feature items (Web Editor, Access Control, Audit Log, Privilege Control, Data Policy, Proxy, DML Snapshot, Ledger Management), helping you intuitively check support status for each vendor.
Administrator > Databases > Connection Management > DB Connections > Create Connection
- In Step 1, select the data source type to proceed to Step 2.
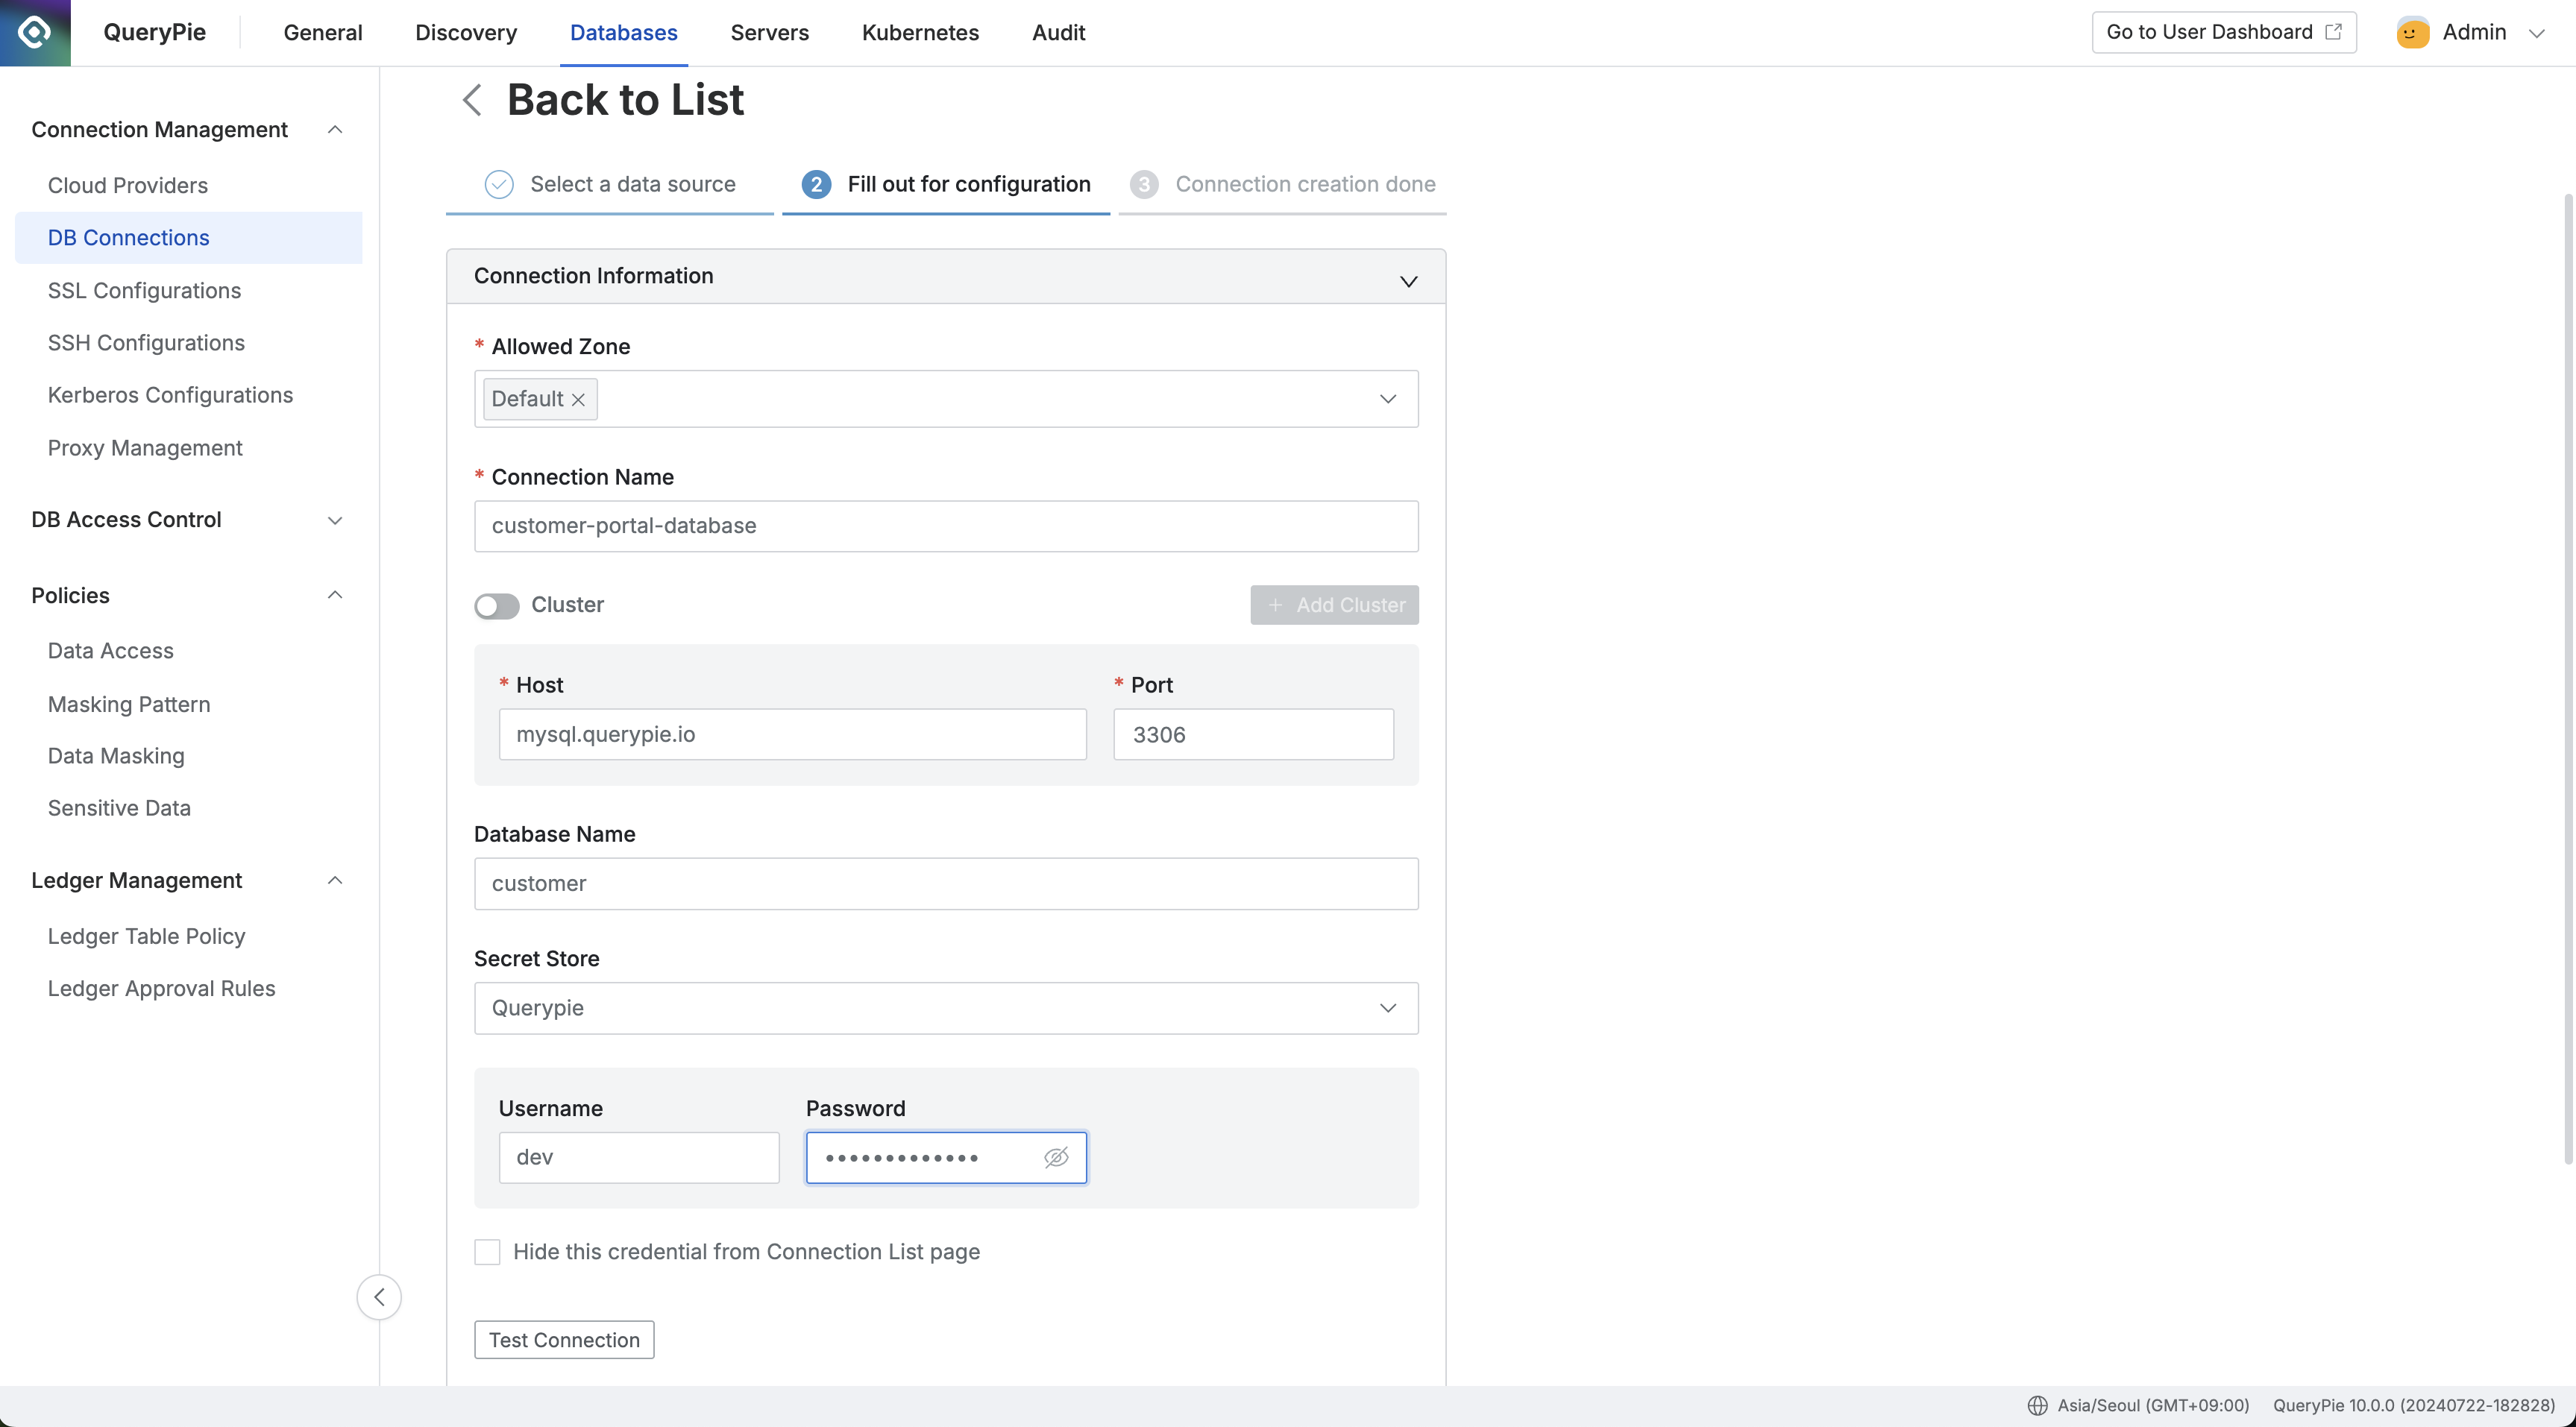
- In Step 2, enter DB connection information.
- Allowed Zone : Network range that can access the DB connection
- You can select Allowed Zones registered in the Allowed Zones menu
- Default: Default (All allowed)
- Connection Name : DB connection name
- Cluster : Cluster configuration status
- When toggled on, cluster registration mode is activated. Refer to the Registering DB Connections with Cluster Configuration section below
- Host : DB connection host (both domain and IP formats can be entered)
- Port : DB connection port
- Database Name : DB name to connect to when establishing connection
- Secret Store : Authentication information storage location
- QueryPie : Stored within QueryPie
- Other registered Vault names are displayed
- Additional authentication information display methods vary depending on the selected authentication information storage location properties
Test ConnectionYou can verify if the connection access information is valid by clicking the button.- Additional Information : Enter additional information
- For detailed description, refer to the Additional Information section below
- SSL / SSH Setting : Enter SSL/SSH configuration information
- For detailed description, refer to the SSL / SSH Setting section below
NextClicking the button completes DB connection creation and proceeds to Step 3.
- Allowed Zone : Network range that can access the DB connection
- In Step 3, you can review the entered DB connection information.
- You can confirm the creation of the new DB connection in the list on the DB Connections page.
Registering DB Connections with Cluster Configuration
When synchronizing resources through Cloud Provider, if resources are configured as clusters, Cluster mode is activated.

Administrator > Databases > Connection Management > DB Connections > List Details
- When the Cluster option is activated, you can enter cluster and instance information in a hierarchical structure.
- If you know the endpoints of each cluster and instance, you can register them manually through
Add Cluster.- Type : Replication type of the corresponding cluster
- Primary and Secondary types are available, and permissions can be granted at the cluster level.
- Expose : Option to display the cluster in the connection list
- Expandable : Displays all clusters and instances in the user’s Connections list when accessing via web
- Unexpandable : Displays only at the cluster level in the web connection user’s Connections list, not showing instances under the cluster
- Hidden : The cluster is not displayed in the user’s Connections list, only instances under the cluster are shown
- Host : Endpoint corresponding to the cluster’s host
- Add Instance : If you want to manage down to the instance level, enter the name and host of the corresponding instance
- Expose : Whether to expose the instance endpoint in the user’s Connections list
- e.g. If there are 3 instances under Secondary and only 2 of them have Expose = On setting, users with Secondary permissions can access 2 instance endpoints
- Expose : Whether to expose the instance endpoint in the user’s Connections list
- Type : Replication type of the corresponding cluster
What is Cluster Mode? Generally, when synchronizing through Cloud Provider, it is registered in cluster structure for Primary and Secondary cluster and endpoint management. Even when manually registering connections, you can register connections in cluster structure through the Cluster toggle button. When using Cluster mode, you can manage access permissions in cluster and instance endpoint structure, and for purposes such as load balancing and permission management, you can grant permissions only to specific instance endpoints to certain users.
Viewing DB Connection List
You can view the list of DB connections currently registered in QueryPie in the Databases settings > DB Connections page within the administrator console.
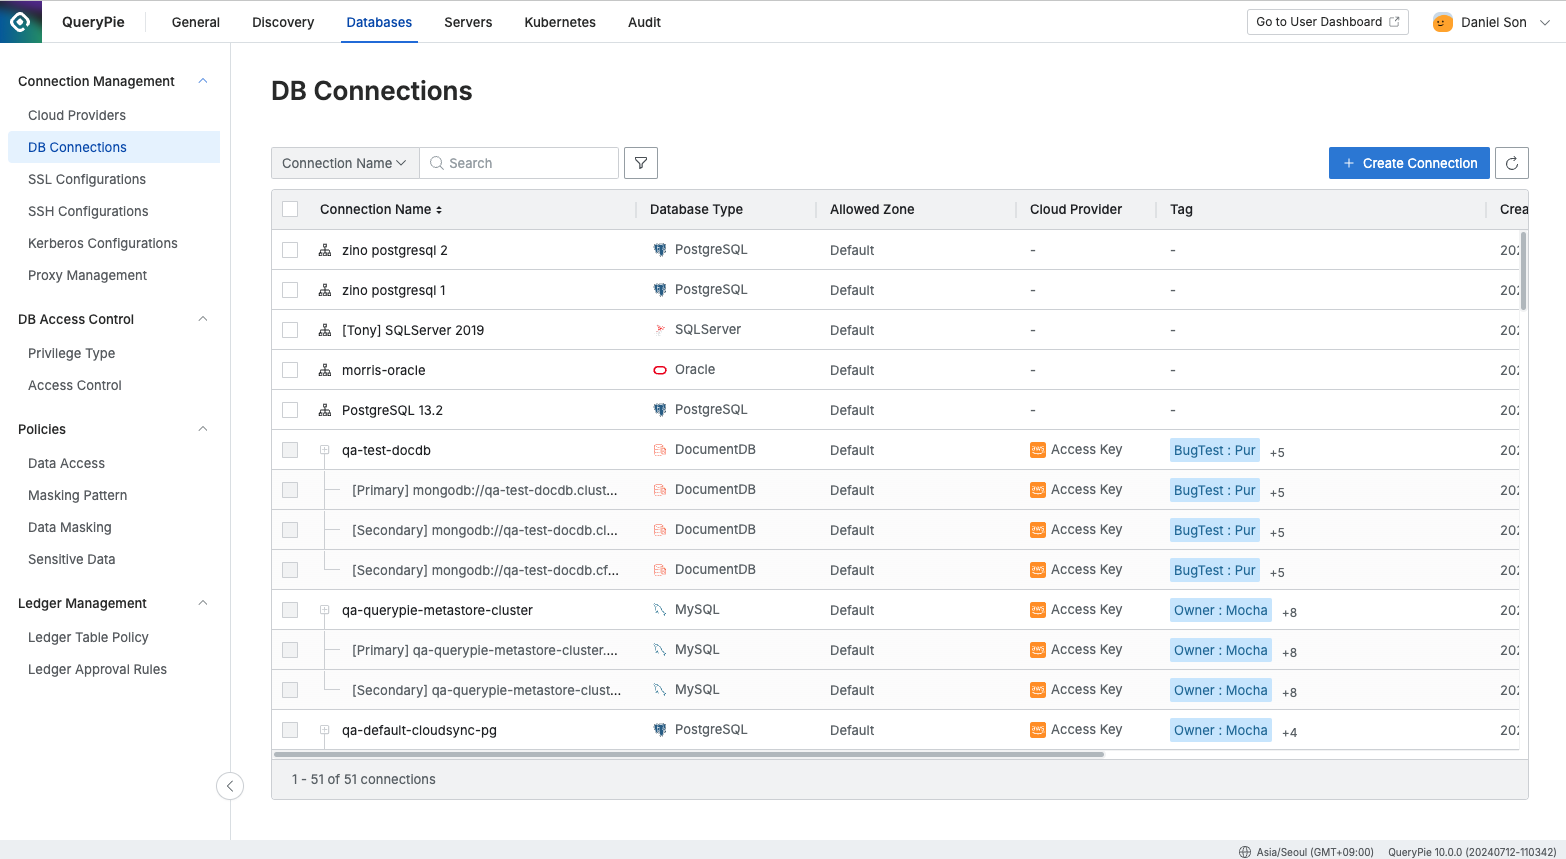
Administrator > Databases > Connection Management > DB Connections
- Search: Search by DB connection name
- Provided filter types
- Database Type : DB type (eg. MySQL, MariaDB, PostgreSQL…)
- Cloud Provider : Cloud provider type (AWS, Azure, GCP, or QueryPie Connection)
- Favorite View : Favorite setting status
- There is a button for favorite setting on the far right of the table.
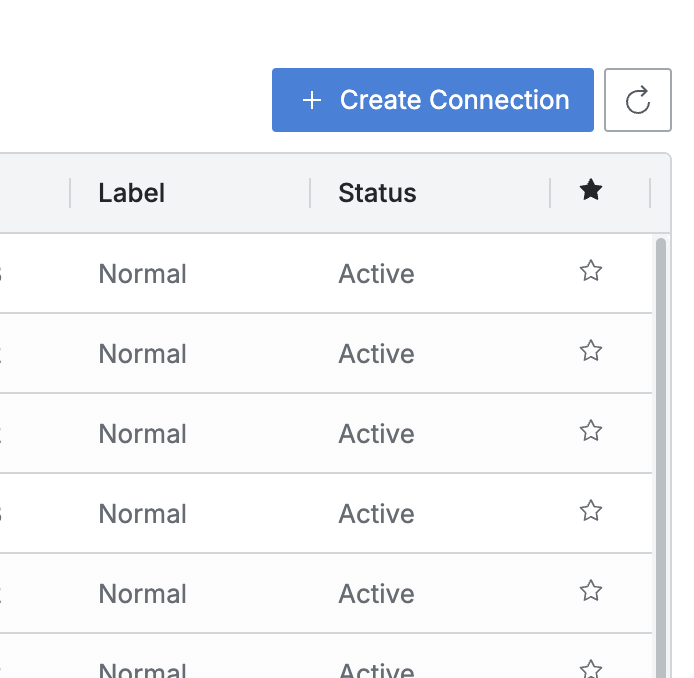
Favorite setting button
- There is a button for favorite setting on the far right of the table.
- SSL Status : SSL activation status
- Label : Whether it’s a ledger DB
- Tag : Tags assigned to connections
- Input method for each tag: Enter Key → Press Enter → Enter operator → Enter Value → Press Enter
- Supported operators:
=,!=,:,!:
- Supported operators:
- When entering multiple tags with the same Key, OR search is performed (union)
- When entering multiple tags with different Keys, AND search is performed (intersection)
- Input method for each tag: Enter Key → Press Enter → Enter operator → Enter Value → Press Enter
Viewing and Configuring DB Connection Details
Click on the item you want to view details for in the DB Connections page to enter the detail page.
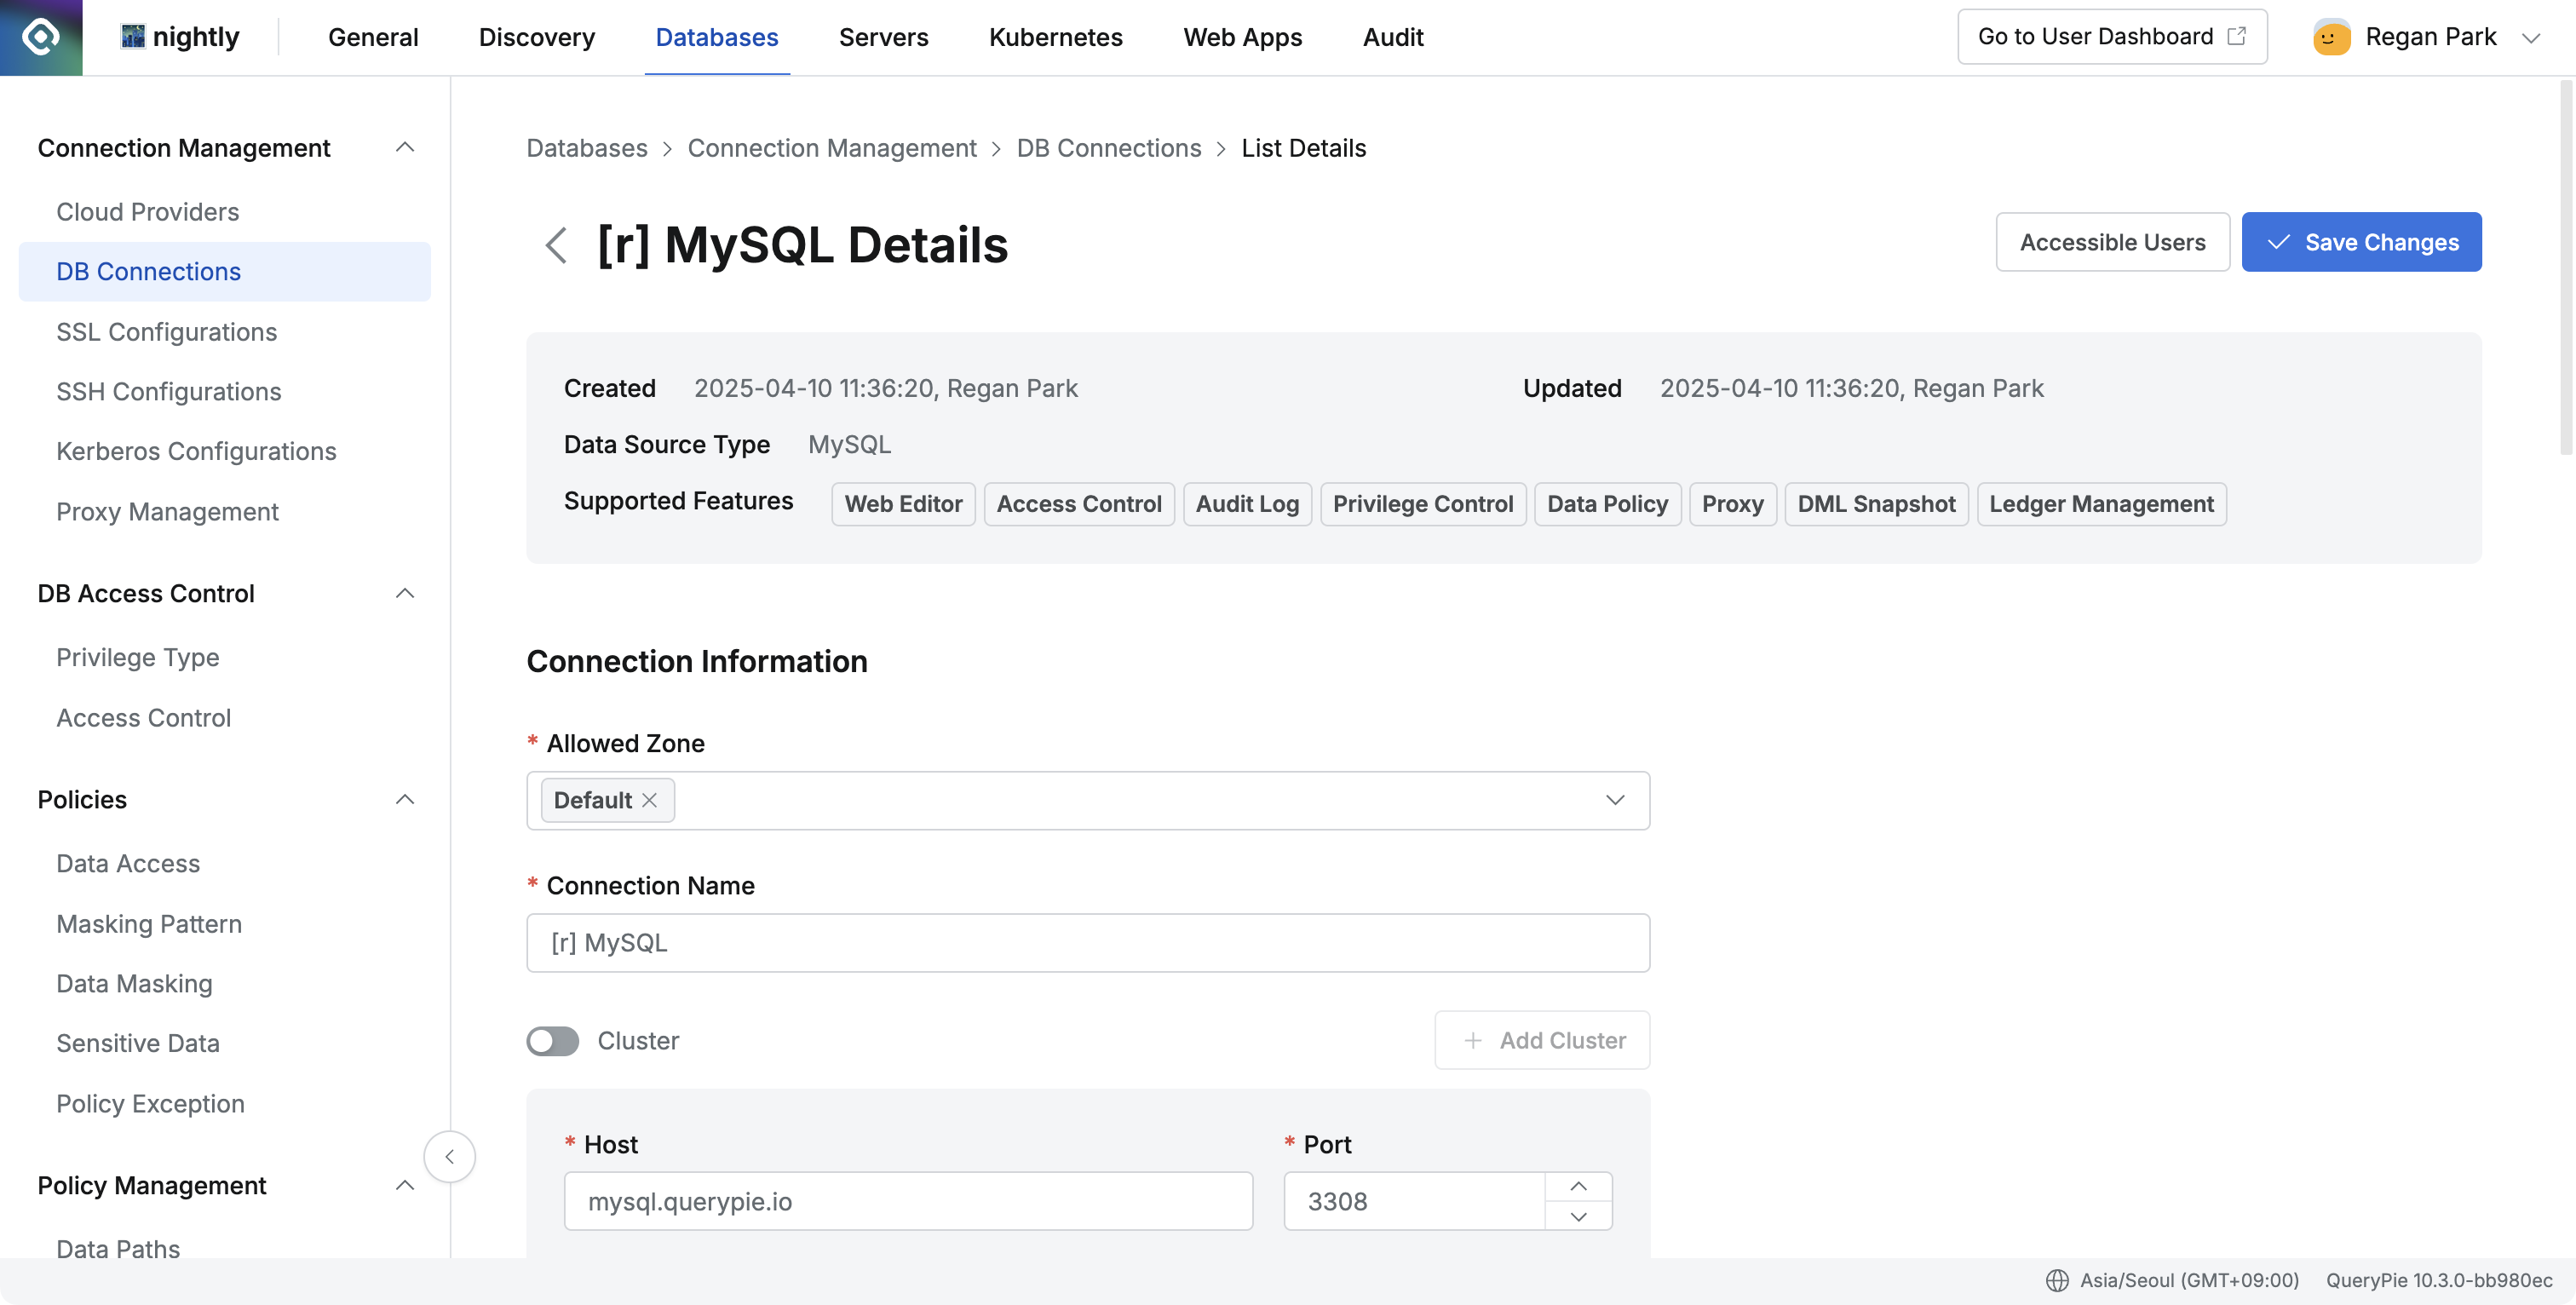
Administrator > Databases > Connection Management > DB Connections > List Details
From 10.2.8, when viewing details, you can check the list of features supported by the connection in Supported Features.
Viewing Accessible Users
Click the Accessible Users button in the top right of the DB connection detail page to open a Drawer and view the list of users who can access the connection.
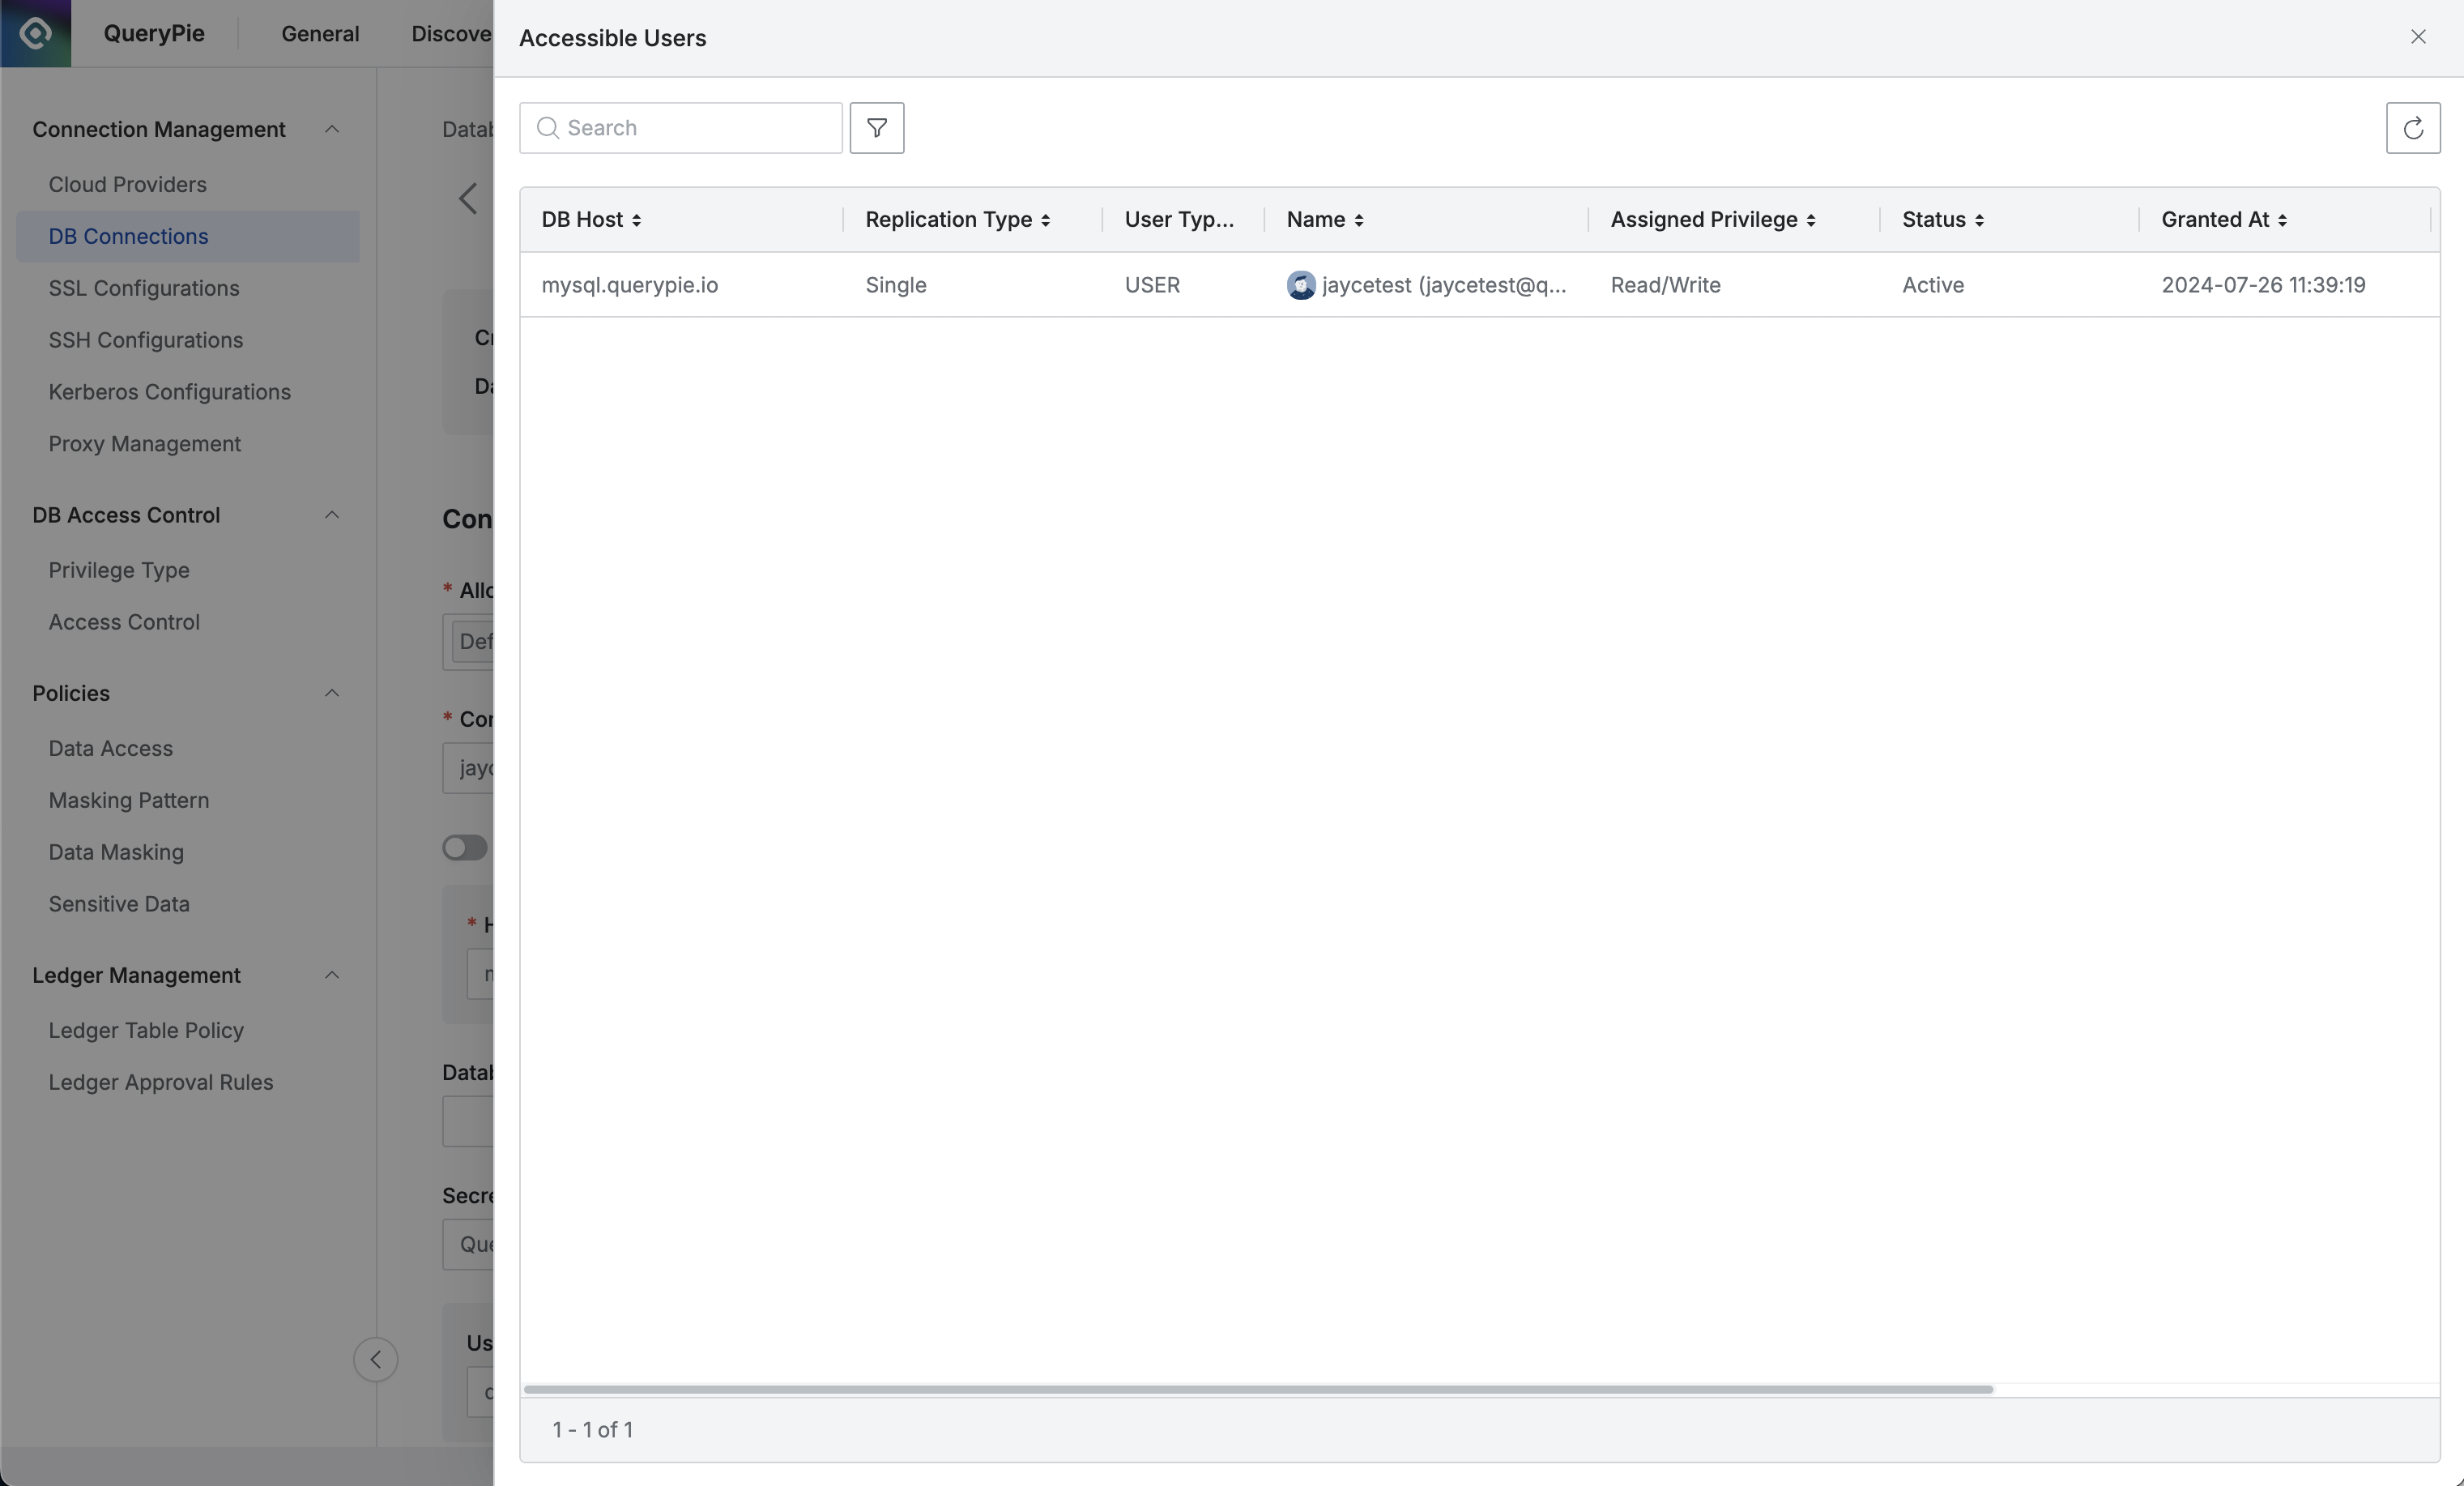
Administrator > Databases > DB Connections > List Details > Accessible Users
Viewing and Modifying DB Connection Information
In the Connection Information area of the DB connection detail page, you can view and modify the information entered during creation.
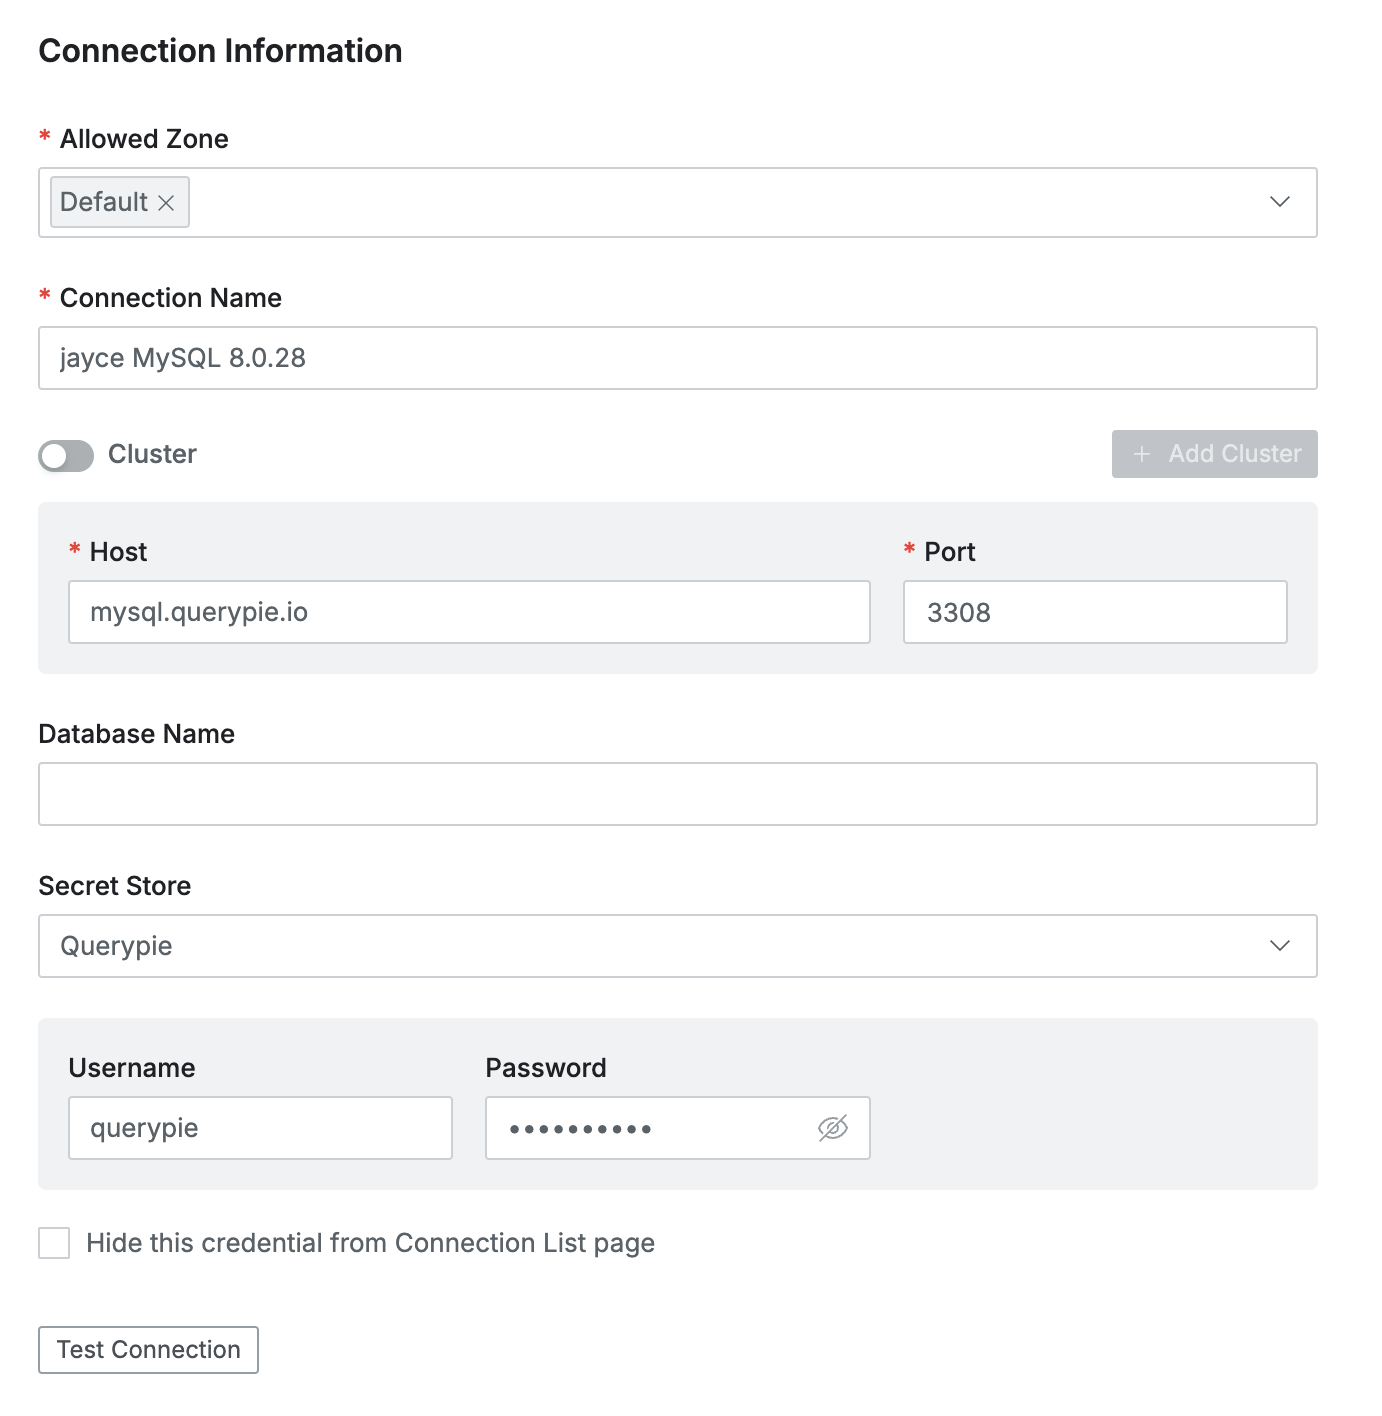
Administrator > Databases > DB Connections > List Details > Connection Information
- Allowed Zone : Network range that can access the DB connection
- You can select Allowed Zones registered in the Allowed Zones menu
- Default: Default (All allowed)
- Connection Name : DB connection name
- Host : DB connection host (both domain and IP formats can be entered)
- Port : DB connection port
- Database Name : DB name to connect to when establishing connection
- Secret Store : Authentication information storage location
- QueryPie : Stored within QueryPie
- Other registered Vault names are displayed
- Additional authentication information display methods vary depending on the selected authentication information storage location properties
Test Connection You can verify if the connection access information is valid by clicking the button.
To save changes, click the Save Changes button in the top right of the detail page.
Secret Store is only supported for DB Connections that use Username/Password authentication. Secret Store is not available for BigQuery, Spanner, Athena, and DynamoDB, which use cloud service-specific authentication.
Secret Store item is displayed when Secret Store usage is enabled in the Admin > General > Company Management > Security settings menu, and to actually use Secret Store, configuration is required on the Admin > General > Integration > Secret Store settings page. (Since version 11.4.0, this has been improved to work with only the Integration settings, regardless of this setting.)
For detailed information, refer to the Secret Store Integration document.
Notes on Secret Store Configuration
Harshcorp Vault
DB Account items are displayed differently depending on the Secret Engine type stored in Secret Store settings.
AWS Secrets Manager
-
Secret ID : Enter the name of the Secret stored in AWS Secrets Manager (e.g.,
prod/db/credentials). -
When
Secret Engine= K/V setting, Username / Password input fields are displayed on the connection information page.- Enter the Vault Path in the Username / Password fields.
- Path can be entered in the format
prod_db/data/mysql?username. - Based on the example, the actual path in Vault is when the key
usernameexists inprod_db > mysql. - The
/datapath in the middle must be added.
-
When
Secret Engine= Database setting, Account input field is displayed on the connection information page.- Enter the Vault Path in the Account field.
- Path can be entered in the format
prod_db/creds/mysql_role.
Additional Settings
You can configure additional settings for DB connections in the tab area at the bottom of the page. Refer to the description for each item.
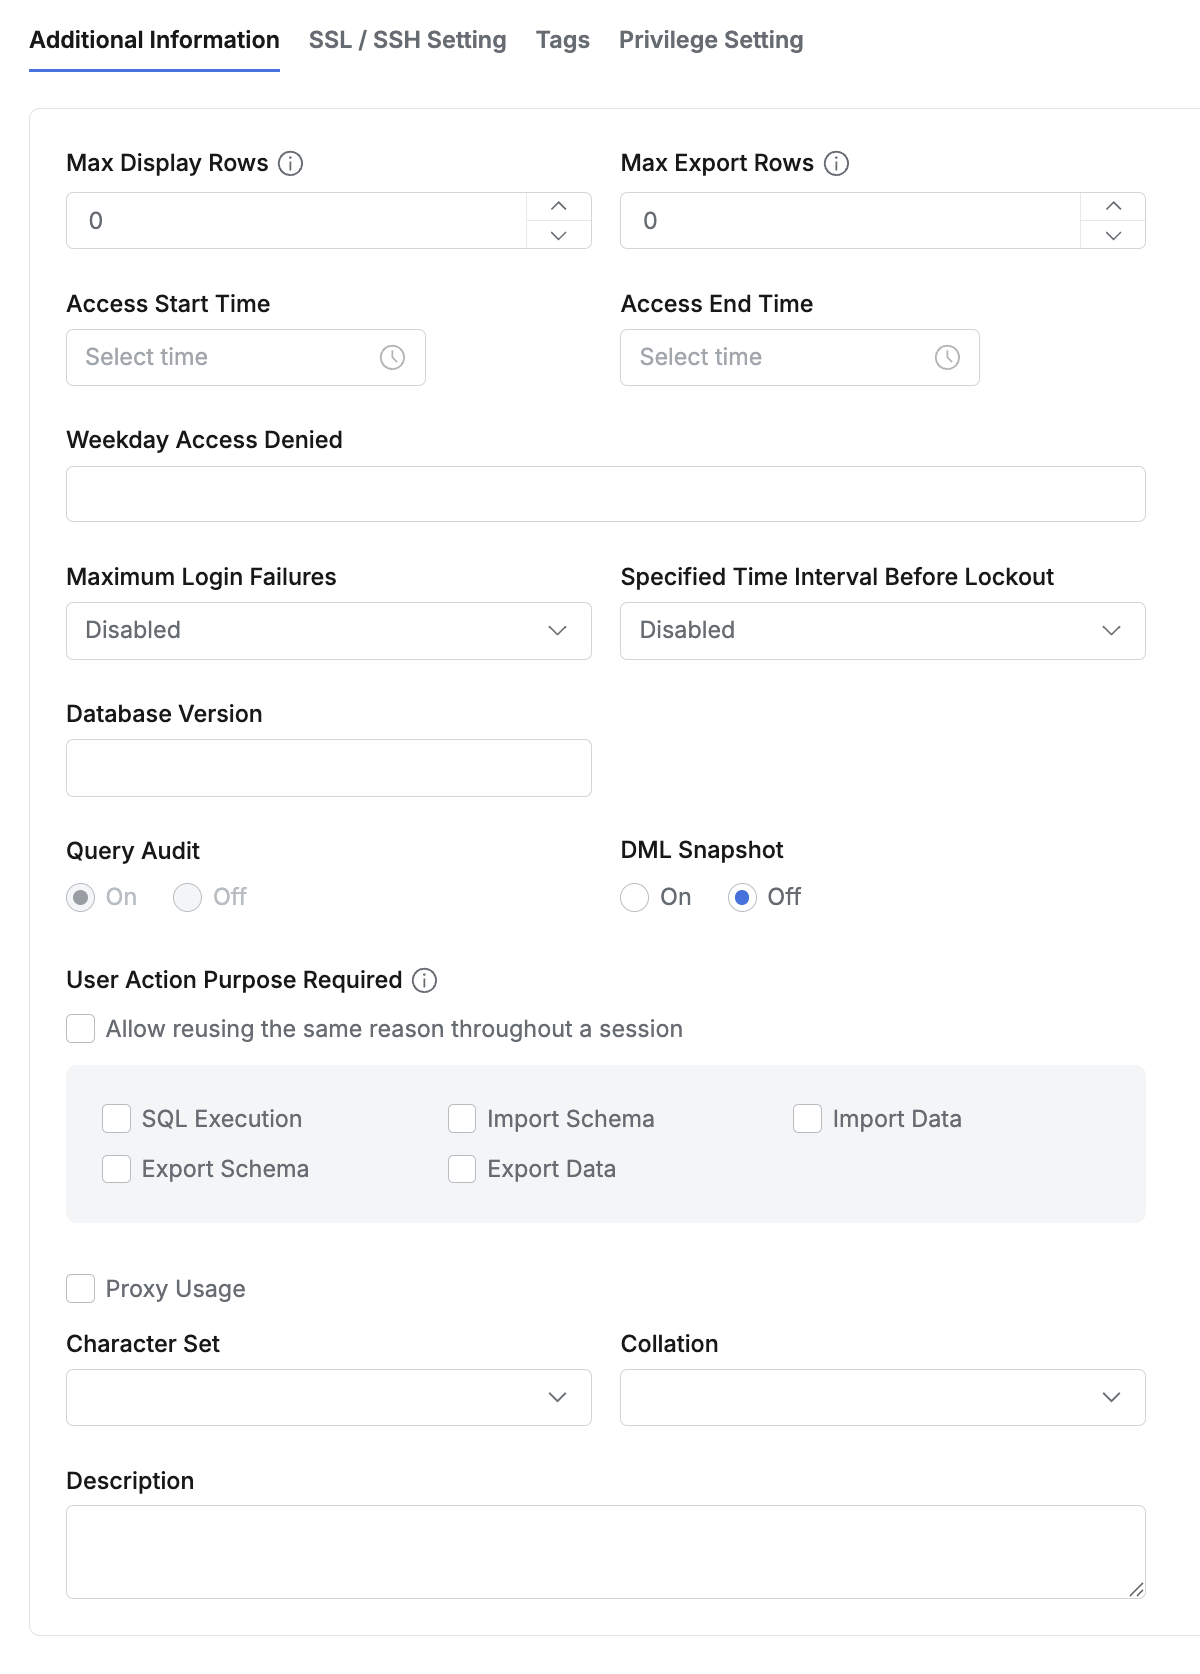
Additional Information
Enter detailed policies to be applied to the DB connection. Save with the Save Changes button.
Additional Information tab
Max Display Rows: You can limit the maximum number of rows of data that can be viewed after query execution. (Query Web Editor only)Max Export Rows: You can limit the maximum number of rows of data that can be exported at once. (Query Web Editor only)Access Start Time: You can set the start time of the time period when the connection can be accessed.Access End Time: You can set the end time of the time period when the connection can be accessed.Weekday Access Denied: You can select multiple weekdays when the connection cannot be accessed.Maximum Login Failures: You can limit the maximum number of database login failures allowed for the connection.Specified Time interval Before Lockout: You can set the time interval that serves as the basis for the number of login failures allowed.Database Version: You can enter the database version used in the connection.Query Audit On/Off: You can choose whether to record query logs executed in the connection. (Default = On)DML Snapshot On/Off: You can choose whether to record before/after data for executions in the connection. (Default = Off)User Action Purpose Required: You can set operations that require reason input in the connection.- Allow reusing the same reason throughout a session : You can set to allow reusing entered reasons.
- Export Schema Purpose : Set whether to require reason input when exporting data after selecting Export > SQL > Schema
- Import Schema Purpose : Set whether to require reason input when importing data after selecting Import > SQL > Schema
- Export Data Purpose : Set whether to require reason input when exporting data via Export > CSV / JSON / EXCEL
- Import Data Purpose : Set whether to require reason input when importing data via Import > CSV / JSON / EXCEL
- SQL Execute : Set whether to require reason input for SQL query execution and table viewing.
Proxy Usage: You can choose whether to use proxy for the connection. For detailed description, refer to Proxy settings.Character Set: You can select the character set to use in the connection.Collation: You can select the sorting method for the selected character set.Description: You can enter a description for the connection.
User Action Purpose Required
From 11.2.0, reason input for SQL Execute events in User Action Purpose Required options has been improved to also be received through Agent.
< Limitations >
- When using 3rd party tools (DBeaver, DataGrip, etc.), only SQL Execute items can be forced to require reason input.
- Queries sent internally by 3rd party tools (queries that show DB schema in tree structure or display data types in UI) are also detected as SQL Execute and require reason input. Example) Reason input popup appears even when no query is entered immediately after initial connection. In this case, since SQL statement types are not judged, it can cause considerable inconvenience depending on settings. Therefore, the value of the Query Purpose Duration for Agent option in Database > General > Configurations must be adjusted appropriately.

Proxy Usage
When Proxy Usage is activated, two options are displayed as follows:
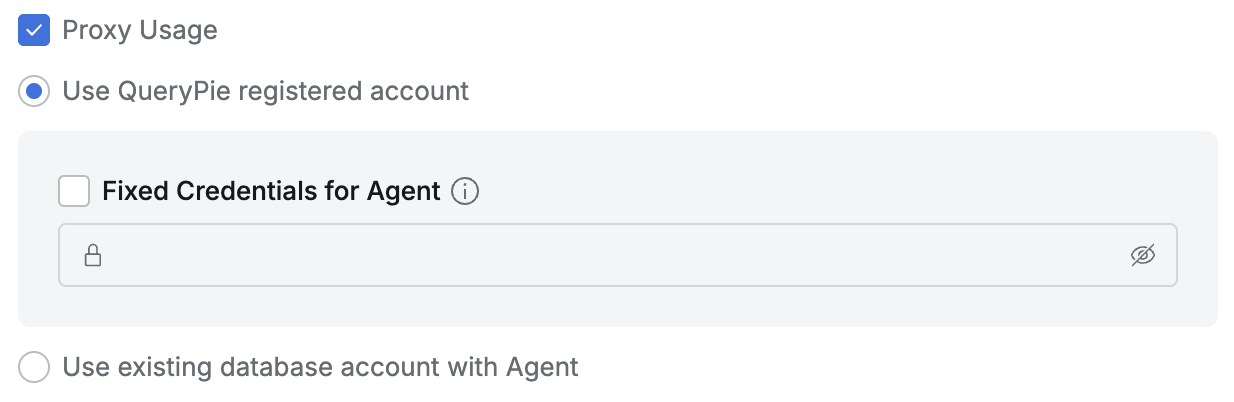
Proxy Usage options
- Use QueryPie registered account : When accessing DB through Proxy, the account information entered in 3rd party tools uses the account information specified by QueryPie’s Proxy.
- Use existing database account with Agent : When accessing DB through Proxy, the account information entered in 3rd party tools uses the actual DB account information.
From QueryPie 9.17, when using account information specified by Proxy, it has been changed to use random passwords as a security enhancement measure. From QueryPie 10.2.2, the ” Fixed Credential for Agent ” option is provided to use fixed passwords in situations where random password usage is difficult. When random password usage is difficult, administrators can activate this option and use fixed passwords, and Fixed Credential for Agent is only available for Oracle, PostgreSQL, and MongoDB.
SSL/SSH Setting
Activate SSL or SSH usage through checkboxes and select pre-registered configuration information from the dropdown below. Save with the Save Changes button.

SSL/SSH Setting tab
SSL/SSH configuration information must be pre-registered. Please refer to the following documents:
Connection Owner
In the Connection Owner tab, click the Add Connection Owner button to specify Connection Owners for each DB connection.
(Can be specified for users or groups) Save with the Save Changes button.
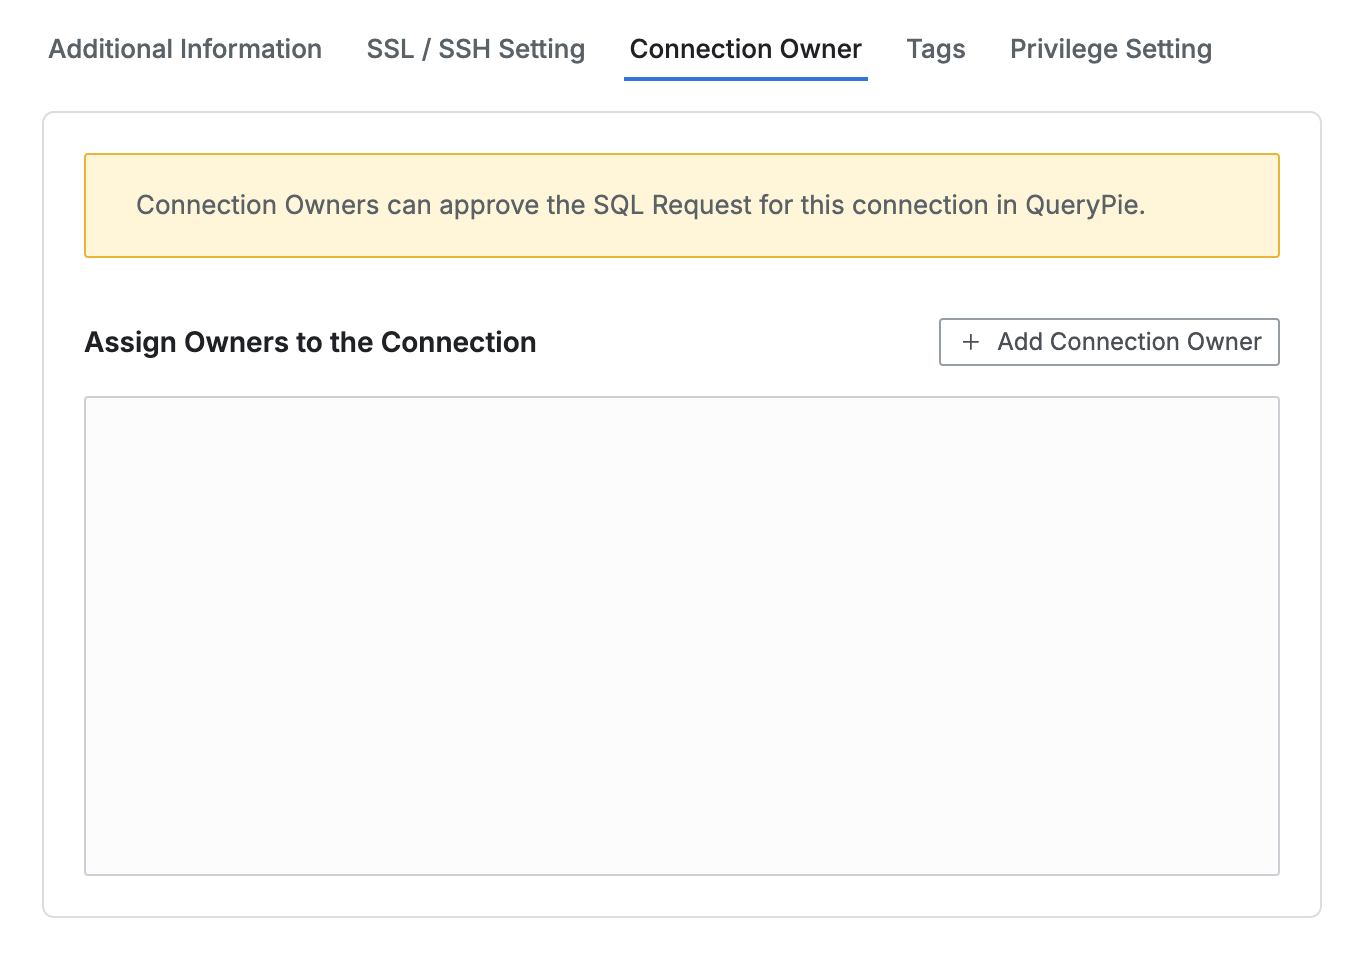
Connection Owner tab
Connection Owner can be specified as approvers or executors for SQL Request, SQL Export Request for the corresponding DB connection.
Tags
In the Tags tab, you can register and manage tags for each DB connection. Click the Add Tag button to add a tag row, and enter Key and Value.
Complete the input and save with the Save Changes button.
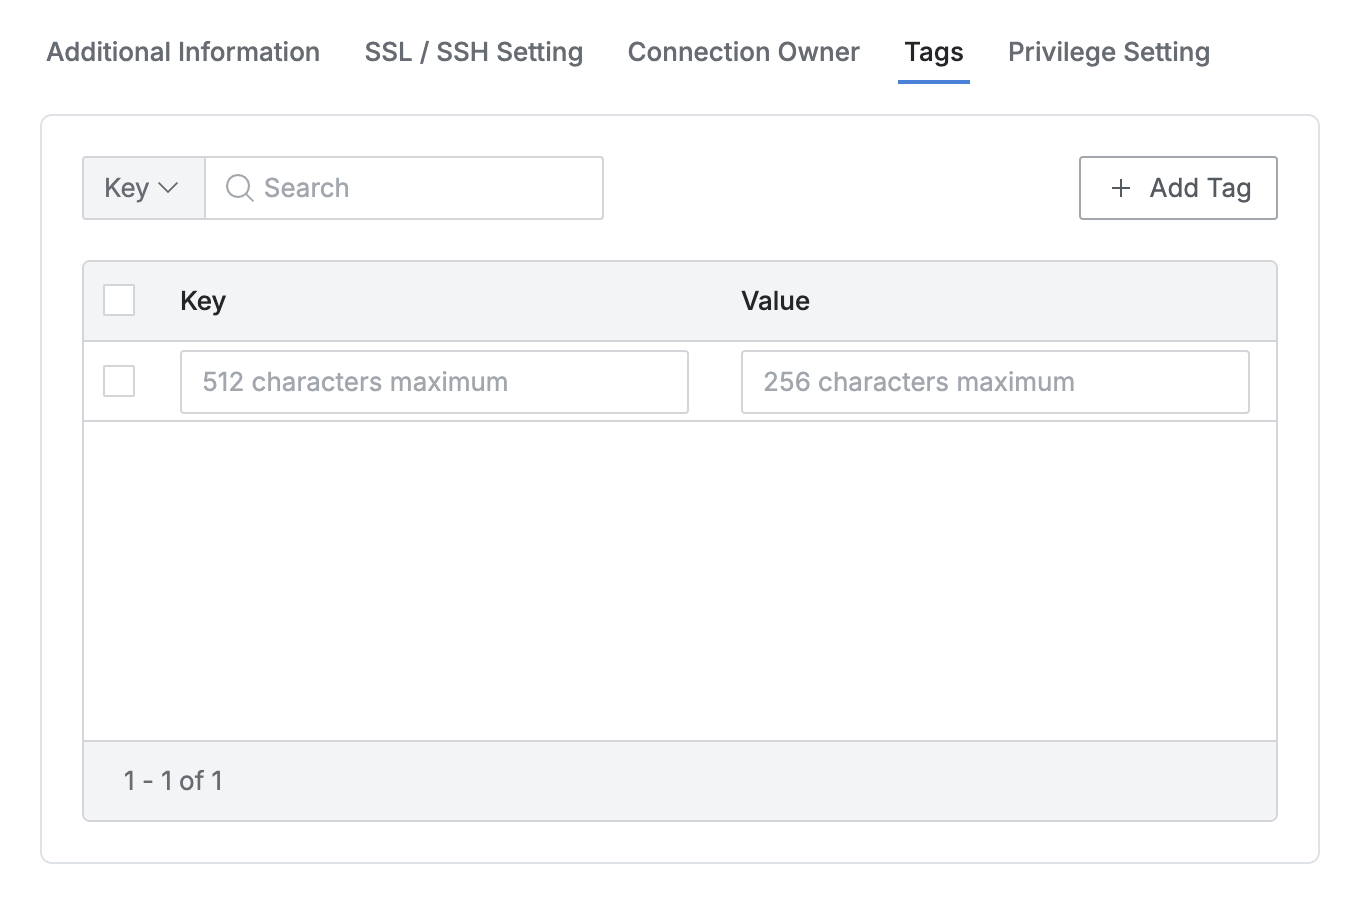
Tags tab
Privilege Setting (Advanced Privilege)
This is a feature that forces specification of connection accounts to use for each Privilege in DB connections.
This tab is only displayed when Advanced Privilege Setting is activated in Security. For detailed information, refer to the DB Connection Security Settings document in Security.
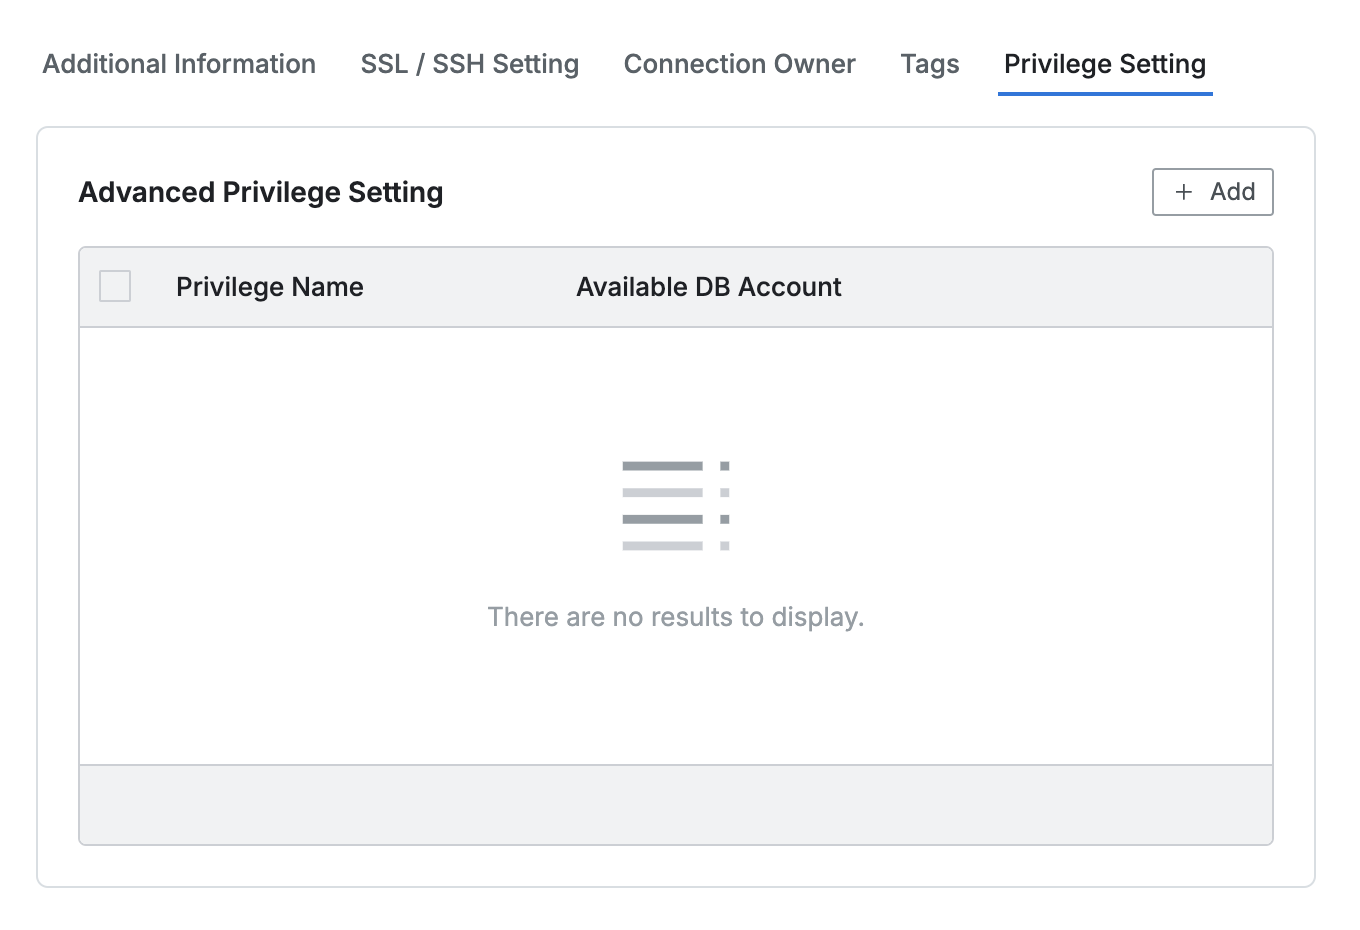
Privilege Setting tab
- Click the
Addbutton to select a Privilege and enter the DB Username and Password to be fixed for that Privilege. - You can test whether the account is actually accessible through
Test Connection. - Complete the configuration by saving the information through
Save Changes.
BigQuery, Dynamo, Athena, Impala, Presto, Trino, and Redis vendors do not support the Privilege Setting feature.
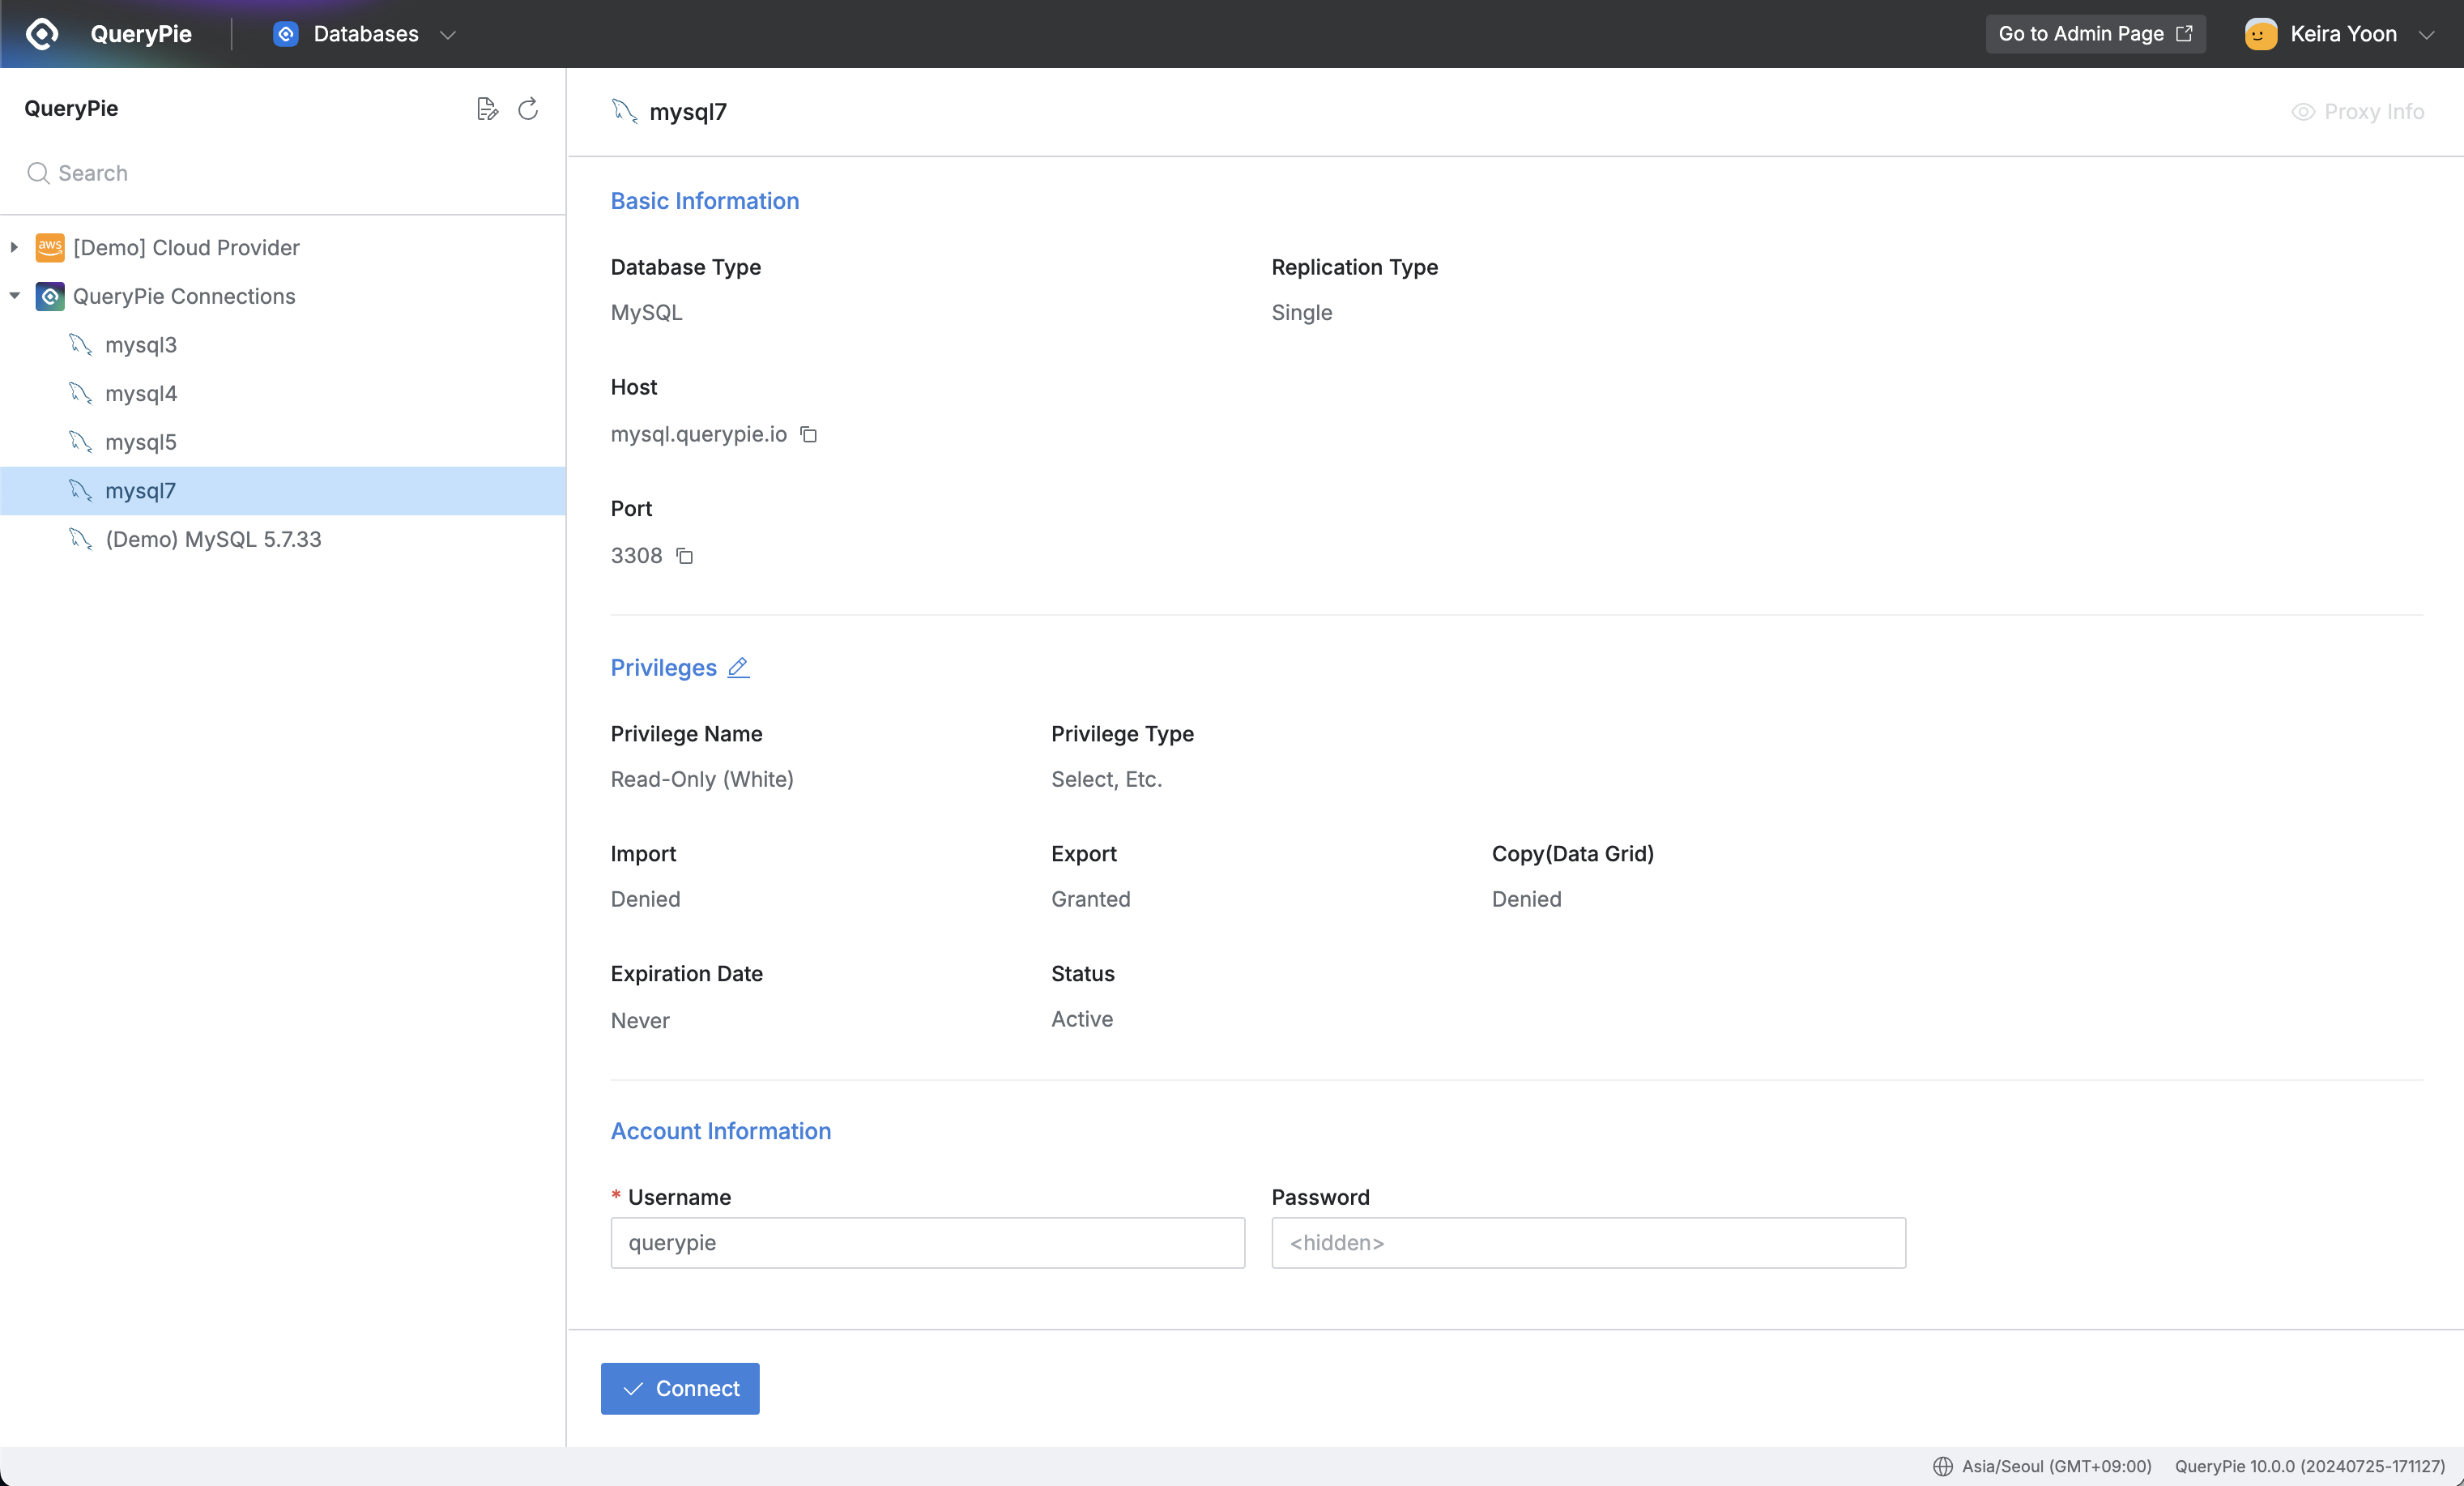
QueryPie Web > Databases > Connections
- Users who have been granted privileges with Privilege Setting configured use the DB account mapped to that Privilege as pre-configured by the administrator when connecting, and cannot see the DB Username and Password fields themselves on the Connections access page.
- The use of that DB account is enforced in connection access such as web editor, agent proxy, SQL Request, Export Request, etc.
From 11.3.0, when configuring Advanced privilege, if you do not register a password for a privileged account, the privileged account (administrator account) can manually enter the password when connecting to the target.
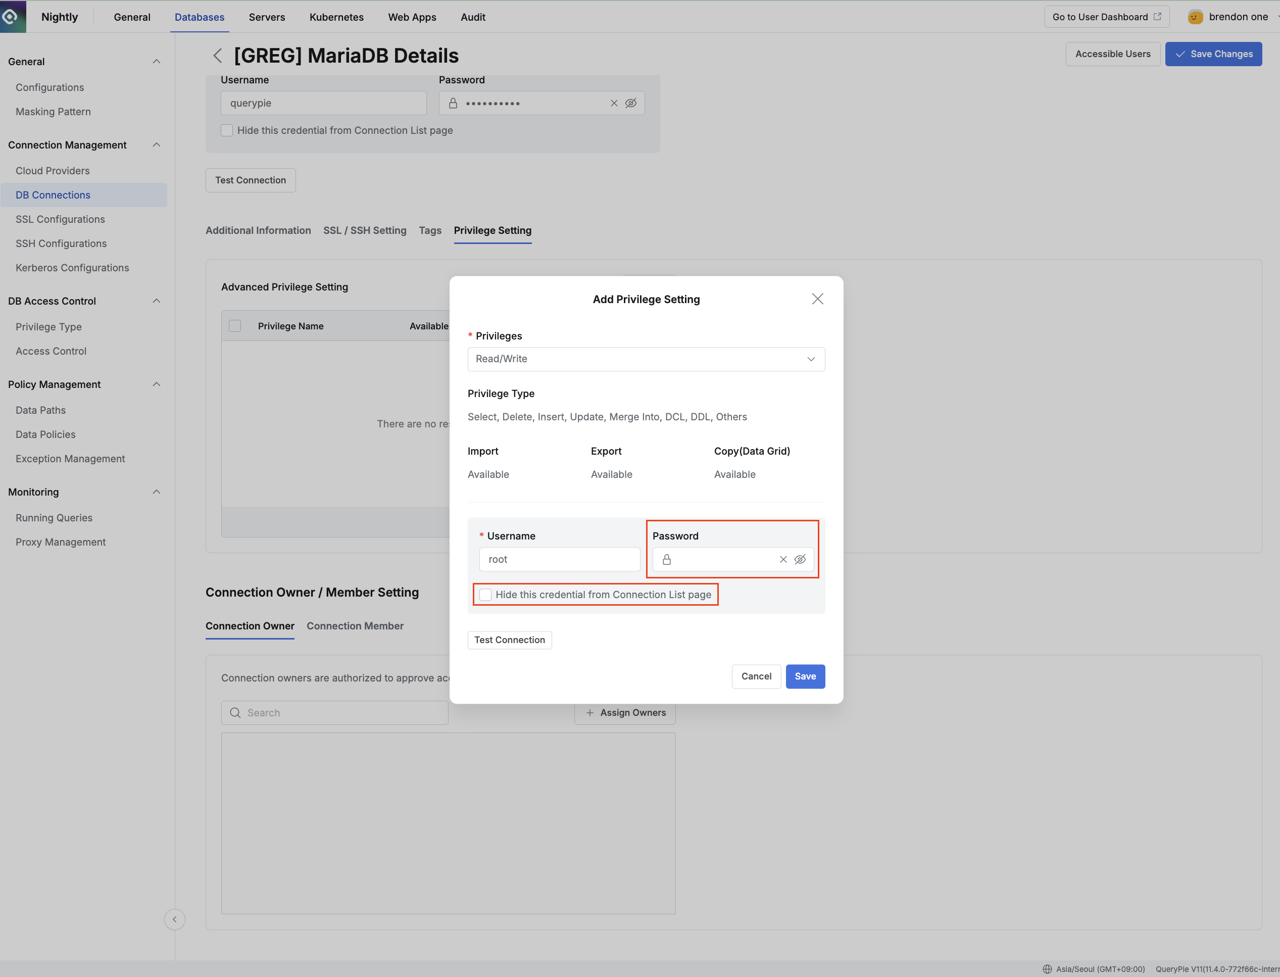
To allow manual entry of the DB account password when configuring Advanced privilege, leave the Password field empty and set the “Hide this credential from connection list page” checkbox to unchecked as shown above.