Installing and Removing Server Agent
Overview
To connect remotely to Windows Server, you must install QueryPie Server Agent. After installing QueryPie Server Agent, Windows Servers are automatically added to the Servers menu in QueryPie.
Installing Server Agent
- Access the Server Agent download page.
- You can access the Server Agent download page by adding
/for-agent/server-agent/downloadafter the installed QueryPie domain address.
e.g.https://sac.querypie.io/for-agent/server-agent/download
- You can access the Server Agent download page by adding
In 11.3.0, administrators can download server agents through the UI (the Download Server Agent button on the Admin > Servers > Connection Management > RDP Server Agent page).
You can still download using the existing download link page.
(Use this when non-QueryPie users need to download agents externally)
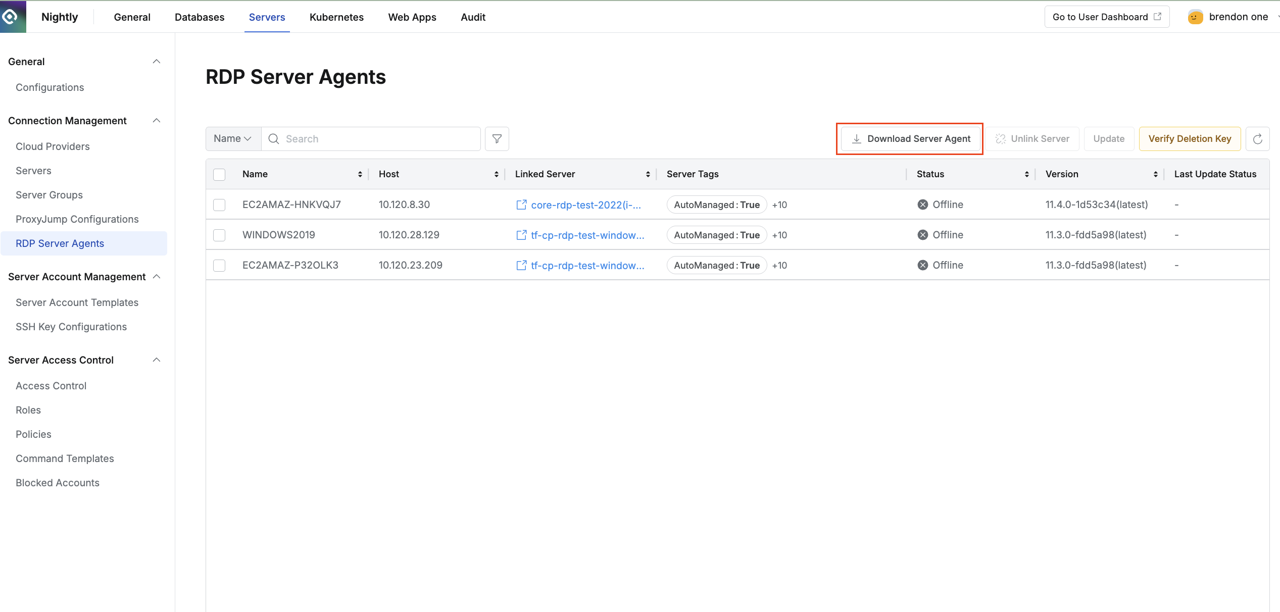
RDP Server Agent Download Button Provided
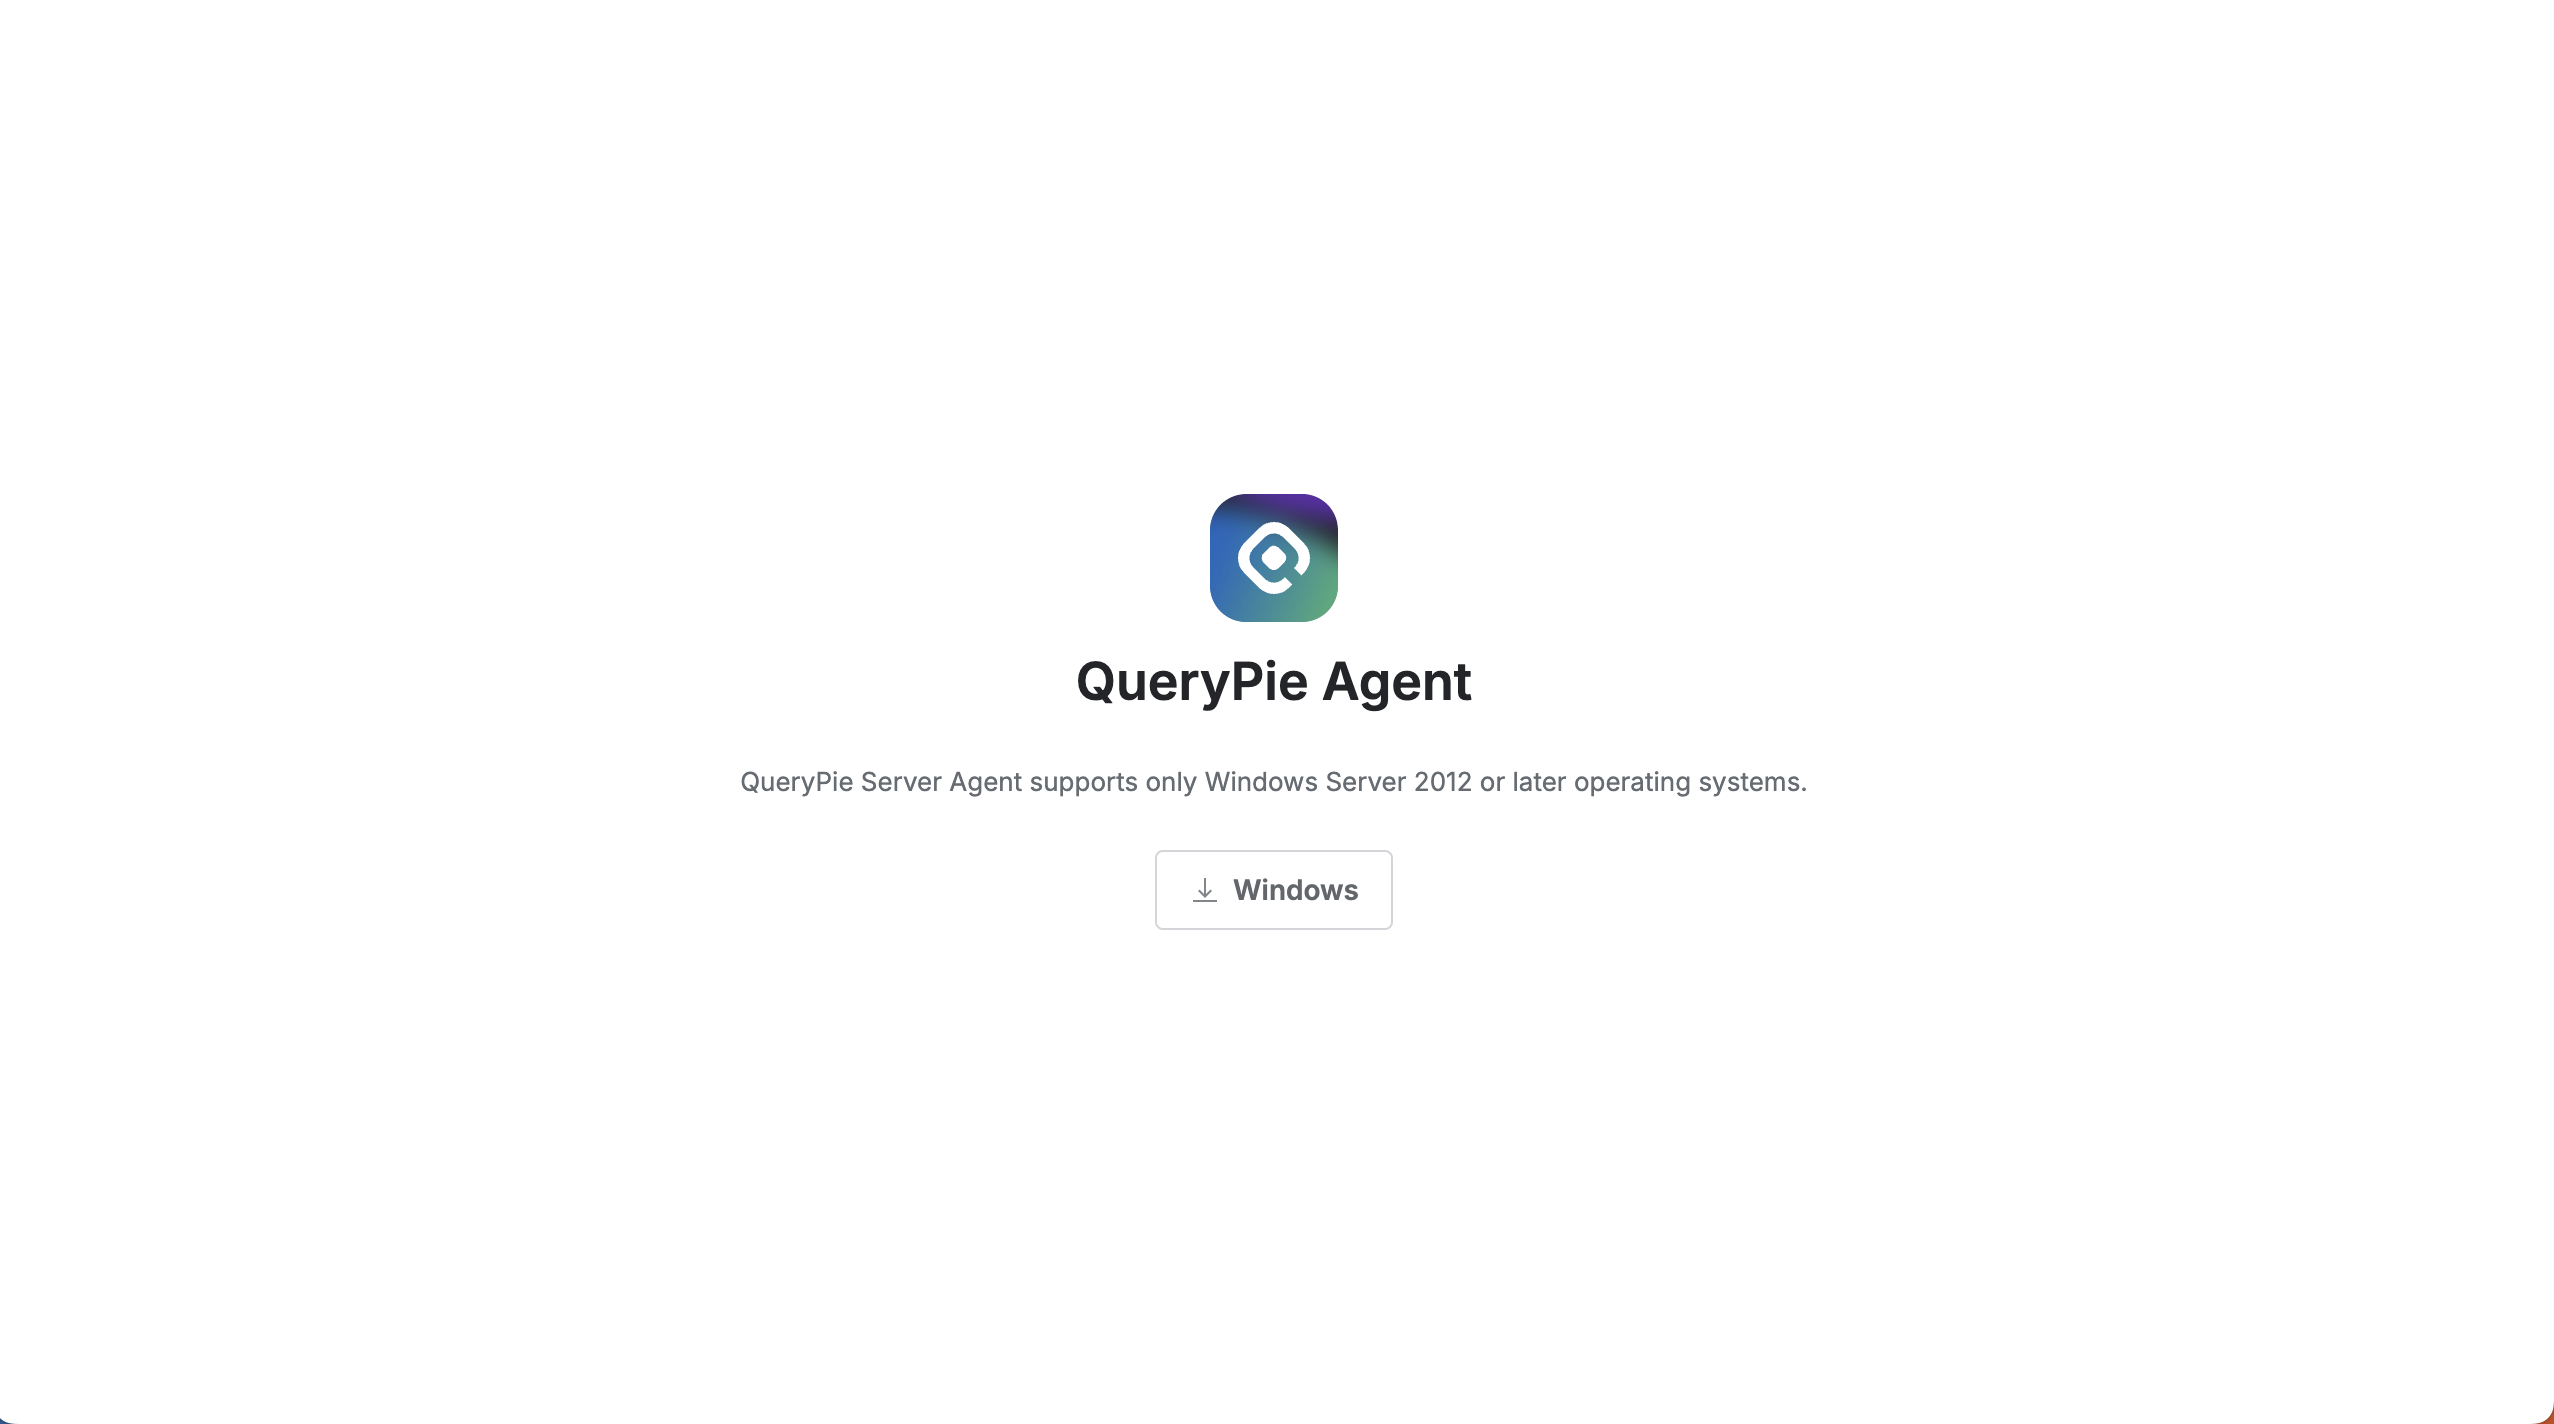
- Login to QueryPie is required for agent installation.
- Click the Windows button in the center of the screen to download the compressed file.
- Extract the compressed file on the Windows server to be installed. The compressed file contains the following two files.
- QueryPie Server Access Control_(QueryPie Version)_Setup
- CONFIG
- Place both files in the same path, then run the QueryPie Server Access Control_(QueryPie Version)_Setup file.
- Install the file according to the instructions.
CONFIG File Description
Contains the address of QueryPie to which the RDP Server Agent will connect.
Starting from version 10.2.8, you can specify the Port to use for RDP connection in the CONFIG file.
Changing Port Used for RDP Connection
- Port changes for RDP are not supported in QueryPie Web.
- If port changes are needed, you must reinstall the RDP Server Agent.
Installing Server Agent Without CONFIG File
Installing without GUI allows automatic program installation without user intervention, which is useful for large-scale deployment or remote installation.
You can automatically install Server Agent through PowerShell or CMD.
PowerShell
& "{installation file path}.exe" /Url="{QueryPie web address}" /Port="{Port to use for RDP}" /VERYSILENTe.g.
& ".\QueryPie_Server_Access_Control_Setup.exe" /Url="https://dev.querypie.com" /Port="13389" /VERYSILENTCMD
"{installation file path}.exe" /Url="{QueryPie web address}" /Port="{Port to use for RDP}" /VERYSILENTe.g.
After moving to the Server Agent installation file location in CMD, execute the following command
".\QueryPie_Server_Access_Control_Setup.exe" /Url="https://dev.querypie.com" /Port="13389" /VERYSILENTRemoving Server Agent
- Access the Administrator > Servers > Connection Management > Server Agents for RDP page.
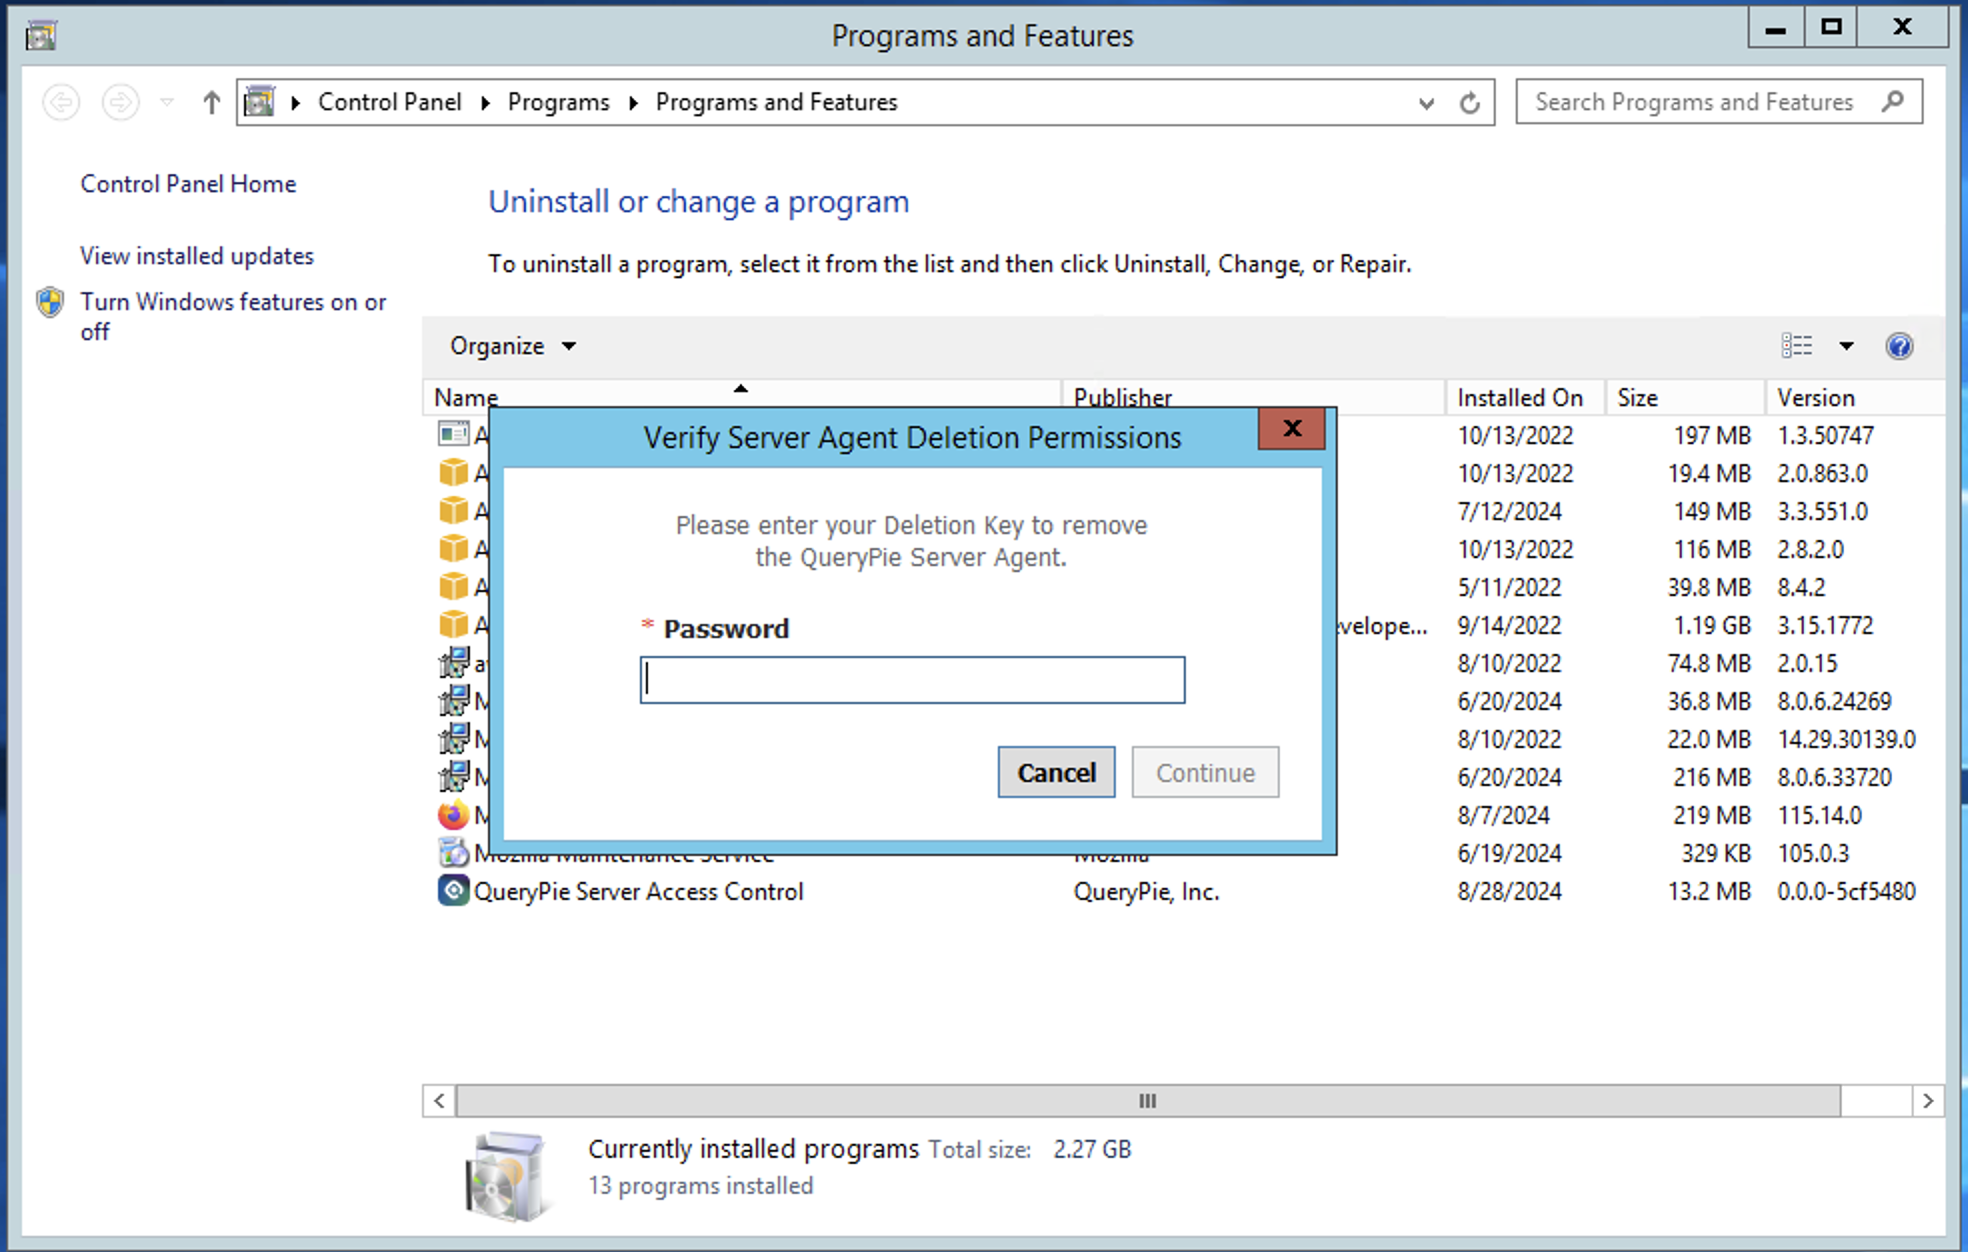
- Click the
Verify Deletion Keybutton in the top right. - Record the confirmed
Deletion Key. - Access the Windows Server console.
- Access Control Panel > Add/Remove Programs menu and delete QueryPie Server Agent.
- Enter the
Deletion Keyrecorded in step 3 in the password input field. - Access QueryPie web.
- Navigate to Administrator > Servers > Connection Management > Server Agents for RDP menu.
- Check the checkbox on the left of the target server to delete in the table and delete through the
Deletebutton.
Deletion Key changes daily, and deletion is only possible when the date of the server running QueryPie and the date of the target Windows server for deletion are the same.
When Deletion Key is Incorrect in Windows
- Check if the
Deletion Keywas received from the connected QueryPie. - Check if the date of the server running QueryPie and the date of the target Windows server for deletion are the same.