MongoDB Specific Guide
This section provides detailed setup guides specific to MongoDB.
Registering MongoDB Connections
MongoDB often uses multi-host structures such as Replica Set or Sharded Cluster (Sharding) rather than single host configurations. In this case, you need to create multi-host connections.
1. Understanding Basic MongoDB Connection String Structure
MongoDB connection strings have two types: standard and +srv.
< Standard Connection String Structure >
mongodb://[Hostname or IP]:[port],[Hostname or IP]:[port],[Hostname or IP]:[port]..../?[options]- mongodb:// : standard connection string scheme
- Hostname or IP : Full domain name or IP address of mongodb cluster member hosts
- options : Options related to connection attached after
/?. When using multiple options, connect them with&.
ex./?authSource=admin&replicaSet=rs0
When using replica set, you must enter /? behind replicaSet=[replica set name].
ex. /?replicaSet=rs0
< +srv Connection String Structure >
mongodb+srv://<FQDN>/?[options]- mongodb+srv:// : +srv connection string scheme
- Fully Qualified Domain Name (FQDN) : - Name composed of hostname and domain name combination registered in DNS ex. server1.example.com
- options : Options related to connection attached after
/?. When using multiple options, connect them with&.
ex./?authSource=admin&replicaSet=rs0
Since +srv can dynamically change the address of each host included in the cluster, QueryPie cannot directly use +srv in connections and converts it to standard connection string for use. Due to this conversion process, direct access to subordinate instances is not supported when using +srv for connection. Nevertheless, if direct access to subordinate hosts in +srv connection environment is needed, users must use nslookup command to check each host information through DNS lookup and create separate connections using standard connection string for access.
2. Creating MongoDB Connections
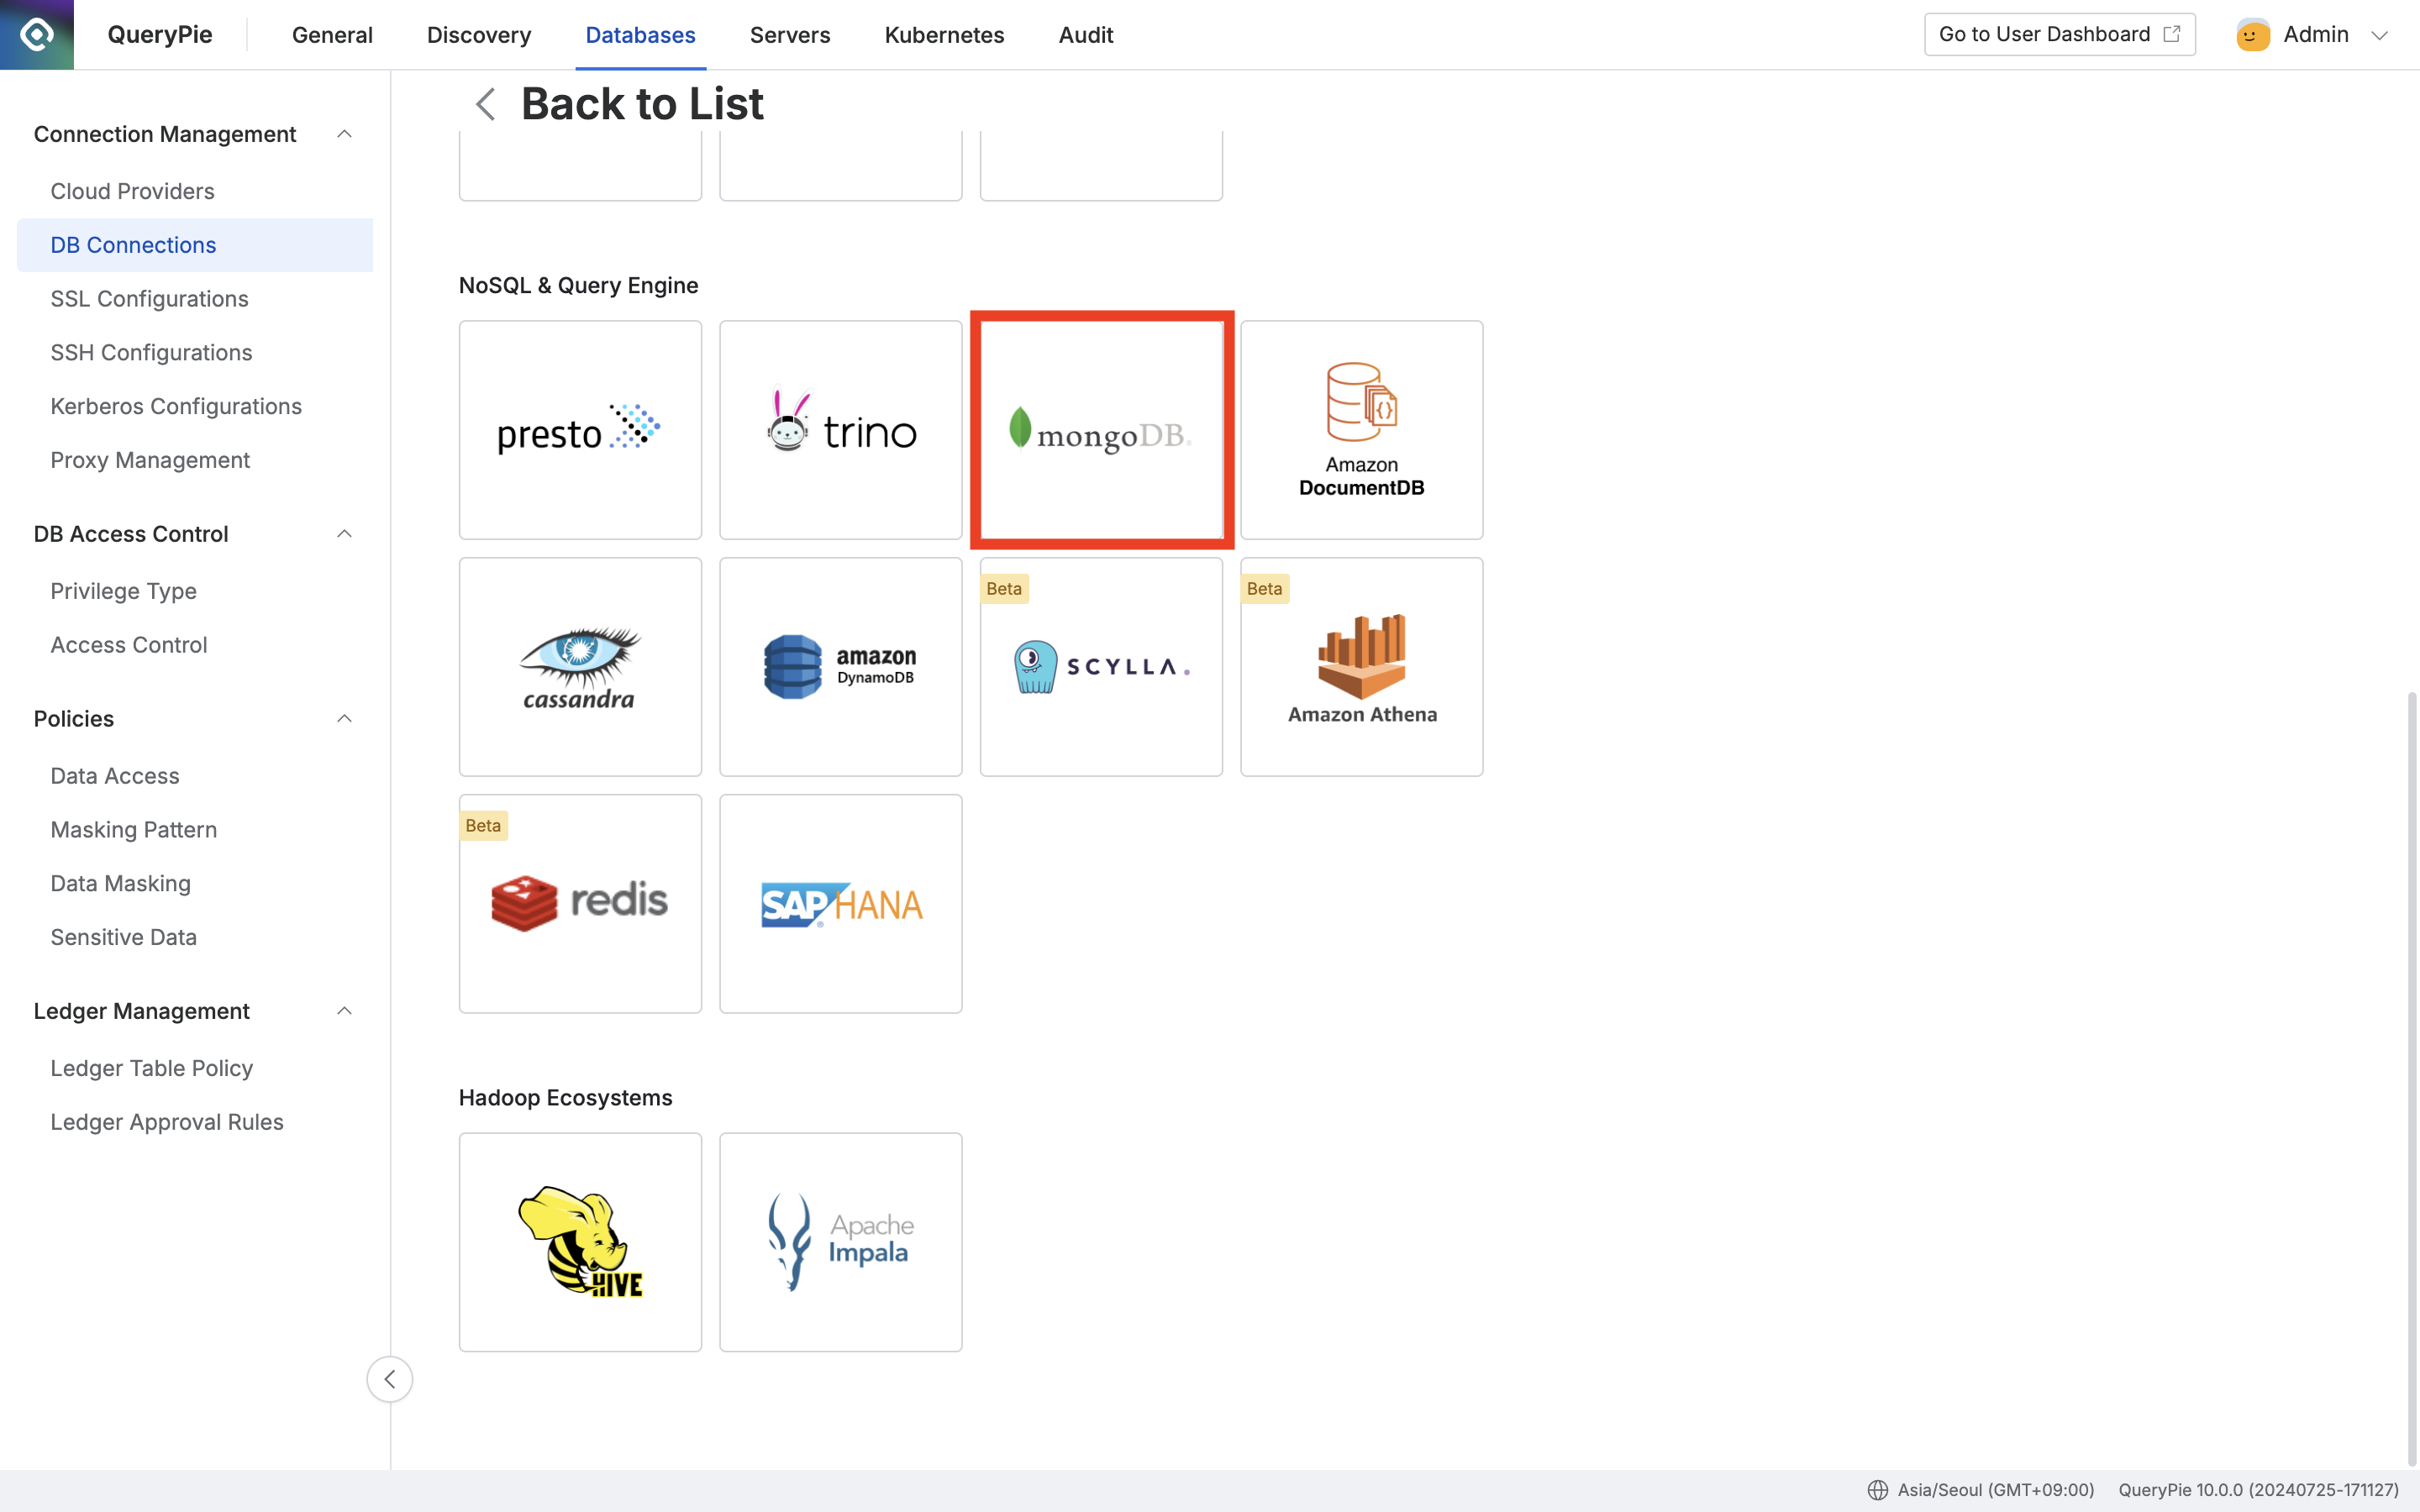
Administrator > Databases > Connection Management > DB Connections > Create Connection
- Navigate to Administrator > Databases > Connection Management > DB Connections menu.
- Click the
Create Connectionbutton in the top right. - Select mongoDB in the data source selection step.
3. Setting Up as Replica Set
< Standard Connection >

- Set appropriate network zone settings in Allowed Zone.
- Specify Connection Name.
- Turn on the
Clusterswitch to activate cluster input, then enter the following information:- Type : Area exposed in connection information. Since Primary role can change dynamically, select the default
Primary. - Expose : To allow viewing subordinate nodes (hosts or instances) of the cluster in connection information screen or agent’s connection target list, select
Expandable, to prevent viewing, selectUnexpandable, to hide the cluster and show only subordinate nodes (hosts or instances), selectHidden. - Connection String :
- Select
mongodb://from the Scheme selection options. - Enter subordinate host names and ports separated by commas.
- Select
- Click the
Add Instancebutton to add each member host as an instance.- Instance Name : Enter a name that can distinguish each host.
- Connection String : Enter each host in
HOSTNAME(FQDN or IP Address):[PORT]format. - Expose is an option that can determine the exposure of individual instances in connection information.
To use multi-host functionality, instances must be in expose state, so be sure to activate theExposeoption.
- Type : Area exposed in connection information. Since Primary role can change dynamically, select the default
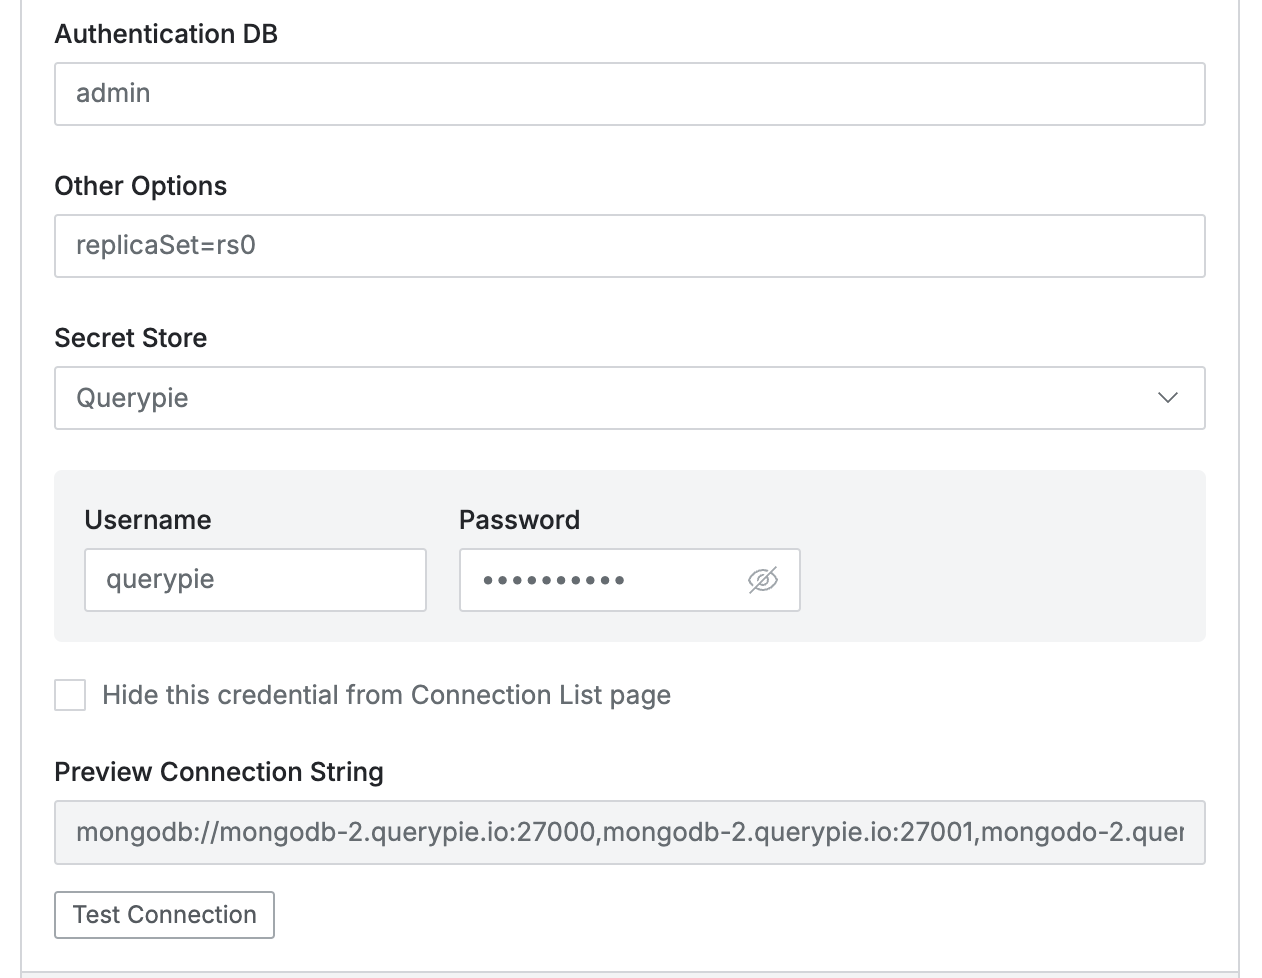
- Authentication DB : Enter the value of Authentication DB (authSource).
- Other Options : Enter remaining values except authSource among options used in connection string.
Example 1) When using only single option format ( [Key]=[Value] ) : replicaSet=rs0
Example 2) When using multiple options format ( [Key]=[Vaule]&[Key]=[Value] ) : replicaSet=rs0&tls=true
When using replica set configuration, you must enter replicaSet=[replicaset name] option. - Secret Store : Option for using 3rd party for password and key management. Default QueryPie means managed within QueryPie.
- User Name & Password : Enter the username and password for the database.
- Click the
Test Connectionbutton to verify if the entered connection information is valid. - Complete and save by clicking the
Nextbutton.
For more detailed information about Cluster mode, you can also check DB Connections.
< +srv Connection >
- Set appropriate network zone settings in Allowed Zone.
- Specify Connection Name.
- Turn on the
Clusterswitch to activate cluster input, then enter the following information:- Type : Area exposed in connection information. Since Primary role can change dynamically, select the default
Primary. - Expose : To allow viewing subordinate nodes (hosts or instances) of the cluster in connection information screen or agent’s connection target list, select
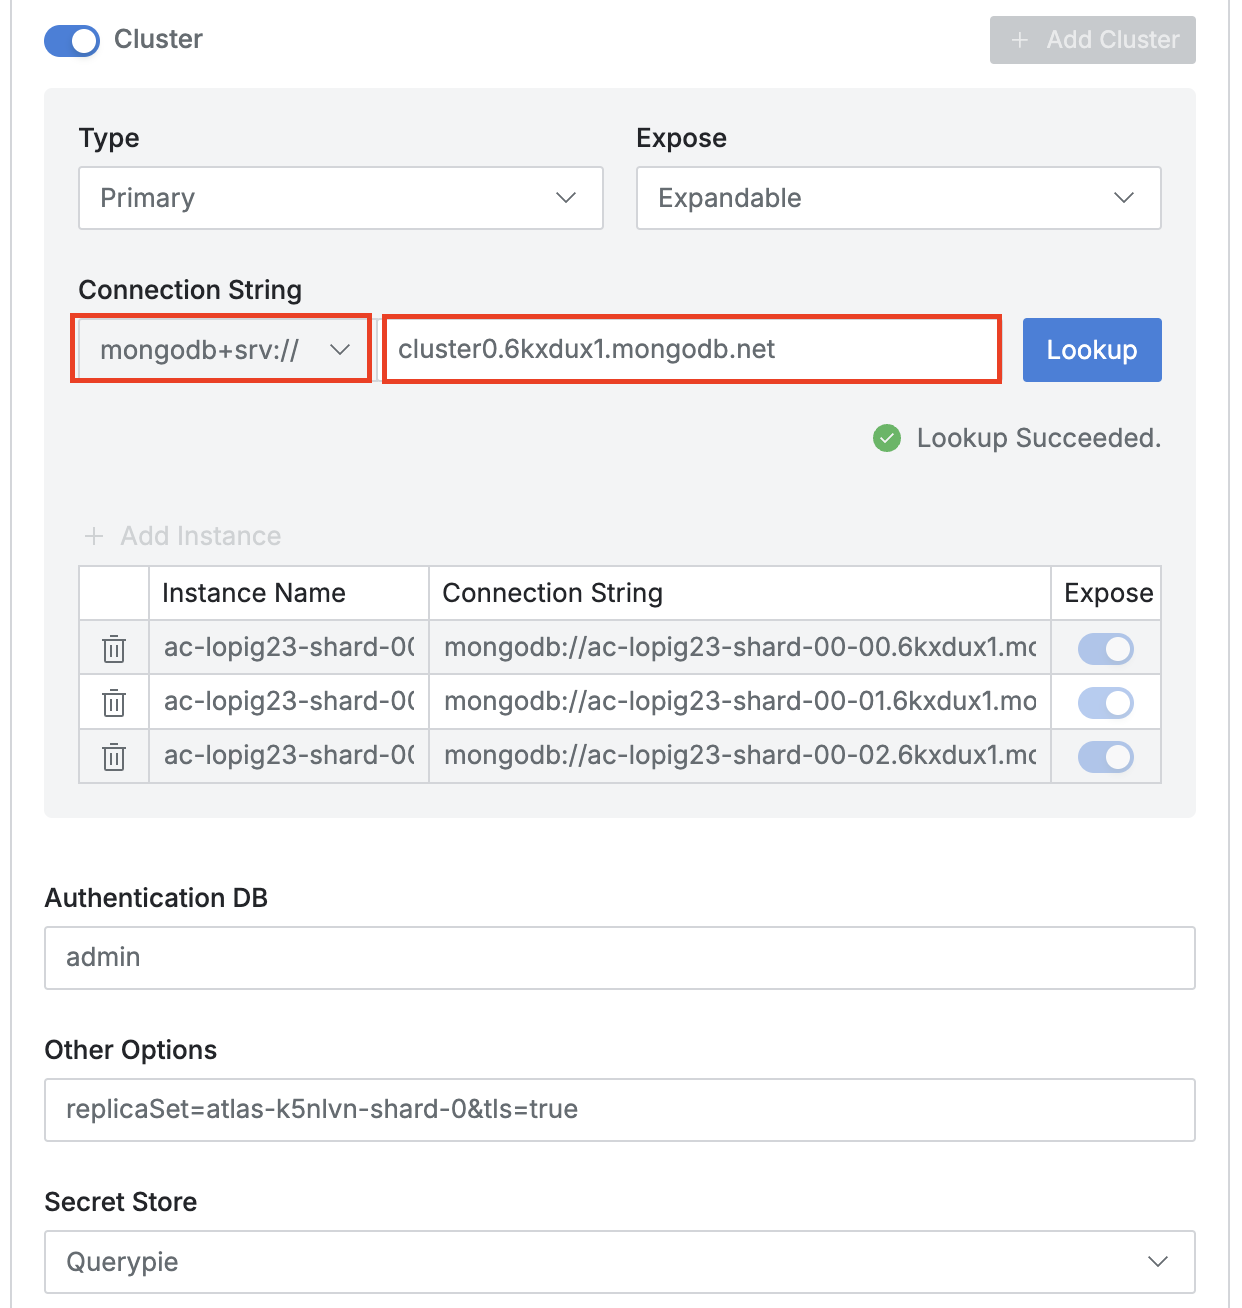
Expandable, to prevent viewing, selectUnexpandable, to hide the cluster and show only subordinate nodes (hosts or instances), selectHidden. - Connection String :
- Select
mongodb+srv://from the Scheme selection options. - Enter domain format host name (FQDN).
- Click the
Lookupbutton. If DNS lookup is successful, nodes included in the cluster are automatically added as instances.
- Select
- Authentication DB and Other Options
- Authentication DB value and Other Options are automatically entered with values queried from DNS TXT records.
- Since +srv scheme automatically has TLS option as true, when converting to standard string, tls=true must be manually entered. (Because TXT record doesn’t have TLS option.) Therefore, enter &tls=true in Other options field as shown in the figure above.
- Type : Area exposed in connection information. Since Primary role can change dynamically, select the default
- Secret Store : Option for using 3rd party for password and key management. Default QueryPie means managed within QueryPie.
- User Name & Password : Enter the username and password for the database.
- Click the
Test Connectionbutton to verify if the entered connection information is valid. - Complete and save by clicking the
Nextbutton
4. Setting Up as Sharded Cluster (Sharding)
Sharded Cluster has the same setup method as Replica Set, only the Connection String options are different. Replica Set requires replicaSet=[replica set name] option, but Sharded Cluster doesn’t need this option.
< Standard Connection >
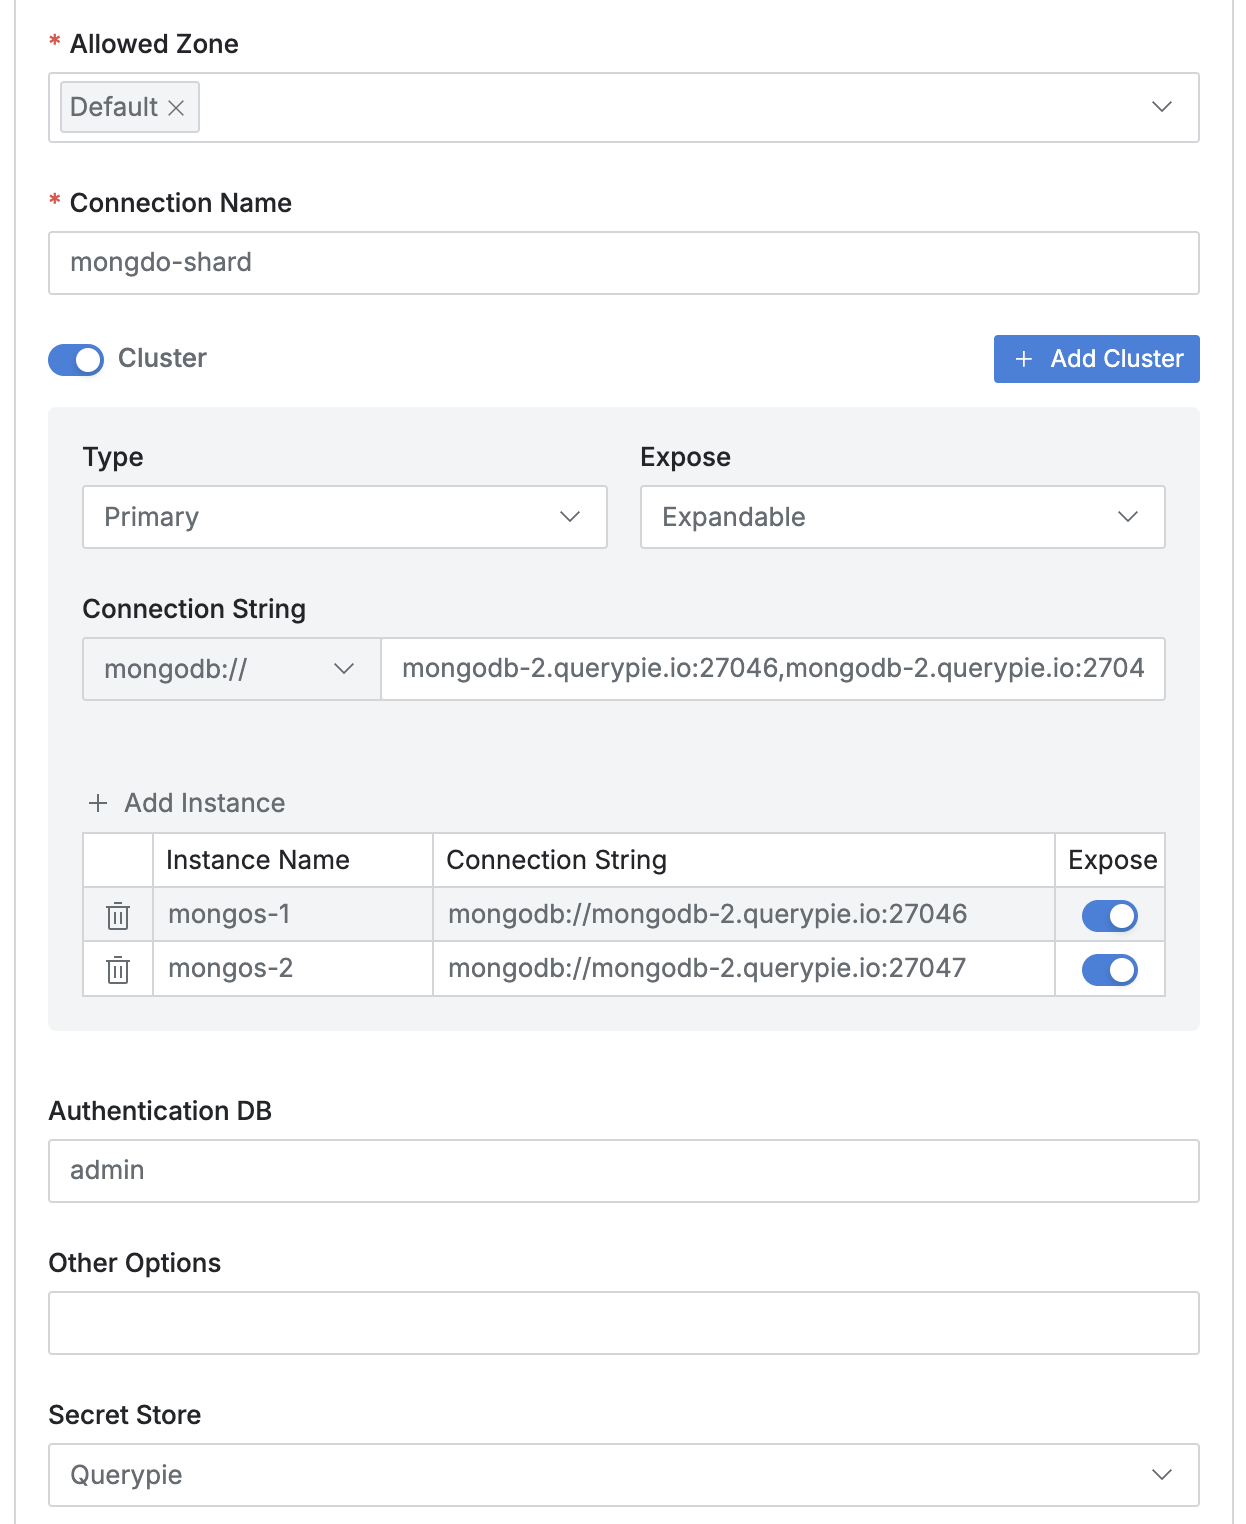
- Turn on the
Clusterswitch to activate cluster input, then enter the following information:- Type : Area exposed in connection information. Since Primary role can change dynamically, maintain the Primary value.
- Connection String :
- Select
mongodb://from the Scheme selection options. - Enter each mongos host name and port separated by commas.
- Select
- Click the
Add Instancebutton to add each mongos as an instance.- Enter in
mongodb://HOSTNAME(FQDN or IP Address):[PORT]format, then enter appropriate Instance Name. - Expose is a value that can determine exposure in connection information.
- Enter in
- Authentication DB : Enter the value of Authentication DB (authSource).
- Other Options : Sharded cluster may not need additional options.
- Secret Store : Option for using 3rd party for password and key management. Default QueryPie means managed within QueryPie.
- User Name & Password : Enter the username and password for the database.
- Click the
Test Connectionbutton to verify if the entered connection information is valid. - Complete and save by clicking the
Nextbutton.
< +srv Connection >
After converting to standard string, simply add the tls=true option to Other options. There is no difference from replica set configuration.
For more detailed information about Cluster mode, you can also check DB Connections.
TLS(SSL) Settings When Using Proxy
As mentioned above, when using QueryPie’s SQL editor for connection, tls=true is required in the connection string.
Since +srv scheme automatically has TLS option as true, when converting to standard string, tls=true must be manually entered. (Because TXT record doesn’t have TLS option.) Therefore, enter &tls=true in Other options field as shown in the figure above.
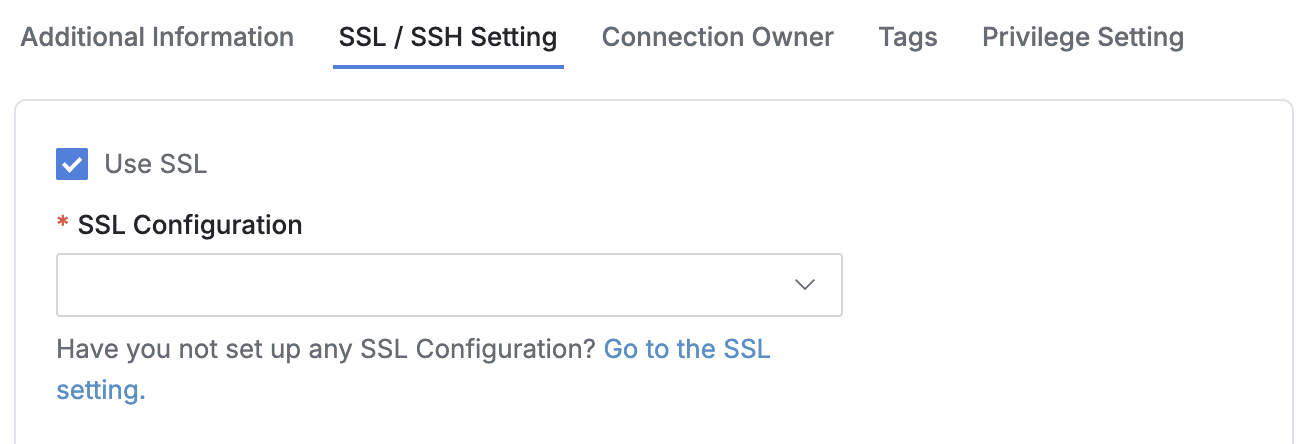
When using Proxy, SSL settings are required in QueryPie separately from TLS settings in SQL clients like DataGrip.
Refer to SSL Configurations for setup and reflect in the connection’s SSL settings.
MongoDB Data Policy and Rule Settings
For data requiring access restrictions such as personal information or sensitive information in MongoDB, you can set data access restrictions and masking policies for Collections and JSON Values so that such data cannot be viewed during queries. Since MongoDB among DBMS supported by QueryPie always stores data in JSON format, separate formatting logic is used.
Please check the links below for initial policy creation.
Registering Rules in Masking Policy
Administrator > Databases > Policies > Data Masking > Add Rule List
- After creating a policy, register the data path to which the policy will be applied as rules.
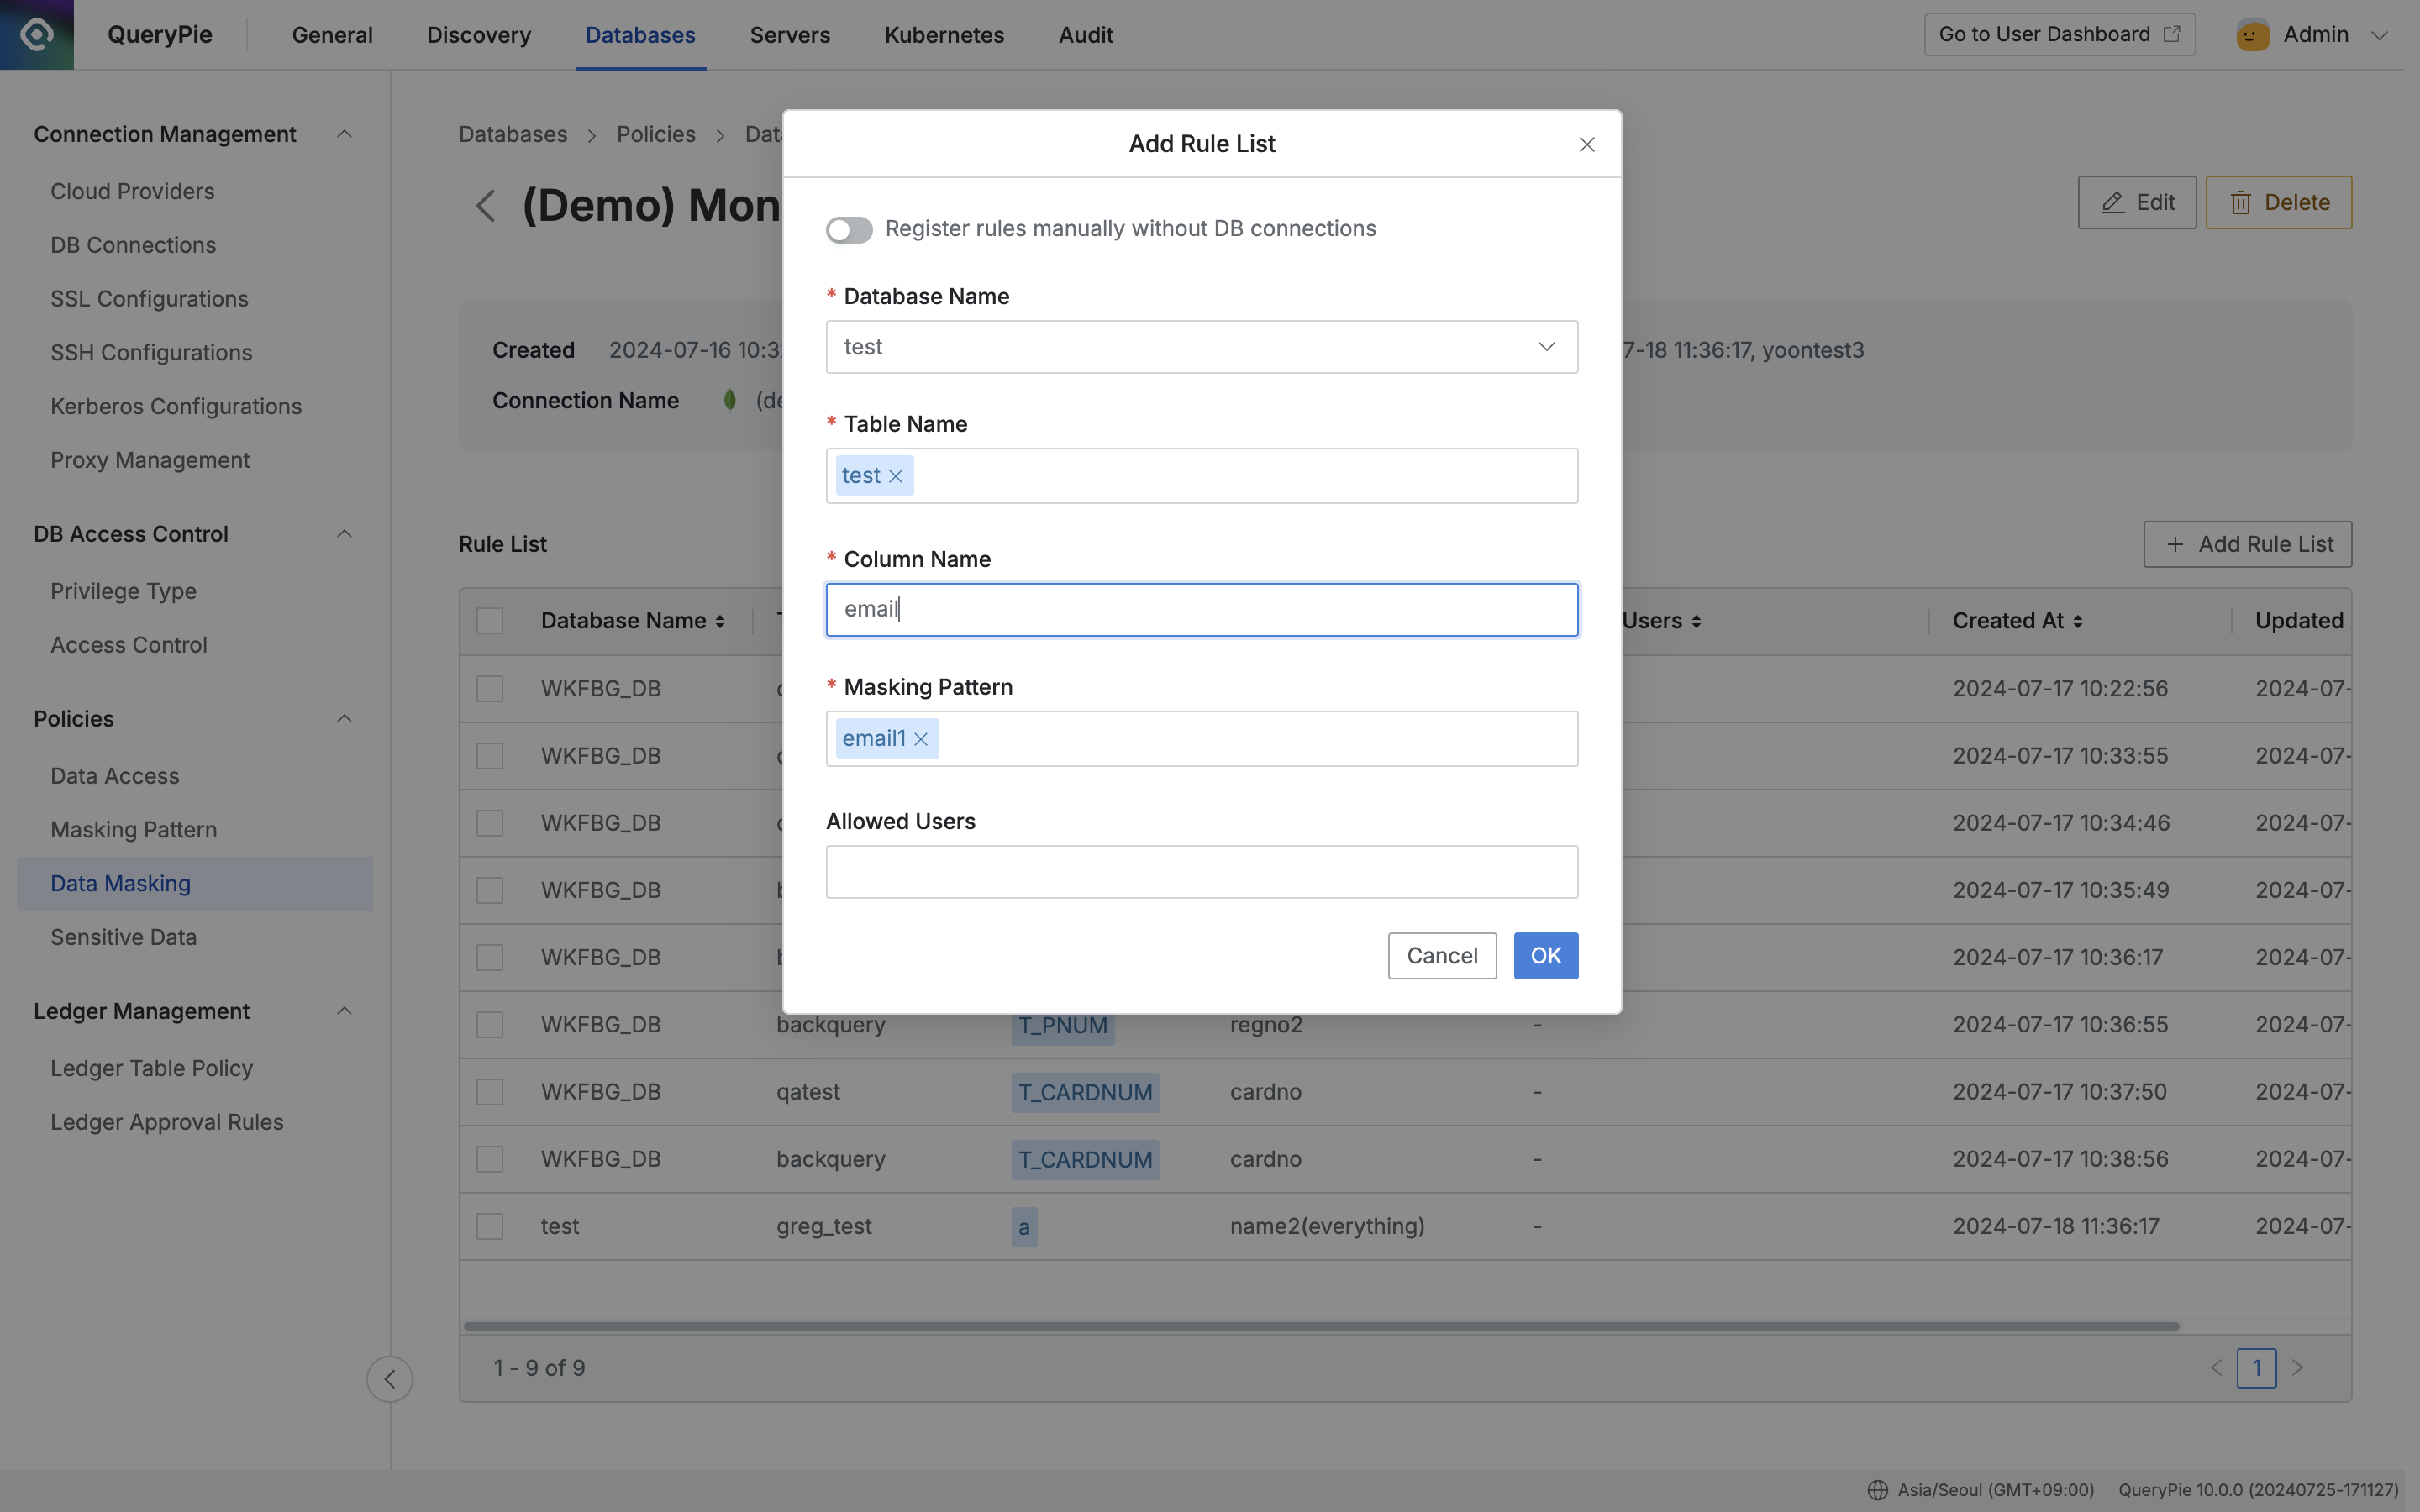
You can check that rules are registered in the Rule List tab. Now when users query Documents of the corresponding Collection in MongoDB, the Value of the pre-specified Attribute is masked and displayed according to the applied masking pattern, such as*****@gmail.com.- Click the policy created in the Data Masking menu.
- The policy detail information and rule registration screen is displayed, click the
Add Rule Listbutton on the right. - Select the data path to which the policy will be applied in order.
- Database Name : Required value for rule registration.
- Table Name : For MongoDB, enter the Collection name.
- Column Name : For MongoDB, enter the JSON Attribute value to apply masking within the Document.
- Apply masking pattern.
- Select one or more masking patterns to apply to the column selected in step 3.
- Basically provides patterns for masking personal information and sensitive information in about 20 types.
- You can create detection patterns and masking patterns directly through regular expressions in the Masking Pattern menu.
- Exception handling of masking rules can be done for users or groups who need to query the data.
- Allowed Users : Select users or groups to exception handle the rule.
- Save by clicking the
Okbutton.
Registering Rules in Collection / JSON Value Access Restriction Policy
After creating a policy, register the data path to which the policy will be applied as rules.

Administrator > Databases > Policies > Data Access > Add Rule List
- Click the policy created in the Data Access menu.
- The policy detail information and rule registration screen is displayed, click the
Add Rule Listbutton on the right. - Select the data path to which the policy will be applied in order.
- Database Name : Required value for rule registration.
- Table Name : Required value for rule registration. When only table is selected, querying the table itself is restricted. For MongoDB, enter the Collection name.
- Column Name : For MongoDB, enter the JSON Attribute value to restrict data access for specific Values within Documents.
- Exception handling of access restriction rules can be done for users or groups who need to query the data.
- Allowed Users : Select users or groups to exception handle the rule.
- Save by clicking the
Okbutton.
You can check that rules are registered in the Rule List tab.
Now when users query the data, if policy is applied to the table, the table itself cannot be queried, and if rules are applied to columns, it is displayed as {RESTRICTED}.
JSON PATH Examples
Examples of MongoDB data to which policies are applied are as follows:
{
    _id: ObjectId("64b3f7ad344ac8c881a09dc6"),
    item: "journal",
    qty: 25,
    tags: ["blank", "red"],
    size: {
        h: 14,
        w: 21,
        uom: "cm"
    }
}
Case 1. item Attribute Access Restriction
Administrator > Databases > Policies > Data Access > Add Rule List
When setting access restriction policy for one attribute, enter the corresponding item in the “Column Name” field and click the OK button.
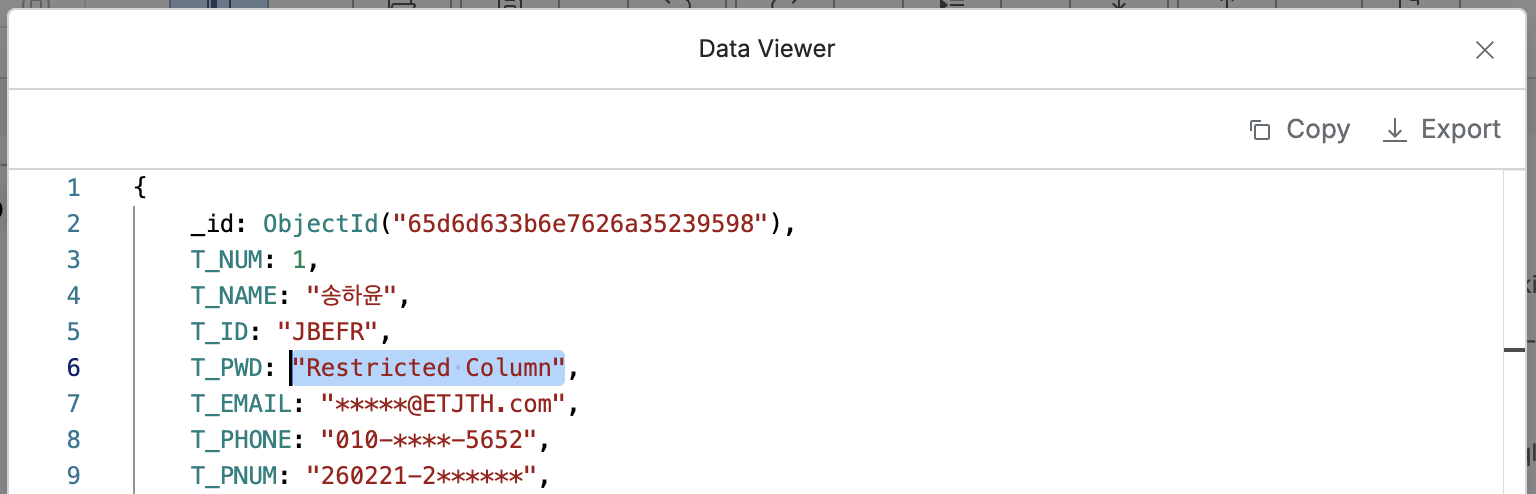
As shown in the screenshot above, you can see that the value of the item(“T_PWD”) attribute is displayed as “Restricted Column”.
Case 2. size.h Attribute Access Restriction
When setting access restriction policy for the h attribute under size, enter $.size.h in the “Column Name” field and click the OK button.

Administrator > Databases > Policies > Data Access > Add Rule List
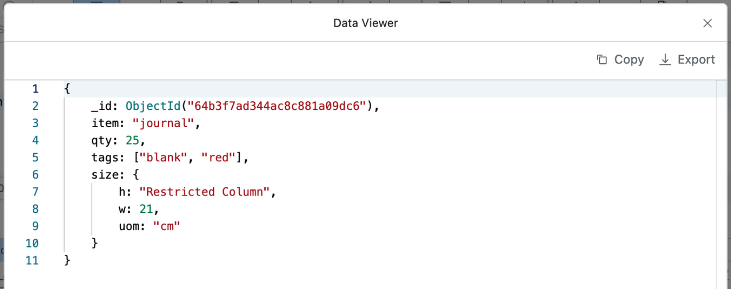
As shown in the screenshot above, you can see that the value of the h attribute under size is displayed as “Restricted Column”.
Case 3. All Attributes Under size Access Restriction
When setting access restriction policy for all attributes under size, enter $.size in the “Column Name” field and click the OK button.
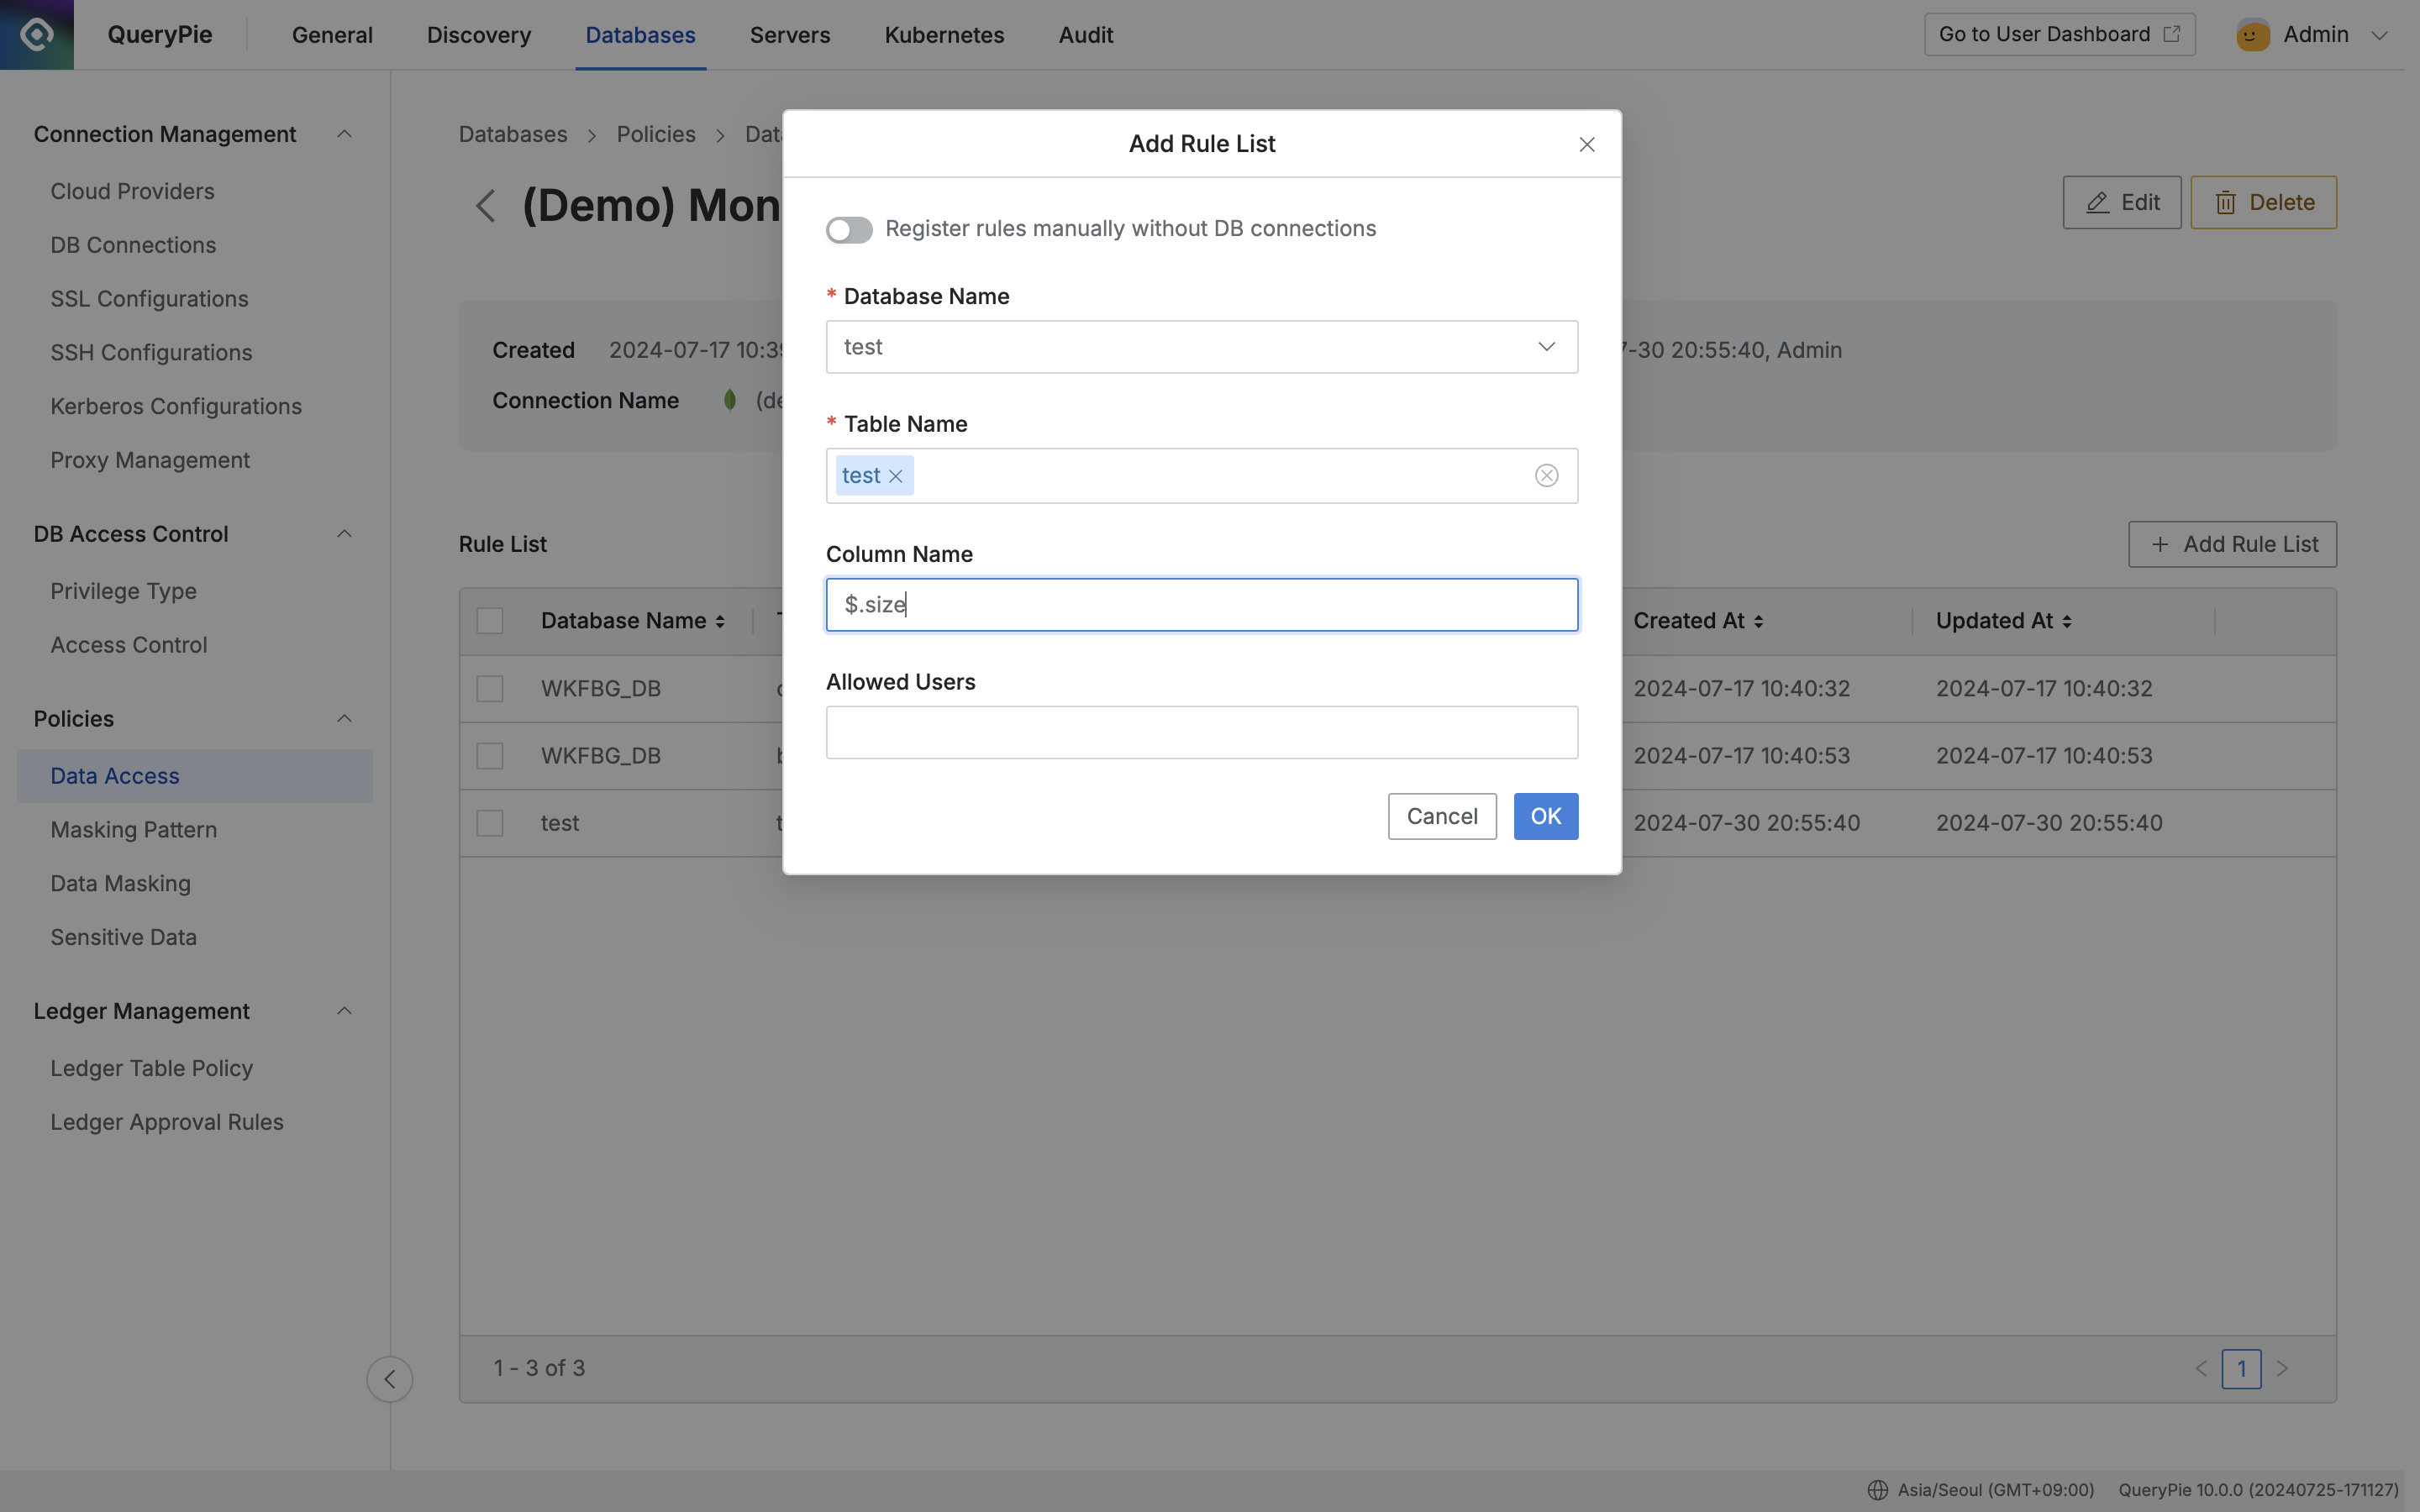
Administrator > Databases > Policies > Data Access > Add Rule List
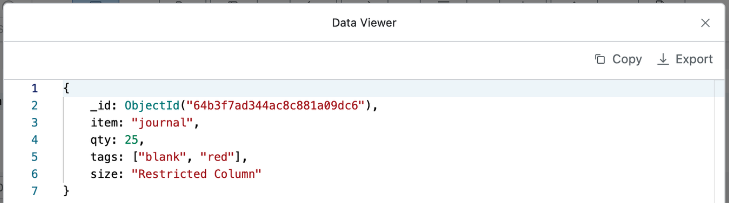
As shown in the screenshot above, you can see that the values of all attributes under size are displayed as “Restricted Column”.
Case 4. Access Restriction for 2nd Value in tags Attribute
When setting access restriction policy for the 2nd value in the tags attribute list, enter $.tags[1] in the “Column Name” field and click the OK button.

Administrator > Databases > Policies > Data Access > Add Rule List

As shown in the screenshot above, you can see that the 2nd value of the tags attribute is displayed as “Restricted Column”.