Post Installation Setup
This guide explains settings that must be performed after installation according to the operating environment.
Common Settings
Common procedures required when using QueryPie immediately after installation.
QueryPie Web Base URL Settings
Configuration path: Admin Page → General
This is the URL address of QueryPie for accessing the Web Console.
(Example. https://querypie.customer.com) This URL is also called the Base URL of QueryPie.
This URL must not end with /. Please be careful not to add / at the end of the URL like https://querypie.customer.com/.
This URL is used for the following purposes.
- Used as a callback address in the authentication process of SSO Integration.
- Used in links to download User Agent from Web Console.
- For other detailed purposes, please refer to QUERYPIE_WEB_URL.
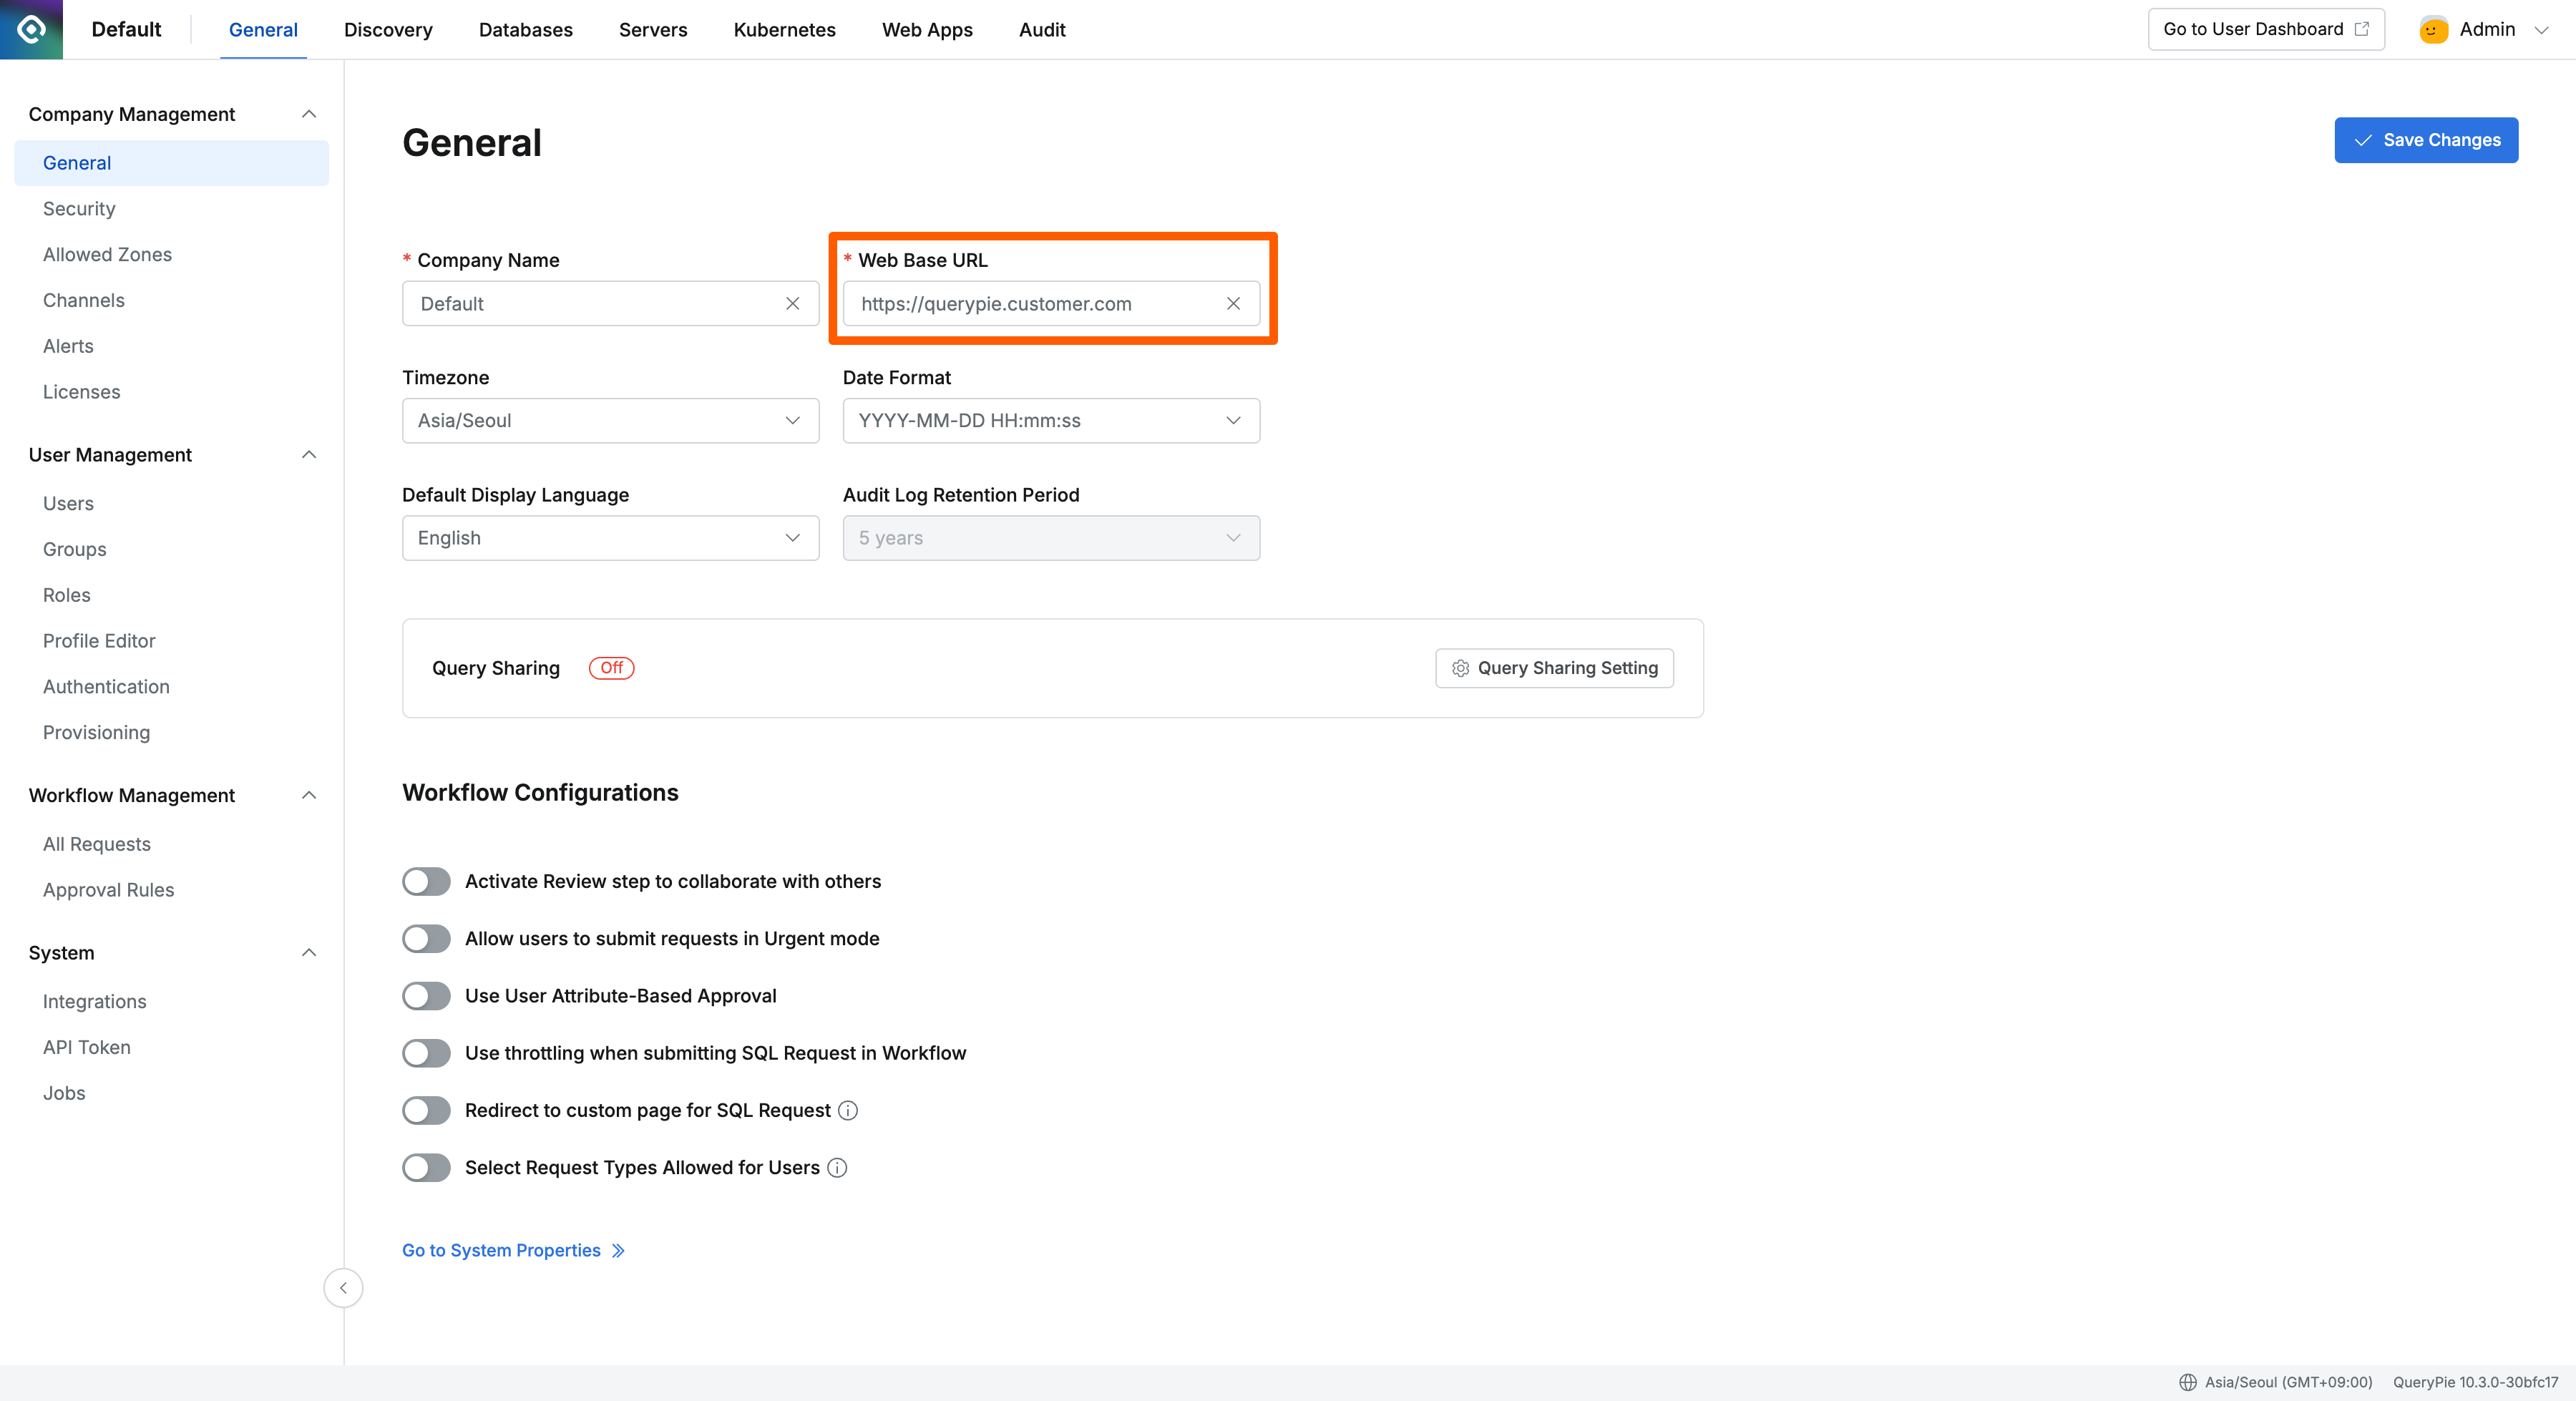
QueryPie Web Base URL Settings Screen
Product-specific Settings
DAC/SAC: Proxy Connection Address Settings
Connect to QueryPie Database and register the address for DAC/SAC Proxy connection.
To connect to QueryPie Database from QueryPie Web Console, DB connection settings are required: DB Connections
The following information is required for Database connection settings: QueryPie MySQL Hostname, Username, Password.
- Hostname:
host.docker.internal - Username:
querypie(for default settings) - Password: Check
DB_PASSWORDin the environment variable file in the QueryPie installation directory.- If installed with setup.v2.sh:
.envfile - If installed with setup.sh:
compose-envfile
- If installed with setup.v2.sh:
Values set in the environment variable file such as DB_PASSWORD, REDIS_PASSWORD, KEY_ENCRYPTION_KEY must be stored securely.
Please be careful not to expose these values to others.
Replace the <customer-proxy-address> part below with your company’s Proxy connection IP or domain and execute the query.
The address must not include a Scheme such as http or https.
UPDATE querypie.proxies SET host = '<customer-proxy-address>' WHERE id = 1;If the query executes without errors, run the following query to verify the registration.
SELECT * FROM querypie.proxies;After registering the Proxy connection address in QueryPie Database, you do not need to restart the Server Container. When you try to log in from User Agent, after authentication through the web browser, User Agent will be ready to use.
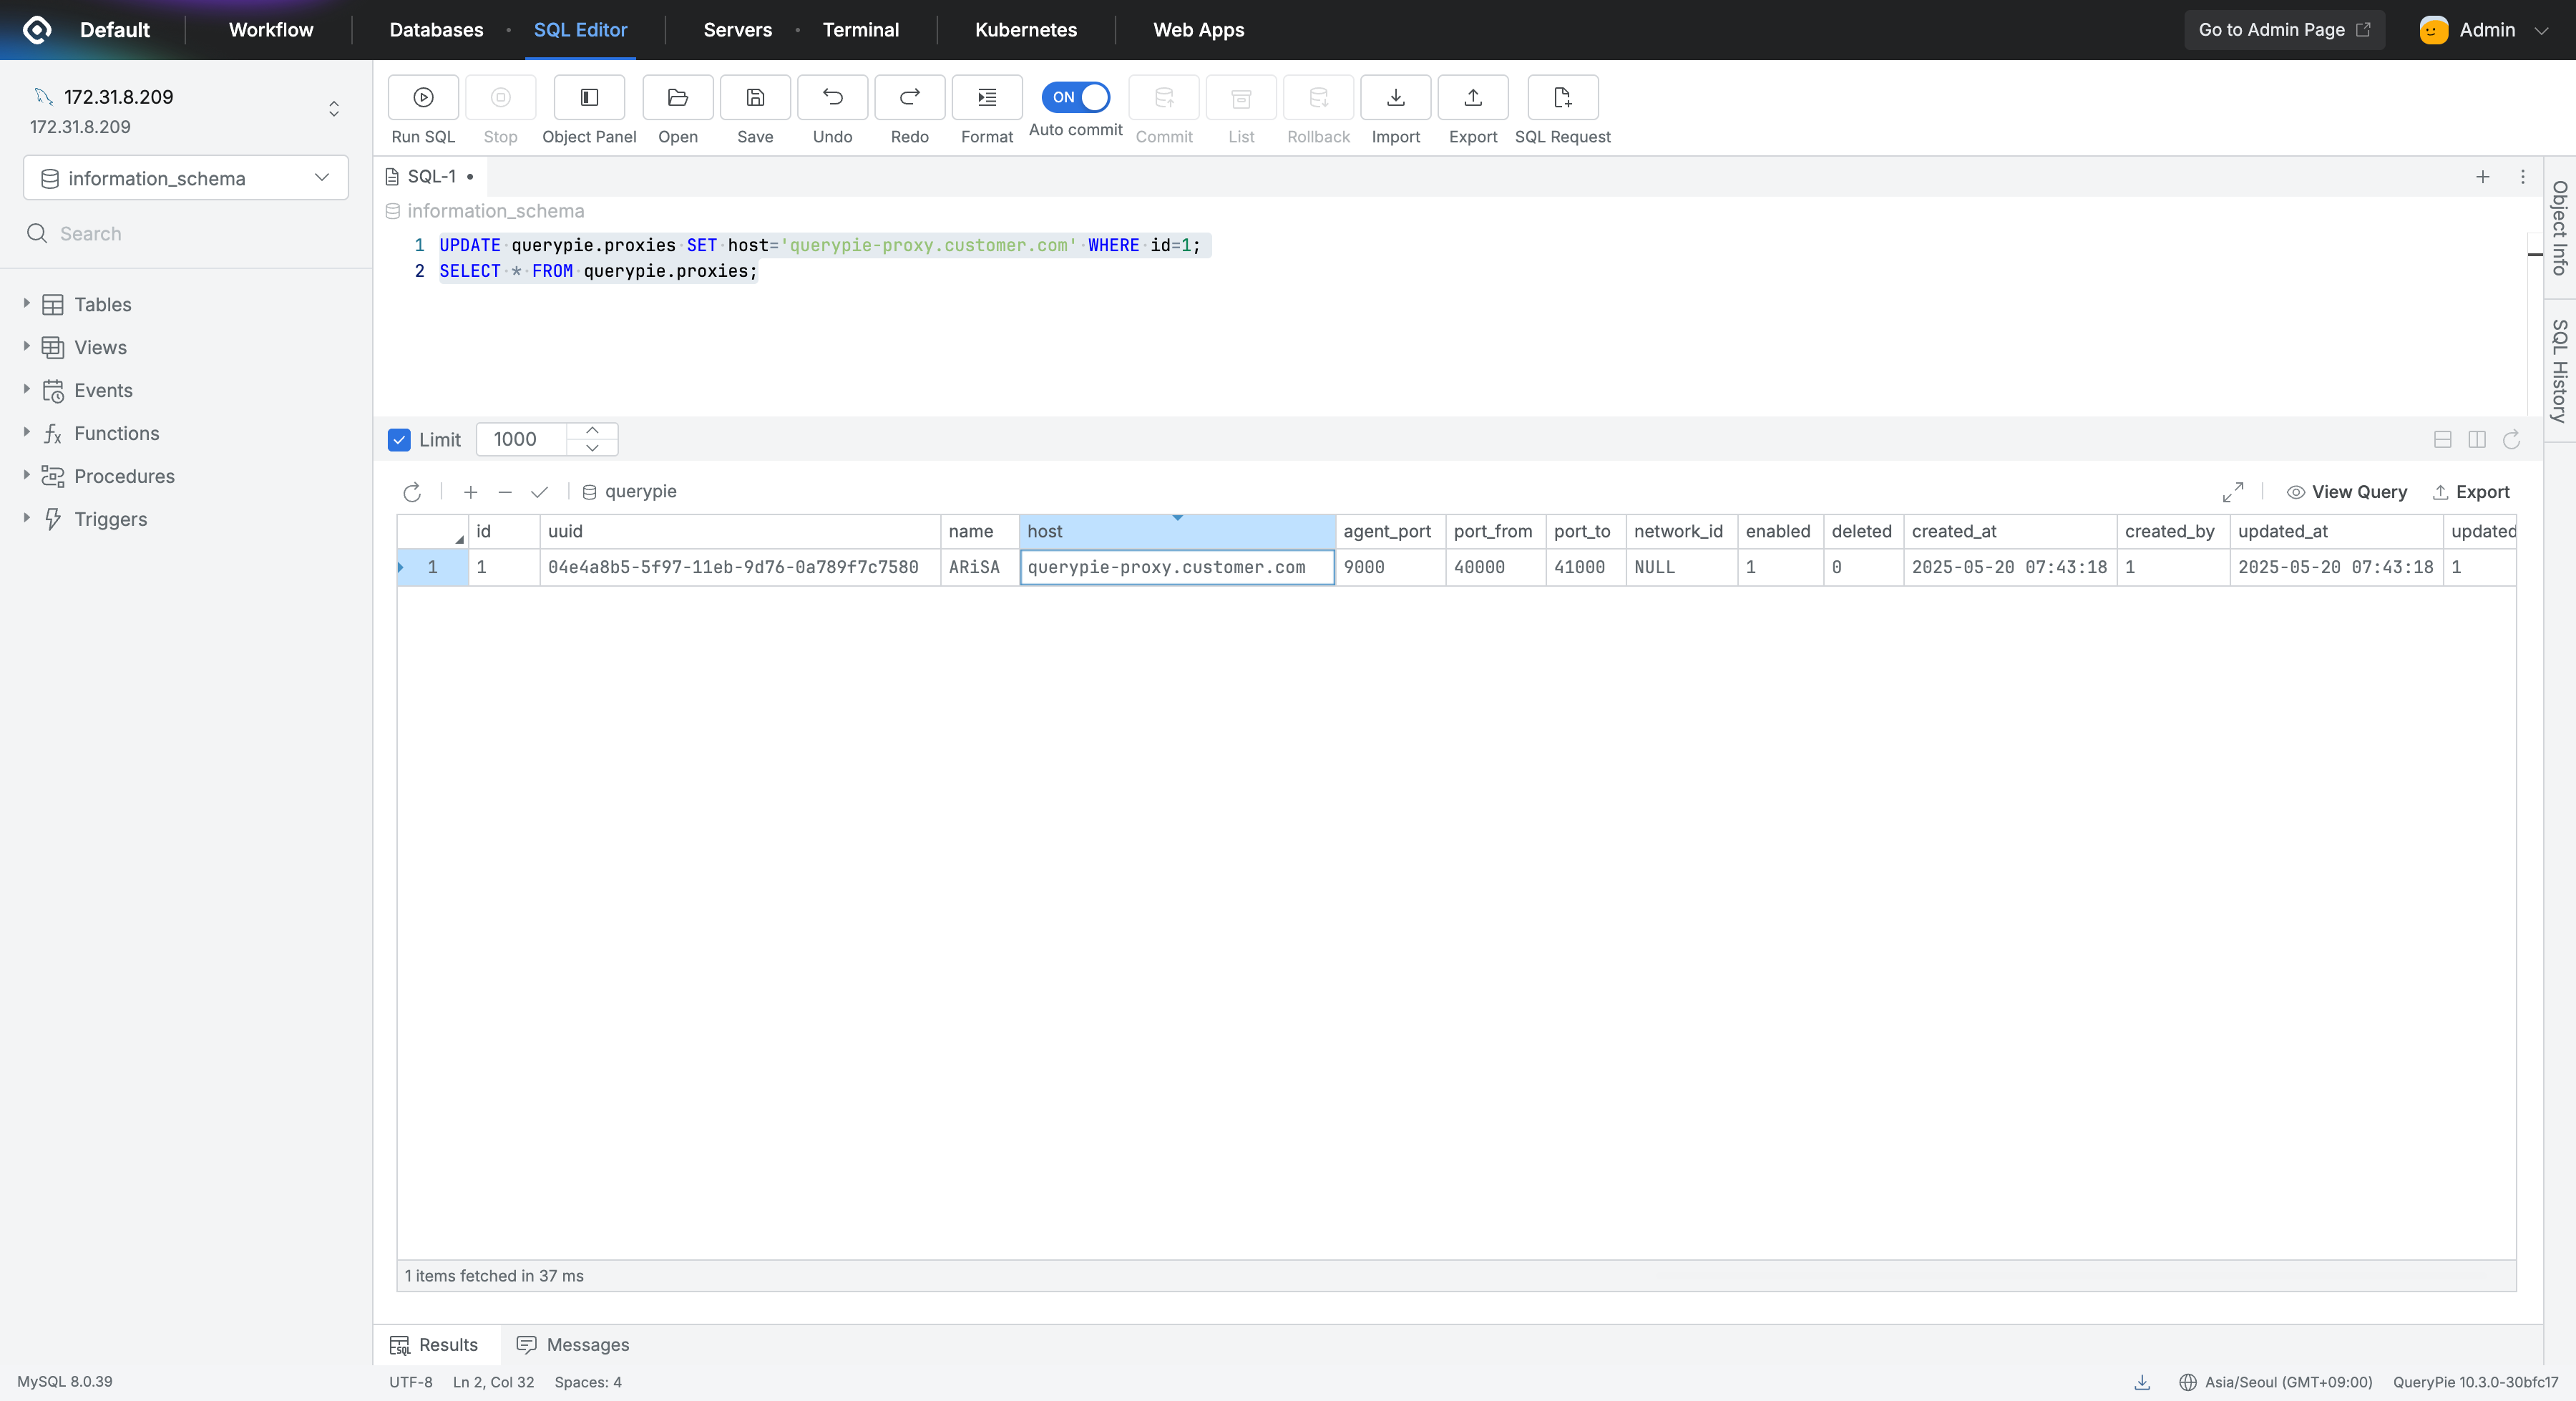
DAC/SAC Proxy Connection Address Settings Screen
KAC: Proxy Connection Address Settings
Connect to QueryPie Database and register the address for KAC Proxy connection.
Replace the <customer-proxy-fqdn> part below with your company’s Proxy connection IP or domain and execute the query.
Unlike DAC/SAC settings, you can freely enter a Scheme such as http or https.
After configuration, QueryPie Container restart is required to issue TLS certificates matching the registered address internally.
UPDATE querypie.k_proxy_setting SET host = 'https://<customer-proxy-fqdn>';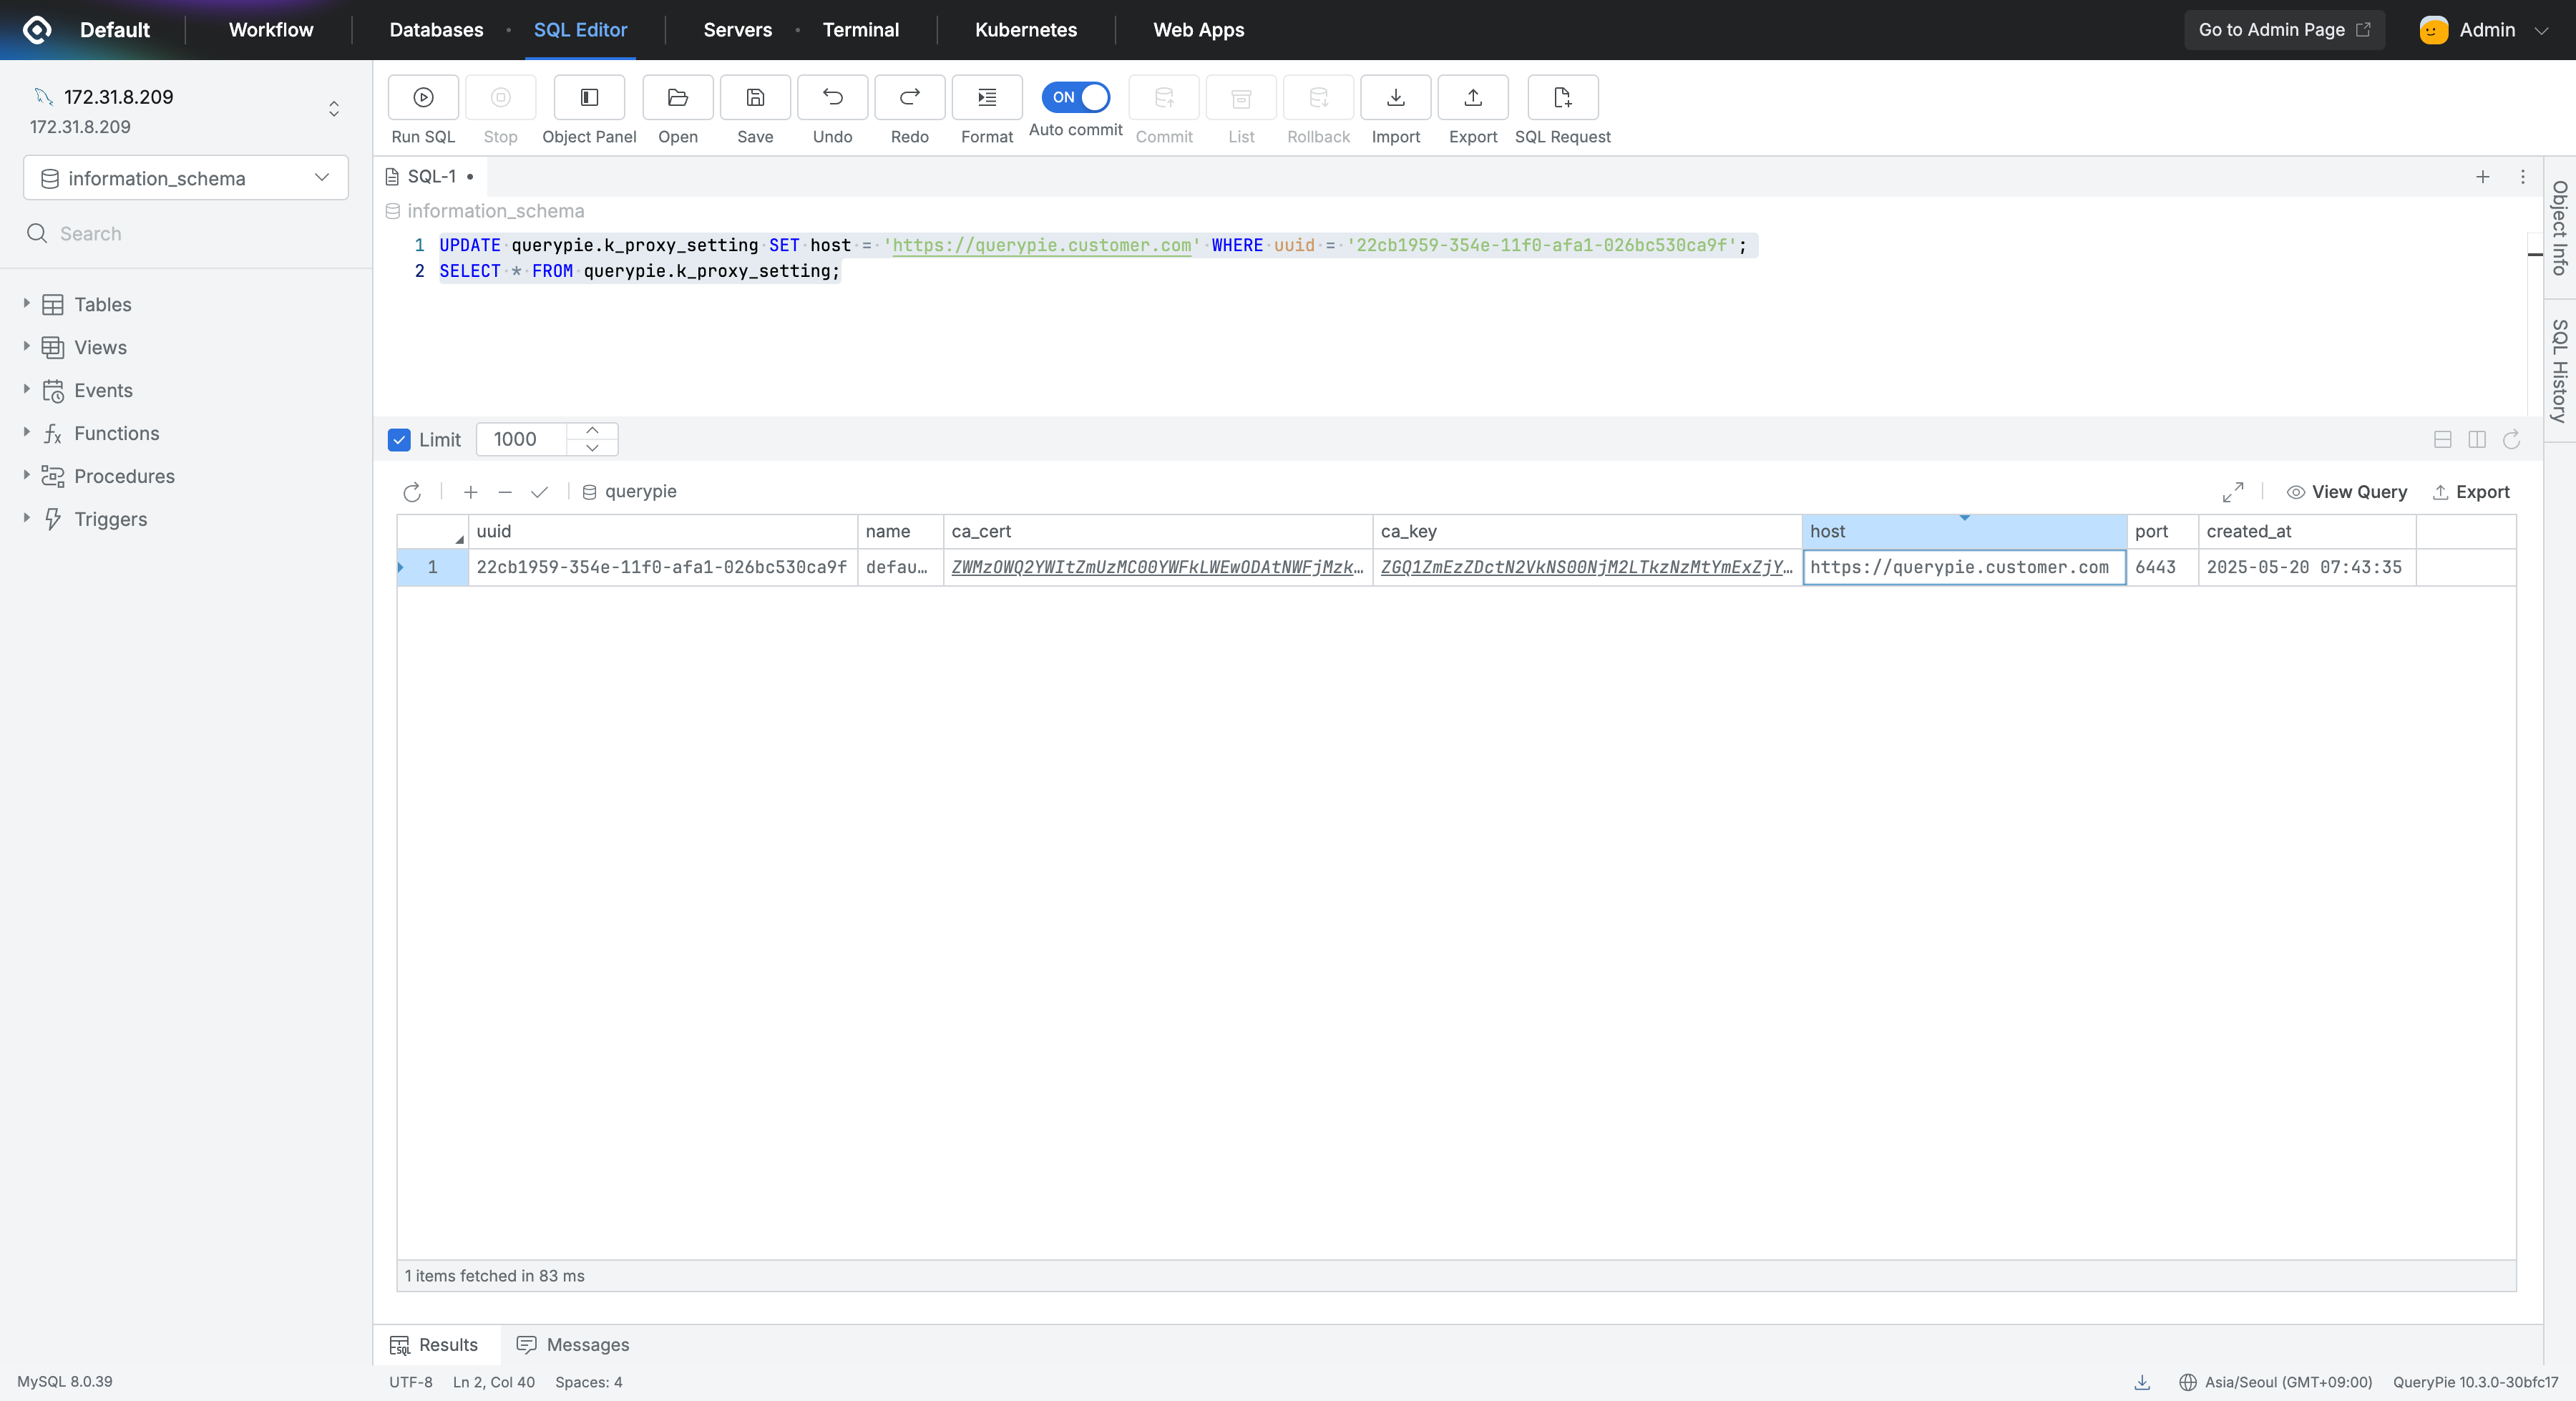
KAC Proxy Connection Address Settings Screen
WAC: Proxy Connection Address Settings
Configuration path: Admin Page → Web Apps → Web App Configurations
WAC Proxy connection address settings can be performed in Web Console.
For detailed configuration procedures, please refer to the following document: Initial WAC Setup in Web App Configurations
After configuration, QueryPie Container restart is required to issue TLS certificates matching the registered address internally.
Product Installation Complete
With the post-installation setup complete, QueryPie ACP is now ready to use. Well done.
Refer to the following documents to proceed with administrator settings and use the product.